Freeform Crochet Repousse Teapot DRAFT - · PDF fileFreeform Crochet Composite Motif -...
3
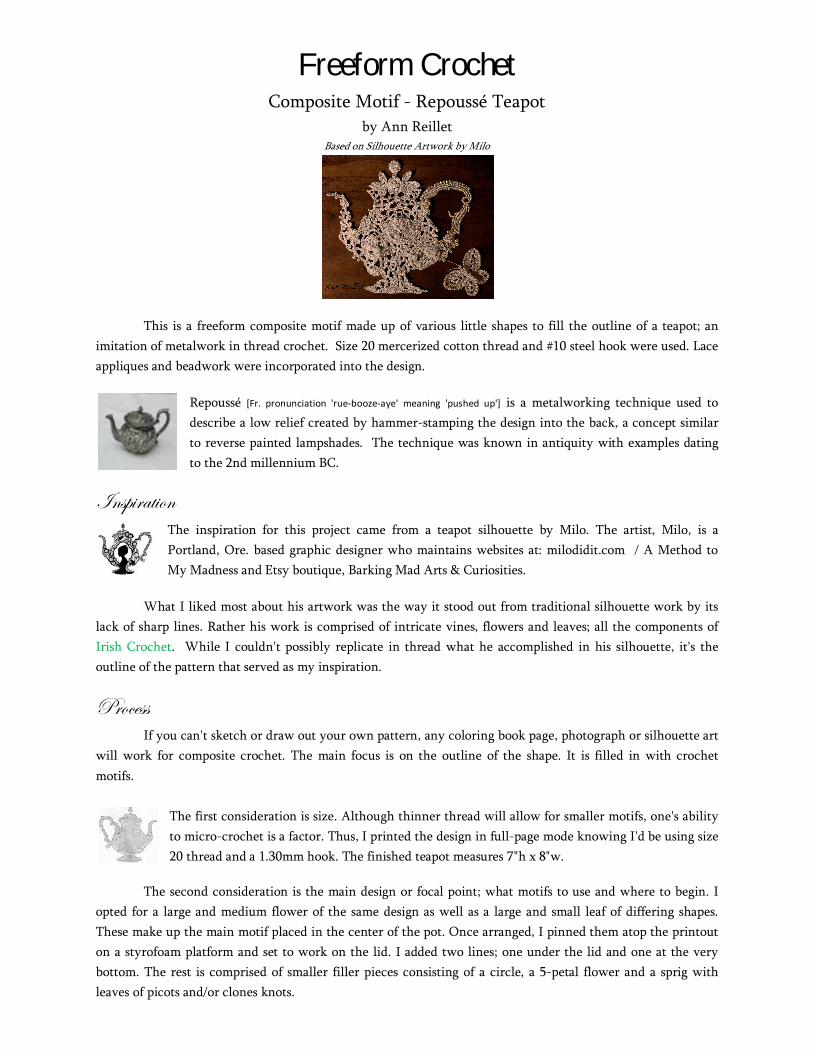
Freeform Crochet Composite Motif - Repoussé Teapot by Ann Reillet Based on Silhouette Artwork by Milo This is a freeform composite motif made up of various little shapes to fill the outline of a teapot; an imitation of metalwork in thread crochet. Size 20 mercerized cotton thread and #10 steel hook were used. Lace appliques and beadwork were incorporated into the design. Repoussé [Fr. pronunciation 'rue-booze-aye' meaning 'pushed up'] is a metalworking technique used to describe a low relief created by hammer-stamping the design into the back, a concept similar to reverse painted lampshades. The technique was known in antiquity with examples dating to the 2nd millennium BC. Inspiration The inspiration for this project came from a teapot silhouette by Milo. The artist, Milo, is a Portland, Ore. based graphic designer who maintains websites at: milodidit.com / A Method to My Madness and Etsy boutique, Barking Mad Arts & Curiosities. What I liked most about his artwork was the way it stood out from traditional silhouette work by its lack of sharp lines. Rather his work is comprised of intricate vines, flowers and leaves; all the components of Irish Crochet. While I couldn't possibly replicate in thread what he accomplished in his silhouette, it's the outline of the pattern that served as my inspiration. Process If you can't sketch or draw out your own pattern, any coloring book page, photograph or silhouette art will work for composite crochet. The main focus is on the outline of the shape. It is filled in with crochet motifs. The first consideration is size. Although thinner thread will allow for smaller motifs, one's ability to micro-crochet is a factor. Thus, I printed the design in full-page mode knowing I'd be using size 20 thread and a 1.30mm hook. The finished teapot measures 7"h x 8"w. The second consideration is the main design or focal point; what motifs to use and where to begin. I opted for a large and medium flower of the same design as well as a large and small leaf of differing shapes. These make up the main motif placed in the center of the pot. Once arranged, I pinned them atop the printout on a styrofoam platform and set to work on the lid. I added two lines; one under the lid and one at the very bottom. The rest is comprised of smaller filler pieces consisting of a circle, a 5-petal flower and a sprig with leaves of picots and/or clones knots.
Transcript of Freeform Crochet Repousse Teapot DRAFT - · PDF fileFreeform Crochet Composite Motif -...
Freeform Crochet Composite Motif - Repoussé Teapot
by Ann Reillet Based on Silhouette Artwork by Milo
This is a freeform composite motif made up of various little shapes to fill the outline of a teapot; an imitation of metalwork in thread crochet. Size 20 mercerized cotton thread and #10 steel hook were used. Lace appliques and beadwork were incorporated into the design.
Repoussé [Fr. pronunciation 'rue-booze-aye' meaning 'pushed up'] is a metalworking technique used to describe a low relief created by hammer-stamping the design into the back, a concept similar to reverse painted lampshades. The technique was known in antiquity with examples dating to the 2nd millennium BC.
Inspiration The inspiration for this project came from a teapot silhouette by Milo. The artist, Milo, is a Portland, Ore. based graphic designer who maintains websites at: milodidit.com / A Method to My Madness and Etsy boutique, Barking Mad Arts & Curiosities.
What I liked most about his artwork was the way it stood out from traditional silhouette work by its lack of sharp lines. Rather his work is comprised of intricate vines, flowers and leaves; all the components of Irish Crochet. While I couldn't possibly replicate in thread what he accomplished in his silhouette, it's the outline of the pattern that served as my inspiration.
Process If you can't sketch or draw out your own pattern, any coloring book page, photograph or silhouette art will work for composite crochet. The main focus is on the outline of the shape. It is filled in with crochet motifs.
The first consideration is size. Although thinner thread will allow for smaller motifs, one's ability to micro-crochet is a factor. Thus, I printed the design in full-page mode knowing I'd be using size 20 thread and a 1.30mm hook. The finished teapot measures 7"h x 8"w.
The second consideration is the main design or focal point; what motifs to use and where to begin. I opted for a large and medium flower of the same design as well as a large and small leaf of differing shapes. These make up the main motif placed in the center of the pot. Once arranged, I pinned them atop the printout on a styrofoam platform and set to work on the lid. I added two lines; one under the lid and one at the very bottom. The rest is comprised of smaller filler pieces consisting of a circle, a 5-petal flower and a sprig with leaves of picots and/or clones knots.
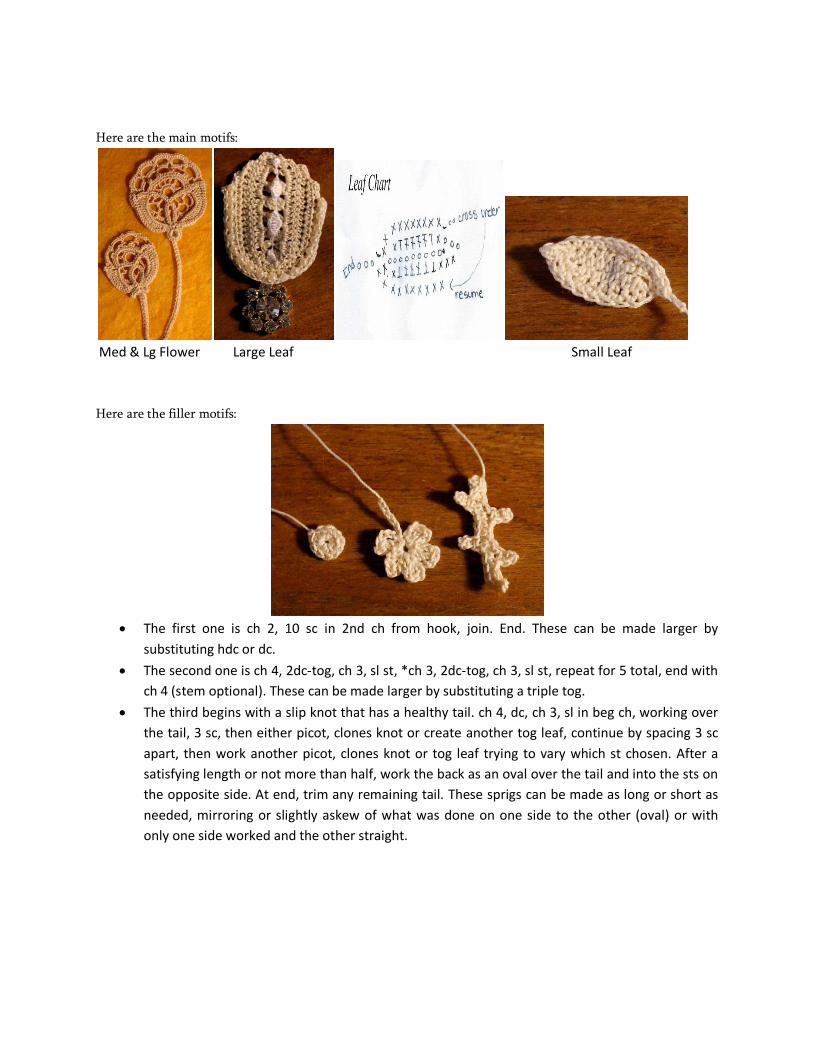
Here are the main motifs:
Med & Lg Flower Large Leaf Small Leaf
Here are the filler motifs:
• The first one is ch 2, 10 sc in 2nd ch from hook, join. End. These can be made larger by
substituting hdc or dc. • The second one is ch 4, 2dc-tog, ch 3, sl st, *ch 3, 2dc-tog, ch 3, sl st, repeat for 5 total, end with
ch 4 (stem optional). These can be made larger by substituting a triple tog. • The third begins with a slip knot that has a healthy tail. ch 4, dc, ch 3, sl in beg ch, working over
the tail, 3 sc, then either picot, clones knot or create another tog leaf, continue by spacing 3 sc apart, then work another picot, clones knot or tog leaf trying to vary which st chosen. After a satisfying length or not more than half, work the back as an oval over the tail and into the sts on the opposite side. At end, trim any remaining tail. These sprigs can be made as long or short as needed, mirroring or slightly askew of what was done on one side to the other (oval) or with only one side worked and the other straight.
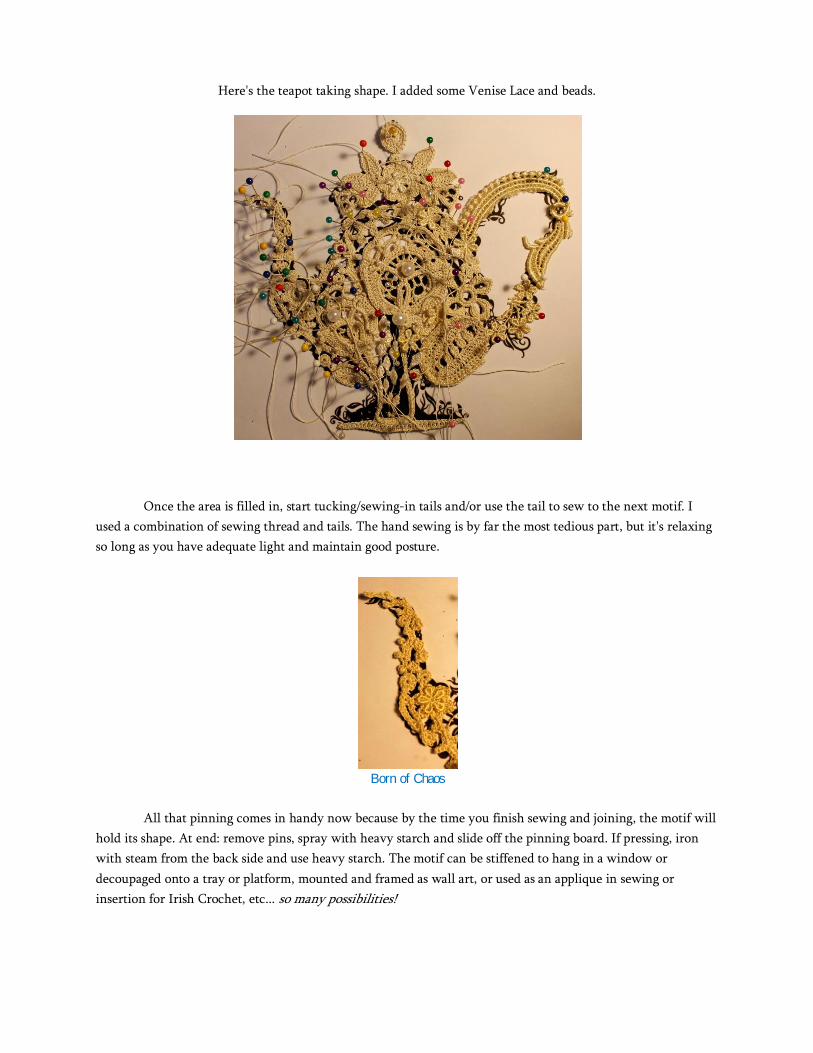
Here's the teapot taking shape. I added some Venise Lace and beads.
Once the area is filled in, start tucking/sewing-in tails and/or use the tail to sew to the next motif. I used a combination of sewing thread and tails. The hand sewing is by far the most tedious part, but it's relaxing so long as you have adequate light and maintain good posture.
Born of Chaos
All that pinning comes in handy now because by the time you finish sewing and joining, the motif will hold its shape. At end: remove pins, spray with heavy starch and slide off the pinning board. If pressing, iron with steam from the back side and use heavy starch. The motif can be stiffened to hang in a window or decoupaged onto a tray or platform, mounted and framed as wall art, or used as an applique in sewing or insertion for Irish Crochet, etc... so many possibilities!