First Class First Year: A Program and Tools · First Class Program Page 2 Introduction On the...
37
First Class First Year: A Program and Tools Written by Jeff Thompson Troop 164 – Okemos, MI
Transcript of First Class First Year: A Program and Tools · First Class Program Page 2 Introduction On the...

First Class First Year:A Program and Tools
Written by Jeff ThompsonTroop 164 – Okemos, MI

First Class Program Page 2
Introduction
On the following pages you will find valuable tools to implement your first class first yearprogram. When the BSA implemented the current joining to first class rank requirements,emphasis was placed on scouts getting to first class in one year. This program will provide youwith step by step procedures for putting together your own program. Throughout the document Ihave used the following scheme to refer to the various requirements:
• ‘J’ followed by a number indicates that Joining requirement number (i.e. J2 is joiningrequirement two).
• ‘T’ stands for Tenderfoot• ‘S’ stands for Second Class• ‘F’ stands for First Class
For convenience, the smallest aggregate here is the effective teaching sessions on each event.Each one has been placed on a separate page, or pages. These are designed to be presented at ameeting, or on a campout in a single session. The time required for each of the sessions isapproximately twenty minutes.
In addition to meeting skills instruction, part of this document deals with designing a program. Itcontains worksheets to use, as well as a sample first year program.
First Class Program Page 3
Contents
INTRODUCTION 2
PUTTING IT TOGETHER 4
SKILLS INSTRUCTION TEACHING PLANS 7
CAMPING KNOW-HOW I 8CAMPING KNOW-HOW II 9CITIZENSHIP 10COOKING 11FIRES AND FIRE SAFETY 12FIRST AID: BASICS I 14FIRST AID: BASICS II 16FIRST AID: BANDAGES 18FIRST AID: CPR 19FIRST AID: HURRY CASES 20FIRST AID: RESCUES 21FITNESS I 22FITNESS II 23FORMING THE PATROL I 24FORMING THE PATROL II 25KNOTS AND LASHINGS I 26KNOTS AND LASHINGS II 27MAP AND COMPASS I 28MAP AND COMPASS II 29MAP AND COMPASS III 30NATURE I 32NATURE II 33TOTEN’ CHIP 34LESSON EVALUATION FORM 36
APPENDIX 37
FLAG QUIZ 42FIRST AID SITUATION CARDS 43PROGRAM PLANNING WORKSHEET 44PRESENTATION SCHEDULE WORKSHEET 45PROGRAM PLAN BY MONTH 46

First Class Program Page 4
Putting it Together
Interfacing with Woods WisdomWoods Wisdom is an invaluable program tool. It does not, however, make sure you provideopportunities for scouts to achieve all the requirements up to First Class in any specified time.The plans in Woods Wisdom are laid out as monthly themes with no real connection to oneanother. It can happen that you’ve already done the activity listed for ‘new scouts’ severalmonths ago. On the other hand, Woods Wisdom may list an activity that your scouts are notready for because they haven’t been in the program long enough. This program picks up whereWoods Wisdom leaves off, giving you a set of plans and worksheets to plan a goal oriented,comprehensive first year for new scouts.
In many cases, the activity in Woods Wisdom will closely match the plans in this packet.Sometimes Woods Wisdom will suggest a field-trip or other activity. When you are able, dothese other activities.
Ordering the PlansWhen deciding the order and timing of the plans, keep these things in mind
• There are only 20 plans here as compared to at least 40 meetings in your first year.• Sometimes you will want to do activities other than those listed. These plans are to
get at specific requirements and make sure that scouts get opportunities to advance.• Scouts will need to review and practice the material. This is an extension of the
application listed in each plan. If needed, plan a review meeting full of games thatuse the skills. Woods Wisdom is invaluable for this purpose.
The table below lists the plans in the program according to what rank they apply. To make iteasier for scouts to advance in succession, start with the plans for Tenderfoot, then those forSecond Class, and finally the plans for First Class.
Joining/Tenderfoot Second Class First ClassCamping Know How ICamping Know How IICitizenship IFirst Aid: The Basics IFitness IFitness IIForming the Patrol IForming the Patrol IIKnots and Lashings I
Camping Know How IIFires and Fire SafetyFirst Aid: The Basics IFirst Aid: The Basics IIFirst Aid: Hurry CasesMap and Compass INature IToten Chip
CookingFirst Aid: BandagesFirst Aid: CPRFirst Aid: RescuesKnots and Lashings IIMap and Compass IIMap and Compass IIINature II
Sample First Year ProgramThis program starts in March and goes through the first year. It is meant as an example only.Your plan will need to fit in with the themes your troop has chosen and your specific calendar.

First Class Program Page 5
Month/Week
Requirement Goals Presentation/Description
MarchWeek 1 J4-J7, T8 Forming the Patrol IWeek 2 T1, T4 Camping Know How IWeek 3 T7 Forming the Patrol IIWeek 4 T2, S2e Camping Know How IIOuting T1-2, T4, S2b, S2d Toten’ Chip, Fires and Fire Safety. Review campsite
selection techniques. Work on patrol spirit, patrol flag.April
Week 1 T9a Fitness IWeek 2 T10, T11, S6b First Aid: The Basics IWeek 3 T3 Knots and Lashings IWeek 4 T9b, T1, T4, T8 Citizenship. Review Camping Know How I, II (brief).Outing T3b, F4 Cooking. Stage first aid test, use knots, practice
identifying poisonous plants, and have fire buildingcontest.
MayWeek 1 T5 Fitness IIWeek 2 T6 Skills night. Have a variety of skill games to review
Tenderfoot rank. Prizes are a good idea. Have anindividual conference with each scout to complete T6.
Week 3 S1 Map and Compass IWeek 4 F1 Map and Compass IIIOuting S1b Take a hike to complete S1b, try several methods of
finding directions during the day and night.June
Week 1 S3 Court of Honor. Have scouts participate in flag ceremonyto complete requirement S3
Week 3 F2 Map and Compass IIOuting Compete orienteering course for F2
JulyWeek 2 F7a Knots and Lashings IISummerCamp
S7, F7, F9 Continue work on knots and lashings by building campgadgets (F7b). Scouts should be able to complete F4 ifthey haven’t already. Complete swimming requirements(S7, F9).
AugustWeek 3 Patrol/Troop hike. Instead of a meeting go an a hike.Week 4 Skill night. Review knots and lashings, first aid, camping,
and cooking skills.Outing Service Project for all separate Annual Planning
Conference for Junior Leaders

First Class Program Page 6
SeptemberWeek 1 Court of Honor.Week 2 S6c First Aid: The Basics IIWeek 3 F8a, F8c First Aid: RescuesWeek 4 S6b First Aid: Hurry CasesOuting Disaster Day Event: Practice First Aid from previous
month. See Woods Wisdom First Aid feature.October
Week 1 S5 Nature IWeek 2 Special Guest: Nature speaker. Have person talk about
nature and bring some interesting nature exhibits.Week 3 F6 Nature IIWeek 4 S5, F6 Scouts should present their evidence of plants and animals
to each other at this meetingOuting District Fall Camporee
NovemberWeek 1 S8 Dangers of Drugs and alcohol program at meetingWeek 2 F8b First Aid: BandagesWeek 3 F8d First Aid: CPRWeek 4 Skill night. Practice first aid all through first class.Outing Practice all first aid through first class. Make sure all
scouts have completed all first aid requirements.December
Week 1 F5 Bring in a community leader to talk to scouts about theirroles as US citizens.
Week 2 Court of Honor

First Class Program Page 7
Skills Instruction Teaching Plans
This section includes effective teaching outlines for all the requirements from joining to firstclass. Some requirements are not covered by specific plans. These are ‘participation’ or ‘doing’requirements. Also, there are some plans that cover no specific requirements, but are included toenhance patrol spirit and cooperation. These plans can mostly be done either at a meeting or onan outing.
The table below lists the requirements in order and the corresponding part of the program inwhich the scout is presented with the information to the requirement. Scoutmaster’s conferencesare not included to conserve space and because the information would be repetitive.
1 2 3
J1234 Forming the Patrol I5 Forming the Patrol I6 Forming the Patrol I7 Forming the Patrol I8
T1 Camping Know How I2 Camping Know How II
3a Knots and Lashings I3b Knots and Lashings I4 Camping Know How I5 Citizenship67 Forming the Patrol II8 Forming the Patrol I
9a Fitness I9b Fitness II10 First Aid: Basics I
11a First Aid: Basics I11b First Aid: Basics IS
1a Map and Compass I1b Map and Compass I2a2b Toten Chip2c Toten Chip
2d Fires and Fire Safety2e Camping Know How II345 Nature I
6a First Aid: Hurry Cases6b First Aid: Basics I6c First Aid: Basics II78
F1 Map and Compass III2 Map and Compass II34 Cooking56 Nature II
7a Knots and Lashings II7b Knots and Lashings II8a First Aid: Rescues8b First Aid: Bandages8c First Aid: Rescues8d First Aid: CPR9
Note: In the above chart ‘1’ denotes that ascout can complete the requirement at ameeting, ‘2’ on a troop outing, and ‘3’ onhis own.

First Class Program Page 8
Camping Know-how I
Learning ObjectivesAs a result of this experience, each participant should be able to:
• Complete advancement requirement T1.• Know what to bring and what not to bring on a campout.• Know how to pack a pack.• Know how to make a ground bed• What equipment is necessary for sleeping comfortably in to outdoors.
Materials Required• Sleeping bag.• Sleeping pad.• Pack.• Overnight clothes for the season.• Usual equipment for an overnight (see Boy Scout Handbook pages 51 to 54).• Poster sized diagram of proper weight distribution of a packed backpack.
DiscoveryBefore the presentation, arrange the overnight gear on a table or the floor. Allow scouts to examine the gear.Take note of those who know what the equipment is and what it is used for and does that do not. Ask scoutshow many times they have been camping before and what type of camping it was.
Teaching-LearningI. Equipment:
A. Tell the name and explain the purpose of each item of equipment you've have brought. Tell the Scoutsthat they can find more information in their Boy Scout Handbooks.
B. Tell the scouts about the parts of the pack.C. Show the diagram of proper packing. Show scouts how to pack the pack properly. Have each scout
try on the pack to see how it feels.II. Clothing:
A. Tell Scouts that proper clothing is important. Ask them what they might bring.B. Show the Scouts the clothing that you have brought and explain what its advantages are.
III. Show the Scouts where in their handbooks they can find out what clothing and equipment to bring withthem on this month’s outing. Tell them that there will be a gear ‘shakedown’ beforehand and if they comeprepared they will be able to complete requirement T1.
Application: Equipment Kim’s GameArrange a selection of the equipment on the table when scouts are not looking. Cover the table with the sleepingbag. Uncover the table for a short period of time and ask scouts to remember as many items as possible. Thenrecover the items with the sleeping bag and ask the Scouts to make a list of as many items as they can and theiruses.

First Class Program Page 9
Camping Know-how II
Learning ObjectivesAs a result of this experience, each participant should be able to:
• Complete advancement requirements T2, and S2e.• Know how to make a ground bed.• Understand the importance of a sleeping pad.• Know how to set up a tent.
Materials Required• 2 tents with poles, stakes, and lines.• 2 hammers.• Ground cloths for tents.• Sleeping Bag.• Sleeping pad.
DiscoverySet up the tent. If it's free standing and you have the room set it up inside. Make sure it's the type of tent thatthe Scouts will be using on their camping trips. Ask scouts if they have ever stayed out in a tent before. If so,was it one like this one. Ask the scouts if they have ever set a tent like this up before. At the end of thediscovery, take the tent down and show the scouts how it goes into the bag.
Teaching-LearningI. Move the Scouts outside. Choose a location for setting up the Tent.
A. Level, but with good drainage.B. Free of lumps, stumps, etc.C. Low environmental impact.
II. Show scouts how to prepare a proper ground bed.III. Pitch the tent. Let scouts lie on the sleeping bag on the inside to see how it feels.IV. Choosing a campsite: Instruct scouts on how to choose a campsite for their patrol
A. Environmental ImpactB. Safety, Size and Shelter (The three S’s)C. Water and FirewoodD. PrivacyE. Permission.
V. Show scouts the sections in the Boy Scout Handbook that relate to this session. Tell them that if they knowthis material, they will be able to complete requirements T2, and S2e at this month’s outing.
Application: Tent pitching ContestDivide the patrol in half to form two teams. Line them up across from the equipment. At the signal (“Go”) eachteam erects its tent. When completed, guy lines must be taught with knots correctly tied, tent sides smooth, pegsproperly placed, and tent door closed.

First Class Program Page 10
Citizenship
Learning ObjectivesAs a result of this experience, each participant should be able to:
• Complete advancement requirement T5.• Properly display the American Flag.• Properly raise, lower and fold the American Flag.
Materials Required• flag pole.• American Flag.
DiscoverySet up a display of the history of the US flag using the Boy Scout Handbook pages 471 and 472. Let Scoutsbrowse this display. Ask how many of them know how to properly display the flag, and how many haveparticipated in a flag ceremony before.
Teaching-LearningI. Go over the rules for displaying the American flag found in the Boy Scout Handbook pages 478-79.
A. When flags are flown at different heights the US flag is always the highest.B. When flags are flown at equal height the US flag is always in front or farthest to the right.C. When displayed horizontally the blue field is always on its own right and at the top.D. When on the stage, the flag is on the speaker’s right. If not of the stage the flag is on the audience’s
right.E. Never flown upside down except in case of emergency or distress as a signal for help.
II. Show scouts how to fold the American flag. Let them practice.III. Go to the flag pole and show scouts how to properly raise and lower the Flag.
Application: Flag QuizHand out the Flag Quiz found in the appendix of this book. Score the quizzes with the scouts when they aredone. Scouts should participate in a formal flag ceremony to complete S3 and use what they have learned.

First Class Program Page 11
Cooking
Learning ObjectivesAs a result of this experience, each participant should be able to:
• Complete advancement requirements F4, and part of T2d.• Plan a menu for the season.• Cook a simple meal.
Materials Required• Bread or muffin mixes of different flavors. Approximately one per participant.• Other ingredients as called for in the bread mixes.• A heat source.• A pan of water.• Zip Lock sandwich bags.
DiscoveryGive each scout a sandwich bag and the ingredients for his muffin mix. Have each one put the ingredients intothe bag. Get as much air out of the bag as you can and then seal it. Next, the scout should mix up theingredients by ‘swishing’ the bag. When the muffins are mixed, put them in boiling water to cook them. Theyshould be ready by the end of a meeting if you do this as an early pre-opening activity. This would also be anexcellent camp out activity.
Teaching-LearningI. What are we going to eat? To answer this question you need to ask a few more.
A. How long will we be out? For short outings, fresh foods are fines. For trips of more than a day ortwo, carry supplies that won’t spoil.
B. How many people are going? Then you can decide how much food to take for each meal.C. What are you going to do? Estimate how much time you want to spend cooking. For days packed
with action, choose recipes that won’t take long to prepare. However, cooking may be you majorcamp activity. Take the ingredients and gear and you’ll cook up a real feast!
D. How will you reach camp? Are you traveling by car? Then you can take griddles, Dutch ovens, andplenty of utensils. If you’ll be packing everything on your back, keep your menus and your load basicand light.
E. What kind of weather do you expect? Winter menus should contain more of the fats your bodyburns for heat. Include soup mixes and hot drinks. Summer meals by be lighter and include more coldfluids.
II. Planning a menu: Have the group actually plan the menu for their next campout.III. Shopping list:
A. Make a list of all the ingredients you will need for the menu.B. Use page 105 of the Boy Scout Handbook to determineC. Go through this process using one meal as an example for the group. Have the group do the rest in
their patrol meeting.
Application:Scouts should begin to cook meals on their own at the campouts after this presentation. The ultimate applicationwill be in the completion of F4.

First Class Program Page 12
Fires and Fire Safety
Learning ObjectivesAs a result of this experience, each participant should be able to:
• Complete advancement requirement T2d, and part of T2c.• Earn the Firem’n Chit award.• Understand the outdoor code as it relates to fire safety.• Be safe with fire.• Gather tinder, kindling, and wood.• Light a fire.
Materials Required• Firem’n Chit Cards for each participant.• Outdoor code cards for each participant.• Fire starters, tinder, kindling, and wood.• Fire wood usefulness chart (from appendix).• Examples of Teepee, Lean-to, and criss cross fire lays.• Examples of several different fire starters.• Examples of several different types of wood.• Outdoor Code Poster• (A place to make a fire.)
DiscoveryDisplay for the scouts several different types of fire starters, tinder, kindling, and wood. Display the outdoorcode poster behind. Ask scouts if they know the difference between them.
Teaching-LearningI. What is the outdoor code and what does it mean? Hand out outdoor code cards to each participant.II. Fires
A. What are the ways of building a fire?1. Teepee2. Lean-to3. Criss cross
B. What do you need to make a fire?1. Fire Starters2. Tinder3. Kindling4. Wood
a) Soft woodb) Hard wood
C. Wet weather tips (see Boy Scout Handbook page 89)1. Store tinder and kindling for several fires under your dining fly before it rains.2. Keep a supply of tinder in a plastic bag3. Split wet logs.4. Blow gently on damp tinder.5. Waterproof your matches.6. Use fire starters.
III. Fire SafetyA. Where can I build a fire?
1. Existing fire circles.2. Gravel pits, sand, or bare soil away from trees.3. Clear all burnable materials five feet in all directions from a fire.

First Class Program Page 13
4. Save ground cover so that it can be replaced.B. How do I put out a fire?
1. Splash water onto the embers and stir. Repeat until the fire is cold out.2. Without water, work dirt in the fire until it is cold out.
C. Secure all necessary permits before you build a fire.IV. After the presentation sign and hand out Firem’n chit cards to each participant. Tell them that to keep the
card they must live up to their responsibility to keep fires safe.
Application: Fire Building ContestHold a fire building contest. Divide the patrol up into teams of two or three scouts. Break down the examplefire lays and assign each team a different one. Line the scouts up across from the materials and at the signaleach team must build its fire lay. If you can, allow the scouts to actually light the fires as a part of the contest.

First Class Program Page 14
First Aid: Basics I
Learning ObjectivesAs a result of this experience, each participant should be able to:
• Complete advancement requirements T10, T11a, T11b, S6b.• Assemble for themselves a personal first aid kit to take on a hike.• Treat for minor first aid (simple cuts, minor burns, nosebleed, bites and stings).• Do the Heimlich maneuver.
Materials Required• Example first aid kit and personal first aid kit.• Bandages suitable for simple cuts, burns, etc.
DiscoveryDisplay the first aid kit and example first aid kit. Answer any questions the scouts may have about the first aidkit. Get a feeling for how much each one already knows about first aid.
Teaching-LearningI. What is in a first aid kit?
A. Briefly go through the items in your example first aid kit and their uses.B. What goes in your personal first aid kit?
1. Adhesive bandages.2. Small role of adhesive tape.3. Latex gloves.4. Moleskin
II. Simple First Aid (consult current first aid manual).A. Simple cuts and scratches.
1. Clean wound with soap and water.2. Allow wound to dry and then apply an adhesive bandage.
B. Blisters on hand and foot.1. Surround the tender spot with a doughnut bandage of moleskin when you notice a hot spot
forming on your hand or foot.2. If the blister must be broken, sterilize a pin in the flame of a match.3. Prick the blister near the edge and press the fluid out.4. Keep the wound clean with a sterile bandage and protect it from pressure with a doughnut.
C. First degree burns.1. Treat immediately with cold water. Keep the burn under water until there is little or no pain.2. Apply a moist bandage loosely.3. Where water is not available apply a clean, dry dressing.
D. Bites or Stings of insects and ticks1. Ticks: cover the tick with a grease. It will back out on its own.2. Other Insects: Remove carefully any stinger and relieve the pain with ice water.
E. Poisonous snakes.1. Get medical help immediately. If you know what kind of snake it was, tell the doctor.2. Have the victim lie down. Keep him calm and quiet.3. Elevate the would above the heart.4. Treat the victim for shock.
F. Nosebleed:1. Have the victim sit up and lean forward slightly.2. Press the bleeding nostril toward the center.3. Apply a cool, wet cloth to the nose and face.
G. Poisonous Plants:
First Class Program Page 15
1. Know how to identify poisonous plants in the area. Show scouts how to do this on a campout.2. Treat the area by rinsing it off with water to remove oils.3. Wash clothing that may have the oils of the plant on it.4. Calamine lotion may relieve itching.
III. The Heimlich maneuver.A. Step behind the victim and put your arms around his midsection.B. Clasp your hands together with the knuckle of one thumb just above his navel.C. With a sharp, inward thrust drive your hands up under the victim’s rib cage.D. If the food doesn’t pop loose repeat.
IV. Test the scout’s knowledge at this month’s event.
Application:Allow scouts to practice their first aid and talk about preparing their personal first aid kits. Tell them to bringtheir kits to the next meeting and on the outing for the month.

First Class Program Page 16
First Aid: Basics II
Learning ObjectivesAs a result of this experience, each participant should be able to:
• Complete advancement requirement S6c• Treat for object in the eye, bite of suspected rabid animal, puncture wounds, second degree burns,
heat exhaustion, and shock.
Materials Required• Blanket• Bandages (for snakebite, cold cloths, etc)• Gauze pad
DiscoveryStage a first aid situation in the meeting during at an unexpected time. Use one of the injuries in thepresentation and see how scouts react. Alternatively, tell scouts that one member of their patrol has one of theseinjuries and see how they react.
Teaching-LearningAs always, consult a current first aid manual to verify these techniques.
I. Shock.A. Shock occurs in every injury. Its symptoms are:
1. Sudden lowering of strength.2. Skin is cold and clammy.3. Vomiting
B. First Aid:1. Have the person lie down.2. Raise his feet 10 to 12 inches. If he is have trouble breathing, raise his head instead.3. Cover him and keep him warm. If conscious, let him sip water.4. Never leave him alone. Talk to him and assure him that everything will be all right.
II. Object in eyeA. Have the person blink--the tears may flush out the object.B. If that doesn’t work, pull the upper lid down over the lower one. If the object is under the lower lid,
place your thumb on the skin just below the lid and pull it down gently. Lift out the object with acorner of a sterile gauze pad.
C. If that fails, cover the eye with a gauze pad and get the patient under medical care.III. Bite of suspected rabid animal.
A. You have three jobs to do:1. Give First Aid2. Get medical help.3. Call the police or rangers to capture the animal.
B. First Aid1. Scrub the bite with plenty of soap and water.2. Cover the wound with sterile bandage and get the victim to a doctor.
IV. Puncture woundA. Nail and Splinter
1. Take out any foreign matter then squeeze gently around the wound.2. Wash gently with soap and water.3. Apply a sterile bandage.
B. Fishhook1. Cut the line and allow a doctor to remove the fishhook.

First Class Program Page 17
2. If in the backcountry:a) Push the barb out through the skin and snip if off with a pair of pliers.b) Back the barbless hook out of the wound.
V. Second degree burns.A. Symptoms: Blisters, Redness of skin.B. First Aid:
1. Do not break the blisters.2. If the blisters are not broken, place the injury in cool water until the pain lessens.3. Apply a moist dressing and bandage loosely.4. Do not apply creams, ointments, or sprays.
VI. Heat exhaustion.A. Symptoms:
1. Pale skin. Cold and clammy from perspiration.2. Shallow breathing and nausea3. Dilated pupils4. Headache and dizziness.
B. First Aid:1. Move the patient to a cool shady spot.2. Place him on his back and raise his feet.3. Fan him and apply cool wet cloths. Give him sips of water.
VII. Poisonous PlantsA. Do you know what poisonous plants look like? Refer to page 428 in the Boy Scout Handbook for
pictures of the plants. At the next available opportunity, show scouts in the wild what the plants looklike and have them learn to identify them.
B. First Aid:1. Rinse with water immediately. Do not scrub as this will only spread the oil of the plant.2. Use Calamine lotion to relieve itching.3. Remove any lingering sap by laundering clothing.
VIII. Tell patrol members that they will have a chance to practice this skill at this month’s outing.
Application: First Aid Steps Games.Cut out the First Aid steps cards in the appendix. For each first aid situation, the patrol must line up with thepatrol leader in front and each member holding a step card. Members must be in the proper order to get credit(e.g. the patrol leader has the first step, the second scout has the next step, etc). If time allows, have the patroldo all the situations presented. The patrol can compete against its own time. Note, there are not enough cardsfor each injury so the patrol could be split into two teams if there are enough scouts.

First Class Program Page 18
First Aid: Bandages
Learning ObjectivesAs a result of this experience, each participant should be able to:
• Complete advancement requirement F8b• Construct and use the bandages for the head, upper arm, sprained ankle and collarbone.
Materials Required• Bandages for above (One set for each injury)• Two ‘victems’ for game.
DiscoveryFix up a scout (or better an Assistant Scoutmaster) with all the bandages above. Allow the scouts to laugh andask questions. Ask each if they have seen bandages like this before, and if they know how to tie them.
Teaching-LearningI. Go over, with a victim, the following bandages:
A. HeadB. Upper armC. Sprained ankleD. Collar Bone.
II. Allow scouts to practice for a few minutes.III. Tell scouts that they will use these skills on this month’s outing.
Application: Bandage RelayDivide the patrol into two teams. Provide patrols with a list of bandages. At the signal (“Go”) one member ofeach team will run forward and apply the first bandage to the ‘victim.' It must be certified correct. Then thenext member does the second one and so on. The first team finished wins.

First Class Program Page 19
First Aid: CPR
Learning ObjectivesAs a result of this experience, each participant should be able to:
• Complete advancement requirement F8d.• Describe the five signs of a heart attack.• Tell the steps in CPR.
DiscoveryHave one of the adults exhibit clearly the five signs of a heart attack. See if scouts react. If they do not, havethe leader ‘fall’ to the floor and pretend to be unconscious. See if the scouts can determine what is wrong.
Teaching-LearningI. Five Signs of a Hear Attack
A. Uncomfortable pressure, squeezing, fullness or pain1. In the center of the chest behind the breastbone.2. This may spread to the shoulders, arms, neck, jaw, and back.3. It may come and go.4. Sharp, stabbing twinges of pain usually are not symptoms of a heart attack.
B. Unusual sweatingC. NauseaD. Shortness of breathE. A feeling of weakness
II. CPR (Consult a current first aid manual to check these steps)A. Establish unresponsiveness (Hey are you OK).B. Send someone to call for help.C. Open Airway, check ABC’s (Airway Breathing Circulation)D. Give two breathsE. Complete 15 compressions and two breathsF. Do ‘D’ four times.G. Check ABC’s again.H. Goto ‘D’I. Continue until help arrives or you are physically exhausted.
Application:Scouts should discuss CPR. If possible have a trained instructor on hand. They will know the currentrecommended procedure and may be able to provide materials for certification. (Note, however, that scouts donot have to be certified to complete requirement F8d.)

First Class Program Page 20
First Aid: Hurry Cases
Learning ObjectivesAs a result of this experience, each participant should be able to:
• Complete advancement requirement S6a.• Treat for the hurry cases of stopped breathing, serious bleeding, and internal poisoning.
DiscoveryAsk scouts to take their pulse using the Brachial artery. Tell them this is the one in the arm. See how may canfind where this is.
Teaching-LearningI. Serious Bleeding
A. Direct Pressure First1. Cover the wound a pad (a bandanna, shirt, or any cloth)2. Press hard3. Tie the pad firmly in place.4. If the pad becomes soaked with blood don’t remove it. Place another on top of it.5. Continue the pressure.6. Get medical Help.
B. Pressure points1. Don’t cut off blood flow entirely.2. Use to slow the flow of blood and allow clotting.3. Show scouts the locations of the pressure points.
II. Stopped Breathing (consult a current first aid manual for steps)A. Establish unresponsiveness (Hey are you OK).B. Send someone to call for help.C. Open Airway, check ABC’s (Airway Breathing Circulation)D. Give two breathsE. Check to see if the chest rises and falls. If not
1. Position yourself astride the victim.2. Place the heal of your hand between the waist and rib cage and the second on top.3. Give eight inward and upward thrusts.4. Open mouth and sweep deeply onto the mouth along the cheek with hooked finger.
F. Continue until help arrives or you are physically exhausted.III. Internal Poisoning
A. Quickly take the poison container (if available) to the phone.B. Call a poison control center or emergency medical center and follow their instructions.C. Treat for shock and check breathing frequently.D. Save all containers and vomit.
Application:Practice these skills on this month’s outing.

First Class Program Page 21
First Aid: Rescues
Learning ObjectivesAs a result of this experience, each participant should be able to:
• Complete advancement requirement F8a, and F8c.• Demonstrate the carries used to transport a victem.• Tie the bowline.
Materials Required• Several older scouts to demonstrate the carries.• Ropes for scouts to tie bowline.
DiscoveryHave scouts attempt to transport a victim a certain (short) distance. See how they do.
Teaching-LearningI. Bowline: the rescue knot (show scouts how to tie the Bowline and let them practice)II. How would you move a person out of a smoke filled room? Have older scouts demonstrate these carries
from the Boy Scout book.A. Walking Assist:B. One person CarryC. Four Handed SeatD. Two Person Carry.
Application: Carry RelayDivide the patrol into two teams. If there is not enough members have older scouts participate or have the patrolcompete against its own time. Set up a start line and another approximately 25 yards away as a turning line.Have scouts practice one carry going down and one coming back. The first team to complete all four carrieswins.

First Class Program Page 22
Fitness I
Learning ObjectivesAs a result of this experience, each participant should be able to:
• Complete advancement requirement T9a.
Materials Required• A pull-up bar• A location suitable for doing fitness tests in T9a.
Application:Have scouts record their best in the tests listed. Record these for your records as well.

First Class Program Page 23
Fitness IITo be completed 30 days after the completion of Fitness I
Learning ObjectivesAs a result of this experience, each participant should be able to:
• Complete advancement requirement T9b
Materials Required• A pull-up bar• A location suitable for doing fitness tests in T9a.
Application:Have scouts record their best in the tests listed. Record these for your records as well. If they have shownimprovement they have completed T9b.

First Class Program Page 24
Forming the Patrol I
Learning ObjectivesAs a result of this experience, each participant should be able to:
• Complete advancement requirements J4, J5, J6, J7, T8.• Begin to personally understand the Scout Oath, Law, Motto and Slogan.• Know the Scout sign, salute, and handclasp.• Be able to tie the square knot.• Describe why we use the buddy system in Scouting.• Name their patrol members and state their patrol name.
Materials Required• Scout Oath, Law, Motto, Slogan, and Outdoor Code Posters.• Poster of the Scout Badge.• A large beach ball.• Blindfolds for each patrol member.
DiscoveryShow scouts the scout sign, salute, and handclasp. Let them practice. Show them a square knot and teach themhow to tie it.
Teaching-LearningI. Recite with the Scouts the Scout Oath, Scout Law, Motto, and Slogan. Talk about what each part means.
Ask scouts what they think about them.II. Discuss the buddy system in Scouting. Ask them why they think that the buddy system is important.III. Play Moon Ball
A. Arrange the patrol in a circle.B. The object of the game is for the patrol to keep the ball aloft as long as possible without hitting the
ceiling. To do this the patrol must work together.C. The patrol should compete against its own record.
IV.
Application: Patrol MeetingTalk about what a patrol is. Ask scouts to think about a name and flag design for their patrol and bring this tothe next meeting. If there is agreement, name the patrol.
Once the patrol is named, have scouts work on patrol yells, and cheers.

First Class Program Page 25
Forming the Patrol II
Learning ObjectivesAs a result of this experience, each participant should be able to:
• Complete advancement requirement T7• Make a patrol flag.• Have patrol spirit.• Give their patrol yells, and cheers.
Materials Required• Example(s) of patrol flag(s)
DiscoveryHave a patrol within the troop present their flag to the troop at the opening of the meeting. Make sure they tellabout all the symbolism of the flag and all the embellishments that have been put on it.
Teaching-LearningI. Patrol Meetings and Activities
A. Patrols can and should function outside the regular troop meetings.B. Patrols can have activities outside the regular troop meetings.
II. Talk with the patrol about what they want their flag to look like. Discuss each member's suggestions andwrite down a plan for making the patrol flag.
III.
Application: Make a Patrol FlagThe patrol should now make its flag and continue to develop yells, cheers, and songs. It might be a good idea tohave the patrol make the patrol flag in a patrol meeting separate from the regular troop meeting. This willgive them an introduction to patrol meetings and activities.

First Class Program Page 26
Knots and Lashings I
Learning ObjectivesAs a result of this experience, each participant should be able to:
• Complete advancement requirements T3a, and T3b.• Whip and fuse the ends of a rope.• Tie a two half hitches and taut line hitch.
Materials Required• A frayed piece of rope.• Ropes that need to be whipped and fused.• One rope for each participant for knot tying.
DiscoveryShow scouts a segment of rope that is badly frayed. Ask them how useful this rope is as compared a good piece.Introduce scouts to the notion of never cutting rope.
Teaching-LearningI. Whipping and Fusing
A. Demonstrate to scouts how to fuse a rope.B. Demonstrate to scouts how to whip a rope and let them practice.
II. Demonstrate to Scouts the Two Half Hitches and let them practice.III. Demonstrate to Scouts the Taut Line Hitch and let them practice.
Application: Knot Relay.Divide the patrol up into two teams. At the signal, one the member of each the team will run to the judges andtie a Taut Line and a Two Half Hitches. That patrol member then steps behind the judge and sits down. Thefirst team with all members sitting behind their judge wins.

First Class Program Page 27
Knots and Lashings II
Learning ObjectivesAs a result of this experience, each participant should be able to:
• Complete advancement requirement F7a.• Tie the timber hitch, clove hitch.• Use these knots in the square, shear, and diagonal lashings.• Use these lashings in a real outdoor settings (F7b).
Materials Required• 2 short stick for each participant and one for the instructor.• 1 15 foot rope for each participant and one for the instructor.• 4 5 foot poles.• 2 seven foot poles.
DiscoveryBuild an H trestle for the scouts to inspect with the five foot and seven foot poles. Let them notice how sturdythe structure is. Let the scouts take the structure apart.
Teaching-LearningI. Show the scouts the following knots and allow them to tie them several times
A. Clove hitchB. Timber hitch.
II. Show scouts these lashings and allow them to practice.A. Square.B. SheerC. Diagonal.
Application:For this meeting, have scouts build the H trestle and compete against their own time.
You may want to practice these skills more during the skills time of the next meeting. If so, scouts can make anX trestle or some other pioneering projects.
Have scouts make a simple camp gadget on this month’s outing to complete requirement F7b.
First Class Program Page 28
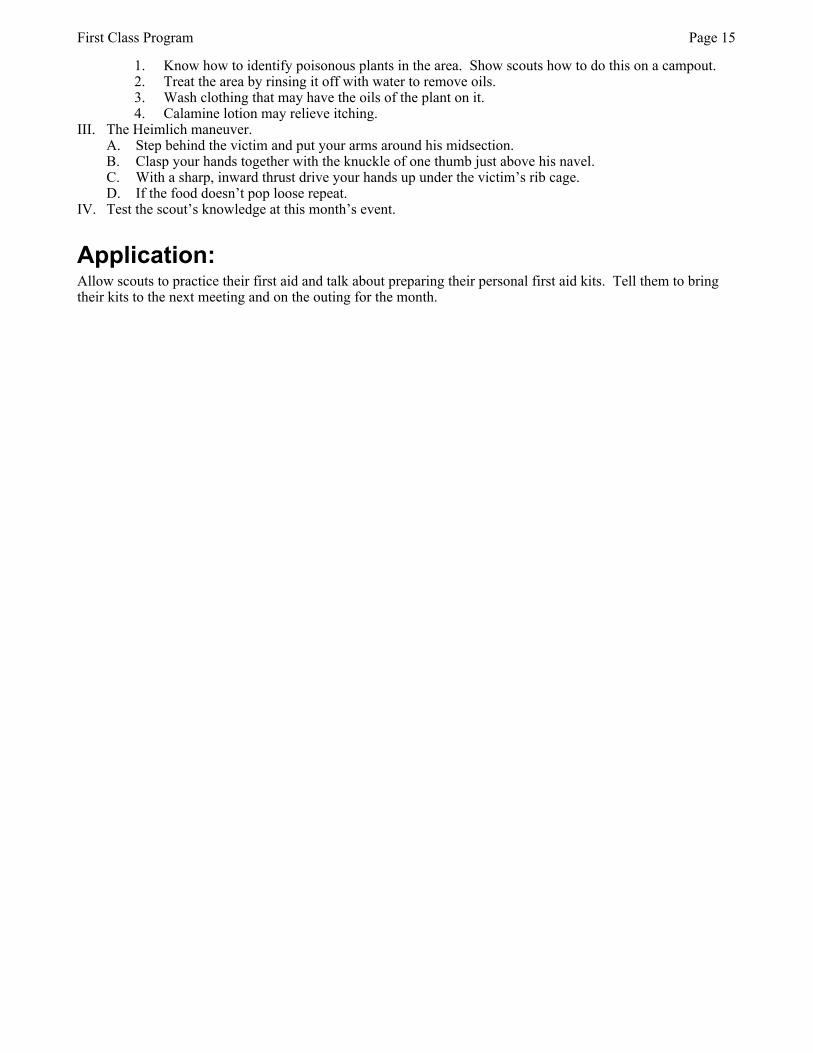
Map and Compass I
Learning ObjectivesAs a result of this experience, each participant should be able to:
• Complete advancement requirements S1a, S1b.• Use a compass and understand basically how a compass and map can work together.
Materials Required• Several different types of maps (street maps, topographical maps).• 1 compass and map for every participant.
DiscoveryPlay the Compass Game (No. R01005) or Beginner’s Compass Game (No. R01004). Divide scouts into teamsof two and then see how accurate they are with the compass. Make sure to help those scouts who have neverused a compass before by giving a brief explanation.
Teaching-LearningI. The Compass
A. What are the parts of the compass you’ve been using? Aim for the following main points.1. Needle.2. Orienting arrow3. Direction of Travel arrow.
B. How do you use a compass?1. To follow a bearing (they should all know this one)?2. How about to take a bearing?
a) Point direction of travel arrow at object.b) Align the Orienting arrow with the north end of the needle.c) Read degrees at the base of the direction of travel arrow.
II. Maps.A. Ask scouts to look at the maps you’ve brought. Ask them what similarities and differences they see
(one has contour lines, the scales are different, both use the same symbols, etc)B. Map Colors:
1. Green: Forests, woodlands, orchards, and other areas of heavy vegetation.2. White: Mostly clear of trees--fields, meadows, rocky slopes, or open country.3. Blue: Water--streams, lakes, etc.4. Black: Man made--roads, bridges, buildings, etc.
C. Ask scouts what they thing the contour lines are for? Explain how they are used.III. Orienting the map: Show scouts how to orient the map and let each try to do it on his own.
Application:Before anyone arrives, circle a set of points on each of the Scout’s maps. Number the points on one of them in acircular pattern (this will be the ‘master’ map). Take degree readings from point to point, moving in a circularpattern (like an orienteering course). Write these down and instruct scouts to use the degree readings to numberthe points on their map. When everyone is done, give them the correct answers.

First Class Program Page 29
Map and Compass II
Learning ObjectivesAs a result of this experience, each participant should be able to:
• Complete advancement requirement F2• Measure the height and width of objects using several different methods.• Complete and orienteering course.
Materials Required• One dish of muddy water.
DiscoveryAsk scouts to measure the height of some object around the area. If you don’t know the height of the object forsure, measure it in advance using one of the more accurate methods. Allow the patrol about five minutes toaccomplish the task. See how close they came.
Teaching-LearningI. How can we accurately measure the height of something? Demonstrate several of the methods listed. . See
the Boy Scout Handbook for full explanations and illustrations.A. Pencil MethodB. Tree Felling Method.C. Muddy Water Method.D. Shadow Method.
II. How can we measure the width of something? Demonstrate several of the methods listed. See the BoyScout Handbook for full explanations and illustrations.A. Napoleon Method.B. Stick Method.C. Compass Method.
Application: MeasuringNow have the scouts go out and measure the heights and widths of some things around the meeting place.Again, try to make these things that are known, or you can measure accurately Do an orienteering course on thismonth’s outing to complete the requirement.

First Class Program Page 30
Map and Compass III
Note: It is best to do this session on a campout where scouts can actually practice the skills. Do the discoveryexperience on Friday night, the directions during the day throughout Saturday, and the final Directions duringnight Saturday night.
Learning ObjectivesAs a result of this experience, each participant should be able to:
• Complete advancement requirement F1.• Tell directions during the day and night in several ways without a compass.
Materials Required• Compass (to give the right answer).• Sticks and materials for various methods.• Constellation finder.
DiscoveryHave scouts look around. Can they tell which way is north? How do they know--what method are they using?Use the compass to confirm their findings.
Teaching-LearningI. Setup: Choose several methods to demonstrate to scouts. Teach them these. Some may require waiting
time so start these early in the day and work on other things in between times.II. Directions during the day.
A. Watch method (Analog Only).1. Hold your watch flat2. Place a short twig upright against the edge of the watch at the point of the hour hand.3. Turn the watch until the shadow of the twig falls exactly along the hour hand.4. A line from the center of the watch dividing in half the angle between the hour hand and the
numeral 12 will point south.B. Shadow stick method.
1. Push a short, straight stick in the ground.2. Angle it toward the sun so that it creates no shadow.3. Wait until it casts a shadow 6 inches long. The shadow will be pointing East.
C. Equal Length shadow method.1. In the morning, push a 3 foot staff upright into the ground.2. Tie a string around the bottom and extend the string to the end of the staff’s shadow.3. Tie a peg to the string at that point and use it to make a circle around the staff.4. Push the peg into the circle at the place where the staff’s shadow meets it.5. In the afternoon, place another peg where the tip of the staff’s shadow again touches the circle. A
straight line between the pegs is a West-East line with West at the morning peg.III. Directions at night.
A. The north star.1. First, locate the north star using the Big Dipper.2. Push a stick into the ground about 2 foot high.3. Use a shorter stick in such a way as to sight over the tops of both to the North Star.4. The line created by the sticks (shorter to longer) will point north.
B. When you can only see one star.1. Mark the location of the star in the sky with a landmark or the stick method mentioned above for
the north star. Preferably, this star would be along the horizon.2. In 1 to 2 hours observe the star again. You will now be able to tell the direction pointed to by the
sticks.

First Class Program Page 31
a) If the star has rose, that direction is Eastb) If the star has set, that direction is West.c) If the star has moved to the left, that direction is Northd) If the star has moved to the right, that direction is South.
C. Constellation Method. There are many constellations in the sky. These move in a predictable waythroughout the various seasons. If you know the constellation, you can tell directions from where theyare in the sky, given the season and time. This is easily demonstrated using a wheel type Star Gazer orConstellation Finder.
D. The methods used during the day with the sun will also work at night with the moon.
Application:Scouts should construct and use one or more of the methods for finding directions that were not demonstrated.This could be made into an individual contest to see which scout can get the most accurate North-South or East-West line as checked with the compass.

First Class Program Page 32
Nature I
Learning ObjectivesAs a result of this experience, each participant should be able to:
• Complete advancement requirement S5.• Appreciate and respect the animals that live in their communities.
Materials Required• Examples of plaster casts of animal prints.• Books on animal identification.• Plaster of Paris.• One plate for each participant.
DiscoveryAn excellent discovery would be to have an animal brought into the meeting by a qualified professional If thistype of person is not available, you can allow scouts to make a plaster of Paris cast of their hand to take home.Do this at the beginning of the meeting or the casts will not be set up by the end.
Teaching-LearningI. Whay are some types of animals? What are some characteristics of each one?
A. Mammals (have fur, warm blooded)B. Birds (have feathers, sometimes fly)C. Reptiles (Scaly skin, cold blooded, hibernate)D. Amphibians (Moist skin, ‘dual life’)E. Fish (Have gills, life in water)
II. Identifying AnimalsA. Show the pages (291-312) in the Boy Scout Handbook that can be used in identifying animals.B. Show other books that can also be used.C. Demonstrate to scouts how they would go through the process of identifying an animal.
III. Observing AnimalsA. Evidence of animals
1. Droppings2. Partially eaten food (chewed nuts, etc).3. Tracks. (Making plaster casts)
B. Taking pictures of animals.
Application:Have scouts collect evidence of 10 animals and bring it into a future meeting. This can include plaster casts,pictures, etc.

First Class Program Page 33
Nature II
Learning ObjectivesAs a result of this experience, each participant should be able to:
• Complete advancement requirement F6• Appreciate the beauty of the plants around them.• Use resources to identify plants.
Materials Required• Plant identification books• Leaf casts.• 10 to 15 different types of leaves (1 of each per participant and a set for the presenter).• Ink (water soluble) and rubber roller.• Newspaper.• Copy paper (for prints).• A piece of glass or a glass plate.• Example leaf casts and leaf prints.
DiscoveryAllow scouts to look at the leaves and identify as they can. Let scouts make a leaf cast at the beginning of themeeting so that it will be dry by the end. This could be done as the pre-opening.
Teaching-LearningI. Identifying Leaves.
A. Types of Trees1. Deciduous (Broad Leafed).2. Conifer (Evergreen or Cone Bearing).
B. Types of leaves:1. Simple.2. Compound.3. Simple Palmate.4. Compound Palmate.
C. For some of the leaves you have brought in, explain to scouts how you identified them.D. Include what make them different from other leaves and how they are alike.
II. Making leaf casts and leaf prints (see appendix)
Application: Leaf PrintingHave scouts make prints of their choice of 5 of the leaves you brought in. Make prints of these as describedabove. For scouts to complete their requirement, have them collect some more leaf samples and identify themon their own.

First Class Program Page 34
Toten’ Chip
Note: It is best to do this session on a campout where scouts can actually practice the skills.
Learning ObjectivesAs a result of this experience, each participant should be able to:
• Complete advancement requirements S2b, and S2c.• Properly use and care for the scout knife, ax, and saw.• Earn the Toten’ Chip Card
Materials Required• A Toten’ Chip Card for each participant.• Ax, knife, and saw (1 set of these per every 2 -3 participants).• file, knife sharpening kit (with oil, 1 set per every 2 - 3 participants).• Ax Yard• Sticks• Choping Log• Ax and Saw Sharpening Demonstration log.• Gloves (1 pair per every 2 -3 participants).• Rags (to wipe up excess oil).• Newspaper (to cover table if protection is necessary).
DiscoveryStart by asking the scouts the following questions. How many of you have used a knife, ax, or saw before?How important do you think that being safe with these tools? What do you think can happen if you’re not safe?Is being able to use wood tools properly and safely a right, or a privilege?
Teaching-LearningNote: You may wish to do I, II, and III as three separate presentations separated by a game or activity. This canbe especially helpful with younger scouts.
I. The Scout Knife:A. Care and Sharpening
1. Cleaning:a) Open all the blades, being careful not to cut yourself.b) Twirl a small piece of cloth or paper towel into the end of a toothpick.c) Moisten it with oil and wipe out the inside.d) Be sure to clean the joint at the base of each blade.e) Swab out extra oil with a clean cloth.
2. Sharpening:a) Put a few drops of honing oil on the stone.b) Hold the back against the stone at about a 20 to 30 degree angle.c) Push the blade back along the stone as if you were slicing a thin piece off the stone.d) Work the blade back and forth. Make sure that the number of times for each side is the same
to evenly sharpen the blade.B. Handling and Use: Follow these Dos and Don’ts.
1. Do.a) Keep blades closed except when in use.b) Always cut away from yourself.c) Close blades before handing the knife to someone else.d) Make sure that no one is within an arm's length away when using the knife.
2. Don’t

First Class Program Page 35
a) Carry a knife with the blade open.b) Pound on the knife handle with another tool. The knife may break.c) Throw the knife.d) Pry with the point of the knife blade--it can snap.e) Put the knife in a fire--new blades are made by a process called tempering in which the
blades are heated to harden the blade. Re-heating the knife with a fire can ruin the temperand weaken the knife.
3. Handing your knife to another person.a) Close the blade.b) Hand the knife.c) Make sure the other person has the tool (i.e. says ‘thank you’).d) Never hand any tool across the body.
C. Allow scouts to practice the proper care, handling, and use the knife.II. The Scout Saw
A. Care and Sharpening1. Touch up teeth with a triangle file or ignition file.2. The best way to ‘sharpen’ a blade is to buy a new one.3. Hand saws to another scout the same way you would hand a knife.
B. Handling and Use1. Treat every saw with respect.2. Protect the blade (and your hands) with a sheath.3. Use a long, smooth stroke.4. Undercut branches first.
C. Allow scouts to practice the care, handling and use of the saw.III. The Scout Ax
A. Sharpening1. Use a file with a knuckle guard and wear gloves.2. Use a log and stakes as shown in the Boy Scout Handbook on page 75.3. Place the file on the edge of the blade and push it into the bit. Use enough pressure so that you
can feel the file cutting the metal. Use firm, even strokes and sharpen each side evenly.B. Handling and Use
1. The ax should be sharp and the head on tight.2. Always wear sturdy shoes to protect your feet.3. Clear the area in which you're working.4. Hand the ax in the proper way (Boy Scout Handbook page 75).5. Know how to properly
a) Buck a log.b) Switch Hit.c) Use a chopping block, and to split wood.
Application:Scouts should practice their skills completing requirement S2c. They should receive the Toten’ Chip card asrecognition for their accomplishments and a reminder of the responsibility of using wood tools.
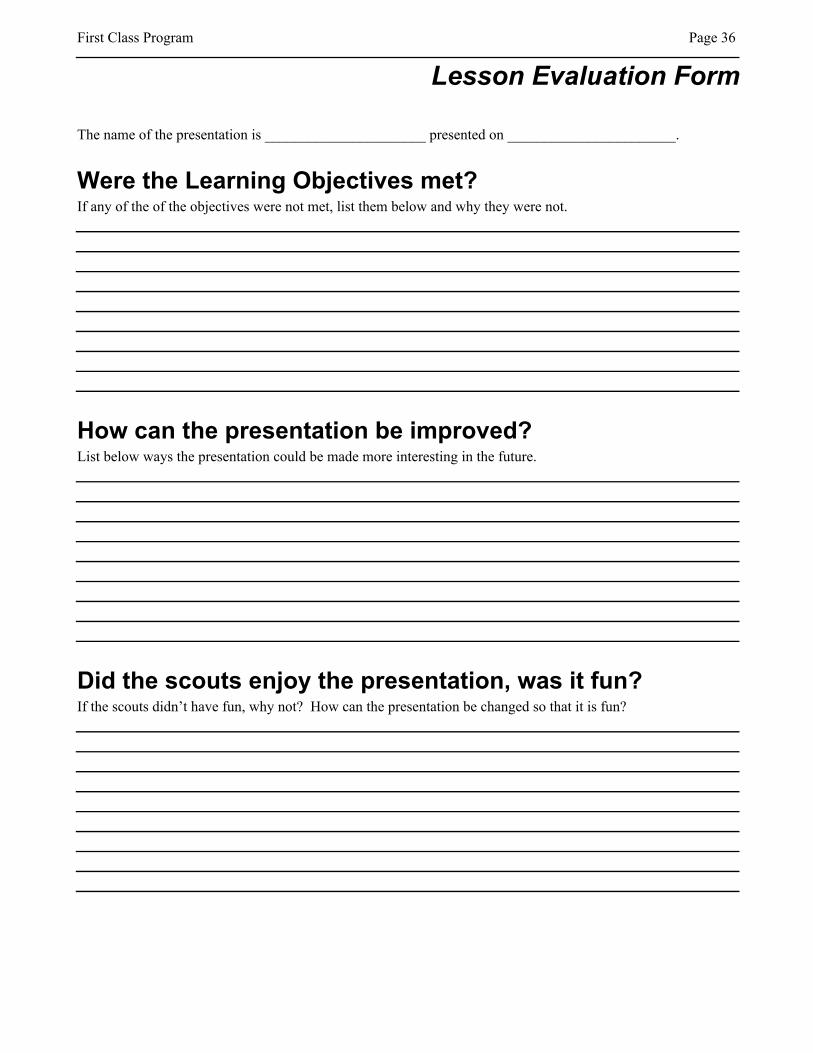
First Class Program Page 36
Lesson Evaluation Form
The name of the presentation is ______________________ presented on _______________________.
Were the Learning Objectives met?If any of the of the objectives were not met, list them below and why they were not.
How can the presentation be improved?List below ways the presentation could be made more interesting in the future.
Did the scouts enjoy the presentation, was it fun?If the scouts didn’t have fun, why not? How can the presentation be changed so that it is fun?

First Class Program Page 37
Appendix
This section contains the forms and worksheets you will need to implement the program.