EZEKIEL 3-30x56 - Sightmarksightmark.com/manuals/SM13024_INF_man_eng.pdf · ABOUT THE SIGHTMARK...
14
Riflescope EZEKIEL 3-30x56 English / Francais / Español / Deutsch
Transcript of EZEKIEL 3-30x56 - Sightmarksightmark.com/manuals/SM13024_INF_man_eng.pdf · ABOUT THE SIGHTMARK...
USER MANUAL
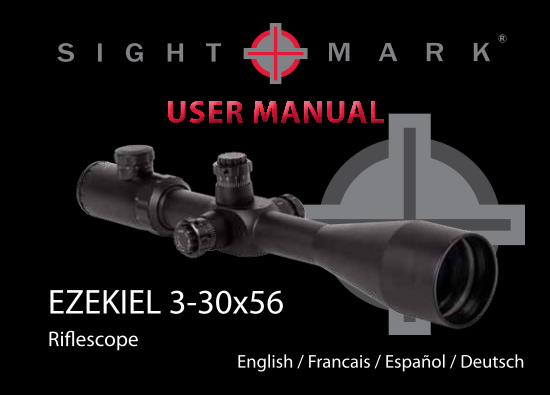
Riflescope
EZEKIEL 3-30x56
English / Francais / Español / Deutsch

Sightmark offers a wide range of products that include red dot scopes, reflex sights, rangefinders, riflescopes, laser sights, night vision and award-winning flashlights and boresights. Sightmark products are inspired by military and law enforcement applications. All products are designed to be the most effective weapon accessories possible.
Sightmark - MAKE YOUR MARK
ABOUT SIGHTMARK®
www.sightmark.com
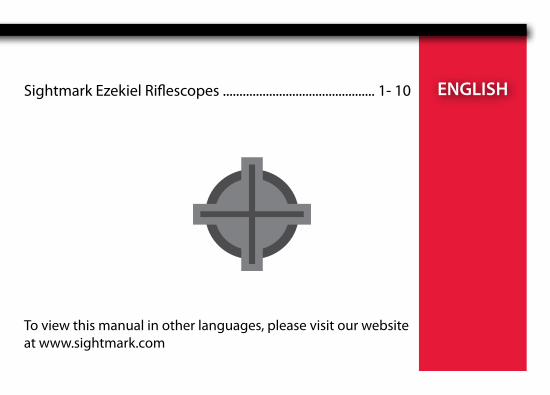
Sightmark Ezekiel Riflescopes .............................................. 1- 10 ENGLISH
To view this manual in other languages, please visit our website at www.sightmark.com
1
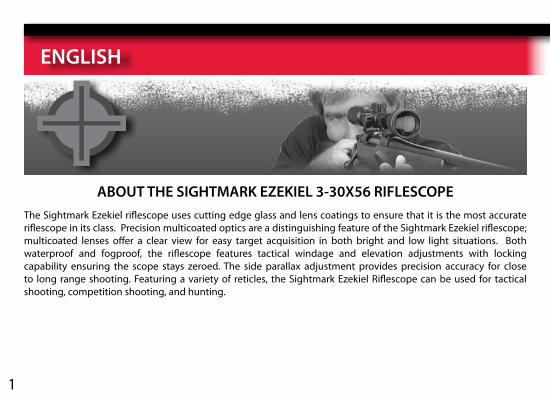
ABOUT THE SIGHTMARK EZEKIEL 3-30X56 RIFLESCOPEThe Sightmark Ezekiel riflescope uses cutting edge glass and lens coatings to ensure that it is the most accurate riflescope in its class. Precision multicoated optics are a distinguishing feature of the Sightmark Ezekiel riflescope; multicoated lenses offer a clear view for easy target acquisition in both bright and low light situations. Both waterproof and fogproof, the riflescope features tactical windage and elevation adjustments with locking capability ensuring the scope stays zeroed. The side parallax adjustment provides precision accuracy for close to long range shooting. Featuring a variety of reticles, the Sightmark Ezekiel Riflescope can be used for tactical shooting, competition shooting, and hunting.
ENGLISH
1
2
3
4
8
5
6
7
9
9
2
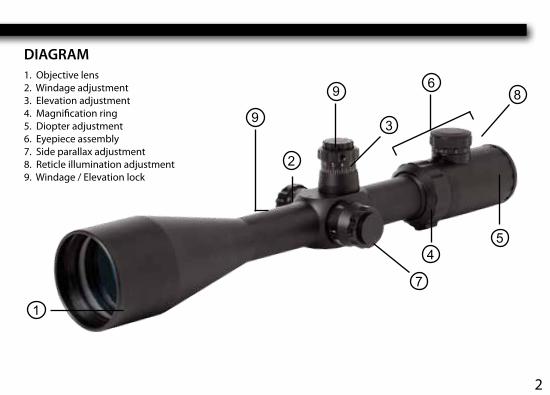
1. Objective lens 2. Windage adjustment 3. Elevation adjustment 4. Magnification ring 5. Diopter adjustment 6. Eyepiece assembly 7. Side parallax adjustment8. Reticle illumination adjustment 9. Windage / Elevation lock
DIAGRAM
3
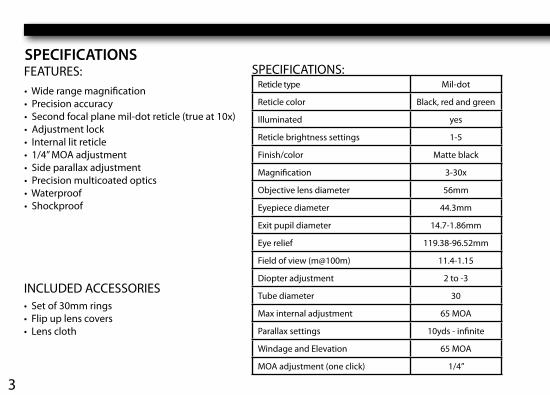
SPECIFICATIONSFEATURES:• Wide range magnification• Precision accuracy• Second focal plane mil-dot reticle (true at 10x)• Adjustment lock• Internal lit reticle• 1/4” MOA adjustment• Side parallax adjustment• Precision multicoated optics• Waterproof• Shockproof
Reticle type Mil-dot
Reticle color Black, red and green
Illuminated yes
Reticle brightness settings 1-5
Finish/color Matte black
Magnification 3-30x
Objective lens diameter 56mm
Eyepiece diameter 44.3mm
Exit pupil diameter 14.7-1.86mm
Eye relief 119.38-96.52mm
Field of view (m@100m) 11.4-1.15
Diopter adjustment 2 to -3
Tube diameter 30
Max internal adjustment 65 MOA
Parallax settings 10yds - infinite
Windage and Elevation 65 MOA
MOA adjustment (one click) 1/4”
INCLUDED ACCESSORIES• Set of 30mm rings• Flip up lens covers• Lens cloth
SPECIFICATIONS:
4
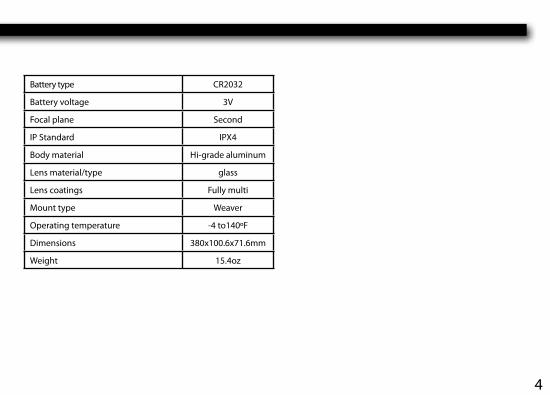
Battery type CR2032
Battery voltage 3V
Focal plane Second
IP Standard IPX4
Body material Hi-grade aluminum
Lens material/type glass
Lens coatings Fully multi
Mount type Weaver
Operating temperature -4 to140ºF
Dimensions 380x100.6x71.6mm
Weight 15.4oz
5
It is recommended to have the riflescope mounted by a professional gunsmith. However, if attempting to mount the riflescope without professional assistance, please read and strictly adhere to the following directions.1. All riflescopes come with basic rings for immediate mounting. 2. Unload the weapon. Remove the bolt/firing pin to ensure the weapon is incapable of firing.3. Install the lower portions of the rings onto a Weaver base. Tighten the screws to between 45 - 65 inch pounds of torque.4. Place the riflescope in the rings and install the top portion of the rings loosely so that the riflescope can move freely.5. Establish the correct eye relief by moving the weapon into the shooting position. While in the shooting position, move the riflescope so that very little black can be seen while looking through the riflescope.6. Once eye relief is established, check the crosshair alignment by pointing the riflescope at an object that is level and align the crosshair. 7. Once the alignment is checked, tighten the rings evenly. Take care not to over tighten the screws as this could bend the scope. [base attatchment screws & ring top screws - 15 inch/lbs; ring cross bolt nut - 68 inch/lbs] 8. Check alignment and position, then boresight the riflescope.
INSTALLATION
Using a Sightmark laser boresight is the most accurate and convenient way to sight in a riflescope.Boresighting and test firing should be performed safely on a firing range. Laser boresights are a quick and accurate method to sighting in riflescopes. Below is listed the traditional method of boresighting.1. When mounting the riflescope on a bolt action rifle, remove the bolt. When mounting to a semi automatic rifle, disassemble the rifle until there is a straight line of sight through the bore.2. Now use a target at least 20-50 feet away when sighting in the riflescope. Look through the bore of the weapon and locate the target.
BORESIGHTING
In order to make windage and elevation adjustments:1. Loosen the windage and elevation locks (9) located on top of the windage and elevation turrets (2,3) by rotating counter clockwise.2. Make the necessary windage and elevation adjustments. The MOA increments for the windage and elevation adjustments are noted on the windage/elevation lock. For example, a 1/4” MOA increment means that 1 click moves the point of impact 1/4” at 100yds. Adjustments can be both felt and heard allowing the shooter to make adjustments without looking at the dials.3. After adjustments are made, tighten the windage and elevation locks (9) by rotating clockwise untill they are firmly secured. Check that the windage and elevations are unable to rotate.
OPERATING WINDAGE AND ELEVATION ADJUSTMENTS
The Sightmark Ezekiel Riflescopes come equipped with tactical elevation and windage adjustments that can be repositioned to align with the original MOA hash mark. In order to reposition:1. Using a 1.5mm metric hex wrench, loosen the three set screws located along the top edge of the adjustments. 2. Next, tighten the windage and elevation locks (9).
ZEROING WINDAGE AND ELEVATION ADJUSTMENTS
3. Sight the target through the bore and then make windage and elevation adjustments (see “Operating Windage and Elevation Adjustments” for instructions) to the riflescope until the reticle is centered on the bullseye.To verify the riflescope is accurately sighted in, always fire a three-shot test group at 100yds.4. If you are still off center, make the necessary amount of adjustments to move the reticle to the center of target.5. Again fire a three-shot test group, and use the center of the group to determine final adjustments.
6
3. Then rotate the adjustment turret and set the MOA hash marks back to zero.4. Once the knob is zeroed, retighten the three set screws making sure not to over tighten. After all three set screws are sufficiently tightened, the mechanism will re-engage.
The Sightmark Triple Duty Riflescopes come equipped with variable magnification. Rotate the magnification ring (4) to the desired setting. Note: Do not loosen the screw located on the magnification ring, doing so will cause problems with the magnifcation function.
MAGNIFICATION ADJUSTMENT
Sightmark’s higher magnification riflescopes do come equipped with a parallax adjustment knob. Parallax is the change of angular position of two stationary points relative to each other as seen by an observer. In other words, it’s how the image lines up in the riflescope and how the eye perceives it. Be sure to adjust the parallax knob to the correct shooting range. It is very important to keep this in mind when zeroing the rifle. If this is not taken into consideration at the time of sighting in the riflescope, accuracy will diminish.In order to adjust parallax:Rotate the side parallax adjustment knob (7) on the side of the unit to the desired shooting range. Distances are noted on the parallax adjustment knob.
PARALLAX ADJUSTMENT
7
The diopter is the measurement of the eye’s curvature. People’s eyes are all curved differently. Sightmark Triple Duty Riflescope have a diopter adjustment (5) that helps attain a clear sharp reticle. If the reticle does not appear clear, crisp, nor sharp, rotate the diopter adjustment ring until the reticle becomes sharp. This adjustment should stay the same unless the riflescope’s operator changes.
DIOPTER ADJUSTMENT
8
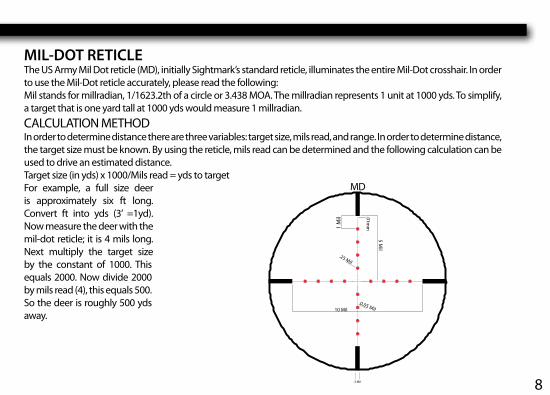
MIL-DOT RETICLE The US Army Mil Dot reticle (MD), initially Sightmark’s standard reticle, illuminates the entire Mil-Dot crosshair. In order to use the Mil-Dot reticle accurately, please read the following:Mil stands for millradian, 1/1623.2th of a circle or 3.438 MOA. The millradian represents 1 unit at 1000 yds. To simplify, a target that is one yard tall at 1000 yds would measure 1 millradian. CALCULATION METHODIn order to determine distance there are three variables: target size, mils read, and range. In order to determine distance, the target size must be known. By using the reticle, mils read can be determined and the following calculation can be used to drive an estimated distance.Target size (in yds) x 1000/Mils read = yds to targetFor example, a full size deer is approximately six ft long. Convert ft into yds (3’ =1yd). Now measure the deer with the mil-dot reticle; it is 4 mils long. Next multiply the target size by the constant of 1000. This equals 2000. Now divide 2000 by mils read (4), this equals 500. So the deer is roughly 500 yds away.
MD
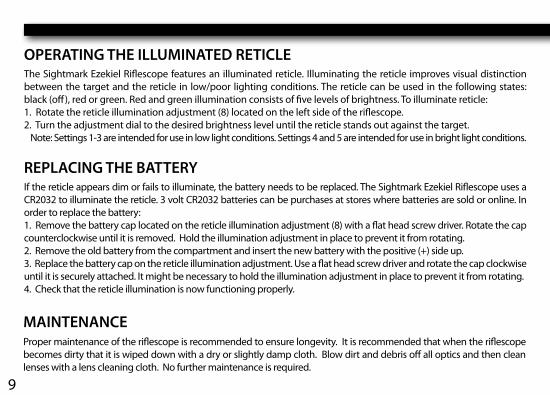
The Sightmark Ezekiel Riflescope features an illuminated reticle. Illuminating the reticle improves visual distinction between the target and the reticle in low/poor lighting conditions. The reticle can be used in the following states: black (off), red or green. Red and green illumination consists of five levels of brightness. To illuminate reticle:1. Rotate the reticle illumination adjustment (8) located on the left side of the riflescope.2. Turn the adjustment dial to the desired brightness level until the reticle stands out against the target. Note: Settings 1-3 are intended for use in low light conditions. Settings 4 and 5 are intended for use in bright light conditions.
OPERATING THE ILLUMINATED RETICLE
9
If the reticle appears dim or fails to illuminate, the battery needs to be replaced. The Sightmark Ezekiel Riflescope uses a CR2032 to illuminate the reticle. 3 volt CR2032 batteries can be purchases at stores where batteries are sold or online. In order to replace the battery:1. Remove the battery cap located on the reticle illumination adjustment (8) with a flat head screw driver. Rotate the cap counterclockwise until it is removed. Hold the illumination adjustment in place to prevent it from rotating.2. Remove the old battery from the compartment and insert the new battery with the positive (+) side up.3. Replace the battery cap on the reticle illumination adjustment. Use a flat head screw driver and rotate the cap clockwise until it is securely attached. It might be necessary to hold the illumination adjustment in place to prevent it from rotating.4. Check that the reticle illumination is now functioning properly.
REPLACING THE BATTERY
Proper maintenance of the riflescope is recommended to ensure longevity. It is recommended that when the riflescope becomes dirty that it is wiped down with a dry or slightly damp cloth. Blow dirt and debris off all optics and then clean lenses with a lens cleaning cloth. No further maintenance is required.
MAINTENANCE
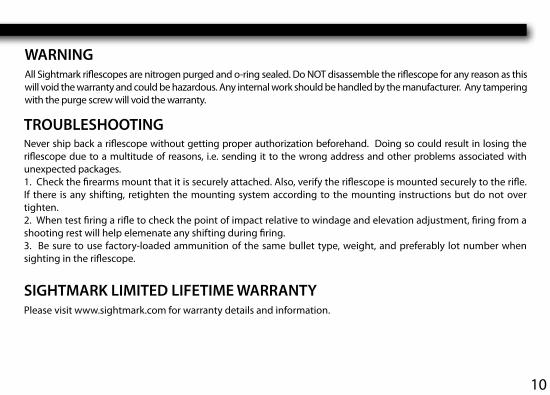
Never ship back a riflescope without getting proper authorization beforehand. Doing so could result in losing the riflescope due to a multitude of reasons, i.e. sending it to the wrong address and other problems associated with unexpected packages.1. Check the firearms mount that it is securely attached. Also, verify the riflescope is mounted securely to the rifle. If there is any shifting, retighten the mounting system according to the mounting instructions but do not over tighten. 2. When test firing a rifle to check the point of impact relative to windage and elevation adjustment, firing from a shooting rest will help elemenate any shifting during firing. 3. Be sure to use factory-loaded ammunition of the same bullet type, weight, and preferably lot number when sighting in the riflescope.
TROUBLESHOOTING
10
Please visit www.sightmark.com for warranty details and information.
SIGHTMARK LIMITED LIFETIME WARRANTY
All Sightmark riflescopes are nitrogen purged and o-ring sealed. Do NOT disassemble the riflescope for any reason as this will void the warranty and could be hazardous. Any internal work should be handled by the manufacturer. Any tampering with the purge screw will void the warranty.
WARNING
www.sightmark.com