ETP Store Operationetp.benetton.co.in/ETPSupport/pdf/ETPStoreOperation… · · 2012-12-10this...
11
THIS ETP STORE OPERATION MANUAL COVERS DAY BEGIN CREATING SALES PERSON INVOICE PRINTING CONFIGURATION CREDIT NOTE PRINTING CONFIGURATION DISABLE/ENABLE EXCEPTION ENTRY DISABLE/ENABLE AUTOMATIC SCHEME IN ETP NRGP OTHER RECEIVING DAY END
Transcript of ETP Store Operationetp.benetton.co.in/ETPSupport/pdf/ETPStoreOperation… · · 2012-12-10this...
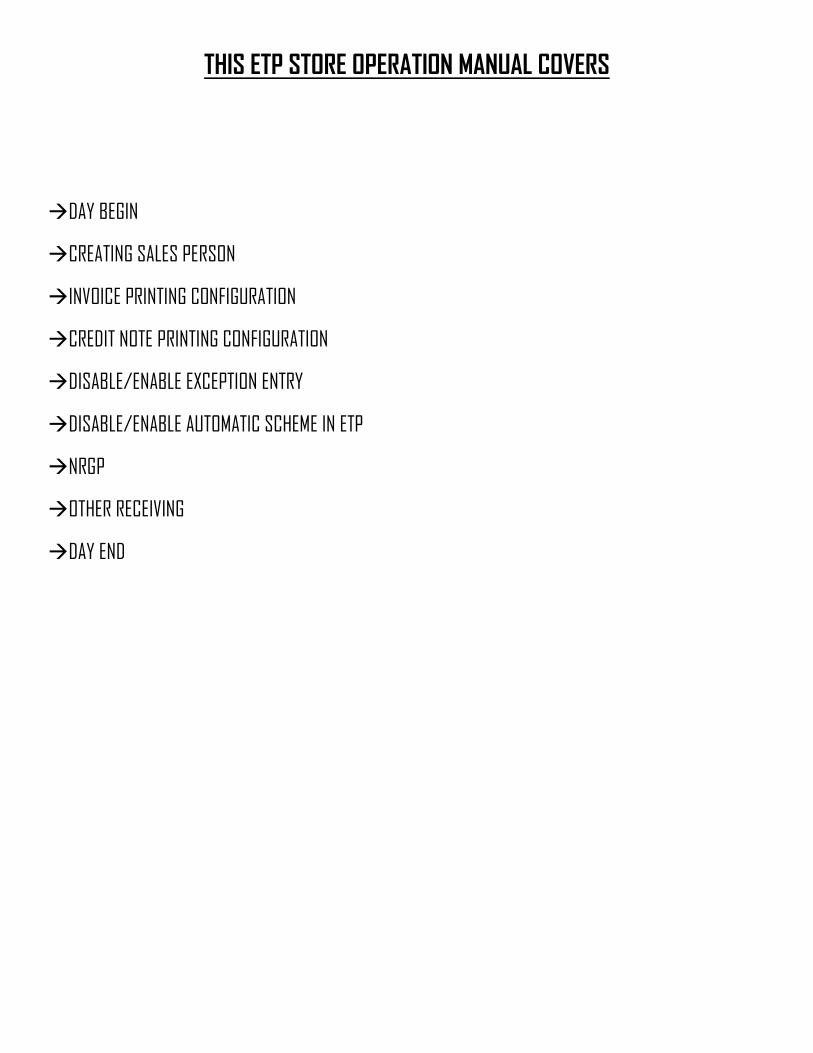
THIS ETP STORE OPERATION MANUAL COVERS
�DAY BEGIN
�CREATING SALES PERSON
�INVOICE PRINTING CONFIGURATION
�CREDIT NOTE PRINTING CONFIGURATION
�DISABLE/ENABLE EXCEPTION ENTRY
�DISABLE/ENABLE AUTOMATIC SCHEME IN ETP
�NRGP
�OTHER RECEIVING
�DAY END

DAY BEGIN
Figure 1.1
Figure 1.2
Figure 1.3
The very first step in ETP to start
billing is, Day Begin from ETP
Store Operation. Go to Master
Maintenance�Begin of Day, as
shown in Figure 1.1.
Begin of Day windows will appear
on the screen. Before confirming
Day Begin, please ensure that
Current Date and Time should
reflect in System Date & Time
Field. See figure 1.2
Once you ensure that details
reflecting are correct, press OK
button for Day Begin. The
confirmation message for Day
Begin will appear in Status Bar of
Window. See figure 1.3

CREATE SALESPERSON
Figure 2.1
Figure 2.2
Figure 2.3
To create ID’s for FC’s in ETP
Store Operation, go to Master
Maintenance�Sales Person. See
Figure 2.1.
Sales Person window will appear
on the screen, as seen in figure
2.2. There is already an ID with
Example exist in the record.
Now to create a new ID. Put ID
no. in Sales Person’s No field,
and then press ENTER key.
Same way you need to enter all
details by moving with ENTER
key only. As shown in figure 2.3
After Date of Join field, when
you press ENTER key, the cursor
will automatically move to
Address Tab from SP Info.

Figure 2.4
Figure 2.5
Figure 2.6
Same way you need to enter the
details one by one moving with
ENTER Key in Address
columns, as you did in SP Info
Tab. Cursor will move to Free
Field Tab now.
We don’t have to enter any
details in Free field columns, so
simply leave all these field
blanks moving with ENTER key,
and then click Save button.
Once you pressed Save button,
the details provided by you for
the Sales Person get saved in
ETP, then ID and Name of that
person will get appear in left side
of the Window. See Figure 2.6

CONFIGURATION FOR INVOICE PRINT
Figure 3.1
Figure 3.2
Figure 3.3
To get store details like,
Company Name, Address, Phone
No, Tin No etc, print on the
header and footer of Invoice, In
ETP Store Operation go to
Configuration�Invoice Printing.
See Figure 3.1
Put Counter Id ‘1’ then press
ENTER Key, then select
Warehouse Master in Address
Source, and printer details in
Paper Size example 40 / 80 Cols.
Then enter the details you want
to get printed in Invoice by
moving with ENTER key. In
Drop Down / Selection field,
select the same parameter as
shown in Figure 3.2, then press
ENTER to move to Footer Tab.
In this tab, select the same
parameters in selection field as
you can see in Figure 3.3. Then
by moving with ENTER key
press Save button to save the
defined details.

PRINTING CONFIGURATION FOR CREDIT NOTE
Figure 4.1
CONFIGURATION (DISABLE/ENABLE )
Figure 5.1
Figure 5.2
To get store details like,
Company Name, Address, Phone
No, Tin No etc, print on the
header and footer of Invoice, In
ETP Store Operation go to
Configuration�Credit Note
Printing. See Figure 4.1 then
proceed further by referring the
Figure 3.2 and 3.3.
Allow system to pick Automatic
Discount while promotions /
EOSS. And to Disable/Enable
exceptional Entries to be accepted
by System. In ETP Store
Operation go to
Configuration�Property
File�Client. See Figure 5.1
Property File window will appear
on the screen. Put ‘1’ in Counter
ID field, and then press ENTER
Key.

Figure 5.3
Figure 5.4
Figure 5.5
Once you press the ENTER key,
parameters will get reflect in
field. Now to Enable/Disable
Exceptional Entries in ETP, you
need to press the NEXT button 4
times, and to Enable/Disable
automatic schemes, you need to
press NEXT button 5 times.
After pressing the NEXT button 4
times, you will reach the property
window shown in Figure 5.4.
Now change the Allow
Exceptional Entries to ‘N’ if you
want to Disable this feature and
‘Y’ to Enable.
After pressing the NEXT button 5
times system will show the
property window shown in Figure
5.5. Now change the Use Pcc
option to ‘N’ to Disable
Promotional/EOSS schemes, and
‘Y’ to Enable.

MAKING NRGP
Figure 6.1
Figure 6.2
Figure 6.3
In ETP Store Operation go to
Stock Management�Stock Issue.
See Figure 6.1
Stock Issue window will appear,
put STO only as Order Type by
default system will show T01. In
Ref. Doc. No. mention the reason
for making NRGP or any other
Reference. Stock Transfer No.
could be any no. that you can
maintain for your own records. In
Item Number field start scanning
the barcodes one by one, the same
will reflect below in the Grid
View. See Figure 6.2
Once you finished with scanning
the Barcodes, press the Save
button to confirm the NRGP.

DAY END
Figure 7.1
Figure 7.2
Figure 7.3
Figure 7.4
Day End has to be confirmed
from ETP Store Front first. After
that, In ETP Store Operation go
to Day End�Z-Read
Now Counters need to closed one
by one in case stores running
with Multiple Tilts. Put Counter
ID no. first then by moving with
ENTER key, put the ID you used
in billing for the day then select
the transaction/current date and
then put the Shift No. See Figure
7.2.
Once you press ENTER key after
putting Shift No. System reported
and User reported sale will reflect
below. Press the Save button
after cross check. See Figure 7.3.
[Note: User Reported Sale is
calculated on the basis of
denomination and collection updated
by the user while doing Day End in
Store Front. Whereas System
Reported represents the sale updated
in System.]
After doing Counter Wise Day
End, go to Master Maintenance
�End of Day.

Figure 7.5
Figure 7.6
Figure 7.7
In End of Day Window, you can
see the store code & name.
Transaction Date is the date for
which you are about to do Day
End as show in Figure 7.5. Press
the OK button.
The Alert window will appear on
the screen asking for the Day End
Confirmation. Press the Yes
button to confirm the Day End.
See Figure 7.6
“End of Day is completed”
message will appear in the Status
Bar of End of Day windows,
confirming that Day End is done.
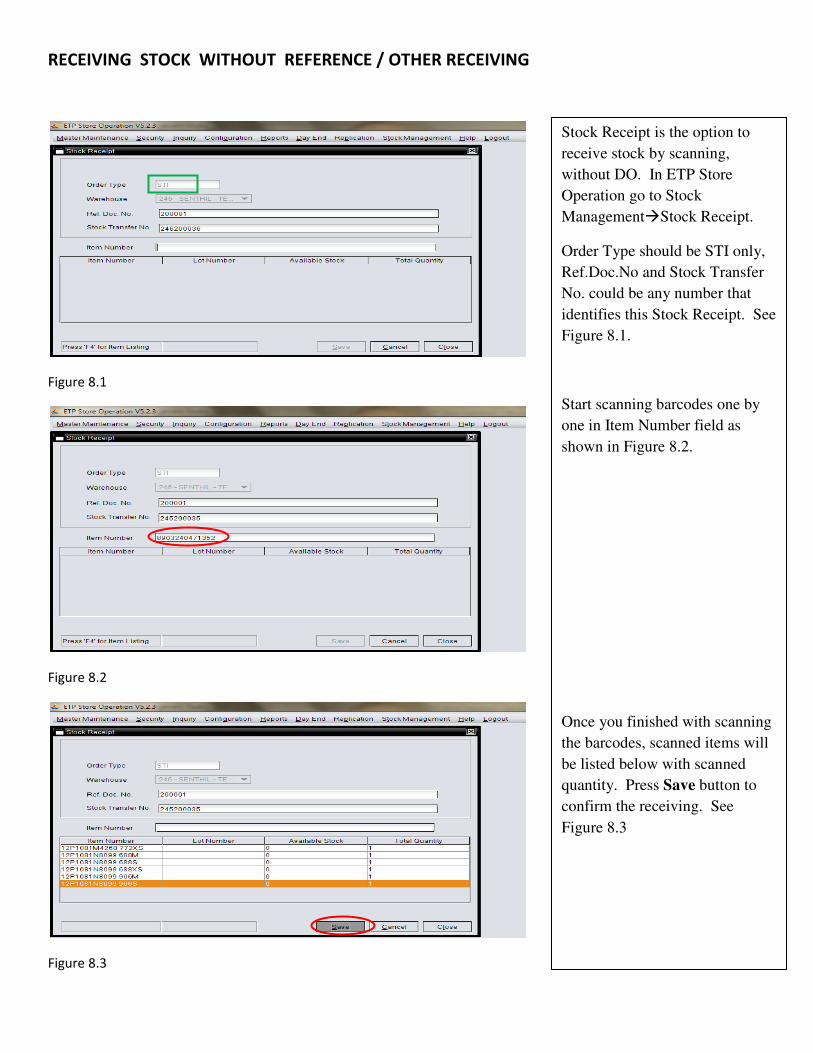
RECEIVING STOCK WITHOUT REFERENCE / OTHER RECEIVING
Figure 8.1
Figure 8.2
Figure 8.3
Stock Receipt is the option to
receive stock by scanning,
without DO. In ETP Store
Operation go to Stock
Management�Stock Receipt.
Order Type should be STI only,
Ref.Doc.No and Stock Transfer
No. could be any number that
identifies this Stock Receipt. See
Figure 8.1.
Start scanning barcodes one by
one in Item Number field as
shown in Figure 8.2.
Once you finished with scanning
the barcodes, scanned items will
be listed below with scanned
quantity. Press Save button to
confirm the receiving. See
Figure 8.3