Datex-Ohmeda Avance S5: Controls and Operation€¦ · Datex-Ohmeda Avance S5: Controls and...
26
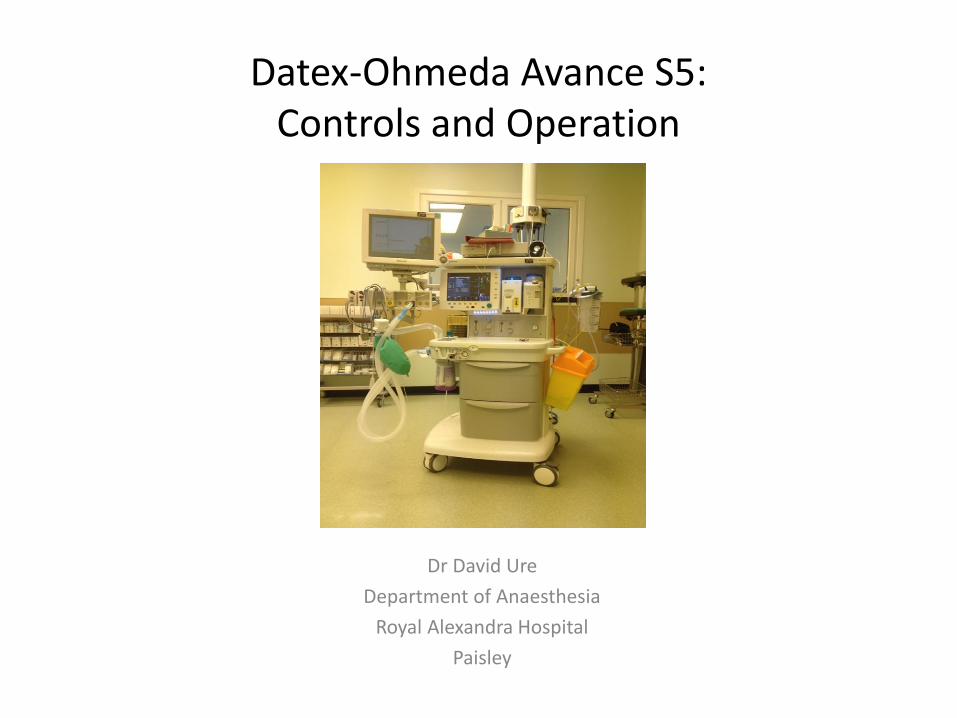
Datex-Ohmeda Avance S5: Controls and Operation Dr David Ure Department of Anaesthesia Royal Alexandra Hospital Paisley
Transcript of Datex-Ohmeda Avance S5: Controls and Operation€¦ · Datex-Ohmeda Avance S5: Controls and...
Datex-Ohmeda Avance S5: Controls and Operation
Dr David Ure
Department of Anaesthesia
Royal Alexandra Hospital
Paisley

The ‘On/Off’ switch is under the vaporisers on the right.

Gas hoses/pipelines
Oxygen hose (white)
Air hose
(black)
Vacuum or suction (yellow)
• The gas and vacuum hoses are connected to their pipelines through Schraeder valves • These are uni-fit, so misconnection (e.g. of oxygen hose to nitrous pipeline) is not
possible • The connections at the rear of the machine are different diameters and cannot be
interchanged
Nitrous oxide hose (blue)
Schraeder valves
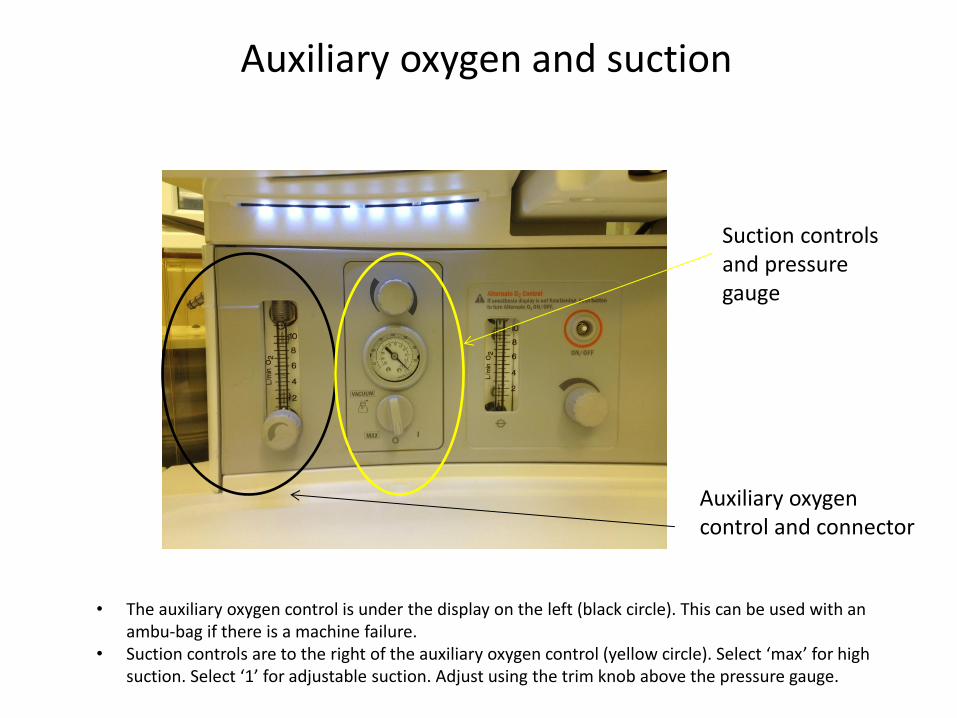
• The auxiliary oxygen control is under the display on the left (black circle). This can be used with an ambu-bag if there is a machine failure.
• Suction controls are to the right of the auxiliary oxygen control (yellow circle). Select ‘max’ for high suction. Select ‘1’ for adjustable suction. Adjust using the trim knob above the pressure gauge.
Suction controls and pressure gauge
Auxiliary oxygen control and connector
Auxiliary oxygen and suction
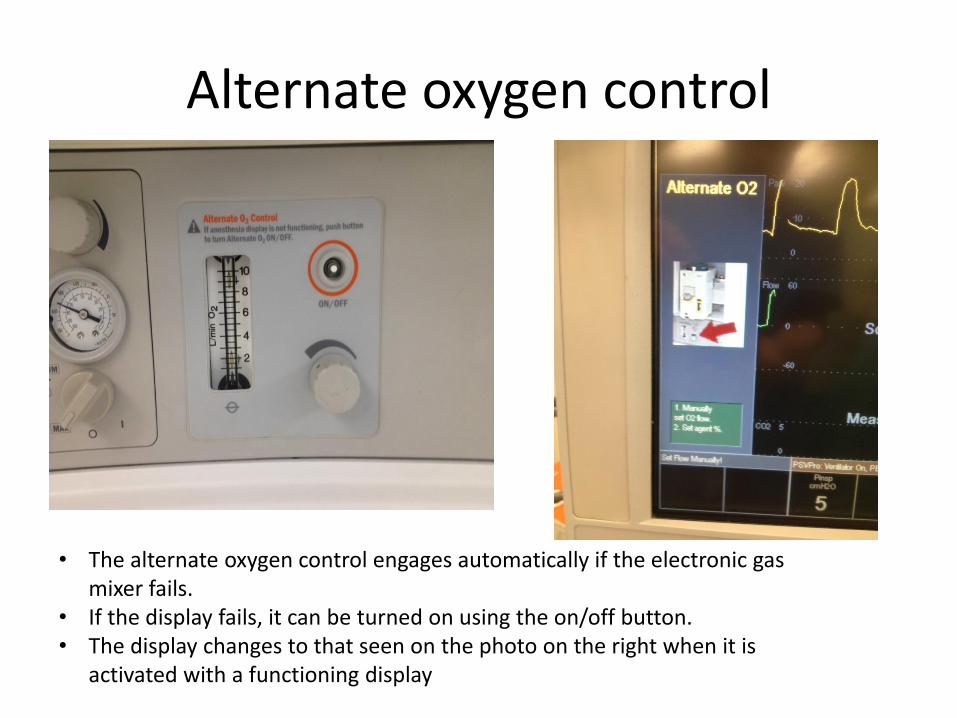
Alternate oxygen control
• The alternate oxygen control engages automatically if the electronic gas mixer fails.
• If the display fails, it can be turned on using the on/off button. • The display changes to that seen on the photo on the right when it is
activated with a functioning display

Oxygen flush and Auxiliary common gas outlet (ACGO) switch
Press for high flow 100% oxygen
ACGO (auxiliary common gas outlet)
ACGO selector switch (up for circle system/ down for ACGO) Oxygen flush: high flow 100% oxygen ( bypasses vaporisers)
ACGO (auxiliary common gas outlet): keep switch up to select circle system. Occasionally used in down position with a paediatric breathing circuit or Bain circuit
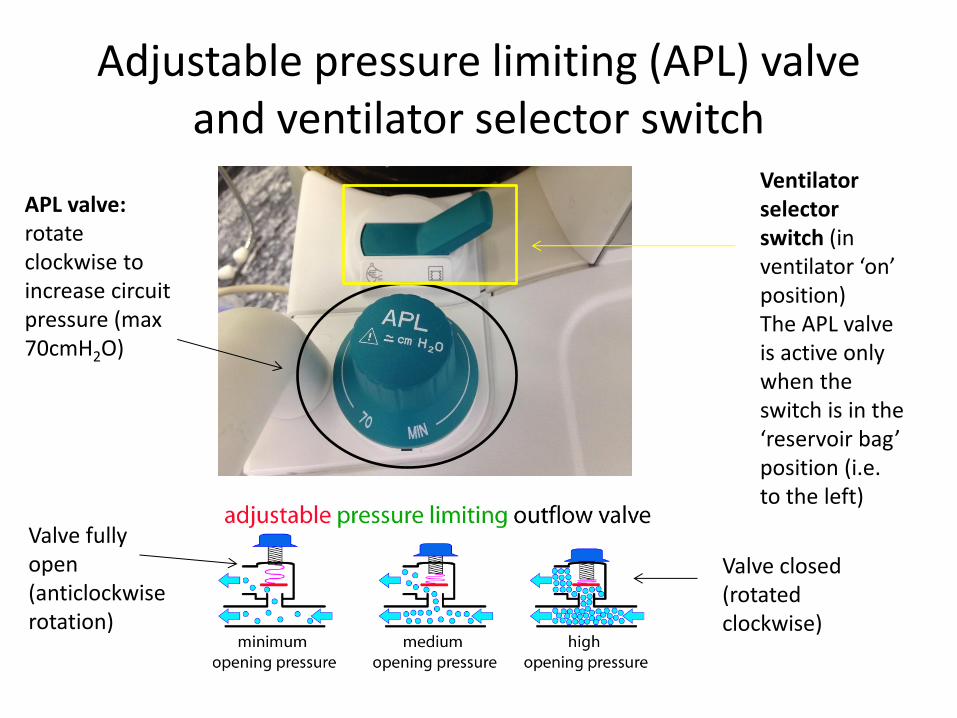
Adjustable pressure limiting (APL) valve and ventilator selector switch
APL valve: rotate clockwise to increase circuit pressure (max 70cmH2O)
Ventilator selector switch (in ventilator ‘on’ position) The APL valve is active only when the switch is in the ‘reservoir bag’ position (i.e. to the left)
Valve closed (rotated clockwise)
Valve fully open (anticlockwise rotation)
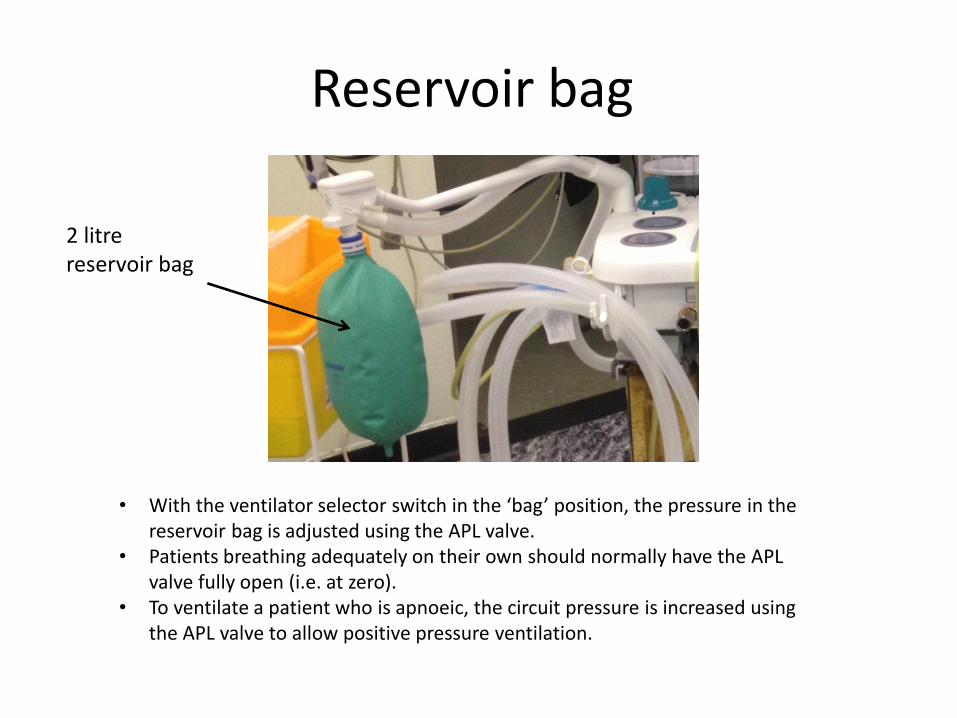
Reservoir bag
• With the ventilator selector switch in the ‘bag’ position, the pressure in the reservoir bag is adjusted using the APL valve.
• Patients breathing adequately on their own should normally have the APL valve fully open (i.e. at zero).
• To ventilate a patient who is apnoeic, the circuit pressure is increased using the APL valve to allow positive pressure ventilation.
2 litre reservoir bag

Circle system one-way valves
Inspiratory valve (opens on inspiration and closes with expiration)
Expiratory valve: Opens on expiration and closes with inspiration
The valves are simple discs, which rise or fall depending on the direction of gas flow.
Flow direction arrows
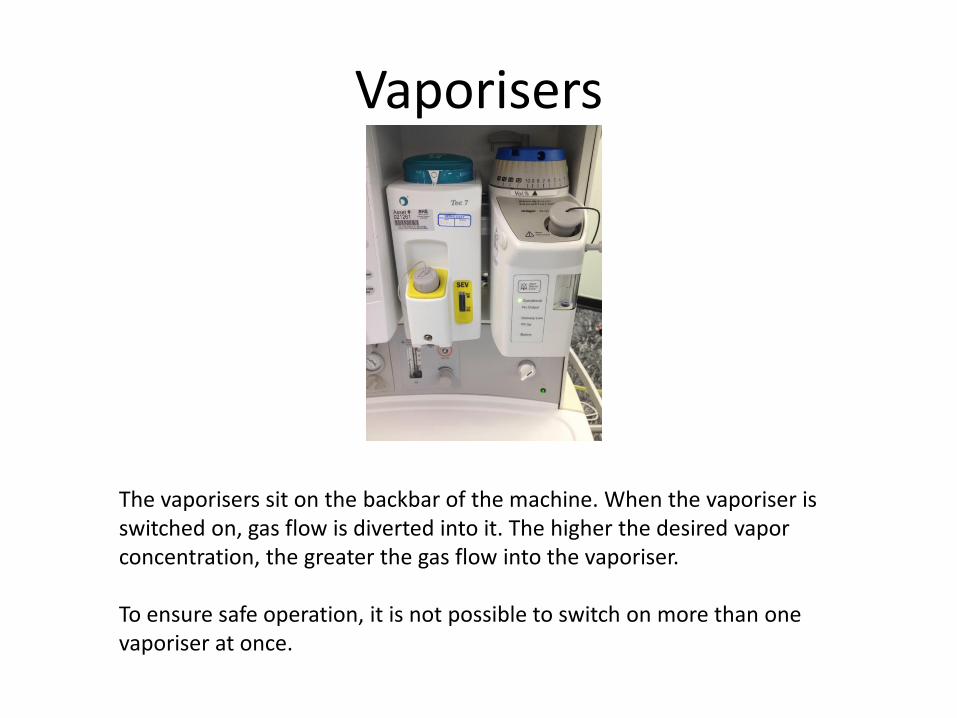
Vaporisers
The vaporisers sit on the backbar of the machine. When the vaporiser is switched on, gas flow is diverted into it. The higher the desired vapor concentration, the greater the gas flow into the vaporiser. To ensure safe operation, it is not possible to switch on more than one vaporiser at once.
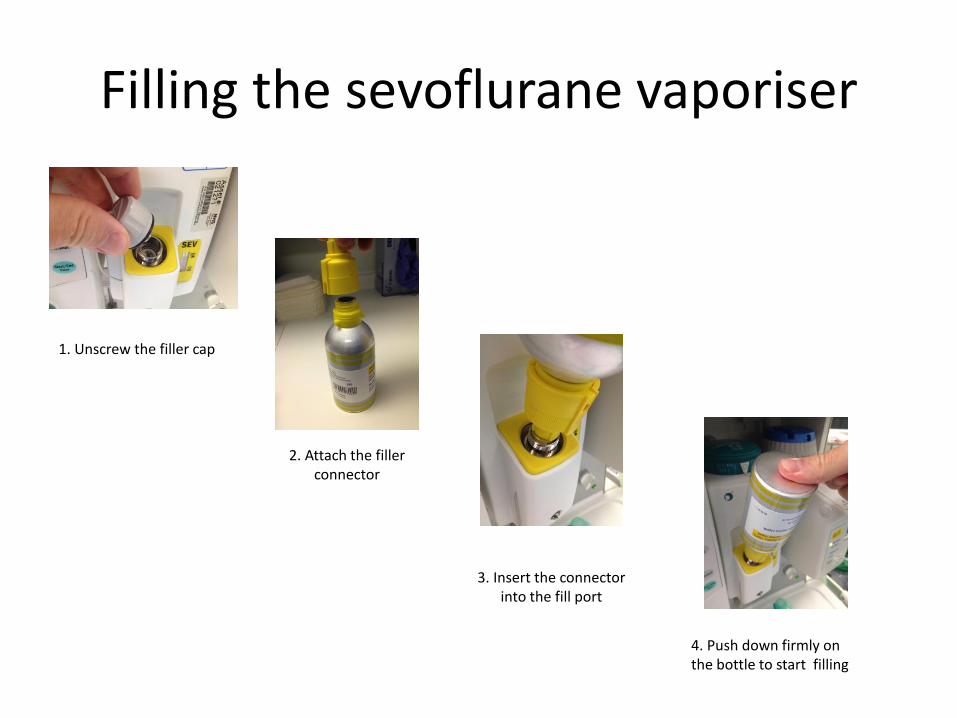
Filling the sevoflurane vaporiser
1. Unscrew the filler cap
2. Attach the filler connector
3. Insert the connector into the fill port
4. Push down firmly on the bottle to start filling

Filling the desflurane vaporiser
1. Depress button fully and firmly pull off
protective cap
2. Push desflurane bottle firmly into filler port to
begin filling
3. Push button in, replace cap and release button
You do not have to turn the vaporiser off to refill

Gas scavenging
Scavenging hose
Scavenging flow monitor (located above ventilator bellows): ball hovering in the green zone of the indicator indicates safe operation
Waste gas is removed through the AGSS (anaesthesia gas scavenging system) to prevent contamination of the operating theatre. It is vented to the atmosphere.
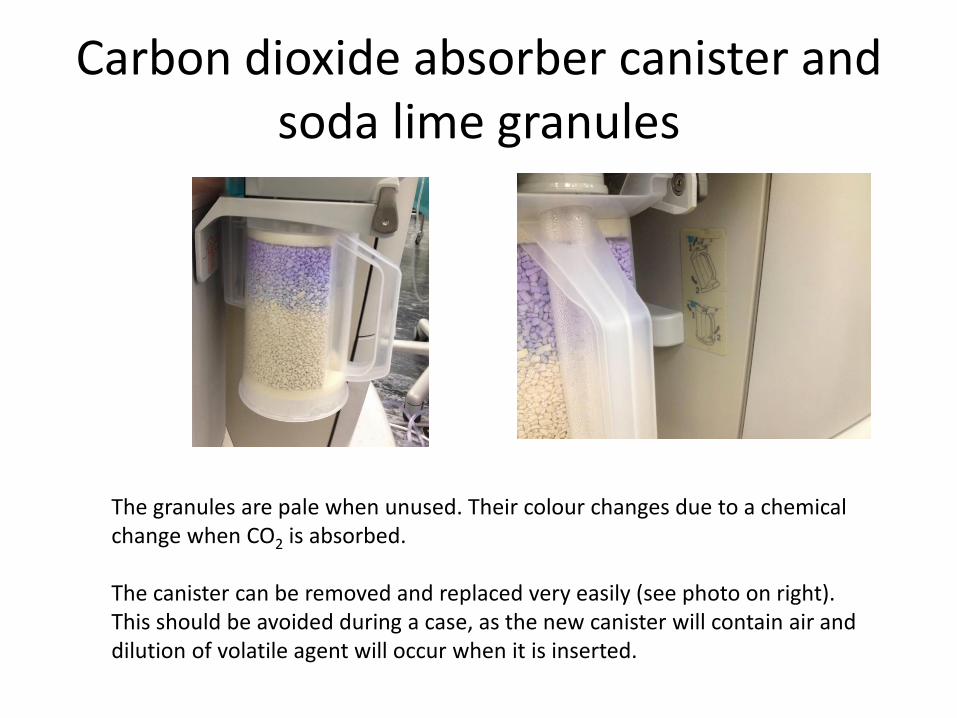
Carbon dioxide absorber canister and soda lime granules
The granules are pale when unused. Their colour changes due to a chemical change when CO2 is absorbed. The canister can be removed and replaced very easily (see photo on right). This should be avoided during a case, as the new canister will contain air and dilution of volatile agent will occur when it is inserted.
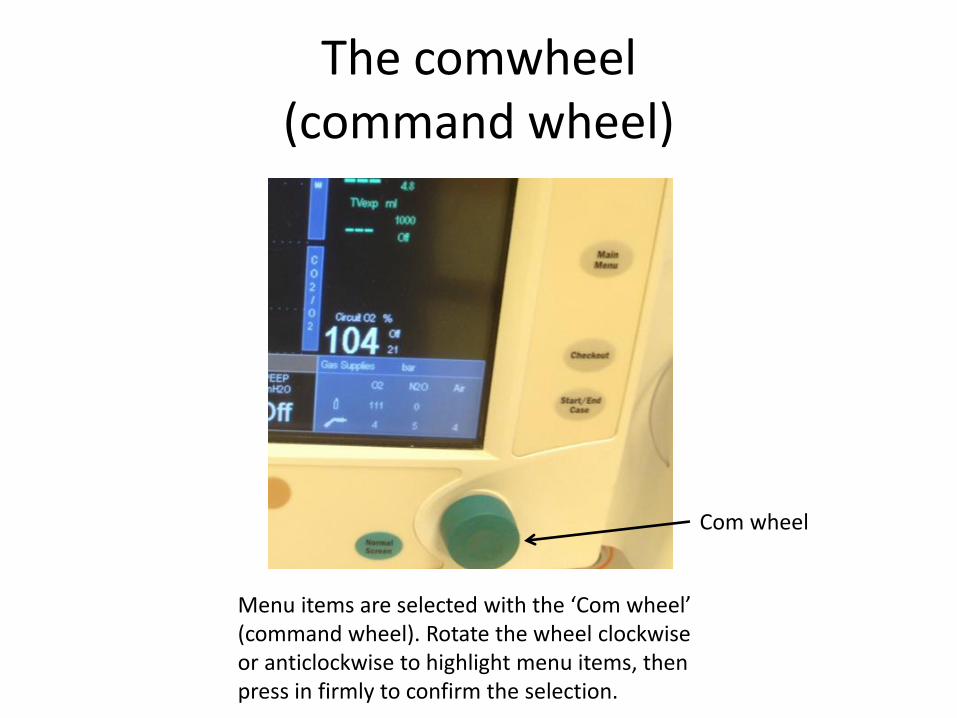
The comwheel (command wheel)
Com wheel
Menu items are selected with the ‘Com wheel’ (command wheel). Rotate the wheel clockwise or anticlockwise to highlight menu items, then press in firmly to confirm the selection.

Operation
To use the machine: 1. Press Start/End case button (circled). The display on the right will appear. 2. Use the com wheel to select and confirm ‘Start Case Now’ 3. Default gas flow of 100% oxygen at 6l/min, with default ventilator settings start
(see next slide)

Default gas flows and ventilator settings
Oxygen % / Total gas flow / Tidal volume / Resp rate / I:E ratio / PEEP
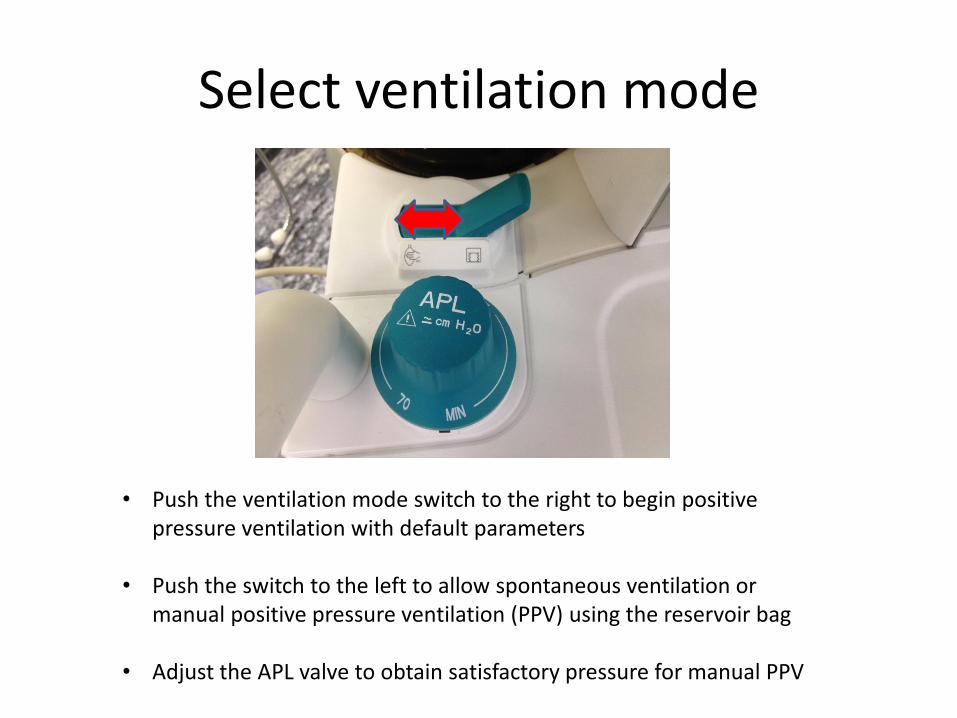
Select ventilation mode
• Push the ventilation mode switch to the right to begin positive pressure ventilation with default parameters
• Push the switch to the left to allow spontaneous ventilation or manual positive pressure ventilation (PPV) using the reservoir bag
• Adjust the APL valve to obtain satisfactory pressure for manual PPV

Turn on vaporiser
To turn on a vaporiser: 1. Push the button on the back (sevoflurane) or front (desflurane) of the dial 2. With the button depressed, rotate the dial anticlockwise to the desired
concentration

Adjust ventilator controls (1): changing parameter values
To alter any parameter, press the button below the parameter to highlight it, adjust using the com wheel and then press to confirm
Press button below parameter to highlight
Adjust using comwheel and press to confirm
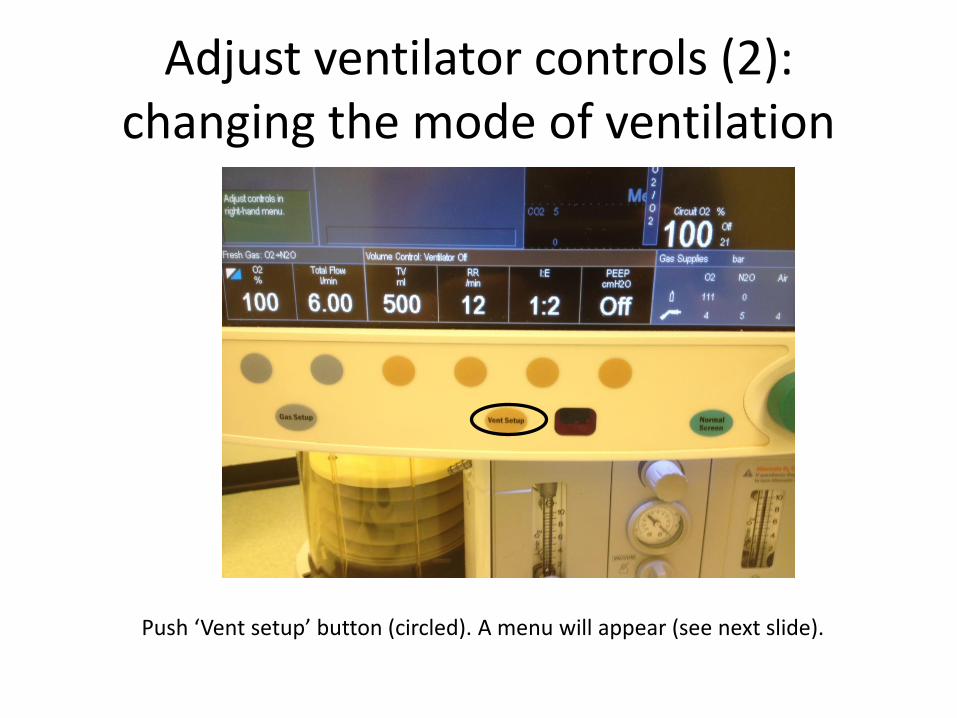
Adjust ventilator controls (2): changing the mode of ventilation
Push ‘Vent setup’ button (circled). A menu will appear (see next slide).
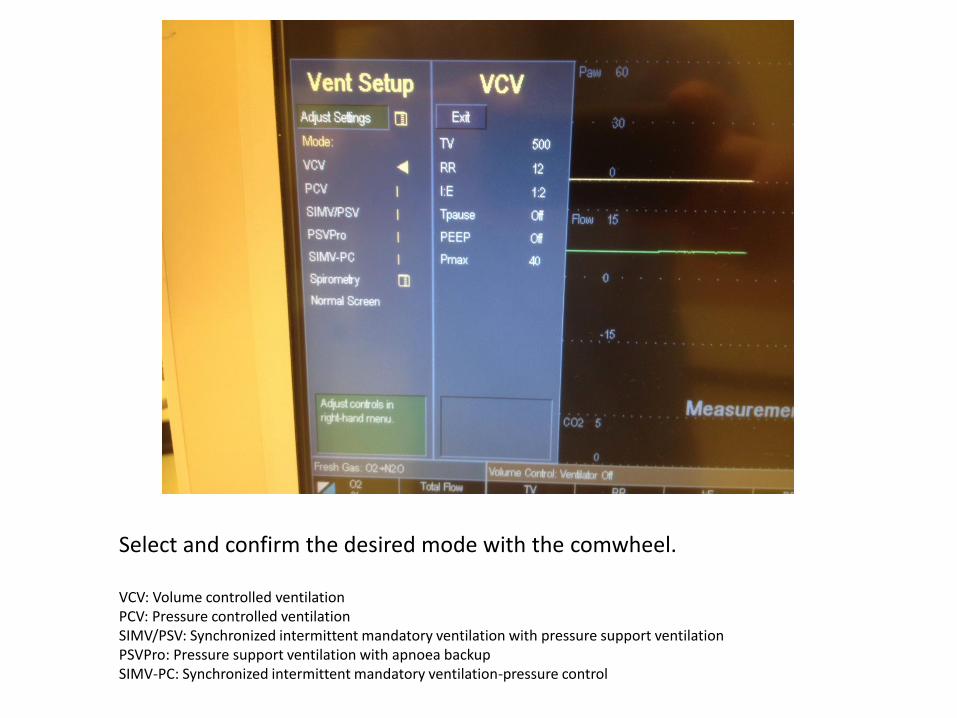
Select and confirm the desired mode with the comwheel. VCV: Volume controlled ventilation PCV: Pressure controlled ventilation SIMV/PSV: Synchronized intermittent mandatory ventilation with pressure support ventilation PSVPro: Pressure support ventilation with apnoea backup SIMV-PC: Synchronized intermittent mandatory ventilation-pressure control
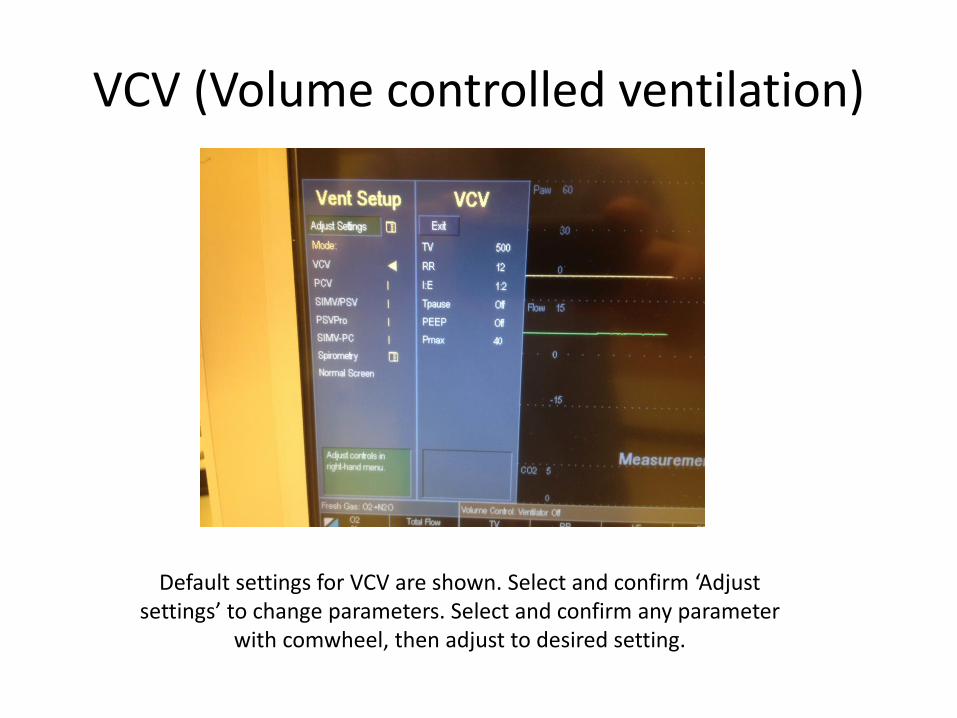
VCV (Volume controlled ventilation)
Default settings for VCV are shown. Select and confirm ‘Adjust settings’ to change parameters. Select and confirm any parameter
with comwheel, then adjust to desired setting.

PSVPro (Pressure support ventilation with apnoea backup)
This mode assists a patient who is breathing spontaneously, by increasing the circuit pressure when the machine detects a spontaneous breath.
Set P support , PEEP and flow trigger, then confirm

PSVPro flow trigger
This sets the patient effort needed to start an assisted breath in l/min. Default setting is 2

End


![Draeger Innovian Anesthesia supported connectivity for the .../media/documents/us-global/products/patien… · Datex other [DATX] Capnomac ... Ohmeda 7900 Ventilator Excel 110 SE](https://static.fdocuments.us/doc/165x107/5aefb1e57f8b9ac62b8dc487/draeger-innovian-anesthesia-supported-connectivity-for-the-mediadocumentsus-globalproductspatiendatex.jpg)