Data Science blueprint
53
Data Science blueprint Release 1.0 May 07, 2020
Transcript of Data Science blueprint

Data Science blueprintRelease 1.0
May 07, 2020


Presentation:
1 Introduction 1
2 Blueprint’s structure 3
3 Make this your own 5
4 Installation 7
5 Environment 9
6 Quality testing 13
7 Using the cli interface 15
8 Requirements 17
9 Using cookiecutter 19
10 Installation 21
11 Project operations 23
12 Make the installation your own 27
13 Commands 29
14 Build & Start 31
15 Notebook 33
16 Shell 35
17 Make the environment your own 37
18 Flake8 39
19 Unit tests 41
20 Code coverage 43
i

21 Package your project 45
22 Create your app 47
23 Indices and tables 49
ii

CHAPTER 1
Introduction
Data science blueprint is a nothing more than a data science project structure proposition. Its purpose is very simple :
• help you build a robust project
• help you gain some confidence regarding the reliability of the code
• help you meet the requirements needed to deploy in a production environment
• Bring data scientists and machine learning engineers to work together around a common code base
To reach this goal, the blueprint proposes some interesting features that will be covered in this documentation :
• a personalized backbone for your data science project, thanks to cookiecutter
• a dockerized environment that you can use to work with notebooks
• a code quality focus, with the set of tools that will help you profiling and testing your code
• a set of tools to let you use your project as an app that you can deploy on a production server, or on a remotepython
repository like Pypi
The Data Science blueprint works with Python projects, with fully packaged code and also Jupyter notebooks. It isparticularly adapted to data science projects.
1

Data Science blueprint, Release 1.0
2 Chapter 1. Introduction

CHAPTER 2
Blueprint’s structure
The blueprint file structure follows the following pattern. Let’s consider that after installing the project with cook-iecutter, you have decided to call it awesome_project
data <- The data folder used by default by the dockerized→˓environment
docker <- docker files injections used to build the environment
docs <- Sphinx documentation of the project
notebooks <- Jupyter notebooks used by the dockerized environment
awesome_project <- Source code location of this project.__init__.py <- Makes it a Python module
commands <- Command scripts that will allow you to use your project→˓with command lines
cmd.py
features <- Contains the scripts that will handle feature explorations→˓and engineering
models <- Contains the scripts that will handle the models
operator <- Contains the scripts that will handle data processingdata.pydataframe.pygenerator.py
tests <- Contains the unit testsoperator
data.pydataframe.pygenerator.py
(continues on next page)
3

Data Science blueprint, Release 1.0
(continued from previous page)
Dockerfile <- Build file used by Docker to build the project environment
LICENSE
Makefile <- Makefile to run commands over the project
README.md
requirements.txt <- The requirements file that lists all the package→˓dependencies to install
setup.cfg <- Configuration file used to fill the setup.py file
setup.py <- Setup file to install the project as a pip package
.gitignore <- Avoid pushing tmp files that should never exist on Github
As you can see in the file tree, some python files have been added (particularly in the awesome_project folder). Youmust keep in mind that those files have been added only for demonstration purposes. Their purpose is to help youunderstand how the unit tests are organized, how the project code should be organized.
Note: After you have installed the blueprint, and you have got to know how to use it, you will indeed remove the unittests, the operator files, and write your owns.
4 Chapter 2. Blueprint’s structure

CHAPTER 3
Make this your own
The very purpose of this blueprint is that you make it your own. That said, you are allowed to bring any modificationsyou want to the blueprint. You can fork it, change any part you want, use it for commercial or non commercial use,and even republish it under your own brand if you wish to.
Feel free to give me your feedbacks. With your feedbacks, I can design some new features. I will integrate them intothe blueprint, and update the documentation. As I have said before, the project is available on github, here. You canalso easily clone it like this:
git clone https://github.com/mysketches/data-science-blueprint.git
If you wish to contribute to my project, I’d be glad to receive your pull requests on Github. If you see a bug, orsomething os not clear, you can also create an issue on Github.
5

Data Science blueprint, Release 1.0
6 Chapter 3. Make this your own

CHAPTER 4
Installation
Installation of the blueprint will proceed as follow:
$ pip install cookiecutter$ cookiecutter https://github.com/mysketches/data-science-blueprint
This should output the following form:
full_name [John Doe]:email [[email protected]]:project_name [DS-blueprint]:package_name [Awesome project]:package_slug [awesome_project]:project_short_description [No description]:version [0.1.0]:Select python_interpreter:1 - python32 - pythonChoose from 1, 2 [1]:application_cli_name [awesome-project-cli]:Select opensource_licence:1 - MIT2 - BSD3 - ISCL4 - Apache Software License 2.05 - Not open sourceChoose from 1, 2, 3, 4, 5 [1]:docker_base_image [jupyter/base-notebook:python-3.7.6]:docker_image_name [awesome-project-env]:docker_container_name [awesome-project-env-instance]:docker_container_port [8888]: 8082
Leave the fields blank if you wish to use the default values.
That’s it, your blueprint is installed, and ready to work !
7

Data Science blueprint, Release 1.0
8 Chapter 4. Installation

CHAPTER 5
Environment
5.1 Build the environment
After the blueprint is installed, most of what you will do with your environment will work through the make command.You can build your environment like this:
$ make environment-build
You should see the following output:
Successfully built c70c2ec13421Successfully tagged awesome-project-env:latest
Environment is built! A Docker image was created: awesome-project-env
Let’s add some sample data to our project:
$ make environment-data
You can now start your environment:
$ make environment-start
You should see the following output:
05f32052868110f38e8233a2ac70ebff076272c7997f5409a8d70a780fc33ec7Environment is running!Notebooks interface is available at http://localhost:8082
9

Data Science blueprint, Release 1.0
5.2 Use the Jupyter interface
You can now reach out to your environment interface, and access the Jupyter notebook instance. A notebook has beencreated with the blueprint, to give you a sample exploration. It is located in the notebooks folder. After displaying it,you can run the cells.
5.3 Work with the shell
Back to your terminal, you can now launch a shell:
$ make environment-shell
You are now in the shell, and you will notice that the prompt has changed:
jovyan@awesome_project:~$
Move to the scripts folder, and launch a python script that tests your package:
jovyan@awesome_project:~$ cd scriptsjovyan@awesome_project:~/scripts$ python3 nz-mapping.py
This is the output you should expect:
10 Chapter 5. Environment

Data Science blueprint, Release 1.0
NZ_area Count geo_level0 Area Outside Region 6 Regional council areas1 Area Outside Region 15 Regional council areas2 Area Outside Region 9 Regional council areas3 Area Outside Region 15 Regional council areas4 Area Outside Region 3 Regional council areas
NZ_area Count geo_level0 area outside region 6 REGIONAL COUNCIL AREAS1 area outside region 15 REGIONAL COUNCIL AREAS2 area outside region 9 REGIONAL COUNCIL AREAS3 area outside region 15 REGIONAL COUNCIL AREAS4 area outside region 3 REGIONAL COUNCIL AREAS
5.3. Work with the shell 11

Data Science blueprint, Release 1.0
12 Chapter 5. Environment

CHAPTER 6
Quality testing
You can check that the your project meets the Python coding conventions:
$ make lint
If you try this command with the fresh installation of the blueprint, nothing should output this command as the codewritten in the blueprint respects the conventions.
Let’s run unit tests now:
$ make test
This is the output you should get:
=================================== test session starts ==============================platform linux -- Python 3.7.6, pytest-5.4.1, py-1.8.1, pluggy-0.13.1rootdir: /datacollected 4 items
awesome_project/tests/operator/test_data.py . [ 25%]awesome_project/tests/operator/test_dataframe.py .. [ 75%]awesome_project/tests/operator/test_generator.py . [100%]
=================================== 4 passed in 0.84s ================================
Finally, you can launch a coverage test over your project:
$ make coverage
This is the output you should get:
Name Stmts Miss Cover Missing--------------------------------------------------------------------------------awesome_project/__init__.py 4 0 100%awesome_project/operator/data.py 6 0 100%
(continues on next page)
13

Data Science blueprint, Release 1.0
(continued from previous page)
awesome_project/operator/dataframe.py 6 0 100%awesome_project/operator/generator.py 4 0 100%awesome_project/tests/operator/test_data.py 6 0 100%awesome_project/tests/operator/test_dataframe.py 11 0 100%awesome_project/tests/operator/test_generator.py 3 0 100%--------------------------------------------------------------------------------TOTAL 40 0 100%
14 Chapter 6. Quality testing

CHAPTER 7
Using the cli interface
As the project is packaged in the environment, it is possible to use to run your project command lines. Open theenvironment shell:
$make environment-shell
We will use a sample command written for the sake of the blueprint. It just generates a sequence of text. You can callit like this:
jovyan@awesome_project:~$ awesome-project-cli
As you didn’t write any action to perform, here is the obvious output you’ll get:
Usage:awesome-project-cli lorem <iterations> [--text-size=<text_size>]awesome-project-cli data <data-url> <data-location>awesome-project-cli (-h | --help)
Let’s use the lorem action. It generates a list of lorem ipsum text:
jovyan@awesome_project:~$ awesome-project-cli lorem 10 --text-size=50
Here is the final output:
['Lorem ipsum dolor sit amet, consectetur adipiscing','Lorem ipsum dolor sit amet, consectetur adipiscing','Lorem ipsum dolor sit amet, consectetur adipiscing','Lorem ipsum dolor sit amet, consectetur adipiscing','Lorem ipsum dolor sit amet, consectetur adipiscing','Lorem ipsum dolor sit amet, consectetur adipiscing','Lorem ipsum dolor sit amet, consectetur adipiscing','Lorem ipsum dolor sit amet, consectetur adipiscing','Lorem ipsum dolor sit amet, consectetur adipiscing','Lorem ipsum dolor sit amet, consectetur adipiscing']
15

Data Science blueprint, Release 1.0
16 Chapter 7. Using the cli interface

CHAPTER 8
Requirements
To install the Data Science blueprint and benefit from all its features, a few requirements will have to be checked
• python
• docker
• pip
• git
And that’s it. To check your python version, you can type in this instruction in your favorite terminal. Knowing whichexecutable is installed on your machine will help you decide on the python interpreter to choose
python --versionpython3 --version
Regarding Docker, you must be able to run docker commands without being sudo. Therefore, you must be able tocheck this command on your terminal:
docker --version
If it appears that you need to be sudo to run docker, then you must add your user account to the docker group that wascreated after installing docker on your machine. This can be done thanks to this command:
sudo usermod -aG docker $USER
To interact avec the blueprint, you will need to run the make command many times. This command can run definitionsthat are specified in the Makefile file. Depending on the operating system you are installing the blueprint on, youwill find much documentation about how to install make.
17

Data Science blueprint, Release 1.0
18 Chapter 8. Requirements

CHAPTER 9
Using cookiecutter
The blueprint will be installed using a great tool called cookiecutter. When launching Cookiecutter, the program willask for some variables, whose values will configure the blueprint in order to make it your project.
Here is the list of the variables that will be set by Cookiecutter
Variable Default value Definitionfull_name John Doe Name of the author / maintaineremail [email protected] Email of the author / maintainerproject_name DS project Name of the folder where the blueprint will be installedpackage_name Awesome project Name of the projectpackage_slug awesome.project Formatted name of the project that will be used with
packagesproject_short_descriptionNo description Description of your projectversion 1.0.0 Version of the projectapplication-cli-name {project_slug}-cli Unix command to use your packaged project as an appopensource_licence “MIT”, “BSD”, “ISCL”,
“Apache”. . .Licence for your project
docker_base_image jupyter/base-notebook:python-3.7.6
Docker image used to build the environment
docker_image_name {package_slug}-env Name of the built Docker image that will be used as yourenvironment
docker_container_name{docker_image_name}-instance
Name of the Docker container that will be instanciated
docker_container_port 8888 Port exposed to access Jupyter notebooks
19

Data Science blueprint, Release 1.0
20 Chapter 9. Using cookiecutter

CHAPTER 10
Installation
Installing the blueprint will be quite easy.
First, you need to install cookiecutter, with this command:
pip install cookiecutter
Now Cookiecutter is installed, you can install the Data Science blueprint:
cookiecutter https://github.com/mysketches/data-science-blueprint
The blueprint should now be installed in the folder matching the value you set for the cookiecutter variableproject_name.
After testing the blueprint, I found situations where the cookiecutter would not be recognized. If this happens, you cancall it with this alternate command:
python -m cookiecutter https://github.com/mysketches/data-science-blueprint
21

Data Science blueprint, Release 1.0
22 Chapter 10. Installation

CHAPTER 11
Project operations
The Makefile will help you work on the structure of your project. Data science projects are about coding of course,but it is also about all that is going around, such as working on a Jupyter notebooks interface, running unit tests, andeven deploying your project.
To work your project beyond coding, all you will need is the make command installed on your machine. Dependingon your operating system, there are many ways to install make.
11.1 Install dependencies
The blueprint comes with a requirements.txt file, whose purpose is to list the packages that will be required towork your project.
Here is the list of the requirements that come with the blueprint:
coverageflake8numpypandasscikit-learnmatplotlibdocoptconfigparserpytest
You are indeed encouraged to update this file and make it fit your needs.
To install the dependencies on your machine, just open a terminal, move to the folder where the blueprint is installed,and type in the following command:
$ make install
23

Data Science blueprint, Release 1.0
11.2 Update dependencies
In order to update the version of your dependencies (because you have specified a specific version of a dependency inthe requirements.txt file, or because there is a newer latest version of the dependency on pypi), you can open aterminal, move to the folder where the blueprint is installed, and type in the following command:
$ make upgrade
11.3 Install your project as a package on your machine
You can package your project, and install it as a python package on your machine. Once packaged, your project is partof the Python path, and can be called in another project or anywhere else on your machine.
In particular, you could also imagine packaging your project in a Docker image, and deploy it in the Cloud. You couldthen spawn resources and call entry points to run your data science project.
To package your project on your machine, just open a terminal, move to the folder where the blueprint is installed, andtype in the following command:
$ make package
After this command is complete, you can import your project in any python script that would be running on yourmachine.
11.4 Build your environment
Your work environment will be built with Docker. Therefore, in order to create this environment, you will have tobuild a Docker image.
To build your environment, just open a terminal, move to the folder where the blueprint is installed, and type in thefollowing command:
$ make environment-build
11.5 Start your environment
Starting your environment will allow you to access your shell, and Jupyter notebooks. Once the environment is started,you can immediately use your browser to connect to Jupyter notebooks on your localhost.
To start your environment, just open a terminal, move to the folder where the blueprint is installed, and type in thefollowing command:
$ make environment-start
11.6 Stop your environment
To stop your environment, just open a terminal, move to the folder where the blueprint is installed, and type in thefollowing command:
24 Chapter 11. Project operations

Data Science blueprint, Release 1.0
$ make environment-stop
11.7 Restart your environment
To restart your environment, just open a terminal, move to the folder where the blueprint is installed, and type in thefollowing command:
$ make environment-restart
11.8 Get your environment status
To check whether your environment is running, and where you can access your Notebooks interface, just open aterminal, move to the folder where the blueprint is installed, and type in the following command:
$ make environment-status
11.9 Access your environment shell
You can load a shell in your environment. This will allow you call your project package through command lines, andalso test your code. To enter your shell, just open a terminal, move to the folder where the blueprint is installed, andtype in the following command:
$ make environment-shell
11.10 Load the sample data
The blueprint comes with some sample data to load into your project. This command will only be useful for the sakeof the tutorial. You may update this command according to your needs.
The data that will be loaded into your project is a data sample of the visitors and travellers arriving in New Zealandfrom June 2014 to June 2019. To load this data, just open a terminal, move to the folder where the blueprint is installed,and type in the following command:
$ make environment-data
11.11 Clean your project
This command will remove from your project all the temporary files, in particular those that shall never be pushed onGithub. If you identify other temp files to add, feel free to update the Makefile.
To clean your project, just open a terminal, move to the folder where the blueprint is installed, and type in the followingcommand:
$ make clean
11.7. Restart your environment 25

Data Science blueprint, Release 1.0
11.12 Test your project
To run unit tests to your project, just open a terminal, move to the folder where the blueprint is installed, and type inthe following command:
$ make test
11.13 Visualize the tests coverage for your project
After running your unit tests, you can use visualization of the tests coverage. To do so, just open a terminal, move tothe folder where the blueprint is installed, and type in the following command:
$ make coverage
11.14 Check the code quality of your project
The Data Science blueprint uses Flake8 to test the code quality of the project. To output the coding styles tests thatwouldn’t pass, just open a terminal, move to the folder where the blueprint is installed, and type in the followingcommand:
$ make lint
26 Chapter 11. Project operations

CHAPTER 12
Make the installation your own
12.1 Updating cookiecutter template
The cookiecutter template is written in the file cookiecutter.json. You are free to update the file and add (orremove) the parameters that you need. Keep in mind that if you update this file, you will need to crawl the blueprintcode in order to integrate the new parameters.
If you want more information about how to update the cookiecutter.json file, you can take a look at thecookiecutter documentation
12.2 Updating the Makefile
If you want to add new commands, or update existing commands, you are free to open the file Makefile, and updateit according to your needs.
27

Data Science blueprint, Release 1.0
28 Chapter 12. Make the installation your own

CHAPTER 13
Commands
Your work environment will be built with Docker. Therefore, in order to create this environment, you will have tobuild a Docker image.
To build your environment, just open a terminal, move to the folder where the blueprint is installed, and type in thefollowing command:
$ make environment-build
13.1 Start your environment
Starting your environment will allow you to access your shell, and Jupyter notebooks. Once the environment is started,you can immediately use your browser to connect to Jupyter notebooks on your localhost.
To start your environment, just open a terminal, move to the folder where the blueprint is installed, and type in thefollowing command:
$ make environment-start
13.2 Stop your environment
To stop your environment, just open a terminal, move to the folder where the blueprint is installed, and type in thefollowing command:
$ make environment-stop
29

Data Science blueprint, Release 1.0
13.3 Restart your environment
To restart your environment, just open a terminal, move to the folder where the blueprint is installed, and type in thefollowing command:
$ make environment-restart
13.4 Get your environment status
To check whether your environment is running, and where you can access your Notebooks interface, just open aterminal, move to the folder where the blueprint is installed, and type in the following command:
$ make environment-status
13.5 Access your environment shell
You can load a shell in your environment. This will allow you call your project package through command lines, andalso test your code. To enter your shell, just open a terminal, move to the folder where the blueprint is installed, andtype in the following command:
$ make environment-shell
13.6 Load the sample data
The blueprint comes with some sample data to load into your project. This command will only be useful for the sakeof the tutorial. You may update this command according to your needs.
The data that will be loaded into your project is a data sample of the visitors and travellers arriving in New Zealandfrom June 2014 to June 2019. To load this data, just open a terminal, move to the folder where the blueprint is installed,and type in the following command:
$ make environment-data
13.7 Clean your project
This command will remove from your project all the temporary files, in particular those that shall never be pushed onGithub. If you identify other temp files to add, feel free to update the Makefile.
To clean your project, just open a terminal, move to the folder where the blueprint is installed, and type in the followingcommand:
30 Chapter 13. Commands

CHAPTER 14
Build & Start
The blueprint’s environment runs with Docker. Therefore, before using it, you must build it. All is done thanks to theDockerfile file that is located at the root of the project.
The content of the Dockerfile is pretty straightforward:
FROM jupyter/base-notebook:python-3.7.6
COPY docker/docker-entrypoint.sh /home/COPY requirements.txt /home/requirements.txtRUN rm -rf /home/jovyan/work
RUN pip install -r /home/requirements.txt
ENTRYPOINT ["sh", "/home/docker-entrypoint.sh"]
The base image used (base-notebook here) can be configured in the cookiecutter.json. In this file, you canset the default value for the docker_base_image parameter, and you will also be prompted the parameter wheninstalling the blueprint with the cookiecutter command.
When the blueprint’s environment is built, you can start it with this command:
$ make environment-start
The output of this command should be:
8c512b6e09c1b5551075fb8921b24f08044dad876e102cd0e7f1813943c1816aEnvironment is running!Notebooks interface is available at http://localhost:8888
The Jupyter notebook interface is then accessible through port 8888 (by default). It is also possible to configure thedefault port value in the cookiecutter.json file.
All the dependencies listed in the file requirements.txt will be loaded in the environment during its build. Thismeans that if you update the file requirements.txt and you want to add those new dependencies to the environment,you will need to build it again.
31

Data Science blueprint, Release 1.0
To do so, just launch a new build thanks to the following command:
$ make environment-build
32 Chapter 14. Build & Start

CHAPTER 15
Notebook
After starting the blueprint’s environment, you will have an access to Jupyter notebooks. The default port used for theinterface is 8888. You can configure the default port value thanks to the file cookiecutter.json.
15.1 Mapping folders
When the environment is started, it is automatically mapped with your local folders so that in the Jupyter interface,you you will see the following folders:
• notebooks, that is mapped with the notebooks folder of your project
• scripts, that is mapped with the scripts folder of your project
• data, that is mapped with the data folder of your project
That said, you will be able to launche the Juypter interface, create your notebooks and scripts, and theyr will automat-ically be saved in your project. Therefore, there is no need to export any notebook or Python code. You can safelysave your workspace to Github.
33

Data Science blueprint, Release 1.0
15.2 Working with passwords
It is often recommended to secure the Jupyter interface with a password or a token. The purpose of theis blueprintis to provide you with a coding environment. As I expect that you will be the single user of this environment, Ihave suggested that you wouldn’t require any password. Though, it is possible to activate a password to your Jupyterinterface.
To activate the password, you can update the default password value (currently set to null) in the filecookiecutter.json. When installing the blueprint, you will also be prompted whether or not you wish to use apassword for your notebooks. At this point of the installation, you can also set a password.
15.3 Working with your packaged project
Every time you start your environment, your project will be packaged and deployed in the environment. It is thenmade possible to import your project in your notebooks, and work with as if you had installed a new dependency.
You can then add some code to your project, and live test it in your notebooks. As you update your code, its packagedversion in your notebooks will automatically be updated. The only limitation is that Jupyter takes a snapshot of yourPython environment status when it loads its workspace. Therefore, if you update your project code, you will need toreload your notebook’s workspace, and rerun the cells.
34 Chapter 15. Notebook
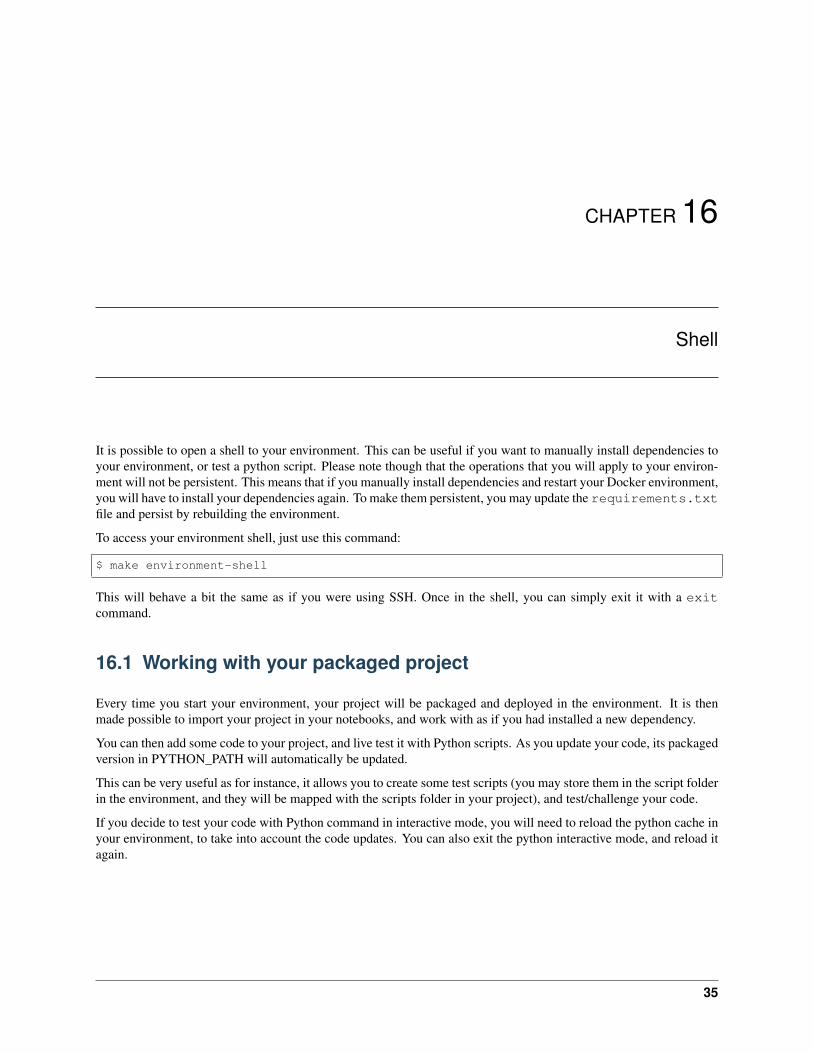
CHAPTER 16
Shell
It is possible to open a shell to your environment. This can be useful if you want to manually install dependencies toyour environment, or test a python script. Please note though that the operations that you will apply to your environ-ment will not be persistent. This means that if you manually install dependencies and restart your Docker environment,you will have to install your dependencies again. To make them persistent, you may update the requirements.txtfile and persist by rebuilding the environment.
To access your environment shell, just use this command:
$ make environment-shell
This will behave a bit the same as if you were using SSH. Once in the shell, you can simply exit it with a exitcommand.
16.1 Working with your packaged project
Every time you start your environment, your project will be packaged and deployed in the environment. It is thenmade possible to import your project in your notebooks, and work with as if you had installed a new dependency.
You can then add some code to your project, and live test it with Python scripts. As you update your code, its packagedversion in PYTHON_PATH will automatically be updated.
This can be very useful as for instance, it allows you to create some test scripts (you may store them in the script folderin the environment, and they will be mapped with the scripts folder in your project), and test/challenge your code.
If you decide to test your code with Python command in interactive mode, you will need to reload the python cache inyour environment, to take into account the code updates. You can also exit the python interactive mode, and reload itagain.
35

Data Science blueprint, Release 1.0
36 Chapter 16. Shell

CHAPTER 17
Make the environment your own
The blueprint’s environment is entirely managed with Docker. Therefore, if you wish to customize the environment,you may update the following files
17.1 Updating Dockerfile
The Dockerfile’s content is pretty straightforward:
FROM jupyter/base-notebook:python-3.7.6
COPY docker/docker-entrypoint.sh /home/COPY requirements.txt /home/requirements.txtRUN rm -rf /home/jovyan/work
RUN pip install -r /home/requirements.txt
ENTRYPOINT ["sh", "/home/docker-entrypoint.sh"]
The installation process is explained as follow:
• Load the base docker image for jupyter notebooks
• Copy the starting script
• Copy the python dependencies list
• Install the dependencies
• Map the image starting script with the one we have just added
37

Data Science blueprint, Release 1.0
17.2 Updating docker-entrypoint
The purpose of the docker-entrypoint script is just to prepend the jupyter workspace launch with a package build ofyour project. Thanks to this docker-entrypoint script, you can use your project as a python package, in your workingenvironment.
The docker-entrypoint file is located here : docker/docker-entrypoint.sh
38 Chapter 17. Make the environment your own

CHAPTER 18
Flake8
I have chosen flake8 package to test coding conventions. Indeed, you are free to use your own, but flake8 is installedby default, and it is working just fine.
18.1 Installation and usage
To work it, you don’t have to integrate anything in your code.
Here are the few steps to follow to use flake8 :
Installation (once):
$ make install
Use:
$ make lint
18.2 Configure flake8
Flake8 configuration is stored in the file setup.cfg. In the [flake8] section, you can update a few parameters:
[flake8]max-line-length = 79max-complexity = 10filename = ./awesome_project/*.py
If you need to get some information about flake8 parameters, you can check these links:
• flake8 options
• flake8 error codes
39

Data Science blueprint, Release 1.0
40 Chapter 18. Flake8

CHAPTER 19
Unit tests
I ‘ve decided to use pytest package to run unit tests.
To run unit tests over your project, you can use the command:
$ make test
The unit tests are located in the package’s test folder. I recommend you follow the folder structure of the files thatare tested. For instance in the blueprint, the python code that is covered with unit tests is located in the operatorsfolder. This is why unit tests are located in the folder tests/operators.
The output of the unit test will look like this:
platform darwin -- Python 3.7.2, pytest-5.4.1, py-1.8.0, pluggy-0.13.1collected 4 items
awesome_project/tests/operator/test_data.py . [ 25%]awesome_project/tests/operator/test_dataframe.py .. [ 75%]awesome_project/tests/operator/test_generator.py . [100%]
======================== 4 passed in 0.82s =============================
41

Data Science blueprint, Release 1.0
42 Chapter 19. Unit tests

CHAPTER 20
Code coverage
After running unit tests, you can display the code coverage of your project. To show the code coverage, simply use thecommand:
$ make coverage
The output of the coverage report should look like this:
Name Stmts Miss Cover Missing-------------------------------------------------------------------------------awesome_project/__init__.py 4 0 100%awesome_project/operator/data.py 6 0 100%awesome_project/operator/dataframe.py 6 0 100%awesome_project/operator/generator.py 4 0 100%awesome_project/tests/operator/test_data.py 6 0 100%awesome_project/tests/operator/test_dataframe.py 11 0 100%awesome_project/tests/operator/test_generator.py 3 0 100%-------------------------------------------------------------------------------TOTAL 40 0 100%
43

Data Science blueprint, Release 1.0
44 Chapter 20. Code coverage

CHAPTER 21
Package your project
Packaging your project should be the final step before deploying in your production environment. The purpose of thisstep is to convert your project to a Python package, that will be installed on your machine.
Once your project is packaged, it can be imported by any Python code that would be running on your machine. Thismakes your project portable, and exportable in a Docker image, on Pypi repository, or on a remote machine. At thisstage of the blueprint, the strategy to deploy on production is yours.
To package your project, just use this command:
$ make package
It is also the very same command that is used in the blueprint’s environment, and allows you to use your packagedproject with your notebooks.
45

Data Science blueprint, Release 1.0
46 Chapter 21. Package your project

CHAPTER 22
Create your app
After your project is deployed, the question of how you will interact with it remains. You can certainly open a Pythonshell or call a Python command and call a module, but this is will require you to strictly interact with Python, which isnot very comfortable, in particular if you wish to deploy in production, and maybe interact with other programs.
This is why the blueprint also onboards command lines, so that you can call some specific modules with a dedicatedcommand line on your machine.
I guess this would be much more convenient to train a model by simply calling it in a shell:
mymodel-cli train xgboost datafile.csv output
This is just an example to show you that working like will make your deployments and in-production executions muchmore accessible.
22.1 Create you cli interfaces
You can declare your cli interfaces in the file setup.py:
entry_points={'console_scripts': [
'awesome-project-cli={}.commands.cmd:main'.format(config['application'][→˓'package'])
]}
For the sake of the blueprint, an example of entry point was written : awesome-project-cli. You can access thesource code of this command line in the file commands/cmd.py. You are free to update the entry points and addyour owns as you wish.
In the blueprint’s example, one sample call is defined like this:
awesome-project-cli lorem 10 --text-size=50
47

Data Science blueprint, Release 1.0
48 Chapter 22. Create your app

CHAPTER 23
Indices and tables
• genindex
• modindex
• search
49