Creative DIY tutorial: Make a desk-top hanging file from a fruit box
20
A photo tutorial
-
Upload
nicole-mccarthy -
Category
Self Improvement
-
view
41 -
download
0
Transcript of Creative DIY tutorial: Make a desk-top hanging file from a fruit box
A photo tutorial
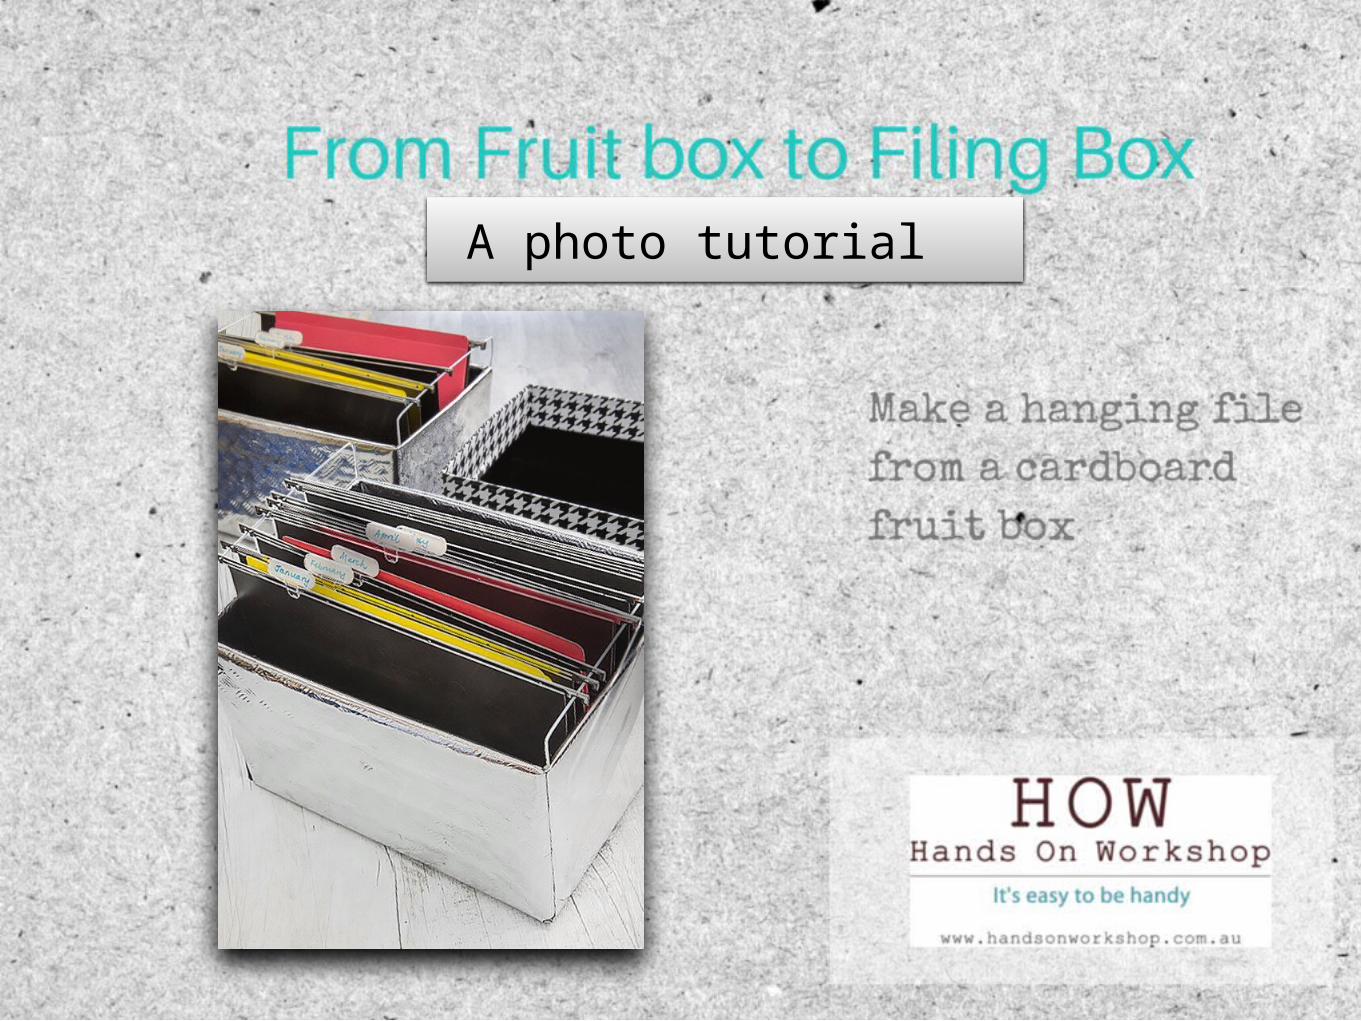
Step 1
rulerscissorspliers
hot glue gun (or use
PVA glue)
cardboard fruit box
wire coathangers
adhesive paper in chalkboard
chequerplate pattern
Hanging files & manilla folders
this one measures 38cm long, by 27cm wide, by 22cm high.
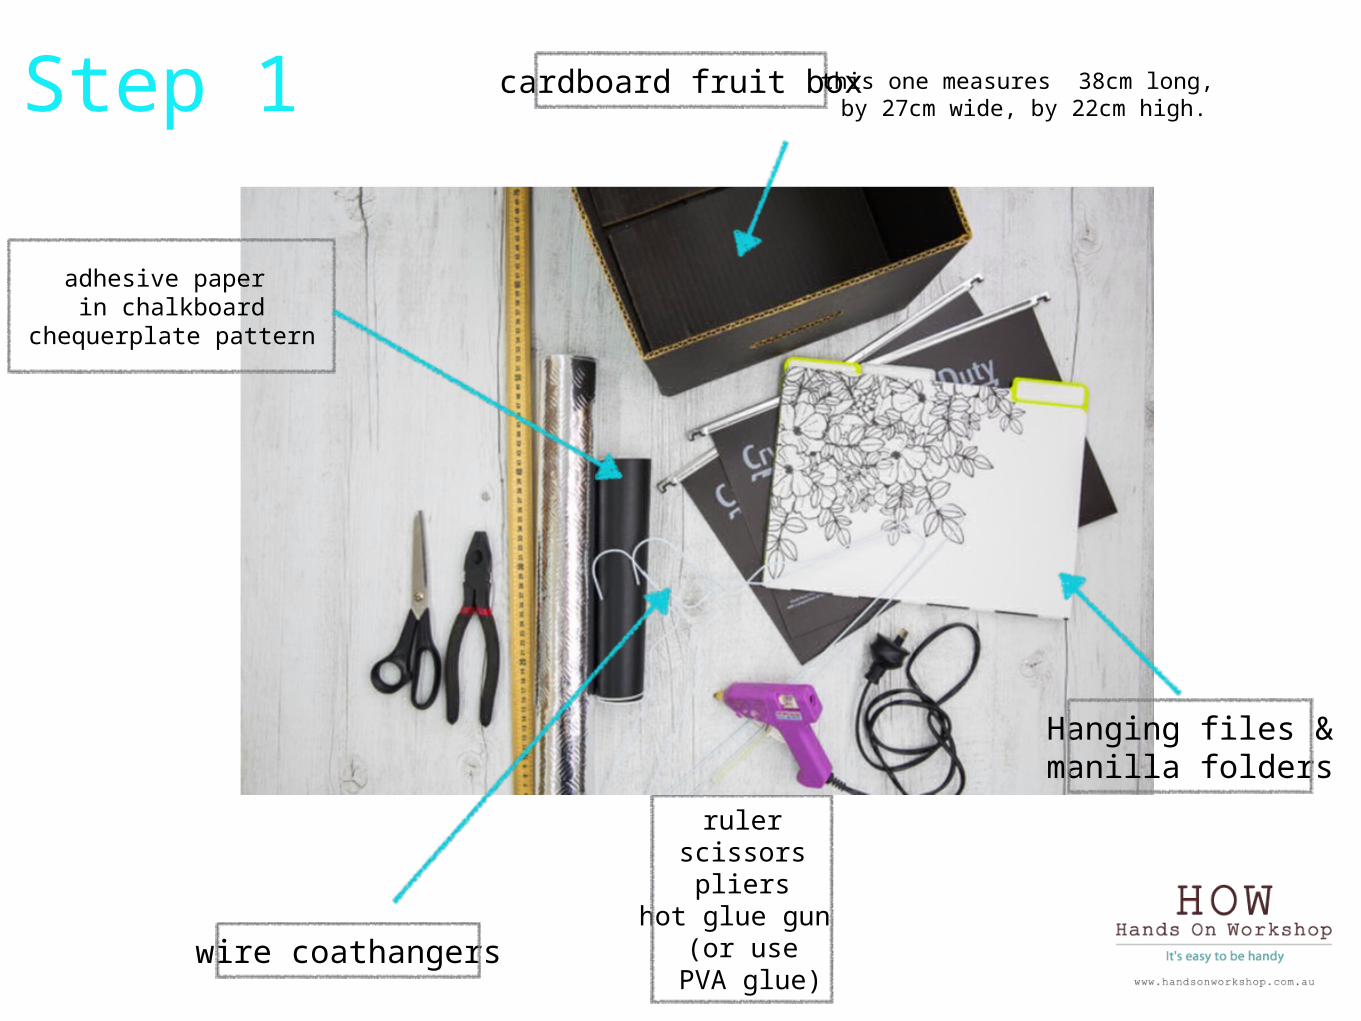
Step 2
2 bottom of box
1 side of box 4 5
3 side of box
4 & 5short ends of box
There are 5 sides to cover with adhesive paper.
1, 2, 3 with 1 piece.
4 with 1 piece
5 with 1 piece (same size as 4)
Piece 1
Start with side 1, the widest side. Rest the box on it’s side, about about 5 cm in from the side of the paper and about 20cm in from the start of the paper. This will be folded back to line the inside.
Title Text
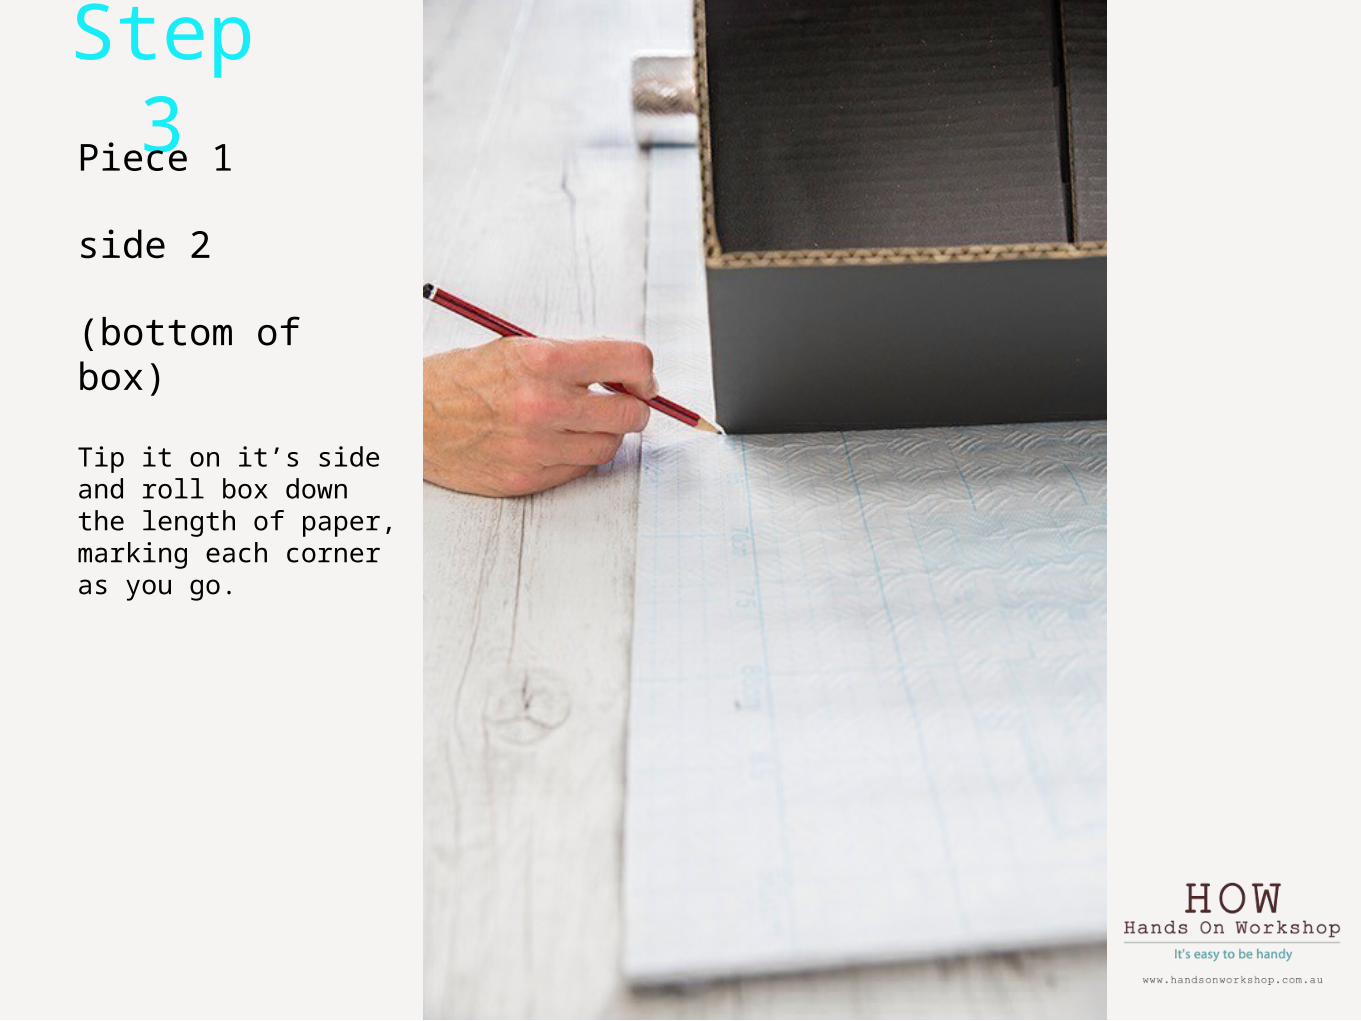
Step 3Piece 1
side 2
(bottom of box)
Tip it on it’s side and roll box down the length of paper, marking each corner as you go.
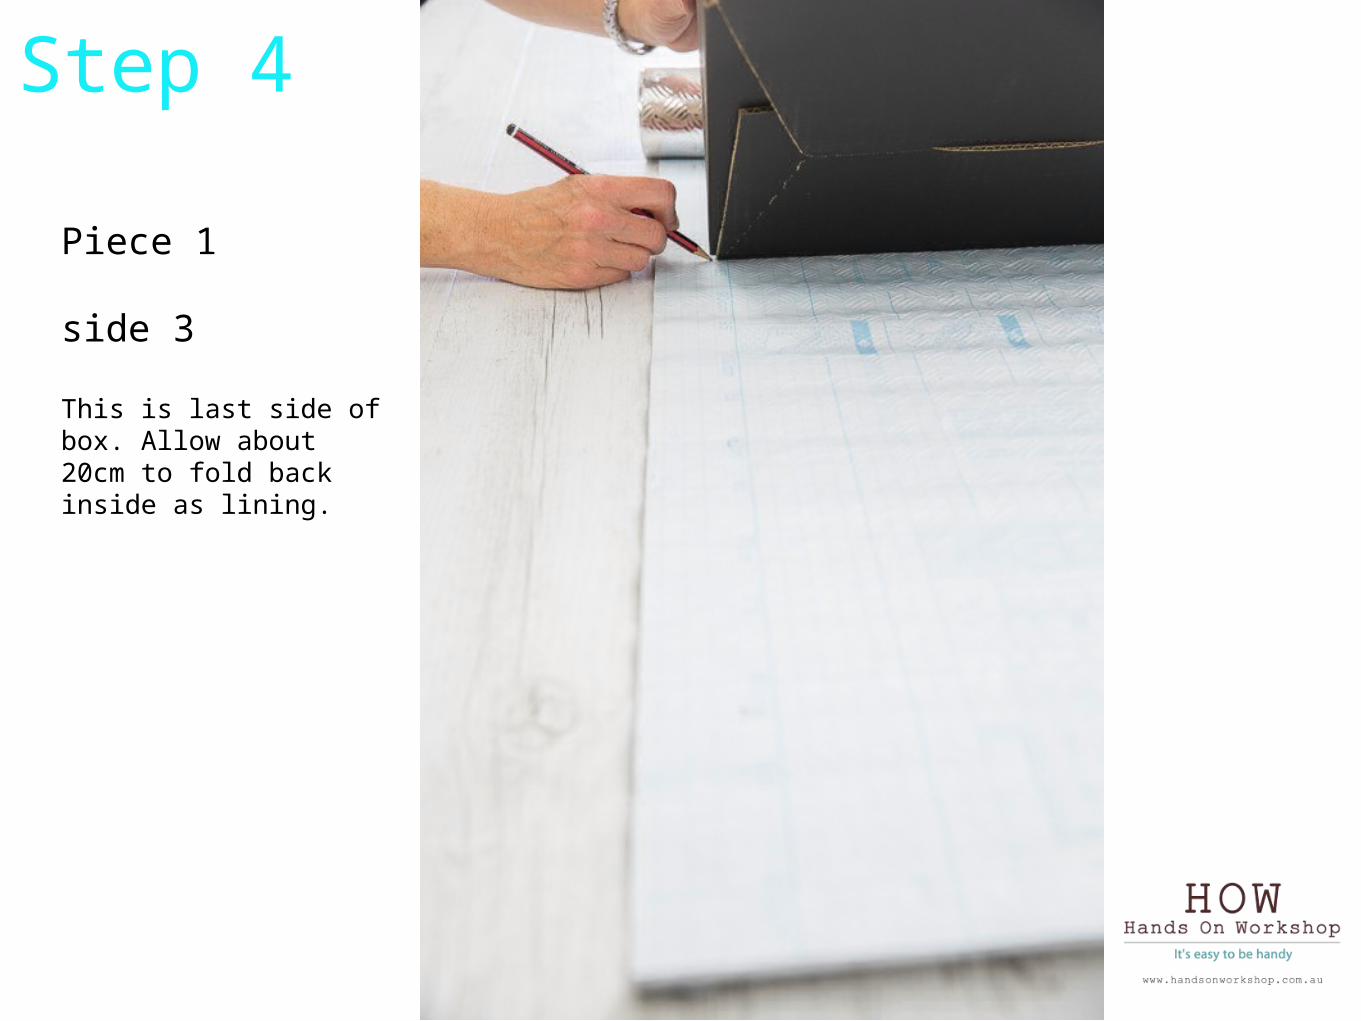
Piece 1
side 3
This is last side of box. Allow about 20cm to fold back inside as lining.
Step 4
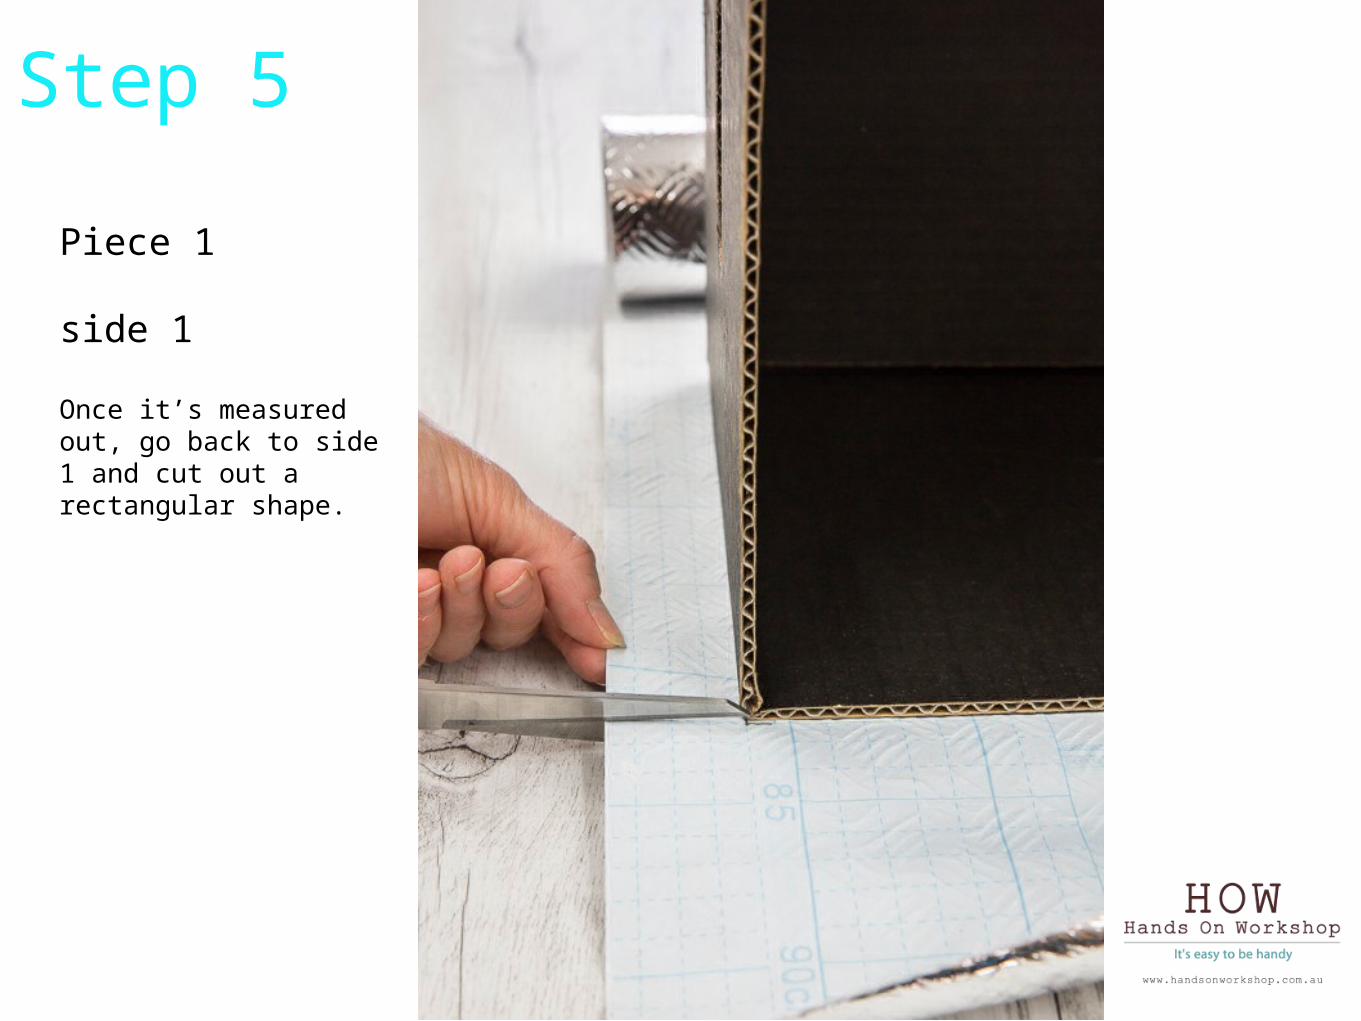
Step 5
Piece 1
side 1
Once it’s measured out, go back to side 1 and cut out a rectangular shape.

Piece 1
side 1
Cut the rectangle out to look like this.
Peel off the paper and start covering the box by sticking this overhanging section onto the inside of side 1.
Step 6
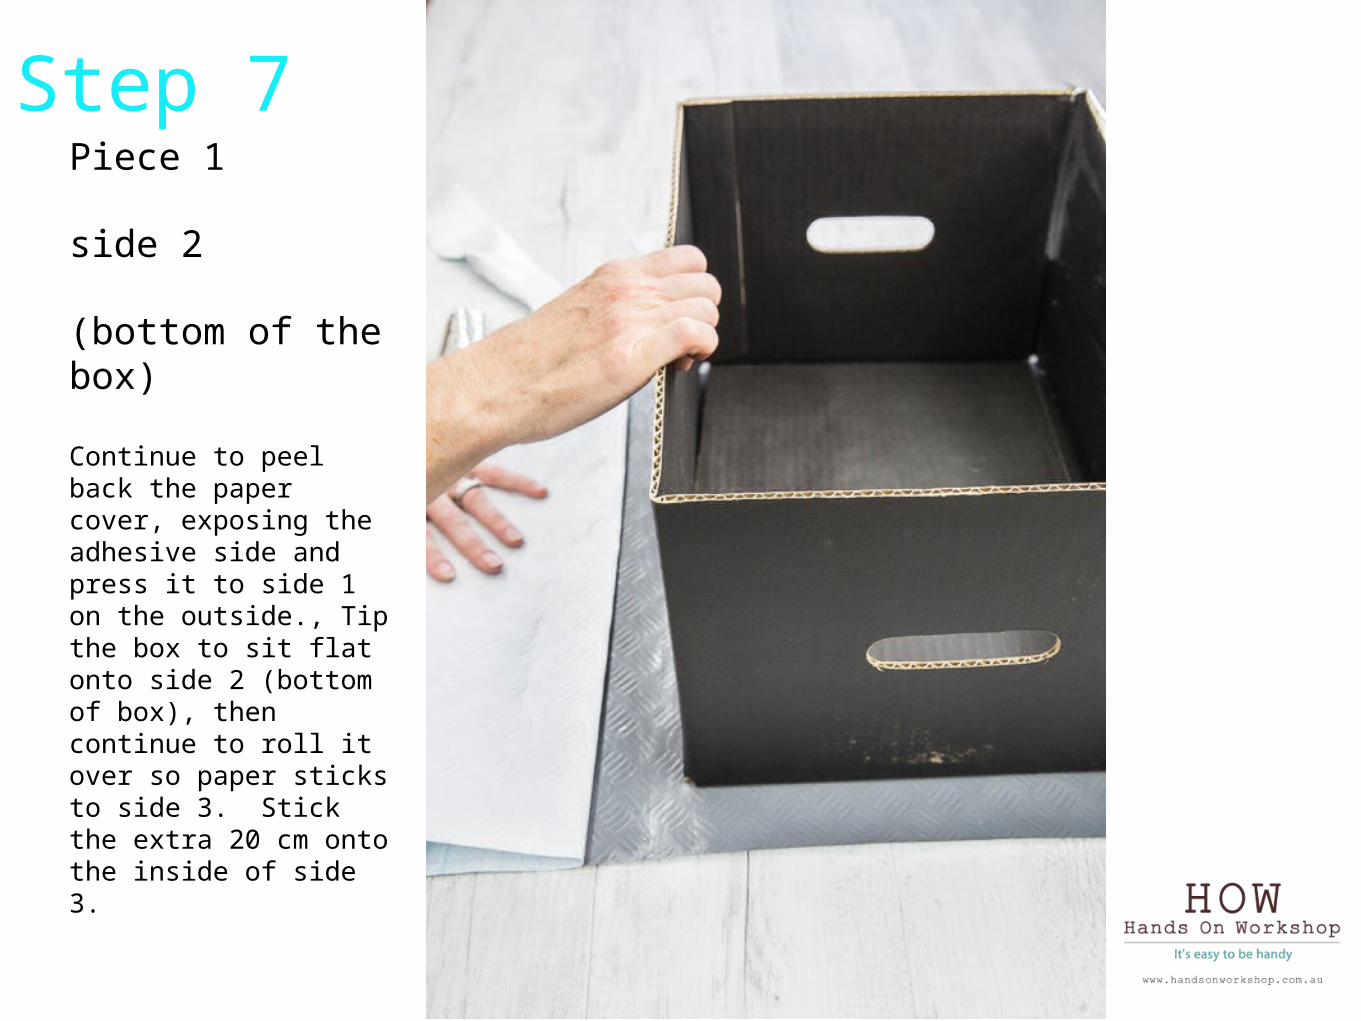
Step 7Piece 1
side 2
(bottom of the box)
Continue to peel back the paper cover, exposing the adhesive side and press it to side 1 on the outside., Tip the box to sit flat onto side 2 (bottom of box), then continue to roll it over so paper sticks to side 3. Stick the extra 20 cm onto the inside of side 3.
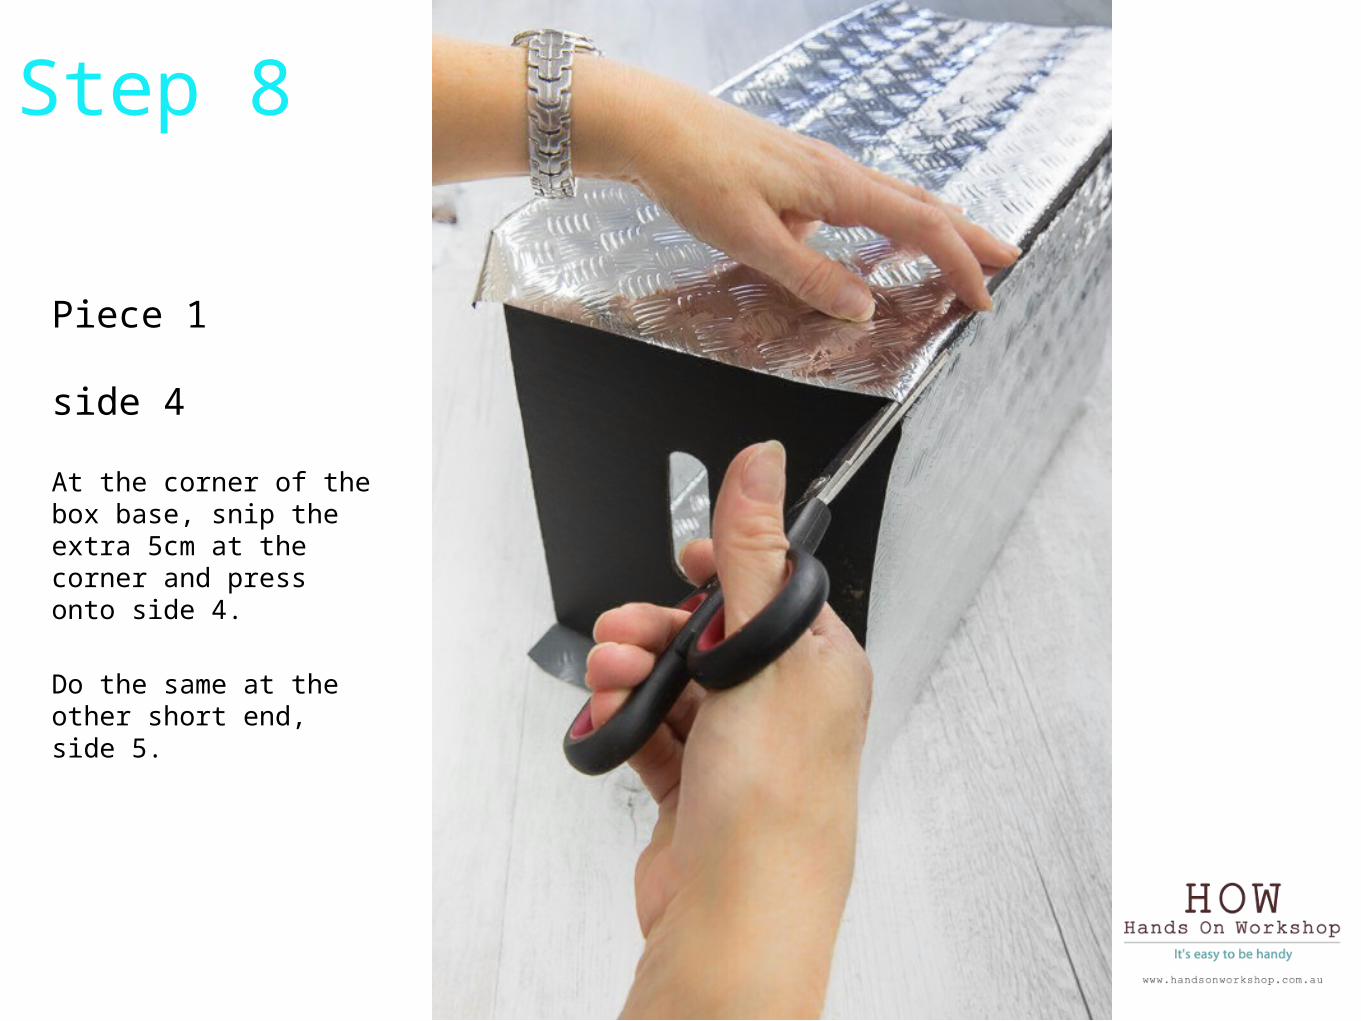
Step 8
Piece 1
side 4
At the corner of the box base, snip the extra 5cm at the corner and press onto side 4.
Do the same at the other short end, side 5.
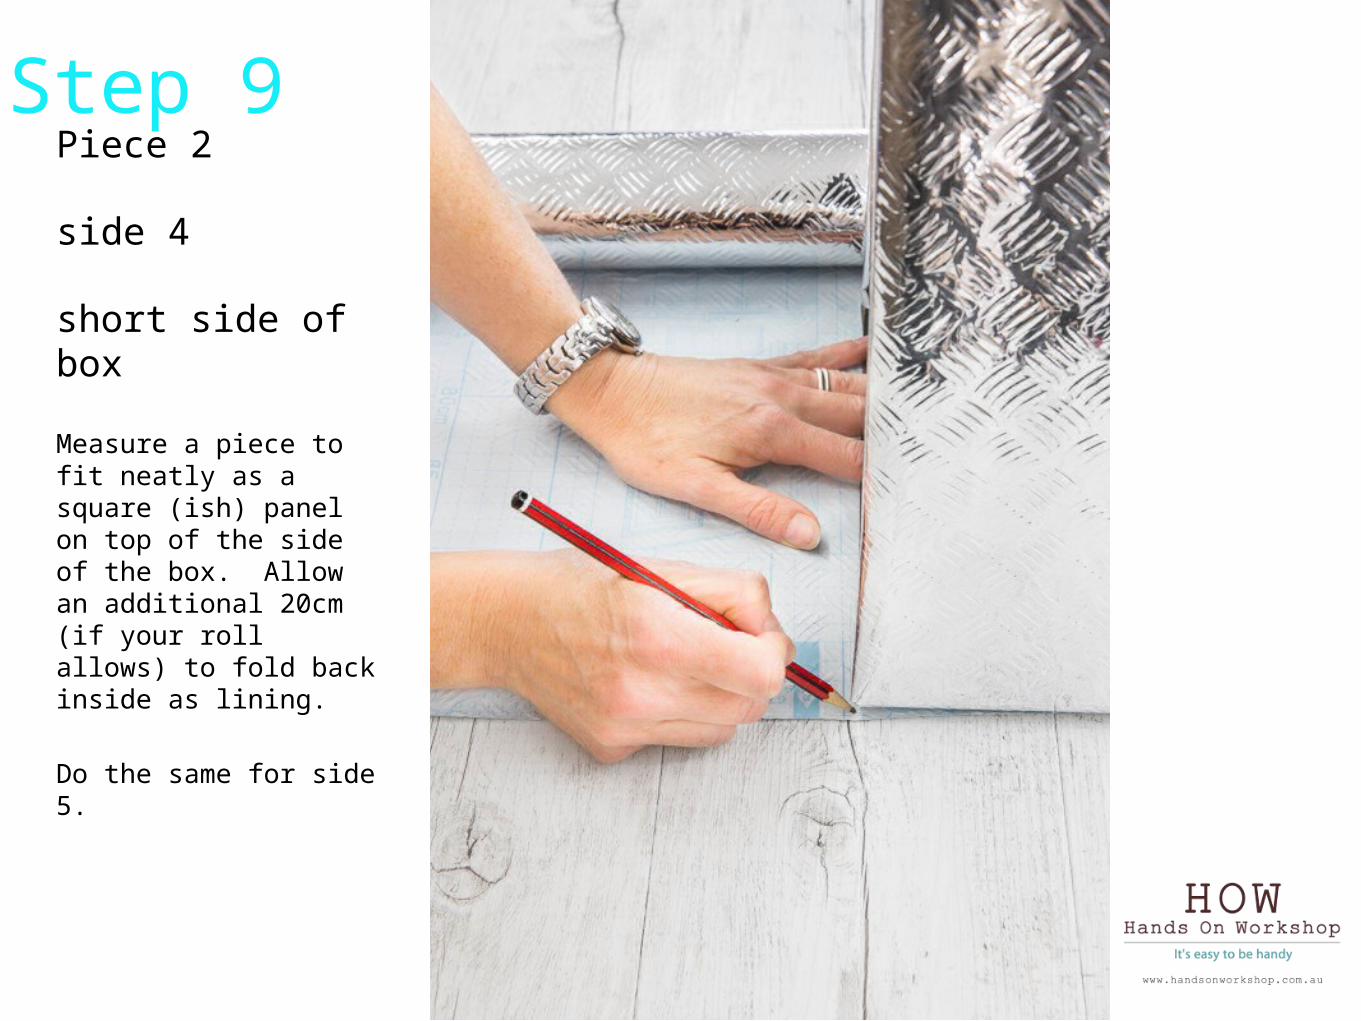
Step 9
Piece 2
side 4
short side of box
Measure a piece to fit neatly as a square (ish) panel on top of the side of the box. Allow an additional 20cm (if your roll allows) to fold back inside as lining.
Do the same for side 5.
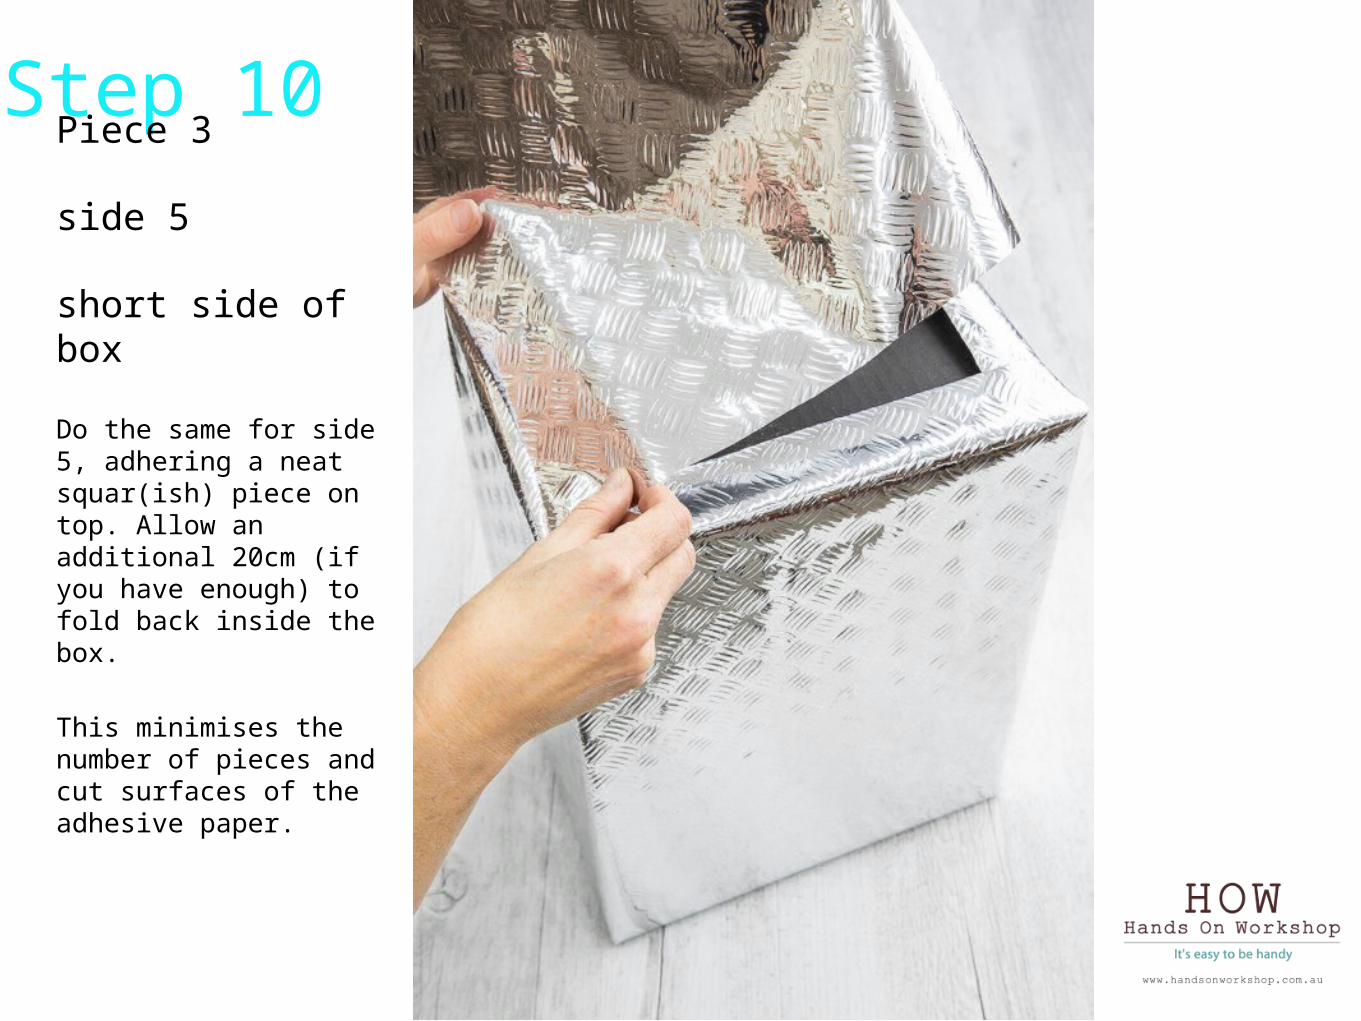
Step 10Piece 3
side 5
short side of box
Do the same for side 5, adhering a neat squar(ish) piece on top. Allow an additional 20cm (if you have enough) to fold back inside the box.
This minimises the number of pieces and cut surfaces of the adhesive paper.
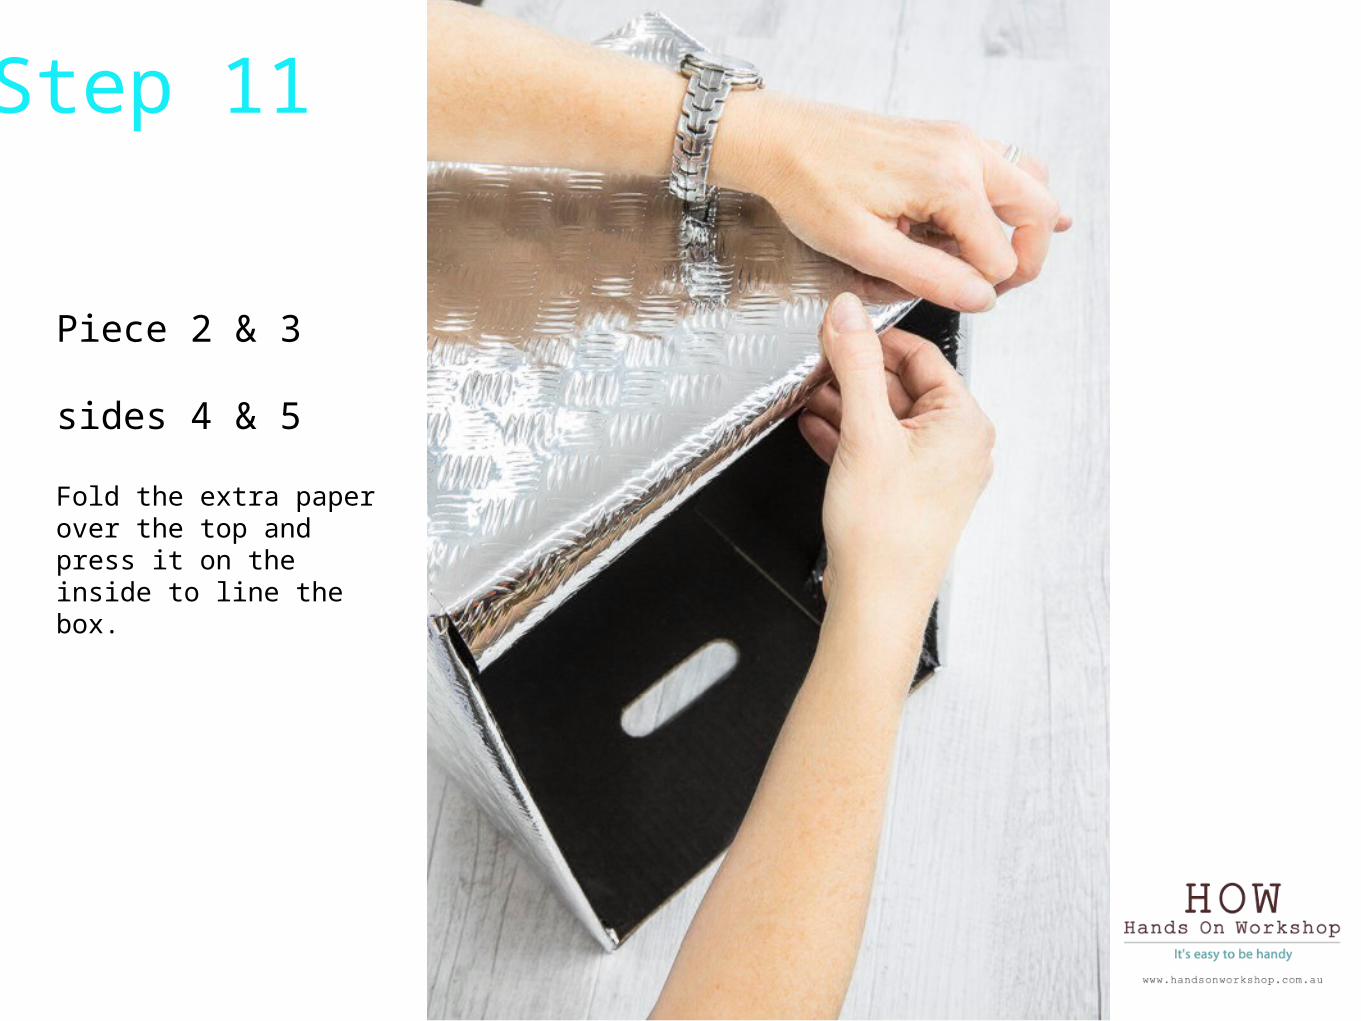
Step 11
Piece 2 & 3
sides 4 & 5
Fold the extra paper over the top and press it on the inside to line the box.
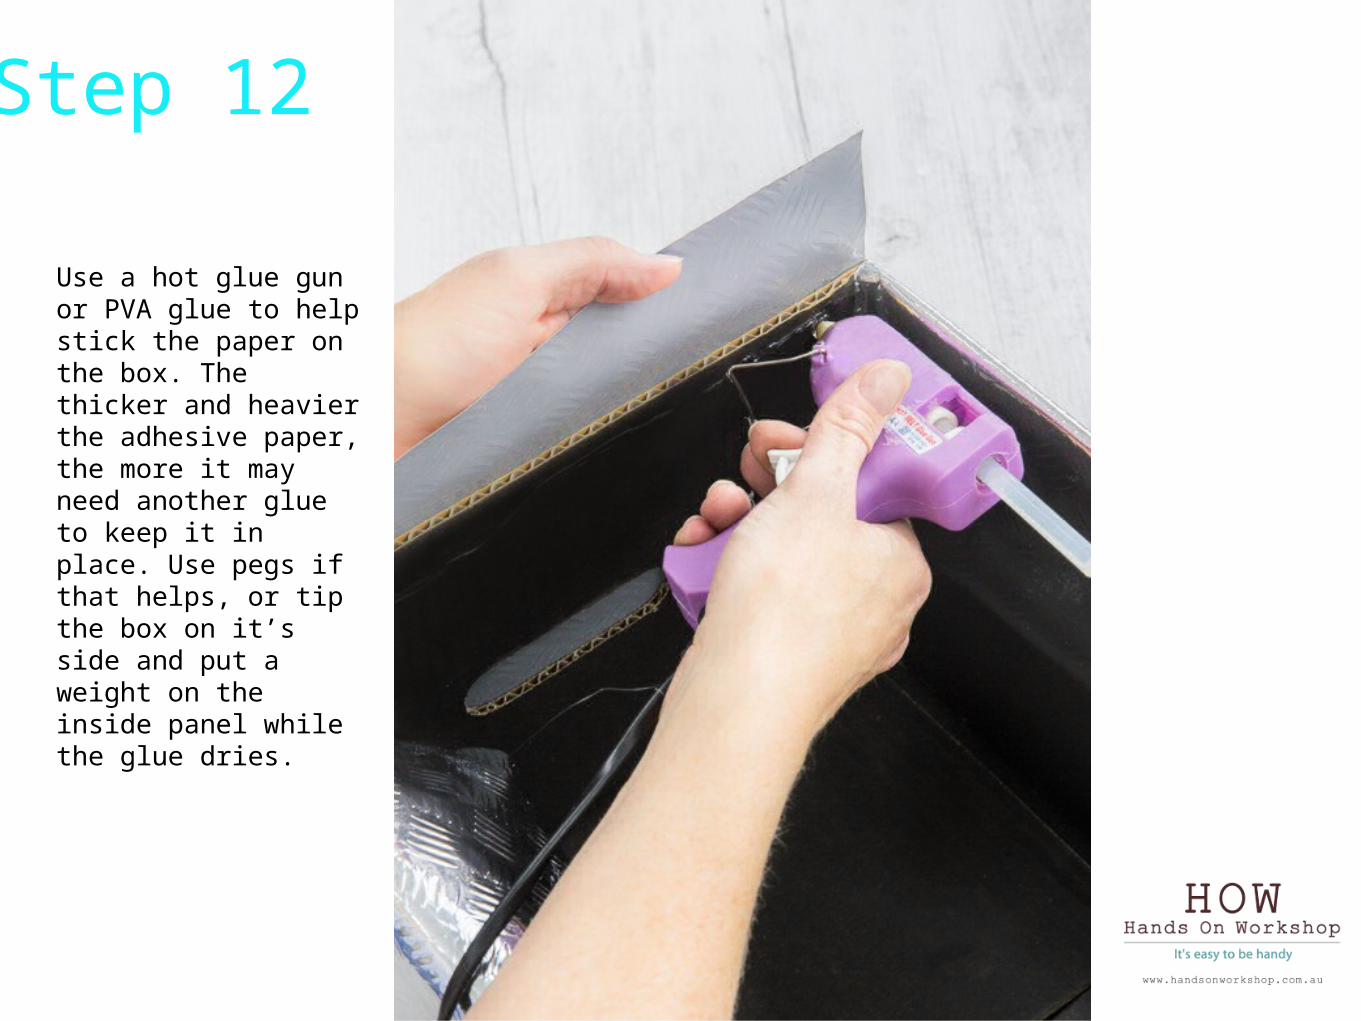
Step 12
Use a hot glue gun or PVA glue to help stick the paper on the box. The thicker and heavier the adhesive paper, the more it may need another glue to keep it in place. Use pegs if that helps, or tip the box on it’s side and put a weight on the inside panel while the glue dries.
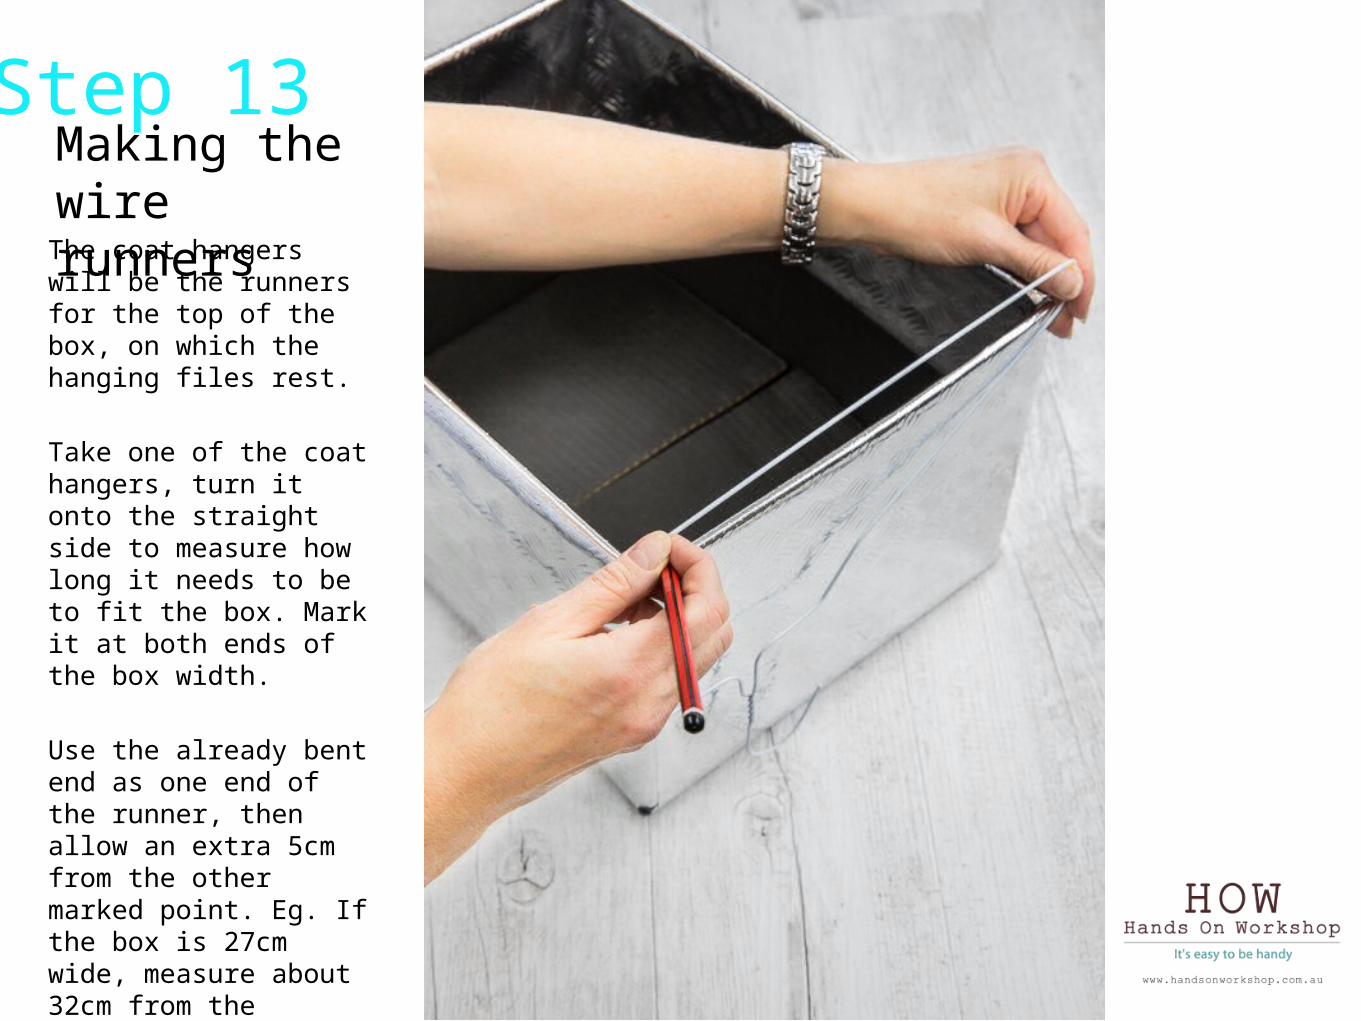
Step 13Making the wire runnersThe coat hangers will be the runners for the top of the box, on which the hanging files rest.
Take one of the coat hangers, turn it onto the straight side to measure how long it needs to be to fit the box. Mark it at both ends of the box width.
Use the already bent end as one end of the runner, then allow an extra 5cm from the other marked point. Eg. If the box is 27cm wide, measure about 32cm from the already-bent end.
Step 14
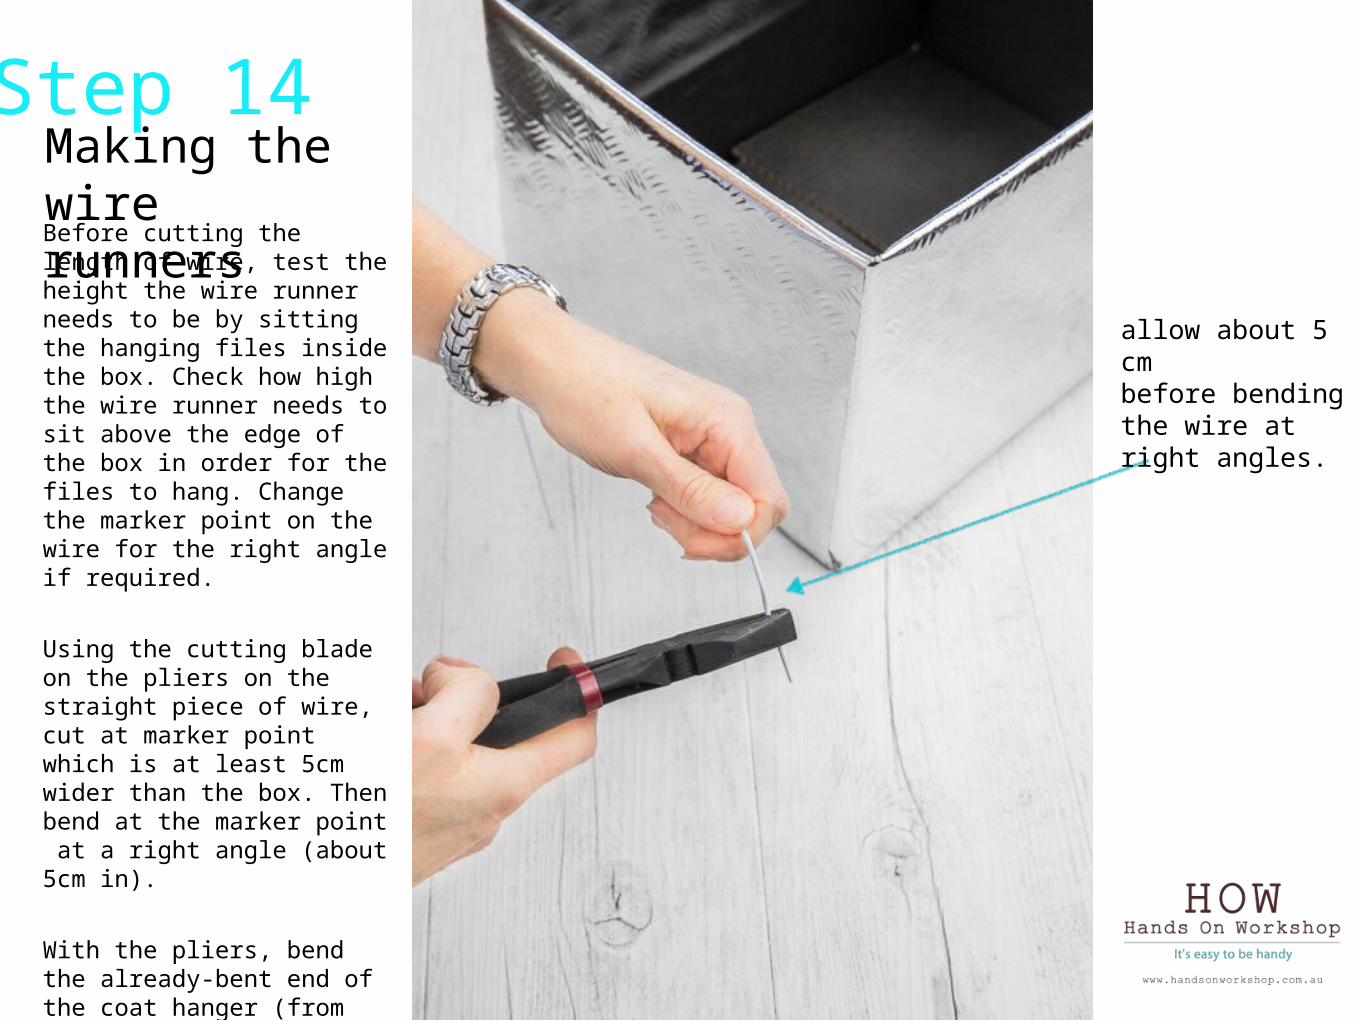
Before cutting the length of wire, test the height the wire runner needs to be by sitting the hanging files inside the box. Check how high the wire runner needs to sit above the edge of the box in order for the files to hang. Change the marker point on the wire for the right angle if required.
Using the cutting blade on the pliers on the straight piece of wire, cut at marker point which is at least 5cm wider than the box. Then bend at the marker point at a right angle (about 5cm in).
With the pliers, bend the already-bent end of the coat hanger (from the existing curve) to a right angle.
allow about 5 cmbefore bending the wire at right angles.
Making the wire runners
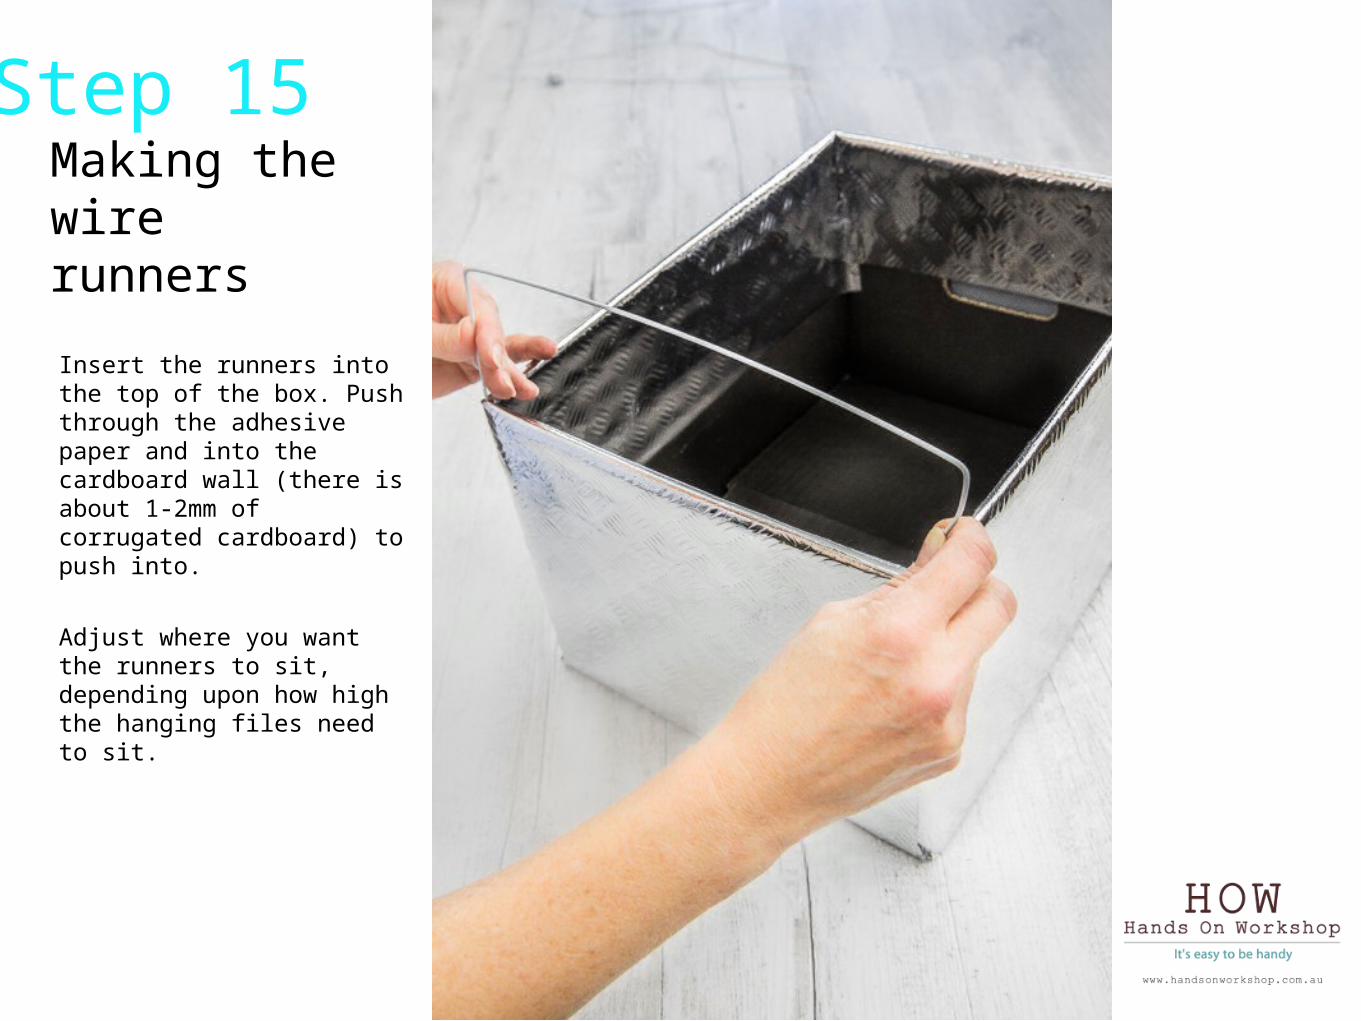
Step 15Making the wire runners
Insert the runners into the top of the box. Push through the adhesive paper and into the cardboard wall (there is about 1-2mm of corrugated cardboard) to push into.
Adjust where you want the runners to sit, depending upon how high the hanging files need to sit.
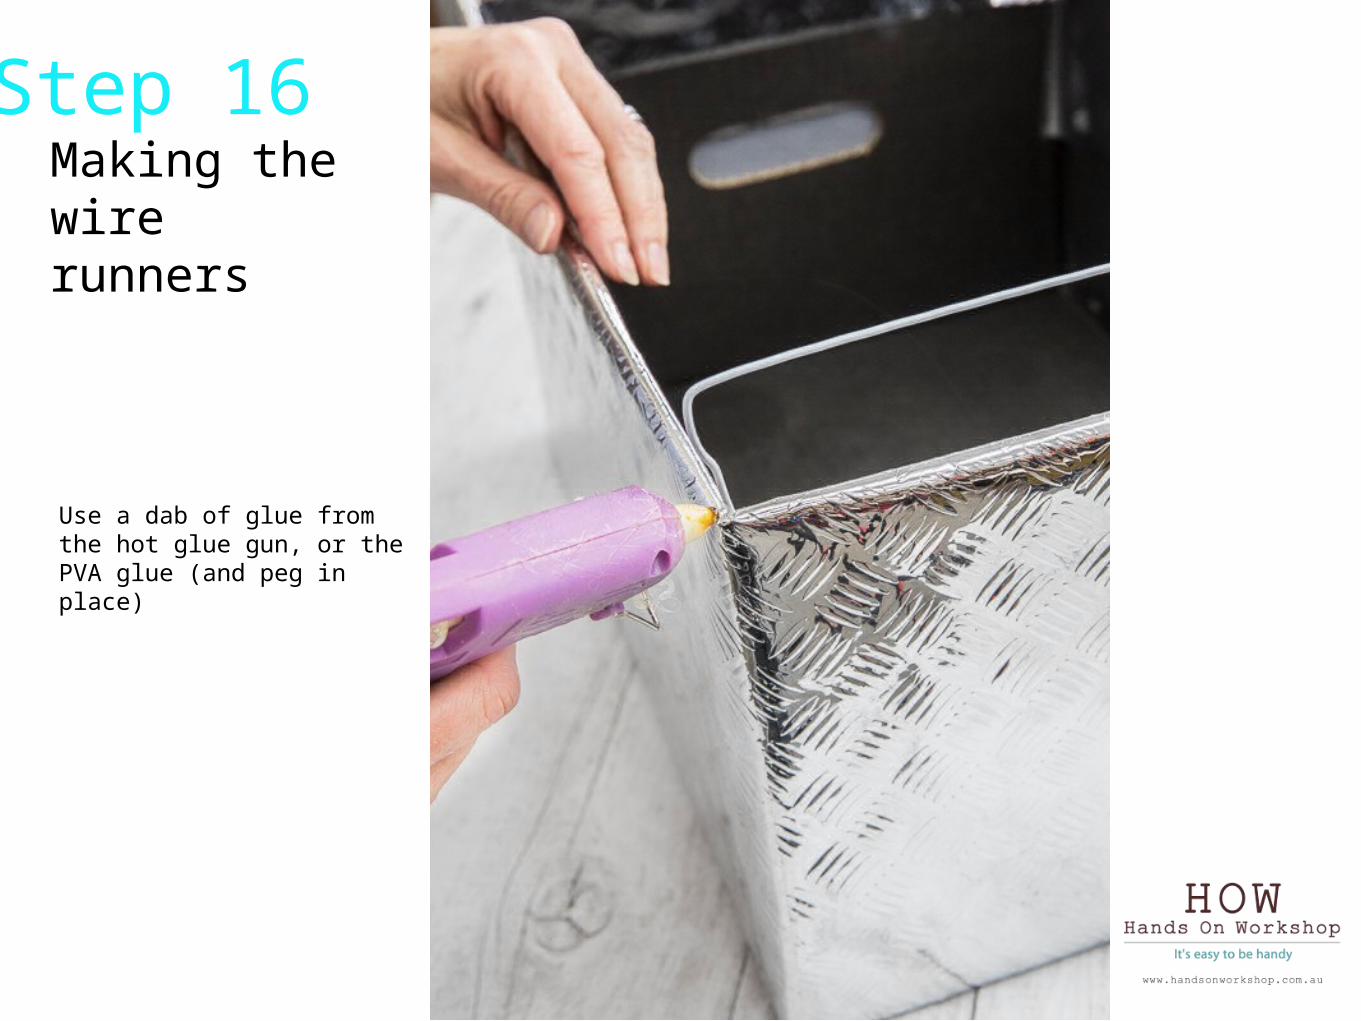
Step 16
Use a dab of glue from the hot glue gun, or the PVA glue (and peg in place)
Making the wire runners
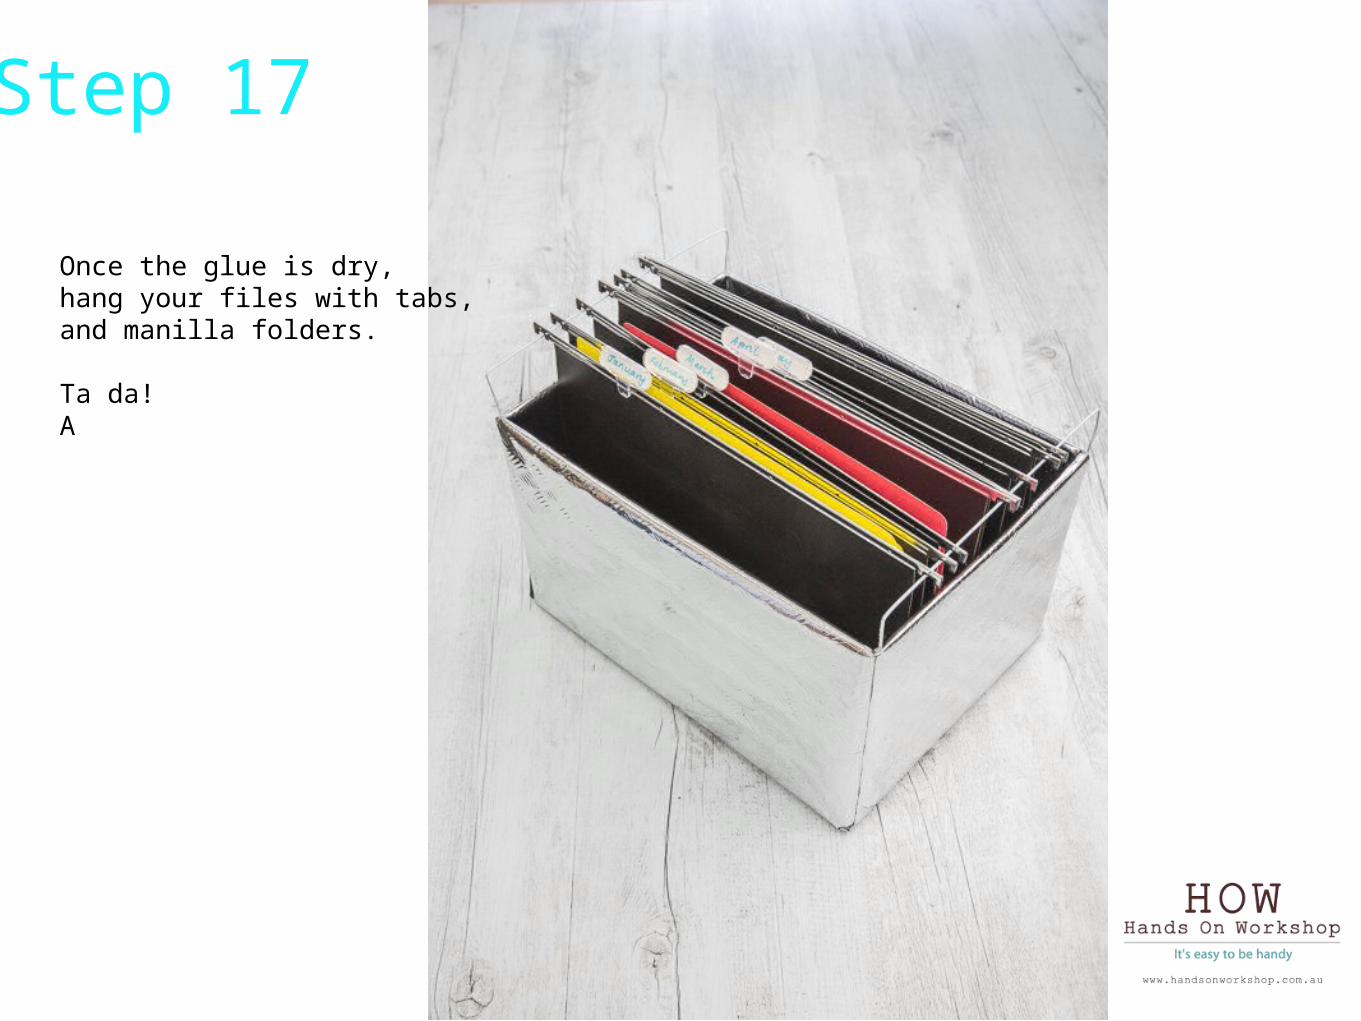
Step 17
Once the glue is dry, hang your files with tabs, and manilla folders.
Ta da! A
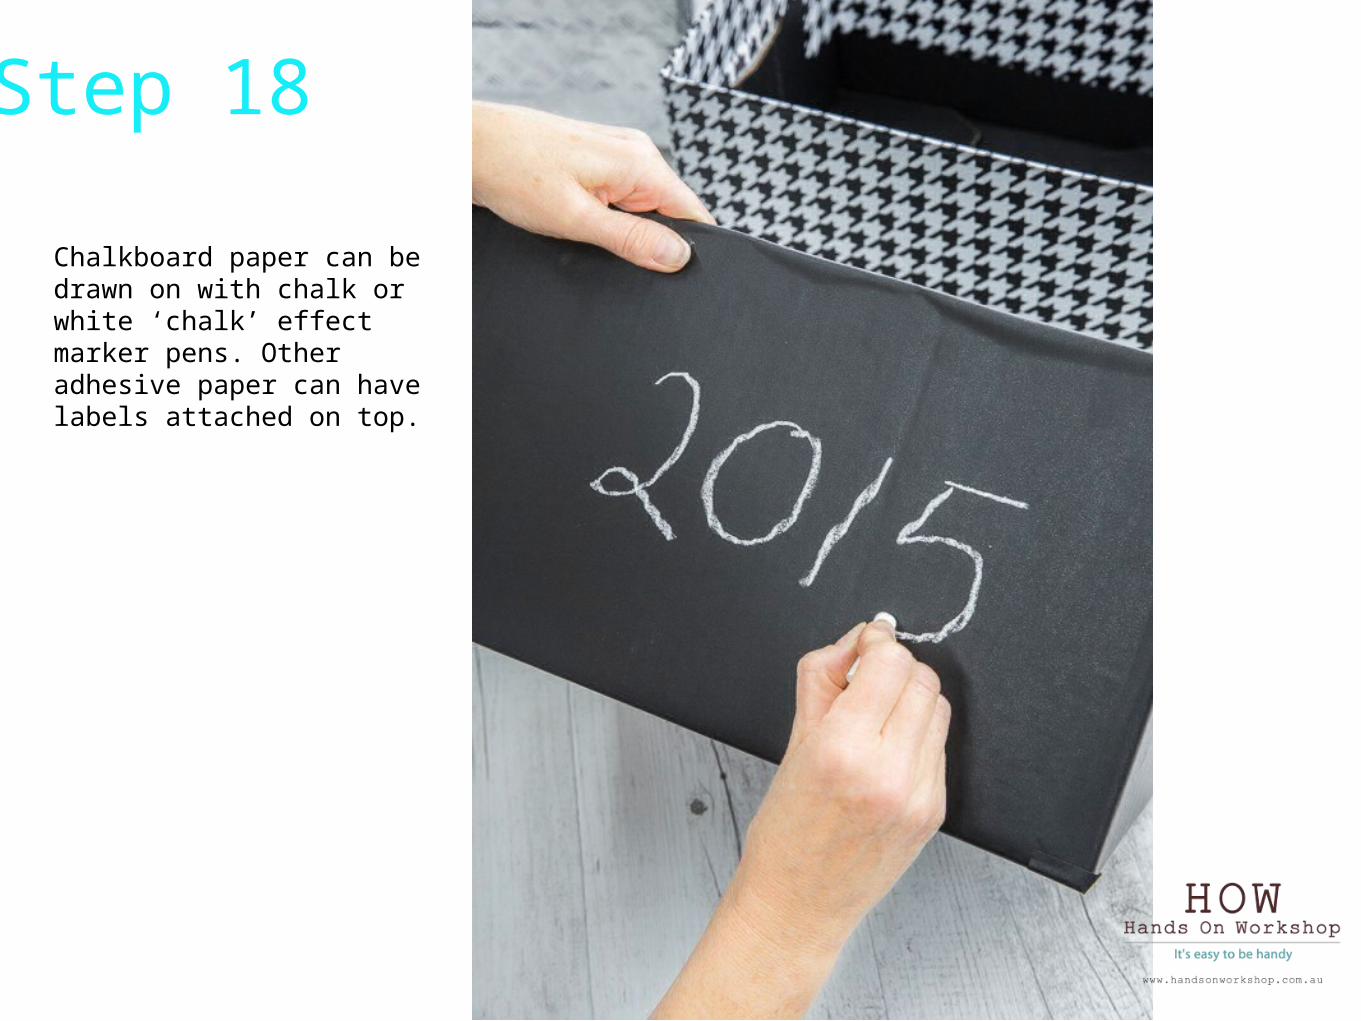
Step 18
Chalkboard paper can be drawn on with chalk or white ‘chalk’ effect marker pens. Other adhesive paper can have labels attached on top.
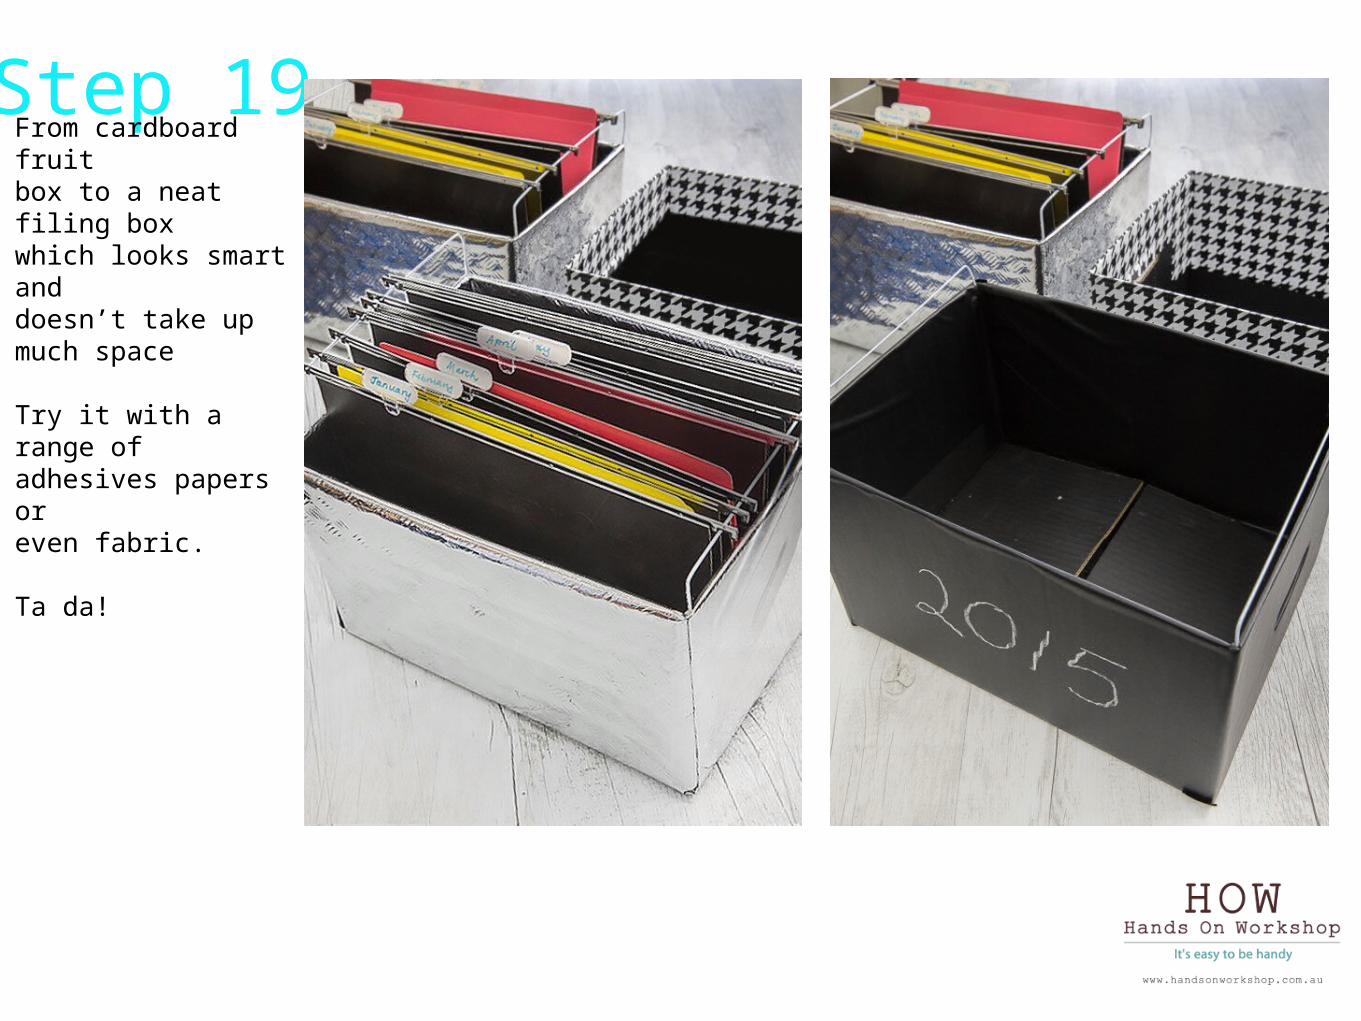
Step 19From cardboard fruit box to a neat filing boxwhich looks smart and doesn’t take up much space
Try it with a range of adhesives papers oreven fabric.
Ta da!