Computer Graphics Coursework Cookbook original from Anthony Jones modified Dan Cornford (Oct 2010)
82
Computer Graphics Coursework Cookbook original from Anthony Jones modified Dan Cornford (Oct 2010)
-
date post
20-Dec-2015 -
Category
Documents
-
view
213 -
download
0
Transcript of Computer Graphics Coursework Cookbook original from Anthony Jones modified Dan Cornford (Oct 2010)
Computer GraphicsCoursework Cookbook
original from Anthony Jonesmodified
Dan Cornford (Oct 2010)
Introduction• Me– Dan Cornford– Used to teach this before I got sacked ...
• You– Computer graphics students– Attending labs?
• This lecture– Aims to help you with your coursework– Available online...
2

Lecture Outline• The specification
• Approaching the problem– Simplification– Paper designs as stepping stones– Scene graphs– Objects– Animations– Lights– Cameras
• Lecture outcomes• Where to get further help
3
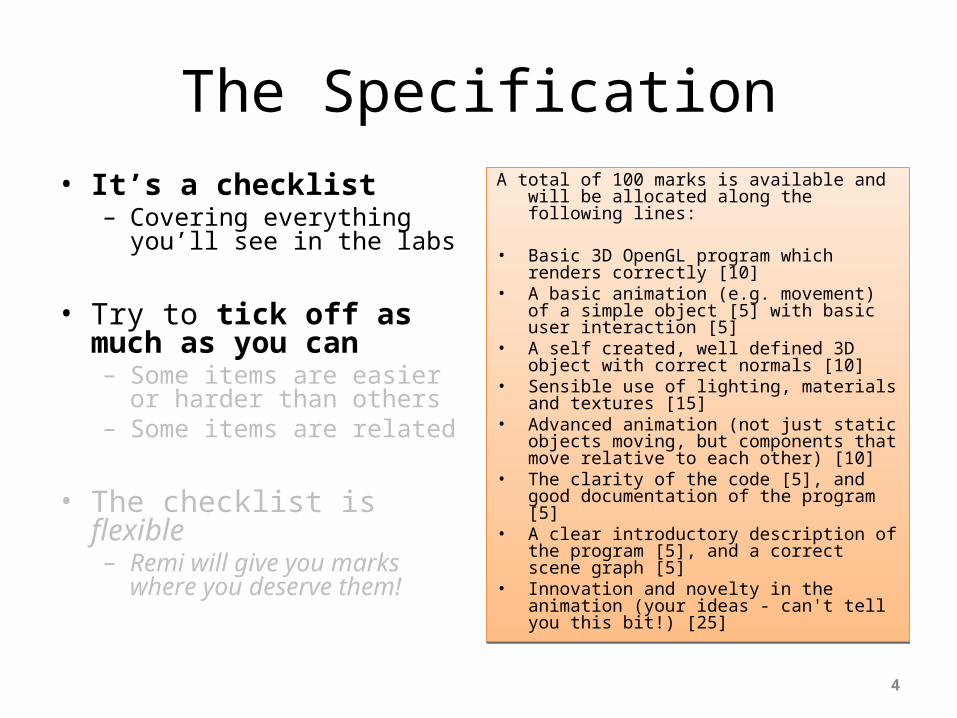
The Specification• It’s a checklist
– Covering everything you’ll see in the labs
• Try to tick off as much as you can– Some items are easier or
harder than others– Some items are related
• The checklist is flexible– Remi will give you marks
where you deserve them!
A total of 100 marks is available and will be allocated along the following lines:
• Basic 3D OpenGL program which renders correctly [10]
• A basic animation (e.g. movement) of a simple object [5] with basic user interaction [5]
• A self created, well defined 3D object with correct normals [10]
• Sensible use of lighting, materials and textures [15]
• Advanced animation (not just static objects moving, but components that move relative to each other) [10]
• The clarity of the code [5], and good documentation of the program [5]
• A clear introductory description of the program [5], and a correct scene graph [5]
• Innovation and novelty in the animation (your ideas - can't tell you this bit!) [25]
4
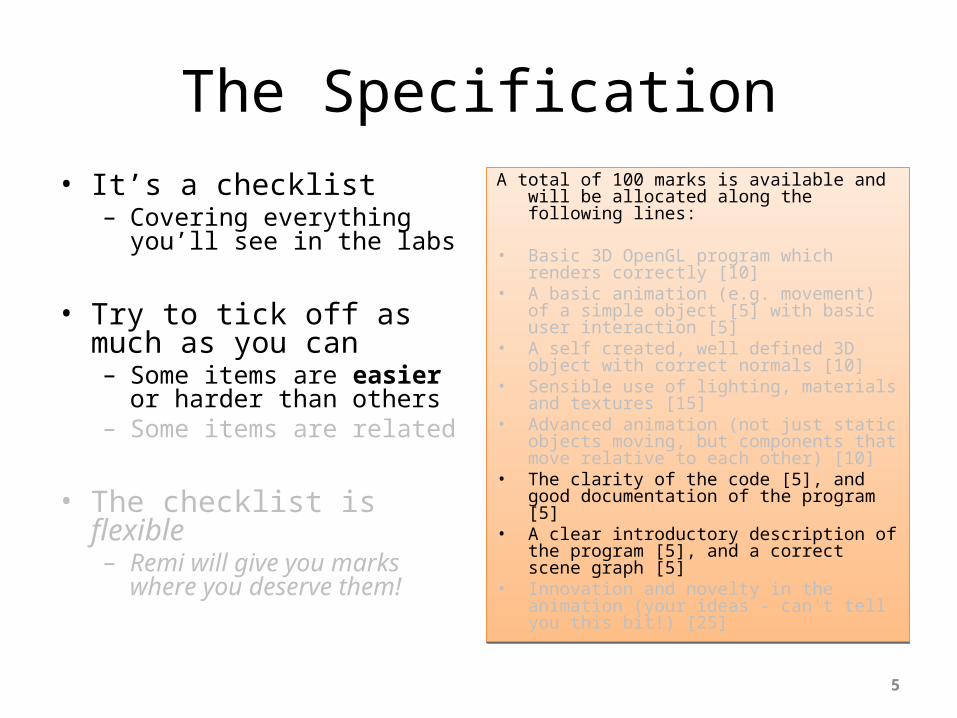
The Specification• It’s a checklist
– Covering everything you’ll see in the labs
• Try to tick off as much as you can– Some items are easier or
harder than others– Some items are related
• The checklist is flexible– Remi will give you marks
where you deserve them!
A total of 100 marks is available and will be allocated along the following lines:
• Basic 3D OpenGL program which renders correctly [10]
• A basic animation (e.g. movement) of a simple object [5] with basic user interaction [5]
• A self created, well defined 3D object with correct normals [10]
• Sensible use of lighting, materials and textures [15]
• Advanced animation (not just static objects moving, but components that move relative to each other) [10]
• The clarity of the code [5], and good documentation of the program [5]
• A clear introductory description of the program [5], and a correct scene graph [5]
• Innovation and novelty in the animation (your ideas - can't tell you this bit!) [25]
A total of 100 marks is available and will be allocated along the following lines:
• Basic 3D OpenGL program which renders correctly [10]
• A basic animation (e.g. movement) of a simple object [5] with basic user interaction [5]
• A self created, well defined 3D object with correct normals [10]
• Sensible use of lighting, materials and textures [15]
• Advanced animation (not just static objects moving, but components that move relative to each other) [10]
• The clarity of the code [5], and good documentation of the program [5]
• A clear introductory description of the program [5], and a correct scene graph [5]
• Innovation and novelty in the animation (your ideas - can't tell you this bit!) [25]
5
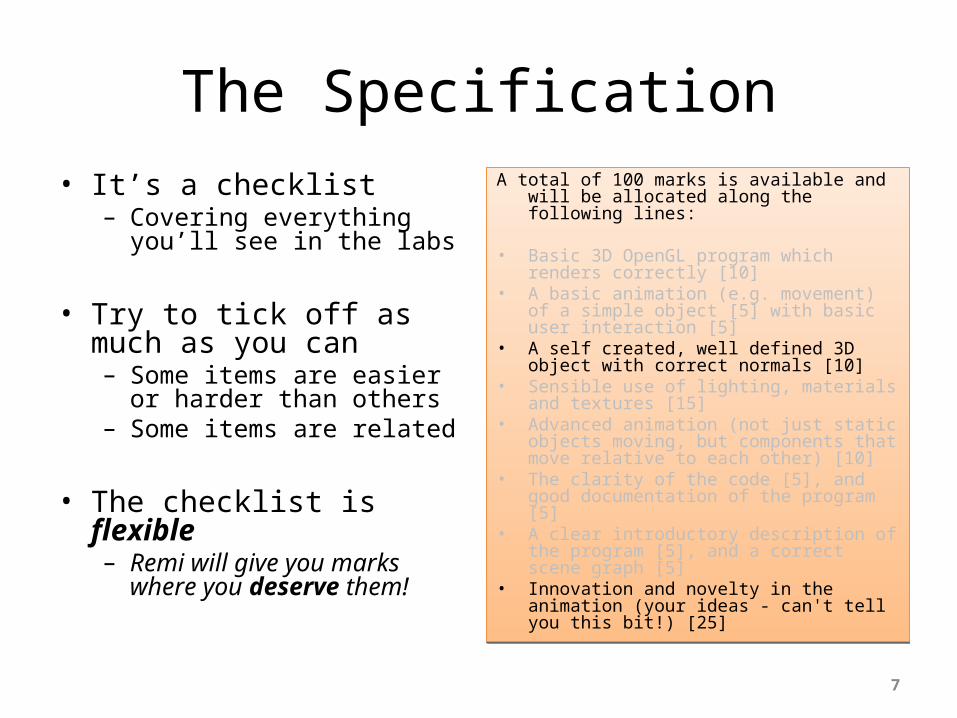
The Specification• It’s a checklist
– Covering everything you’ll see in the labs
• Try to tick off as much as you can– Some items are easier or
harder than others– Some items are related
• The checklist is flexible– Remi will give you marks
where you deserve them!
A total of 100 marks is available and will be allocated along the following lines:
• Basic 3D OpenGL program which renders correctly [10]
• A basic animation (e.g. movement) of a simple object [5] with basic user interaction [5]
• A self created, well defined 3D object with correct normals [10]
• Sensible use of lighting, materials and textures [15]
• Advanced animation (not just static objects moving, but components that move relative to each other) [10]
• The clarity of the code [5], and good documentation of the program [5]
• A clear introductory description of the program [5], and a correct scene graph [5]
• Innovation and novelty in the animation (your ideas - can't tell you this bit!) [25]
A total of 100 marks is available and will be allocated along the following lines:
• Basic 3D OpenGL program which renders correctly [10]
• A basic animation (e.g. movement) of a simple object [5] with basic user interaction [5]
• A self created, well defined 3D object with correct normals [10]
• Sensible use of lighting, materials and textures [15]
• Advanced animation (not just static objects moving, but components that move relative to each other) [10]
• The clarity of the code [5], and good documentation of the program [5]
• A clear introductory description of the program [5], and a correct scene graph [5]
• Innovation and novelty in the animation (your ideas - can't tell you this bit!) [25]
6
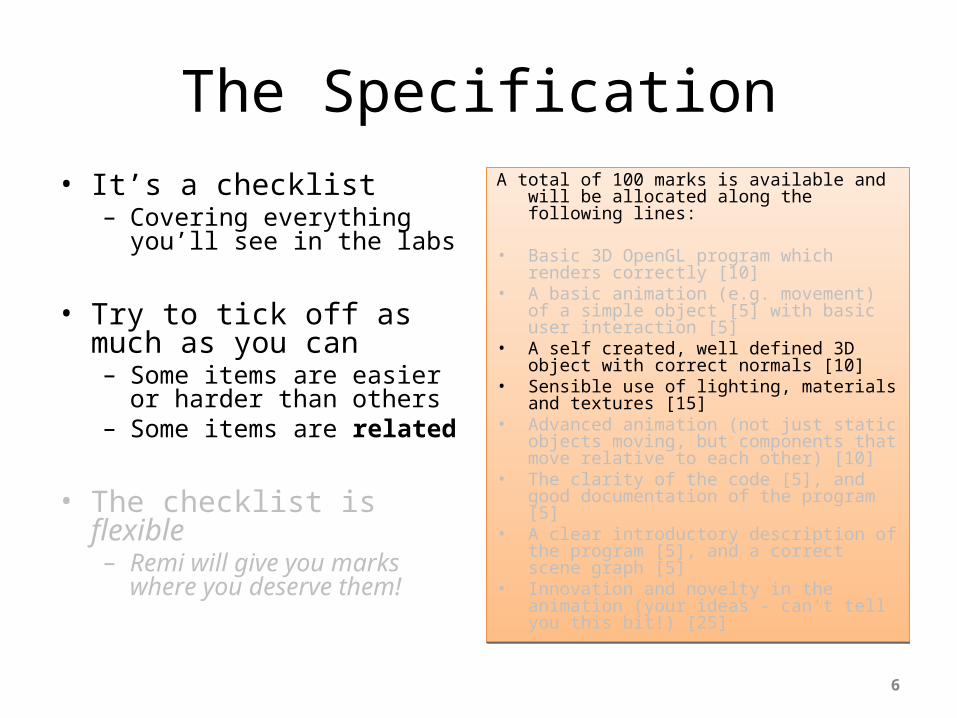
The Specification• It’s a checklist
– Covering everything you’ll see in the labs
• Try to tick off as much as you can– Some items are easier or
harder than others– Some items are related
• The checklist is flexible– Remi will give you marks
where you deserve them!
A total of 100 marks is available and will be allocated along the following lines:
• Basic 3D OpenGL program which renders correctly [10]
• A basic animation (e.g. movement) of a simple object [5] with basic user interaction [5]
• A self created, well defined 3D object with correct normals [10]
• Sensible use of lighting, materials and textures [15]
• Advanced animation (not just static objects moving, but components that move relative to each other) [10]
• The clarity of the code [5], and good documentation of the program [5]
• A clear introductory description of the program [5], and a correct scene graph [5]
• Innovation and novelty in the animation (your ideas - can't tell you this bit!) [25]
A total of 100 marks is available and will be allocated along the following lines:
• Basic 3D OpenGL program which renders correctly [10]
• A basic animation (e.g. movement) of a simple object [5] with basic user interaction [5]
• A self created, well defined 3D object with correct normals [10]
• Sensible use of lighting, materials and textures [15]
• Advanced animation (not just static objects moving, but components that move relative to each other) [10]
• The clarity of the code [5], and good documentation of the program [5]
• A clear introductory description of the program [5], and a correct scene graph [5]
• Innovation and novelty in the animation (your ideas - can't tell you this bit!) [25]
7

The Specification
• Topic changes every year– What is the topic this year?
• Lecture example:– Topic: “A sporting event”– Idea: England won the
world cup in 1966
• How do we turn this idea into code?
8

Approaching The Problem:Mind the Gap!
protected void renderScene() { // draw the ground plane GL11.glPushMatrix(); { // position, scale and draw the ground plane GL11.glTranslatef(0.0f,-2.15f,-10.0f); GL11.glScaled(10.0f, 1.0f, 10.0f); drawUnitPlane(); } GL11.glPopMatrix();
// position, rotate and draw the person GL11.glTranslatef(0.0f,personOffsetY,-10.0f); GL11.glRotatef(personSpinY, 0.0f, 1.0f, 0.0f); person.draw(); }
9

The Wrong Approach
10
The Right Approach
• Methodical, incremental development based on a careful design
• Treat the specification as a checklist• Customize the coursework template
11
The Right Approach
• Methodical, incremental development based on a careful design
• Treat the specification as a checklist• Customize the coursework template
• Keep It Short & Simple! (KISS)“Everything should be made as simple as possible, but no simpler.” (Albert Einstein)
12
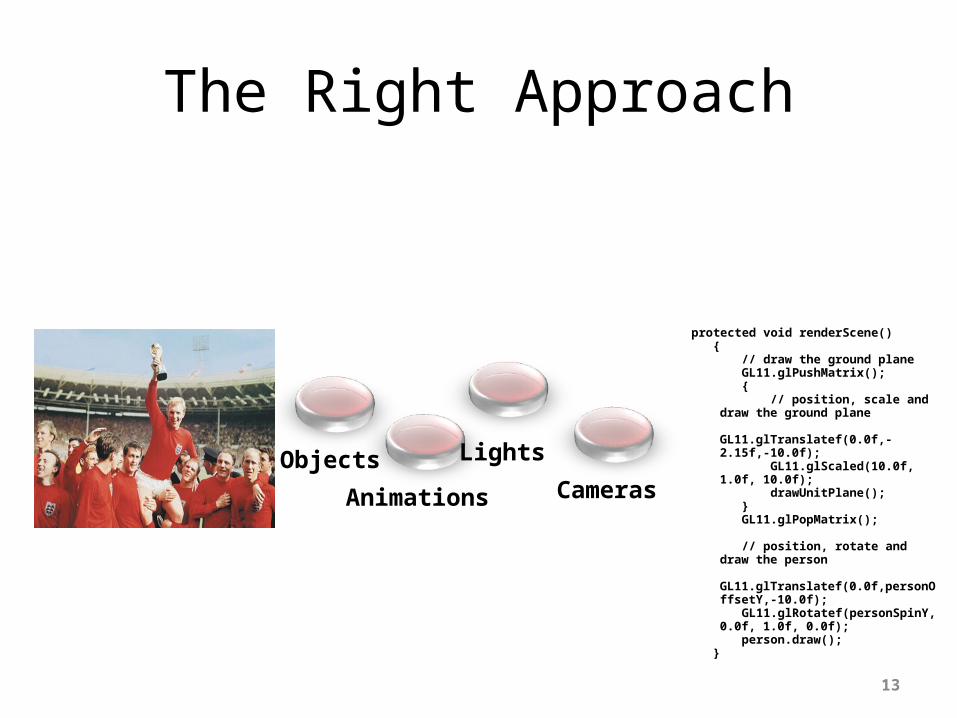
The Right Approach
protected void renderScene() { // draw the ground plane GL11.glPushMatrix(); { // position, scale and draw the ground
plane GL11.glTranslatef(0.0f,-2.15f,-10.0f); GL11.glScaled(10.0f, 1.0f, 10.0f); drawUnitPlane(); } GL11.glPopMatrix();
// position, rotate and draw the person GL11.glTranslatef(0.0f,personOffsetY,-10.0f); GL11.glRotatef(personSpinY, 0.0f, 1.0f, 0.0f); person.draw(); }
Objects
Animations
Lights
Cameras
13
Simplify Your 3D Scene
• Remember to KISS!• Ideas Paper design– Objects– Animations– Lights– Cameras
• Paper Design Code
14
Simplify Your 3D Scene
• Remember to KISS!• Ideas Paper design– Objects– Animations– Lights– Cameras
• Paper Design Code
15
Paper Design
• Pencil and paper– Remember to KISS!– Start in 2D and move to 3D later– Use different colours
• Understand your scene as:– Scene graph– Objects– Animations
16
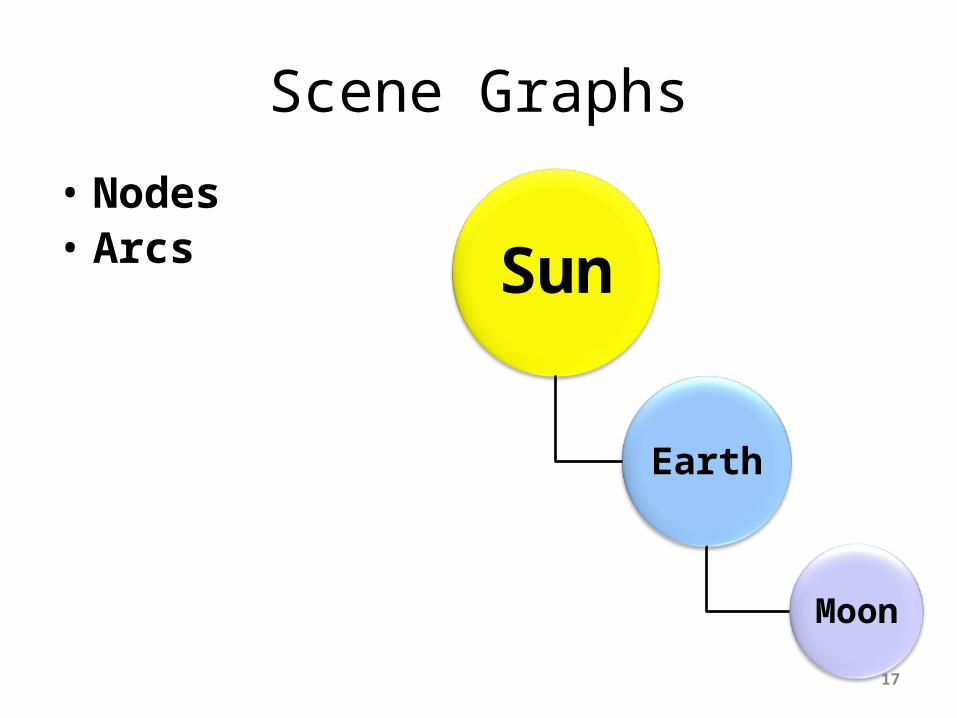
Scene Graphs
• Nodes• Arcs Sun
Earth
Moon
17
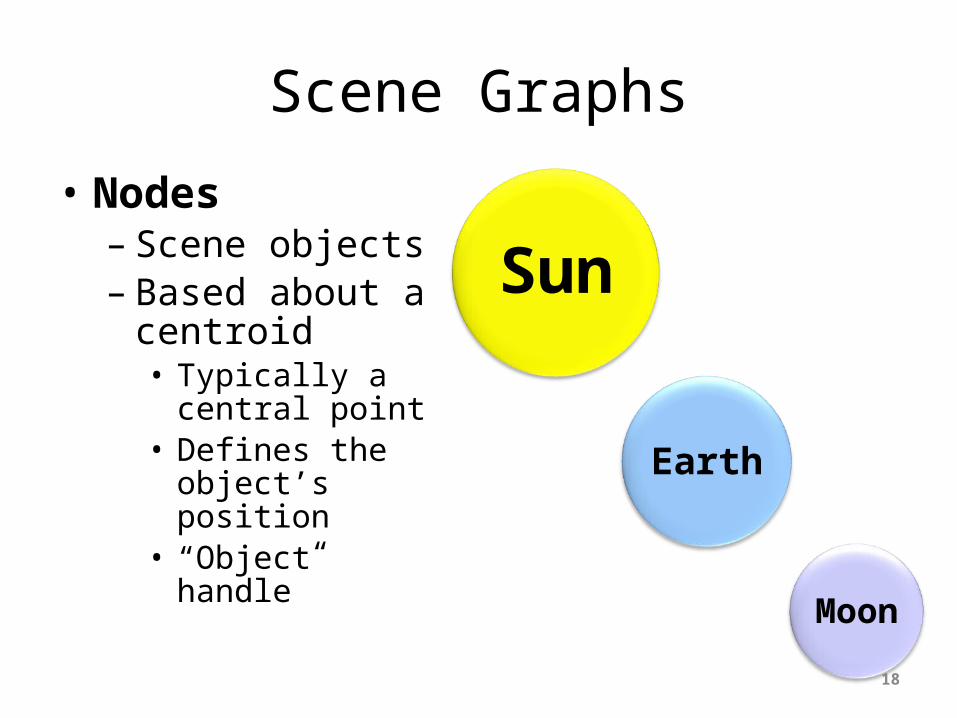
Scene Graphs
• Nodes– Scene objects– Based about a
centroid• Typically a central
point• Defines the object’s
position• “Object handle”
Sun
Earth
Moon
18
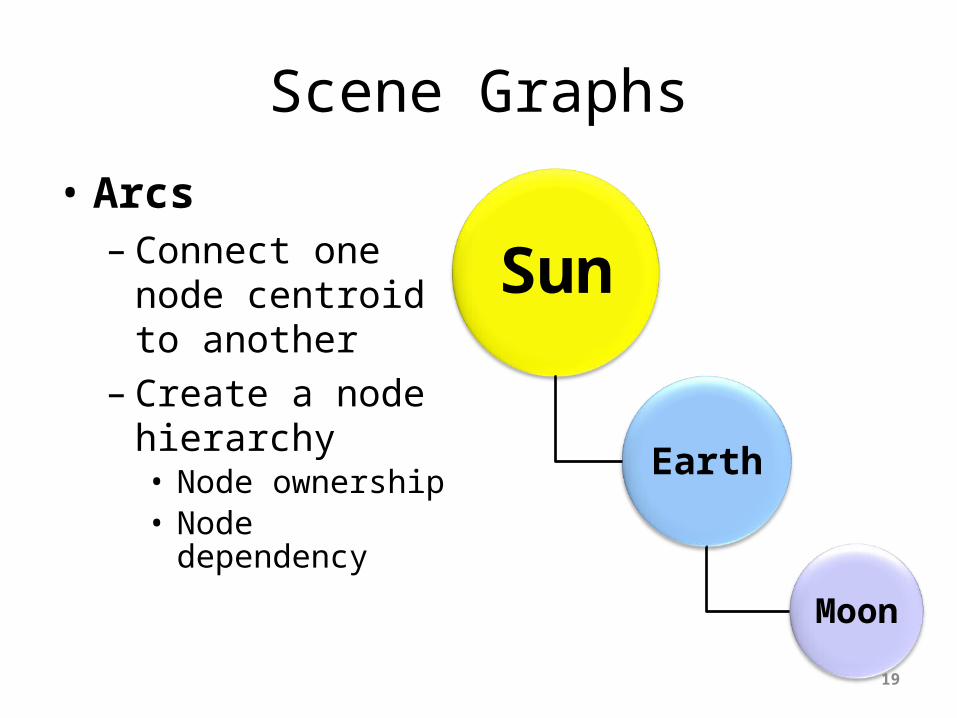
Scene Graphs
• Arcs– Connect one node
centroid to another– Create a node
hierarchy• Node ownership• Node dependency
Sun
Earth
Moon
19
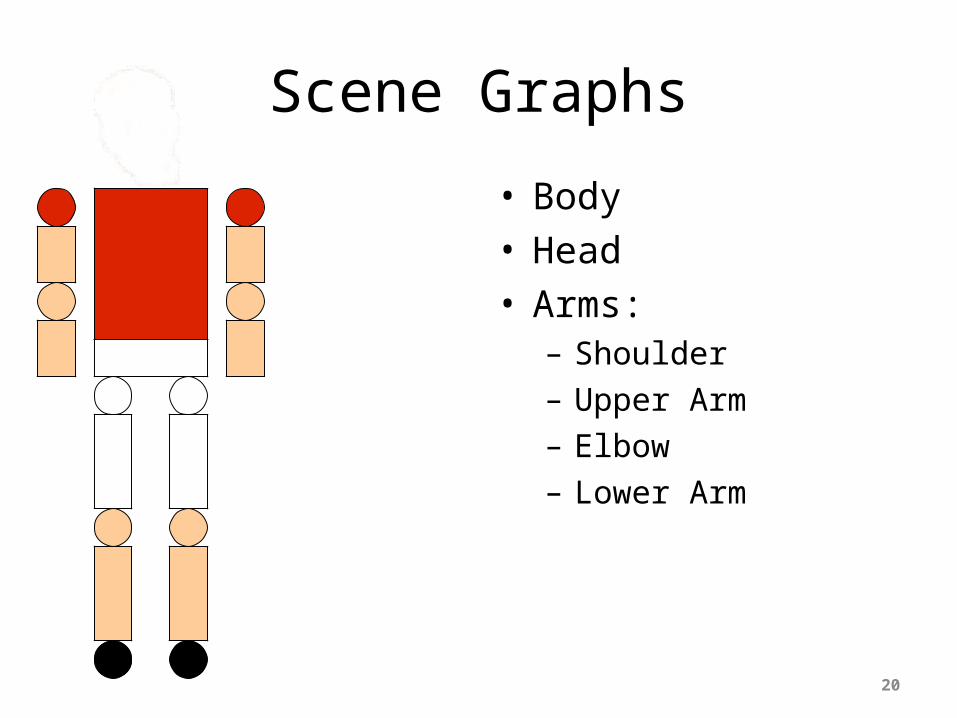
Scene Graphs
• Body• Head• Arms:– Shoulder– Upper Arm– Elbow– Lower Arm
20
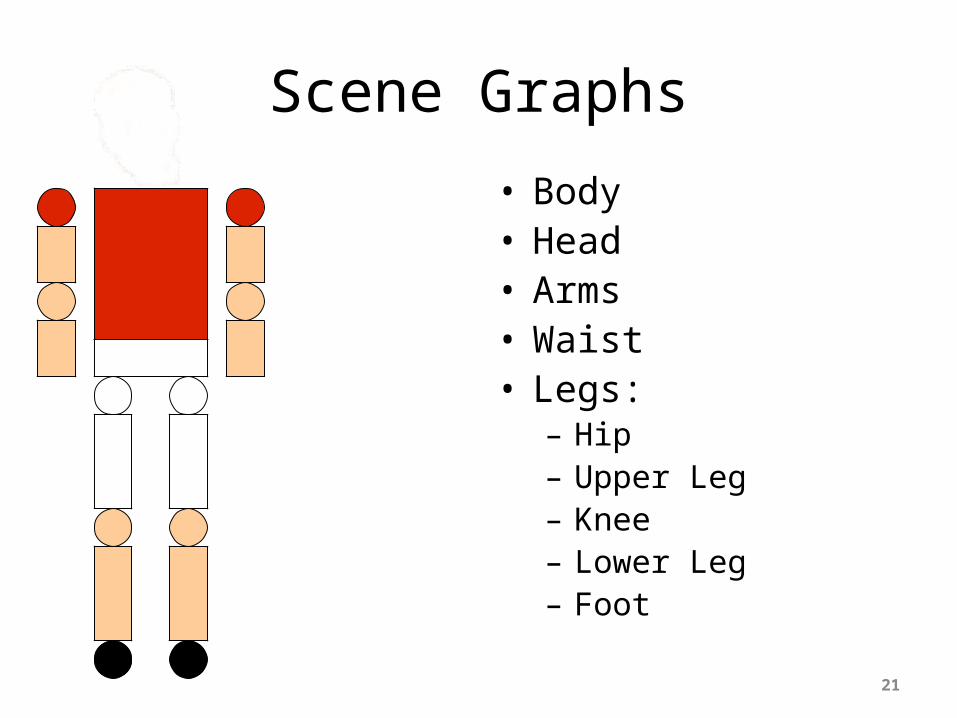
Scene Graphs
• Body• Head• Arms• Waist• Legs:– Hip– Upper Leg– Knee– Lower Leg– Foot
21
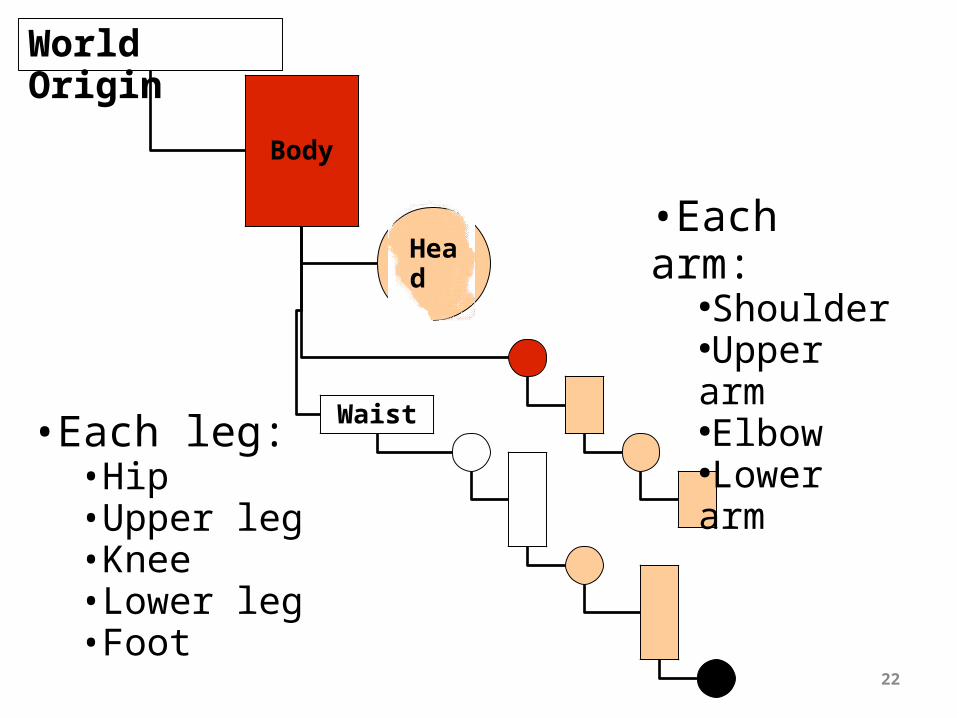
•Each leg:•Hip•Upper leg•Knee•Lower leg•Foot
Body
Head
Waist
World Origin
•Each arm:●Shoulder●Upper arm●Elbow●Lower arm
22
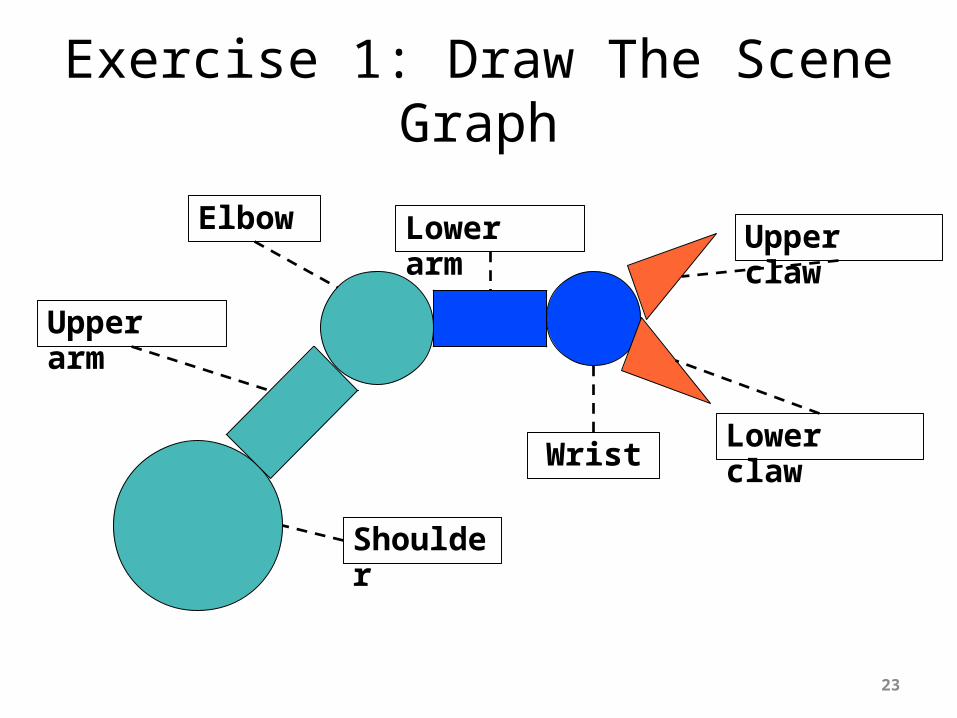
Exercise 1: Draw The Scene Graph
Upper arm
Elbow Lower arm Upper claw
Lower clawWrist
Shoulder
23
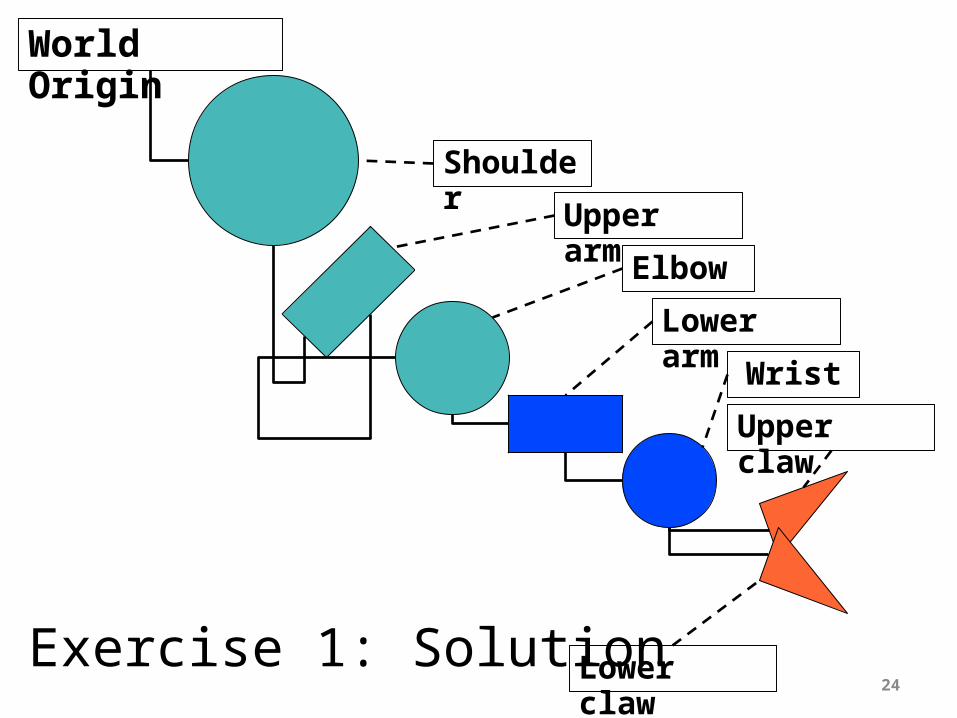
Exercise 1: Solution
Upper arm
Elbow
Lower arm
Upper claw
Lower claw
Wrist
World Origin
Shoulder
24
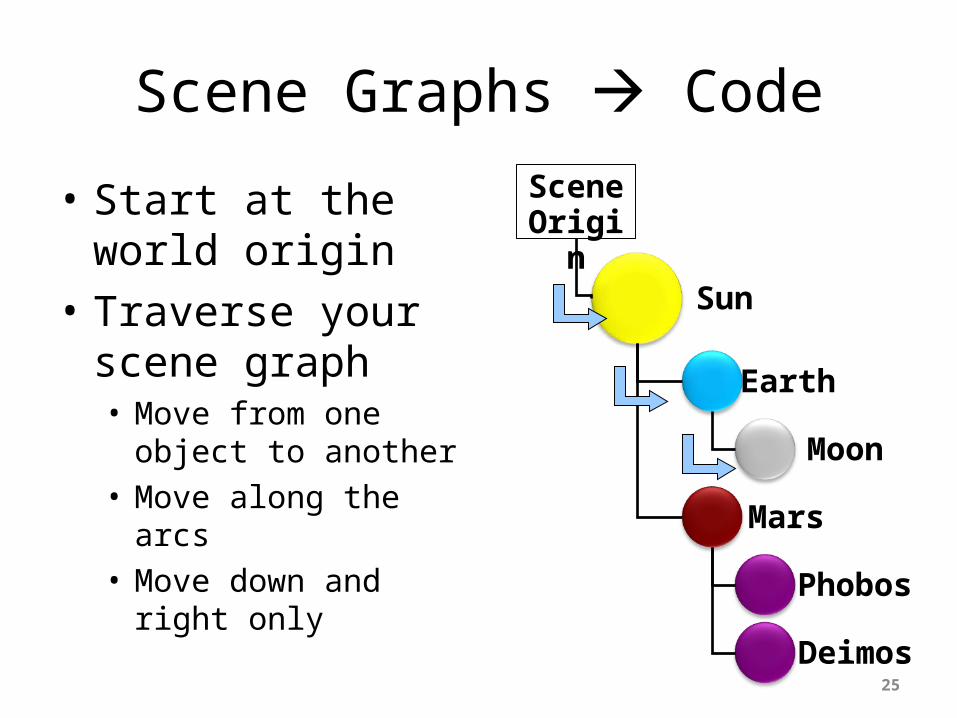
Scene Graphs Code
• Start at the world origin
• Traverse your scene graph• Move from one object to
another• Move along the arcs• Move down and right only
Sun
Earth
Moon
Mars
Phobos
Deimos
Scene Origin
25
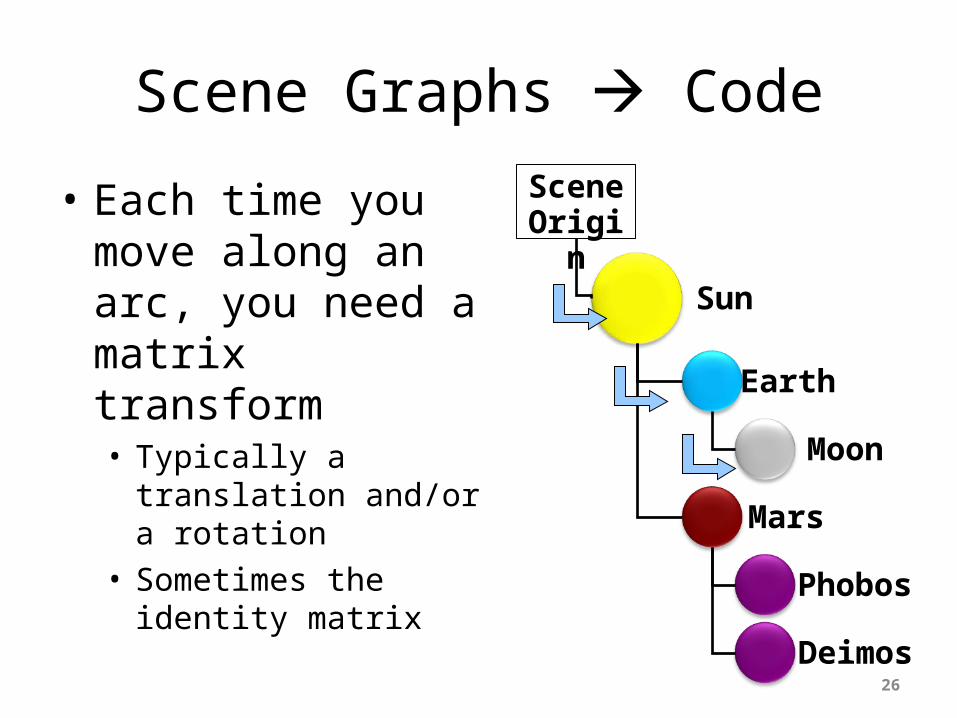
Scene Graphs Code
• Each time you move along an arc, you need a matrix transform• Typically a translation
and/or a rotation• Sometimes the identity
matrix
Sun
Earth
Moon
Mars
Phobos
Deimos
Scene Origin
26

Scene Graphs Code
• When you reach an object, draw it• Using your own objects• Using GLUT quadrics
Sun
Earth
Moon
Mars
Phobos
Deimos
Scene Origin
27
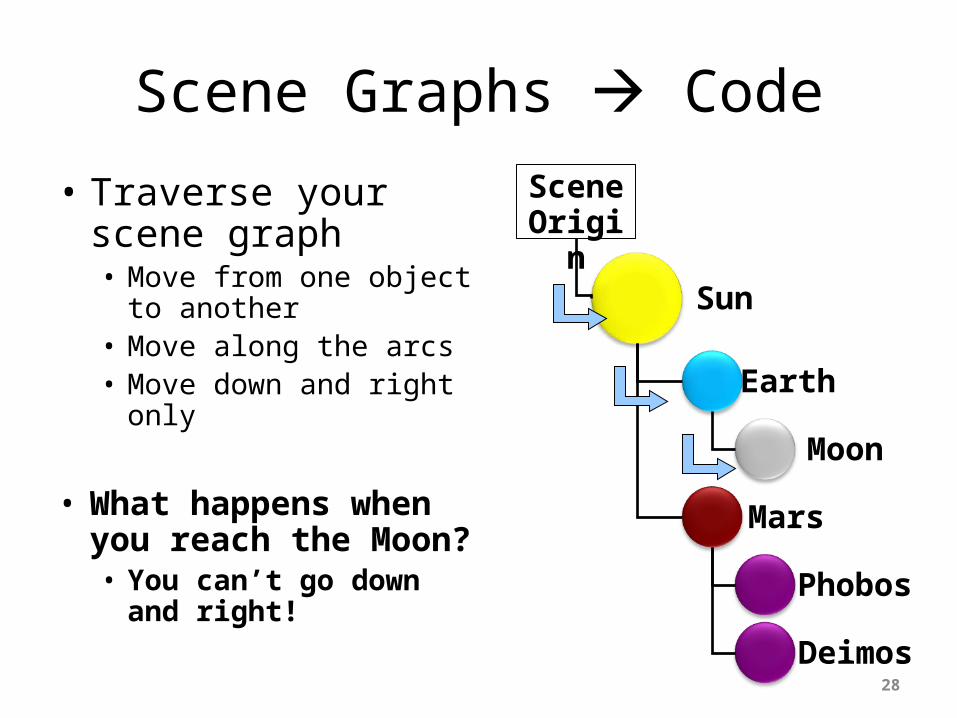
Scene Graphs Code
• Traverse your scene graph• Move from one object to
another• Move along the arcs• Move down and right only
• What happens when you reach the Moon?• You can’t go down and
right!
Sun
Earth
Moon
Mars
Phobos
Deimos
Scene Origin
28
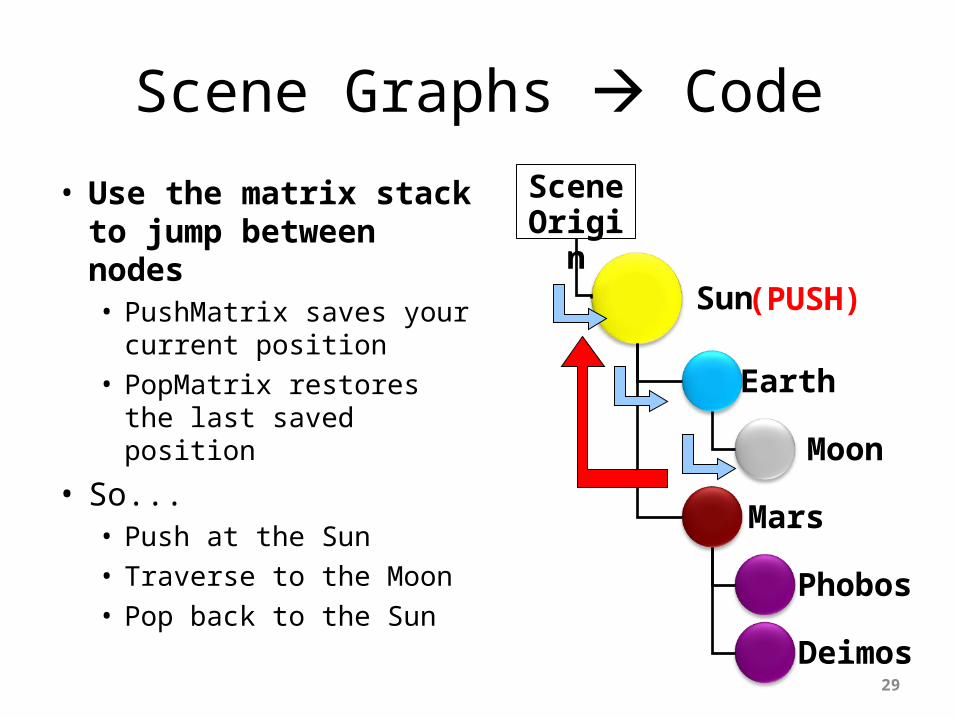
Scene Graphs Code
• Use the matrix stack to jump between nodes• PushMatrix saves your
current position• PopMatrix restores the
last saved position
• So...• Push at the Sun• Traverse to the Moon• Pop back to the Sun
Sun
Earth
Moon
Mars
Phobos
Deimos
Scene Origin
(PUSH)
29
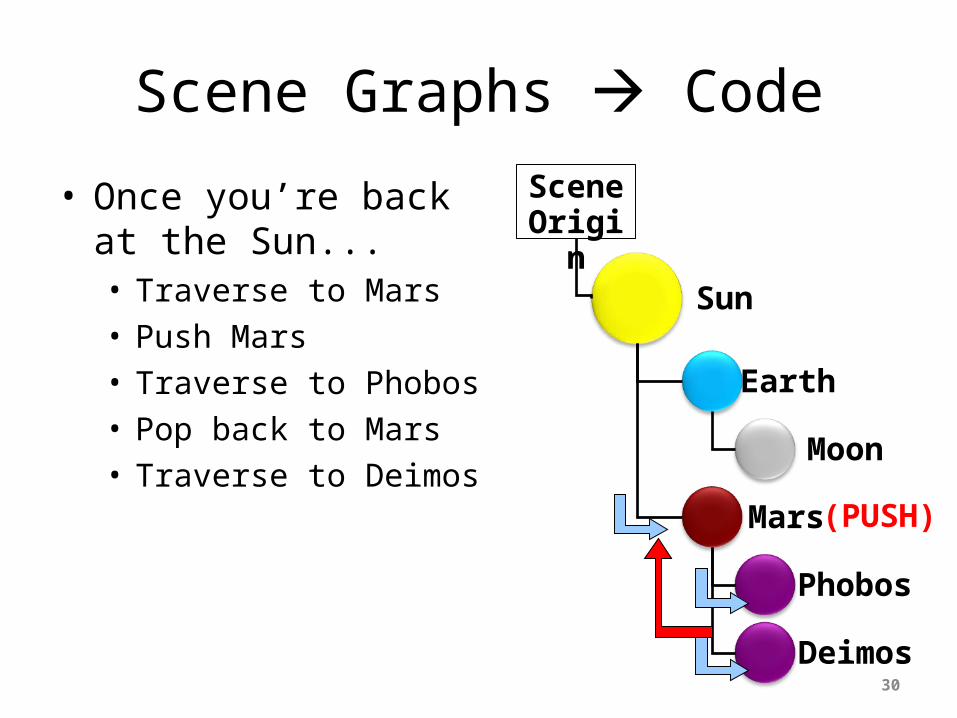
Scene Graphs Code
• Once you’re back at the Sun...• Traverse to Mars• Push Mars• Traverse to Phobos• Pop back to Mars• Traverse to Deimos
Sun
Earth
Moon
Mars
Phobos
Deimos
Scene Origin
(PUSH)
30
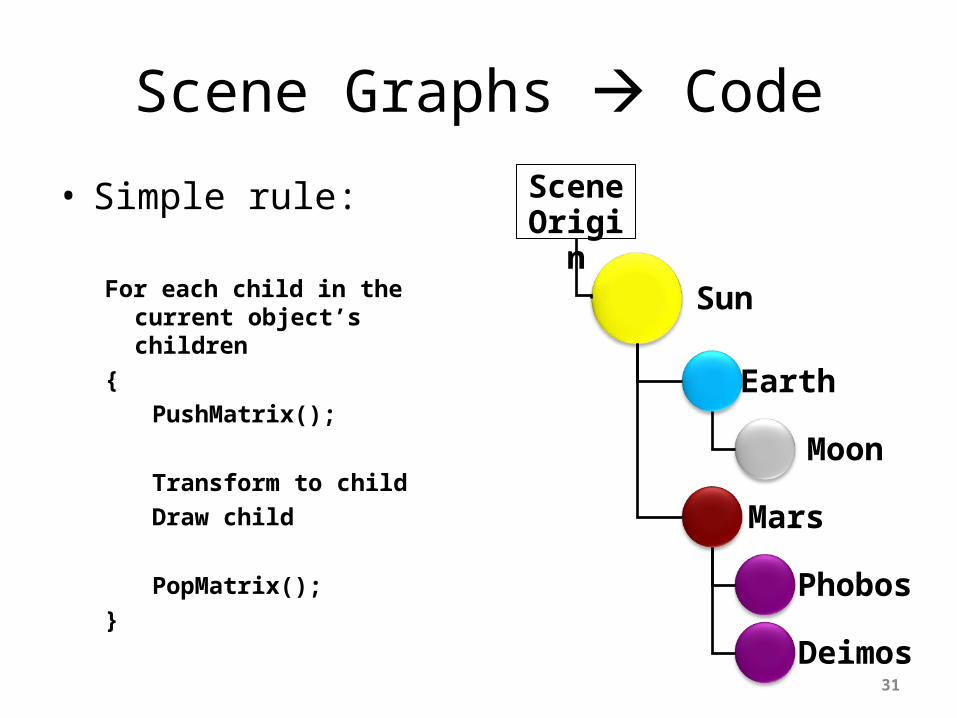
Scene Graphs Code
• Simple rule:
For each child in the current object’s children
{PushMatrix();
Transform to childDraw child
PopMatrix();}
Sun
Earth
Moon
Mars
Phobos
Deimos
Scene Origin
31
Paper Design
• Pencil and paper– Remember to KISS!– Start in 2D and move to 3D later– Use different colours
• Understand your scene as:– Scene graph– Objects– Animations
32
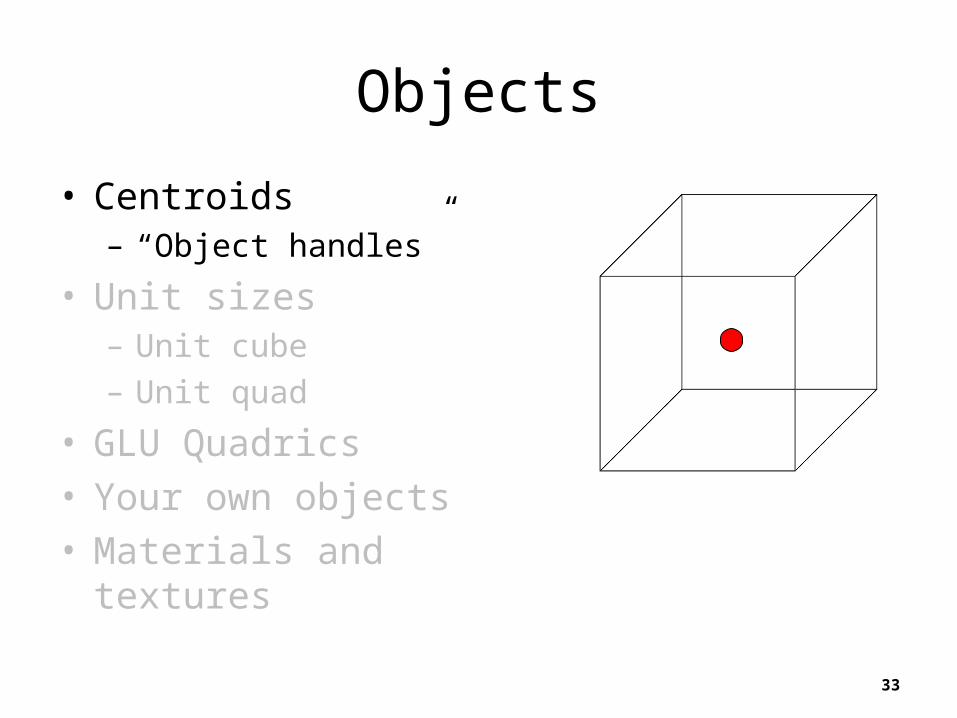
Objects
• Centroids– “Object handles”
• Unit sizes– Unit cube– Unit quad
• GLU Quadrics• Your own objects• Materials and textures
33

Objects
• Centroids– “Object handles”
• Unit sizes– Unit cube– Unit quad
• GLU Quadrics• Your own objects• Materials and textures
34
1 unit
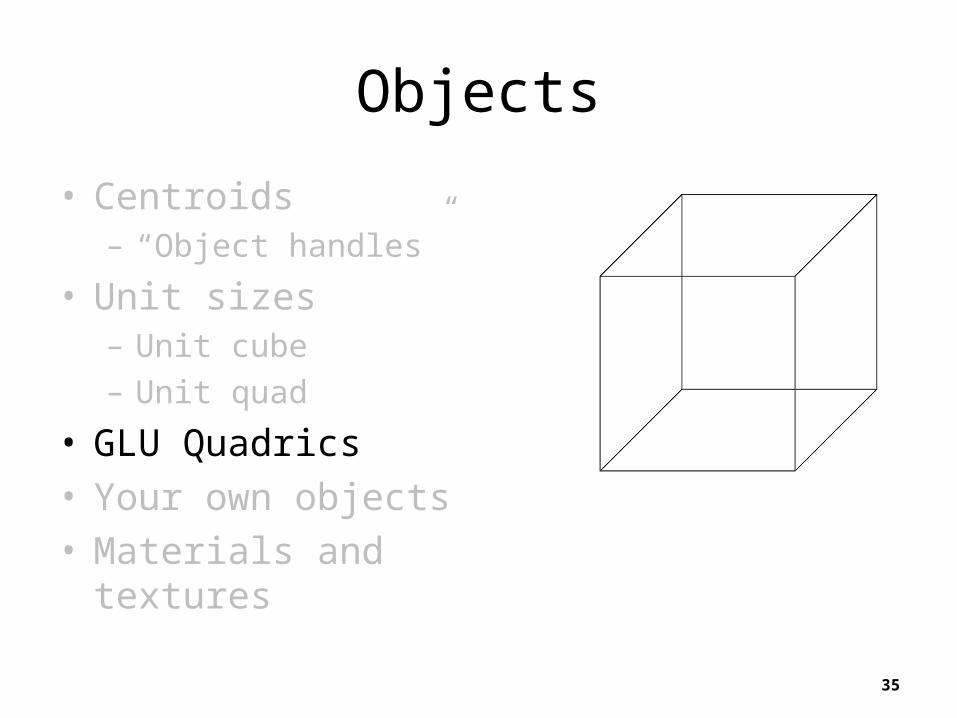
Objects
• Centroids– “Object handles”
• Unit sizes– Unit cube– Unit quad
• GLU Quadrics• Your own objects• Materials and textures
35
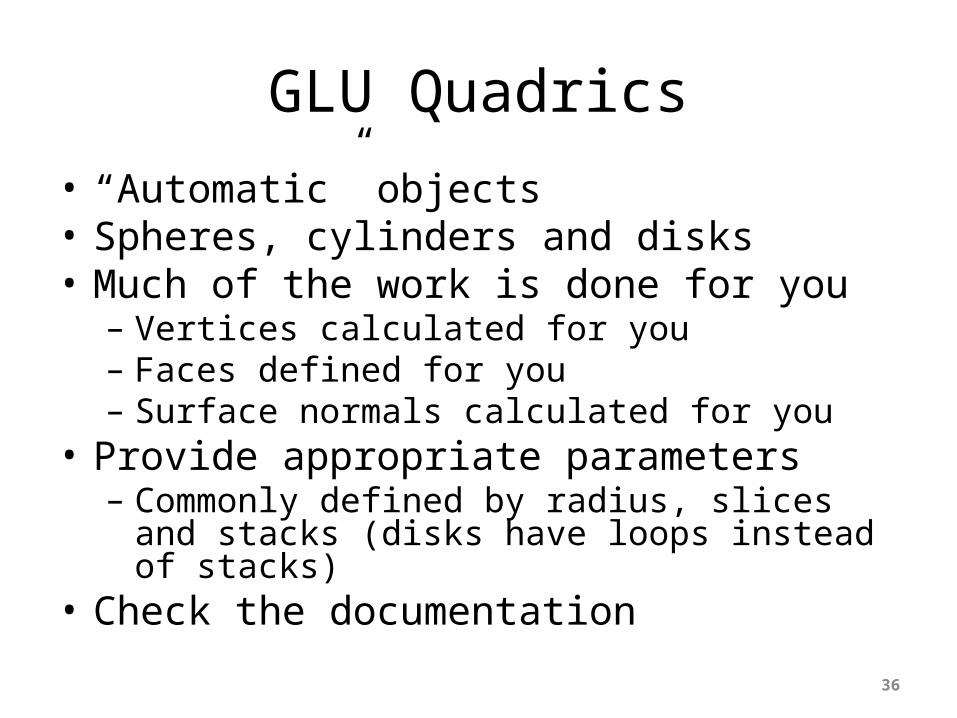
GLU Quadrics• “Automatic” objects• Spheres, cylinders and disks• Much of the work is done for you– Vertices calculated for you– Faces defined for you– Surface normals calculated for you
• Provide appropriate parameters– Commonly defined by radius, slices and stacks (disks
have loops instead of stacks)• Check the documentation
36
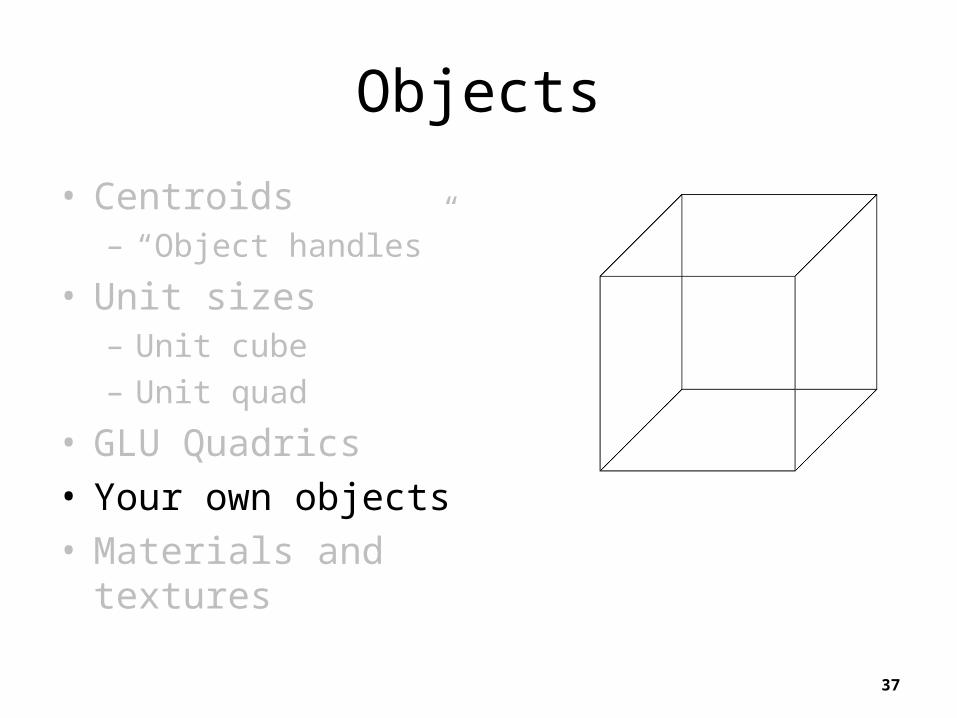
Objects
• Centroids– “Object handles”
• Unit sizes– Unit cube– Unit quad
• GLU Quadrics• Your own objects• Materials and textures
37
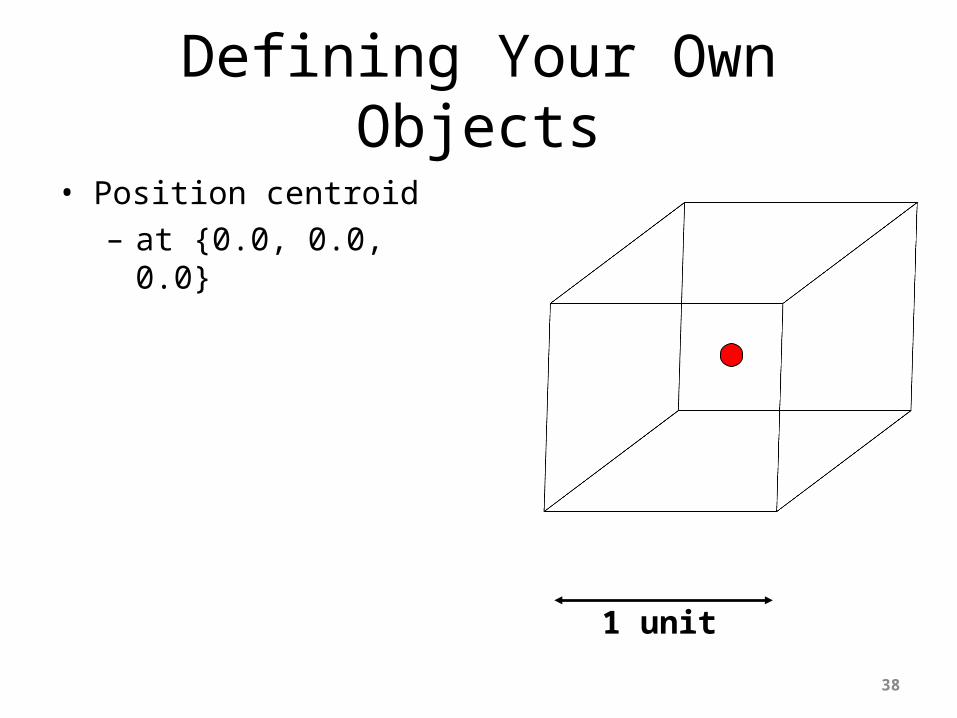
Defining Your Own Objects
• Position centroid– at {0.0, 0.0, 0.0}
1 unit
38
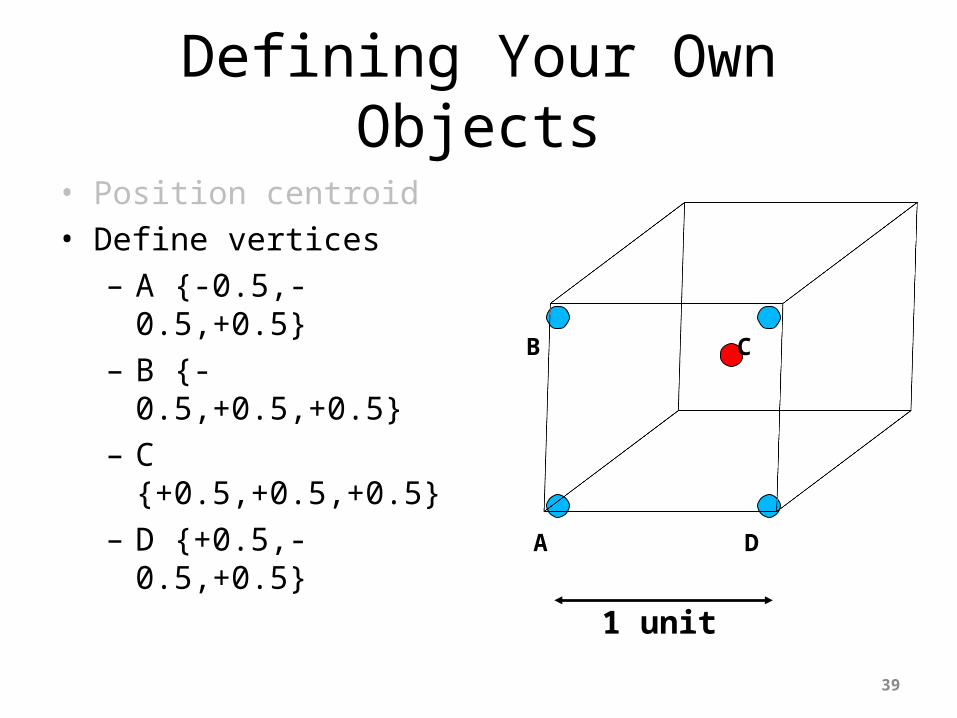
Defining Your Own Objects
• Position centroid• Define vertices
– A {-0.5,-0.5,+0.5}– B {-0.5,+0.5,+0.5}– C {+0.5,+0.5,+0.5}– D {+0.5,-0.5,+0.5}
A D
B C
1 unit
39
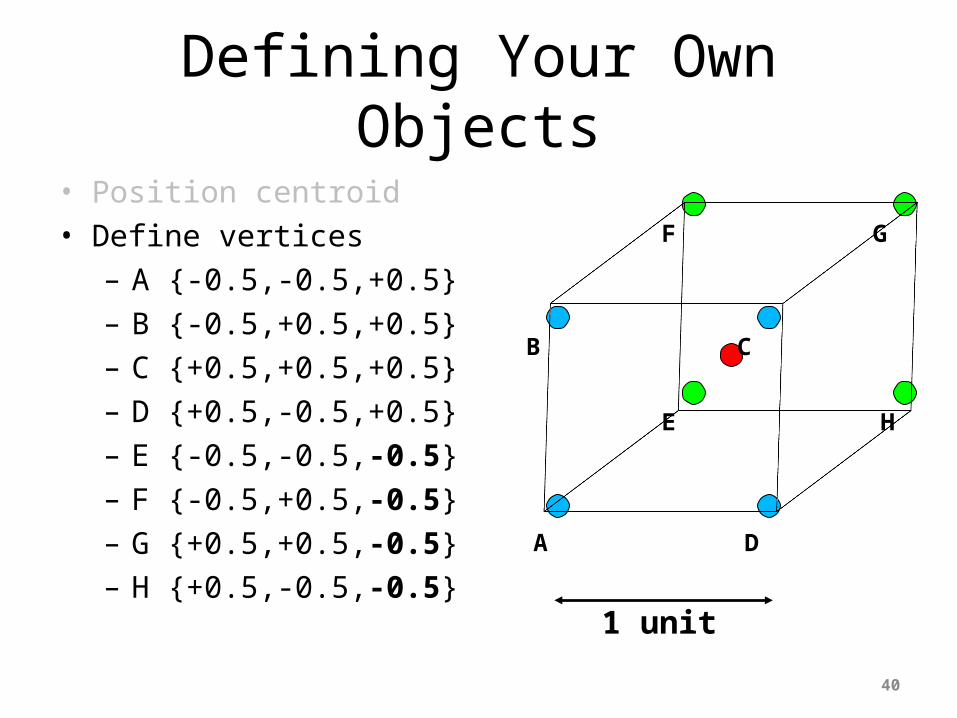
Defining Your Own Objects
• Position centroid• Define vertices
– A {-0.5,-0.5,+0.5}– B {-0.5,+0.5,+0.5}– C {+0.5,+0.5,+0.5}– D {+0.5,-0.5,+0.5}– E {-0.5,-0.5,-0.5}– F {-0.5,+0.5,-0.5}– G {+0.5,+0.5,-0.5}– H {+0.5,-0.5,-0.5}
A D
B C
E
F G
H
1 unit
40
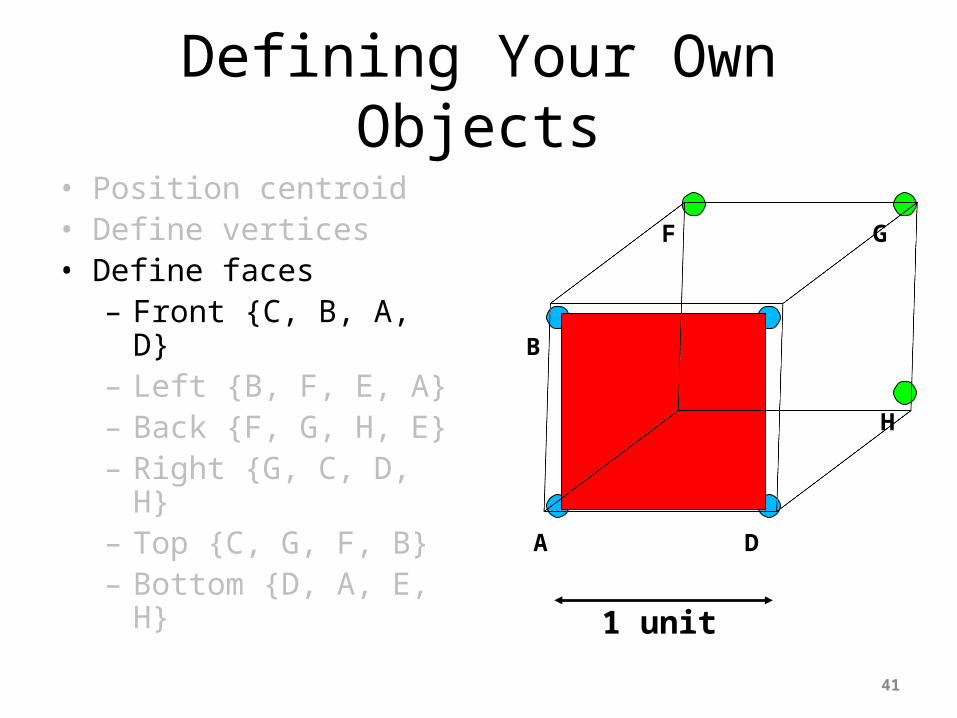
Defining Your Own Objects• Position centroid• Define vertices• Define faces
– Front {C, B, A, D}– Left {B, F, E, A}– Back {F, G, H, E}– Right {G, C, D, H}– Top {C, G, F, B}– Bottom {D, A, E, H} A D
B C
E
F G
H
1 unit
41
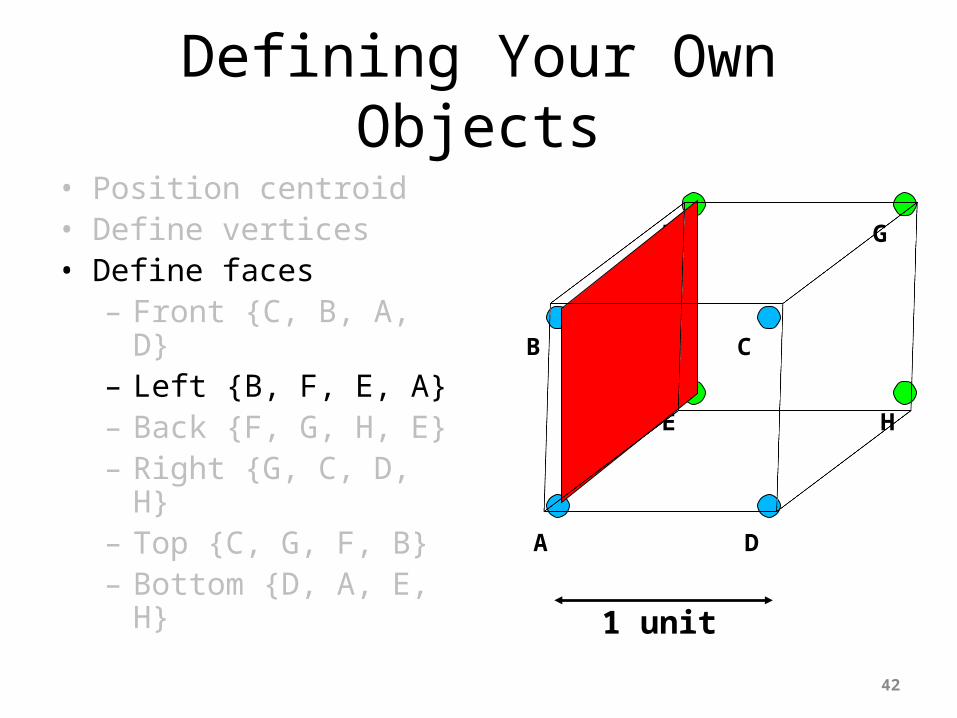
Defining Your Own Objects• Position centroid• Define vertices• Define faces
– Front {C, B, A, D}– Left {B, F, E, A}– Back {F, G, H, E}– Right {G, C, D, H}– Top {C, G, F, B}– Bottom {D, A, E, H} A D
B C
E
F G
H
1 unit
42
Defining Your Own Objects• Position centroid• Define vertices• Define faces
– Front {C, B, A, D}– Left {B, F, E, A}– Back {F, G, H, E}– Right {G, C, D, H}– Top {C, G, F, B}– Bottom {D, A, E, H} A D
B C
E
F G
H
1 unit
43
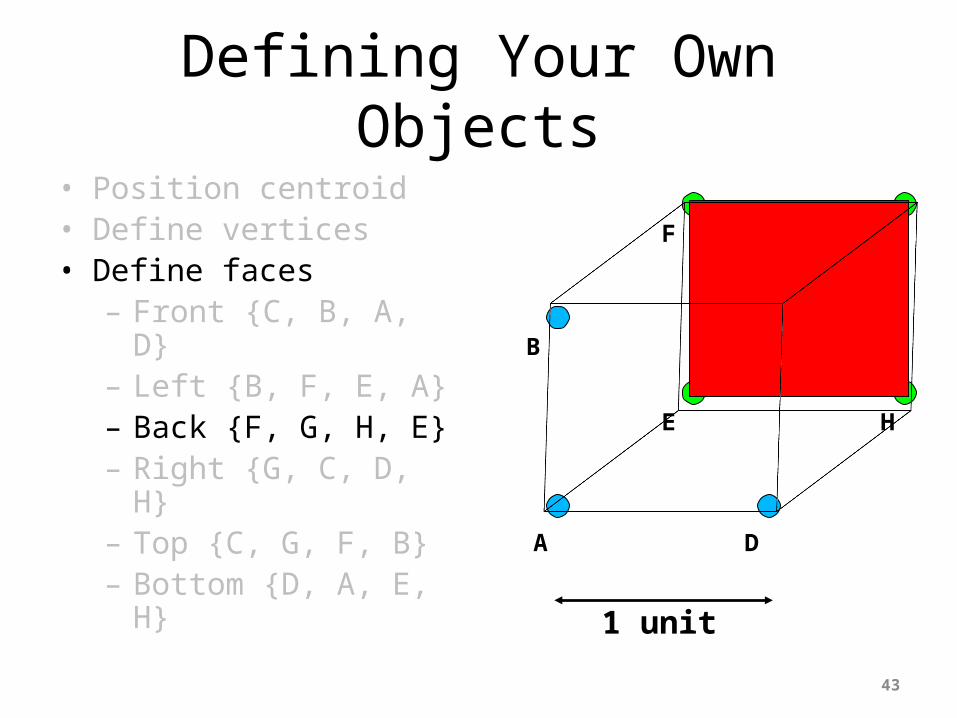
Defining Your Own Objects• Position centroid• Define vertices• Define faces
– Front {C, B, A, D}– Left {B, F, E, A}– Back {F, G, H, E}– Right {G, C, D, H}– Top {C, G, F, B}– Bottom {D, A, E, H} A D
B C
E
F G
H
1 unit
44

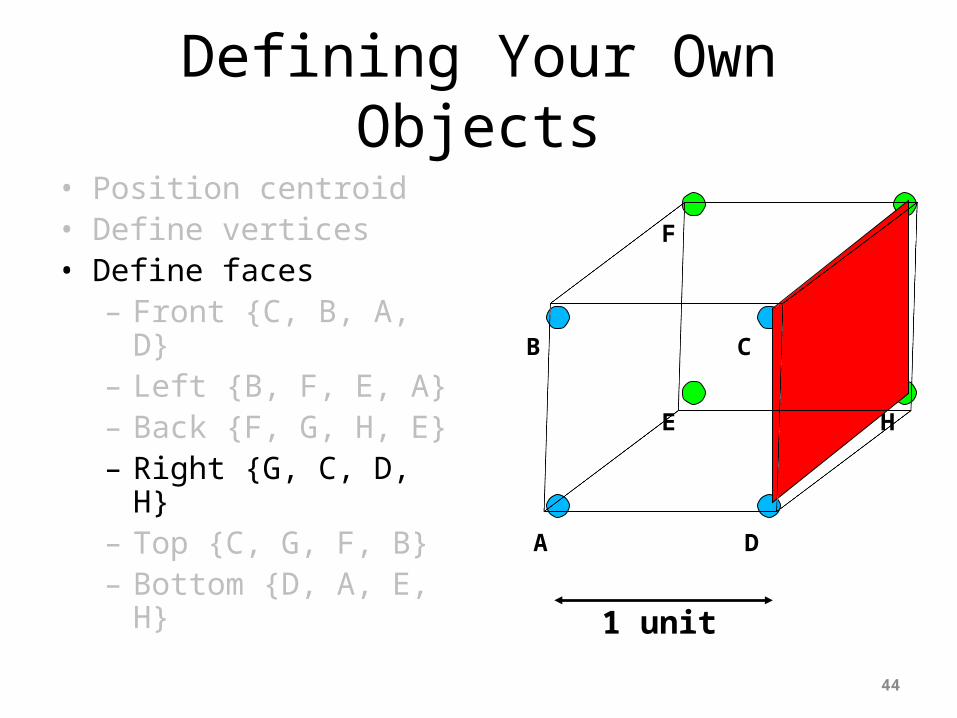
Defining Your Own Objects• Position centroid• Define vertices• Define faces
– Front {C, B, A, D}– Left {B, F, E, A}– Back {F, G, H, E}– Right {G, C, D, H}– Top {C, G, F, B}– Bottom {D, A, E, H} A D
B C
E
F G
H
1 unit
45
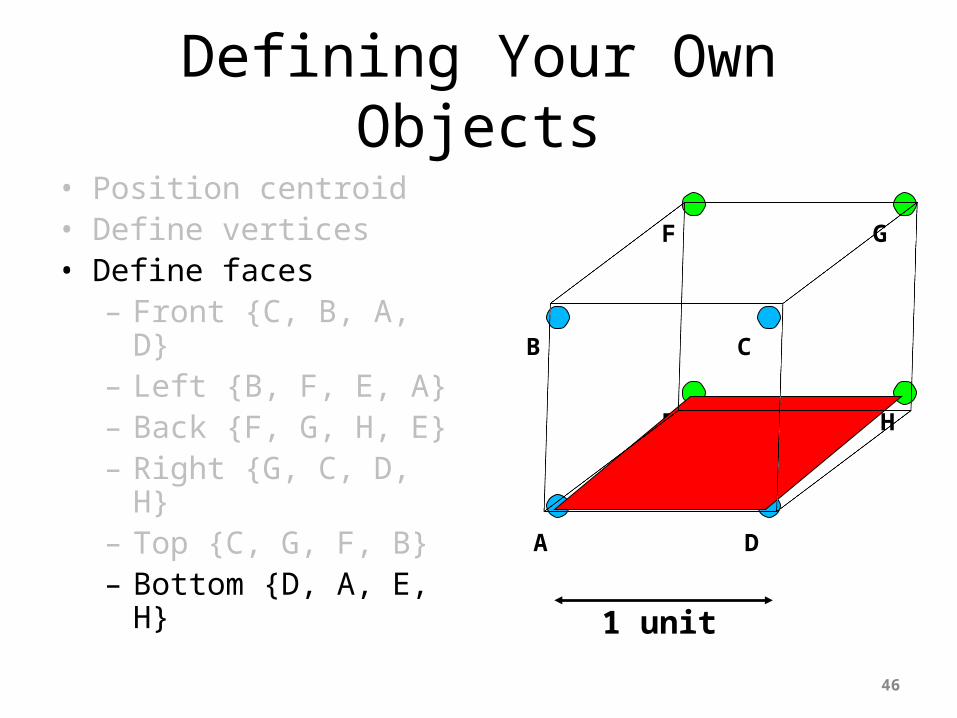
Defining Your Own Objects• Position centroid• Define vertices• Define faces
– Front {C, B, A, D}– Left {B, F, E, A}– Back {F, G, H, E}– Right {G, C, D, H}– Top {C, G, F, B}– Bottom {D, A, E, H} A D
B C
E
F G
H
1 unit
46
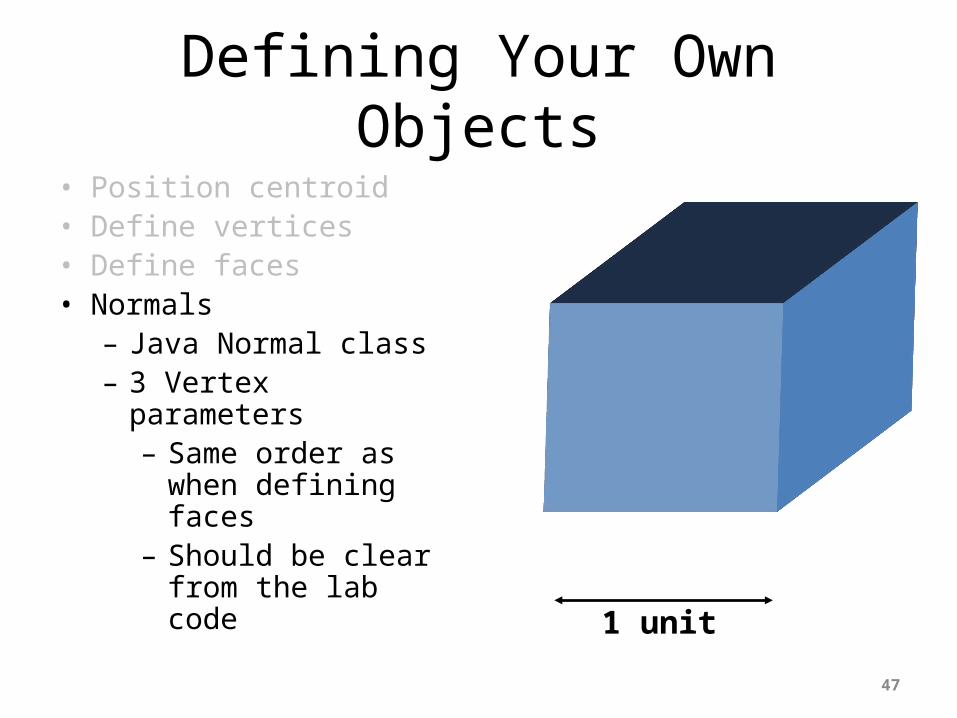
Defining Your Own Objects• Position centroid• Define vertices• Define faces• Normals
– Java Normal class– 3 Vertex parameters
– Same order as when defining faces
– Should be clear from the lab code
C
E
1 unit
47
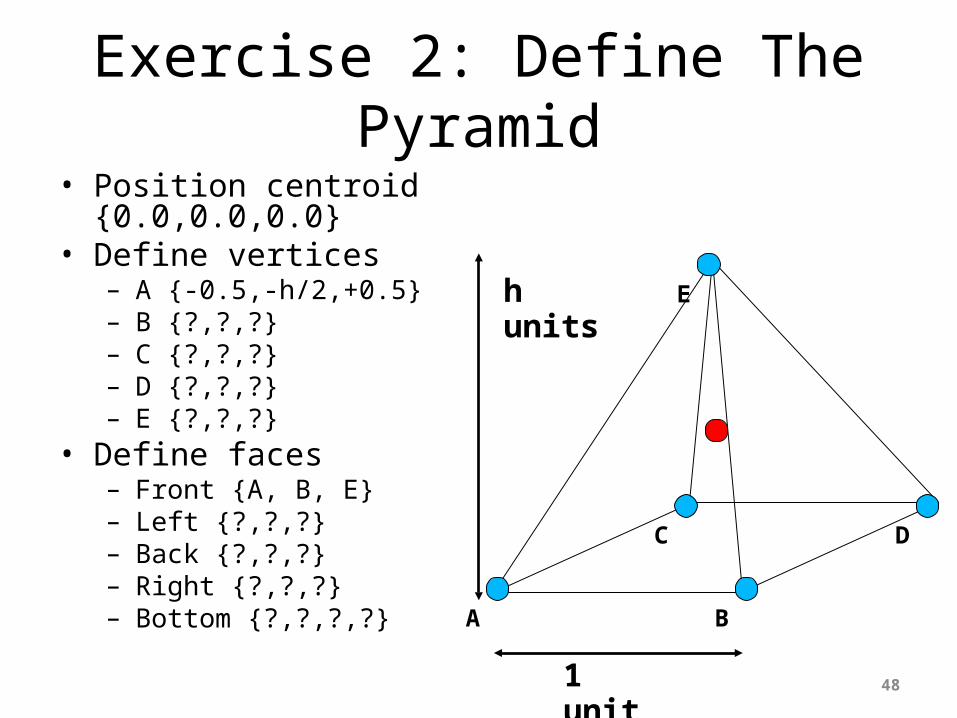
Exercise 2: Define The Pyramid• Position centroid {0.0,0.0,0.0}• Define vertices
– A {-0.5,-h/2,+0.5}– B {?,?,?} – C {?,?,?} – D {?,?,?}– E {?,?,?}
• Define faces– Front {A, B, E}– Left {?,?,?}– Back {?,?,?}– Right {?,?,?}– Bottom {?,?,?,?}
1 unit
h units
A B
C D
E
48
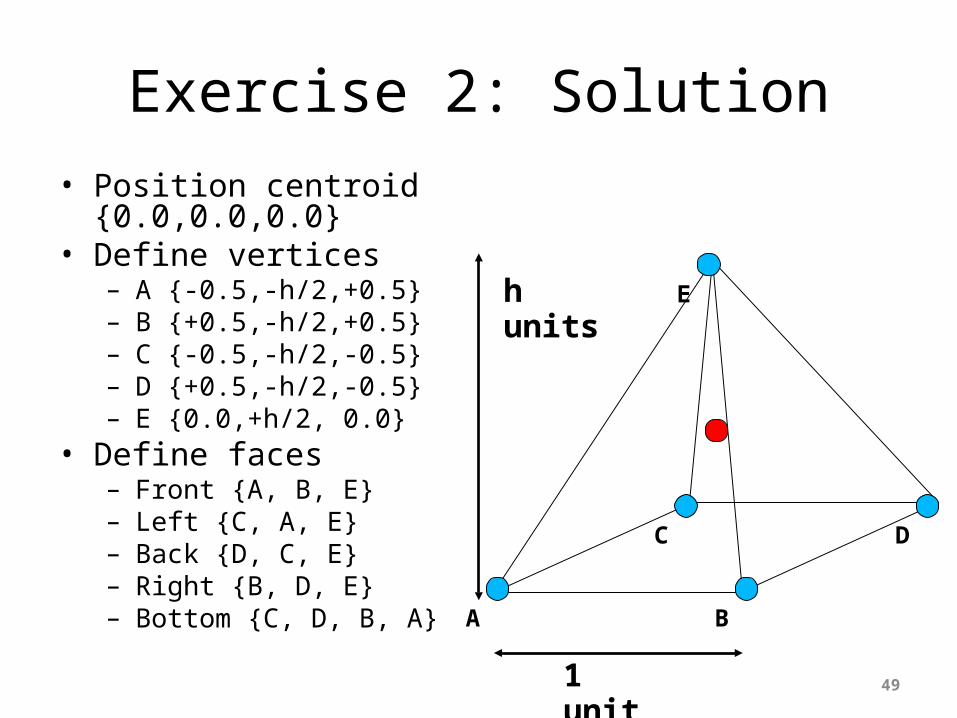
Exercise 2: Solution• Position centroid {0.0,0.0,0.0}• Define vertices
– A {-0.5,-h/2,+0.5}– B {+0.5,-h/2,+0.5} – C {-0.5,-h/2,-0.5} – D {+0.5,-h/2,-0.5}– E {0.0,+h/2, 0.0}
• Define faces– Front {A, B, E}– Left {C, A, E}– Back {D, C, E}– Right {B, D, E}– Bottom {C, D, B, A}
1 unit
h units
A B
C D
E
49
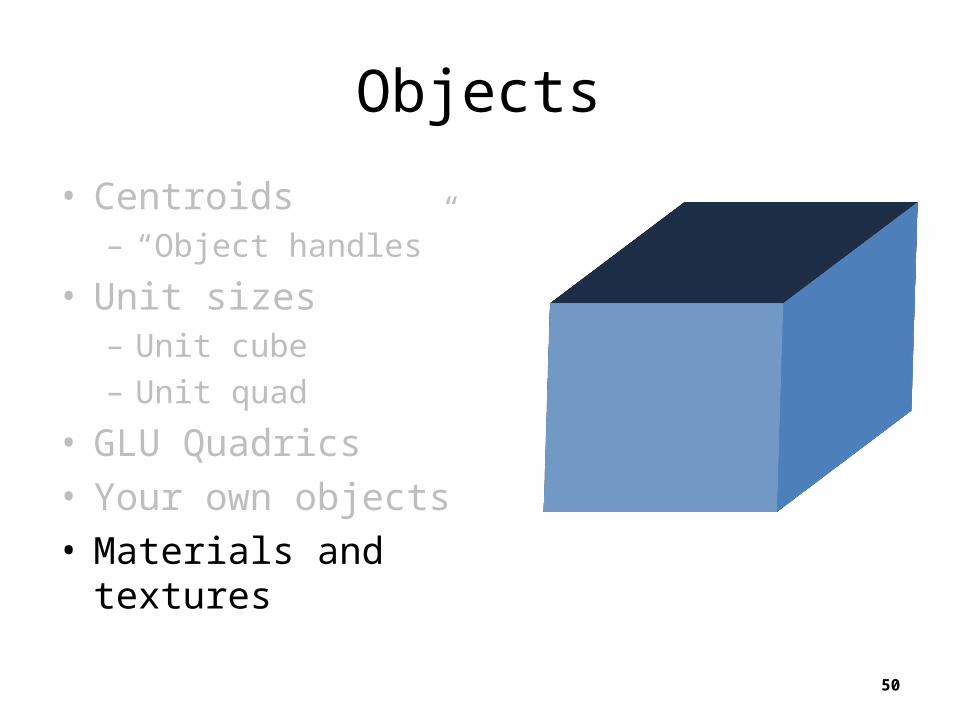
Objects
• Centroids– “Object handles”
• Unit sizes– Unit cube– Unit quad
• GLU Quadrics• Your own objects• Materials and textures
50
Materials And Textures
• Did you remember to KISS?• Use materials and not colours– More marks for you!– Make sure you’ve removed any glColor calls
• Use Nate Robins’ online tutorial programs– Interactive– Choose material properties for your objects
• Only texture square faces– Ask in the labs for help with other shapes
51
Paper Design
• Pencil and paper– Remember to KISS!– Start in 2D and move to 3D later– Use different colours
• Understand your scene as:– Scene graph– Objects– Animations
52
Animations
• 2 types of animation1. User controlled
animation2. Scripted animation
53
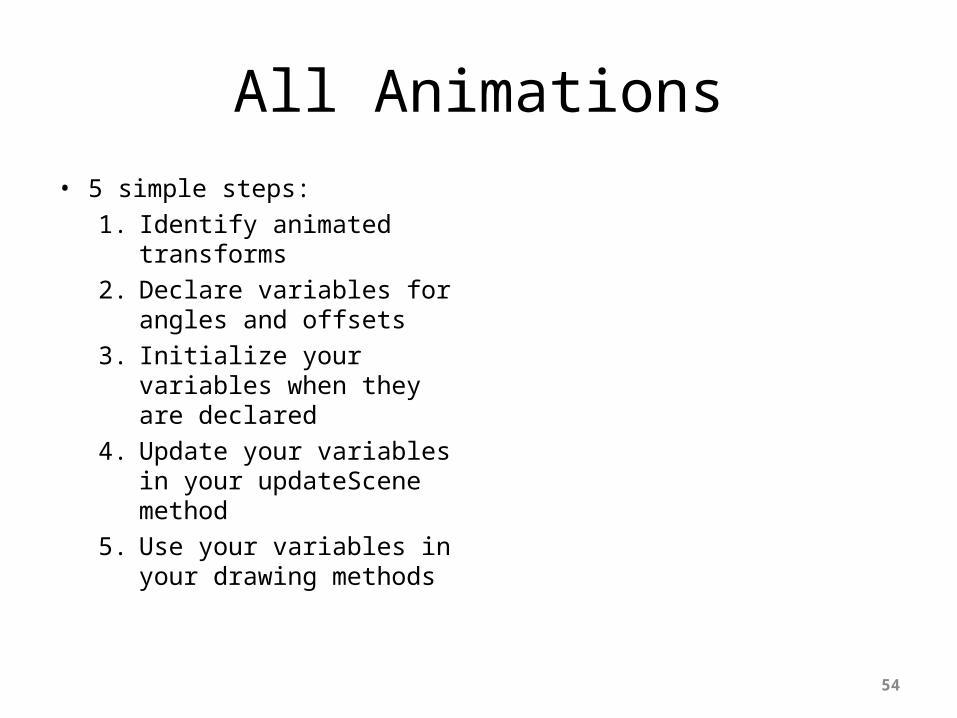
All Animations• 5 simple steps:
1. Identify animated transforms
2. Declare variables for angles and offsets
3. Initialize your variables when they are declared
4. Update your variables in your updateScene method
5. Use your variables in your drawing methods
54
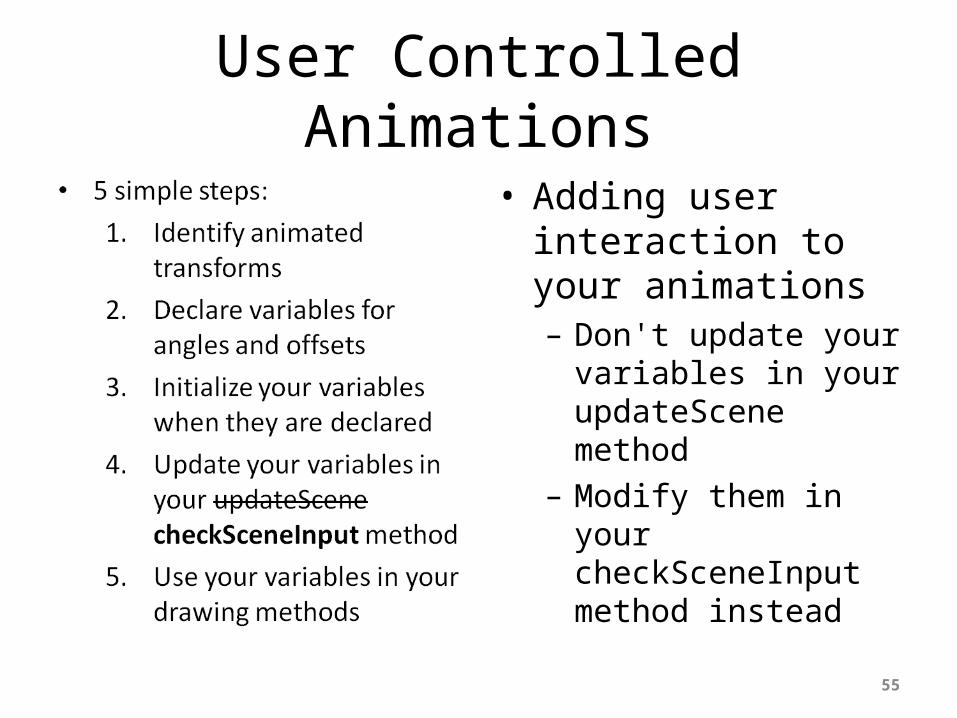
User Controlled Animations
• Adding user interaction to your animations– Don't update your
variables in your updateScene method
– Modify them in your checkSceneInput method instead
55

Scripted Animations• 5 simple steps:
1. Identify animated transforms
2. Declare variables for angles and offsets
3. Initialize your variables when they are declared
4. Update your variables in your updateScene method
5. Use your variables in your drawing methods
• Use animation scripts in your updateScene method to change your scene at runtime according to a set of predefined rules
56
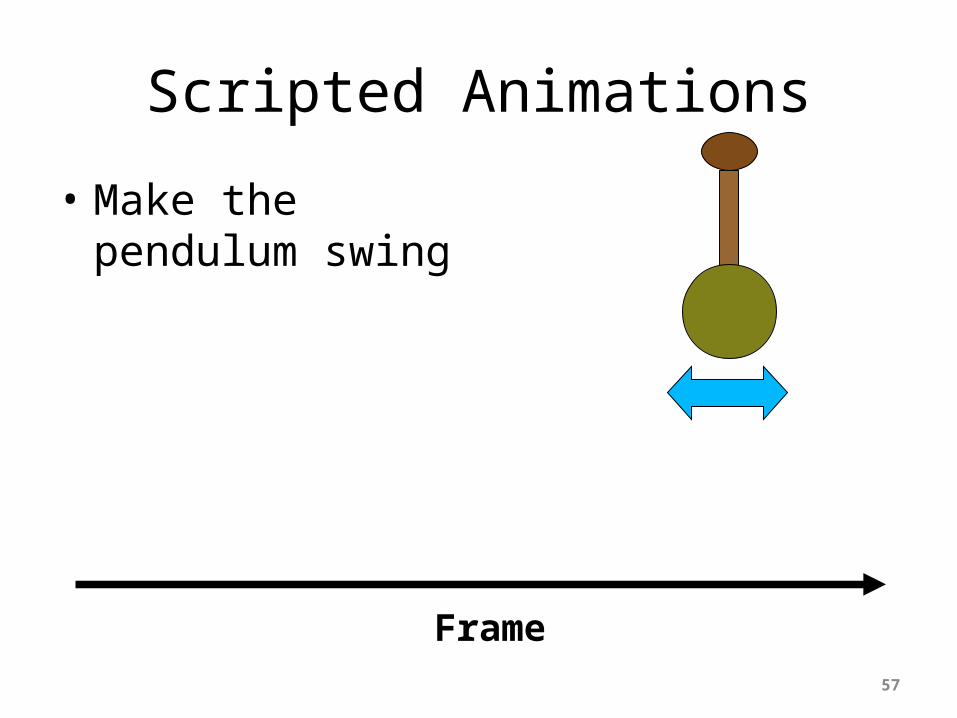
Scripted Animations
• Make the pendulum swing
Frame57
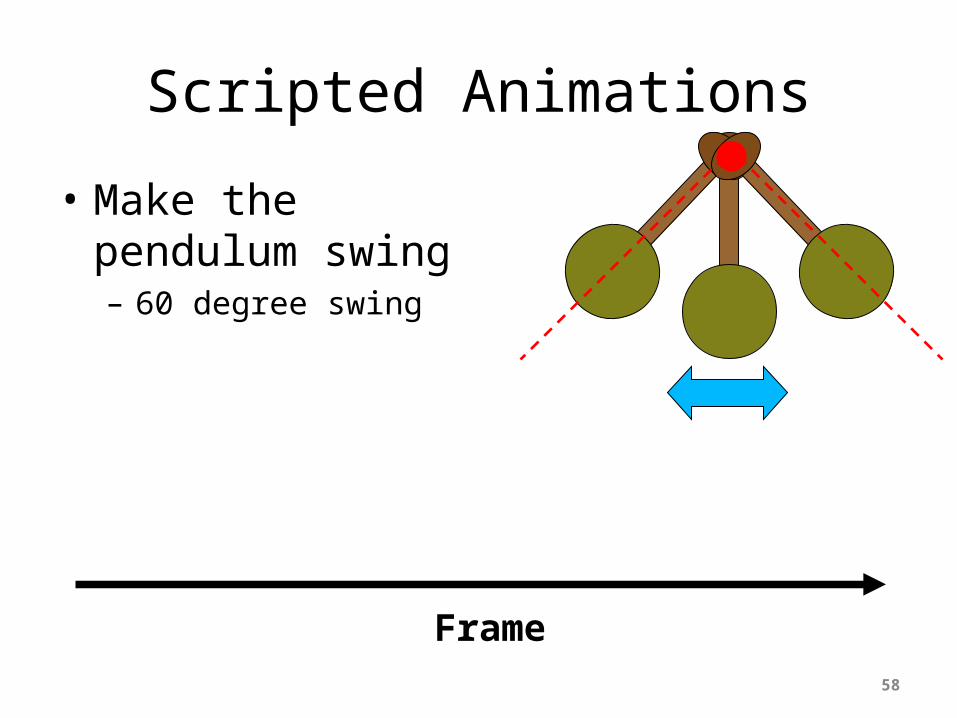
Scripted Animations
• Make the pendulum swing– 60 degree swing
Frame58
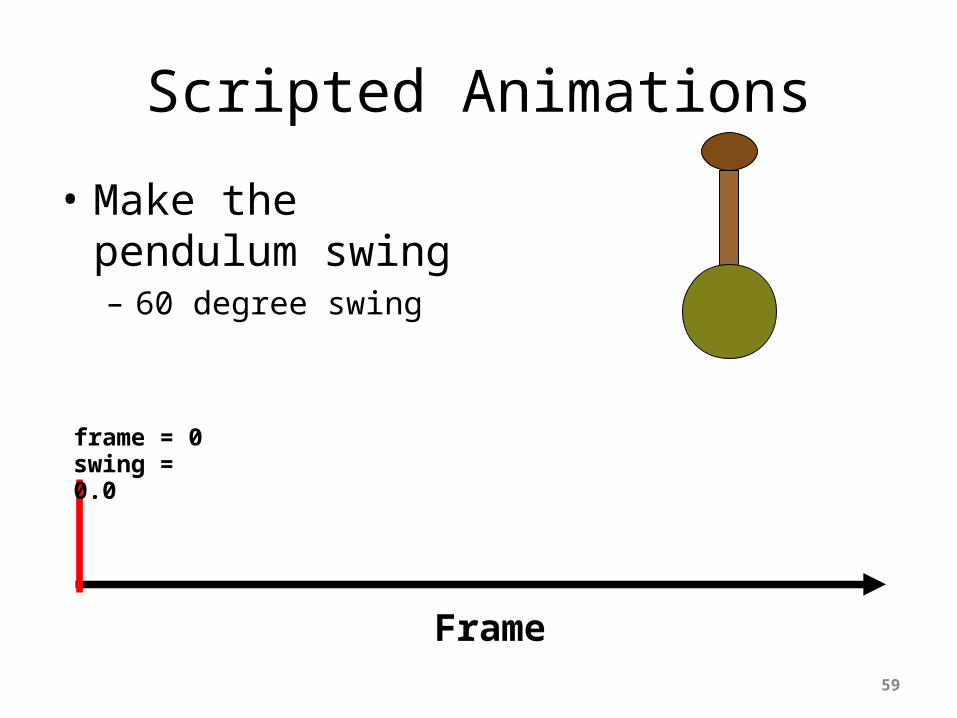
Scripted Animations
• Make the pendulum swing– 60 degree swing
Frame
frame = 0swing = 0.0
59
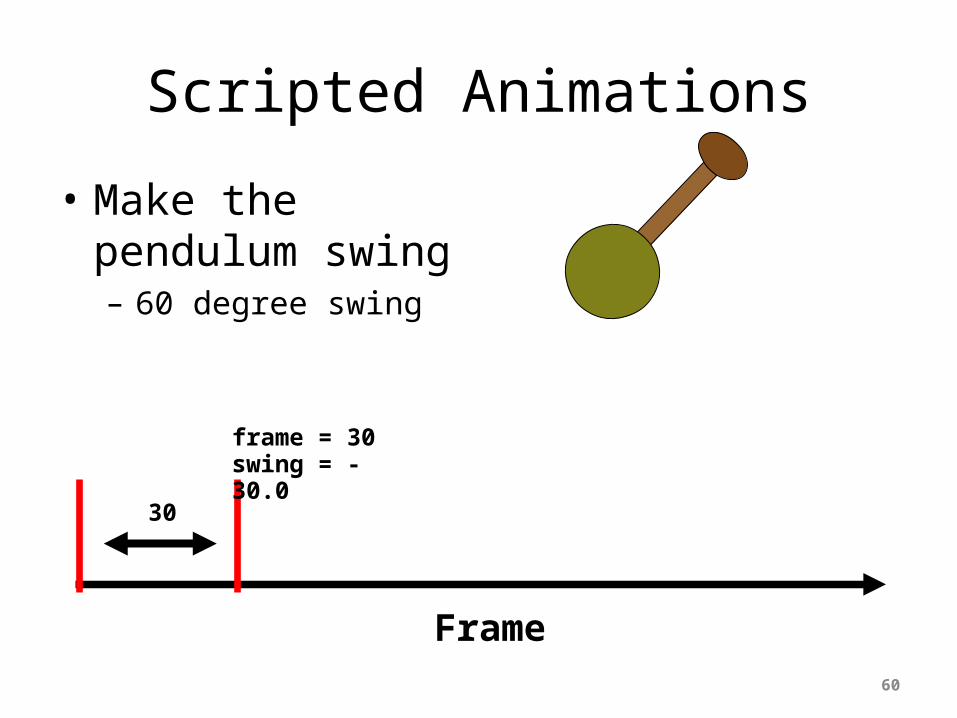
Scripted Animations
• Make the pendulum swing– 60 degree swing
Frame
frame = 30swing = -30.0
30
60

Scripted Animations
• Make the pendulum swing– 60 degree swing
Frame
frame = 90swing = +30.0
30 60
61

Scripted Animations
• Make the pendulum swing– 60 degree swing
Frame
frame = 120swing = 0.0
30 60 30
62
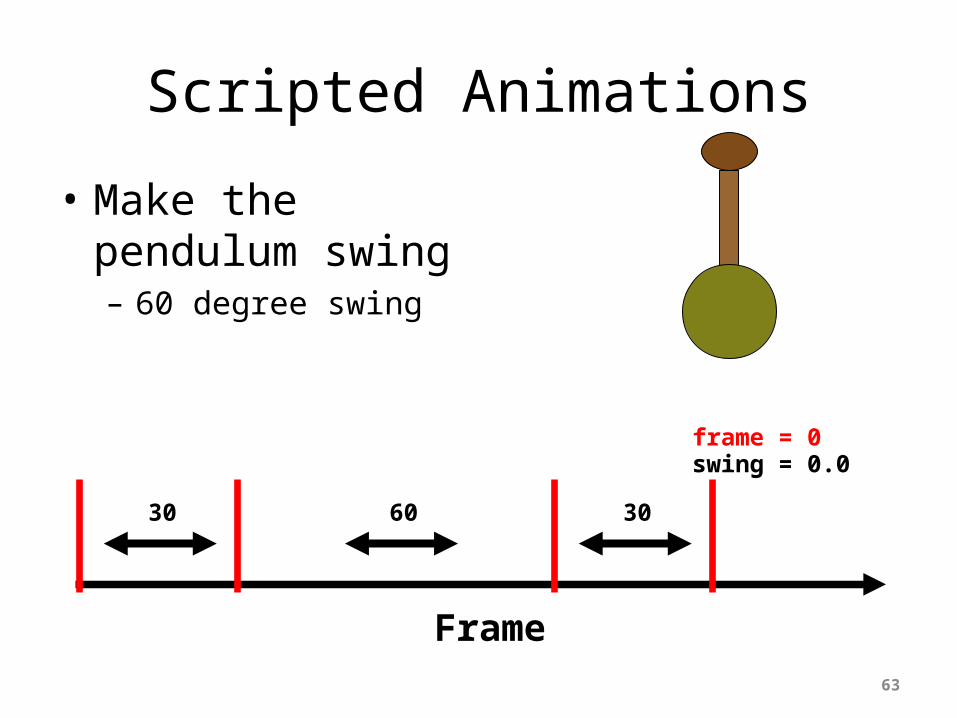
Scripted Animations
• Make the pendulum swing– 60 degree swing
Frame
frame = 0swing = 0.0
30 60 30
63
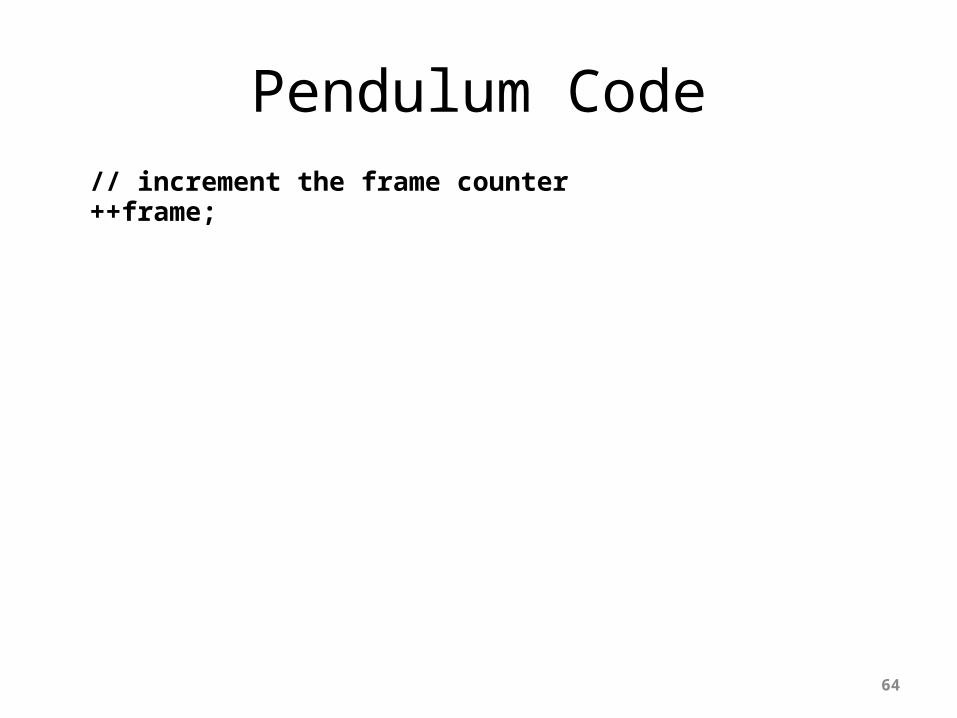
Pendulum Code // increment the frame counter ++frame;
64
Pendulum Code // increment the frame counter ++frame;
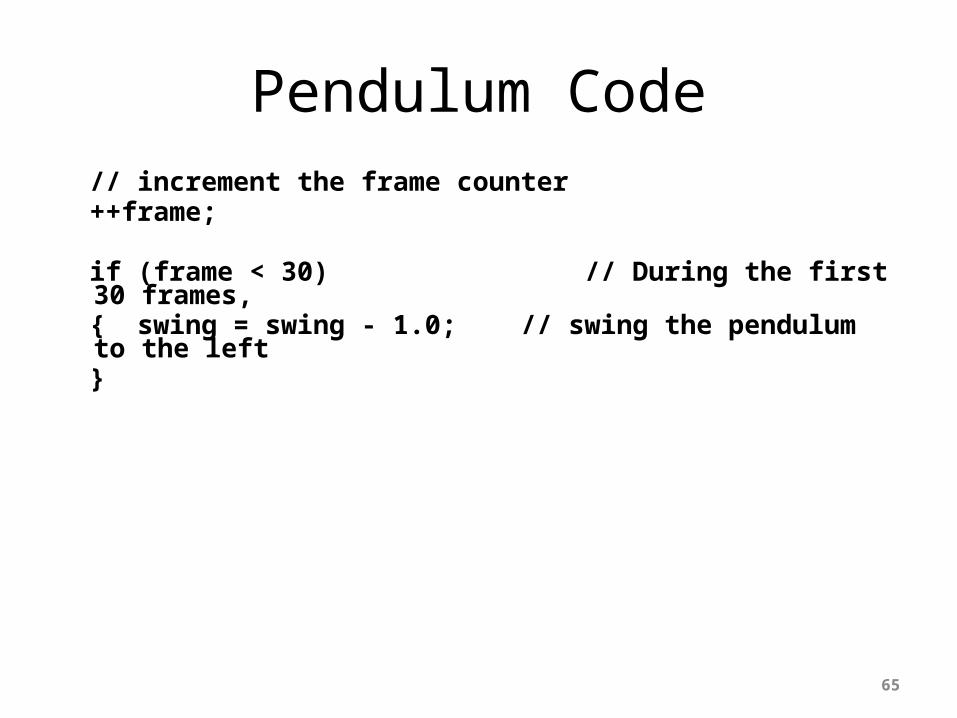
if (frame < 30) // During the first 30 frames, { swing = swing - 1.0; // swing the pendulum to the left }
65
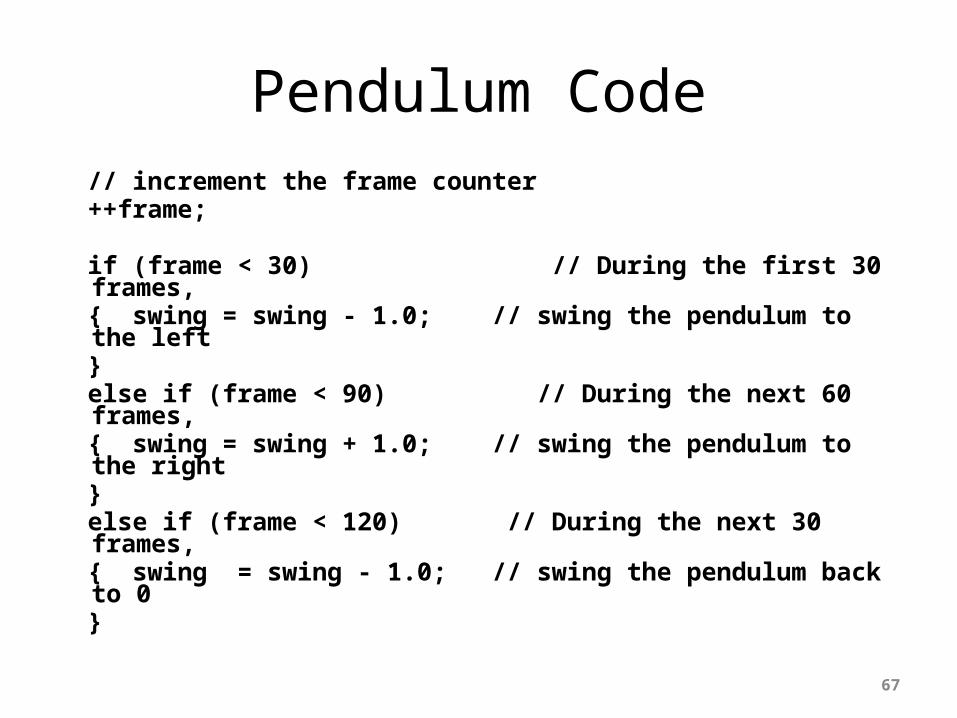
Pendulum Code // increment the frame counter ++frame;
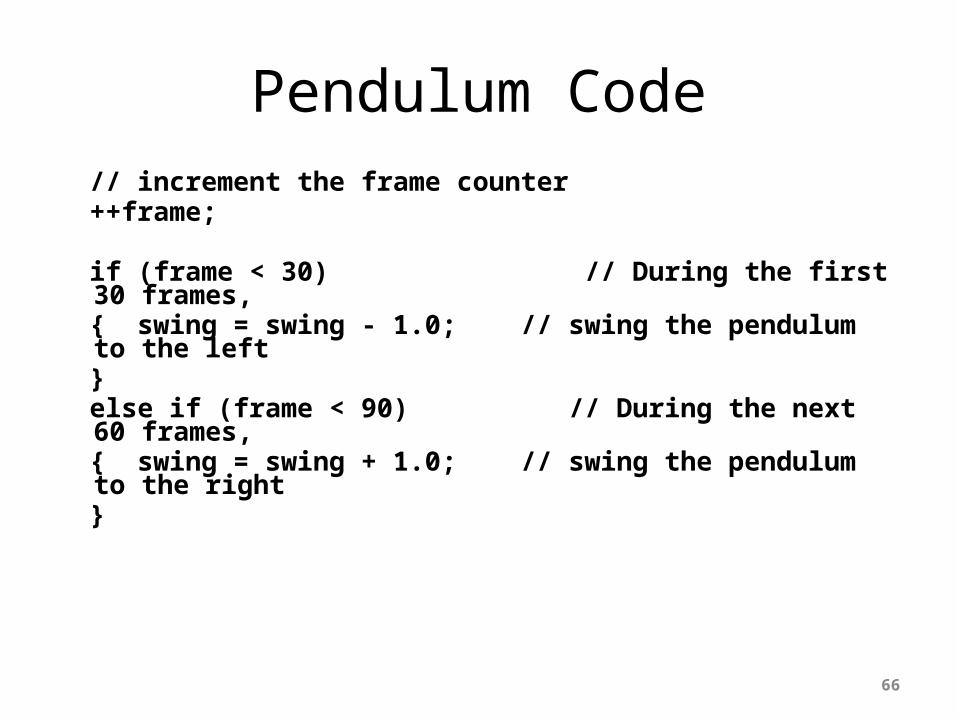
if (frame < 30) // During the first 30 frames, { swing = swing - 1.0; // swing the pendulum to the left } else if (frame < 90) // During the next 60 frames, { swing = swing + 1.0; // swing the pendulum to the right }
66
Pendulum Code // increment the frame counter ++frame;
if (frame < 30) // During the first 30 frames, { swing = swing - 1.0; // swing the pendulum to the left } else if (frame < 90) // During the next 60 frames, { swing = swing + 1.0; // swing the pendulum to the right } else if (frame < 120) // During the next 30 frames, { swing = swing - 1.0; // swing the pendulum back to 0 }
67
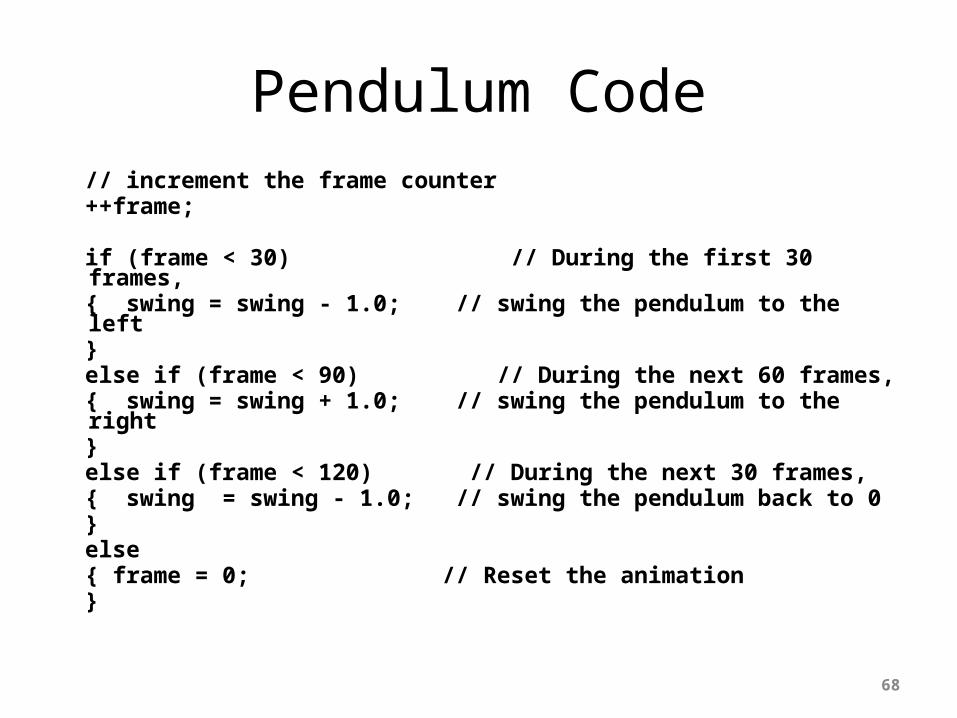
Pendulum Code // increment the frame counter ++frame;
if (frame < 30) // During the first 30 frames, { swing = swing - 1.0; // swing the pendulum to the left } else if (frame < 90) // During the next 60 frames, { swing = swing + 1.0; // swing the pendulum to the right } else if (frame < 120) // During the next 30 frames, { swing = swing - 1.0; // swing the pendulum back to 0 } else { frame = 0; // Reset the animation }
68
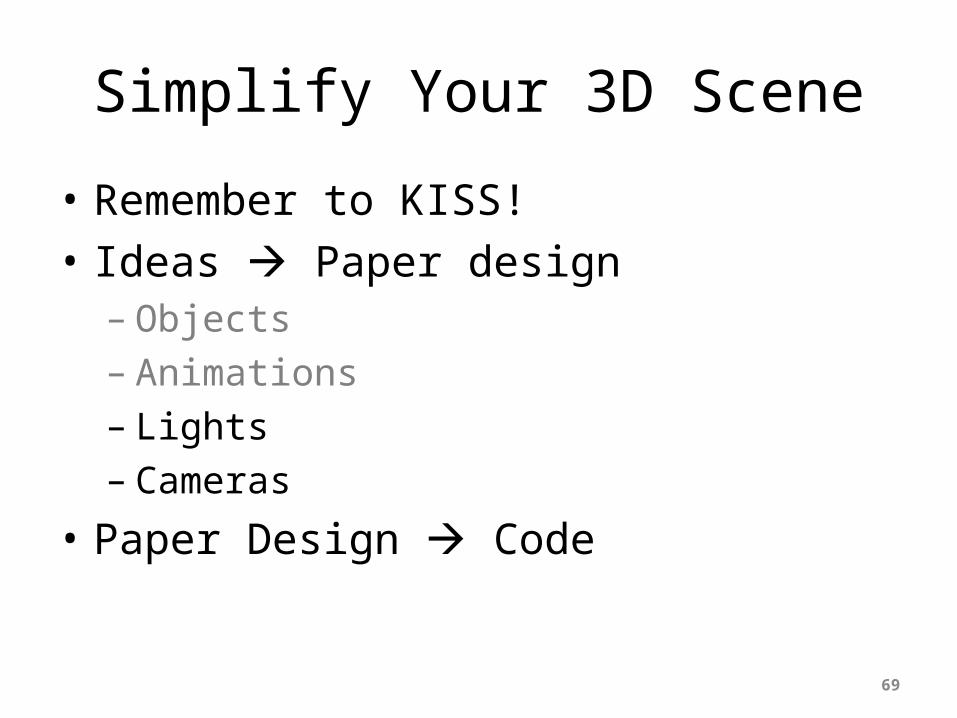
Simplify Your 3D Scene
• Remember to KISS!• Ideas Paper design– Objects– Animations– Lights– Cameras
• Paper Design Code
69
Lights
• Global properties• Per-light properties
70
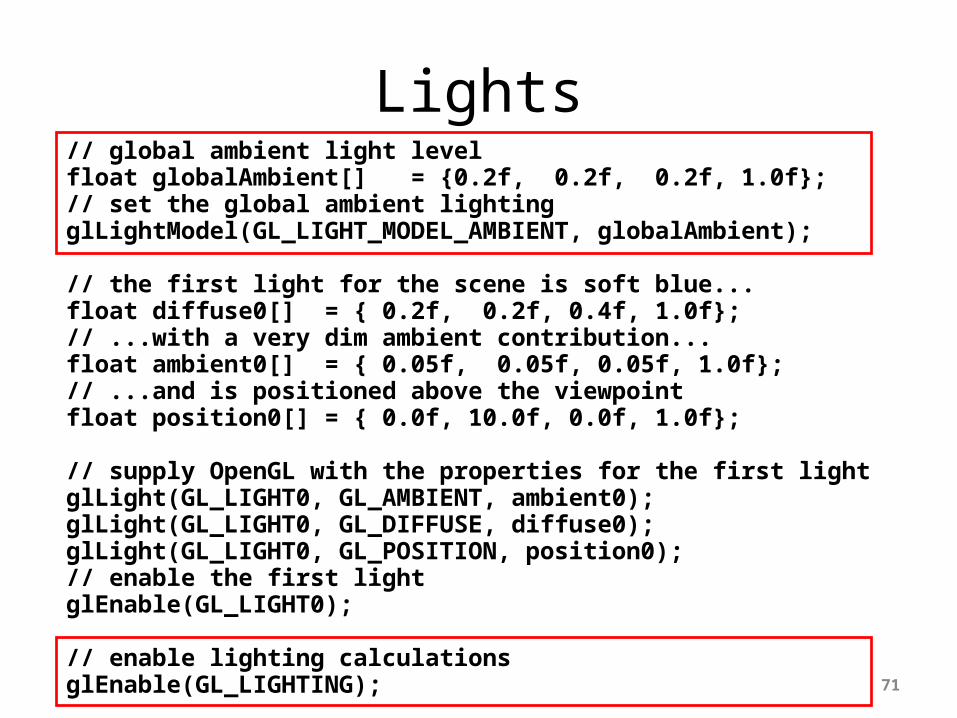
Lights// global ambient light levelfloat globalAmbient[] = {0.2f, 0.2f, 0.2f, 1.0f};// set the global ambient lightingglLightModel(GL_LIGHT_MODEL_AMBIENT, globalAmbient);
// the first light for the scene is soft blue...float diffuse0[] = { 0.2f, 0.2f, 0.4f, 1.0f};// ...with a very dim ambient contribution...float ambient0[] = { 0.05f, 0.05f, 0.05f, 1.0f};// ...and is positioned above the viewpointfloat position0[] = { 0.0f, 10.0f, 0.0f, 1.0f};
// supply OpenGL with the properties for the first lightglLight(GL_LIGHT0, GL_AMBIENT, ambient0);glLight(GL_LIGHT0, GL_DIFFUSE, diffuse0);glLight(GL_LIGHT0, GL_POSITION, position0);// enable the first lightglEnable(GL_LIGHT0);
// enable lighting calculationsglEnable(GL_LIGHTING); 71

Lights
• Global properties• Per-light properties– 8 lights in total– Named GL_LIGHT0 to GL_LIGHT7– Describe, enable and disable each one separately
72
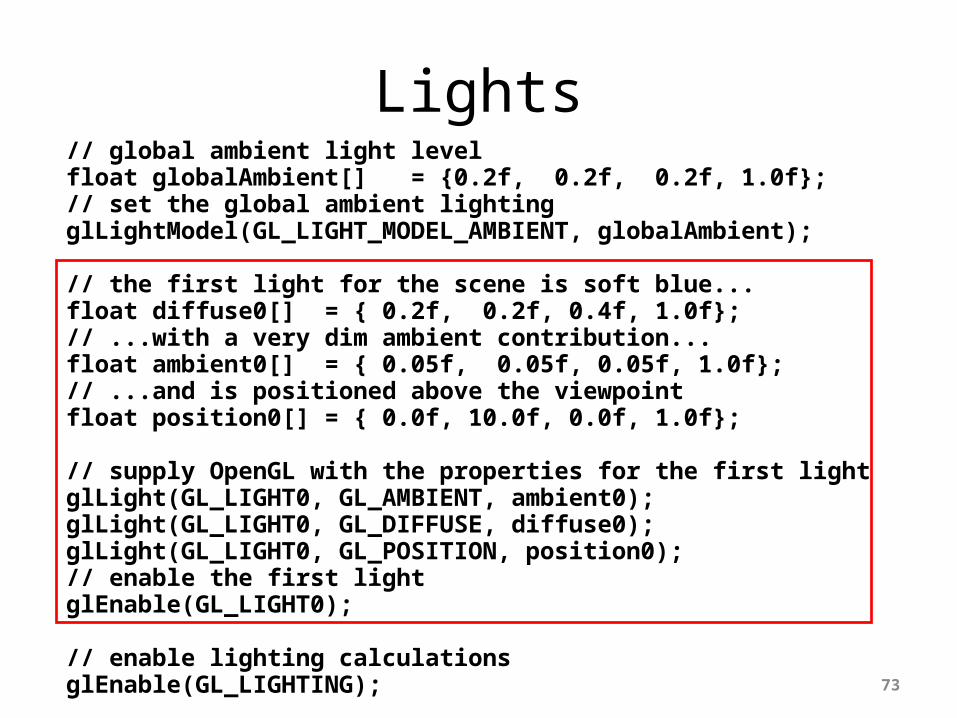
Lights// global ambient light levelfloat globalAmbient[] = {0.2f, 0.2f, 0.2f, 1.0f};// set the global ambient lightingglLightModel(GL_LIGHT_MODEL_AMBIENT, globalAmbient);
// the first light for the scene is soft blue...float diffuse0[] = { 0.2f, 0.2f, 0.4f, 1.0f};// ...with a very dim ambient contribution...float ambient0[] = { 0.05f, 0.05f, 0.05f, 1.0f};// ...and is positioned above the viewpointfloat position0[] = { 0.0f, 10.0f, 0.0f, 1.0f};
// supply OpenGL with the properties for the first lightglLight(GL_LIGHT0, GL_AMBIENT, ambient0);glLight(GL_LIGHT0, GL_DIFFUSE, diffuse0);glLight(GL_LIGHT0, GL_POSITION, position0);// enable the first lightglEnable(GL_LIGHT0);
// enable lighting calculationsglEnable(GL_LIGHTING); 73
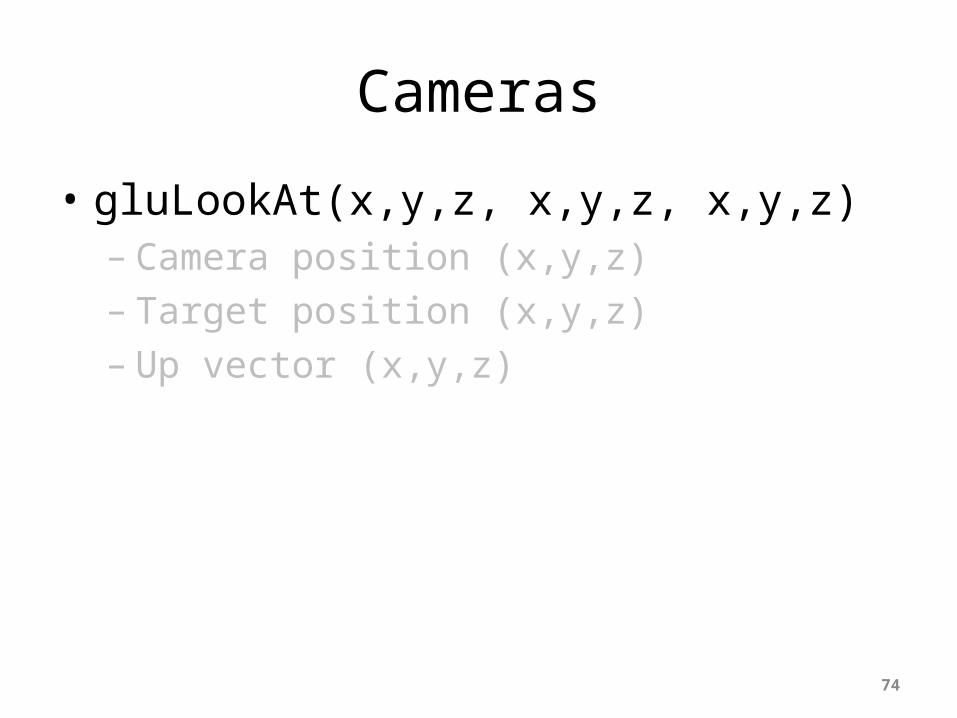
Cameras
• gluLookAt(x,y,z, x,y,z, x,y,z)– Camera position (x,y,z)– Target position (x,y,z)– Up vector (x,y,z)
74
Cameras
• gluLookAt– Camera position (x,y,z)– Target position (x,y,z)– Up vector (x,y,z)
75
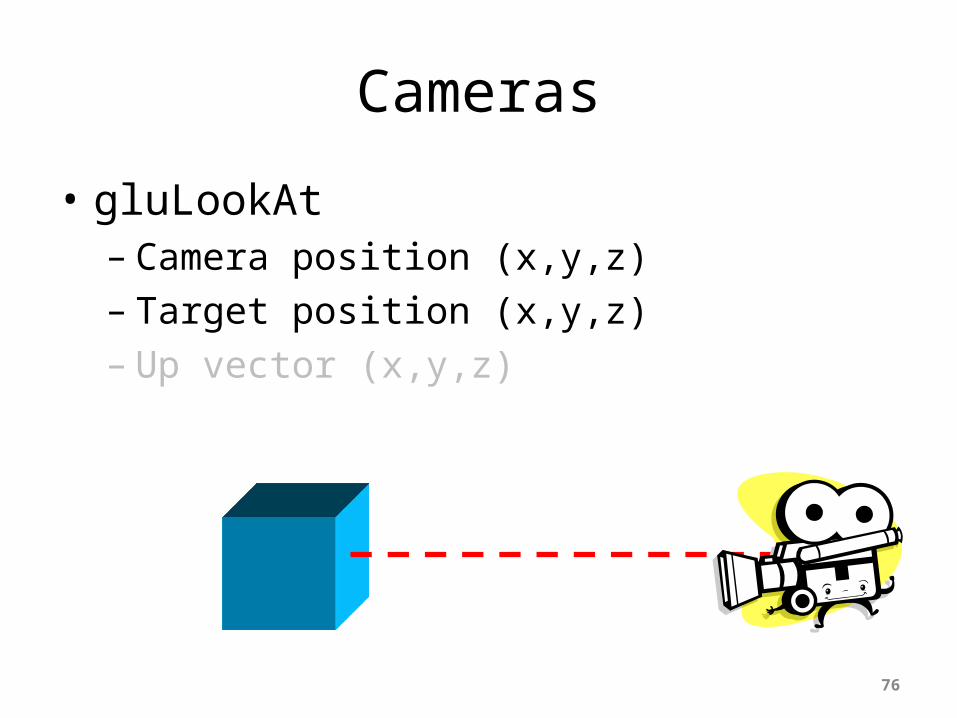
Cameras
• gluLookAt– Camera position (x,y,z)– Target position (x,y,z)– Up vector (x,y,z)
76

Cameras
• gluLookAt– Camera position (x,y,z)– Target position (x,y,z)– Up vector (x,y,z)• (0.0,1.0,0.0) in most cases
77
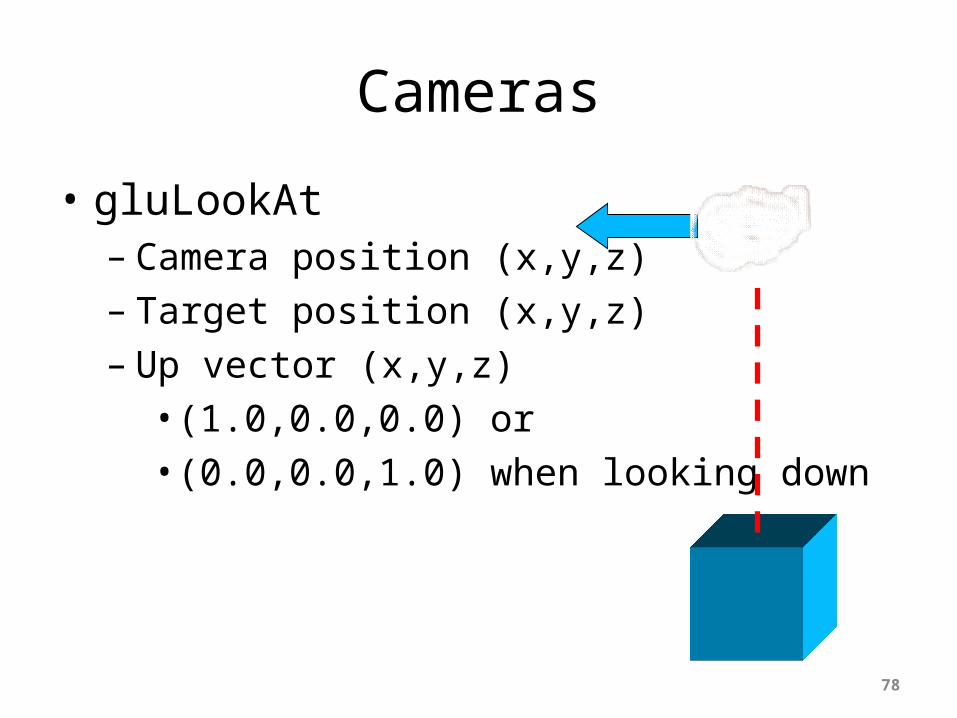
Cameras
• gluLookAt– Camera position (x,y,z)– Target position (x,y,z)– Up vector (x,y,z)• (1.0,0.0,0.0) or• (0.0,0.0,1.0) when looking down
78
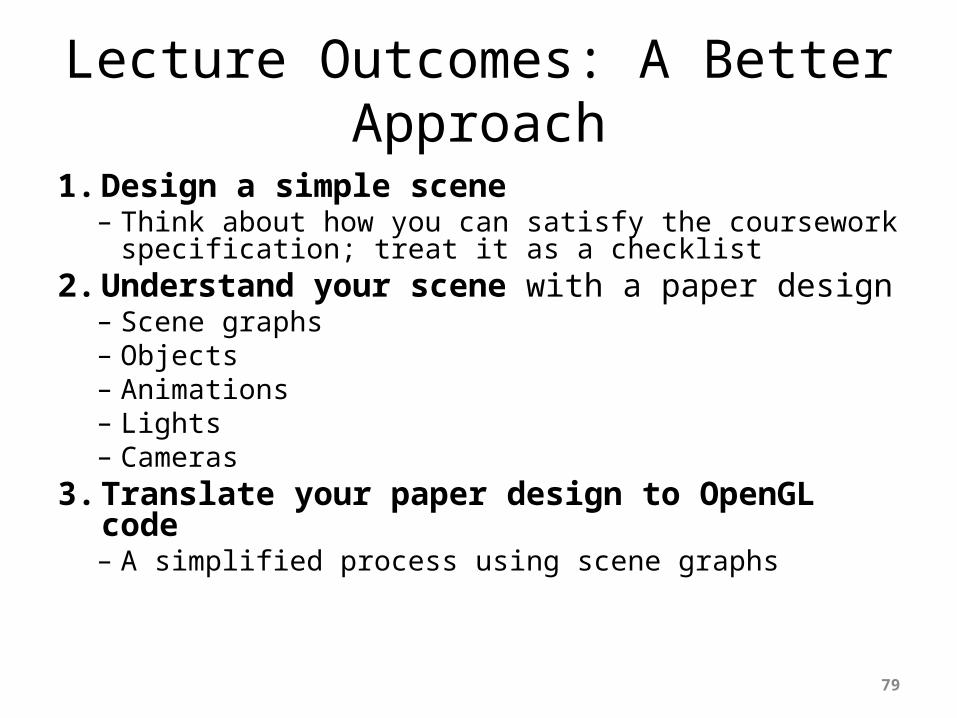
Lecture Outcomes: A Better Approach
1. Design a simple scene– Think about how you can satisfy the coursework
specification; treat it as a checklist2. Understand your scene with a paper design– Scene graphs– Objects– Animations– Lights– Cameras
3. Translate your paper design to OpenGL code– A simplified process using scene graphs
79
Where To Get Help• Did you remember to KISS?• Return to pencil and paper• Labs
– Lab notes– Lab examples– Lab demonstrators
• Internet and others– But be careful to avoid
collusion– It’s a bit obvious…
• Remi ...
80
Lecture Summary• The specification
• Approaching the problem– Simplification– Paper designs as stepping stones– Scene graphs– Objects– Animations– Lights– Cameras
• Lecture outcomes• Where to get further help
81

Thanks for listening
82
![[F. M. Cornford] Principium Sapientiae the Origin(BookFi.org)](https://static.fdocuments.us/doc/165x107/55cf9474550346f57ba21eb6/f-m-cornford-principium-sapientiae-the-originbookfiorg.jpg)