Circulation I Sierra Training Manual - Library...
33
1 Circulation I Sierra Training Manual PrairieCat website: http://support.prairiecat.info/ Copyright © 2009 by Innovative Interfaces, Inc. This publication is supplied for the exclusive use of customers of Innovative Interfaces with the understanding that it shall not be shown or distributed to anyone outside of the customer's organization without the prior written permission of Innovative Interfaces. This publication may be copied only if the copies are for the exclusive use of staff members of libraries that have purchased the Innovative system. Last PrairieCat Revision Date: 3/12/14
Transcript of Circulation I Sierra Training Manual - Library...

1
Circulation I
Sierra Training Manual
PrairieCat website: http://support.prairiecat.info/
Copyright © 2009 by Innovative Interfaces, Inc.
This publication is supplied for the exclusive use of customers of Innovative Interfaces with
the understanding that it shall not be shown or distributed to anyone outside of the
customer's organization without the prior written permission of Innovative Interfaces. This
publication may be copied only if the copies are for the exclusive use of staff members of
libraries that have purchased the Innovative system.
Last PrairieCat Revision Date: 3/12/14

2
TABLE OF CONTENTS
Overview ______________________________________________________________ 4
Log In ___________________________________________________________ 4
Sierra Circulation Window ____________________________________________ 4
Custom Settings and Preferences ______________________________________ 5
New Record Templates ______________________________________________ 5
Record Structure _______________________________________________________ 5
Review Patron Record Fields __________________________________________ 5
Patron Records ________________________________________________________ 6
Sample Patron Record _______________________________________________ 6
Review Item Record Fields ___________________________________________ 7
Sierra Circulation Modes _____________________________________________ 8
Circulation Desk Mode _____________________________________________ 8
Patron Records ________________________________________________________ 8
Search for a Patron record ___________________________________________ 8
Create New Patron Record __________________________________________ 10
Copy a Patron Record ______________________________________________ 13
Check Out ____________________________________________________________ 13
Check Out Tab ____________________________________________________ 13
Checked-Out Items Tab ____________________________________________ 15
Fines _________________________________________________________________ 15
Collect money ____________________________________________________ 15
View Fines Paid ___________________________________________________ 16
Add a Fine (Manual Charge) _________________________________________ 17
Waive Fines ______________________________________________________ 18
Renew Material ________________________________________________________ 18
Renew with Patron ________________________________________________ 18
Renew without Patron ______________________________________________ 18
Holds ________________________________________________________________ 19
Place Bibliographic (Title) level holds - Copy returned soonest ______________ 20
Placing a hold from the Check Out (Circulation Desk) mode: ______________ 20
Placing a bibliographic level hold from Search/Holds mode _______________ 21
Placing multiple holds on the same title (e.g., book club holds) ____________ 23
3
Placing a hold on a multi-volume title (TV series, magazines, etc) in Sierra in
Search/Holds _____________________________________________________ 23
Placing a hold on a multi-volume title (TV series, magazines, etc) in Sierra starting
from the patron record ___________________________________________ 25
Place Item level Holds ______________________________________________ 28
Placing an item-level hold from Check Out (Circulation Desk) mode: ________ 28
Placing an item-level hold from Search/Holds mode: ____________________ 29
Modify Holds _____________________________________________________ 29
Cancelling Holds __________________________________________________ 29
Viewing Cancelled Holds __________________________________________ 30
Check in items with holds ___________________________________________ 30
Check In ______________________________________________________________ 31
Check in with Patron Present ________________________________________ 31
Check in without Patron Present ______________________________________ 32
Backdate Check Ins ________________________________________________ 32
Check in overdue items _____________________________________________ 32
Check in billed items _______________________________________________ 33

4
Overview
Sierra Circulation allows staff to do the following: check out items, check in items, search all patrons, place holds, maintain hold queues, maintain course reserves
lists, manage fines and bills, and perform other Circulation-related functions.
Log In
Double click on the Sierra icon on your computer’s desktop:
When the Login and Password dialog box appears, enter your Sierra Circulation login name and password. Your assigned login and
password determine the privileges and functions you can perform in Sierra.
Click the OK button or press the <Enter> key twice.
This connects you to the server and loads the Sierra Circulation software.
Sierra Circulation Window
Once logged into Sierra, the circulation window opens. The right side dropdown box lists the various functions assigned to the login.

5
Custom Settings and Preferences
Many Sierra functions are customizable (for example: screen and text colors, font and font size, new record template creation and maintenance, print templates,
and a number of other Sierra functions.)
New Record Templates
The Sierra system uses record templates to create new records. A new record template can be configured by the local library to prompt the staff member to fill in
specific fields. A new record template can also be configured by the library to contain default data in certain fields which is automatically inserted into the record
during the new record creation process. In Circulation, staff particularly uses templates to enter new patron records. If you need additional patron templates for
your library, please open a Help Desk ticket.
Record Structure
Review Patron Record Fields
Along the top, at the far right, are icons for Editing, Save, Delete, Print and Close.
Tip: Always Save before closing the patron’s record.
The first half of the Patron record are fixed-length fields, containing information on expiration date, birth date, money owed, notice preference and last circ activity.
These are called fixed-length fields because they can only be populated with approved data from a system table associated with each field. In the fixed-length field area of the patron record, there are also fields populated by system activity
that cannot be edited by staff. These are fields such as current checkouts, total checkouts, etc.
The record’s second half are variable-length fields, containing the patron’s name, address, phone numbers, messages, notes, email and barcode. These fields can
contain up to 10,000 characters of free-text data. You can also add multiples of fields such as messages, notes, etc.
Changing the font size and screen color is a decision of the local library

6
Patron Records
Sample Patron Record
Explanation of the patron fields:
Patron Code 1 – used to indicate patron computer/Internet permissions, interface with 3rd party management software.
Patron Code 2 – gender and general age categories for statistics.
Patron Code 3 – decade of birth and graduating class for statistics.
Patron Code 4 – geography for local patrons or home library for reciprocal patrons for statistics.
Patron type – a numeric value (0-255) that is used to define groups of patrons that may have different borrowing privileges.
Home Library – the library to which the patron belongs.
Patron Agency – the agency to which the patron belongs.

7
Review Item Record Fields
Along the top, at the far right, are icons for Insert Field, Save, View, Edit, Summary, Export, Print and Close.
Tip: Always Save before closing the item record if you made any changes.
The first half of the Item record are fixed-length fields, containing information on location, item type, # of renewals and overdues, status, checkout date, total
checkouts and last circ activity.
The record’s second half are variable-length fields, containing the call #, item field and barcode.

8
Sierra Circulation Modes
Circulation Desk Mode
Circulation Desk mode is where most of the daily circulation functions take
place, check in, check out, paying fines, creating a new patron record..
Pull down the Function list on the right and choose Check Out (Circulation Desk) to open.
Patron Records
Search for a Patron record
Patron records may be searched by any indexed field in the Patron record.
1. Go to Check Out (Circulation Desk) function
2. Type or Scan the patron barcode into the query box in the upper left-hand portion of the screen.
3. There are two ways to search by other fields indexed in the patron record.
Instead of entering a barcode, you can click on the Search button and a window will pop up with a drop down list where you can search by name, personal information, unique ID or patron record number.
4. Or, in the barcode search box, you can use the shortcut of typing the code for
the index you want to search. For example, type the letter “n” (to designate the name index) and
search by the patron’s last name, first name. It is optional to insert a space after the letter “n”. This searching option informs the system
that it should search the Name Index instead of the Barcode Index.
5. Or Type the letter “e” to search the personal information index (address, telephone or email). It is optional to insert a space after the letter
“e.” This searching option informs the system that it should search the Personal Information

9
Index instead of the Barcode index. Personal information reads left to right and is a phrase search. All ten numbers of the phone number must be entered in the
correct format, e.g. xxx-xxx-xxxx.
6. Or Type the letter “u” to search the Unique ID (formerly AltID). It is optional to insert a space after the letter “u.” This informs the system that
it should search the Unique ID index.
7. Or Type a “.p” and the number to search by patron record number (the unique number assigned by Sierra to each patron record).
8. After typing your search term, press the <Enter> key or click the Search
button.
9. From a browse screen of a list of Patron records, double click on the line for the
selected patron name or highlight the line for the patron name and click the Select button.

10
Create New Patron Record
1. Search the PrairieCat database thoroughly for the patron by name, unique ID, phone number, etc. If there isn’t already a patron record for your library or type of library, create a new patron record. If a public library patron already has a
record in the database, but has moved to your community, the correct procedure is to edit the existing record to update the patron’s information, while
keeping checkouts, holds and fines. Do not edit an academic,
school or special library patron record
to make it a public library patron record.
2. Click the New Patron
Record button or use the dropdown menu File | New Patron
3. Select a new record template from the preferred list or use the default new record template, if that is the appropriate template. Patron Record templates can be selected as preferred templates in the dropdown menu Admin |
Settings | Record Template.
4. Insert patron information in the fixed- and variable-length fields as prompted by
the new record template. To skip a field, click Next
Tip – to enter the expiration date, type
either t or c in the box. Typing t enters today’s date, and you can change the year.
Typing c displays a calendar to choose the expiration date.
5. Double-click with the mouse in the white part of the desired field to display a list of valid codes and/or meanings for that specific field, and click on the
appropriate line for the chosen field to select it. If you click on the code, a list of choices will display alphabetically by code. If you click on the description,
the list will display alphabetically by description.
6. Type the necessary data into the white area of the variable-length field
display box.

11
PrairieCat Note: name should be entered in all caps, last name first, first name, middle name
PrairieCat Note: address should be entered in all caps with correct postal
abbreviations. Use line 1 for Street address 1, line 2 for Street address 2 (e.g., PO Box), line 3 for City, State, Zip.
Use Address 2 for alternate addresses such as winter addresses, etc.
Note: enter primary telephone number in Home Phone. Ten digits are required with
hyphens (including area code). Use Mobile Phone or Work Phone for alternate numbers.
Scan or type 14 digit barcode in barcode field.
Type the last four digits of the barcode as the user’s PIN, then enter the four digits again to confirm.
Once you have added the PIN and hit OK, it will appear as an encrypted code. To
edit the PIN in the future, you will need to highlight the encrypted text and replace it with the last four digits of the barcode again.

12
Adding Another Variable Length Field
There are four ways to add another variable field. 1) Click at the end of the field
above where you want to insert a field, and press <enter>. A field will be entered with a blank pink field label and question mark. The “?” indicates that you must
insert a valid field tag which is appropriate for the field to be inserted. Or 2), you can right click and choose Insert Field. Or 3), you can use <control>I. Or 4), you can click the Insert Field button on the top right. All of these latter methods will
open the Insert a Non-MARC Field box at the top of the record.
List of variable fields and their codes: n=name
a = address h = address 2
t = telephone p = telephone 2 o = mobile telephone
s = alias u = unique ID No. (Public libraries
should enter Alt ID in this field)
m = message (displays as pop up
for circulation staff) x = note (displays in record but
does not pop up for staff) b = barcode c = patron status
z = email = = PIN
To move a field within the same field group (i.e.: rearrange the displayed order of several NOTE fields), position the cursor inside the field to move, right-click on the mouse, and select” Move Up”, “Move Down”, or “Move to Top”, or “Move to Bottom
of Group” from the pop-up menu.
Check the other fixed fields to add other desired information such as Notice Preference.

13
Click the Save button when you have finished entering all the needed data in the patron record:
Copy a Patron Record
It is possible to create a new Patron record by copying an existing record. This is useful for entering multiple patrons from a group (for example: a classroom or a
family).
Retrieve a Patron record by searching by name or any other appropriate field. If a browse list is presented, select the appropriate line by double-
clicking on the line or by clicking in the “Select” button. Then, click on the Edit icon on the toolbar button. With the selected Patron record open, use
the dropdown menu Edit | Copy Record to copy the selected record and simultaneously create a new Patron record from the selected record.
The data from the original record will be copied into a new record according
to the fields you have selected. It is necessary to edit the new Patron record for changes as appropriate. When all changes have been completed, click on
the Save icon on the toolbar.
Check Out
Check Out Tab
1. To check out an item, retrieve the Patron record using any of the methods above.
2. A brief version of the Patron record displays in the upper part of the display screen. Along the record’s left side are tabs with allowable actions: Check Out, Checked Out Items, Holds, Fines, Check In and Linked Patrons.
Save button

14
3. Scan or type the item barcode in the blank field in the upper left-hand corner
of the screen.
4. After checking an item out to a patron, it is possible to override the system-
selected Due Date. To override the system-selected Due Date, click on the Change Due Date button. (The staff member must be authorized to override due date via configuration of their login.) Select an appropriate due date from
the calendar box presented and click the OK button. It is possible to retain the changed due date by selecting the checkbox at the bottom of the calendar
display.
5. It is essential to close the Patron record to complete the checkout transaction and to move checked out items into the Checked-Out Items tab. Use <Alt> +Q or click the Close icon in the toolbar to close the patron’s record. Closing a
Patron record assures that the Patron record does not unnecessarily remain “in use” and also protects the privacy of patron information.
Once the patron record is closed, the items move from Check Out to Checked Out Items.

15
Checked-Out Items Tab
Click “Checked Out Items” tab on the left to display the Checked-Out Items. Several functions may be performed using the Checked-out Items tab, including Renew, Claim Returned, Mark Lost Item, and Change Due Date. .
Fines
Within a Patron record, it is possible to view current fines, view a history of fines paid, manually add a charge, waive charges or collect money. The Fines tab
displays in a warning color if a patron’s fines exceed a library-defined limit.
Collect money
1. To collect money for an unpaid fine, retrieve the Patron record using any method and click the Fines tab
2. Select the appropriate fine(s) by clicking on and highlighting the appropriate line(s).
3. Click the Collect Money button. The checkbox at the left side may also be used
to select the appropriate fine or fines.

16
The system displays the total amount owed for that particular fine but it is possible to accept partial payment of a fine or bill. This is determined by library policy.
There are no special settings to accept partial payments. If a patron chooses to pay a partial amount of a specific fine, the system will ask if the remaining amount of
the fine or bill should be waived. Only staff who is authorized via their initials and password will be permitted to waive fines.
4. Enter the amount being collected/paid into the box, click Ok.
5. In the Payment Types field, you have the option to enter the type of payment received (for example: cash, credit card, check, etc.).
6. Printing a receipt for the patron is an optional feature. During the fine collection process, if a receipt is desired by the patron, click on the print button at the
bottom of the payment display box. This is an option, and may be performed as needed.
View Fines Paid
To view the fines paid by the patron, click the Fines Paid button within the
Fines Tab.
To view details about the item pertinent to a fine paid, highlight the appropriate line and click the View Item button. The View Item option is not available for manual charges since such charges are normally not
associated with a specific item. It is possible to print the resulting screen with the Print button.
Click the View Fine button to view the details of a fine or to reinstate a fine.

17
Add a Fine (Manual Charge)
This function is used to add miscellaneous charges to a patron’s account, anything
not automatically generated from an overdue item. Examples are: Book Drop Fee, Damaged Book, Hold Not Picked Up, etc.
1. In the Fines Tab, click the Add Charge button.
2. Click the Predefined drop-down menu and choose the desired charge. The reason and amount will be automatically entered. The amount can be adjusted
as needed.
3. If you don’t want to use a Predefined Charge, you can simply add a charge
and type in the Reason for the charge. A reason is required to assess a manual charge. Click OK.

18
Waive Fines
1. To waive a fine, select the appropriate fine or fines and click the Waive Charges button.
2. Only users authorized to waive fines will be permitted to complete this function.
Renew Material
Renew with Patron
1. Retrieve the Patron record and click on the Checked Out Items tab.
2. Select the item to be renewed from the displayed list by highlighting the appropriate line and then click the Renew button.
Renew without Patron
The Renew mode can be used to renew items without accessing a patron record:
1. Change the current mode to Renew (No Patron) in the function box
2. Two methods of renewing an item are possible:
o Search by Item record number, and then select the item to be renewed
o Scan or type in the barcode of the item to be renewed
3. Click the Close button

19
Holds
Holds may be added to a Patron‘s account from their Patron Record tab. Or holds may be placed in the Search/Holds function. It is also possible to cancel or modify
existing holds in both places.
The number of holds already on a title displays from the Holds/Bookings tab summary, in the last column to the right on the Holds/Bookings tab.
If the patron already has a bibliographic-level hold on this title, the system will alert staff and they will need to override to place the hold.
There are three types of holds:
Bibliographic level holds, which are also called “Title level” or “Copy Returned Soonest” holds. The first copy checked back in will be selected to satisfy
the hold. This is the level of hold that should be used normally for all patron holds with the exception of multi-volume materials (e.g.,
magazines, multi-disc DVDs).
Volume-level holds, where there is the additional step of indicating which specific volume you want to borrow, i.e., the May 2013 Time magazine, or the
5th season of The Big Bang Theory. This is the level of hold that must be used for patron holds for any records where volumes are attached.
Item level holds is the last type. For item level holds, only a specific copy will satisfy the hold. This level of hold should only be used when you want to
retrieve a specific copy, such as to have it returned to technical services for repair.
Holds can be placed on:
A title, volume or item that is checked out
A title, volume or item that is not checked out
A bibliographic record with an attached On Order record
20
Holds cannot be placed on:
An item currently checked out to this patron
An item with status o (“library use only”)
An item pointing to a Loan rule whose “Code” element is “N” (non-
circulating)
An item pointing to a Loan rule whose HOLDABLE element is set to “N” (no holds allowed)
Place Bibliographic (Title) level holds - Copy returned soonest
It is possible to place a bibliographic-level hold from Check Out (Circulation Desk) mode or from Search/Holds mode on the navigation bar.
Placing a hold from the Check Out (Circulation Desk) mode:
1. Select Check Out (Circulation Desk) mode r
2. Retrieve the Patron record using any method.
3. Click the Holds tab
4. Click the Add Holds button
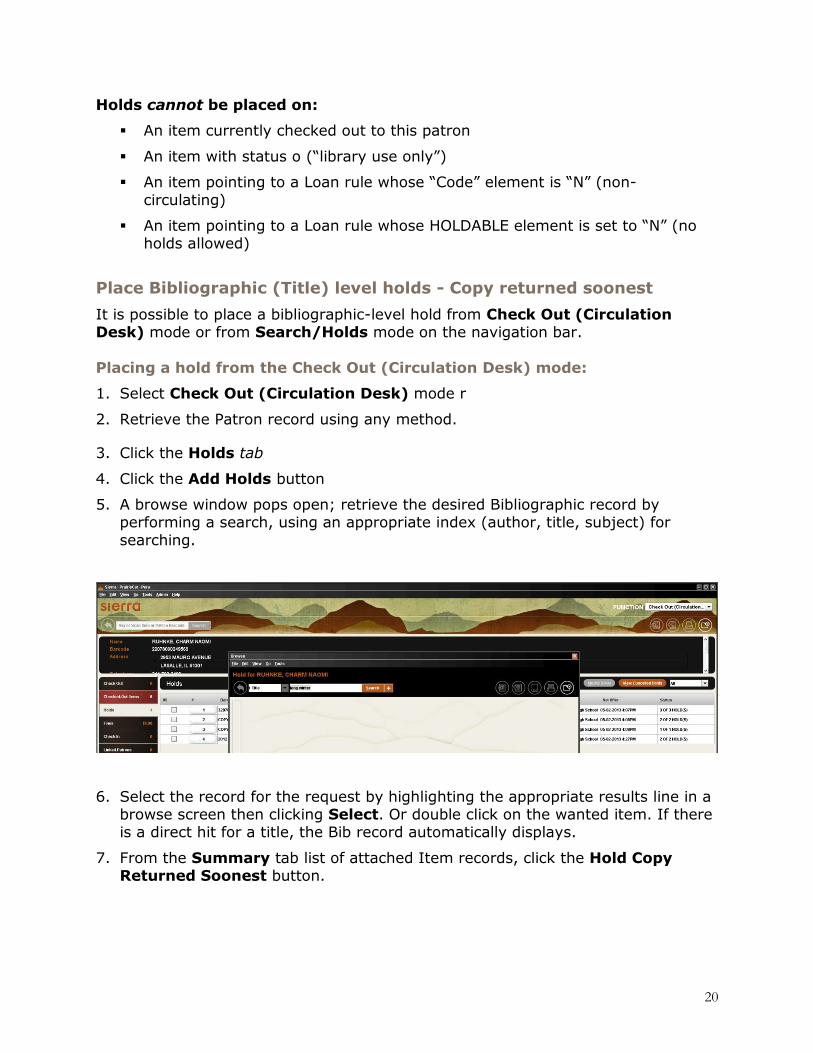
5. A browse window pops open; retrieve the desired Bibliographic record by performing a search, using an appropriate index (author, title, subject) for
searching.
6. Select the record for the request by highlighting the appropriate results line in a browse screen then clicking Select. Or double click on the wanted item. If there is a direct hit for a title, the Bib record automatically displays.
7. From the Summary tab list of attached Item records, click the Hold Copy Returned Soonest button.

21
Type in or select the desired hold parameters for pickup location, not wanted after date and click OK. Hold parameters are configured in Circulation Parameters.
If there are available copies of the title in PrairieCat, you should next get this dialog
box regarding Title Paging Options. You should ALWAYS choose Page for Title.
You will not get this box if there are no available copies in PrairieCat. An example is
if all copies are currently checked out.
Placing a bibliographic level hold from Search/Holds mode
1. Go to Search/Holds mode on the Function box on the right side of the screen.
2. Retrieve the Bibliographic record by searching an appropriate index (author,
title, subject) for searching.
3. If the search results in a browse list, select the Bibliographic record on which the
hold will be placed by highlighting the line of the appropriate title. If the search results in a direct hit for only one Bibliographic record, the Bibliographic record will display on the screen).

22
4. From the Summary tab list of Item records, click the button for Hold Copy Returned Soonest.
5. Retrieve the desired Patron record by using the Add Patron button and searching for the patron
6. Type in the desired hold values for pickup location and not wanted after date and click OK
If no Item records for this title are eligible for hold placement (for example, they all contain a status of “Library Use Only”), the system will display a “REQUEST
BLOCKED” message. The system will place, instead, a bibliographic-level hold. By using the bibliographic level hold option, if the library later changes the status of any attached item record or acquires new items for that title for which
holds may be placed, the HOLD will be fulfilled. If item level holds are placed, only that particular item may satisfy the hold and if that item becomes
unavailable, the hold will never be satisfied. The number of holds already on a particular title displays on the summary tab
on the left. Click on the Bib-Level Hold tab to display the current holds.
Note: The Hold Note appears on paging slips printed for items requested from other locations and displays when staff view holds in Sierra. The Hold Note may also optionally be printed on Hold Pickup notices.
If the copy being held has a Status of AVAILABLE (meaning on the shelf and available to be checked-out), the system can generate a paging list (formerly
known as the picklist) so that staff may retrieve the hold and place it on the hold shelf for the patron. The item must be scanned at the desk, using “Check-In” mode, after which the system will generate a hold pickup notice.

23
If the desired item cannot be located on the shelf, it is possible to change the item status to missing, and to place another bibliographic level hold for the
patron. Changing the item status to missing places the item in the On Search File. The library will need to periodically create a list of missing items to
determine disposition of missing items in the collection.
Placing multiple holds on the same title (e.g., book club holds)
The process for placing multiple holds on the same bibliographic title is the same, except that you indicate how many copies of the title you need. Once you have
clicked on the Hold Copy Returned Soonest button, you should get the following dialog box, and your cursor will be in the No. of Hold box which is defaulted to 1. You can order up to 99 copies of the same title by simply entering the needed
number in this box.
Note: Please remember that if you are placing multiple holds (for instance, for a book club), and your library owns a copy on this record, you should be sure that
your library’s copy is checked out before you place multiple holds. Otherwise, you will get multiple hold requests on your next paging list for this title.
Placing a hold on a multi-volume title (TV series, magazines, etc) in
Sierra in Search/Holds
To place a hold on a multi-volume title, you need to add the step of selecting the
desired volume. First, search the title in Search/Holds. On the Summary screen, select the desired volume. Click on the Volume-Level Holds tab.

24
Then, click on the Add Patron button:
Search the patron by name, barcode, etc:
Then complete the hold details in the Place a Volume-Level Hold dialogue box:

25
and select Page for title:
You should now see your Volume-Level hold in the record:
Placing a hold on a multi-volume title (TV series, magazines, etc) in Sierra starting from the patron record
To place a hold on a multi-volume title, you need to add the step of selecting the desired volume. First, search the patron record in Checkout (Circulation Desk).
Click on the Holds tab and then select Add Hold

26
Search for the title that the patron is requesting. Once you have selected a record, the summary screen will display. For a multi-volume record, you may be on the
summary screen which displays the available volumes:
Next, pull down the View menu to switch the View to Holds/Bookings and this
screen will display:
From this screen, it is important that you make sure the correct volume is selected
(highlighted). Do not select an item! Click on the volume record for the specific part that you want to request.

27
Please note that volume records have a “j” in front of the record number, while an item has an “i” in front. Again, do not select an item! You will know
that you have erroneously selected an item if the Hold Selected Item button becomes available.
In the example above, there is only volume to choose. However, when searching a magazine or any multi-volume work with more volumes, it is important to be sure the correct volume is selected. When you first display
the Holds/Booking screen for a multi-volume item, the first volume on the list will be highlighted, so you need to consciously scroll down and choose the
volume you want. Here’s an example of the screen from a magazine with a specific volume
further down the list selected/highlighted:
Next, click on the Hold Selected Volume button. Then, complete the rest of the holds process as normal, indicating pickup point and selecting Page for Title when prompted:

28
When the hold has been completed, and you are back in the patron’s record, you can see the difference in a properly placed Volume Level hold versus a Title Level
hold. There is an example below of a DVD as well as a magazine. The volume information displays in the Barcode field, instead of just Copy RTD Soonest:
Place Item level Holds
It is possible to place an item-level hold from Check Out (Circulation Desk) mode or Search/Holds mode.
Placing an item-level hold from Check Out (Circulation Desk) mode:
1. Retrieve the patron record using any method.
2. Click the Holds tab in the patron’s record

29
3. Click the Add Holds button
4. Retrieve the desired Bibliographic and Item record using an appropriate search
index.
5. From the Summary tab of attached Item records, select the desired Item
record by highlighting the line, and click the Hold Selected Item button.
6. Type in the desired hold parameters and click OK
Placing an item-level hold from Search/Holds mode:
1. Go to Search/Holds mode on the navigation bar on the left side of the display.
2. Retrieve the Bibliographic and Item record, using any appropriate search index.
3. From the Summary tab of attached Item records, select the desired Item record by highlighting the appropriate summary line of the Item record and click
the Hold Selected Item button.
4. Retrieve the desired Patron record using the Add Patron button
5. Type in the desired hold parameters and click OK
Modify Holds
The hold parameters (for example: not-wanted-before or after dates, hold note, pickup location, etc.) can be changed by staff members. Holds can be modified
from Check Out - Circulation Desk mode and Search/Holds mode. The procedure is the same in both modes:
1. Retrieve the Patron record (Check Out Circulation Desk mode) or Bibliographic and Item record (Search/Holds mode)
2. Select the appropriate Holds tab.
3. Highlight the line or lines of the hold(s) to be modified.
4. Click the Modify Holds button to modify the required field of pickup location,
the optional not-wanted-before date, the optional not-wanted-after date and the optional hold note. The Pickup Location is required. Other values are optional.
Cancelling Holds
Holds may be cancelled from Check Out (Circulation Desk) mode and
Search/Holds mode on the navigation bar. The procedure is the same in both modes:
1. Retrieve the Patron record (Check Out - Circulation Desk mode) or Bibliographic/Item record (Search/Holds mode)
2. Select the appropriate Holds tab.
3. Highlight the line or lines of the hold(s) to be cancelled.

30
4. Click the Cancel Holds button to cancel all of the selected holds and to generate hold cancellation notices (if you have chosen to send notices for
cancelled holds).
Viewing Cancelled Holds
When staff cancels a hold, there is an option to create a notice confirming the hold has been cancelled. This notice can be printed or emailed to the patron, this is a
local decision.
1. To view the patron’s cancelled holds, to the patron’s record
2. Choose the Holds tab, then choose the View Cancelled Holds button.
3. The screen displays a list of all holds cancelled on the patron record. This list can be printed.
Check in items with holds
If a patron returns an item which has a hold on the item, Sierra Circulation will present a message alerting the staff that there is a hold on the item. It is possible
to print a slip or wrapper to insert in the item before it is placed on the Hold Shelf.
At the exact moment an item which satisfies a hold is returned, the system sets the item status to On Holdshelf for patron pickup. If the item is on hold for another
library, the item status will be changed to In Transit. See the In Transit section for more information. Depending on the library’s notice settings, a hold pickup notice
may be generated that night for the patron.
If the item has a hold, the screen display’s this pop-up message.
Staff has the option of Fulfill Hold, Check in, do not fulfill hold and Cancel hold. Choose
Fulfill Hold.
Once Fulfill Hold is clicked, the screen displays this message. Click Yes to print a transit slip. Staff may be prompted to select
a printer, if the default printer has not been set. This is a local decision.

31
Check In
Check in with Patron Present
When an item is checked in using Check Out - Circulation Desk, the patron’s
record displays. This allows staff to perform patron-specific circulation functions such as collecting fines and viewing the history of fines paid while the patron is at
the desk.
1. Go into Check Out (Circulation Desk)
2. Retrieve the Patron record and click on the Check In tab
3. Scan the item barcode to check it in.
It is possible to backdate the check-in date by using the Backdate button.
It is essential to click the Backdate button before scanning the item barcode to check it in
It is possible to waive charges or to collect money immediately by selecting the checked in item and clicking the Collect Money or Waive Charges button, which will become active if the user is authorized to perform this
function.
If printing a receipt acknowledging the return of an item, the system will
print the date & time, title, barcode, patron name, and record number on the receipt. The routine printing of a receipt acknowledging checked in items (not to be confused with receipts for payment of fines), is configurable for
routine function in the Circulation Options. A receipt may also be created by checking in the “Print Receipt” box for the individual check-in before the item
is checked in.
It is also possible to check in items from different patrons using this same tab without closing the previous Patron record.

32
Check in without Patron Present
In the function dropdown box, choose Check In (No Patron) and begin scanning item barcodes.
Should the item be needed to fill a hold/request, the screen will display the
appropriate pop-up screen.
Backdate Check Ins
To backdate checked in items (assign a return date earlier than the current date):
Choose Check In (No Patron) from the Function box.
Click the Backdate button before checking in the materials. Choose the desired
date of return (checked in date) from the popup calendar. Depending on local
decision, the waive fines box may also be checked.
Scan the item barcode (or type in the item barcode). Should the item be needed
to fulfill a hold/request, the appropriate pop-up screen will appear.
Check in overdue items
If a patron returns an overdue item (i.e., the time of check-in is later than the Item record's DUE DATE field), Sierra Circulation generates a fine as established
in the Loan Rules, and adds the fine to the charges assessed in the Patron record. .

33
Check in billed items
When a patron returns an item which is billed, the system will change the amount assessed in the Patron record to the amount specified by the library. The library has the following options:
Reduce the billed amount to:
the BILLING FEE the greater of the BILLING FEE or the overdue fine
the lesser of the BILLING FEE or the overdue fine no charge; Sierra Circulation waives the fine automatically if this option is
selected. Note that it may be necessary to enter your initials and password to
waive the fine. The ability to waive fines is controlled by authorizations associated with individual initials and password.
This option is set in the Circulation Options, “Check-In of Billed Item: Reduce
bill to” option.