CAQH SolutionsTM EnrollHub Help Getting Started · PDF fileHelp Getting Started Table of...
23
CAQH Solutions TM EnrollHub TM Help Getting Started Table of Contents 1 HELP GETTING STARTED 2 1.1 ENROLL H UB DESCRIPTION AND BENEFITS 3 1.2 PRODUCT OVERVIEW 3 1.3 PROVIDER USERS 4 1.4 COMMON T ERMS 5 1.5 QUICK S TART 8 1.6 PROVIDER RESOURCES 9 1.6.1 P RODUCT T OUR : 9 1.6.2 P ROVIDER U SER G UIDE 10 1.6.3 P ROVIDER FAQ S 10 1.6.4 P AYER -S PECIFIC H ELP 11 1.6.5 CAQH H ELP D ESK 12 1.6.6 A CCOUNT C REATION O VERVIEW 13 1.6.7 C REATE AN A CCOUNT 13 1.6.8 S TEP 1: U SER I NFORMATION 14 1.6.9 S TEP 2: C OMPANY I NFORMATION 15 1.6.10 S TEP 3: A CCOUNT S ET U P 15 1.6.11 S TEP 4: T ERMSOF S ERVICE 17 1.6.12 S TEP 5: A CCOUNT A CTIVATION 18 1.7 L OG I N 19 1.8 RETRIEVE USERN AM E 19 1.9 RETRIEVE PASSWORD 20 1.10 ACCOUNT L OCK OUT 21 1.11 L OG OUT 21 1.12 S YSTEM I NACTIVITY 21 1.13 VIEW AND EDIT PROFILE 22
Transcript of CAQH SolutionsTM EnrollHub Help Getting Started · PDF fileHelp Getting Started Table of...
CAQH SolutionsTM EnrollHubTM
Help Getting Started
Table of Contents
1 HELP GETTING STARTED 2
1.1 ENROLLH UB DESCRIPTION AND BENEFITS 3 1.2 PRODUCT OVERVIEW 3 1.3 PROVIDER USERS 4 1.4 COMMON TERMS 5 1.5 QUICK START 8 1.6 PROVIDER RESOURCES 9 1.6.1 PRODUCT TOUR: 9 1.6.2 PROVIDER USER GUIDE 10 1.6.3 PROVIDER FAQS 10 1.6.4 PAYER-SPECIFIC HELP 11 1.6.5 CAQH HELP DESK 12 1.6.6 ACCOUNT CREATION OVERVIEW 13 1.6.7 CREATE AN ACCOUNT 13 1.6.8 STEP 1: USER INFORMATION 14 1.6.9 STEP 2: COMPANY INFORMATION 15 1.6.10 STEP 3: ACCOUNT SET UP 15 1.6.11 STEP 4: TERMS OF SERVICE 17 1.6.12 STEP 5: ACCOUNT ACTIVATION 18 1.7 LOG IN 19 1.8 RETRIEVE USERNAME 19 1.9 RETRIEVE PASSWORD 20 1.10 ACCOUNT LOCK OUT 21 1.11 LOG OUT 21 1.12 SYSTEM INACTIVITY 21 1.13 VIEW AND EDIT PROFILE 22
Provider User Guide Help Getting Started
2
1 Help Getting Started
The Help Getting Started guide will describe the following topics:
� Description & Benefits
� Product Overview
� Provider Users
� Common Terms
� Quick Start Guide
� Provider Resources
� Self-register for a new user account
� Log in to the system
� Retrieve a forgotten username
� Retrieve a forgotten password
� Account lock out
� Log out of the system
� Learn about the system time limit for inactivity
� View and edit profile
Provider User Guide Help Getting Started
3
1.1 EnrollHub Description and Benefits
CAQH, a non-profit alliance of health plans and associations, has simplified and streamlined the electronic funds transfer (EFT) enrollment process for providers and payers with EnrollHubTM, a CAQH SolutionTM. Instead of enrolling in EFT individually with each payer, CAQH, a trusted partner of over one million providers, offers a secure, online system that allows providers to enroll in electronic payments with multiple payers at no cost. This eliminates redundant paper forms and saves administrative time and costs for both providers and payers.
Payers have the option to receive ERA enrollments from providers through EnrollHub as well. Providers will have the opportunity to enroll in ERA with participating payers after the EFT enrollment request is submitted. ERA enrollment options are payer-specific and are only offered to providers when a payer has elected to activate ERA enrollment.
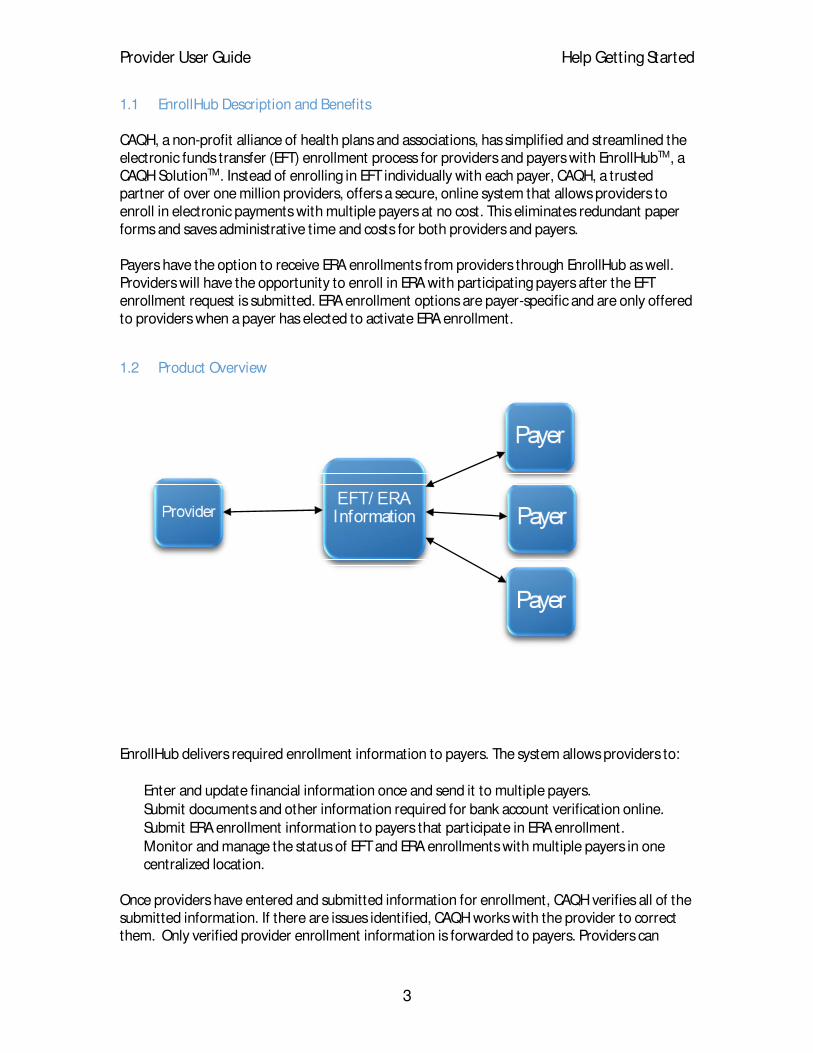
1.2 Product Overview
EnrollHub delivers required enrollment information to payers. The system allows providers to:
� Enter and update financial information once and send it to multiple payers.
� Submit documents and other information required for bank account verification online.
� Submit ERA enrollment information to payers that participate in ERA enrollment.
� Monitor and manage the status of EFT and ERA enrollments with multiple payers in one centralized location.
Once providers have entered and submitted information for enrollment, CAQH verifies all of the submitted information. If there are issues identified, CAQH works with the provider to correct them. Only verified provider enrollment information is forwarded to payers. Providers can
Provider User Guide Help Getting Started
4
monitor the status of their enrollments, and make updates to enrollments through the system as needed.
1.3 Provider Users
EnrollHub and this user guide refer to the following terms when describing people or entities that interact with the EFT and ERA process.
Provider This is a general term that is used to refer to the provider entity, practice, or office. This is not referring to a practitioner but instead the billing entity.
Registered User This term is used to refer to a person that has a username and password for EnrollHub. (See Chapter 2: Create & Manage Users for instructions on obtaining a username and password.)
If there is a need for multiple registered users from the same provider office or billing agency to share enrollment data, accounts should be structured so that there is a single Administrator, who self-registers to create an Administrator account. That Administrator can create “child” accounts. The “Administrator” and “child” accounts share the same provider and enrollment data. For more information on “Administrator” accounts, see Chapter 5: Managing User Roles.
Although each provider office is different, EFT and ERA transactions are usually managed by practice managers, administrative assistants, office managers, CFOs, or contracted billing agency staff. People in these roles are typically users of the system.
Provider Contact The Provider Contact is the person who works within the provider office and is responsible for electronic funds transfer. During the enrollment process, the system collects information about the Provider Contact. The Provider Contact may or may not be the same person as the Registered User. The provider contact is the person who can authorize administrator users or child users to submit EFT and ERA enrollments on behalf of the provider office.
Provider Authorized Agent and Provider Authorized Agent Contact While some provider entities manage billing internally, others use outside agencies, which can be called Provider Authorized Agents. The Provider Authorized Agent is a term used in the CORE rules to refer to an organization that is contracted by the provider to manage financial transactions on behalf of the provider office. A Provider Agent Contact is the person at that agency who manages the financial transactions on behalf of the provider office. The Provider Agent Contact may or may not be the same as the Registered User.
Provider User Guide Help Getting Started
5
1.4 Common Terms
This section defines common terms used throughout the EFT system.
Account Number Linkage to Provider Identifier This field describes the provider preference for grouping (bulking) claim payments. This field is in the Financial Institution Account section of the EFT enrollment process. The provider has the option to group by TIN or by NPI. The preference indicated must match the preference for (v5010 X12 835) remittance advice.
If you select TIN in this field, you are indicating that all claims associated with the specified TIN should be paid to the same bank account for a specific payer.
If your practice has multiple bank accounts which belong to different practice groups, you should select NPI and indicate each practice group’s billing NPI so that the pa�er will understand which bank account should be used for each claim.
Bank Document The CAQH system requires that a digital image of a bank document is uploaded to the system as supporting documentation of the bank account owner. The system will accept one of two types of bank documents:
Bank Letter: A bank letter is used to validate a provider’s bank account. You will need to scan a bank letter and upload the electronic image when you add a new bank account. A bank letter can be requested from your bank’s customer service department.
Voided Check: A voided check is a blank, unused check with “VOID” handwritten across it and is used to verify your bank account. You must scan a voided check and upload the electronic image when adding a new bank account. For EFT enrollment, each Provider must provide its bank's routing number as well as account number. These are the numbers that are encoded on the bottom of the check. Both are on the check along with other information (sometimes check serial number) to help assure the data is accurately sent to the bank.
“Doing Business As” Name (DBA) This is a legal term used in the United States that means that the trade name, or fictitious business name, under which the business or operation is conducted and presented to the world, is not the legal name of the legal person (or persons) who actually own it and are responsible for it. The provider name or the DBA that you enter here must match the name that appears on the voided check or bank letter.
EFT and ERA Enrollment Status When you submit an enrollment it could have one of the following statuses. This field indicates the current status of the enrollment.
� Enrollment Request Pending: The enrollment information has been submitted to CAQH. CAQH is verifying the information.
Provider User Guide Help Getting Started
6
� Enrollment Requested: CAQH has verified the enrollment information and has passed it along to the payer for processing
� Received: The payer has received the enrollment. The payer will contact the provider outside of the system user when EFT processing is complete.
� Change Enrollment Request Pending: The provider user submitted a change to an existing enrollment. CAQH is verifying the information.
� Change Enrollment Requested: CAQH has verified the enrollment information submitted with the change. CAQH has passed the enrollment change on to the payer.
� Cancel Enrollment Requested: The provider user has cancelled an enrollment.
� Cancel Enrollment Received: The payer has received the enrollment cancellation.
� Declined: The payer has declined the enrollment. The provider user should view the alert in the message center for details.
� Terminated: The payer has terminated a previously received EFT enrollment.
National Provider Identifier (NPI) The NPI number is used to validate your practice identity.
The Administrative Simplification provisions of the Health Insurance Portability and Accountability Act of 1996 (HIPAA) mandated the adoption of standard unique identifiers for health care providers. The purpose of these provisions is to improve the efficiency and effectiveness of the electronic transmission of health information. The Centers for Medicare & Medicaid Services (CMS) developed the National Plan and Provider Enumeration System (NPPES) to assign these unique identifiers known as National Provider Identifiers (NPI) (www.cms.gov). Health care providers must apply for an NPI number through CMS and the NPPES.
An Associated NPI refers to billing NPIs that are used for a single provider or group of providers within a larger provider entity. Associated NPIs are indicated when providers within an entity need to be paid to multiple bank accounts.
Provider Name The Provider Name is the name of the provider receiving reimbursement from payers. The name as it is entered either here or in the Doing Business As Name (DBA) field must match what appears on the voided check or bank letter that will be uploaded later in the process.
Provider Federal Tax Identification Number (TIN) Your tax identification number is an identification number assigned to your practice by the Internal Revenue Service (IRS). It is also sometimes known as Employer Identification Number (EIN). In the case of a sole proprietorship, the provider might not have a Tax ID and would use his or her social security number instead.
Routing Number A routing number is a unique code present on a check assigned by the American Bankers Association (ABA) that identifies a particular bank or finance institution issuing the check. This code is primarily used by US-based financial institutions, who own accounts at the Federal Reserve Bank, to process check transactions including deposits and clearances. (www.businessdictionary.com)
Provider User Guide Help Getting Started
7
You can consult your bank to determine where routing numbers are found. Typically, they can be found on checks and deposit slips.
Verification CAQH performs the following three verification steps on provider enrollment information before sending the information to the payer:
Bank Verification: Bank information that is entered by a provider user is verified by CAQH before it is sent to the payer. First, CAQH checks to make sure that the name printed on the voided check or bank letter matches the information entered in the Provider Details section of the enrollment. Next, a pre-note transaction is sent which will verify the accuracy of the bank account number and the bank routing number that was entered. If either of those checks fail, provider users will be notified by the CAQH system. The information must be fixed before an enrollment is submitted to the payer.
Identity Verification: When you submit an enrollment to a payer, CAQH confirms that the person registering for an account and entering enrollment information into the EnrollHub system is authorized to do so by the provider entity.
Clearinghouse: A clearinghouse is a company or service hub that connects providers and payers so that they can send and receive electronic claims information.

Provider User Guide Help Getting Started
8
1.5 Quick Start
At a high level, here are the steps you will take to submit and EFT or ERA enrollment. Please review the rest of this guide for details of all of the functionality in the system.
1. Create an account at https:/ /solutions.caqh.org b� clicking the “Register” button.
� Enter required personal information
� Establish a username and password
� Set up security questions
2. Activate your account and log in
� An activation email will be sent to you. You must click on the link in the email to activateyour account.
� Log in to complete the enrollment process.
3. Create a provider record
� Enter the practice name or billing entity name (not the practitioner name, unless thepractitioner name and the billing/entity name are the same)
� Enter contact information
� Enter authorized agent (i.e. billing agency) information, if applicable
� Enter the entit�’s TIN and NPI
4. Add at least one bank account to the provider record.
� Enter financial institution name, routing number, account type, and account number
� Indicate if this bank account will be used for all claims related to the TIN that youentered or indicate that the bank account will be used for specific billing NPIs. If the bank account will be used for specific NPIs, you will enter those Associated NPIs.
� Upload a voided check or bank letter
5. Submit EFT enrollment(s) (once you have entered provider information and at least onebank account)
� Select the bank account, and select the payers(s) with which you wish to enroll
� Accept the payment terms agreement
� Click the “Confirm” button to complete your submission.
6. Submit ERA enrollments for participating payers
� Some payers that use EnrollHub to receive EFT enrollments also use EnrollHub toreceive ERA enrollments.
� If you submit an EFT enrollment to a payer that participates with EnrollHub for ERA too, you will be asked if you would like to submit an ERA enrollment for that payer. Your EFT enrollment will not be impacted by this decision.
Provider User Guide Help Getting Started
9
1.6 Provider Resources
CAQH offers in-product and in-person resources to help providers use EnrollHub
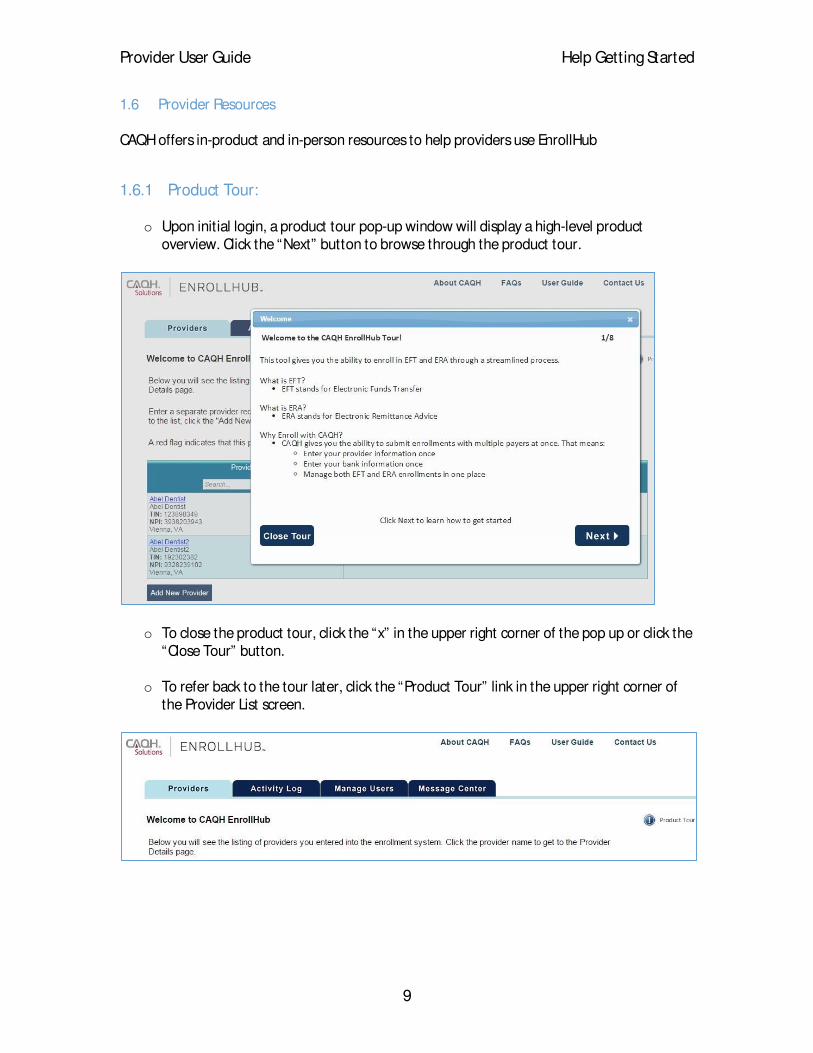
1.6.1 Product Tour:
o Upon initial login, a product tour pop-up window will display a high-level productoverview. Click the “Next” button to browse through the product tour.
o To close the product tour, click the “x” in the upper right corner of the pop up or click the“Close Tour” button.
o To refer back to the tour later, click the “Product Tour” link in the upper right corner ofthe Provider List screen.
Provider User Guide Help Getting Started
10
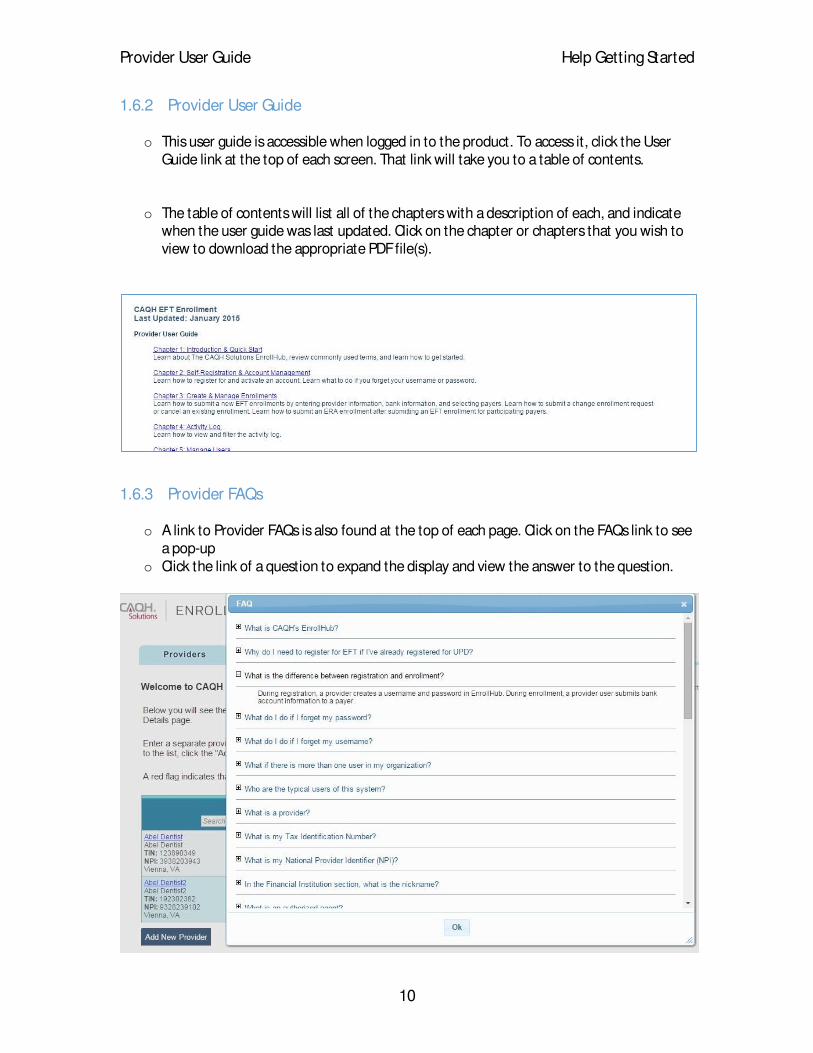
1.6.2 Provider User Guide
o This user guide is accessible when logged in to the product. To access it, click the UserGuide link at the top of each screen. That link will take you to a table of contents.
o The table of contents will list all of the chapters with a description of each, and indicatewhen the user guide was last updated. Click on the chapter or chapters that you wish toview to download the appropriate PDF file(s).
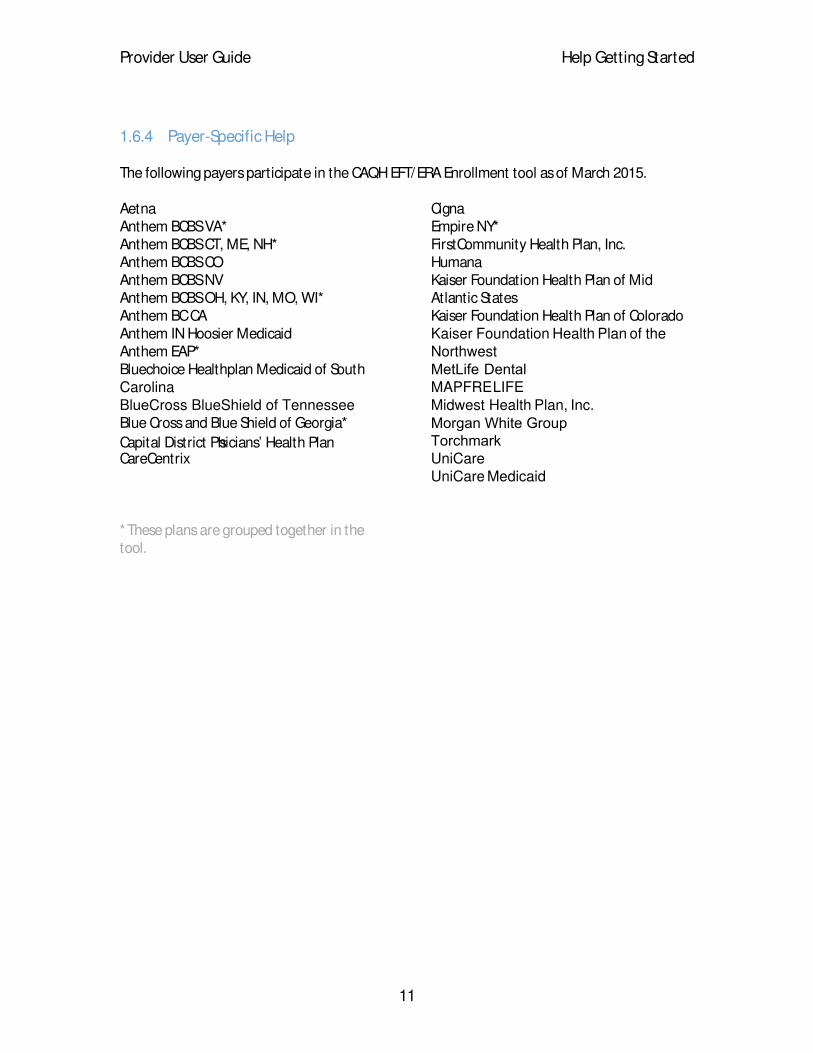
1.6.3 Provider FAQs
o A link to Provider FAQs is also found at the top of each page. Click on the FAQs link to seea pop-up
o Click the link of a question to expand the display and view the answer to the question.
Provider User Guide Help Getting Started
11
1.6.4 Payer-Specific Help
The following payers participate in the CAQH EFT/ERA Enrollment tool as of March 2015.
Aetna Anthem BCBS VA* Anthem BCBS CT, ME, NH* Anthem BCBS CO Anthem BCBS NV Anthem BCBS OH, KY, IN, MO, WI* Anthem BC CA Anthem IN Hoosier Medicaid Anthem EAP* Bluechoice Healthplan Medicaid of South Carolina BlueCross BlueShield of Tennessee Blue Cross and Blue Shield of Georgia*
Capital District Ph�sicians’ Health Plan CareCentrix
Cigna Empire NY* FirstCommunity Health Plan, Inc. Humana Kaiser Foundation Health Plan of Mid Atlantic States Kaiser Foundation Health Plan of Colorado Kaiser Foundation Health Plan of the Northwest MetLife DentalMAPFRE LIFE Midwest Health Plan, Inc. Morgan White GroupTorchmarkUniCare UniCare Medicaid
*These plans are grouped together in thetool.
Provider User Guide Help Getting Started
12
If you participate with one of the following payers, please review this payer-specific information.
Aetna Anthem BlueCross BlueShield
Late or Missing EFT:
If �ou believe �ou’re missing an EFT, please review �our account over a four (4) da� range to see if the funds had settled on a different day. If �ou’re still unable to find the missing EFT, please contact your bank for assistance. If your bank is unable to resolve your inquiry, please contact Aetna directly for further assistance.
If I �ubmit an ERA enrollment to Anthem, Empire, Blue Cro�� and Blue Shield of Georgia and their affiliate�; BlueChoice HealthPlan Medicaid of South Carolina; Unicare Life � Health In�urance Company, what �hould I put in the Trading Partner ID field?
A Trading Partner ID is required for all ERA enrollment requests. When enrolling for both EFT and ERA through CAQH, and �ou are a direct ERA receiver, please enter �our Trading Partner, Submitter or Device ID. All ERA’s will be delivered to this one location. If �ou receive ERA’s via a third part�, (example: Clearing House or Billing Service), please contact that entit� to obtain the trading partner ID or request the� submit an enrollment request on �our behalf.
I enrolled in one or more of the following payer�, what �hould I do if we are not receiving electronic payment� or electronic remittance�? Anthem, Empire, Blue Cro�� and Blue Shield of Georgia and their affiliate�; BlueChoice HealthPlan Medicaid of South Carolina; Unicare Life � Health In�urance Company.
The Pa�er will contact �ou at the email address �ou provided during enrollment. Providers should allow 4-6 weeks from successful EFT/ERA registration before contacting Local Provider Service or e-Solutions at [email protected].
1.6.5 CAQH Help Desk
If you need to work with a customer service representative, the CAQH help desk is available by phone or email during business hours.
CAQH Provider Help Desk: 844 815-9763 [email protected]
Help Desk Hours:
� 7am-9pm EST Monday-Thursday
� 7am-7pm EST Friday
Provider User Guide Help Getting Started
13
1.6.6 Account Creation Overview
All EnrollHub users must have a personal account with a username and a password in the system. There are two ways to create an account.
� A person can self-register for an Administrator account.
� An Administrator user can create “child” user accounts for staff members that need to access the same enrollment data.
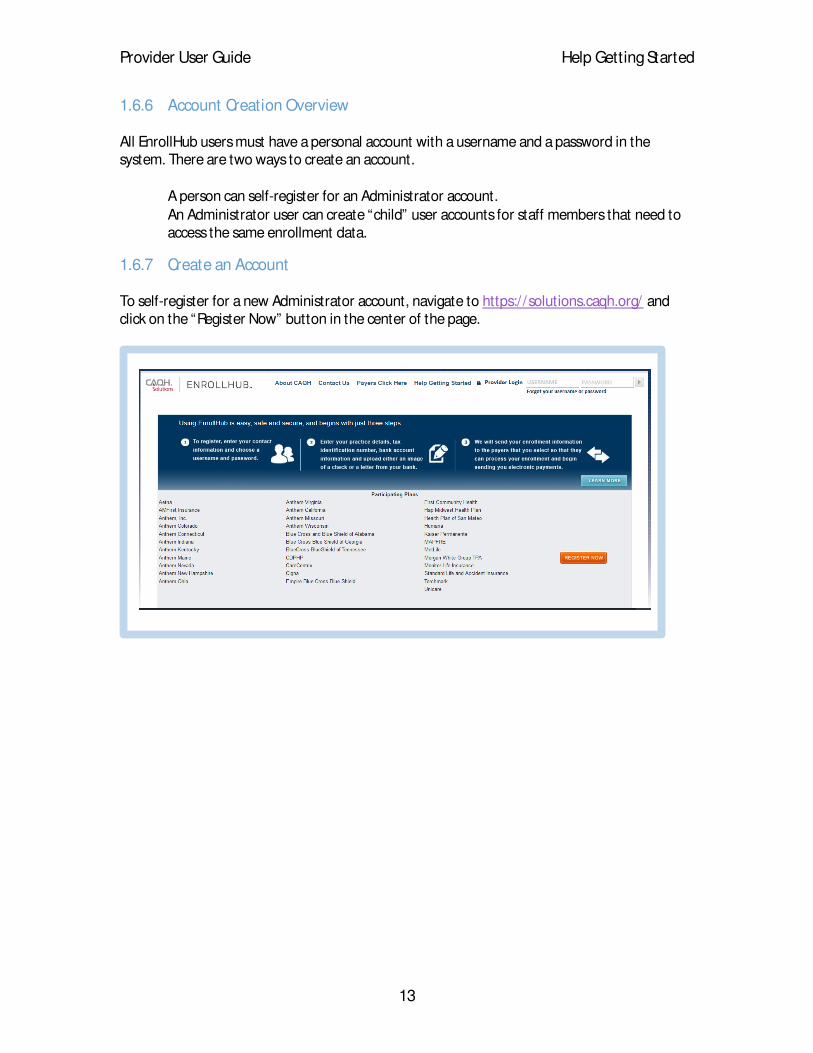
1.6.7 Create an Account
To self-register for a new Administrator account, navigate to https:/ /solutions.caqh.org/ and click on the “Register Now” button in the center of the page.
Provider User Guide Help Getting Started
14
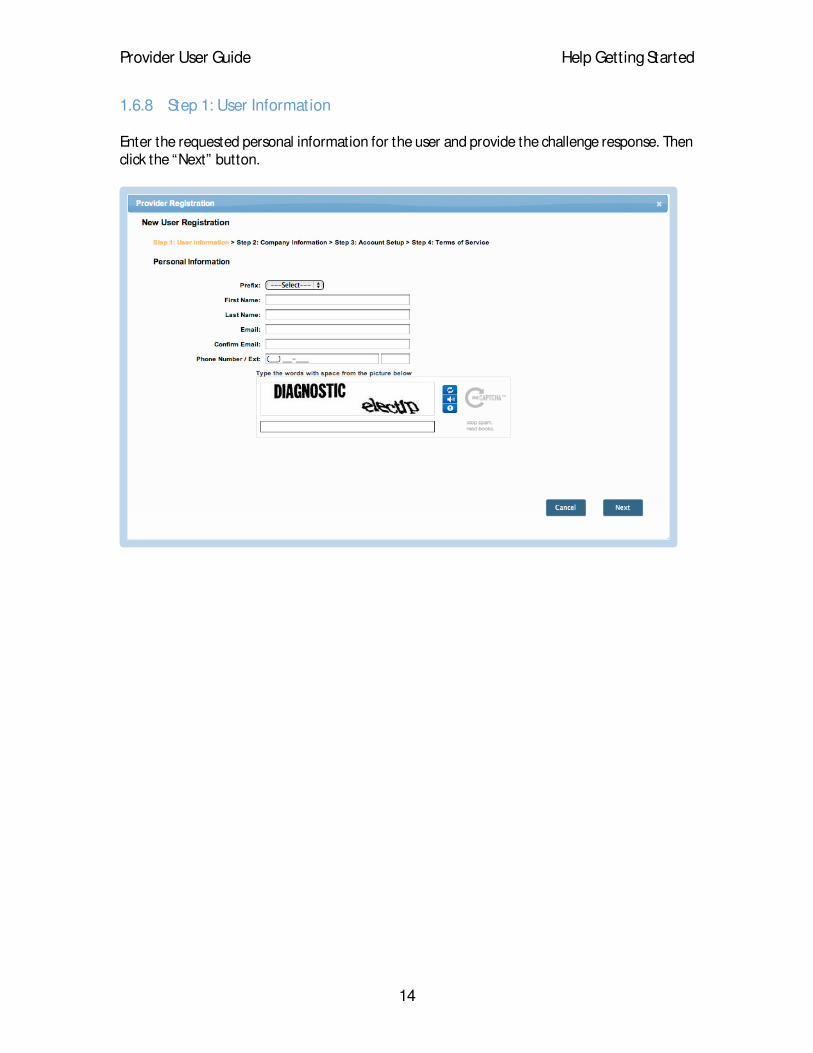
1.6.8 Step 1: User Information
Enter the requested personal information for the user and provide the challenge response. Then click the “Next” button.
Provider User Guide Help Getting Started
15
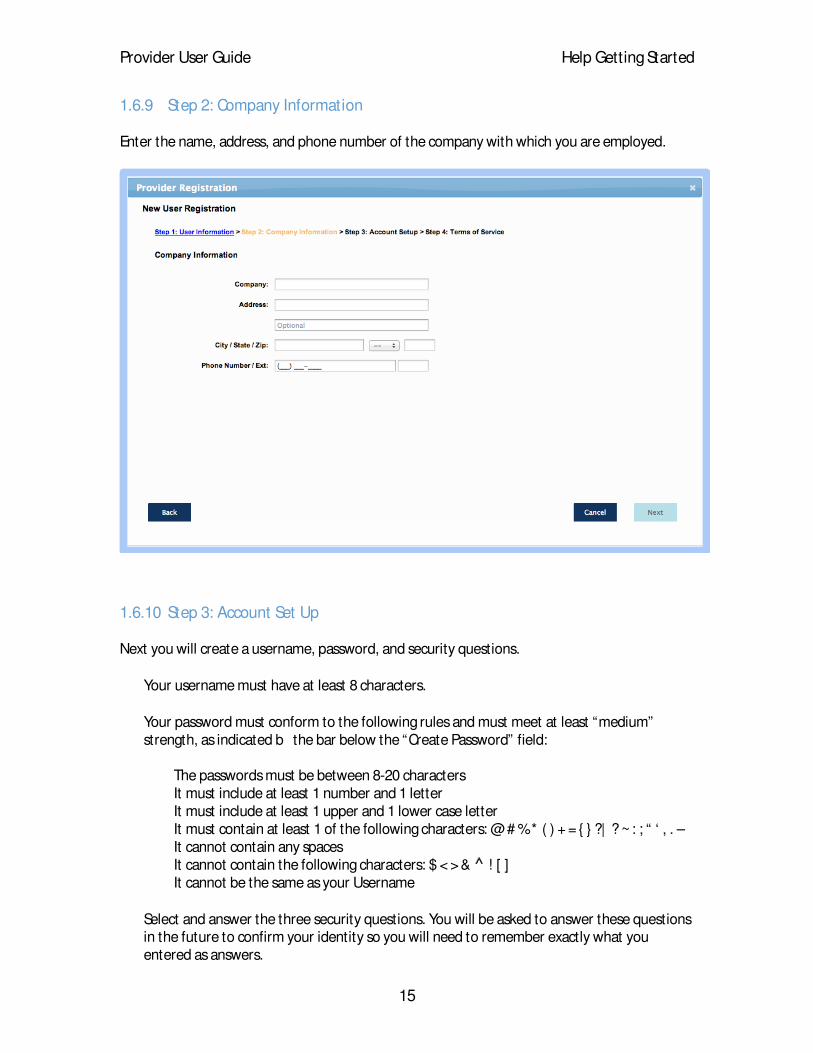
1.6.9 Step 2: Company Information
Enter the name, address, and phone number of the company with which you are employed.
1.6.10 Step 3: Account Set Up
Next you will create a username, password, and security questions.
� Your username must have at least 8 characters.
� Your password must conform to the following rules and must meet at least “medium” strength, as indicated b� the bar below the “Create Password” field:
� The passwords must be between 8-20 characters � It must include at least 1 number and 1 letter � It must include at least 1 upper and 1 lower case letter � It must contain at least 1 of the following characters: @ # % * ( ) + = { } ?| ? ~ : ; “ ‘ , . – � It cannot contain any spaces � It cannot contain the following characters: $ < > & ⌃ ! [ ] � It cannot be the same as your Username
� Select and answer the three security questions. You will be asked to answer these questions in the future to confirm your identity so you will need to remember exactly what you entered as answers.
Provider User Guide Help Getting Started
16
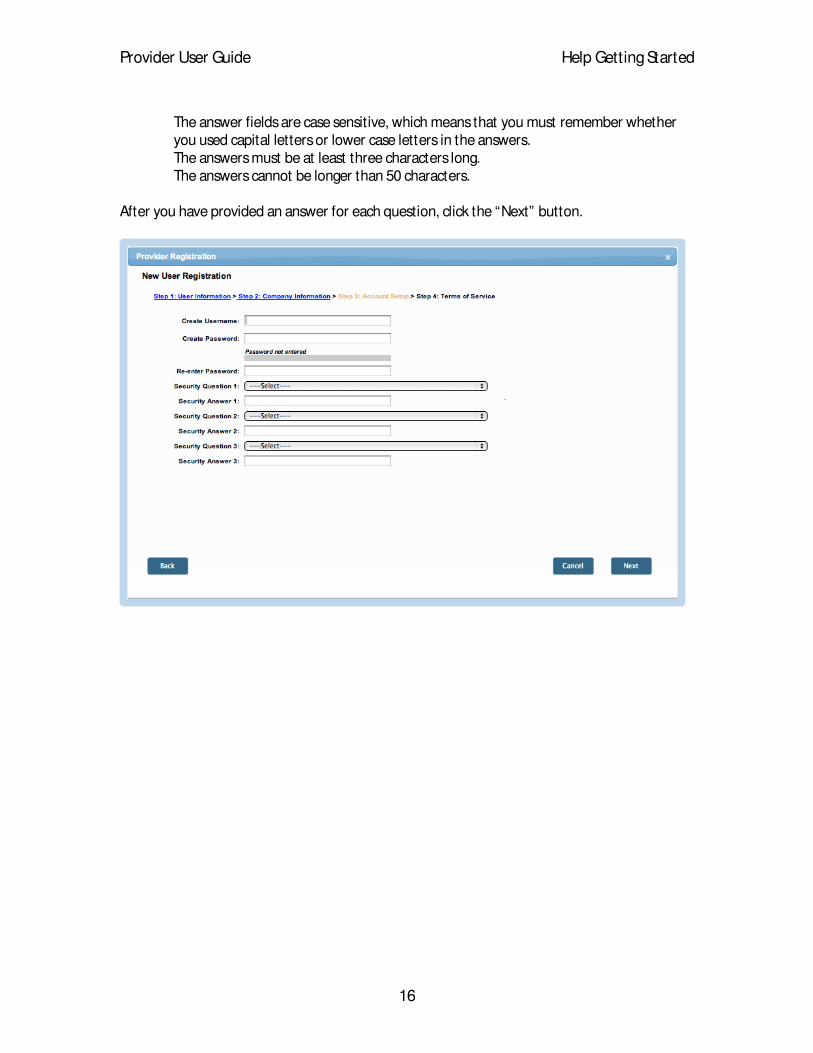
� The answer fields are case sensitive, which means that you must remember whether you used capital letters or lower case letters in the answers.
� The answers must be at least three characters long. � The answers cannot be longer than 50 characters.
After you have provided an answer for each question, click the “Next” button.
Provider User Guide Help Getting Started
17
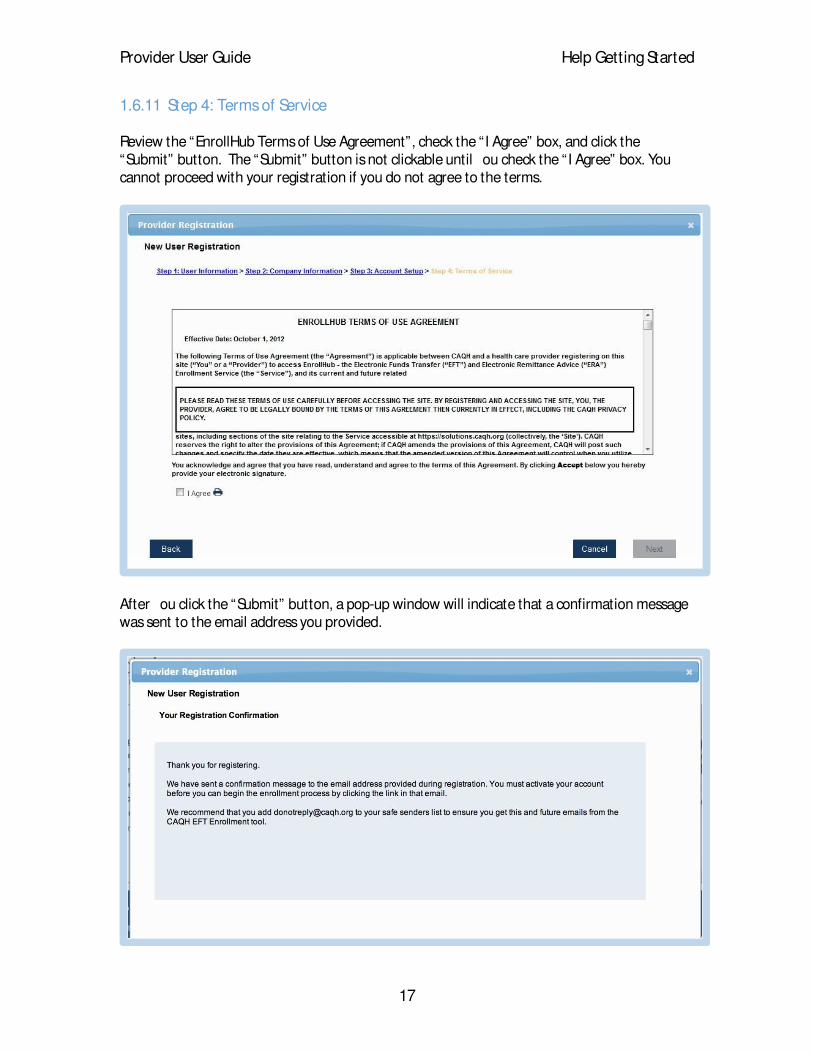
1.6.11 Step 4: Terms of Service
Review the “EnrollHub Terms of Use Agreement”, check the “I Agree” box, and click the “Submit” button. The “Submit” button is not clickable until �ou check the “I Agree” box. You cannot proceed with your registration if you do not agree to the terms.
After �ou click the “Submit” button, a pop-up window will indicate that a confirmation message was sent to the email address you provided.
Provider User Guide Help Getting Started
18
1.6.12 Step 5: Account Activation
An email should appear in your inbox soon after you submit your registration. We recommend that you add [email protected] to your safe senders list in your email program. If you do not see the email right away, please check your spam folder or contact the Help Desk for assistance.
You must activate your account prior to using the system. In order to activate your account, you will need to click the activation link in email you receive shortly after you complete your account registration.
If you do not activate your account, a second email will be sent to you one week after the original sign up. If there is still no activation after the second email, a third and final email will be sent to you two weeks after original signup. If you do not activate your account after the third email, your account will be deleted from the system.
As soon as you activate your account, you are ready to log in and submit enrollments.
Provider User Guide Help Getting Started
19
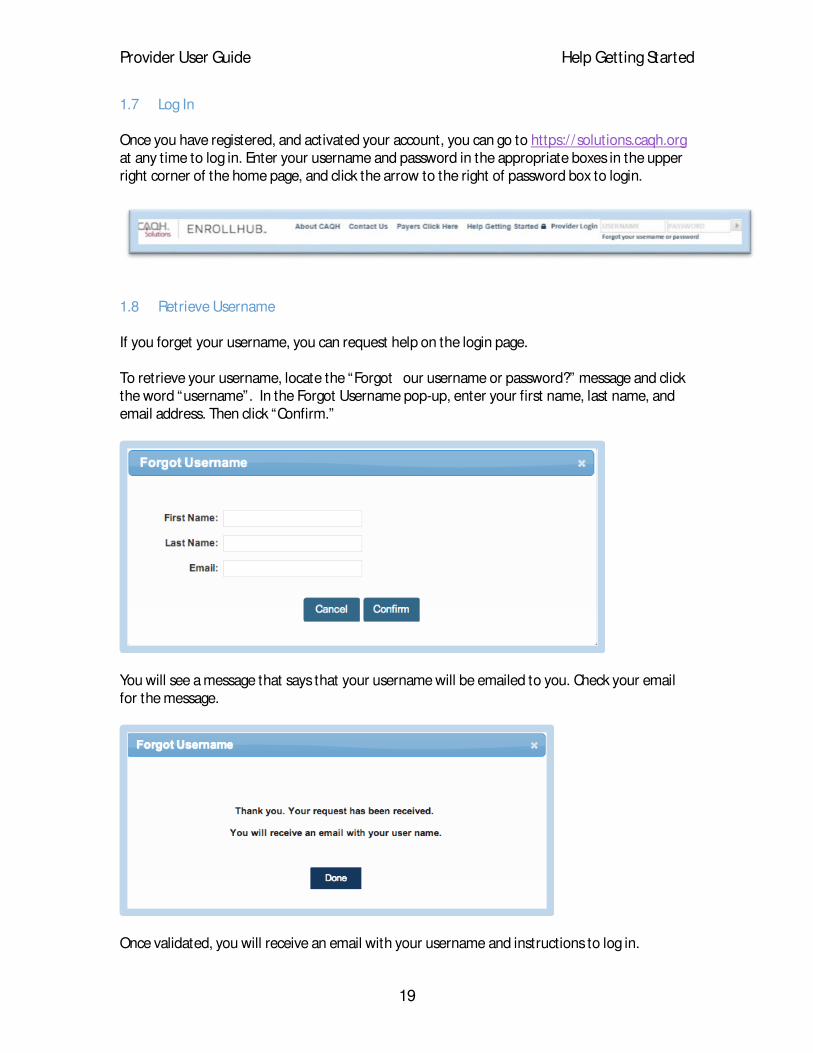
1.7 Log In
Once you have registered, and activated your account, you can go to https:/ /solutions.caqh.org at any time to log in. Enter your username and password in the appropriate boxes in the upper right corner of the home page, and click the arrow to the right of password box to login.
1.8 Retrieve Username
If you forget your username, you can request help on the login page.
To retrieve your username, locate the “Forgot �our username or password?” message and click the word “username”. In the Forgot Username pop-up, enter your first name, last name, and email address. Then click “Confirm.”
You will see a message that says that your username will be emailed to you. Check your email for the message.
Once validated, you will receive an email with your username and instructions to log in.

Provider User Guide Help Getting Started
20
1.9 Retrieve Password
To retrieve your password, locate the “Forgot �our username or password?” message and click on the word “password”. In the Forgot Password pop-up, enter your username in the appropriate field and click the “Retrieve” button.
Next, enter the answers to the security questions that you set up during registration and click the “Confirm” button. All three questions must match the answers originally provided. Remember that the answer fields are case sensitive so use upper and lower case letters exactly as you used them when you created the answers the first time.
After correctly answering the security questions, you will be instructed to create a new password. The new password cannot be the same as any password previously used. You will not need to change the security questions when you change the password.
Provider User Guide Help Getting Started
21
1.10 Account Lock Out
If you enter the correct username but an incorrect password five times, your account will be locked. To unlock your account, click on the word password under the login boxes and answer the security questions to unlock your account, reset your password, then log in again.
1.11 Log Out
To log out, click on the “Log Out” button, which can be found in the top right corner. By clicking the “Log Out” button, the session will end and you will be re-directed to the login screen.
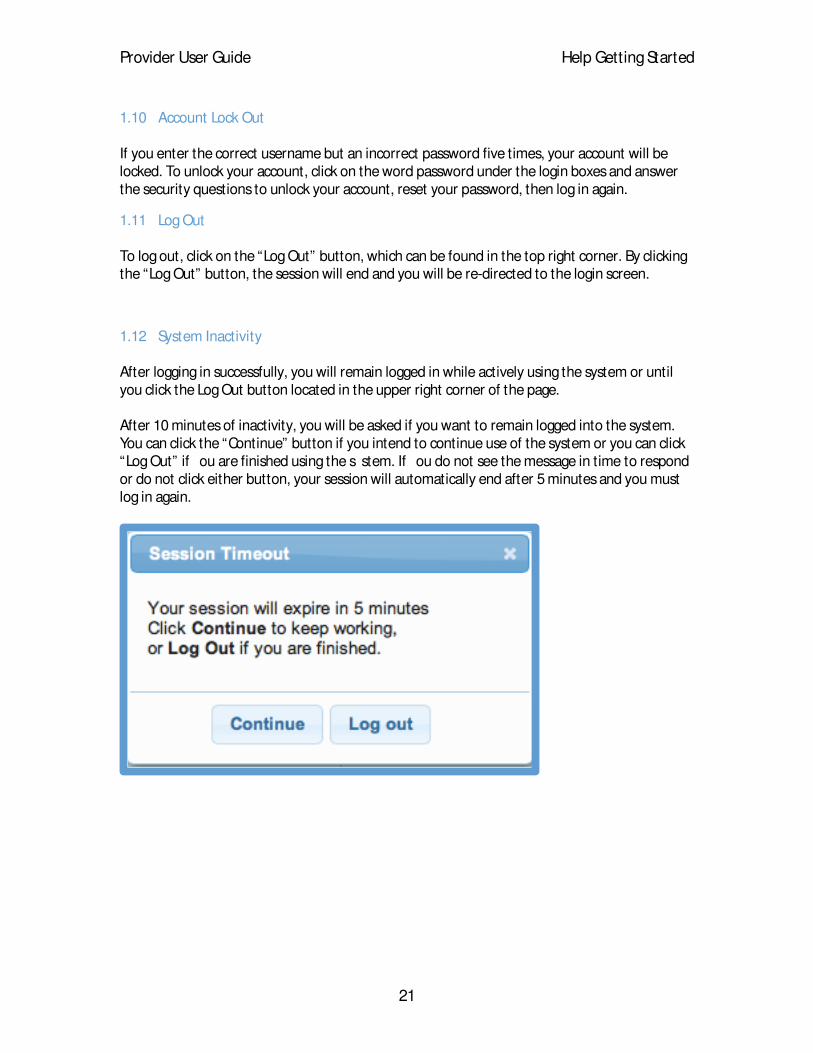
1.12 System Inactivity
After logging in successfully, you will remain logged in while actively using the system or until you click the Log Out button located in the upper right corner of the page.
After 10 minutes of inactivity, you will be asked if you want to remain logged into the system. You can click the “Continue” button if you intend to continue use of the system or you can click “Log Out” if �ou are finished using the s�stem. If �ou do not see the message in time to respond or do not click either button, your session will automatically end after 5 minutes and you must log in again.
Provider User Guide Help Getting Started
22
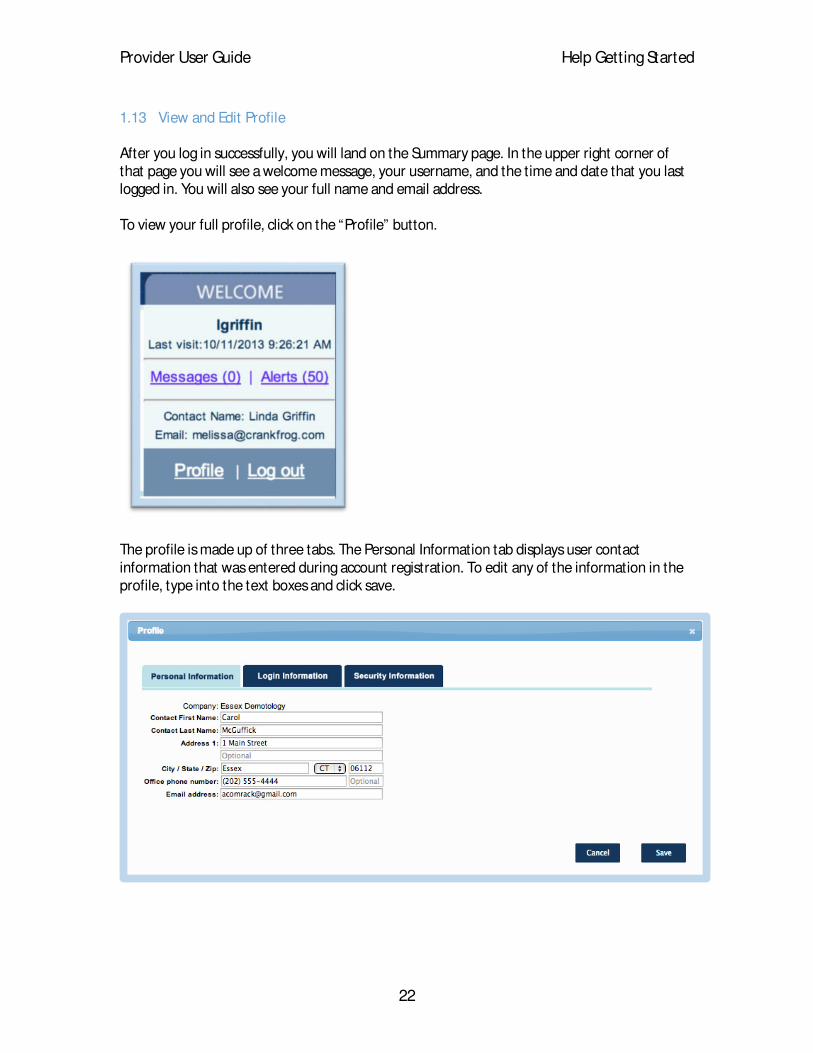
1.13 View and Edit Profile
After you log in successfully, you will land on the Summary page. In the upper right corner of that page you will see a welcome message, your username, and the time and date that you last logged in. You will also see your full name and email address.
To view your full profile, click on the “Profile” button.
The profile is made up of three tabs. The Personal Information tab displays user contact information that was entered during account registration. To edit any of the information in the profile, type into the text boxes and click save.
Provider User Guide Help Getting Started
23
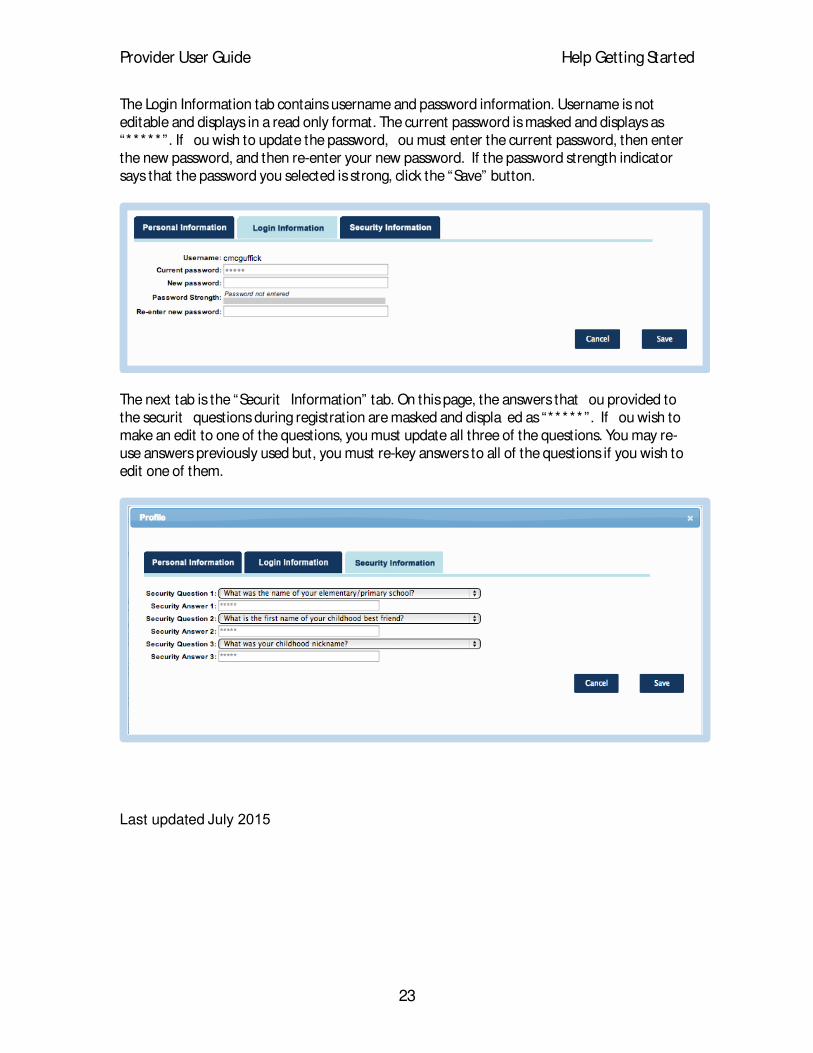
The Login Information tab contains username and password information. Username is not editable and displays in a read only format. The current password is masked and displays as “*****”. If �ou wish to update the password, �ou must enter the current password, then enter the new password, and then re-enter your new password. If the password strength indicator says that the password you selected is strong, click the “Save” button.
The next tab is the “Securit� Information” tab. On this page, the answers that �ou provided to the securit� questions during registration are masked and displa�ed as “***** ”. If �ou wish to make an edit to one of the questions, you must update all three of the questions. You may re-use answers previously used but, you must re-key answers to all of the questions if you wish to edit one of them.
Last updated July 2015