
(,bClick a ;opic i - Sears Parts Direct · /tort/petiole Dalleres aso 01111 gel s zan cause serious...
95
i S i I i i( i ( C } ili LIci,},fl (hi }i':tl (71'(! ;}({ (I(7( t f7 rYTlr i71[ t , i i, (,bClick a ;opic ........... i ©onl:enl:,s Bascf nctors Extended ftncto s ,';'Shoot :itopt ons P ayb ac k/Ii:{d t n i:\ppe :d xes _ndex
Transcript of (,bClick a ;opic i - Sears Parts Direct · /tort/petiole Dalleres aso 01111 gel s zan cause serious...

i S i I i i( i ( C }
ili LIci,},fl (hi }i':tl (71'(! ;}({ (I(7(
t f7 rYTlr i71[ t , i i,
(,bClick a ;opic
........... i©onl:enl:,s
Bascf nctors
Extended ftncto s
,';'Shoot :itopt ons
P ayb ac k/Ii:{d t n
i:\ppe :d xes
_ndex
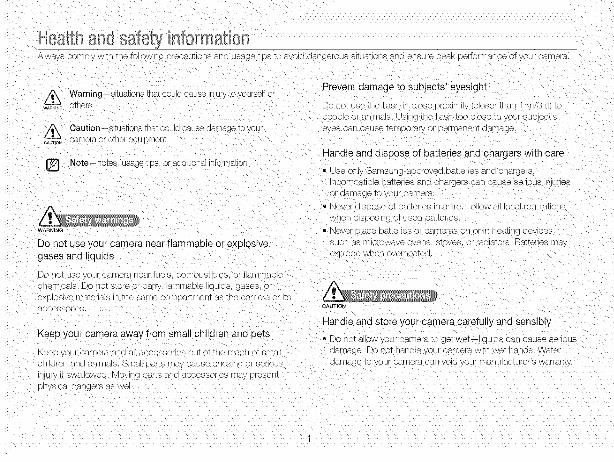
I[I011111{I0../_Wa}/S corsp y with the fo owing }[ecaJtlOn8 ana usage t ps to avoia dangerous situations and eseure peak performance of your camera
Prevent damage to suojects' eyesight
Warning--stuaTons Thatc )u @cause injury to yourse f c....... cruets Dc sot use the lash ir_c ose proHmJty looser man " n/3 lt/to_eoole or anK/s _. us ng it- e t ash too c ose to you r suoject s
Caution-- s tua[ ons [nat cou a cause carnage to yoL e/es can cause [emporar} sr - DrrrqaneN[marsage.o=oT,o=)amera or omer e( ulemen]
Handle and dispose of batteries and chargers with care
[] Note-notes, usageps oraddtionalinformaroro use oily Samsung aDDrovea batteries an@ chargers
/tort/petiole Dalleres aso 01111 gel s zan cause serious lljurles
Dr acreage to your camera.
Never dis sose of batteries in a t re, Fo ow all ioca regu @ oils
when a spos ng of used basenes.
WAFii_ING • Never @ace bat[cries or cameras oll or i1 iqeamlg @evoes
Do not use your camera near flammable or exploswe sues as T/icrowave ovens, s] es. or raa ators Batte es may
gases aria Iq Jlas e>soae when overnea_ec
Do not use yo{ camera sear fuels, r_or-sbtst b es. or tarsmableonem css Do not s_ore or cs %/tamrnab e Iqu ds, gases, c
CAUTIOn,
Handle and store your camera carefully and sensibly
Keep your camera away from small children and pets • Do not a sw • sat camera _c jet we_ aus _can cause senous
,eeD your camera ano a -]ocessones out ot the tea( at s "ha aamage. Do not handle your sa -_eraw m wet na os. ware0_1ares ann an mas. Sinai parts may ause cnoKmg Drserous carnage tc your camera can vo8 your manufactJrer's warrant
-lury if swallowed. Moving _arts ane accessones rnay [ esem
pnys cs aasgers as we

oDonotexposet ecameratom_rec_su_gntorngn_emeeraturssIoranextendedperodoftime.Prolongec®xposure IO SUnl gNI or extreme ter'rlDera_ures DaN cause
oermaneNt mar'flags to your cameras iNterNe corn ONeNIS,
• A_ Dla usJrIg or stor]Rg _ our oarNera i[i austy_ alrt_ 3urr a. £
ooorl] verlt latea areas co prevent rummageto me hg }arts aria11erna cosec[lent 8
Remmve the batteries frorr bs sarnera when s_c g it for a
extenae£ eeriod of time, instal ea oa_enes may leak or oorroae
overtlr'ne ano cause senous aamage _o bur carnera
• Prelect your camera from saris aria a rt WRe[1 us r _ It or
beaches or in other similar areas
Protect yet r camera from irT oact, rough rlanallng, ar sexcessive vlor_atl b[1 to a%DIGserous aamac9
® Exerc se cautlor wrier1 con[leo1 ng cad e8 or amaoters ant
nstall r s satteres aria memory cards. Forci[1 ] the connectorspropery connecting caeles, oJmpropeny ms_a n{ oazeres
ana maser} c arms can aamage sor_s connecters, antaccessories
o Do ot _sertfore j/ _.:)jects to a_ly of your camerascomearu'ne[1t8.8 etc. or access points. Darna{ e uue tc
r/DK}oer use may not De ooverea Dy yc Jr warranty
Protect batteries, chargers, and memory cards fromdamage
_. s exposwig oattenes or merrlory ca us to very cola or ver_no_ temr statures below 0° C/32 ° F o above 40° Q/104 ° F
Extrgrne temDer_stures carl reauce [ne cna g ng capacity of /ourbaseres ana can cause memory cares to rr _ltunctlo
o Prevent oattenes from makng co tac_ with rnetal oojects asI IS car cr_ate a CONNeOIIO[1 eetwee[1 ule + aria terrn rials
}f your batery ana leaa to _emporary o be Y_anentoatteryaa lag@
• Pre\ ant rr,amory csrds from rrlaklrlg co[11act wt[1 icJIGB.al_t.cfore gn substaHces, If d rty, wipe tr/e mernory carc s san wits a
soft clot }afore insertng n your camera
Turn off the camera wnerl i[1sertlrlg brrerrlovrlg trle rnerrlor_Dara
• Do nmt bend ]roe. or suK _ct memory oaras to neavy im[- _olir eressure.
• Dc xbt use rrlemc sards that have been fmrmattea oy o_[1esameras or oy acc s_euter Reformat the mem )r! cars vqtr
your oarnera
• _ever use a aamagee o[1ar_@ battery, or rlhemor_ carc
2

Use only Samsung-approved accessories
USng no< rnDatlDle aooessones may qamage 2 }u ,ameracause IrlJury, or VOQ your warranty
Protect your camera's lens
o Do not expose the ens to @r÷ct sun gnz, as m s may @sco or
me mage sensor or cause t to m_:tunctior
Protect your Je£3from flngeq}r nts an@scr;atcnes C ea youenswm asJt. cean, debts frse bns coin
Exercise caution when using the camera in humidenvironments
When transferrin{ the camera fr_rn a co@ enwxbnF ent to a warnanQ nurnlQ one. conc ens_ o[ csn form on the de c Me electron c
sl_Jtryanememo% ca_,lntr/sstuat© watt, -3tleastl hob
Jnt a moisture has evaporated before us F _ the csme_
Check that the camera ts operating properly before use
The manufacturer takes no res _ons bi ty for any oss st ties o
uamage that may resut frorr samera maltu ct Dn )r morooeruse
Allow only qualified personnel to service your camera
Do not a ow unc sa ifiea personnel to service in@ camera or
a_emrK _o serwce me camera } surselt. Any damage that resu _slrxbmun@uaited sew ses no_ covers@ Dyyour warra xy
Ensure maximum battery and charger life
° Overcharging Da_enes may snor_en Da_ery Ife, After charging 3flnisheQ, elsconneot in@ cab @ tr_br'r 3ur car@era
• Over tir'rl@. JnuseQ DalX@ @S W e scna ge ano must De
_,_qarge@before use.
• m soennect cRargers from DOWer sources when not it1 use
• use DaKenes or for ther ntended PUrPOSe
3

ui laNiZdtiOno_tL_euser _nw_us
02009 Samsung Electronics America, inc.
Camera specifications or contents of this manual may bechanged without pnor notice due to upgrade of camerafunctions.
Copyright information
o Microsoft Windows and the Windows logo areregistered trademarks ot the Microsoft Corporation.
HDMI, the HDMI logo and the term "High Definition
Multimedia Interface" are trademarks or registeredtrademarks ot HDMI Licencing LLC,
QuickTirne ® and QuickTime <_logo are trademarks or
registered trademarks ot Apple Computer, Inc_ usedunder licence.
10
_earnaDOU]your cameras ayout cons aria )asic
functions for shoot ng.
LX_enaga _u_ ;ons 25
_earr _ow to raKea D]OTODyseecting a mode a _c)w _orecord a video or voce memo
Shoot nco ........ 34
_earnamoutthe op_Dnsy )u can set in sr DOTn _mode
.... U_U_<LU U 51
_earn now to play DaCK pnoIos, vaeos, of VOICe
_9mo8 and ear DNOIOS C VideOS, £8o. earn nc N IC
sonnee_your camera _oyour corn[ uter. E_o_oonnteor HDTV,
_efer to seTtngs, errc _lessages, specifcatlons ant_qa 3tenanoe TDS
72

Auto
Program p
DUAL IS 0 _DUA[
Photo He p Guide &_n
Beaut_ Shot _
Scene SCENE
Movie _
Smart Auto I_'SMAR'f
Add tonal ntorrnatDr
Satety warn ngs and orecaJtlons
Camera buttons: tot exam )b: [Shutter] (_ep_esentstne8nutter DU_TON
, Page number ot related intormator
The order ot c Drons or menus • }u must seect tcperform aster}: tot examoe: Seect Functions _White
Balance reoresents select Functions and then WhiteBalance
Annotator
Shooting mode tcons
_' 3se ICONS inciioate that a ruE/orion is avallao e in TNe
correspond ng modes, The SCENEmode _nayno_ supporlIunctior s for a scenes
e .g .}
:_.dustir/g the exposure Fia[iuall_
E . ,_[ ob_nd _/_x the n-er rlt_ cl -ho an_ cY¢ iaht you, _h: to._
a_ r_,l -lo_aam inlnosn ,.a_c Jcana,L i1easo8 ,r__oa_l a _l_O_ DnsI"
Program, DUAL ISand Move fqode8
_rghte_(+J
.......y@VHahVOr_used m ths l_anual
ACB Auto Contrast Balance
AEB Auto E>DosureBracket
AF Auto Focus
DIS D%a wnageStablzat_on
DPOF Dgita Prnt Order Format
EV Exoosu_e /aue
OIS )pt ca Image Stabilzatior
WB vvn_eBalance
5

thL_
Pressing the shutter
Halt prsss [Shutter]: press me snu]ter halwc @owr
® Press [Shutter] xess me snaser a me way @own
alf-press [Shutter] Sress Shutter
Exposure (Brignmess3
e StflouR] }f C -1t IFlaI enters your camera £1e_er[@Nes ire
exrDosure, YOU ( arl ater trle @x }osure wltrl srqutter sDee£
aDer_urs va ue, and ISO speed. By alter ng the exDc sure, your
pRoIos WlJ De EJarKer or g[lter,
}rrrla e: }osure Overexoosur9 (too DrlgRT
Subject. bacKgrouna, and composition
o Subject: the, rrlar sbjeet ot a s 3erie. SUChas a person, an rrlaor still hfe
• Background: the oo _cts arouna me suDjec_
° Composition me eombi/lation of a s oject an@PacK@}un®
Subject
-=_ ComDoston
6
quick reference
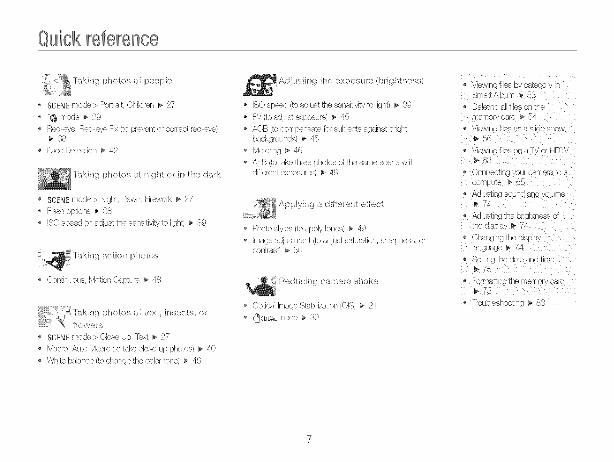
;_,%_[fakh_gphotosofpeople
SCENE rnede > PorE!air, (}hiJdren b 27
*(9 mode _" 29
Red %,e, Red e/e Fix (re pre'x nt or correct red eyQ38
Face Detoction m 4P
photos<tnigh[orinhednk
SCENE mode > Night, Dawn, Fi!e,;,'}rk _ 27'
Flash )pUc,ns _" 38
iSO speed (to adjust the sensitMty to light) _ 3,c
Continuous, 'vk,tion Capture _ 18
i*i :{T_sk[na photos of ext insects o_
* SCENE n-!odo > Cie,_< UD _xt l_" 27'
* iV]acre,,Auk:, Macro (io take ,'los( up photos) _ ,40
e White bslar/ce (to chan!_/e the color tone', _ ,46
_ Adi<lstir_g the expos_lre (brigh[t_ess}
iSO speed (to adjust the sensitivi%, to light_ _ 89
_-',/(to adjust exposure1 _ 45
ACB ',tocompensat_ %r sul_ecis against brigi/t
backgreund,q _ 45
Meienng _ 46
AEF5',re take three pb£<s of the sarl_e scene withdiffe_ nt cxposurus) _ 48
;_ A } y no _ diffelen_ e/fecl_o.,,,_ ....
P_oosyes(o_l! _' }_es _ 4,c
_rlags dus rl ,,q, ,, ) cdj{ ,,, ,,at_r:tlor, s[iarpr-!es8, or< x-_rasti _ 5(}
O!)ticalImage8tabilization(O18)_ 21
* (9_mUALmocie _ 3',)
vie' g _le_:_by catefiorSmartAbum _ 5{
e u@_@['_ L @s of 1[[lqne nory car } 5,_
e Vl( {,;_IJeP(48_ Sae S[56
vie [ib_ or d v or DIV
e (}OLReC[ 1_your carpers [o aaL!ter t_ (}5
e £,O]UF'L0 S( 1, u vu_u_. F4
e '_,rJ]u!<'r;cJ [rle Drlgr/tF/es!: )
_nec spay _- [
a ]ucge _ 74[
beCLngtne GaLe 8q( [N]e
e Fo/fY/_[_i/o[q6 *_'e'norvoara
roub eshooL_ _ 88
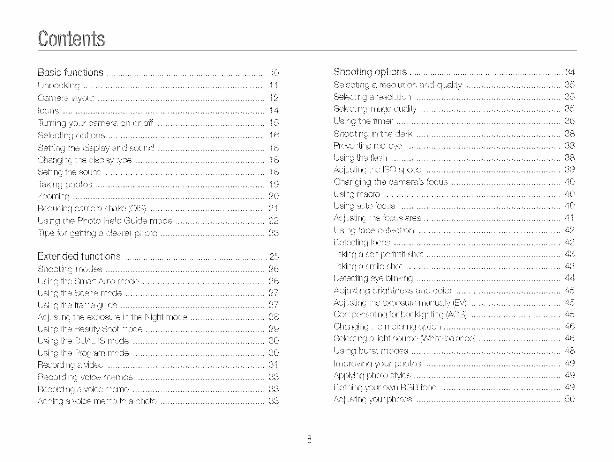
Basic functions ................................................................... 10
Unpacbng 11
Camera layout 12cons 14
lumir_q your esmem on o_"off 15
SqecS_ng opt_e_s ........................ 16
Solhr,{:__h_ dlsDlay and s_uld ......................................... 18
Cr,_.ging he dis#_/y Lyp_ 18
Se4i/_g*'e sound ........................................................... 18
lsb.g phcSos .................................................... 19£ooming ..................................................................... 20
Redudng caJneras_uko ',L)I,c_....................................... 21
U_ng the Ph<_/oHelp Guide mode .................................... 22
Shooting options ................................................................... s/
S_le_ing a resoluhon and quall!y ...................................... 35
Seb( ring a resd,Jt on 35SebM _fj imc_gequoJly 35
U_lng/he diner ........................................................ 36
Shoo!ing in the dark .................................................... 88
Prevo_/t rig ied eye ....................................................... 38
Using the %sh ............................................................ 88
/\djust'_g le ISO speed ................................................... 39
Changing _he camera s/_,>cus .......................................... 40
Using mac'o ....... 40
Using a,Jo *oeus ............... 40
/\dju%_"_(/'so *oc,_sarea .................................................. 41
Uuing/ace detection ................................................... 42
Dete_stng *_xses.......................................................... 42
hdng a sc?por.,-at s_'ot ..............................................48
hdng a smile shot .....................................................43
}_'tectng eve bin<qf4..........................................................
/\dlusfi_q b.df.?,mess s_,d color..........................................5
/\dJuc,bqgth_ e×'pOC,¢<:mA u{ty (,:%/)....................................5
Comoe"w_t,'_g_orba_ H'g _tngJ\CB' ....................................45
Cha' giqg the mo_e"_g or£on ...............................................6
Selecting s} Ig__se, _rc(_ (%/q{_ r)5_,_{ce! .................................6
( _u[nq b_m/modeu 48
Impr,.x,_l_o yc,ur pho!cq¢ 49
Appyng p.@ styes 49
De*ning y<;urown RGB .e"e 49
/\dlust ng your ' \,ores 50

(}¢_ii{eri{3
Playback/Editing ................................................................... bl
Ppqying back ...................................................................... 52
Starting Playback mode ..................................................... 52
Vicwir/g photos .............................................................. 56
PlayiT_ga video 57
Piayi _gvoice memos 58
Editing a photo .............. 59Resizing plsobs ................................................... 59
RotatiT_ga photo 59Applying photo styles ....................................... 60
Definir_gy_;urown RGB tone 60Corr_ectinge×posure pror)lems 61
Croating a prit_to_der(DPOF) .................. 62
Vk_Mn!._files on a YV or b/[)TV .................... 63
lransbrrin!j fibs o your computer ............. 65For Windews users ................................... 65
Fer Mac users ................ 70
Prir tit g ph( t( t_with a ph(to pdntor (P ctBrid%>) 71
Appendixes ............................................................................ 72
(amem settincTs menu 78
A<cessing the seKir_gsmenu ........ 73Sound 74
Displny 74
Settir/qs ........................................ 75
Em>r rne_:sage_ ................................. F8( a/hera m_:tnt(>na/_co .............................. 79
Oieanir!gyour ea/nern ............................................. 79
About mer!'!ery cards ................................ 80
About the batten,' ...................................... 81
BeR:}mcontacting a sen/ice center .................................... 83
C;a/ /era specifications 86F:::CC nolice .................... 90
Index 91

LearRaDOUIyourcamera'slayouLICQrlS. ana Dasio funct _ns
for shooting.
Unpacking
Camera layout .....
cons _zz
Turning your camera on or off ..... 1{_
Selecting options ..
Setting the display and sound _. 18
)hal _ ] _ne alsplay typ_
_: ,3[ne souna
Taking photos. Js
Zooming K
-_eau_ng _mera shake _OIS} ........ 2_
Using the Photo Help Guide mode
Tips for getting a clearer photo .......................... 23

Checkyourproductboxtorthefolbwingitems,
Camera
Rechargeable battery Strap
(4802 001221) (Silver:AD6S 02596A/Black: AD6S 02604A)
/F--
AG adapter/USB cable
tAD44 00148@/(AD89 00162A)
Software CD ROM
(User manual
included)
(AD46 00248B)
A/V cable Quick Start Manual
(ADS9-00163A) (AD68-03680B)
G Theillustra_cc_sn!aydifter!r°m Y°U!actuaJitems:
Optional accessories
Camera case
Sold as a set
HDMI c _a@e manua
&D68-03751/_
emc car(is
Remote contnc
AD59-00164A_
Cradle HDMI cable
or chargin 9 the baltery 'for viewing high-resolu_lorar s 3onneo_w _ 'y)ur Lrnages or F ay_lg wdeos
camera _c an HDT',/or PC} tAD39-00160A/
lAD61-04147/_
Basic tunctions 11

CameralayoutBetore you start, tamiliarise yourself with your camera's }arts and their functions.
POWER button ........................
Shutter button
Flash .............................................
Speaker
-- Microphone
sensor
Lens
light/timer lamp
USB and A/Vport
Battery chamber coverInserta memorycardandbattery
Tripod mount
Basic tunctions 12

Zoom button
• Zoom in orout in Shooting mode
• Zoom in on part of a photo or view files as thumbnails in Playback mode
Display --
MENU/ \,\S MENU Access options or menus
In Shooting mode Whilesetting
DISP Changethe displayoption Move up
Navigation _ Changethe macrooption Move down
Changethe flash option Move left
_t_ ............................Move right
Take a photo quickly and easily withAuto minimal settings
p Program Take a photo by setting options
Take a photo with options suitable forQ_)DUAL DUAL IS reducing camera shake
Photo Help Get shooting tips and practice shooting_m Guide
Take a photo of a person with options to*_ Beauty Shot hidefacial imperfections
Take a photo with options preset for aSCENE Scene
specific sceneOK Confirm the highlighted option or menu,
'q[]_]j' Playback Enter Playback mode _ Movie
Access options in Shooting mode,Function I_SMA_'r Smart Auto
• Delete files in Playback mode
Record a video
Take a photo by letting the camera selecta scene mode as it detects
Basic functions 13

The icons displayed will change according to the mode you select or the options you set,
A. Information
Selected shooting mode
_×so Zoom ratio
BD[IB| Available number of photos
BD:D|:Bll Available recording time
internalmemory
Memory card inserted
_ : Fullycharged
• _C][ :Partially charged
• C : Oharging needed
FI2.0 Aperture and shutter speed|/|25s
Voice memo
F-] Auto focus frame
(/_l) Camera shake
HO:OBAm_l]09/lllll[Jll CurTentdate and time
Basic functions 14
B. Icons on the right
(_) Flash
0 Truer
_l_q Auto focus
/'_S Photo style
_ Face detection
_ Optical image Stabilization (OIS)
Face tone
+_ Face retouch
image adjustment[] (contrast, sharpness, saturation)
_) Voice muted
C. Icons on the left
Exposure value
",".0:- White balance
ISO speed
IM Photo resolution
3_0 Video resolution
Photo qualityJll-F Frame rate
[m] Metenng option
LT Long time shutter
Burst type
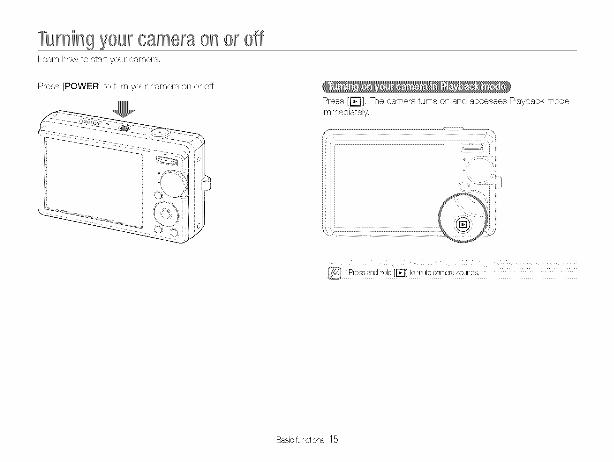
°l_ming7ourcameraon or offLearn how to start your camera,
Press [POWER] to turn your camera on or off.
Press [El], The camera turns on and accesses Playloack modeimmediately.
Basic functions 15

SelectingoptionsYou can select options by pressing [MENU] and using the navigation buttons ([DMSP],[_], [_.], [__,)]).
,j
2
In Shooting mode, press [MENU].
Use the navigation buttons to scroll to an option or
menu,
• To move left or right, press [_.] or [_...)].
To move up or down, press [OlSP] or [_],
{_ Press [OK] to confirm the highlighted option or menu
' Rotate the mode dial to p.
2 Press [MENU]
Press [MENU] again to go back to the previous menu.
Bress[Shutter]t° returnt0 Shc°!!nqn!cde,
Basic functions 16
S_:?i_}}c(iii!}Oi}iiD)iS
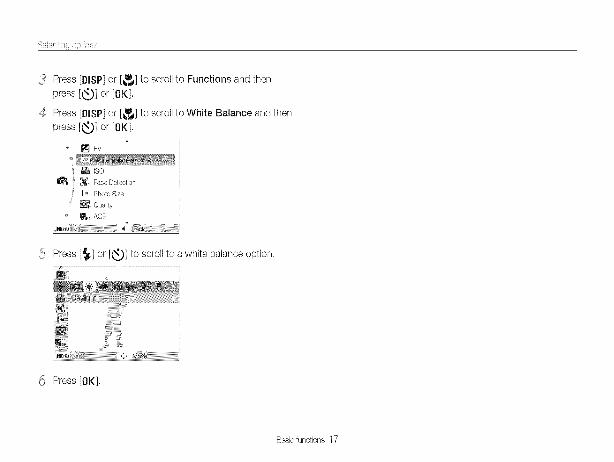
3
4
Press
press
Press
press
[DISP]or [_] to scroll to Functions and then
[Q] or [OK].
[DISP]or [_] to scroll to White Balance and then
[Q] or [oK].
[] EV
'_a_ _so_, '_ [_ Face Detection
| M Photo Size
Quality
'_ _jf AOB
/!!i Press [_] or [_] to scroll to a white balance option
))_)i ii@i}ii_ii:Jiii¸_¸¸¸........
)iii_ii:i ,iii_iii)ii)@
iiliiii!_ii!ii!ii!ii!ii!ii!ii!ii!ii!ii!ii!ii!ii!ii!ii!ii!il
Press [OK]
Basic functions 17
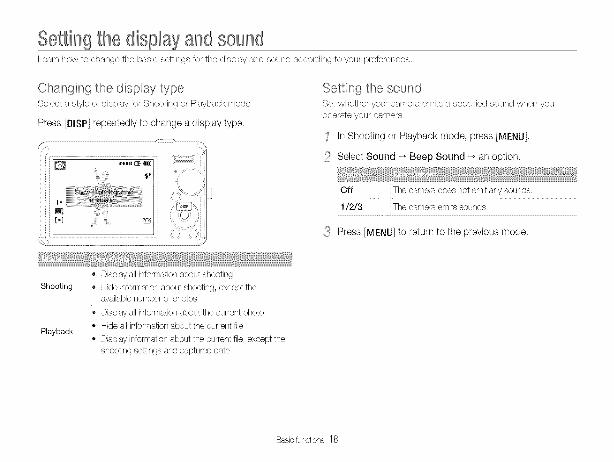
S ngthe displa7andsoundLearn how to change the basic settings for the display and soclnd according to your preferences,
Setting the soundSet whether your camera emits a specified sound when youoperate your camera,
' In Shooting or Playback mode, press [MENU].
Select Sound _ Beep Sound _ an option.
Off The camera does not emit any sounds.
1/2/3 The camera emits sounds.
{_ Press [MENU] to return to the previous mode.
o Display all information about shooting
Shooting , Hide information about shooting, except the
availablenumber ot photos
o Display all information about the current photo
, Hide all intormation about the current filePlayback
o Display information about the current file, except the
shooting settings and captured date
Basic functions 18

l king photosLearn basicactionsto takephotos easilyand quicklyin the Automode.
' Rotate the mode dial to
2 Align your subject in the frame.
{_ Half-press [Shutter] to focus.A greenframemeansthe subjectinfocus.
z_ Press [Shutter] to take a photo.
Basic functions 19

You can shoot close up photos by adjusting the zoom, Your
camera has a 5X optical zoom and 5X digiU zoom. By clsingboth, you can zoom in up to 25 times,
Push [Zoom] up to zoom in on your subject. Push [Zoom] downto zoom out,
Zoom ratio
Zoom in
If the zoom indicator is in the digital range, your camera is using
the digital zoom. The picture quality may deteriorate when youuse the digital zoom,
Optical range Zoom indicator
Ir _] x5.0L__]Digital range
Zoom out
G Thez°°m ra_°availablet°r vide°sdiffers'
Itmay take longer to save a photo when using the digital zoom,
Basic functions 20

Reducing camera shake {OIS)Reduce camera shake opdcaHy in Shooting mode,
Before correction Atter correction
' In Shooting mode, press [MENU],
Sebct Functions _OIS _an option.
_-'_,,_'_ Off: Deactivate the OJS function,
_ • OIS may not funct on properly wneryou move _ bur camera to fo ow a Jlov40gsuojec_
you use aC [a zoomthere s too much camera SNaKe
the SNk]er speeo s SlOW(e g,, wNeAyOL _eect Nignz n theSCENEmc _e}
tne oaEe _ _iov_yot take a close UD8AOI
If .OU USe the OS tuNotoN W_I7 a _rlpo(1, your mages may De C urfec
s thevibratonotfl-leOSsensonDeac_ £etheOIStuncllonwhe
you Jse a Trloo(
t the camera _ mpac_ea, the (1spJay _lJJDeoJurry, 1In 8 ease. _urrDft the camera and turn ton agan to use the O]S tuncllon correct
Basic functions 21

Usingthe PhotoHelp6side modeTlais mode provides various shooting tips. Learn how to get belier photos and videos.
' Rotate the mode dial to _'_n.
Select a menu from the list,
View a topic.• Press[DISP]or [_] to displaythe previousornextscreen.
{!!i Press [OK] to practice.• Press[[lISP]to returnto the list.
{_ Select a submenu.
Basic functions 22

Tips for getting a clearer photo
--_'_X_-'_ Make sure noth%4_,_,_ OOCKlng_neens
@:J
\
• Set the Optlca LmageStabi izaton orxDn to
re@ucecamera snaKe Dptlcaly. (p. 21
o Seectthe O_)DUALmode [c reauce camerasnake Dot SOTcalyan(] ogta V./P. 20/
Halt-Dress [Shutter] and adjJst tnefocus. Focus and e: oosure wll De
_tGjus_eo automatical y,
The aperture value aria 8r Jzel
soeea are aJ[ornaf ca ly set
°Focus frame
,, Press [Shutter] to take tne enotct displayed in gree
Change fl _ frame and half-xess[Shutter] agan t dsplaye@ in reca
.ou_ When shoot g 1tne can avolo
3et_lngthe{lash oeton to SlowSync o Off, The aoerture remains
open longer ano t ma} De naroerIO r/olo [ne carYz a S_
use aTnoodor set the flas
oeton to Fill in. (o, 38/
• _et 30 soeed oetlons. (e, 39}amera snaKe
Basic functons 23

may be d ffcu t to get your subjec_ _tocus when • When you take photos in Io_4Ight
9acKgrTourla
- ire i]grlt source Derlirla ins ._ JJOect Js too Drlgnt
iris SuDJeCI IS SFIIFI}
IFIS SL DJeCI ir/cluass rloNzorl[8 Datt@fris, SUCFI as DIRas
Iris K DJeCI _ riot Dosltlorlea the cer/te[ ot the _ralTl_
,i %
o When subjects are mow-g tasl
Turnon the rash
). 38/
use IRe cont Ruous
or motion C&Kure
TJnOt]on o, 48
Use the focus lock
Halt Dress[Shutter] to rocus, snen me subject is in focusye can eDos_on me Tramsto crlange me compos_lo
vvnen you are ready, press [Shutter] to take yo_ mote
Basic functons 24
BLearn now IO ISKe a pnoIo oy selecting a moae and now tc"ecora a vlaeo or volee memo
Shooting modes ............................................ 6
_s_uc [he Smart Auto mode 26
_s g the Scene mode 2-
.,. 2
/-_ujusun!:L__, _xuc_o_,_ [ne Nic ]ode ............. 28
using _nc Bea_]ly Shot mode ....
SIf/_ [he U[/-_L I© f/IoL/e SO
Js_ug the Program mode ............................. 7(
(CO .}rOllfl{J _ VlCleo ......................... J
Recording voice memos .................... 33
--/ecorql/ _ a Voice memo ............. -J3
/-_(lt; S _ v oICe memo {o _ pro ............................. _J3

Sh0etingmodesTake photos or record videos by selecting the best shooting mode for the conditions,
Using the Smart Auto modeIn this mode, your camera automatically chooses the appropriatecamera seltings based on a defected type of scene, Itwill be
helpful if you are not familiar with the camera settings for variousscenes.
' Rotate the mode dial to _SSMART,
Align your subject in the frame,
,, The camera selects a scene automatically. An appropriate
mode icon will appear at the top lett of the screen.
lA\ Appears when taking phetos of landscapes.
Appears when taking phetos of bnght backgrounds,
.) Appears when taking photos of landscapes at night,This is available only when the flash isoff,
*)l Appears when taking portraits at night,
:eA Appears when taking photos of landscapes withbacklighting.
_ Appears when taking portraits with backlighting.
Appears when taking portraits.
_,, Appears when taking close up photos,
To, Appears when taking close up photos of text.
_., Appears when the camera and subject are stable for awhile,
Appears when taking photos of actively moving subjects,
{_ Half-press [Shutter] to focus.
zS Press [Shutter] to take the photo.
@ '_!fthe camera does not leoegnize a proper scene mede _s_ will notcharge and the default settings wil! be used;
Even if there is a race detected, the camera may not select a portraitmode dependir_q on the subjectls positlqn or !!ghting,
The camera may not select the correct scene depending on shooSnq
environments, such as camera shake, light!rig, and d!stance to thesubject,
Even ifyou use a tTlpod; the 4', mode may not be detected dependinqon the subject's movement,
B<ended functions 26

Siic_oiiii{I iiiod_s
Using the Scene modeTake a photo with optior/s preset for a specific scene.
' Rotate the mode dial to SCENE
Select a scene
Using the frame guideWhen you want another person to take a photo of you, you can
compose the scene with the frame guide feature, The frameguide will help the other person take a photo of you by showing
the part of the pre composed scene,
'_ Rotate the mode dial to SCENE.
Select Frame Guide.
_ Align your subject in the frame and press [Shutter],
• Transparent guides will appear on the left and right of theflame.
• To change the scene mode, press [MENU] and select Scene
a scene,
• For the Frame Guide mode, see "Using the frame guide,"
• For the Night mode, see "Adjusting the exposure in the Night
mode" on page 28.
{<_ Align your subject in the frame and half-press [Shutteq
to focus.
Press [Shutter] to take the photo
_{ Ask another person to take a photo.• Thepersonmustalignthe subjectinthe frameby usingthe
guides,andthenpress [Shutter]to takethe photo.
/!!i To cancel the guides, press [OK].
B<ended functior/s 27
Siieoiiii{ I iiiod_s
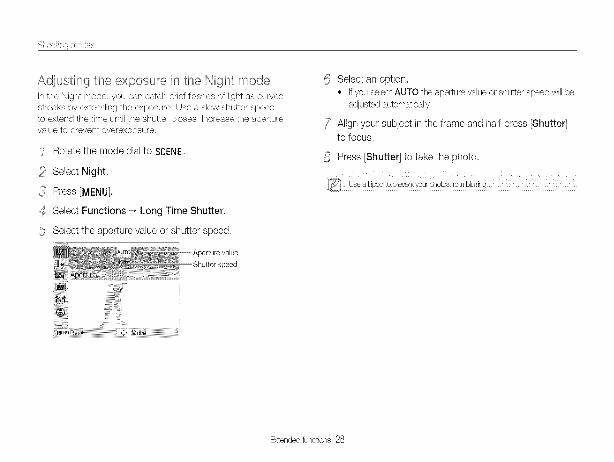
Adiusting the exposure in the Night modeIn the Night mode, you can catch brief flashes of light as curved
streaks by extending the exposure. Use a slow shutter speedto extend the time until the shutter closes, Increase the aperture
value to prevent overexposure,
' Rotate the mode dial to SCENE
Select Night,
{_ Press [MENU]
_ Select Functions _Long Time Shutter.
/!!i Select the aperture value or shutter speed.
(_ Select an option,,_ IfyouselectAUTOthe aperturevalueor shutterspeedwill be
adjustedautomatically,
_? Align your subject in the frame and half-press [Shutter]to focus,
_} Press [Shutter] to take the photo.
@ Usea_!_d to prev6ntY°U!Pt_°tcstr°mblurrhg,
Shutter speed
E_ended tuncticns 28

Siieoiiii{Iiiiod_s
Using the Beauty Shot modeTakea photo ot a personwith optionsto hidefacial imperfections.
' Rotate the mode dial to *_.
To make the subject's skin tone appear lighter (face
only),press [MENU].
_ Select Functions _Face Tone _an option.Selecta highersettingto makeskintone appearlighter.
B "ii_i_¸_ ¸ _......
Bev_ 3
_ To hide facial imperfections, press [MENU].
/!!i Select Functions _ Face Retouch _ an option.Selecta highersettingto hidea greaternumberofimperfections.
(_ Align your subject in the frame and half-press [Shutter]to focus.
17 Press [Shutter] to take the photo.
E_ended tunctior/s 29

Siiooiiii!]ii ii iod(_:!;
Using the DUAL IS modeReducecamerashakeand preventblurred photoswith Opticaland DigitalImageStabilizationfunctions_
Before correction After correction
' Rotate the mode dial to [_))DUAL
Align your subject in the frame and half-press [Shutter]to focus.
,_t Press [Shutter] to take the photo.
Using the Program modeSet variousoptions (exceptforshutterspeedand aperturevalLle)in the Programmode.
'_ Rotate the mode dial to p.
Set options. (For a list of options, refer to "Shooting
options")
{_ Align your subject in the frame and half-press [Shutter]to focus.
Press [Shutteq to take the photo
Seu_oelt-_atis brighter than _luoreseent light,
, Ifyqur subject i8 movirg rapidly, the photo may be blu(ry.
, Set tt_eQpScal Image Stabilization optbn tq redl4s?camera shake !n
different shooting modes. (p. 21)
B<ended functior/s 30
Siiooiiii!iliiiiod{_s
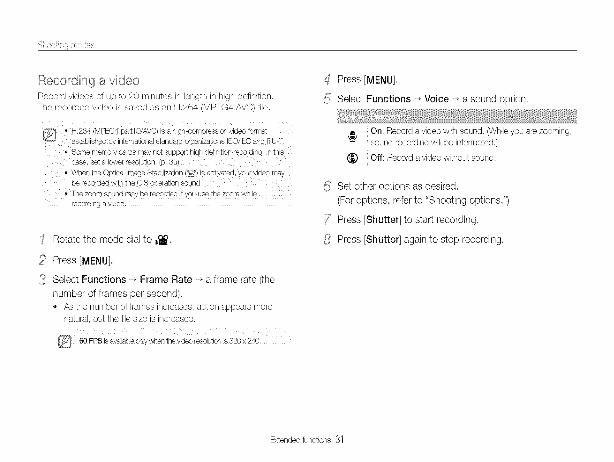
Recording a videoRecord videos of up to 20 minutes its length itshigh definition,
Tlqe recorded video is saved as an H,264 (MPEG4,AVC) file,
• 8ore? memory cards may not SUpporthigh definiti0n recqrdinq. In tt-_is
case, set a Iowe: resolution, (p, 35)
_, The zoom sound may be recorded ifyou use the zoom while
recording a video,
' Rotate the mode dial to _
Press [MENU],
_<_Select Functions _Frame Rate * a frame rate (the
number d frames per second)
,, As the number of frames increases, action appears morenatural, but the file size is increased.
60 EPSis _!aJbableon!ywhenthevideo/÷sout,onis320x 2401
z_ Press [MENU],
4::1Select Functions _ Voice _ a sound option
a On: Record a video with sound, (While you are zooming,_2 sound recording will be interrupted,)
(_ Off: Record a video without sound,
(_ Set other options as desired.
(For options, refer to "Shooting options.")
_7 Press [Shutteq to start recording,
_ii Press [Shutteq again to stop recording
B<ended functior/s 31

Siic_oiiii{i iiiod_s
The camera allows you to pause temporanly while recording a
video, With this function, you can record your tavonte scenes asa single video.
Press IOK] to pause while recording. Press it again to resume,
E_ended tuncticns 32
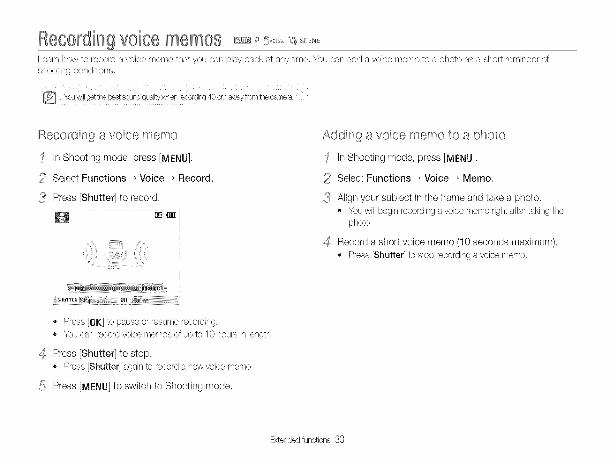
Recordingvoicememos ......Learn how to record a voice rnemo that you ear/play back at any time, You can add a voice memo to a photo as a short reminder of
shooting conditions,
Youwl!lgetthe_st soundquaJityvv'-!enrecording40cmawaytromlt-_ecamera.
Recording a voice memo
' In Shooting mode, press [MENU]
Select Functions _Voice _ Record.
_<_Press [Shutter[ to record.
4
5¸
li_iii_,,i-i_E_iiB_ii{iiiiiii_i_i_iiiiiiiiiiiiiiii!iiiiiilin, ii_@_iiiiiiiiiiiiiiiiiiiiiiiiiiiiiiiiiiiiiiiiiiiiiii
• Press [OK] to pause or resume recording.
• You can record voice rlerr/os of up to 10 hours in length.
Press [Shutter] to stop,• Press[Shutter]againto recorda newvoicememo.
Press [MENU]to switch to Shooting mode.
Adding a voice memo to a photo
'_ In Shooting mode, press [MENU]
Select Functions _ Voice _ Memo,
_ Align your subject in the frame and take a photo.
• You will begin recording a voice rr/emo right atter taking the
photo.
_{ Record a short voice memo (I0 seconds maximum).
• Press [Shutter] to stop recording a voice mettle.
D<ended functior/s 33

0Learn about Ire orations you carl set in snooting r'noae
Selectino a resolution and quality ............ 3_ Adjusting brightness and color 45
oelec[in o a resolu[io ...... :_;_ r,(_us_ [ne exposu "emanually (EV) ........... 45
oe/_cun!l iHage quu_l_y .......... 35 Coml_erlsal it ]or DSCKllgn_IF CB' , .......... 4_'}
Using the umer 3_: C anf_,_ngthe eteHrld o_)ri ........ 4(_
Shooting in the dark 38 Selectin(:/ s lighl s( ume/While balance ......... 4_
vrev-en[_ngtea-eye 38 Using burst modes :_
Js _g_ne _a_ 38 Improving your prlotos ......
_ju,'_ _uii i_ _,-_.)speed ........... 3_ /._,ppl}vlnU )Rolo styles _
Changing the camera's focus .... {. ueT_n_ngyou_ ew RGB tone ................. 49
using macro ....... 4( /_,%usl_ngyc sr _JHOLOo.............. 5C
usEng auto _ocu,_{ ............................... 4(
_,OjLl$llr}._i] rRe fOCUS 8_8 .., /<_!
Using face detecz_on ........... 4'_
Detedi laces.,
_a _ 8 S@II'DOF}.FSI[ SRO[ ......................... '_*p
l_:_kinga smile snol _,.
Detecting eye L _Kin9 ......

Selectinga resoluti0nandqualit7Learn how to change the image resolution and quality settings.
Selecting a resolution u_ _,h00,,4ssc_ ,,,[email protected] you increase the resolution, your photo or video will includemore pixels, so it car/be printed on larger paper or displayed on
a larger screen, When you use a high resolution, the file size willalso increase.
When recording a video:
' In the _ mode, press [MENU]
Select Functions _ Movie Size _an option
When taking a photo:
' In Shooting mode, press [MENU[
Select Functions _Photo Size _ an option
12881280 X 720 HQ: Play back high quality files on an HDTV,
1288 1280 X 720: Play back on an HD%!.
1_18 640 X 480: Play back orsageneral TV,
]_8 320 X 240: Post on a web page.
12M 4000 X 3000: Print on A1 paper,
3984 X 2656: Print orsA2 paper in wide ratio(3:2),
3968 X 2232: Printon A2 paper in panorama ratio (16:9)
or play back on an HD%!,
8M 3264 X 2448: Print on A3 paper,
5M 2592 X 1944: Print on A4 paper,
3M 2048 X 1536: Print orsA5 paper,
1920 X 1080: Print orsA5 paper or play back on an[]E] HDTV.
IM 1024 X 768: Attach to email,
Selecting image quality _,_ r_ _ sc_,_-Photos you take are cornpressed and saree1in JPEG format.
Higher quality images will result in larger sizes,
' inShootingmode,press[MENU].
Select Functions _ QuaJJty _ an option,
_F Super Fine
Fine
_,n Normal
Theoptions maydifferdepending onthe shootingmode,
Shooting options 35

Usingthetimer ....Learn how to set the timer to delay shooting.
' in Shooting mode, press [Q].
S Remote: Takea photo in 2 seconds each time you
press the shutter button on the remote control.
Select an option,
OFF Off: The timer is not active,
O 10 8ec: Takea photo in 10 seconds.
O_s 2 Sec: Take a photo in 2 seconds.
Double: Takea photo in 10 seconds and take another"c'J° in 2 seconds.
Motion Timer: Detectyour movement and then take a((O)) photo, (p, 37)
4m
Theoptions maydifferdepending onthe shootingmode.
{_ Press [Shutter] to start the timer,
• The AF assist light/timer lamp blinks. The camera will
automatically take a photo at the specified time.
availabJeor some timer options are not availabJe
Shooting options 36

i isii_!i!iii_i"iiiii_!:_i¸
' In Shooting mode, press [_].
Select ((O)).
_ Press [Shutter],
_{ Stand within 3 m from the camera within 6 seconds after
pressing [Shutter],
/!!i Make a motion, such as waving your arms, to activatethe timer.
,, TheAF assistlighYtimerlampwillstartto blinkrapidlywhenthecameradetectsyou.
(_ Pose for your photo while the AF-assbt light/timer lamp
is blinking.
• The AF assist light/timer lamp will stop blinking just betore the
camera automatically takes a photo.
Themot]o;11linermayno_,vor_vwlen
youa emorethanS mawa! tromthec amera
• yourmovemen_saretooStJD_leo _neres toomucr gn_orDaOKIJ_1I
The detection rangeof the motion timer
Shooting options 37

Shootingin the darkLearn how to take photos at night or in low light conditions.
Preventing fed eye _ Ps, s%n_If the flash fires when you take a photo of a person in the dark, ared glow may appear itsthe eyes. To prevent this, select Red-eye
or Red-eye Fix.
Using the flash _x_p <_%m_-@,,,,<,Use the flash when taking photos in the dark or when you needmore light on your photos.
' In Shooting mode press [_.]
Select an option.
Off:
(_) o The flash will not fire,• Camera shake warning ((_)) will be displayed when
shooting in low light,
Auto: The camera will select a proper flash setting forthe detected scene inthe _SSMARTmode,
Shooting options 38

Siiooiiii!ii ii_ 1hi"dsii._
Red-eye Fix+:
+ The flash fireswhen the subject or background is_/ dark.
+ The camera corrects red eyes through its advanced
software analysis.
Slow Sync:
+ The flash fires and the shutter stays open longer
_s + Select this when you want to capture ambient light to
revealmore details in the background.
+ Use a tripod to prevent your photos from blurring.
Fill in:
, The flash always fires.
o Ught intensity is adjusted automatically.
Red-eye':The flash fireswhen the subject or background is
q_ dark.
+ The camera reduces red eyes.
l.R Auto: Theflash fires automatically when the subject orbackground is dark.
Theoptions maydifferdepending onthe shootingmode.* Thereis anintervalbetweentwo burstsof the flash.Do notmove until
the flashfiresa secondtime
_a • RashoD_+onsareno_avaare tyouse[Durs_o [onsorse_ec_Self-Portrait or Blink Detection
Make sure tna_your subjects are _n+nme recommenaea a s_ancettomtne_asr t_,81-"
+ tthere 8refeoTe@llgn_orr'suorlcuSNn_nea _nyspo_smayappea
Dr yot )BO[O
The _+30s see s the measure of a f rn's sensitwlty To c tx as
]ef ned h _ne -_ternatonal Organ_zaton tot Standard zatot SOThe h gher SC spee@yo: se ec_ _ne more senqwe lo igr/_ your
samera becomes, vvltr/a ngHer :_0 sr}ee /ou can jel a seselphoto w_nout usln{ the flask
Shooting mooe, Dress [Mf:NU1
Select Functions +ISO _ an otxlon
, 3elect _ to use an aDr_roDrateISO sDeeo oaseo on tne
brghtness ot the subject and light ng.
When you set the ISO speed to 3200, you can select only 3M orlower resdutior+,
Shooting options 39

Changingthe camera'sfocusLearn how to adjust the camera's focus according to your subjects,
Using macro _ po_,,, ,,_Use macro to take dose up photos of subjects, such as flowersor insects. Refer to macro options in "Using auto focus,"
Using auto focus _ p" ........To take sharp photos, select the appropriate focus according toyour distance from the subject,
' In Shooting mode press [_],
Select an option,
FIF NormaJ (AF): Focus on a subject farther than 80 cm.
Macro: Focus on a subject 5 80 cm (50 80 cm when_r using zoom).
Auto Macro: Focus on a subject farther than 5 cm5(farther than 50 cm wherl usingzoom).
The options may differ depending on the shooting mode.
Shooting options 40

(}iisii{iiii{i ii_{!!c8iri8i8_3 ioc(i3
Adjusting the focus area _,_ p:,0,_,,_ s_:_NYou car/get dearer photos by selecting an appropriate focus
area according to your subject's location in the scene.
' In Shooting mode, press [MENU],
Select Functions _Focus Area _ an option.
_} Center AF: Focus on the center (suitablewhen subjectsare located in the center).
[] Multi AF: Focus on one or more of 9 possible areas.
Theoptions maydifferdepending onthe shootingmode.
Shooting options 41
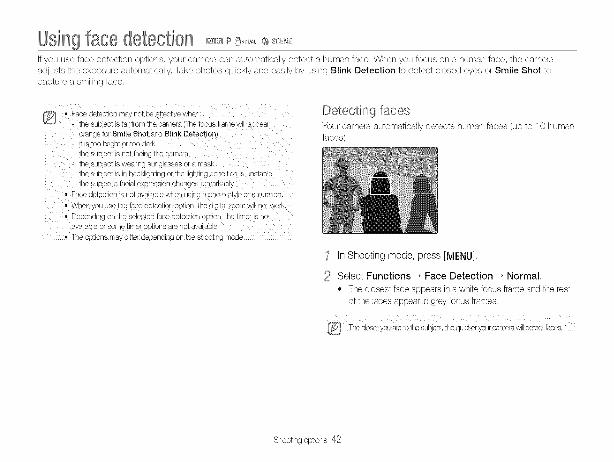
Usingfacedetection ......If you use face detection options, your camera can automatically detect a human face, When you focus on a human face, the camera
adjusts the exposure automatically, Take photos quickly and easily by using Blink Detection to detect closed eyes or Smile Shot tocapture a smiling face,
Detecting facesYour camera automatically detects human faces (up to 10 humanfaces),
the subject is Wearing sunglasses or a mask
• Face erection !s not available when using a photo style er saturatien.
,, When you use the face detection optien, the digita! zoom will not Work.
• Depending on fl_eselected face detection optic 0, the time( is not
available o: some time(options ale not aYailable
,, The options may diffe_ depending on the shooting mode
'_ In Shooting mode, press [MENU],
Select Functions _ Face Detection _ Normal,
,, The closest face appears in a white tocus frame and the rest
of the faces appear in grey focus frames,
G :Thee!oseryeuaret°thesubje°t'thequiekeryour_amera,#/!ldetectfaces,
Shooting options 42

/aking a self portrait shotTake photos of yourself, The focus distance will be set to
dose tip and your camera will emit a beep.
' In Shooting mode, press [MENU],
Select Functions _Face Detection _ Self-Portrait.
_ When your hear a quick beep, press [Shutter].
_ Toturnthebeepono!oft,select SeIf-Poitrait)/1_-,esoundsettings,(p:74)
/aking a smile shotThe camera automatically releases the shutter when it detects a
smiling face.
In Shooting mode, press [MENU],
Select Functions _ Face Detection _ Smile Shot.Whenyoursubjectsmilesbroadly,yourcameracandetectthesmilemoreeasily.
Shooting options 43
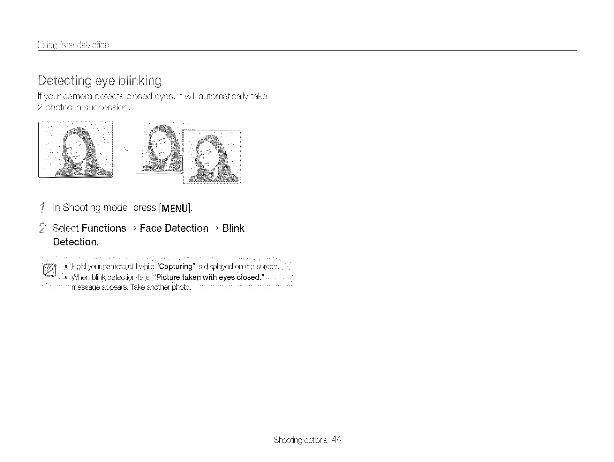
Detecting eye blinkingIf your camera detects dosed eyes, it will automatically take
2 photos in succession.
£' In Shooting mode, press [MENU],
Select Functions * Face Detection _ BlinkDetection,
message appears, Take another photo,
Shooting options 44

AdisstingbrightnessandcolorLearn how to adjust the brightness and color for better image quality,
Adiusting the exposure manually
Depending on the intensity of the ambient light, your photos
may be too bright or da£, In these cases, you car/aqust theexposure to get a better photo,
Compensating for backlighting (ACB) _When the light source is behind your subject or there is highcontrast between your subject and the background, your subject
is likely to appear dark in the photo, In this case, set the AutoContrast Balance (ACB) option,
Darker ( ) Neutral (0) Brighter (+)
' In Shooting mode, press [MENU],
Select Functions _EV,
,_t Select a value to adjust the exposure.
o_unQerexposure,
• If you cannot decide on an appropriate exposure, select AEB (AutoExposure Bracket), The camera takes photos _vltf_d!fle/ent exposures:
normal, underexposed, and ove/sxposed, (p, 48)
Without A©B With ACB
In Shooting mode, press [MENU],
? Select Functions _ ACB _ an option,
_r_oFf off: ACB is off,
On: ACB is on,
Shooting options 45

i_4%stii_!ilii}i i{%ii_:!_ss_:ii_dcoi0i
Changing the metering option _:_.......The metering mode refers to the way its which a camera
measures the quantity of light. The brightness and lighting of yourphotos will vary depending on the metering mode you select,
' In Shooting mode, press [MENU],
Sebct Functions _Metering,
Selecting a light source(White balance} _<"_..........The color of your photo depends on the type and quality of thelight source. Ifyou want the odor of your photo to be realistic,
select an appropriate lighting condition to calibrate the whitebalance, such as Auto WB, Daylight, Cloudy, or Tungsten.
Multi:
Your camera divides the scene into severalareas, and[m] then measures the light intensity of each area,
Suitablefor general photos.
Spot:
• Your camera measures only the light intensity of thevery center of the frame.
[_] _ Ifa subject is not inthe center of the scene, your
photo may be improperly exposed.
Suitablefor a subject with backlighting,
Center-weighted:
o Your camera averages the meter reading of the entire[$] frame with emphasis placed on the center.
Suitablefor photos with subjects inthe center of theframe.
(AutoWB)
4t_%(Cloudy) :6 z (Tungsten)
Shooting options 46
i_%_i;tii_!iibi i_iiitii_:!_;_i__ii_i<_i:_ioi¸
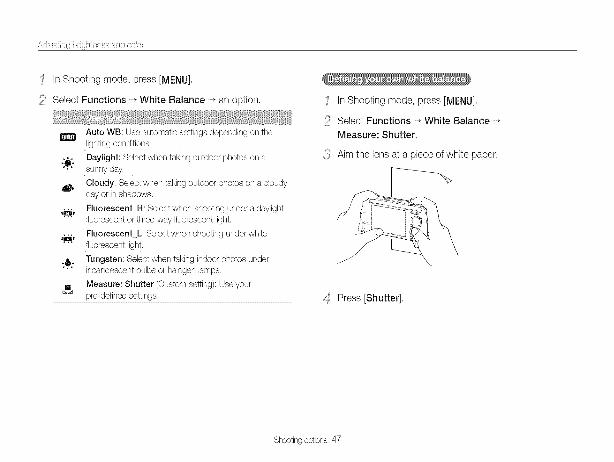
' In Shooting mode, press [MENU].
Select Functions _White Balance * an option.
Auto WB: Use automatic settings depending on thelighting conditions.
Daylight: Select when taking outdoor photos on a"[,0_" sunny day.
6% Cloudy: Select when taking outdoor photos on a cloudyday or in shadows.
.,. Fluorescent H: Select when shooting under a daylight_E_ fluorescent or three way fluorescent light.
_ Fluorescent L: Select when shooting underwhite°'" fluorescent light.
:6,- Tungsten: Select when taking indoor photos under' incandescent bulbs or halogen lamps.
m Measure: Shutter (Custom setting): Use your
_ pre defined settings.
'_ In Shooting mode, press [MENU].
Select Functions _ White BalanceMeasure: Shutter.
{_ Aim the lens at a piece of white paper,
Press [Shutte[}.
Shooting options 47
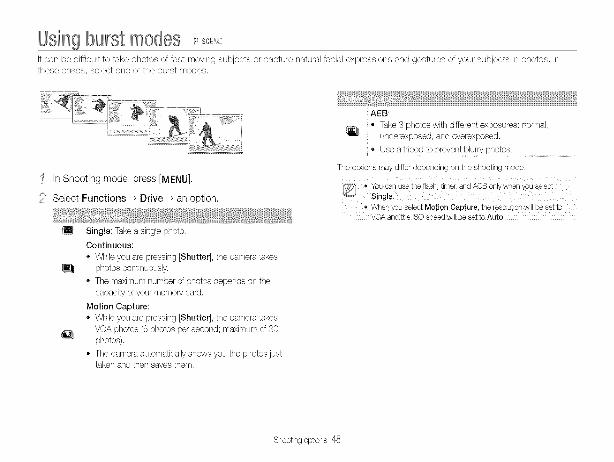
Usingburst modes +:,It can be difficult to take photos of fast moving subjects or capture natural facial expressions and gestures of your subjects its photos, Inthese cases, select one of the burst modes,
' In Shooting mode, press [MENU].
Select Functions _Drive _ an option.
[] Single: Takea single photo.
Continuous:
• While you are pressing [Shutter], the camera takes
photos continuously.
+ The maximum number of photos depends on the
capacity of your memory card.
Motion Capture:+ While you are pressing [Shutter], the camera takes
VGA photos (6 photos per second; maximum d 30photos).
, The camera automatically shows you the photos justtaken and then saves them.
AEB:
• Take 3 photos with different exposures: normal,_J underexposed, and overexposed.
• Use atnpod to prevent blurry photos.
Theoptionsmaydifferdepending onthe shootingmode.
When you select Motiou CaPture, tfl e (es01utionwill be set to
VGA arid the IS() speed will be set to Auto,
Shooting options 48
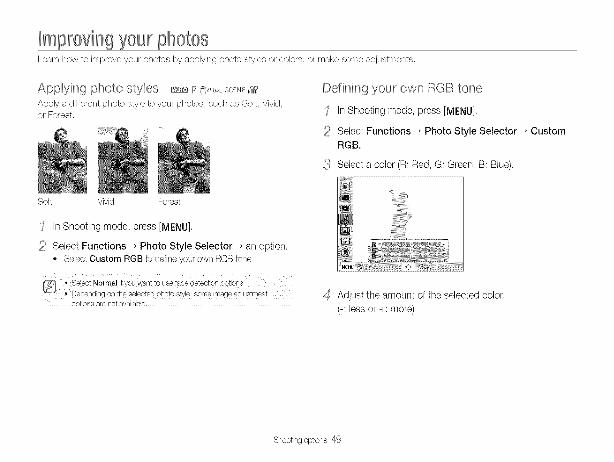
ImprovingyourphotosLearnhow to improveyour photos byapplyingphoto stylesor odors, or makesomeadjustments,
Applying photo styles ,,,_x,_....,_p _;0_,_scN_-,_Applya differentphoto styleto yourphotos, suclaas Soft,Vivid,or Forest.
Soft Vivid Forest
Defining your own RGB tone
' In Shooting mode, press [MENU]
Select Functions _ Photo Style Selector _ CustomRGB
{<_Select a color (R: Red, G: Green, B: BkJe)
' in Shooting mode, press [MENU].
Select Functions _Photo Style Selector _ an option.• SelectCustom RGBto defineyourown RGBtone.
options are not available,Adjust the amount of the selected color
(-: less or +: more)
Shooting options 49

iii iDix}'_iiii!ili yO(ii i3iXiiOS
Adiusting your photos pAdjust the contrast, sharpness and saturation of your photos.
' In Shooting mode, press [MENU].
Select Functions _Image Adjust.
_ Select an adjustment option.,, Contrast,, Sharpness,, Saturation
Select a value to adjust the selected item.
Decrease the color and brightness,
+ Increase the color and brightness.
Decrease the saturation,
+ ncrease the saturaton
styles are rlo£available
Sharpen the edges to improvethe clarity
ot your photos. This may also increase thenoise on your photos,
Sottenthe edges on your photos (suitablefor+editing the photos on your computer),
Shooting options 50

ngLearn now to play DaCK DnoIos, vlaec B. o /olce lemos and
eal_ DnOIOSO _eos. ALso. learn now to connec_ your camera
to your computer, unoto urinter. Tv! or HDTv!
Playing back .............. bP
3tarring Playbac _oae ................ 52
wew__ >holes ...... G6
Fl% ,7 a Vlqeo ....... 5]
-_d ,L]VOICe mefi/o_ ........ 58
Editing a photo .......... _9
IeSlZIH aROfOS ................... L)_:
/era]in@ a bMO]O .,. 5_
tpplyEll s pnoto STyleS ................................ D0
_, j _our _wn RGB/one ............................... 60
_on'@otln_ _xeosulb _ O[}lef[)_ .,, o
Drea] cja pnn_ofoe_ DPOF/ ................. 0Z
Viewing flies on a TV or HDTt_........
Transferring files to your computer ................... 0._
- /VII/OOW_ dS@f_> ........ ]5
of Mac user_ ......... 70
_rinting photos with a photo printer (PictBridge) ..... 7_

PlaTingbackLearn actions to play back photos, videos, or voice memos, and managing files.
Starting Playback modeView photos or play videos and voice memos stored in youroame_s,
' Press [[]]
- The most recent fileyou have taken or recorded will be
displayed.* If the camera is off, it will turn on,
2 Press [_.] or [_..)] to scroll through fibs.
® Pressand hold[_.] or [_] to view filesquickly,
/AV F 3.4TV 1/45
FLASH OnSIZE 4000X3000
DATE 2009/01/01
Photo includes a voice memo
_' Video file
Printorder has beerl set (DPOF)
'_ PrDtectedfile
_oo-ono_Folder name File name
Playback/Editing 52

View and manage files by categories, such as date, file type, orweek,
' In Playback mode, push [Zoom] down
Press [MENU],
{_ Select a category.
Press [_.] or [__._] to view files.
• Press and hold [_] or [_t_.)]to select a date, fib type,weekday, or color,
{!!i Press [OK] to return to the normal view.
Scan thumbnails of files.
In Playback mode, push [Zoom] down to display 9or 20 thumbnails (push [Zoom] up to return to the
previous mode).
Type View files by the file type.
Date View files by the date they were saved.
Colour View files by the dominant odor of the image.
Week View files by the weekday they were saved,
Scro mrough files
Delete files
Press {DISP], [_], [_], or [_t_.)],
Press [Fn] and seect Yes,
Playback/Editing 53

Protectyour filesfrom accidenU deletion.
' In Playback mode, press [MENU].
Select File Options _ Protect _Select.,, Toprotectall files,selectAll _Lock.
{_ Select the file you want to protect and press [BK].,, Press[OK]againto cancelyourselection.
4 Press [Fn].
Delete single files or all files at once. You cannot delete protectedfiles.
To delete a single file,
'/ in Playback mode, select afile and press [Fn].
Select Yes to delete the file.
To delete multiple files,
'_ in Playback mode, press [Fn].
Select Multiple Delete
{_ Select files you want to delete and press [BK].,, Press[OK]againto cancelyourselection.
4 Press [Fn].
{!!i Select Yes.
To delete all flies,
'_ in Playback mode, press [MENU].
Select Fib Options _Delete _All _ Yes.
Playback/Editing54

Ifyouactivatetherecyclebin,filesyoudeletewillbesenttotherecyclebininsteadotbeingdeletedperrnanently,Thisappliestosinglefilesorselectedfilesonl_ifyouchoosetodeleteallfiles,thoseflieswillnotbesenttotherecyclebin,
To activate the recycle bin,
' In Playback mode, press [MENU].
Select File Options _ Recycle Bin _ On
To restore files from the recycle bin,
' In Playback mode, press [MENU].
Select File Options _ Recycle Bin _ Retrieve.
• Ifyou format the interm_alroemory, all !ibs i8 the recycle to!der will b_deleted_
• The recycle bin will holdup to !0 MB of files. Once you exceed the10 MB limit, the camera asks you whether to ernptl the lecyc!e bin......
Selec! Yes to empty tf_elsc#de bir_o_Ne to debte only the curTent_ile,
Youcan copy filesfrornthe internalmemoryto a memorycard.
'_ In Playback mode, press [MENU].
Select File Options _Copy to Card.
{_ Select Yes to copy flies.
Playback/Editing 55
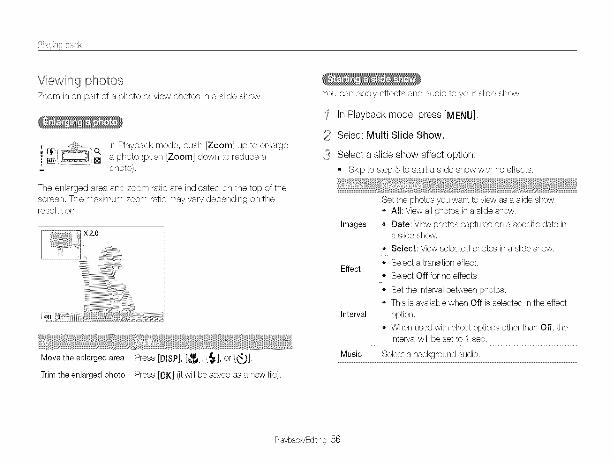
Viewing photosZoom in on part of a photo or view photos in a slide slqow.
+ E#3_. o. In Playback mode, push [Zoom] up to enlarge
! _(,_J............................Igl a photo (push [Zoom] down to reduce a_ photo),
The enlarged area and zoom ratio are indicated on the top of the
screen, The maximum zoom ratio may vary depending on theresolution.
X2.0
Move the enlarged area Press [DISP], [_t], [_], or [_£_)],
Trim the enlarged photo Press [OK] (it will be saved as a new file),
Youcan applyeffectsand audio to your slideshew.
'_ In Playback mode, press [MENU],
Select Multi Slide Show,
{_ Select a slide show effect option,
• Skipto step5 to starta slideshowwithno effects.
Set the photos you want to view as a slide show.
• All: View all photos in a slide show.
Images o Date: View photos captured on a specific date ina slide show,
o Select: View selected photos in a slide show.
Select a transition effect,Effect
o Select Off for no effects,
• Set the intervalbetween photos,
• This isavailable when Off is selected in the effect
Interval option.
, When used with effect options other than Off, theintervalwill be set to 1 sec,
Music Select a background audio.
PlaybacWEditing 56
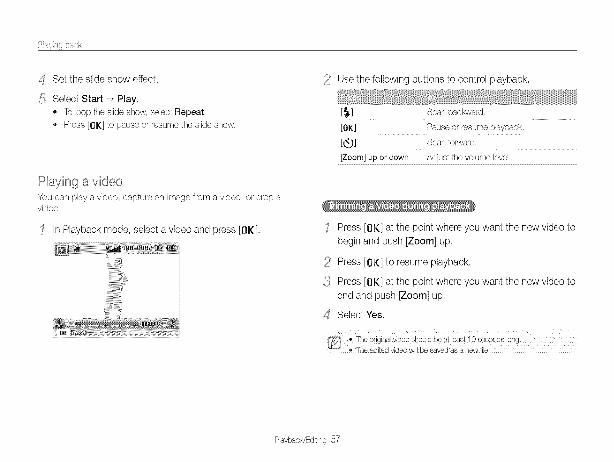
_ Set the slide show effect
_!!i Select Start _ Play.- Tolooptheslideshow,selectRepeat,- Press[OK]to pauseor resumetheslideshow.
Playing a videoYoucan playa video, capturean imagefrom a video, orcrop avideo.
' In Playback mode, select a video and press [0K],
Use the following buttons to control playback.
{_.] Scan backward,
[OK] Pause or resume playback,
[_..)] Scan forward,
[Zoom] up or down Adjust the volume level.
'_ Press [0K] at the point where you want the new video to
begin and push [Zoom] up.
Press [0K] to resume playback.
{_ Press [0K] at the point where you want the new video to
end and push [Zoom] up,
z_ Select Yes,
Playback/Editing 57

' Press [OK] at the point where you want to save a still
image,
2 Press [_],
in Playback mode, select a photo that includes a voice
memo and press [0K]o Press[OK] to pauseor resumeplayback.
Playing voice memos
,j
2
In Playback mode, select a voice memo and press [0K],
Use the following buttons to control playback.
[_.] Scan backward.
[OK] Pause or resume playback.
[_)] Scan forward,
[_] Stop pJayback.
[Zoom] up or down Adjust the volume bveL
Playback/Editing 58

Editinga photoPerformphoto editingtasks, such as resizing,rotating,eliminatingred eyes,and adjustingbrightness,contrast, or saturation.
Edited photos ,_allbesaved as new 1iJes,
Resizing photos
' in Playback mode, select a photo and press [MEIIU],
Select Edit _ Resize _ an c £ion
Rotating a photo
' In Playback mode, select a photo and press [MENU],
Select Edit _ Rotate _ an option,
o Available options differ depending on ttle size of the selected photo.
Playback/Editing 59

Applying photo stylesApplya differentphoto styleto the photo, such as Soft,Vivid,orForest.
Soft Vivid Forest
Defining your own RGB tone
'_ In Playback mode, select a photo and press [MENU]
Select Edit _ Photo Style Selector _ Custom RGB
{<_Select a color (R: Red, G: Green, B: Blue)
' In Playback mode, select a photo and press [MENU],
Select Edit _ Photo Style Selector _an option• SelectCustom RGBto defineyourown RGBtone,
Adjust the amount of the selected color
(-: less or +: more)
Playback/Editing 60
i!ciiiiiicl _ phete
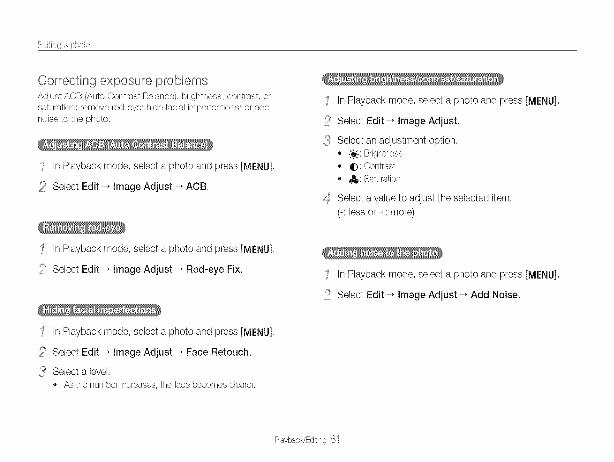
Correcting exposure problemsAdjustAOB (AutoContrastBalance),brightness,contrast orsaturation:removered eye;hideracialimperfections;oraddnoiseto the photo.
' in Playback mode, select a photo and press [MENU],
Select Edit _ Image Adjust _ACB,
'_ In Playback mode, select a photo and press [MENU]
Select Edit _ Image Adjust.
{<_Select an adjustment option
,_ o:o[.:BrightnessqD:ContrastJtl: Saturation
_{ Select a value to adjust the selected item
(-: less or +: more)
' In Playback mode, select a photo and press [MENU],
Select Edit _ Image Adjust _ Red-eye Fix. '_ In Playback mode, select a photo and press [MENU].
Select Edit _ Image Adjust _ Add Noise
' In Playback mode, select a photo and press [MENU],
Select Edit _ Image Adjust _ Face Retouch.
{_ Select a level.As thenumberincreases,the tacebecomesdearer.
Playback/Editing61

Creating a print order (DPOF)Selectphotos to k)eprintedand set options, such as numberofcopiesor paper size,
DPOF oornpatlble printer at homet Wide photos may print with file left and nght edg@sgut off, so be
aware of the dimensions of your photoso You carlrlot set the DPOF for the photos stored irl the ir_tetnalmemory
' In Playback mode, press [MENU].
Select File Options _ DPOF _ Standard _an option,
Select Print the selected photos,
All Printallphotos,
Reset Resetyoursettings.
If yOUselect Select, scroll to a photo and press [Zoom]
up or down to select the number of copies, Repeat forthe photos you want and press [Fn],
IfyouselectAll, press[DlSP]or [_] to selectthe numberofcopiesand press[OK],
z_ Press [MENU].
x::_Select Fib Options _DPOF _ Size _an option.
6
Select Specify the pnnt sizefor the selected photo,
All Specify the print sizefor all photos,
Reset Reset your settings,
If you select Select, scroll to a photo and press [Zoom]
up or down to select the print size, Repeat for thephotos you want and press [Fn],_ IfyouselectAll, press[DISP]or [_] to selectthe printsize
andpress [OK].
' In Playback mode, press [MENU].
Select File Options _DPOF _ index _Yes.
Playback/Editing62

Viewingfiles on a or HDI Playback photos or videosby connectingyour camerato a TV usingthe providedA/V oabJe.
' Select a video signal output according to your country or
region. (p. 76)
Turn off your camera and TV,
{_j#Connect your camera to your TV using the A/V cable
f \/icle° Audio
\,/
Turn on your TV and select the video output mode usingthe TV remote control.
#!!iTurn on your camera and press [[]]
_!_View photos or play videos using the buttons on yourcamera,
You can capture photos or videos while the camera is connectedto aTV.
You can view high quality and uncompressed photos or videoson an HDTV using the optional HDMI cradle, HDMI (High Definition
Multimedia Interface) is supported by most HDTVs.For details, see the "HDMI cradle manual,"
'_ In Shooting or Playback mode, press [MENU],
Select Settings _ HDMI Size
{_j#Select an HDMI resolution
_ Turn off your camera and HDT_,
Playback/Editing63

i,vv j > ', i i
/!!i Insert your camera into the cradle and plug the HDMIcable into the HDTV and the cradle.
(_ Turn on your camera.
,, The HDTV will be powered on automatically and the camera
screen will be displayed.
_7 View files using the buttons on your camera or a remote
control of your camera or HDTV.
TVremoteccmltro!,Fordetails, see the "HDMIcradle manual,'!
Playback/Editing64

l?ansferdngfiles to yourcomputer
For Windows usersTransfer files by connecting your camera to your PC.
Hardware and software requirements
Pentium Ill500 MHz or betterCPU
(Pentium Ill800 MHz or better recommended)
RAM 256 MB or more (512 MB or more recommended)
OS Windows 2000/XP/Vista
Hard disk250 MB or more (1 GB or more recommended)
capacity
• USB port• CD ROM drive
Others o 1024 x 768 pixels, 16 bit color display compatible
monitor (24 bit color display recommended)
• Miorosott Direct X 9.0 or later
IntelPentium 4, 3.2 GHz er higher/AMD Athlin 64FX,
Minimum 512 MB BAM (1 GB arid above reoommendE
" 64 MB or g/eater video card (nVIDIAGeforce 7600GT 0r higher/ATI X1600 series or higer recqmmended)
The programs may not work properly on 64bit Edition of WindowsXP andVista,
Programs contained on the CD
SamsungMaster Edit photos and videos,
View videos (H,264 (MPEG4,AVC)files)QuickTime Player 7.5on a PC.
Adobe Reader View the user manual,
Playback/Editing 65

if_iiiSii_Tfiii!ijiii_i!_SiO_iOtifCOiiiiTtiti_i
' Insert the installation CD in a compatible CD-ROM drive.
When the setup screen is displayed, cNckSamsung
Digital Camera Installer to start installation.
Once you connect the camera to your PC, the camera will be
recognized as a removable ddve.
' Connect your camera to your PC with the USB cable.
manufacturer isn©t respqnsibletot any loss qf data.
{_ Select programs to install and follow the onscreeninstructions.
Click Exit to complete the installation and restart your
computer.
Playback/Editing66

iisii3i(}iiiii!ii iii(!_SiO y(}(ii ¸COiiii}(it(}i
Turn on the camera.• Tilecomputerrecognizesthecameraautomatbally,
{_ On your PC, select My Computer _ Removable DiskDCIM _100SSCAM
Select the files you want and drag or save them to yourPC.
The way to disconnect the USB cable for Windows 2000/Vistais similar.
' If the status lamp on your camera is blinking, wait until
it stops.
Click _ on the tool bar at the bottom right of your PCscreen,
{_ Click the pop-up message
Remove the USB cable
Playback/Editing67

iisii3i(}iiiii!ii iii(!_SiO y(}(ii ¸COiiii}(it(}i
You can download files or edit photos or videos stored on your
PC. For details, see the Help menu,
Thisprogranldoesnqtsup'toertedi!nge!w]_ !lies(M,264_PEG4_AVC))on1hecamera.
Click Next and follow the onscreen instructions,
Downloading files using Samsung Master
Whenyou connectthe camerato the PC,a windowfordownloadingfilesautomaticallyappears,
' Select the files you want to download
@ Select a location for downloaded files,
@ Click to download the selected files.
@ Thumbnails of files; click an image to download.
Playback/Editing 68
ii_iiiSii_iiiii!iiiii_i!_SiO_iOiiiCOiiii_iiii_i
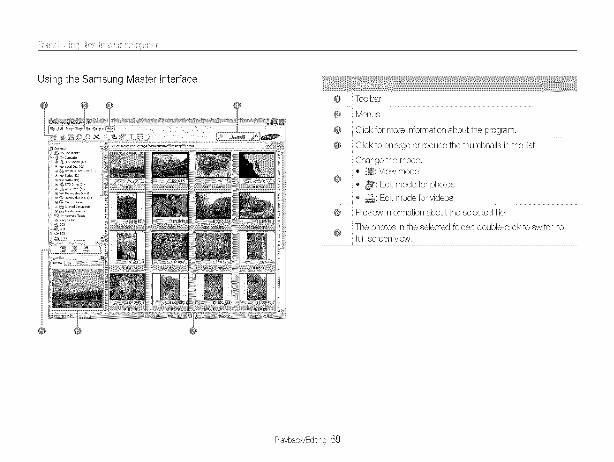
Using the Samsung Master Interface
@ Toolbar
@ Menus
@ Click for more information about the program,
@ Click to enlarge or reduce the thumbnails inthe list.
Change the mode,
, View mode
@ " i_: Editmode for photos
® _[_: Editmode for videos
_ Preview informationabout the selected file,
The photos in the selected folder; double click to switch to@ full screen view,
Playback/Editing69

iisii_'i(}iiiii{ iii<!_SiO yO(ii ¸COiiii}(iii}i
FOFMac useFsWhen you connect the camera to a Macintosh computer, the
computer will recognize the device automatically, You car/transfer
files directly from the camera to the computer without installing
any programs,
• 1 8 GHz power Mac G5/1,83 GHz Int÷l Core Duo or higher
J Mac QS X version 10,3,9 or later
• Minimum 256 MB RAM (1 GB and above recommer_d_d)
0 64 MB or greater video card
Turn on the camera,• Thecomputerrecognizesthecameraautomaticallyanda
removabledisk iconwill bedisplayed.
_!t Doubb-click the removable disk icon.
,fi' Transfer photos or videos to the computer.
' Connect your camera to a Macintosh computer with theUSB cabb.
/iX You must pluglheend ofthecable with 1/e indicatcrlight A. intoL_ your caslera, I!the c_le is reversed;itmay damage yourfiles, T:}e
ma_utacture,r isnot resp'onsibbtot any loss qf data.
Playback/Editing 70

Pdnt+ngphotosw+tha photopdnter (P+ctBddge}Print photos with a PictBddge compatible pdnter by connectir_g your camera directly to the printer.
' With the printer on, connect your camera to the printerwith the USB cable.
Turn on your camera.* Theprinterrecognizesthe cameraautomatically.
+ If your printer has tt-lemass storage feature, you must first set the
USB mode to Printer it+ fl-_ese_tir_gsmenu: (p 77)
Press [_.] or [_] to select a photo,
- Press [MENU] to set pnnting options. See "Configunng print
settings,"
Press [OK] to print.• Printingstarts+Press[_] to cancelprinting.
images: Select whether to print the current photo or allphotos.
Size: Specify the size of the print.
m Layout: Create thumbnail prints.
Type: Select the type of paper.
Quality: Set the printing qualify.
I_1 Date: Set to print the date.
FiJe Name: Set to print the +-lameof the file.
Reset: Reset the print options,
Playback/Editing71

Refer to se_ungs, error messages, specifications, anaq_alntenance IIDS
Camera settings menu .................... 73
:_ .. 74z
::;el _........ 75
Error messages ......... 78
Camera maintenance 79
} eanirlg your camera ..... 79
_ou[ _eme_ycaress ................................ 80
/ADOUI [rle OBitS • ,, S-
Before contacting a service center 88
Camera specifications 86
--CC notice . _P
ndex ........................................... J

Cameras ngsmenuLearn about various c stions to configure your camera's seltings.
Accessing the settings menu
' in Shooting or Playback mode, press [MENU]
Select a menu
{_ Select an option and save your settings.
Volunle
StartSound
t ShutterSound_1)) BeepSound
AFSound¢ Self-Portrait
Press [MENU]to return to the previous screen.
_)) Sound: Set various camera sounds and volume,(p. 74)
Display: CustomJsethe display settings, such aslanguage and brightness, (p, 74)
Settings: Change the settings for the camera system,such as memory format, default file name, and USB
mode. (p, 75)
Appendixes73
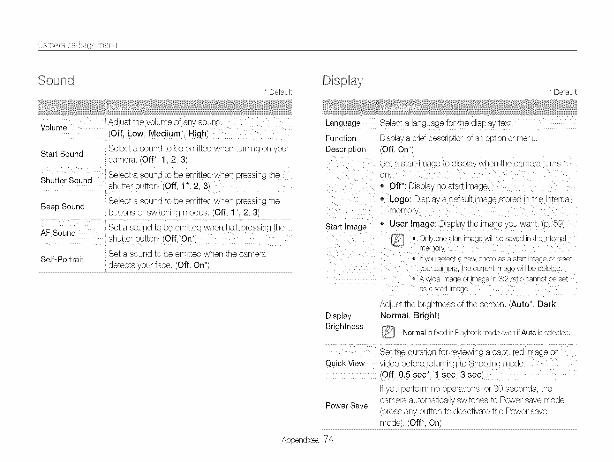
Sound* Default
volume Adjust the v°lume °f anYs°u0d
(Off, Low, Med!um*, High/
Start Sound Select a sound to be emitted when turning on yourcamera, (Off*, 1,2, 3)
shutter button. (Off, ! *; 2, 3)
Beep Sound Select a sound to be emitted when pressing thebuttons or switching modes. (Off, 1%2, 3)
Set a sound to be emitted when the cameraSelf-Portrait
detects your face. (Off, On*)
Start Image
Display
Brightness
* Default
Language Select a language for the d spa, text
Function Displayabnef descrpt on of an opton or men{Descrir_tlon /Off On_
Set a start imageto @splay wnerl me camera turns
o Off*: Dispay no start mage
• Logo: Dlspay a defa._ltimage storeq in me ,xemaller'Nor_
• User Image: Dsplay the mage you wanl o. 59/
• OnlyonestartimagewJJJDecave@_me n_emamemory
. tyou selectanew mo_oasastar_ _georresetyourcamera mecuuentimagewJ_De@ele_ec
• e w@emageor imageir 52 rato cannotDesetasastarI mag£
aqUSt me Dn{nmess of the screen. Auto*. DarkNormal Bright
_ Normals t_<edinPa,backmodeeventAuto isseectec
Set tne auraton TOt review ng a cap,urea mage :
Quick View vdeo before returning tc Shoot ng moae
Off. 0.5 sec*. 1 sec. 3 sec/
T you )erform no oDeratlons tor 8 secon@s me
ca_rlera autolrqatic& swKcnes K Power save [TqOqePower Save
cress any DuKon to @eacwa_e me Power save
mo@e/,/Off* On
Appendixes74
* Default * Default
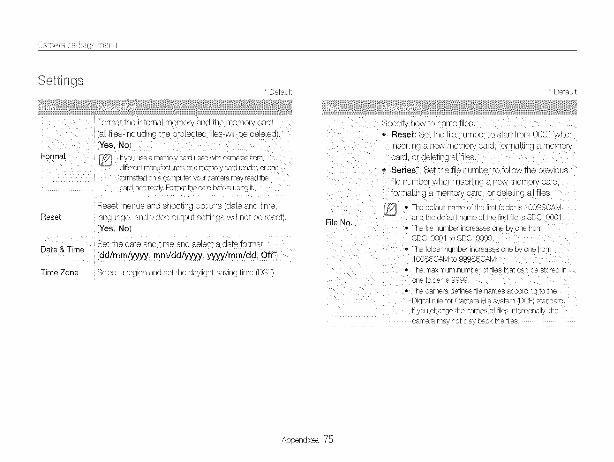
Format the internal memory and the memory card Specily how to name fi es.
a l fi es nc uding the protected f les wil be de eted. • Reset: Set the file number to start trom 0001 wher{Yes, No nser_ng a new memory tara, TO nas_ng a memory
_ara. or aeletlng al ties
,, Series_: Set the fi e nt ruder to TelOW IRe [ "e\ cue
turmatt_don a compute_,your cameramay read lhe fie number whennserzln8 _ new r'nemop cal 1.
card ho_Jrtectly Format1hecard bdore us ng t. Tormaslng a memory c _ra, or ae et nga fi es
Reset menus and shoot ng options (date and t_me, ° Yi • The detaut name ot the trst tolder is IOOSSCA_J
Reset anguage, and wdeo output sett ngs wH not be reset). File No. and the default name ot the first tie is SDC10001(Yes, No) * The tile numrJer ncreases or e [ one trorT
. Set the date and t me and select a date format. SDO 9001 tc SD01999_Date & T me • The to de/numoer ncreases one s one trom
(dd/mm/yyyy, mm/dd/yyyy, yyyy/mm/dd, Off*) IOOSSOAr to999SS}A
Time Zone Select a re_aionand set the dayl ght-savng time (DST). • The maximum num )_ ot ties tna_ can ee s_orea)nn toJder s 9999
The camera defnes fJe names accoraln_ _o_neDic_[a ule tot Camera F e system (DCP_s_an(Jarclyou change the names of flies l_en_lona} _ne
sameramay not p a_ back the flies
Appendixes 75

* Default
: }{{Set whether tc dbp]ay the date a0d time on your
_hotos when printing. (OfP, Date, Date & "rime)
printermodels• I{youselectTextintheSC£NEmode,thedate
andtimewillnotbedispJayed
Set the camera to automatically turn off when you
are not using it. (Off, 1 rain, 3 rain_, 5 rain,10 rain)
[_:_ • YoursettingswillnotchangeafterreplacingtheAuto Power Off battery
• Thecamerawillnotautomaticallyturnoffwhen:it isconnectedto acomputerorpnnteryouareplayingaslideshoworvideosyouarerecordingavoicememo
Video Out
AF Lamp
Anynet+(HDMI-CECt
* Default
Bet t/e v oeo s gr _1outo( [ accoro ng [o you÷g D/1• NTSC" JSA. Canada. Japan. Korea. Tawar"
exIoo,
• PAL (SUPPortsO ]y BDGH ,_ustraa./<ustraBe gU/T 3hina. De _mark.Finland.Germar
E glan@,tay, Kuwat, Malaysla_New ZesancS ngapore, Span. Sv,!eden.Swl_zerano.Thaianc orwa,
Set an assstant ligm to ne4F ou tocus n darkslaces. (Off On
Bet to contrc tne camera connected to a Samsur jqDTV tha_SUDDC"ts Anynet+(CEC)w th _heT"emote contro
• On*: Control the camera with an HDTVrerTHe
conIro
• Off: Vevvfi es without usinc m HDTVremoteCoRIro
Appendixes76

Detaut
i i i_ii!ii! {Sdect the esoluton of snotos wnen _yln{ sac_ties on an HDTVwth the HDIVI cradle
TSC: 1080iL 720p 480p,
HDMI Size PAL: 1080i 720p, 576pt 11/eHDTVdoesnotsL_[ _r__r/eseec_earesoUllOn
theHDTVautumatc_ j _eeels_nenextowel_soulor
Set the tunct xq_ouse v a a uSB connection with a
computer or e xer,
- Auto_: Set you_camer _to se ect a USB moueautoma_ca
USBComputer: Connect your camera to a cart au_e
Tar_ransferrng fi es
• Printer: Connect iouroameratoa }nnterTc
printingfi es
Appendixes77
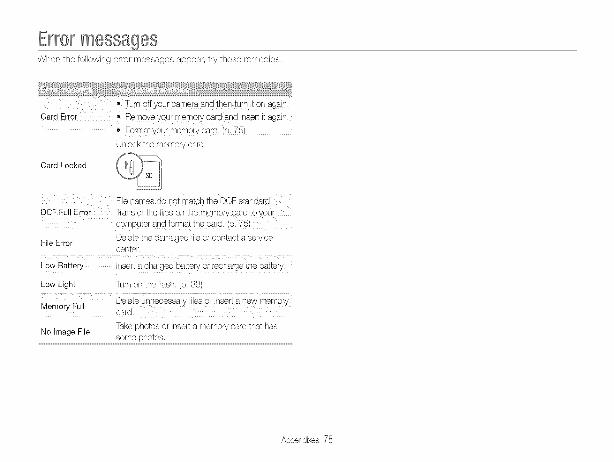
ErFOFmessagesWhen the following error messages appear, try these remedies.
Card Error • Remove your memory card and insert it again.
Font at your memory card. (p. 75)
Unlock the memory card.
Card Locked
-le names do not marc1the DCF standarc
DCF Full Error Transterthe fles on the memc y c _rato yoksort gu_erana Tormattne cara o. 75/
Deete the dams _ed fie or contact a servceFile Error}enter.
Low Batter. serea cnarge@Da_eryor recrlarge tne Da_Tery
LOWLlgnlE Turnon the flask 38/
Deete unnecessap ties or insert a new memoryMemor, Fu
Data
TakeEqo_osor nsert a memo sara tna: na._NO mage File
_O1rle }ROIOS
Appendixes 78

Cameramaintenance
Cleaning your cameraWipe gently with a soft, dry cloth,
Use a blower brush to remove dust and wipe the lens gently witha soft cloth, If any dust remains, apply lens cleaning liquid to a
piece of cleaning paper and wipe gendy,
,/}i/ _9 " Neveruse benzene, th!nners, or aloohql to clean the device. Thesesolutions can damage the came(a or cause it to malfur]ctJon,
Do not press on the lens cover or use a blower brush on the lensoovBr
: i
Appendixes 79

(}_iiii(i_i_i ii iSii]i(!!iiSi iCt}
About memory cards
You car/use SD (Secure Digital), SDHC (Secure Digital HighCapacity), or MMC (Multimedia Card) memory cards.
Label(front) ,._1L_
You car/prevent files from being ddeted by using a write protectswitch on the SD or SDHC card. Slide the switch down to lock or
slide it up to unlock. Unlock the card when shooting.
The memory capacity may differ deper/ding on shooting scenes
or shooting conditions, These capacities are based on a 1 GBSD card:
12_ 142 274 389
Ph
to
8
162 302 426
liE] 195 355 509
8M 204 361 518
5M 327 547 764
3M 514 77A 1028
lIE] 340 1104 1387
IM 1420 1612 1807
|2BO
vi |2BOdeo Gq0s
]20£ Dr(
49 mn
ADr 2
12' 22
13' 57'
A_x}rc
24_T
APE70 rnlr
,C/DDrC
22 min
25 mlr-
)E £
46 min
/_DE
91 v._-
* The recordable time may vary if you use the zoomSeveral videos were recorded in succession to determine the total
recording time,
Appendixes 80

(}_iiii(}i_i ii iSii]i(!!iiSi iCt}
About the batteryUse only Samsung approved batteries.
Mode SLB 10A
Type Lithium ion battery
Cell capacity 1050 mAh
Voltage 3.7 V
Charging timeApprox 150 mln
(when the camera is Sw!tchedOft)................ : ........................
Photos
waeos AEsrox. 180 _ _-
_his is measured under lie Tel }w ngcon@tlons: ntne _ mode 121
resoluton. Fine r Jally, C S o
1. Set the tash catDn to Fill in. ta_e a
3Ingle 8ROI. anG zoot'8 [/or ou_
Approx. 140 min/ 2 Bet the tash option to Off take a
&eerox. 280 3ingleShOt an@zoom n or OhE
8. Parr( m stees 1 and 2tor 803e0£x_s an{] reeeat for 5 rT utes
Then turn off the camera TOt
"rTinJ_e
4. Reeeat stees I to 3.
Record vdeos at 640 x 48( reso utlon
and 80 bs
• The figures above are measured by Samsung's standards and may differdepending on actual usage
• Several videos were recorded in succession to determine the total recordingtime
Appendixes81

_, If the indicator light i8oft, make sure that the battery i8 insertedcorrectly.
Turnoft your camera when charging.
_, Turnon your camera after charging the battery for more than 10minutes.
_, Using the flash or recording videos depletes the battery quickly,
Qharge the battery until the indicator light turns green.
_, If the indicator light blinks in red or does not illuminate, reconnect thecable, or re,hove the battery and insert it again.
_, Ifyou charge the batterywhen it is warm, the indicator light mayturn
orange. Charging will start when the battery cools down.
_, Use only the provided USB cable.
_, The battery may not be charged when:
you use a USB hubother USB devices are connected to your computer
you connect the cable to the port on the front side of yourcomputer
the USB port ot your computer does not support the power outputstandard (5 V, 500 mA)
Appendixes82

Beforec0ntactmga servicecenterIf you are having trouble with your camera, try these troubleshooting procedures before contacting a service center, Ifyou have altempted
the troubleshooting solution and are still having problems with your device, contact your local dealer or sewice center.
Make sure tnat tne Dase y is insertec
Canqo[ turn on me • Ma_e sure tnat tne Dasery s seriec
camera correct a
}harge _ne oa_ery
• Charge :ne oasery
• our camera m_ }eln Power saveThe cower turns off mooe o. 74
suaaer • o The camera may turn oft tc 9revenT71e
memor card trom beng aamagea aue
to an }act. Turnon your camera again
The battery may lose poweFmore qu ckys Jowtern }eratures (below 0° C1.Keeo
_ne oaTTerywarmDypu:qlg I[ nTo ouDOCKeI
Thecamera is iOSleg _ using the lash or recordlr ] 3eos
battery power quickly aemletes_neoattery quickly. Rechargeif neeaec
• Batteres are oonsumaDe Darts i a_ "nusr
De remaoea over time. Get a new batteryif the battep ife isdiminish r ] quicKy.
• There is no space on the memory card.
Delete unnecessary files or insert a newcard,
Formatthe memory card. (p, 75)
• The memory card isdefective. Get anew memory card,
Cannot take photos • The memory card is locked, Unlock thecard, (p. 78)
Make sure that the camera is switched
On.
• Charge the battery,
Make sure that the battery is inserted
correctly,
The camera freezes RerTovethe batteryand _sert tagan
• The flash option maybe set to Off.
The flash does not work (p. 38), You cannot use the flash in the @))DUAL,
_, or some SCEI_IEmodes,
Theflash fires The t!ash may firedue to static electricity.
unexpectedly This is not a malfunction of the camera,
Appendixes 83

i}i(_f(_K¸"COiitEiCiii]{!88(!!ivi(_i}Ct}iii{ff
-hedateanat_meerencorreclThedisplayorbuttonsoonotWOrKThememor,oarshasanerror
Cannotp)aybackfiles
Thec]DiDisblurry
Thecolorsinthepnotoaonotmatcrltlaeaclualscene
Settr/edates{qdtime°]tr/erJ8Dl@setTl%s" eft
Remove INe Dasery aria Jnse t i1agar
The melno% car( nss not Deer] eset
Format the card, 7E
ryou change tne qame ( f a fie, your
camera may not p@ the fie tne name of
Ire % should meet the D )F standard
youencountertn_ss_ua_or D_ayoac Iles
)n } )ur computer
• Make sue mat the focus option you set
s suitable tor close L E 3nots < 40/
® Make sure tRat tRe SUr_ec_ S wlm n
snge of the task ), 86/
• Make sc e tnat 7 ÷ ens s dean. It not
Jlean tile lens ), 79
&n incorrect wn te balance ca c ea;e
qrealstlc soot: Seectthe DrODe wrute
balance ol2)ton to su t Ine gn[ source
E z+OI
Your photo isoverexposed. Adjust the
The photo is too bright exposure value, (p, 45)
• Turn off the flash. (p. 38)
conta!ns photos ,
,, Make sure that the USB cable is
connected correctly,
Your computer does • Make sure that your camera is switchednot recognize your on.camera
Make sure that you are using a
supported operating system.
The_ietransrnissioi; may be k_terruptedby
disconnects the camera static e!ectncity,Disconnect the:USB cab!ewh!le transferring _i!es and connect !tagsn,
Appendixes84
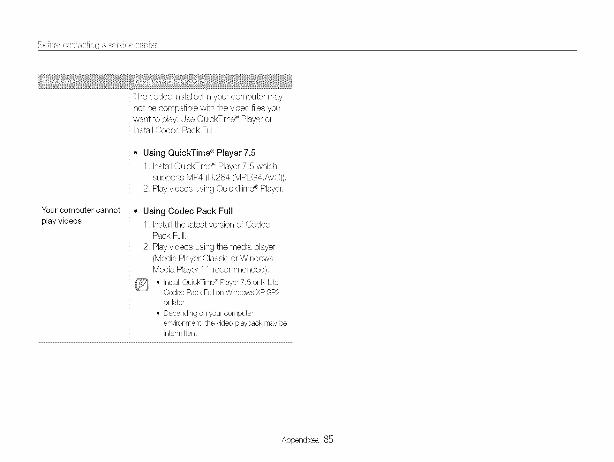
_si(}i_ (}oiiisc_iii{ I _ _vic{} (}{}iii_i ¸
The codec installed in your computer may
not be compatible with the video files youwant to play. Use QuickTime®Player orinstall Codec Pack Full.
• Using QuickTime ®Player 7.5
1, InstallQuickTime®Player 7.5 whichsupports MP4 (H,264 (MPEG4.AVO)),
2. Ray videos usingQuickTimd P'Player.
Your computer cannot • Using Codec Pack Full
play videos 1, Install the latest version of Codec
Pack Full.
2, Ray videos using the medb player
(Media Player Classic or Windows
Media Player 11 recommended),
• Install QuickTime¢'Player 75 or K Lit®Codec Pack Full on Windows XP SP2or later
Depending on your computer
environment the video playback may beintermittent
Appendixes 85
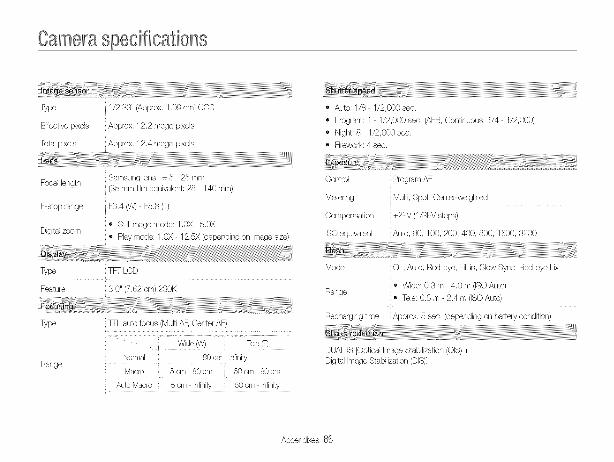
Cameraspec+f+catbns
Type 1/2,33" (Approx. 1,09 ore) COD
Effective pixels Approx, 12.2 mega-pixels
Total pixels Approx, 12.4 mega-pixels
• Auto: 1/8 1/2,000eec,
• Program:1 +1/2,000 sec, (AEB,Continuous:1/4- 1/2,000)
• Night:S 1/2,000see.
+ Firework:4 eeo.
Samsung lens f- 5 25 mmFocal length (35 mm film equivalent: 28 - 140 ram)
F-stop range F3,4 (VV}- F5,8 (T)
• Still image mode: 1.0}<{ 5+0XDigital zoom
® Play mode: 1,0X- 12.5X (depending on image size)
Control Program AE
Metering Multi, Spot, Cente/-weighted
Compensation +2EV (1/3EV steps)
ISO equivalent Auto, S0, 100, 200, 400, 800, 1600, 3200
Type TFTLCD
Feature 3,0" (7.62 ore)230K
Type TFL auto focus (Multi AF, Center AF)
..........................Wide (W) Tele (T)
Normal 80 cm infinityRange
Macro 5 cm 80 cm 50cm 80 cm
Auto Macro 5 cm infinity 50 cm infinity
Mode Off, Auto, Red-eye, Fill in, Slow Syne+ Red-eye Fix
® Wide: 0,3 m 4,0 m (ISOAuto)Range
® Teb: 0,5 m - 2,4 m (ISO Auto)
Recharging time Approx. 5 sec, (depending on baltery condition)
DUAL IS [Optical Image Stabilization (OIS) +
Digital Image Stabilization (DIS)]
Appendixes 86

C_iTiei_ sp{_ciiicsti(xis
® Photo Style Selector: Normal Sort, Vivid, ForesL
Shooting mode Betro, Cool Calm. Classic, Negative, Custom BGB
• Image Adjust: Sharpness, Contrast, Saturation
Auto VVB, Daylight, Cloudy, FluorescentH, Fboreeoent L, Tungsten,Custom Set
Photos
® Modes: Smart Auto (Macro, Macro Text, White,Landscape, Action, Tripod, Night, Night Portrait.
Backlight, BaoHight Portrait, Portrait), Auto,
Program, DUAL IS. BeauS! Shot, Movie, Photo HelpGuide, Scene (Night, Portrait, Children, Landscape,
Text, Close Up, Sunset, Dawn, Backlight, Firework,
Beach & Snow. Frame Guide)
® Dnve: Single, Continuous, Motion Capture. AEB
o Timer: 10 eec, 2 seo, Double, Motion Time/,Remote
Videos
Type
Edit
Effect
® Forrnat: H,264 (Max recording time: 20 min) with
stereo recording
® Size: 1280 x 720 (30 FPS. 15 FPS) High Qualils!,
1280 x 720 (30 FPS, 15 FPS) Standard Qualil_/,
640 x 480 (30 FPS. 15 FPS), 320 x 240 (60 FPS.
30 FPS. 15 FPS)
• 3.6X Optical zoom with sound reoolding and mute
in zooming (sound is muted when operating thezoom function)
® Frame Rate: 60 FPS. 30 FPS. 15 FPS
• Voice: Off, On
• OIS: On, Off
Video editing (embedded): Pause during recording,
Still image capture, Time trimming
Single image, Thumbnails, Multi slide show,
Movie clip, Smart Album
Resize, Rotate, Photo Style Selector, Image AdJust
® Photo Style Selector: Normal, Sort, Vivid, Forest,
Retro, Cod, Calm, Classic, Negative. Custom BGB
® Image Adjust: ACB, Red eye Fix, Face Retouch,Brightness, Contrast, Saturation, Add Noise
" Voice Recording(Max10 hours)
" Voice Memoin a photo (Max.10 sec,)
o Stereorecording
Appendixes 87
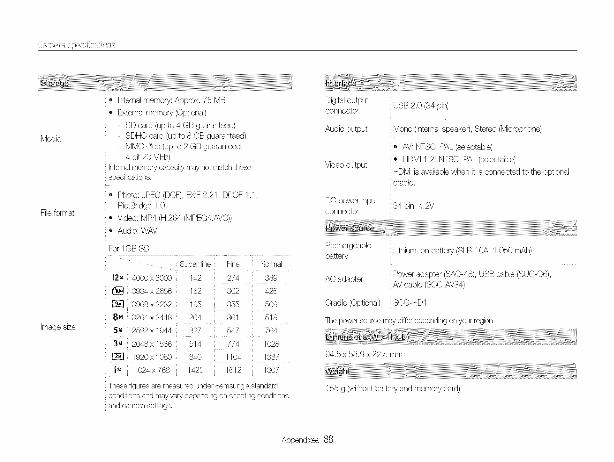
Media
Fileformat
Imagesize
®Internalmemory:Approx,76MB®Externalmemory(Optional)
SDcard(upto4GBguarsnteed)SDHCcard(upto8GBguaranteed)MMCPlus(upto2GBguaranteed,4bit20MHz)
Internalmemorycapaci17]maynotmatchthesespecifications,+Photo:JPEQ(DCF),E}qF2.21.DPOF1.1,
PictBridge10+Video:MP4(H,264(MPEG4.AVC))+Audio:VVAVFor1GBSD
SuperfineFine Normal12_4000x3000142 274 389_ 3984x2656162 302 426[[_[]3968x2232195 355 5098m3264x2448204 361 5185m2592x1944827 547 764:}m2048x1536514 774 1028[]_[]1920x10808401104 1887mm1024x768 14201612 1807
ThesefiguresaremeasuredunderSamsungsstandardconditionsandmayvarydependingonshootingconditionsandcamerasettings
DigitaloutputUSB2,0(34pin)connectorAudiooutputMono(Internalspeaker),Stereo(Microphone)
+AV:NTSC,PAL(eelectable)+HDMI1,2:NTSC.PAL(selectable)VideooutputHDMIisavailablewhenitisconnectedtotheoptionalcradle,
DOpower inputconnector 34 pin,4,2V
Rechargeable Lithium-ion battery (SLB-10A+ 1+050 mAh)battery
AC adapter Power adapter (SAC 48), USB cable (SUC+C6),AV cable (SCC+AV34)
Cradle (Optional) SCC-HD1
The power source may difter depending on your region,
94,5x 58.9 x 22,5 mm
155 g (without battery and memory card)
Appendixes88

C_iTiei__p{_ci%sti(}_is
O-40°0
5-85%
Samsung Mastel, QuickTime _ Player 7,5, Adobe Reader
Specifications are subject to change without prior notice.
Appendixes89

FCCnotice
- NOTE:
Th s eauler'nenTnan Deer/tesTec and found to octopi} wm ir/e
nits for a Class B c gta ae ee. eursuant tc Dart 15 of theFCO Rues. These _m_tsare aes ]nea to Drovae reasonaeeerotecson aganst harmful interference _a resqentlal insta aTio
T, s equlprner/t gerlerstes uses ana carl raalateraaJotrequency energy ana, iTno_ nstalea aria usea n accoroance
win ine instructions --aycause harmful interference to rodc
oorflrflur/cations, Howeven Thereis no guarantee that ir/terterenceno_occur in a Dar_cula sta lation, If this e sulement sees
cause narmfu nterference [o rac ) orTeevlson receeton wncr
can Deaeterm_neaDytu _gTheequ prnent off one on, me user
3enoot ragea to W _ocorrect the nterferenoe % one or more ofme fo Iowir _measures
meonentate sr reocate. T e recelvn{ antennaqor@ase tne ciistance ee_zeeN tne eaulement aRa receiver
Connect Trleeaulement InToan outleI on a oreu t d fferent fro --
maTIO wncn the receiver 3 connecte{
* Oor su t Erie aealer or all e> set encea r_talc techr/ician to_
lelD
, CAUTION:
Char yes or modfleatior/s not e_pressly approvea ey tnemanufacturer ressons ble for corTellance coula vo a the user s
autnomy Tooperate Tneequ f ment
• Declaration of Conformity
Trade Name
Model No.
Responsible Party
Address
Telephone No,
: Samsung ElectronicsAmenca, Inc.
: Samsung SL820
: Samsung ElectronicsAmerica, Inc.
: 105 Challenger Road Ridgdield Park NJ
: 1 800 SAMSUNG (726 7864)
This device complies with Part 15 ot the FCC Rules.Operation is subject to the following two conditions:
(1)This device may not cause harmful interference, and (2)this device must accept any interference received, including
interference that may cause undesired operation.
Samsung Eco_markIt is Samsur/g_sown symbol mark is used t0
effectively cqmrnunicate Samsur_g%e_vironmental
fdendly preduot activities to the consumers, I-hemark represents Samsung_scontinuous effort o_?
development of environmental conscious products,
Appendixes 90
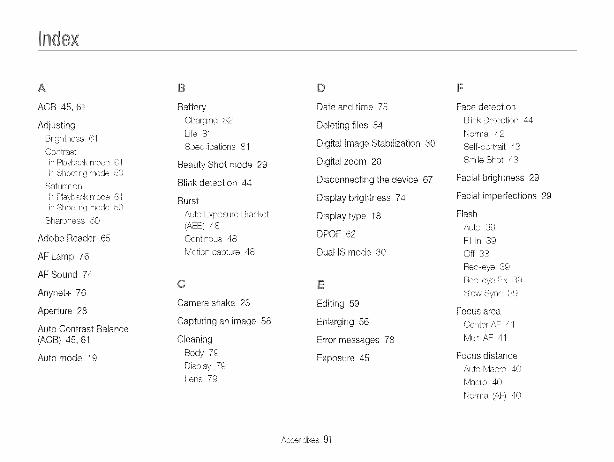
A
ACB 45, 61
Adiusting
Brightness 61
Contrast
in PJaybacl<tic@; C_Iin Shootingrrede 50
Saturation
in Playbacknode ,f51in Shootingnede 5(}
Sharpness 50
Adobe Reader 65
AF Lamp 76
AF Sound 74
Anynet+ 76
Aperture 28
Auto Contrast Balance
(ACB) 45, 61
Auto mode 19
B
Battery
Charging 82
Life 81
Specifications 81
Beauty Shot mode 29
Blink detection 44
Burst
Auto Exposure Bracket
(AEB) 48Continous 48
Motion capture 48
O
Camera shake 23
Capturing an image 58
Cleaning
Body 79
Display 79
Lens 79
D
Date and time 75
Deleting files 54
Digital image Stabilization 30
Digital zoom 20
Disconnecting the device 67
Display brightness 74
Display type 18
DPOF 62
Dual IS mode 30
E
Editing 59
Enlarging 56
Error messages 78
Exposure 45
F
Face detection
Blink Detection 44
Normal 42
Self portrait 43
Smile Shot 43
Facial brightness 29
Facial imperfections 29
Flash
Auto 39
Fill in 39
Oft 3S
Red eye 39
Red eye Fix 39
Slow Sync 39
Focus area
Center AF 41
Multi AF 41
Focus distance
Auto Macro 40
Macro 40
Normal (AF) 40
Appendixes91
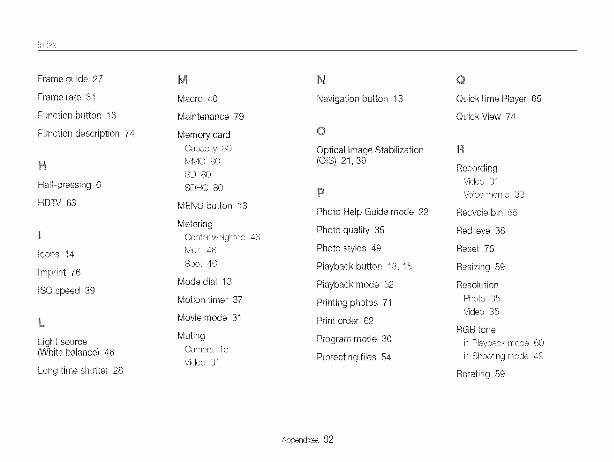
iFiiox
Frame guide 27
Frame rate 31
Function button 13
Function description 74
H
Half-pressing 6
HDTV 63
Icons 14
Imprint 76
ISO speed 39
L
Light source(White balance) 46
Long time shutter 28
Macro 40
Maintenance 79
Memory card
Capacity 80
MMC 80
SD 80
SDHC 80
MENU button 13
Metering
Centepweighted 46
Multi 46
Spot 46
Mode dial 13
Motion timer 37
Movie mode 31
Muting
Camera 15
Video 31
III/
Navigation button 13
O
Optical Image Stabilization(OIS) 21,3O
P
Photo Help Guide mode 22
Photo quality 35
Photo styles 49
Playback button 13, 15
Playback mode 52
Printing photos 71
Print order 62
Program mode 30
Protecting files 54
@
QuickTime Player 65
Quick View 74
R
Recording
Video 31
Voice memo 33
Recycle bin 55
Red-eye 38
Reset 75
Resizing 59
Resolution
Photo 35
Video 35
RGB tone
in PWbaek mode 60
in Shooting mode 49
Rotating 59
Appendixes92

iFiiox
S
Samsung Master
Installing 65
Using 68
Scene mode 27
Self-portrait 43
Service center 83
Settings
Accessing 73Camera 75
Display 74
Sound 74
Shooting mode
Auto 19
Beauty Shot 29
Dual IS 30
Movie 31
Photo Help Guide 22
Program 30
Scene 27
Smart Auto 26
Shutter speed 28
Slide show 56
Smart Album 53
Smart Auto mode 26
Smile shot 43
Start image 74
T
Timer 36
Transferring files
for Mac 70
for Windows 65
V
Video
Playing 57
Recording 31
Video Out 76
Viewing files
as thumbnails 53
by category 53
on TV 63
Slide show 56
Voice memo
Playing 58
Recording 33
Volume 74
W
White Balance 46
Z
Zoom button 13
Zooming 20
Appendixes93

Please refer to the warranty that came with your product orvisit our website http:llwww.samsung,com/for after-sales
service or inquiries.The CE Mark is a Directive conformitymark of the European Community (EC)


![The Barley Uniculme4 Gene Encodes a BLADE-ON- PETIOLE-Like ... · The Barley Uniculme4 Gene Encodes a BLADE-ON-PETIOLE-Like Protein That Controls Tillering and Leaf Patterning1[OPEN]](https://static.fdocuments.us/doc/165x107/5ed141dccd86a73bbf4f388b/the-barley-uniculme4-gene-encodes-a-blade-on-petiole-like-the-barley-uniculme4.jpg)
