ACT! by Sage Premium for Web 2007 (9.0) Administrator’s...
62
ACT! by Sage Premium for Web 2007 (9.0) Administrator’s Guide
Transcript of ACT! by Sage Premium for Web 2007 (9.0) Administrator’s...

ACT! by Sage Premium for Web 2007 (9.0)Administrator’s Guide

ACT! by Sage Premium for Web 2007 (9.0) Administrator’s Guide
Copyright Notice and Trademark
© 2006 Sage Software SB, Inc. All rights reserved.
The Sage Software logo and ACT! are registered trademarks or trademarks of Sage Software SB, Inc., or its affiliated entities. All other trademarks are the property of their respective owners.
Released: 9/2006 for ACT! by Sage Premium for Web 2007 (9.0)
TP172_117
This document may not, in whole or in part, be copied, photocopied, reproduced, translated, or reduced to any electronic medium or machine-readable form without prior consent in writing from Sage Software SB, Inc., 1750 North Brown Road, Lawrenceville, GA 30043 ATTN: Legal Department.
ALL EXAMPLES WITH NAMES, COMPANY NAMES, OR COMPANIES THAT APPEAR IN THIS MANUAL ARE FICTIONAL AND DO NOT REFER TO, OR PORTRAY, IN NAME OR SUBSTANCE, ANY ACTUAL NAMES, COMPANIES, ENTITIES, OR INSTITUTIONS. ANY RESEMBLANCE TO ANY REAL PERSON, COMPANY, ENTITY, OR INSTITUTION IS PURELY COINCIDENTAL.
Every effort has been made to ensure the accuracy of this manual. However, Sage Software makes no warranties with respect to this documentation and disclaims any implied warranties of merchantability and fitness for a particular purpose. Sage Software shall not be liable for any errors or for incidental or consequential damages in connection with the furnishing, performance, or use of this manual or the examples herein. The information in this document is subject to change without notice.
End User License Agreement
ACT! by Sage Premium for Web 2007 (9.0) is protected by an End User License Agreement. To view the agreement, go to the Help menu in the product, click About ACT!, and then click the View the End-User License Agreement link.
Printed in the United States of America.
10 9 8 7 6 5 4 3 2 1

Contents
Introduction . . . . . . . . . . . . . . . . . . . . . . . . . . . . . . . . . . . . . . . . . . . . . . . . . . . . . . . . . . . . . . . iAbout This Manual . . . . . . . . . . . . . . . . . . . . . . . . . . . . . . . . . . . . . . . . . . . . . . . . . . . . . . . . . . . . . . . . . . . . . . iWhat You Need to Know . . . . . . . . . . . . . . . . . . . . . . . . . . . . . . . . . . . . . . . . . . . . . . . . . . . . . . . . . . . . . . . . . iiUnderstanding Differences Between the ACT! and ACT! Premium for Web Applications . . . . . . . . . . . iiWeb Server System Minimum Requirements . . . . . . . . . . . . . . . . . . . . . . . . . . . . . . . . . . . . . . . . . . . . . . . . . iiUsing Microsoft SQL Server with the Software . . . . . . . . . . . . . . . . . . . . . . . . . . . . . . . . . . . . . . . . . . . . . . . ivRelated Documentation . . . . . . . . . . . . . . . . . . . . . . . . . . . . . . . . . . . . . . . . . . . . . . . . . . . . . . . . . . . . . . . . iv
Installation Checklist . . . . . . . . . . . . . . . . . . . . . . . . . . . . . . . . . . . . . . . . . . . . . . . . . . . . . . . vFirst: Prepare Your System . . . . . . . . . . . . . . . . . . . . . . . . . . . . . . . . . . . . . . . . . . . . . . . . . . . . . . . . . . . . . . . vSecond: Install ACT! Premium for Web 2007 . . . . . . . . . . . . . . . . . . . . . . . . . . . . . . . . . . . . . . . . . . . . . . . . v
Chapter 1. Preparing Your ACT! Premium for Web Server . . . . . . . . . . . . . . . . . . . . . . . 1Planning Your Installation . . . . . . . . . . . . . . . . . . . . . . . . . . . . . . . . . . . . . . . . . . . . . . . . . . . . . . . . . . . . . . . . 1
Preparing Your Web Server . . . . . . . . . . . . . . . . . . . . . . . . . . . . . . . . . . . . . . . . . . . . . . . . . . . . . . . . . . . 2Setting Up Your Web Server . . . . . . . . . . . . . . . . . . . . . . . . . . . . . . . . . . . . . . . . . . . . . . . . . . . . . . . 2Planning the Location of Your ACT! Premium Database . . . . . . . . . . . . . . . . . . . . . . . . . . . . . . . 2Gathering Information . . . . . . . . . . . . . . . . . . . . . . . . . . . . . . . . . . . . . . . . . . . . . . . . . . . . . . . . . . . 2Making Security Preparations . . . . . . . . . . . . . . . . . . . . . . . . . . . . . . . . . . . . . . . . . . . . . . . . . . . . . . 3
Using Integrated Windows Authentication . . . . . . . . . . . . . . . . . . . . . . . . . . . . . . . . . . . . . . . . . . . . . . 3Understanding ASP.NET Impersonation . . . . . . . . . . . . . . . . . . . . . . . . . . . . . . . . . . . . . . . . . . . . . . . . . 3Next Steps . . . . . . . . . . . . . . . . . . . . . . . . . . . . . . . . . . . . . . . . . . . . . . . . . . . . . . . . . . . . . . . . . . . . . . . . . 3
Chapter 2. Installing the ACT! Premium for Web Software. . . . . . . . . . . . . . . . . . . . . . . 5Installing the Software . . . . . . . . . . . . . . . . . . . . . . . . . . . . . . . . . . . . . . . . . . . . . . . . . . . . . . . . . . . . . . . . . . 5
Web Server . . . . . . . . . . . . . . . . . . . . . . . . . . . . . . . . . . . . . . . . . . . . . . . . . . . . . . . . . . . . . . . . . . . . . . . . 6Database Server . . . . . . . . . . . . . . . . . . . . . . . . . . . . . . . . . . . . . . . . . . . . . . . . . . . . . . . . . . . . . . . . . . . . 7Next Steps . . . . . . . . . . . . . . . . . . . . . . . . . . . . . . . . . . . . . . . . . . . . . . . . . . . . . . . . . . . . . . . . . . . . . . . . . 7
Creating or Converting a Database . . . . . . . . . . . . . . . . . . . . . . . . . . . . . . . . . . . . . . . . . . . . . . . . . . . . . . 7Next Steps . . . . . . . . . . . . . . . . . . . . . . . . . . . . . . . . . . . . . . . . . . . . . . . . . . . . . . . . . . . . . . . . . . . . . . . . . 7
Installing Optional Synchronization Components . . . . . . . . . . . . . . . . . . . . . . . . . . . . . . . . . . . . . . . . . . . . 8Installing ACT! Network Synchronization Service . . . . . . . . . . . . . . . . . . . . . . . . . . . . . . . . . . . . . . . . . 8Installing ACT! Internet Synchronization Service . . . . . . . . . . . . . . . . . . . . . . . . . . . . . . . . . . . . . . . . . . 8Next Steps . . . . . . . . . . . . . . . . . . . . . . . . . . . . . . . . . . . . . . . . . . . . . . . . . . . . . . . . . . . . . . . . . . . . . . . . . 9
About the ASP.NET Process Account and the Impersonation User Account . . . . . . . . . . . . . . . . . . . . . 9Creating an Impersonation User Account . . . . . . . . . . . . . . . . . . . . . . . . . . . . . . . . . . . . . . . . . . . . . 10
Impersonating on Single-Server Configurations . . . . . . . . . . . . . . . . . . . . . . . . . . . . . . . . . . . . . . 10Impersonating on Multiple-Server Configurations . . . . . . . . . . . . . . . . . . . . . . . . . . . . . . . . . . . . 11
Next Steps . . . . . . . . . . . . . . . . . . . . . . . . . . . . . . . . . . . . . . . . . . . . . . . . . . . . . . . . . . . . . . . . . . . . . . . . 11Registering and Activating the ACT! Premium for Web Software . . . . . . . . . . . . . . . . . . . . . . . . . . . . . 11
Next Steps . . . . . . . . . . . . . . . . . . . . . . . . . . . . . . . . . . . . . . . . . . . . . . . . . . . . . . . . . . . . . . . . . . . . . . . . 12Sharing the Demonstration Database . . . . . . . . . . . . . . . . . . . . . . . . . . . . . . . . . . . . . . . . . . . . . . . . . . . . 12
Next Steps . . . . . . . . . . . . . . . . . . . . . . . . . . . . . . . . . . . . . . . . . . . . . . . . . . . . . . . . . . . . . . . . . . . . . . . . 12Uninstalling or Reinstalling the ACT! Premium for Web Software . . . . . . . . . . . . . . . . . . . . . . . . . . . . . . . 12

Chapter 3. Managing the ACT! Premium for Web Software . . . . . . . . . . . . . . . . . . . . . 13Using the Web Site Administration Tool . . . . . . . . . . . . . . . . . . . . . . . . . . . . . . . . . . . . . . . . . . . . . . . . . . . . 13
Validating Your ASP.NET Process Account . . . . . . . . . . . . . . . . . . . . . . . . . . . . . . . . . . . . . . . . . . . . . 13Specifying and Testing the Impersonation User . . . . . . . . . . . . . . . . . . . . . . . . . . . . . . . . . . . . . . . . . 14Specifying a Virtual Directory and ACT! Database . . . . . . . . . . . . . . . . . . . . . . . . . . . . . . . . . . . . . . 15Next Steps . . . . . . . . . . . . . . . . . . . . . . . . . . . . . . . . . . . . . . . . . . . . . . . . . . . . . . . . . . . . . . . . . . . . . . . . 16
Setting Up Access for Users . . . . . . . . . . . . . . . . . . . . . . . . . . . . . . . . . . . . . . . . . . . . . . . . . . . . . . . . . . . . . 17System Requirements for Remote Users . . . . . . . . . . . . . . . . . . . . . . . . . . . . . . . . . . . . . . . . . . . . . . . . 17Setting Up Users in the ACT! Premium for Web Software . . . . . . . . . . . . . . . . . . . . . . . . . . . . . . . . . . 17Providing Access to the ACT! Premium for Web Software . . . . . . . . . . . . . . . . . . . . . . . . . . . . . . . . . 18
Access from Inside a Common Network . . . . . . . . . . . . . . . . . . . . . . . . . . . . . . . . . . . . . . . . . . . . 18Access from Outside a Common Network . . . . . . . . . . . . . . . . . . . . . . . . . . . . . . . . . . . . . . . . . . 18
Configuring Internet Explorer to Access the ACT! Premium for Web Software . . . . . . . . . . . . . . . . 18Configuring the Trusted Sites Zone . . . . . . . . . . . . . . . . . . . . . . . . . . . . . . . . . . . . . . . . . . . . . . . . . 18Configuring ActiveX Security . . . . . . . . . . . . . . . . . . . . . . . . . . . . . . . . . . . . . . . . . . . . . . . . . . . . . 19
Integrating with Microsoft Outlook . . . . . . . . . . . . . . . . . . . . . . . . . . . . . . . . . . . . . . . . . . . . . . . . . . . . 19Installing the Integration Components . . . . . . . . . . . . . . . . . . . . . . . . . . . . . . . . . . . . . . . . . . . . . 19Defining the Act.Web.OutlookWebServiceAddress Parameter . . . . . . . . . . . . . . . . . . . . . . . . . 20
Next Steps . . . . . . . . . . . . . . . . . . . . . . . . . . . . . . . . . . . . . . . . . . . . . . . . . . . . . . . . . . . . . . . . . . . . . . . . 21Setting the Session Timeout Increment . . . . . . . . . . . . . . . . . . . . . . . . . . . . . . . . . . . . . . . . . . . . . . . . . . . . 21
Next Steps . . . . . . . . . . . . . . . . . . . . . . . . . . . . . . . . . . . . . . . . . . . . . . . . . . . . . . . . . . . . . . . . . . . . . . . . 22Customizing the User’s Experience with the ACT! Premium for Web Software . . . . . . . . . . . . . . . . . . . 22
Next Steps . . . . . . . . . . . . . . . . . . . . . . . . . . . . . . . . . . . . . . . . . . . . . . . . . . . . . . . . . . . . . . . . . . . . . . . . 22
Chapter 4. Securing the ACT! Premium for Web Software . . . . . . . . . . . . . . . . . . . . . . 23Setting Up a Secure Environment for the ACT! Premium for Web Software . . . . . . . . . . . . . . . . . . . . . . 23
Securing Windows 2000, Windows 2000 Server, and Windows XP . . . . . . . . . . . . . . . . . . . . . . . . . . 23Securing Windows 2003 Server . . . . . . . . . . . . . . . . . . . . . . . . . . . . . . . . . . . . . . . . . . . . . . . . . . . . . . . 23
Creating and Securing a Multiple Hosted Environment . . . . . . . . . . . . . . . . . . . . . . . . . . . . . . . . . . . . . . 24Using Virtual Directories to Create Multiple Web Sites . . . . . . . . . . . . . . . . . . . . . . . . . . . . . . . . . . . . 24Using Virtual Servers to Create Multiple Web Sites . . . . . . . . . . . . . . . . . . . . . . . . . . . . . . . . . . . . . . . 24Using Application Pools in IIS 6.0 . . . . . . . . . . . . . . . . . . . . . . . . . . . . . . . . . . . . . . . . . . . . . . . . . . . . . . 24
Configuration Guidelines . . . . . . . . . . . . . . . . . . . . . . . . . . . . . . . . . . . . . . . . . . . . . . . . . . . . . . . . 24Isolating Databases . . . . . . . . . . . . . . . . . . . . . . . . . . . . . . . . . . . . . . . . . . . . . . . . . . . . . . . . . . . . . . . . 25Isolating Supplemental Data . . . . . . . . . . . . . . . . . . . . . . . . . . . . . . . . . . . . . . . . . . . . . . . . . . . . . . . . . 25
Recovering from a Security Compromise . . . . . . . . . . . . . . . . . . . . . . . . . . . . . . . . . . . . . . . . . . . . . . . . . 25Using SSL with the ACT! Premium for Web Software . . . . . . . . . . . . . . . . . . . . . . . . . . . . . . . . . . . . . . . . . 25
Chapter 5. Best Practices . . . . . . . . . . . . . . . . . . . . . . . . . . . . . . . . . . . . . . . . . . . . . . . . . 27Planning the Installation . . . . . . . . . . . . . . . . . . . . . . . . . . . . . . . . . . . . . . . . . . . . . . . . . . . . . . . . . . . . . . . . 28Preparing Your Web Server . . . . . . . . . . . . . . . . . . . . . . . . . . . . . . . . . . . . . . . . . . . . . . . . . . . . . . . . . . . . . 29Installing and Configuring IIS . . . . . . . . . . . . . . . . . . . . . . . . . . . . . . . . . . . . . . . . . . . . . . . . . . . . . . . . . . . . 30Installing and Configuring the ACT! Premium for Web Application . . . . . . . . . . . . . . . . . . . . . . . . . . . . 30Securing the ACT! Premium for Web Server . . . . . . . . . . . . . . . . . . . . . . . . . . . . . . . . . . . . . . . . . . . . . . . . 31Solving Issues with the ACT! Premium for Web Application . . . . . . . . . . . . . . . . . . . . . . . . . . . . . . . . . . . 31
Appendix A. Glossary . . . . . . . . . . . . . . . . . . . . . . . . . . . . . . . . . . . . . . . . . . . . . . . . . . . . . 33

Appendix B. Using Microsoft SharePoint 2003 with the ACT! Premium for Web Software. . . . . . . . . . . . . . . . . . . . . . . . . . . . . . . . . . . . . . . . . . . . . . . . . . . . . . . . . . . . . . . . . 35
Modifying the web.config File . . . . . . . . . . . . . . . . . . . . . . . . . . . . . . . . . . . . . . . . . . . . . . . . . . . . . . . . . . . 35Modifying the SharePoint Exclude List . . . . . . . . . . . . . . . . . . . . . . . . . . . . . . . . . . . . . . . . . . . . . . . . . . . . 36
Appendix C. Setting ASP.NET Process Account Permissions. . . . . . . . . . . . . . . . . . . . . . 37Verifying that the ASP.NET Service Is Available on the Web Server . . . . . . . . . . . . . . . . . . . . . . . . . . . . 37Setting Read Permission for the Registry Key . . . . . . . . . . . . . . . . . . . . . . . . . . . . . . . . . . . . . . . . . . . . . . . 37Setting Process Account Permission on a Web Server that Is Not a Domain Controller . . . . . . . . . . . 38Setting Process Account Permission on a Domain Controller . . . . . . . . . . . . . . . . . . . . . . . . . . . . . . . . . 39
Appendix D. Sharing Preferences Across Web Servers. . . . . . . . . . . . . . . . . . . . . . . . . . 41
Appendix E. Troubleshooting Your ACT! Premium for Web Configuration . . . . . . . . . . 43Web Server Tab . . . . . . . . . . . . . . . . . . . . . . . . . . . . . . . . . . . . . . . . . . . . . . . . . . . . . . . . . . . . . . . . . . . . . . . 43User Account Tab . . . . . . . . . . . . . . . . . . . . . . . . . . . . . . . . . . . . . . . . . . . . . . . . . . . . . . . . . . . . . . . . . . . . . 44Add/Remove Databases Tab . . . . . . . . . . . . . . . . . . . . . . . . . . . . . . . . . . . . . . . . . . . . . . . . . . . . . . . . . . . 45
Index . . . . . . . . . . . . . . . . . . . . . . . . . . . . . . . . . . . . . . . . . . . . . . . . . . . . . . . . . . . . . . . . . . . 47


Introd
uctio
n
Introduction
Welcome to the ACT! by Sage Premium for Web 2007 (9.0) software, which gives users access to ACT! Premium databases through an Internet browser, such as Microsoft© Internet Explorer®. You can support single or multiple users without the need to synchronize because database updates are made on your Web server.
In this guide, you will learn to:
• Prepare your ACT! Premium for Web installation.
• Install and configure the software.
• Manage the software.
• Secure the software.
• Understand best practices for installing, configuring, and securing the software.
This introduction discusses the content of this book, explains the differences between the ACT! Premium for Web and ACT! applications, gives the Web server system minimum requirements, provides information on using SQL Server™ with the software, and lists related documentation.
About This ManualThe Administrator’s Guide provides step-by-step instructions for installing and configuring the ACT! Premium for Web software.
Note: How you perform some tasks can vary according to the Windows® version you use. In these cases, we refer you to the appropriate Microsoft documentation.
The Administrator’s Guide has the following sections:
Installation Checklist This checklist gives the steps you take to install and configure the software. This checklist is written for Web masters, system administrators, and ACT! administrators.
Chapter 1: Preparing your ACT! Premium for Web Server This chapter explains how to prepare for your ACT! Premium for Web installation and configure your Web server. It includes a list of Microsoft Windows components that you must install before beginning.
Chapter 2: Installing the ACT! Premium for Web Software This chapter explains how to install and configure the software.
Chapter 3: Managing the ACT! Premium for Web Software This chapter explains how to use the Web Site Administration tool to select virtual directories and databases and test your configuration, set up user access to the software, set the session timeout increment, and customize the ACT! Premium for Web experience.
Chapter 4: Securing the ACT! Premium for Web Software This chapter discusses security in ACT! Premium for Web environments.
Chapter 5: Best Practices This chapter provides suggestions for installing, configuring, and running the ACT! Premium for Web software.
Administrator’s Guide i

Introduction
Appendix A: Glossary The glossary gives common terminology used with Windows servers, Internet Information Server (IIS), and the ACT! Premium for Web software.
Appendix B: Using Microsoft SharePoint 2003 with the ACT! Premium for Web Software This appendix describes additional tasks to complete if you use SharePoint® on the same server as the ACT! Premium for Web software.
Appendix C: Setting ASP.NET Process Account Permissions This appendix provides information on setting the Read permission for a registry key and setting process account permissions on Web servers.
Appendix D: Sharing Preferences Across Web Servers This appendix describes how to set up a shared preferences storage location, for multiple-server configurations.
Appendix E: Troubleshooting Your ACT! Premium for Web Configuration This appendix helps you identify and resolve configuration issues or errors.
What You Need to KnowTo prepare and configure your Web server, you should have a working knowledge of Windows server technology, security, and IIS. To install and configure the ACT! Premium for Web software, you should be familiar with the ACT! software. For more information, see the Server User’s Guide.
Understanding Differences Between the ACT! and ACT! Premium for Web Applications
The ACT! Premium for Web software emulates the look and feel of the ACT! software. Many of the controls and interfaces are similar. Some important differences include:
• Synchronization is not necessary for ACT! Premium for Web users because all users access one shared database. All users make changes to this database.
• Reports can be created in HTML only.
• The ACT! for Windows shortcut menus do not appear in the ACT! Premium for Web software.
Web Server System Minimum RequirementsTo install the software, you need the following hardware and software:
• One of the following operating systems:
- Microsoft Windows 2000 Professional, Service Pack 4
- Microsoft Windows 2000 Server, Service Pack 4
- Microsoft Windows 2000 Small Business Server (Standard or Premium), Service Pack 4
- Microsoft Windows XP Professional, Service Pack 2
- Microsoft Windows Server 2003 Standard Edition, Service Pack 1 or Release 2
ii ACT! by Sage Premium for Web

Web Server System Minimum Requirements
Introd
uctio
n
- Microsoft Windows Server 2003 Web Edition, Service Pack 1 or Release 2
- Microsoft Windows Server 2003 Enterprise Edition, Service Pack 1 or Release 2
- Microsoft Windows Small Business Server 2003, Service Pack 1 or Release 2
Note: Windows 2000 Professional and XP Professional allow a maximum of ten connections at a time for all applications including the ACT! Premium for Web software. To avoid concurrent usage issues, we recommend using a Windows Server operating system.
• Microsoft Internet Information Server (IIS) 5.0 (Windows 2000), 5.1 (Windows XP), or 6.0 (Windows 2003)
Note: Due to security considerations, we recommend that you use IIS 6.0 (Windows 2003).
• Microsoft Internet Explorer 5.5 or 6.0
Note: For the best ACT! Premium for Web experience, we recommend that you use Internet Explorer 6.0.
• CD drive
• 1000 MB of disk space for the server software, plus additional space for your database
• Network Interface Card (NIC)
• High-speed Internet and/or TCP/IP connection (Internet is optional, but is required for users to access the application outside of the company network.)
• VGA or higher display
• Static IP address (recommended)
Server processor speed and minimum memory requirements depend on the number of users, as shown in the following table:
Server network bandwidth recommendations depend on the number of users, as shown in the following table:
These recommendations assume an average of 44 Kbytes per user, per second, and ten percent of users accessing the Web server during the same second.
Number of Users
Servers Recommended Server Speed
Memory
1-10 1 Pentium® 4, 1.8 GHz 1 GB
11-25 1 Pentium 4, 2.2 GHz Server 1.5 GB
26-50 2 Pentium 4, 2.8 GHz Server 2 GB
Number of Users Server Speed Upload
1-25 512 Kbps
21-50 640 Kbps - 1 Mbps
Administrator’s Guide iii

Introduction
Using Microsoft SQL Server with the SoftwareThe ACT! by Sage Premium for Web 2007 (9.0) software is available in two editions:
• ACT! by Sage Premium for Web 2007 (9.0) (EX Edition), which comes with Microsoft SQL Server Express Edition.
• ACT! by Sage Premium for Web 2007 (9.0) (ST Edition), which comes with Microsoft SQL Server Express Edition and Microsoft SQL Server Standard Edition.
The following table identifies the Microsoft Windows operating systems that we recommend for each SQL version.
Related DocumentationIn addition to this guide, the following documentation is available on the product CD or in the ACT! Premium for Web software:
• The server Help and Server User’s Guide explain how to perform tasks in the ACT! Premium for Web server application.
• The Help and User’s Guide explain how users perform tasks when accessing the software with a Web browser.
Microsoft Windows Operating SystemExpress Edition
Standard Edition
XP Professional (Service Pack 2) X
2000 Professional (Service Pack 4) X
2000 Server Standard Edition (Service Pack 4) X X
Server 2003 Standard Edition (Service Pack 1) X X
Server 2003 Enterprise Edition (Service Pack 1) X X
Server 2003 Web Edition (Service Pack 1) X
2003 Small Business Server (Service Pack 1) X X
iv ACT! by Sage Premium for Web

Installa
tion C
hecklist
Installation ChecklistThis installation checklist outlines the tasks you must complete to install and configure the ACT! Premium for Web server application. These tasks help you organize and plan your installation. The steps may be completed by multiple people, but must be completed in the order given. Review the "Web Server System Minimum Requirements" on page ii before you begin. For more information on each step, see the appropriate page in this guide.
Note: If you are installing the ACT! Premium for Web software for the first time, read each chapter in this guide thoroughly and ensure you complete the necessary steps.
First: Prepare Your System
Second: Install ACT! Premium for Web 2007
* This task may be performed on more than one computer, depending on the configuration you choose for the ACT! Premium for Web software. See the associated procedure for more information.
Task Page # Computer
1 Determine whether you will use a single-server or multiple-server configuration.
page 1 N/A
2 Ensure that servers meet the minimum system requirements. page ii Web server
3 Gather the following information about your Web server:• IP address• Virtual directory names of other Web sites hosted on your
Web server• Location of any existing ACT! Premium for Web databases
page 2 Web server
4 Install and start IIS. Ensure that the ASP.NET service is running. page 2 Web server
Task Page # Computer
1 Install the ACT! Premium for Web software from the product CD; create an ACT! database.
page 5 *
2 Validate an ASP.NET process account. page 9 Web server
3 Create a Windows user account for use in ASP.NET impersonation.
page 9 *
4 Register and activate the ACT! Premium for Web software. page 11 Web server
5 Use the Web Site Administration tool (in the ACT! Premium for Web server application) to validate your configuration and specify an impersonation user, virtual directory, and ACT! database.
page 13 Web server
6 Set up the ACT! Premium for Web software and ensure that remote users meet the system requirements.
page 17 *
7 Verify the Internet Explorer configuration for remote users. page 18 *
8 Supply remote users with the Web address for ACT! Premium for Web access.
page 18 N/A
Administrator’s Guide v


Prep
aring
Your A
CT!
Prem
ium fo
r We
b Se
rver
Chapter 1Preparing Your ACT! Premium for Web Server
This chapter gives tips for planning your installation of the ACT! Premium for Web software.
Note: For information on best practies for planning your installation and preparing your Web server, see Chapter 5, "Best Practices."
Planning Your InstallationFirst, consider whether you will install everything on one server or have the ACT! Premium for Web software on one server and your ACT! Premium database on another. Two possible server/database configurations are:
Single-server In a single-server installation, you install the ACT! Premium for Web software, configure IIS, and create or connect to an ACT! Premium database, all on the same Web server.
Multiple-server In a multiple-server installation, you install the ACT! Premium for Web software and configure IIS on a Web server. You create your ACT! Premium database on a database server. You must also install the ACT! Premium for Web or ACT! Premium for Workgroups software on the database server to provide an instance of Microsoft SQL for creating and managing the database. You then connect to the database from the Web server.
We recommend the multiple-server configuration for more than 25 users.
Note: If you choose a multiple-server installation, you can optionally use more than one Web server. For more information on setting up shared user preferences, see Appendix D, "Sharing Preferences Across Web Servers" on page 41.
You can create a new ACT! Premium database after installing the software, or you can use existing ACT! Premium databases.
The ACT! Premium for Web software uses ASP.NET impersonation to access the database and other files. For more information, see "Understanding ASP.NET Impersonation" on page 3.
The following sections help you prepare your Web server and understand the basic security methods used by the ACT! Premium for Web software.
Administrator’s Guide 1

Preparing Your ACT! Premium for Web Server
Preparing Your Web Server
This section gives information about preparing the server. In addition to general guidelines, this section covers things you must do before beginning installation:
• Set up the Web server.
• Plan the location of your ACT! Premium database.
• Gather information.
• Make security preparations.
Setting Up Your Web Server
You should set up your Web server as follows:
• Install IIS and verify that it runs properly.
• If you use Windows XP, disable Simple File Sharing.
• Verify that your Web server has an Internet Guest Account (IUSR_account).
• Verify that your Web server has an ASP.NET process account. For more information, see "About the ASP.NET Process Account and the Impersonation User Account" on page 9.
• If you use Windows 2000 or Windows XP, use the Microsoft IIS Lockdown Wizard, following the security guidelines in "Setting Up a Secure Environment for the ACT! Premium for Web Software" on page 23.
Planning the Location of Your ACT! Premium Database
Whether you will use a single-server or multiple-server configuration determines the location of your ACT! Premium database.
Gathering Information
Before installing the ACT! Premium for Web software, gather the following information about your Web server and database location:
• The IP address of your Web server
• The virtual directory names of other Web sites hosted on your Web server
• Whether other versions of the ACT! or ACT! Premium for Web software exist on your Web server
• The location of an existing ACT! Premium database, if any
2 ACT! by Sage Premium for Web

Planning Your Installation
Prep
aring
Your A
CT!
Prem
ium fo
r We
b Se
rver
Making Security Preparations
You should develop a plan for securing the ACT! Premium for Web software based on the information you gathered. Consider the following questions.
• Does your ACT! Premium database reside on a server other than the one you will install the ACT! Premium for Web software on? If so, you must give your impersonation user account access to the supplemental files on that server. See "Understanding ASP.NET Impersonation" on page 3 for more information.
If you will install the ACT! Premium for Web software on a Web server that hosts other sites:
• Are there virtual directories or virtual servers for other Web sites on the Web server? Your ACT! Premium for Web installation must have a unique virtual directory or virtual server name.
• How will you secure user data for the ACT! Premium for Web software and for other Web sites? Will you use folder permissions or other security methods?
For optimal performance and security, install the ACT! Premium for Web software on a dedicated Web server.
For more information on securing the software, see Chapter 4, "Securing the ACT! Premium for Web Software."
Using Integrated Windows Authentication
To enhance security, you can use Integrated Windows authentication. This Windows feature checks domain credentials when a user accesses your site, ensuring that the user has permission to do so. If you are not familiar with this feature, we recommend that you enable Anonymous Access authentication. For more information, see the Microsoft IIS Help.
Understanding ASP.NET Impersonation
The ACT! Premium for Web software uses ASP.NET impersonation to access the database and other files. You create a Windows user account, and then use the Web Site Administration tool to configure the software to use that account. ASP.NET impersonation allows an ASP.NET application to access Windows resources using the account you provide.
See "About the ASP.NET Process Account and the Impersonation User Account" on page 9 for more information.
Next Steps
Install the ACT! Premium for Web software. See Chapter 2, "Installing the ACT! Premium for Web Software" on page 5.
Administrator’s Guide 3


Installing
the A
CT!
Prem
ium fo
r We
b So
ftwa
re
Chapter 2Installing the ACT! Premium for Web
Software
When you install the ACT! Premium for Web software, you create or set up access to an ACT! Premium database, and then register and activate the product. This chapter explains how to install, uninstall, and reinstall the software. It also explains about the ASP.NET process account and the impersonation user account.
Note: This chapter gives the steps for installing the software, but you should also review Chapter 5, "Best Practices."
Installing the SoftwareHow you install the ACT! Premium for Web software depends on your existing software and configuration:
New user Your Web server has no existing installation of the ACT! or ACT! Premium for Web software.
ACT! for Web 1.0 user Your Web server has an existing installation of the ACT! for Web 1.0 software.
ACT! Premium for Web 2005 or 2006 user Your Web server has an existing installation of the ACT! Premium for Web 2005 or 2006 software.
ACT! 2005/2006 (MSDE) or ACT! 2007 (SQL Express 2005) user Your Web server has an existing installation of the ACT! by Sage 2005, 2006, or 2007 software and uses a Microsoft SQL Server™ 2000 Desktop Edition (MSDE) or SQL Server 2005 Express Edition database.
ACT! Premium for Workgroups 2005, 2006, or 2007 user Your Web server has an existing installation of the ACT! by Sage Premium for Workgroups 2005, 2006, or 2007 software and uses a Microsoft SQL Server 2000 Standard Edition or SQL Server 2005 Standard Edition database.
ACT! Premium for Real Estate Your Web server has an existing installation of ACT! by Sage Premium for Real Estate software.
Additionally, your installation will differ if you have Microsoft SQL Server and Microsoft .NET Framework installed.
The following procedures cover all of these installation scenarios.
Tip: If you are upgrading from the ACT! Premium for Web 2005 or 2006 software, reset IIS before installing. This ensures that all users are logged out of the Web site and forces IIS to release the existing program files so you can install the new version successfully.
Administrator’s Guide 5

Installing the ACT! Premium for Web Software
Web Server
This section describes how to install the software on the Web server.
To install the ACT! Premium for Web software
1. Insert the ACT! Premium for Web CD 1 into the CD drive.
The installation program automatically starts. If it does not, browse the CD and select setup.exe.
2. Click Install ACT! Premium for Web.
The installation program runs several checks on your Web server to look for other versions of ACT!, Microsoft SQL Server, and Microsoft .NET Framework 2.0.
- If the installer detects the following software, it prompts you to manually uninstall it before proceeding:
- ACT! for Web
- ACT! Premium for Web (see "Uninstalling or Reinstalling the ACT! Premium for Web Software" on page 12)
- ACT! 6.x or earlier
- ACT! Premium for Workgroups 2005, 2006, or 2007
- ACT! Premium for Real Estate
- If the installer detects an installation of the ACT! 2005/2006 (MSDE) or ACT! 2007 (SQL Express 2005) software, it asks whether to uninstall it before proceeding. If you click Yes, it automatically uninstalls the previous version before proceding to the installation. If you click No, the installation stops.
When the installer finishes the system checks, follow the instructions on the screen to copy the necessary files for:
• Microsoft SQL Server
Note: The ACT! by Sage Premium for Web 2007 (9.0) (ST Edition) software comes with both SQL Server 2005 Express Edition (on CD 1) and SQL Server 2005 Standard Edition (on CD 2). You can choose the version of SQL Server to install.The ACT! by Sage Premium for Web 2007 (9.0) (EX Edition) software includes only SQL Server 2005 Express Edition (on CD 1).
• Microsoft .NET Framework
• Microsoft Internet Explorer
• ACT! Premium for Web
The installer proceeds through the Getting Started Wizard.
6 ACT! by Sage Premium for Web

Creating or Converting a Database
Installing
the A
CT!
Prem
ium fo
r We
b So
ftwa
re
Database Server
If you are using a multiple-server configuration, you must install the ACT! Premium for Web or ACT! Premium for Workgroups software on the database server, even though you will be running the application from the Web server. The installation on the database server provides an instance of Microsoft SQL to use in creating and managing the database. You connect to the database from the Web server.
On the database server, follow the steps in "To install the ACT! Premium for Web software" on page 6, or, install the ACT! Premium for Workgroups software on the database server, using the installation instructions for that software.
Next Steps
Create or convert a database. See "Creating or Converting a Database" for more information.
Creating or Converting a DatabaseYou must have a database to use the ACT! software.
• If you have an existing database, you can connect to it. (If it is an ACT! 3.x to 6.x database, you must convert it to an ACT! Premium database. You can do this using the Getting Started Wizard.)
• If you do not have an existing database, you can create one using the Getting Started Wizard. For more information, see the "Creating Databases" chapter in the Server User's Guide.
Caution: You must configure ACT! databases to be shared so the ACT! Premium for Web software can connect to them. If ACT! for Windows users will use your database, grant them permission to access the database files.
If you are using a single-server configuration, create or convert the database on the Web server. If you are using a multiple-server configuration, create or convert the database on the database server.
Next Steps
If users of the ACT! for Windows software will synchronize with your Web-hosted database, optionally install the synchronization components. If not synchronizing, set up your ASP.NET process account and impersonation user account. See "Installing Optional Synchronization Components" on page 8 or "About the ASP.NET Process Account and the Impersonation User Account" on page 9 for more information.
Administrator’s Guide 7

Installing the ACT! Premium for Web Software
Installing Optional Synchronization ComponentsIf ACT! Premium for Workgroups users access your database, they may synchronize data over your network or the Internet. You can install ACT! Network Synchronization Service, ACT! Internet Synchronization Service, both services, or no service, based on your user requirements. For more information on synchronization, see the Server User’s Guide.
Note: If you choose not to install the optional synchronization components, you can still synchronize data over a network. However, the ACT! application and the database must be open for synchronization to occur.
Installing ACT! Network Synchronization Service
The ACT! Network Synchronization Service is a separate application that monitors the port that accepts incoming synchronization requests from remote databases to the main database. The service enables synchronization over a network when the ACT! application and the main database are closed.
To install ACT! Network Synchronization Service
1. Insert CD 2 into the CD drive.
The installation program automatically starts. If it does not, browse the CD and select setup.exe.
2. If you purchased the ACT! by Sage Premium for Web 2007 (9.0) (ST Edition) software, click ACT! Synchronization Services. If you purchased the ACT! by Sage Premium for Web 2007 (9.0) (EX Edition) software, go to step 3.
3. Click ACT! Network Synchronization Service.
4. Follow the instructions on each page, clicking Next to advance.
5. Click Finish to close.
See "Setting Up the ACT! Network Synchronization Service" in the Server User’s Guide for configuration instructions.
Installing ACT! Internet Synchronization Service
The ACT! Internet Synchronization Service is a separate application that monitors incoming synchronization requests from remote databases to the main database. The service enables synchronization over the Internet when the ACT! application and the main database are closed.
The service requires a computer with Microsoft Internet Information Services (IIS) v5.0.2 or later and ASP.NET (if using Windows 2003). The IIS computer should be located outside any firewall. The ACT! Internet Synchronization Service install creates a default virtual directory called ActInternetSync. That directory contains a file called SyncConfigFile, which you must configure.
8 ACT! by Sage Premium for Web

About the ASP.NET Process Account and the Impersonation User Account
Installing
the A
CT!
Prem
ium fo
r We
b So
ftwa
re
To install ACT! Internet Synchronization Service
1. Insert CD 2 into the CD drive.
The installation program automatically starts. If it does not, browse the CD and select setup.exe.
2. If you purchased the ACT! by Sage Premium for Web 2007 (9.0) (ST Edition) software, click ACT! Synchronization Services. If you purchased the ACT! by Sage Premium for Web 2007 (9.0) (EX Edition) software, go to step 3.
3. Click ACT! Internet Synchronization Service.
4. Follow the instructions on each page, clicking Next to advance.
5. Click Finish to close.
See "Setting Up the ACT! Internet Synchronization Service" in the Server User’s Guide for configuration instructions.
Next Steps
Set up your ASP.NET process account and impersonation user account. See "About the ASP.NET Process Account and the Impersonation User Account" for more information.
About the ASP.NET Process Account and the Impersonation User Account
You must set up and validate both an ASP.NET process account and a Windows impersonation user account.
• ASP.NET process account
This account is required for ASP.NET to function. It is usually managed by Windows, and it requires the permission: Impersonate a client after authentication. The default account name varies, depending on the operating system on your Web server. The actual account name may be different from the following default names, if it was customized.
- ASPNET (Windows XP, Windows 2000 Professional, and Windows 2000 Servers that are not domain controllers)
- IWAM_<machine_name> (Windows 2000 domain controllers)
- Network Service or another account that is a member of the IIS_WPG group (Windows 2003 Servers). By default, this account is called Network Service, but the name can vary, depending on the application pool the ACT! Premium for Web software runs under.
Administrator’s Guide 9
Installing the ACT! Premium for Web Software
• Windows impersonation user account
This account is required for the ACT! Premium for Web software to allow secure access to application and database files. For more information, see "Creating an Impersonation User Account."
Note: For more information on verifying that the ASP.NET process is enabled, setting the Impersonate a client after authentication permission, or working with a Web server that is a domain controller, see Appendix C, "Setting ASP.NET Process Account Permissions" on page 37.
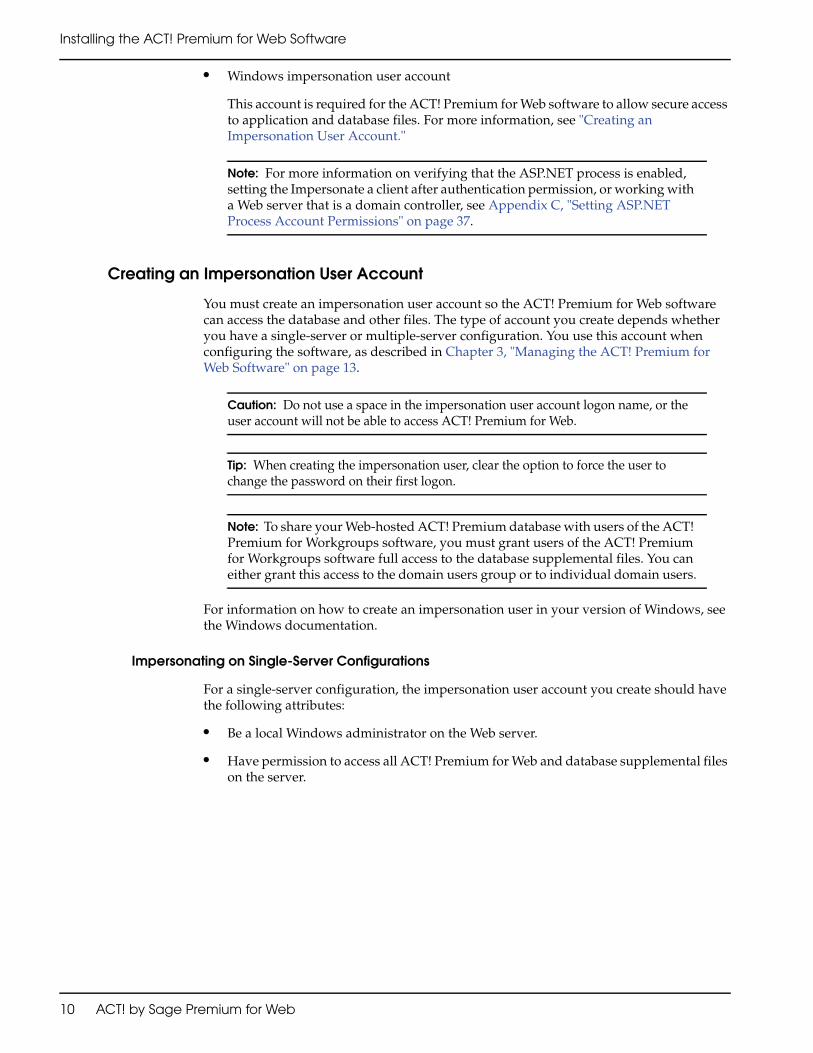
Creating an Impersonation User Account
You must create an impersonation user account so the ACT! Premium for Web software can access the database and other files. The type of account you create depends whether you have a single-server or multiple-server configuration. You use this account when configuring the software, as described in Chapter 3, "Managing the ACT! Premium for Web Software" on page 13.
Caution: Do not use a space in the impersonation user account logon name, or the user account will not be able to access ACT! Premium for Web.
Tip: When creating the impersonation user, clear the option to force the user to change the password on their first logon.
Note: To share your Web-hosted ACT! Premium database with users of the ACT! Premium for Workgroups software, you must grant users of the ACT! Premium for Workgroups software full access to the database supplemental files. You can either grant this access to the domain users group or to individual domain users.
For information on how to create an impersonation user in your version of Windows, see the Windows documentation.
Impersonating on Single-Server Configurations
For a single-server configuration, the impersonation user account you create should have the following attributes:
• Be a local Windows administrator on the Web server.
• Have permission to access all ACT! Premium for Web and database supplemental files on the server.
10 ACT! by Sage Premium for Web

Registering and Activating the ACT! Premium for Web Software
Installing
the A
CT!
Prem
ium fo
r We
b So
ftwa
re
Impersonating on Multiple-Server Configurations
For a multiple-server configuration, the impersonation user account you create should have the following attributes:
• Be a standard domain user.
• Be a local Windows administrator on the Web server.
• Have permission to access the database supplemental files for your ACT! database on the database server.
• Have permission to access all ACT! Premium for Web files on the Web server.
Next Steps
Register and activate the product. See "Registering and Activating the ACT! Premium for Web Software" for more information.
Registering and Activating the ACT! Premium for Web SoftwareAfter you install, you must register and activate the software. Registration ensures you of timely program updates, upgrade offers, and customer support options. After you register, you activate the product. This unlocks the product for use.
Note: The ACT! Premium for Web software stops working if you do not register and activate it within 30 days of first use. To access registration and activation at any time, from the Help menu, click Register ACT!.
To register and activate the ACT! Premium for Web software
When you launch the software after installing, the ACT! Premium for Web Registration and Activation Wizard appears.
1. In the Options area, select I have purchased ACT! and am ready to register, and then click Next.
2. Type your serial number, and then click Next.
The ACT! Registration and Activation Wizard guides you through the rest of the registration and activation process.
The serial number you use during registration allows a specific number of users based on the number of licenses you purchased. If you purchase more licenses, you can register additional serial numbers.
To register additional serial numbers
1. From the Help menu, select Register ACT!.
2. Click Add to add serial numbers.
Administrator’s Guide 11

Installing the ACT! Premium for Web Software
Next Steps
If users need access to the demonstration database, see "Sharing the Demonstration Database." If not, specify and validate your ACT! Premium for Web configuration and set up user access. See Chapter 3, "Managing the ACT! Premium for Web Software" on page 13 for more information.
Sharing the Demonstration DatabaseFor users to access the demonstration database, you must share the database.
To share the database
• From the Tools menu, point to Database Maintenance, and then click Share Database.
If a check mark appears next to the Share Database command, the database is shared. If no check mark appears, the database is not shared.
Next Steps
Specify and validate your ACT! Premium for Web configuration and set up user access. See Chapter 3, "Managing the ACT! Premium for Web Software" on page 13 for more information.
Uninstalling or Reinstalling the ACT! Premium for Web SoftwareIf necessary, you can uninstall or reinstall the software. To reinstall the ACT! Premium for Web software, you must first uninstall it.
To uninstall the ACT! Premium for Web software
1. Click Start, point to Programs, point to ACT! Premium for Web, and then click Uninstall.
2. When prompted, click Yes to confirm that you wish to uninstall the program.
To reinstall the ACT! Premium for Web software
1. Follow the steps under "To uninstall the ACT! Premium for Web software."
2. Follow the steps under "To install the ACT! Premium for Web software" on page 6.
12 ACT! by Sage Premium for Web

Ma
nag
ing the
AC
T!Pre
mium
for W
eb
Softw
are
Chapter 3Managing the ACT! Premium for Web
Software
You can perform most administrative tasks using the ACT! Premium for Web server software on your Web server. This chapter explains how to:
• Use the Web Site Administration tool to manage the impersonation user account, virtual directories, and ACT! Premium databases.
• Set up access to the software for users.
• Set the session timeout increment.
• Customize the user’s experience with the software.
Using the Web Site Administration ToolBefore users can access the ACT! Premium for Web software, you must validate your ASP.NET process account and specify an impersonation user account, a virtual directory, and at least one ACT! Premium database. You do this using the Web Site Administration tool.
Note: You can also use this tool to remove access to databases from the software. For more information, see "Removing access to an ACT! Premium for Web server database" in Help.
Validating Your ASP.NET Process Account
The ACT! Premium for Web software uses ASP.NET to access the database and other files. Before specifying impersonation accounts, virtual directories, and databases, you must validate that an ASP.NET process account exists and is correctly configured on your Web server.
To validate the ASP.NET process account
1. In the ACT! Premium for Web software, from the Tools menu, select Web Site Administration.
The Web Site Administration tool appears.
2. In the Web Server tab, click Test.
- The system displays a "Test Successful" message if an ASP.NET process account exists and is correctly configured. Click OK to close the message. Go to "Specifying and Testing the Impersonation User" on page 14.
- The system displays an error message if an ASP.NET process account does not exist or is incorrectly configured. Click OK to close the message. See "About the ASP.NET Process Account and the Impersonation User Account" on page 9 for more information.
Administrator’s Guide 13

Managing the ACT! Premium for Web Software
- The system displays an informational message if SharePoint software exists on the Web server. You may need to modify your Web configuration. For more information, see "Using Microsoft SharePoint 2003 with the ACT! Premium for Web Software" on page 35.
3. Correct any errors and repeat step 2 until the Web server test is successful.
Note: For information on troubleshooting error messages, see Appendix E, "Troubleshooting Your ACT! Premium for Web Configuration."
Next, you specify and test the impersonation user.
Note: The Web server test must be successful before you can access the User Account tab.
Specifying and Testing the Impersonation User
Before you can specify a virtual directory and ACT! Premium database, you configure the ACT! Premium for Web software to use the impersonation user.
Note: Whenever you change the impersonation user configuration, you should test whether the user can still access the files and folders required for the ACT! Premium for Web software. For more information, see "Specifying and testing the impersonation user" in the Help.
To specify and test the impersonation user
1. In ACT! Premium for Web, from the Tools menu, select Web Site Administration.
The Web Site Administration tool appears.
2. In the User Account tab, click Edit.
Note: You may receive an error message if the Administration tool is unable to access the Windows domain, the Windows User Name does not exist, or you entered an invalid password. Check with your system administrator, correct the errors, and then try again.
3. From the Windows Domain list, select the domain for your impersonation user.
4. Type the user name and password, and then click OK.
The Administration tool does the following:
- Encrypts the user name and password you entered.
- Sets up ASP.NET impersonation using the specified user.
- Verifies that the impersonation user can access the required files and folders.
- Verifies that the ASP.NET process account has access to the required registry key.
14 ACT! by Sage Premium for Web

Using the Web Site Administration Tool
Managing the AC
T!Prem
ium for W
eb Software
Then, a message displays:
- The system displays a "Test Successful" message if the impersonation user has access to the required files and folders. Click OK to close the message. Go to "Specifying a Virtual Directory and ACT! Database" on page 15.
- The system displays an error message if the impersonation user does not have the required access to files and folders. Click OK to close the message. See "Creating an Impersonation User Account" on page 10 for more information.
- The system displays an error message if the ASP.NET process account does not have the required access to the registry key. Click OK to close the message. See Appendix E, "Troubleshooting Your ACT! Premium for Web Configuration" for more information.
5. Correct any errors and repeat steps 2 through 4 until the ASP.NET impersonation user test is successful.
Next, you specify a virtual directory and ACT! database.
Note: The user account test must be successful before you can access the Add/Remove Database tab.
Specifying a Virtual Directory and ACT! Database
When you installed the ACT! Premium for Web software, the installer created a virtual directory called "apfw" on your Web server. Users access the software by adding this virtual directory name to the URL of your Web server. For example, "http://salesweb/apfw" would be the name if "salesweb" is the Web server URL and "apfw" is the virtual directory name. Using the following procedure, you assign one or more ACT! Premium databases to this virtual directory. Users log on to the database when they access the software.
Note: Whenever you change the virtual directory and database configuration, you should test whether the application can still access the files and folders required for the ACT! Premium for Web software. For more information, see "Specifying and testing a virtual directory and ACT! Premium database" in the Help.
To specify a virtual directory and ACT! Premium database
1. In the ACT! Premium for Web software, from the Tools menu, click Web Site Administration.
The Web Site Administration tool appears.
Administrator’s Guide 15

Managing the ACT! Premium for Web Software
2. In the Add/Remove Database tab, from the Web site list, select the name of your Web server.
The Virtual directories field lists the virtual directories available on the selected server.
Note: The box displays only virtual directories associated with an ACT! Premium for Web installation. In most cases, there is only one. However, in environments where you host multiple ACT! Premium for Web sites, the list may have more than one virtual directory. For more information on configuring this type of environment, see Chapter 4, "Securing the ACT! Premium for Web Software."
3. In the Virtual directories field, select the virtual directory to configure.
4. (Optional) Click Test to display the ACT! Premium for Web - Log On page for the selected virtual directory in a browser window. Close the browser window.
5. Click Add, and then browse to the ACT! Premium database to associate with your selected virtual directory. This database can be on the Web server or a database server.
You must have administrator rights in the ACT! Premium database you add. Also, the database must not already be assigned to any virtual directory on your Web server.
6. Click OK.
7. The Administration tool prompts you to log on. Enter your user name and password, and then click OK.
The Administration tool validates whether the impersonation user can access the virtual directory, database, and database supplemental files.
- The system displays a "Test Successful" message if the impersonation user account has access to the virtual directory, database, and files. Click OK to close the message. Go to "Setting Up Access for Users" on page 17.
- The system displays an error message if the impersonation user account does not have the required access. Click OK to close the message. On the Add/Remove Databases tab, the system displays the added database with an error icon next to it. See "Creating an Impersonation User Account" on page 10 for more information.
Note: For information on troubleshooting error messages, see Appendix E, "Troubleshooting Your ACT! Premium for Web Configuration."
Next Steps
After you have validated your ASP.NET process account, specified the impersonation user, and specified your virtual directory and ACT! database, you can set up user access to the software. See "Setting Up Access for Users" for more information.
16 ACT! by Sage Premium for Web

Setting Up Access for Users
Managing the AC
T!Prem
ium for W
eb Software
Setting Up Access for UsersOnce you have installed and configured the ACT! Premium for Web software, you can set up access for your users. This section discusses:
• System requirements for remote users.
• Setting up users.
• Providing access to the ACT! Premium for Web software.
• Configuring Internet Explorer to access the software.
• Integrating with Microsoft Outlook®.
System Requirements for Remote Users
To access the ACT! Premium for Web software, remote user’s systems must meet the following requirements:
• Microsoft Windows 98/Me/NT/2000/XP/2003
• Internet Explorer 5.5 or 6.0 (6.0 recommended), with permissions set to run ActiveX® controls
• Adobe® Reader® 6.0 or 7.0
• Internet and/or TCP/IP connection (Internet is optional, but is required for users to access the software outside of the company’s network)
• NIC, analog modem (56 Kbps minimum), Cable, or DSL (Cable or DSL recommended for optimal performance)
• Printer (optional)
To use Microsoft Outlook integration with the ACT! Premium for Web software, remote user’s systems must meet the following requirements:
• Microsoft Windows 2000/XP/2003
• Internet Explorer 5.5 or 6.0 (6.0 recommended), with permissions set to run ActiveX® controls
• Microsoft Outlook 2000, 2002 (XP), or 2003
• Microsoft .NET Framework 2.0, with Service Pack 2
• If using Windows 2000, the system must have Service Pack 3
• If using Windows XP, the system must have Service Pack 2
• If using Windows 2003, the system must have Service Pack 1
Setting Up Users in the ACT! Premium for Web Software
Before individuals can access the software, you must add them as users in the appropriate ACT! Premium databases and assign them a user role. For more information on users and user roles, see Help.
Administrator’s Guide 17

Managing the ACT! Premium for Web Software
Providing Access to the ACT! Premium for Web Software
You must provide your users with an address for accessing the software. This address consists of the virtual directory name of your ACT! Premium for Web installation appended to your site URL.
Examples of URLs are:
• http://salesweb/apfw, where "salesweb" is your site URL and "apfw" is the virtual directory name
• http://teamwebserver/apfw
• http://www.xxx.com:8080/apfw, where "www.xxx.com" is your site domain name and "8080" is the port number used to access the site
• http://92.123.145.63/apfw
• http://www.salesperson.com/apfw
Access from Inside a Common Network
If the Web server and the users are on a common network, users can access the software using the network machine name of the Web server. In the first two examples, that name is "salesweb" and "teamwebserver."
Access from Outside a Common Network
Users cannot use the network machine name to access the software from outside the common network. Instead, you must provide an external IP address or a URL for a registered domain name, for example "92.123.145.63" or "www.salesperson.com."
Note: An external IP address or URL is also required to use Outlook integration from outside the network. For more information, see "Integrating with Microsoft Outlook" on page 19.
Setting up external Internet access to the Web site for the ACT! Premium for Web software requires additional configuration. Refer to Microsoft IIS Help or contact your network administrator or ISP for assistance.
Configuring Internet Explorer to Access the ACT! Premium for Web Software
While using the software, users will be unable to access the Internet Explorer View Source function and the shortcut menu.
Users must enable Internet Explorer to accept cookies, and they must specify certain browser security settings, as described in the following sections.
Configuring the Trusted Sites Zone
Adding the ACT! Premium for Web site domain to the Trusted Sites zone in Internet Explorer ensures that the application will function properly. Some features, such as pop-up windows, may not work correctly if the Web site is not in the Trusted Sites zone.
For more information on security zones in Internet Explorer, see Help in Internet Explorer.
18 ACT! by Sage Premium for Web

Setting Up Access for Users
Managing the AC
T!Prem
ium for W
eb Software
Configuring ActiveX Security
To use correspondence and word-processing features, users are prompted to install two ActiveX controls, TX Text Control and Common Dialog, if the controls are not already on their systems.
TX TextControl This control installs with the software and is part of the same security zone. All users are prompted to install this control.
Common Dialog Some users may need to install this control. It is part of the Microsoft.com security zone.
Default browser settings typically prompt users to install ActiveX controls. You should inform users that it is safe to install these controls.
Note: If your client-side Web security policies prohibit the installation of ActiveX controls, you may add both the domain associated with your ACT! Premium for Web server installation and Microsoft.com to the Trusted Sites zone in Internet Explorer. Configure Internet Explorer to prompt users when installing ActiveX controls only for sites in the Trusted Sites zone. Doing this bypasses the ActiveX security constraints only for the necessary controls.
Integrating with Microsoft Outlook
To integrate the address book, record history, and attach e-mail to contacts components in Outlook, users must download and successfully install the Outlook integration control program on the machine from which they access the ACT! Premium for Web software. They only need to download and install the program once.
If users will use the ACT! Premium for Web software and Outlook integration from outside the common network, you can set a parameter in the web.config file on the server. The Act.Web.OutlookWebServiceAddress parameter identifies the external IP address or registered domain name that will be used to access the ACT! Premium for Web software.
Installing the Integration Components
Note: Restricted users and above can download and install the executable program. Users must have administrative rights on their computer to install the software.All users must download and install the program on their computers.
To install Outlook integration control program
1. Close Outlook.
Outlook must be closed to install the integration control program.
2. Open the ACT! Premium for Web software.
3. From the Tools menu, click Preferences.
4. Click the E-mail hyperlink.
5. In the E-mail Preferences dialog box, under Microsoft Outlook integration, click the Download button.
6. When asked whether to run or save the file, click Run, and then, at the security warning, click Run again.
Administrator’s Guide 19

Managing the ACT! Premium for Web Software
7. Select the folder to extract the files to, and then click OK.
8. At the success message, click OK.
9. In the Open File - Security Warning dialog box, click Run.
The InstallShield Wizard checks your system for Outlook versions and verifies that you have not already installed the program and that there is enough space on your hard drive for the program. If conditions are not acceptable, an error message displays describing the condition.
10. At the Welcome page, read the text, and then click Next.
The wizard proceeds to install the program, and if successful, advances to the Finish page.
After installing the integration components, users can add up to three ACT! Premium for Web databases as address books in Outlook and set options for recording histories for e-mail sent using Outlook. For more information, see "About using Microsoft Outlook e-mail while in the ACT! application" in Help.
Caution: In some cases, a history may not be recorded when attaching an Outlook e-mail to an ACT! contact. This can occur if the clocks on the Web server and the user’s computer are set so that the minutes setting is more than five minutes different. For example, your Web server is in the Eastern Daylight time zone, with the clock set for 1:15 pm, and the user’s computer is in the Pacific time zone, with the clock set for 10:22 am. A quick way to ensure that Outlook e-mail histories are recorded is to have the user change the clock on his or her computer to be within five minutes (either way) of the Web server time. Alternatively, you can add a setting to the web.config file on the Web server and the app.config files on the client.For more information on troubleshooting and resolving this Outlook e-mail attachment problem, see the related KnowledgeBase article.
Defining the Act.Web.OutlookWebServiceAddress Parameter
Users may wish to send e-mail using Outlook integration when accessing the ACT! Premium for Web application from outside the common network. To enable users to do this, you can set a parameter in the web.config file on the server. This parameter specifies the external IP address or domain to use as the Outlook Web Service address.
Note: You must also configure your firewall to permit access from outside the network. For more information, see the firewall documentation.
To edit the web.config file
1. Open Notepad.
2. From the File menu, click Open.
3. Navigate to the APFW folder on the server where the ACT! Premium for Web software is installed, select the web.config file, and click Open.
Note: In a default installation, the web.config file is located at C:\Program Files\ACT\ACT for Web\APFW.
20 ACT! by Sage Premium for Web

Setting the Session Timeout Increment
Managing the AC
T!Prem
ium for W
eb Software
4. Locate the Act.Web.OutlookWebServiceAddress parameter, which looks similar to the following:
<add key="Act.Web.OutlookWebServiceAddress" value="http://www.xxx.com:8080/apfw" />
5. Replace the text following "value=" with the IP address or domain name for the ACT! Premium for Web site.
6. From the File menu, click Save.
Next Steps
If you like, you can change the session timeout increment or customize the appearance and behavior of the ACT! Premium for Web software. To do this, see "Setting the Session Timeout Increment" or "Customizing the User’s Experience with the ACT! Premium for Web Software" for more information.
If you are not going to customize the software, the next step is to secure your installation of the software. See Chapter 4, "Securing the ACT! Premium for Web Software."
Setting the Session Timeout IncrementThe session timeout increment controls how long ACT! Premium for Web users can be idle and remain logged into the ACT! Web site. After the specified period of time, idle users will be logged out automatically (users receive a timeout warning message two minutes before the automatic logout).
The default timeout increment is 20 minutes.
Note: Microsoft IIS services are automatically restarted so the new session timeout increment can take effect. Ensure that no users are on the system before changing the timeout. Users will receive "Page not found" errors if they access ACT! Premium for Web during the restart.
To change the session timeout
1. In the ACT! Premium for Web software, from the Tools menu, click Web Site Administration.
The Web Site Administration tool appears.
2. In the Options tab, from the Session timeout list, select the new timeout increment.
3. Click Apply.
The system applies the new timeout increment.
4. Click Close to close the Web Site Administration tool.
Administrator’s Guide 21

Managing the ACT! Premium for Web Software
Next Steps
Optionally, customize the appearance and behavior of the ACT! Premium for Web software. To do this, go to "Customizing the User’s Experience with the ACT! Premium for Web Software" for more information.
If you are not going to customize the software, the next step is to secure your installation of the software. See Chapter 4, "Securing the ACT! Premium for Web Software."
Customizing the User’s Experience with the ACT! Premium for Web Software
You can use tools available in the software to customize the way the ACT! Premium for Web software looks and behaves. See the Server User’s Guide for information on:
• Defining custom fields for contact, group, and company records.
• Creating custom layouts for Contact, Group, and Company Detail views.
• Creating custom reports for contacts, activities, and more.
• Creating custom templates for correspondence.
Next Steps
Secure your installation of the software. See Chapter 4, "Securing the ACT! Premium for Web Software."
22 ACT! by Sage Premium for Web

Sec
uring the
AC
T! Pre
mium
for W
eb
Softw
are
Chapter 4Securing the ACT! Premium for Web
Software
As with any software that is available on a network or as an Internet Web site, you must take appropriate security precautions. This chapter discusses:
• Setting up secure environments for the ACT! Premium for Web software.
• Creating and securing multiple sites on a server.
• Recovering from a security compromise.
• Using Secure Sockets Layer (SSL) with the ACT! Premium for Web software.
Note: This chapter gives the steps for securing the software, but you should also review Chapter 5, "Best Practices."
Setting Up a Secure Environment for the ACT! Premium for Web Software
The steps you take to secure your ACT! Premium for Web environment depend on the Windows version you are using. The following sections give information for each operating system.
Securing Windows 2000, Windows 2000 Server, and Windows XP
You can use the Microsoft IIS Lockdown Wizard with Windows 2000 Server and Windows XP to quickly create a secure environment for your Web site. This leaves relatively few steps for you to perform manually. The Lockdown Wizard creates a secure environment by disabling or removing access to unused features on your Web server.
To use the IIS Lockdown Wizard, download it from microsoft.com, and then follow the instructions to run the wizard.
Securing Windows 2003 Server
Because IIS 6.0 in Windows 2003 Server runs in an inherently secure environment, secure Windows 2003 Server by using the default settings. Restore any security features you removed in IIS 6.0.
Administrator’s Guide 23

Securing the ACT! Premium for Web Software
Creating and Securing a Multiple Hosted EnvironmentYou may have two or more instances of the ACT! Premium for Web software hosted on one Web server. In these cases, you can use virtual directories, virtual servers, or application pools to distinguish and secure each ACT! Premium for Web site. You should also isolate any supplemental data for each Web site, as described in "Isolating Supplemental Data" on page 25.
Using Virtual Directories to Create Multiple Web Sites
You can create multiple virtual directories within your default Web site. For example, you may have a directory called "Sales" and one called "Marketing." Clients access the sites using a URL followed by the virtual directory name (for example, http://domain.com/sales). You point each virtual directory to the ACT! Premium for Web installation directory. By default, the installation directory is C:\Program Files\ACT\ACT for Web\APFW.
Using Virtual Servers to Create Multiple Web Sites
If you are using Windows 2000 Server, 2000 Advanced Server, Small Business Server 2000, Server 2003 Standard Edition, Server 2003 Enterprise Edition, or Small Business Server 2003, you can create virtual servers on a single Web server. Using this method, you can support multiple domains on one Web server. For example, you could host "http://www.domain.com" and "http://www.anotherdomain.com" on one Web server.
Using Application Pools in IIS 6.0
In IIS 6.0, application pools are a way to isolate Web sites and applications. An application pool can contain one or more applications. To help create a very secure and reliable environment, you can place each site in its own application pool. Errors in one application pool cannot cause another application pool or the server itself to fail.
Configuration Guidelines
Consider the following guidelines when configuring application pools:
• When you create an application pool, make sure that you select the Use Default Settings option. Otherwise, users may receive errors or be disconnected when accessing the ACT! Premium for Web site.
• To isolate Web applications on one Web site from Web applications on other Web sites running on the same computer, create an application pool for each Web site.
• For enhanced security, configure a unique user account (process identity) for each application pool. Use an account with the least user rights possible, such as the Network Service account in the IIS_WPG group.
• If both a test version and a production version of an application exist on the same server, separate the two versions into different application pools. This isolates the test version of the application.
• To run an application with a unique set of properties, create an application pool for that application.
24 ACT! by Sage Premium for Web

Recovering from a Security Compromise
Sec
uring the
AC
T! Pre
mium
for W
eb
Softw
are
Sec
uring the
AC
T! Pre
mium
for W
eb
Softw
are
Isolating Databases
When a customer logs on to the ACT! Premium for Web software, you should ensure that they are only shown their databases.
To do this, create separate database lists in the Web Site Administration tool. For each virtual directory, have a uniquely named database or list of databases. For example, you set up a virtual directory for Customer A and name it CustomerA. You associate this virtual directory with Customer A's ACT! database, called CustomerADatabase. You then set up a virtual directory for Customer B and name it CustomerB, and associate that virtual directory with Customer B's database, called CustomerBDatabase. Users of Customer A will not see Customer B's database name when they log on to the ACT! Premium for Web software.
Isolating Supplemental Data
You must take steps to isolate the supplemental data of each ACT! Premium for Web site in an environment where a single Web server hosts two or more virtual directories or virtual servers. Examples of supplemental data are reports and templates. The most effective way to isolate supplemental data is with folder permissions. Ensure that each user saves his supplemental data to a specific personal folder; set permissions for that folder so only that user can access it.
Recovering from a Security CompromiseEnsure that logging is enabled in your Default Web Site Properties. If Web server security is compromised, logging can help you determine what went wrong. Using logs, you can view activity on your Web site including date, time, IP address, and the affected area of any unauthorized requests. For example, if someone executes an unauthorized command on your Web server, you can view which command was executed and what user account executed it. This information helps you correct any security deficiencies.
IIS features extensive logging options that are separate from the traditional Event Viewer in Windows. The default format for IIS logs is W3C Extended Log File Format. This format is recommended because IIS lets you set options for what you want to log. You can switch formats at any time without affecting past logs.
For more information on logging, see Help in IIS.
Using SSL with the ACT! Premium for Web SoftwareSSL uses an encryption key to encrypt data you send over the network. The data is decrypted for use in the ACT! Premium for Web software. You can use this technology to make the software more secure.
To use SSL, you must obtain a Web server certificate from a vendor, and then configure your Web site to use that certificate. Once the certificate is configured, you specify which portions of your Default Web Site to secure with SSL. You may secure the entire Default Web Site or just a specific virtual directory or page. Any data you transmit between the Web server and the client without SSL may be intercepted.
Administrator’s Guide 25

Securing the ACT! Premium for Web Software
Consider the following scenarios:
• If your Web server only hosts the ACT! Premium for Web software, you can use SSL to secure the entire Default Web Site. The ACT! Premium for Web - Log on page and everything within it will be secured with SSL. You must precede all URLs with https: rather than http:.
• If other Web pages are hosted on your Web server, you can use SSL to secure only the virtual directory where the ACT! Premium for Web software is set up. The ACT! Premium for Web - Log on page and everything within it will be secured with SSL. You must precede all URLs with https: rather than http:.
• You can use SSL to secure specific folders or pages, for example, only the Log on page. Expand the virtual directory where the software is set up to see the folders and files.
26 ACT! by Sage Premium for Web

Best Pra
ctic
es
Chapter 5Best Practices
Common network administration practices apply to installing and administering the ACT! Premium for Web software. The software will work in configurations that do not follow the recommendations given in this chapter; however, for optimal performance, security, and ease of administration, we recommend that you follow the guidelines given here.
The three most significant recommendations are:
• Locate ACT! databases on a server other than the Web server.
• Make the Web and database servers members of a domain, rather than members of a workgroup.
• Make the Web server, database server, and impersonation user members of the same domain.
The configurations described in the following paragraphs are supported; however, we generally recommend that you:
• Do not install the ACT! Premium for Web software on a domain controller. Domain controllers are a key part of your company’s network infrastructure. To maintain a secure network, your domain controller should be housed in a secure location and should not host a Web site available on the Internet. Domain controllers handle a large amount of network traffic, which may reduce performance of the ACT! Premium for Web software.
• Do not install the ACT! Premium for Web software on Windows Small Business Server 2000 or 2003. Windows Small Business Servers generally are domain controllers. These servers often host a variety of other network services for your company, such as Microsoft Exchange and other Microsoft SQL Server applications. These services increase the load on the server and may reduce performance.
• Do not install the ACT! Premium for Web software on a server running Microsoft SharePoint. Because SharePoint is another service, it may reduce performance. SharePoint may also make administering the ACT! Premium for Web software more complex.
If you decide to run ACT! Premium for Web on a server running Microsoft SharePoint, even though this is not recommended, you may need to modify your Web configuration. For more information, see Appendix B, "Using Microsoft SharePoint 2003 with the ACT! Premium for Web Software."
The remaining sections in this chapter provide recommendations for installation and for troubleshooting the installed software.
Administrator’s Guide 27

Best Practices
Planning the Installation• Read this entire guide before starting the installation.
• Familiarize yourself with the ACT! knowledgebase at www.act.com. You can research installation and other topics online. Do not filter the knowledgebase to search for just ACT! Premium for Web documents, because many of the documents for ACT! Premium for Workgroups 2005, 2006, or 2007 apply to this software as well.
• Consider the following items when planning:
- The number of users who will access the ACT! Premium for Web site.
- How frequently and intensely users will work with the ACT! Premium for Web software.
- Whether users need access from both inside and outside your network.
• Become knowledgeable about your chosen configuration, including:
- The version of IIS on the Web server.
- The operating system on the Web server.
Note: Windows Server 2003 Standard, Service Pack 1, is recommended by ACT! Technical Support.
- The permissions required to run a Web page.
- How to create users on a Windows server.
• If you must install the ACT! Premium for Web software on Windows XP Professional, be aware of the 10-connection limit in IIS. This limit includes ACT! Premium for Web connections, as well as all other connections to the machine, including antivirus or other software updates and services that use the Web. In a normal working environment, three to four users may be able to successfully use the ACT! Premium for Web application, but additional connections to the server may produce intermittent Object Reference errors for all users.
Note: Outlook integration further reduces available connections on both Windows 2000 and Windows XP Professional.
• If fewer than 25 users will access the ACT! Premium for Web site, use a single-server configuration, with a firewall in front of the server. This configuration provides good security and performance.
• If more than 25 users will access the ACT! Premium for Web site, use a dual-server configuration, with a firewall in front of both servers. This configuration provides better security and performance.
• To increase scalability, configure two or more Web servers. The ACT! Premium for Web software supports many Web servers to one database server.
Note: If you use more than one Web server, you can set up a shared location for storing user preferences. For more information, see Appendix D, "Sharing Preferences Across Web Servers" on page 41.
For more information on planning, see "Web Server System Minimum Requirements" on page ii, "Installation Checklist" on page v, and Chapter 1, "Preparing Your ACT! Premium for Web Server" on page 1.
28 ACT! by Sage Premium for Web

Preparing Your Web Server
Best Pra
ctic
es
Preparing Your Web Server• Dedicate a Web server to the application to avoid conflicts with other software, such as
SharePoint.
• Format all volumes on the Web server using Microsoft New Technology File System (NTFS).
• Disable all unnecessary Windows services on the Web server, such as Net News Transfer Protocol (NNTP) or File Transfer Protocol (FTP). If you will use a separate database server, also disable the ACT! SQL Server instance on the Web server.
• Install Transmission Control Protocol/Internet Protocol (TCP/IP). TCP/IP should be the only communications protocol on the Web server.
• Give the Web server a static IP address.
• In Active Directory, create a Global Group for ACT! users.
• If remote users will access the Web server using an Internet-friendly DNS name, register an appropriate Internet domain name. Ensure that internal and external DNS services can resolve the name of the ACT! Premium for Web site.
• If anonymous users will not access the ACT! Premium for Web site, set NTFS permissions on the ACT! directories to allow only the ACT! Premium for Web application to access their contents.
• Create the Impersonation user as a non-Administrator domain user in the LOCAL Administrators group on all servers that are part of the ACT! deployment. If you use multiple application servers, create the account as a regular domain user and add that domain user to each IIS server's LOCAL administrators group.
• In Windows Server 2003, there may be a user called 'actuser'. If you did not create this user, do not use the user for impersonation. For more information on 'actuser', see:
http://msdn.microsoft.com/library/default.asp?url=/library/en-s/act/htm/actml_ref_actu.asp
• Give the Impersonation user and ASP.NET users read/write access to the following folders:
<OS install path>\system32<OS install path>\system32\inetsrv<OS install path>\Microsoft.net\framework\v.2.0.50727<ACT! install path>\ACT for Web\APFW
• Some server operating systems come with a version of Microsoft SQL. The ACT! Premium for Web 2007 application requires SQL Server 2005. To avoid complications when running the application, remove other SQL versions from the Web server.
• If you use a separate Web server and database server:
- Disable SQL services on the Web server and disable Web services on the database server.
- Allow access through the firewall only to the Web server. Do not allow access to the database server. See your firewall documentation for instructions.
For more information about preparing your Web server, see "Preparing Your Web Server" on page 2.
Administrator’s Guide 29

Best Practices
Installing and Configuring IIS• Configure IIS with a default Web site running on port 80, all unassigned IP addresses,
and no host headers. If you do not use this configuration, you may receive errors in the Web Site Administration tool. (Despite the errors, the site may still function correctly.)
If you must change the default settings for other applications, first configure the ACT! Premium for Web application to default settings, and when your site passes all tests in the Web Site Administration tool, close the tool, and then make the changes to IIS.
• On Windows Server 2003, create an ACT! Premium for Web-specific application pool. If you host more than one ACT! Premium for Web site, create an application pool for each site.
• On Windows Server 2003, set the Web server extensions to Allowed for ASP.NET 2.0.
• If your ACT! Premium for Web configuration requires external access, first configure the network and router to successfully access the Web server's default Web site from an external location, and then install the ACT! Premium for Web software.
• If the ACT! Premium for Web site will not be accessed by anonymous users, disable anonymous authentication in IIS.
Installing and Configuring the ACT! Premium for Web Application• Install, configure, and register the ACT! Premium for Web software while logged in
locally to the Web server. Do not install it in a remote desktop environment.
If you must install, configure, or register remotely, use a desktop sharing client that does not require a Windows logon, such as an open-source Virtual Network Computing (VNC) solution or GoToMyPC® from Citrix Online.
Avoid remote desktop applications that require a Windows logon, such as products from Citrix Systems, Inc. or the Microsoft Remote Desktop Protocol (RDP). For new versions of RDP, use this console switch in a command prompt window:
mstsc -v:<IP or hostname> /F -console
• If the Simple Mail Transfer Protocol (SMTP) settings you configured in the Web interface preferences refer to the SMTP server name or IP address of a third-party server, this third-party server must allow the ACT! Web server to relay e-mail through it. Because the ACT! Web server is not on the third-party server's network, e-mail sent remotely through the Web interface of ACT! Premium for Web appears be coming from the Web server itself. You can circumvent this by setting up e-mail accounts for the ACT! users on the ISP of the Web server. You may also install SMTP on the Web server to send e-mail for ACT! users. For information on configuring SMTP, see:
http://support.microsoft.com/kb/303707/
• Immediately after installing the ACT! Premium for Web software, use the Web Site Administration tool to configure virtual directories and database settings and test the configuration.
• After successfully configuring the ACT! Premium for Web software, move the ACT! Web database and supplemental files to a different volume on the Web server.
30 ACT! by Sage Premium for Web

Securing the ACT! Premium for Web Server
Best Pra
ctic
es
For more information on installing the application, see "Installing the Software" on page 5. For more information on setting up the application using the Web Site Administration tool, see Chapter 3, "Managing the ACT! Premium for Web Software" on page 13.
Securing the ACT! Premium for Web ServerFor improved security, we recommend you implement the following items on the Web server:
• Microsoft Windows Update
• Microsoft Windows Integrated Authentication
• Anti-virus software
• Firewall software
• Port blocking
• IP address blocking
• Application pools
• Logging
• Secure Sockets Layer (SSL)
For more information on security, see Chapter 4, "Securing the ACT! Premium for Web Software" on page 23.
Solving Issues with the ACT! Premium for Web Application• Permissions problems are one of the most common issues you may encounter.
- On a stand-alone Web server that is not on a domain or behind a firewall, the normal setup and configuration for the ACT! Premium for Web software should be sufficient.
- On a domain controller, you may need to make changes to access control lists (ACLs) at the folder and registry level to access the site.
- On Windows Server 2003, the user you define in the default application pool for the ACT! Premium for Web virtual directory (predefined or configurable) must also have explicit permissions set in the following registry key:
HKEY_LOCAL_MACHINE\SOFTWARE\AspNetProcess\ASPNET_SETREG
This registry key is recreated when you open the Web Site Administration tool and run the test on the User Account tab. To avoid overwriting permissions changes you made to that key, put the required permissions into the parent key, and then, in the advanced area of the Security tab, replace permissions on all child objects to push the parent permissions to the key below.
Administrator’s Guide 31

Best Practices
• When troubleshooting the application, refer to the Web Site Administration tool log file. This log file may provide information about errors displayed in the tool, such as ASPNET and HTTP errors. The Web Site Administration tool must be closed to create an updated log file. The file is normally located in:
<ACT! installation path>\ACT\ACT for Web\Logs\AFWAdminLog.log-or<ACT! installation path>\ACT\ACT for Web\AFWAdminLog.log
Possible errors reported by the log file include:
- 400 - Bad Request or 404 - File not found
The Web Site Administration tool tests the site using 'localhost'. If the ACT! Premium for Web site is configured to use an IP address, it will not use 'localhost'.
- 500 - Internal server error
Windows Server 2003 contains a section of IIS that deals with Web service extensions. Make sure that ASP.NET 2.0.50727 is set to Allowed.
Note: If you are upgrading from ACT! Premium for Web 2005 or 2006, you may need to adjust properties on the virtual directory to change the version of .NET from 1.1 to 2.0.
- "Error reading the password from the registry."
This error is usually caused by insufficient rights to the ASPNET_SETREG key in the registry. It is sometimes caused by insufficient rights on the database folder.
• To bypass errors in the Web Site Administration tool, hold down the SHIFT or CTRL key and click another tab. Set up as much of the configuration as you can and attempt to access the Web site. If the Web site still generates errors, troubleshoot them. See Appendix E, "Troubleshooting Your ACT! Premium for Web Configuration" on page 43.
• If you receive the "Web site not running" message, verify that IIS is running.
• You may receive the error message: "The windows user account information you have entered is invalid. Please check the user name and password and try again." This error is usually accurate. If you are sure that the user is valid, verify that the user is set to not require a password change on the next logon.
• If you get errors referring to access level or permissions for any specific folders after configuring the Web site and attempting to access it, make sure that the IWAM_<machine name> is added to the local (or domain) security policy under "user rights assignments" in "Impersonate a Client After Authentication."
• You may see errors that are solely on a remote browser and that cannot be replicated while using Internet Explorer on the server itself. Check that pop-up blockers are disabled and that the Web site is added to the list of trusted sites on client machines. Shut down Norton Internet Security or configure it to allow access for the ACT! Premium for Web software.
32 ACT! by Sage Premium for Web

Ap
pe
ndixe
s/Index
Appendix AGlossary
Anonymous access The process of allowing users to access your Web site through an Internet Guest Account, eliminating the need for local credentials.
ASP.NET process account The Windows-managed account under which ASP.NET applications run. This account has minimal security and file access permissions.
IIS Lockdown Wizard A tool in Windows 2000 and Windows XP that protects your Web server from common security vulnerabilities.
impersonation Impersonation allows IIS to run a Web application under a different set of credentials than the default Web permissions.
impersonation user account The ACT! Premium for Web software runs as this user-specified account. This account needs access to both application and database supplemental files, so it requires additional security and file access permissions.
Integrated Windows Authentication The process of checking network credentials when users access your Web site. Turning off Anonymous access enables Integrated Windows Authentication.
Internet Guest Account Also known as IUSR, this user account allows Internet users to access your Web site without having credentials on the Web server.
Internet Information Server (IIS) The Web server software included with Windows 2000, XP, and 2003 Server. The ACT! Premium for Web software runs using IIS.
multiple-server configuration When your ACT! Premium for Web application and ACT! Premium database are on different servers.
session timeout increment This parameter controls how long users can be idle and remain logged into the ACT! Web site. After the specified period of time, idle users are logged out automatically. The default timeout increment is 20 minutes.
single-server configuration When your ACT! Premium for Web application and ACT! Premium database are on the same server.
synchronization The process of allowing multiple copies of the same data to exist in different places at the same time, tracking the changes to the data in multiple places, and transporting the changes from one database to another. Synchronization occurs between a main database and remote databases. While synchronization is unnecessary for users of the ACT! Premium for Web software, many users of ACT! for Windows synchronize remote databases.
virtual directory A directory that is set up in IIS and points to a real directory on your Web server. The directory contains your Web page code files. Users access your Web page by appending its virtual directory name to the Web server IP address or name.
Web server A computer running a server-class operating system, such as Windows 2000 Server or Windows 2003 Server, that hosts and provides access to your Web site.
Administrator’s Guide 33


Ap
pe
ndixe
s/Index
Appendix BUsing Microsoft SharePoint 2003 with the
ACT! Premium for Web Software
To run the ACT! Premium for Web software on a server on which SharePoint 2003 is installed and which is running Microsoft Windows Server 2003 (Standard, Web, or Enterprise versions), make the following configuration changes:
• Modify the web.config file in the APFW folder.
• Add the APFW virtual directory to the exclude list for SharePoint.
If you use Microsoft Small Business Server 2003 and SharePoint 2003, you do not need to make these changes.
This appendix explains how to modify the web.config file and the SharePoint exclude list.
Modifying the web.config FileYou add text to the web.config file so the ACT! Premium for Web software will function with SharePoint.
Note: If you remove SharePoint from the server that hosts the ACT! Premium for Web software, delete the added lines from the web.config file. Otherwise, the software will stop functioning.
To edit the web.config file
1. Open Notepad.
2. From the File menu, click Open.
3. Navigate to the APFW folder on the server where the ACT! Premium for Web software is installed and open the web.config file using an editor, such as NotePad.
Note: In a default installation, the web.config file is located at C:\Program Files\ACT\ACT for Web\APFW.
4. Add the following text, shown in bold, to the file (the text that is not bold is already in the file).
…<identity impersonate="true" userName="registry:HKLM\Software\AspNetProcess\ASPNET_SETREG,userName"password="registry:HKLM\Software\AspNetProcess\ASPNET_SETREG,password"/>
<httpHandlers><clear /><add verb="*" path="*.aspx" type="System.Web.UI.PageHandlerFactory, System.Web, Version=1.0.5000.0, Culture=neutral, PublicKeyToken=b03f5f7f11d50a3a" /></httpHandlers>
Administrator’s Guide 35

Using Microsoft SharePoint 2003 with the ACT! Premium for Web Software
<trust level="Full" originUrl="" />
<httpModules><add name="Session" type="System.Web.SessionState.SessionStateModule"/></httpModules>
<pages enableViewState="true" enableSessionState="true" enableViewStateMac="true" validateRequest="false"/><compilation defaultLanguage="c#"/>...
5. From the File menu, click Save.
Modifying the SharePoint Exclude ListYou use SharePoint Central Administration to exclude the APFW virtual directory.
To exclude the APFW virtual directory
1. On the server running Windows SharePoint Services, point to Start, point to Administrative Tools, and then click SharePoint Central Administration.
2. In the Virtual Server Configuration area, click Configure virtual server settings.
3. In the Virtual Server List, click the virtual server to add the excluded paths to.
Note: In a default installation, the virtual server name is Default Web Site.
4. Under Virtual Server Management, click Define managed paths.
5. In the Path field, under Add a New Path, type the path to exclude. In a default installation, this is the APFW virtual directory on the server.
6. Click Excluded Path, and then click OK.
36 ACT! by Sage Premium for Web

Ap
pe
ndixe
s/Index
Appendix CSetting ASP.NET Process Account
Permissions
This appendix provides information on:
• Verifying whether the ASP.NET service is available.
• Setting Read permission for the registry key that contains the impersonation user credentials.
• Setting process account permissions on Web servers and domain controllers.
Verifying that the ASP.NET Service Is Available on the Web Server
Note: The following instructions are for Windows 2003; see your Windows documentation for how to do this on other Windows versions.
To verify the ASP.NET service is available
1. Open the Windows Control Panel.
2. Double-click Add or Remove Programs.
3. On the left, click Add/Remove Windows Components.
4. In the Components list, select Application Server, and then click Details.
The Application Server dialog box appears.
5. In the Subcomponents of Application Server list, verify that ASP.NET has a check mark to the left. If it does not, select ASP.NET.
6. Click OK to close the Application Server dialog box.
7. Click Next to proceed with the Windows Components Wizard. You may need access to your Windows installation media to complete the process.
Setting Read Permission for the Registry KeyThe ASP.NET process account requires Read permission to the registry key that contains the encrypted impersonation user account credentials. In most instances, the Web Site Administration tool in the ACT! Premium for Web server application sets this permission for you.
To verify the setting, view the permissions on the following registry key: HKEY_LOCAL_MACHINE\SOFTWARE\AspNetProcess\ASPNET_SETREG.
Administrator’s Guide 37

Setting ASP.NET Process Account Permissions
How you view or grant Read permission to this registry key varies, based on the version of Windows installed on your Web server. See your Windows documentation for assistance.
Note: To identify the ASP.NET process account on your Web server, see "About the ASP.NET Process Account and the Impersonation User Account" on page 9.
Setting Process Account Permission on a Web Server that Is Not a Domain Controller
The ASP.NET process account requires the "Impersonate a client after authentication" permission in the Local Security Policy.
Note: In most cases, Windows manages the ASP.NET process account and has already granted permission.
To verify or grant the process account local permission
1. Click Start, point to Programs, point to Administrative Tools, and then click Local Security Policy.
2. In the left pane, expand Security Settings, expand Local Policies, and then click User Rights Assignments.
3. In the right pane, double-click Impersonate a client after authentication.
The Local Security Policy Setting dialog box appears.
4. In the Assigned to list, locate the ASP.NET process account. If it appears in the list and the Local Policy Setting column is checked, the account has the required permission (you have finished this task).
5. If the ASP.NET process account is not present, click Add.
The Select Users or Groups dialog box appears.
6. In the Look in list, select the local machine.
7. In the Name list, select the ASP.NET process account, click Add, and then click OK.
8. Verify the ASP.NET process account has a check mark in the Local Policy Setting column.
9. Click OK twice to close the dialog boxes.
10. At a command prompt, run the following command:
iisreset
38 ACT! by Sage Premium for Web

Setting Process Account Permission on a Domain Controller
Ap
pe
ndixe
s/Index
Setting Process Account Permission on a Domain ControllerIf your Web server is also a domain controller, you may need to grant the ASP.NET process account an additional permission.
Note: These steps are required for domain controllers that run any version of Windows 2000 Server. In most cases, Windows granted this permission if your domain controller runs other versions of Windows.
To verify or grant the process account domain controller permission
1. Click Start, point to Programs, point to Administrative Tools, and then click Domain Controller Security Policy.
2. In the left pane, expand Security Settings, expand Local Policies, and then click User Rights Assignments.
3. In the right pane, double-click Impersonate a client after authentication.
The Security Policy Setting dialog box appears.
4. Click Define these policy settings, and then click Add.
The Add User or Group dialog box appears.
5. Click Browse.
The Select Users or Groups dialog box appears.
6. Select the ASP.NET process account, click Add, and then click OK.
7. Click OK twice to close the dialog boxes.
8. To enforce an update of computer policy, at a command prompt, run the following command:
secedit /refreshpolicy machine_policy /enforce
9. At a command prompt, run the following command:
iisreset
Administrator’s Guide 39


Ap
pe
ndixe
s/Index
Appendix DSharing Preferences Across Web Servers
The ACT! Premium for Web software stores user preferences on the Web server that hosts the software. In some cases, you may want to distribute Web requests across multiple Web servers. This results in each Web server having a unque set of stored preferences. If a user changes his or her preferences when logged into server 1, this preference change is not reflected on server 2.
To prevent users from experiencing preference differences, you can set up a shared location to store user preferences. Then, users’ preferences will be the same, no matter what server responds to their log-on request.
Note: If the shared preference storage location is offline when a remote user logs in to the ACT! software, the software uses the preferences that are stored locally on the remote user’s system for the duration of the session.
To set up shared user preferences
1. Identify the Web servers that will host the ACT! Premium for Web software.
2. Verify that the impersonation user is the same for each Web server in the cluster.
3. Select a computer that all of the Web servers can access (for example, Preference_Server).
4. On this computer, create a new folder to store the shared preferences, using a name of your choice (for example, SharedPrefs).
5. Share the folder you just created, and grant Change and Read permission to your impersonation user account.
6. On a Web server in the cluster, locate and open the web.config file for the APFW virtual directory. By default, this file is located at C:\Program Files\ACT\ACT for Web\APFW.
7. In the web.config file, locate the PreferencesSharedNetworkFolder entry shown below....<!--Shared network folder to store preferences (cluster setup)Leave this value empty if single web server--><add key="PreferencesSharedNetworkFolder" value="" />...
8. Edit the entry by inserting the UNC path to your shared folder between the quotation marks following value=. For example, if your server name is Preference_Server, and your folder name is SharedPrefs, then you would insert \\Preference_Server \SharedPrefs, as shown below....<!--Shared network folder to store preferences (cluster setup)Leave this value empty if single web server--><add key="PreferencesSharedNetworkFolder" value="\\Preference_Server\SharedPrefs" />...
Administrator’s Guide 41

Sharing Preferences Across Web Servers
9. Save and close the web.config file.
10. Repeat Steps 6 through 9 on the remaining Web servers in the cluster, using the same UNC path as in Step 8.
Note: If all Web servers in the cluster use the same configuration, you can copy the web.config file modified in Steps 6 through 9 and then paste it on the other Web servers.Alternatively, you can use the Windows Distributed File Services (DFS) to replicate one web.config file across all Web servers. See the Windows documentation for instructions for using DFS.
42 ACT! by Sage Premium for Web

Ap
pe
ndixe
s/Index
Appendix ETroubleshooting Your ACT! Premium for Web
Configuration
This appendix helps you identify the cause of configuration issues or errors generated by the Web Site Administration tool. See the section for the tab (Web Server, User Account, or Add/Remove Databases) on which you received the error.
Note: For information on best practices for solving problems with software configuration, see Chapter 5, "Best Practices."
Web Server TabThe following messages may display as the result of the tests performed from this tab.
Issue/Message Possible Cause/Solution
Microsoft® Sharepoint software detected. Additional configuration may be required to enable ACT! Premium for Web to
run. See the Troubleshooting appendix in the ACT! Premium for Web Administrator’s Guide for assistance.
Cause: SharePoint was detected on the Web Server. Some installations of SharePoint 2003 modify the default Web site and ASP.NET service configuration.Solution: See Appendix B, "Using Microsoft SharePoint 2003 with the ACT! Premium for Web Software" on page 35 to determine what steps are required to correct this.
The ASP.NET process does not exist or is not configured properly. See the Troubleshooting appendix in the
ACT! Premium for Web Administrator’s Guide for assistance.
Cause: The ASP.NET service is not available, or the ASP.NET process account is improperly configured on the Web server. This error is often caused by non-default IIS settings, such as an assigned IP address or configured host-headers.Solution: To verify whether the ASP.NET service is available, see "Verifying that the ASP.NET Service Is Available on the Web Server" on page 37.To verify the configuration of the ASP.NET process account, see "About the ASP.NET Process Account and the Impersonation User Account" on page 9.For information on creating and configuring users and permissions, see Windows documentation.Cause: You have installed the ASP.NET 2.0 security update (KB917283). This update changes ASP.NET 2.x from allowed to prohibited.Solution: You must make a change in IIS Manager:1 On a command line, type inetmgr and press Enter.2 Expand the appropriate nodes in IIS and click the Webservice
Extensions node.3 In the list of prohibited extensions on the right, select ASP.NET 2.x and
allow it.
Administrator’s Guide 43

Troubleshooting Your ACT! Premium for Web Configuration
User Account TabThe following messages may display as the result of the tests performed from this tab.
Issue/Message Possible Cause/Solution
ACT! is unable to retrieve Windows domain information at this time. This information is required to edit the Windows
User Account. Please check with your network administrator and try again later.
Cause: The Windows domain information is unavailable.Solution: See your network administrator.
Microsoft® Sharepoint software detected. Additional configuration may be required to enable ACT! Premium for Web to
run. See the Troubleshooting appendix in the ACT! Premium for Web Administrator’s Guide for assistance.
Cause: SharePoint was detected on the Web Server. Some installations of SharePoint 2003 modify the default Web site and ASP.NET service configuration.Solution: See Appendix B, "Using Microsoft SharePoint 2003 with the ACT! Premium for Web Software" on page 35 to determine whether additional configuration is required for your Web server.
The ASP.NET process account does not exist or is not configured properly. See the Troubleshooting appendix in the
ACT! Premium for Web Administrator’s Guide for assistance.
Cause: The ASP.NET service is not available, or the ASP.NET process account is improperly configured on the Web server.Solution: To verify whether the ASP.NET service is available, see "Verifying that the ASP.NET Service Is Available on the Web Server" on page 37.
To verify the configuration of the ASP.NET process account, see "About the ASP.NET Process Account and the Impersonation User Account" on page 9.For information on creating and configuring users and permissions, see Windows documentation.
The ASP.NET process account does not have permission to access or run ACT! Premium for Web. See the Troubleshooting
appendix in the ACT! Premium for Web Administrator’s Guide for assistance.
Cause: The ASP.NET process account does not have the permissions on the Web server to run the ACT! Premium for Web software.Solution: To verify the correct account for your Web server configuration, see "About the ASP.NET Process Account and the Impersonation User Account" on page 9.This account requires Read permission for the registry key that contains the encrypted impersonation user credentials. See "Setting Read Permission for the Registry Key" on page 37.For information on configuring the ASP.NET process account on Windows 2000 domain controllers, see "Setting Process Account Permission on a Domain Controller" on page 39.
Cause: The impersonation user account name has a space in it.Solution: Modify the impersonation user account name to eliminate the space.
The impersonation user account does not have access to files and folders required to run ACT! Premium for Web on your Web
server. See the Troubleshooting appendix in the ACT! Premium for Web Administrator’s Guide for assistance.
Cause: The impersonation user account does not have access to program files and folders or registry permissions required to run the ACT! Premium for Web software.Solution: Review the required permissions for the impersonation user account. See "Creating an Impersonation User Account" on page 10.Verify that the user is at least a domain user and part of the LOCAL administrators group. See the note regarding setting access to the ASPNET_SETREG key under "Solving Issues with the ACT! Premium for Web Application" on page 31.
The Windows user account information you have entered is invalid. Please check the user name and password and try
again.
Cause: The Windows user name or password you entered does not exist in the selected Windows domain.Solution: Verify that you entered the correct user name for the selected domain. If you did, you may need to create a user. See your network administrator.
44 ACT! by Sage Premium for Web

Add/Remove Databases Tab
Ap
pe
ndixe
s/Index
Add/Remove Databases TabThe following messages may display as the result of the tests performed from this tab.
Issue/Message Possible Cause/Solution
The impersonation user account does not have access to the database you selected. See the
Troubleshooting appendix in the ACT! Premium for Web Administrator’s Guide for assistance.
Cause: The impersonation user specified on the User Account tab does not have permission to access the selected database. An error icon appears next to any problem database on the tab.Solution: Review the required permissions for the impersonation user account. See "Creating an Impersonation User Account" on page 10.
The Web page fails to load after selecting a Web site and virtual directory, and then clicking Test.
Cause: Varies.Solution: If you just successfully executed the tests on the Web Server and User Accounts tabs, restarting IIS on the Web server may resolve the issue.If you are testing a Web site that was working previously, re-execute the tests on the Web Server and User Account tabs to determine the cause of the issue. Your Web server configuration may have changed, for example:• The password for the impersonation user account was changed or has
expired.• New software or services, such as SharePoint 2003 or Active Directory,
were installed on the Web server.• The application pool where the ACT! Premium for Web virtual directory
runs was modified.If you run Windows 2000 Server as a domain controller, you may need to grant an additional process account permission. See Appendix C, "Setting ASP.NET Process Account Permissions" on page 37.If you just created the impersonation user account, you may not have cleared the option to force the user to change the password at the next logon. Edit the user account to clear this check box.
Administrator’s Guide 45


Ap
pe
ndixe
s/Index
Index
AACT! databases
locating, v, 2planning the location, 2
ACT! for Windowsexisting installations, 2installing ACT! Premium for Web server
application, 5ACT! Internet Synchronization Service, 8ACT! Network Synchronization Service, 8ACT! Premium for Web
accessing through Integrated Windows authentication, 3
product editions, ivproviding access to, 18using SQL Server with, iv
ACT! Premium for Web server applicationconfiguring IIS for, 1, 30configuring SharePoint 2003 for, 35installing, 5installing remotely, 30managing, 13preparing for installation, 1reinstalling, 12removing database access, 13security precautions for, 3uninstalling, 12using a Windows domain controller with, 39
activation, 11ActiveX, 19Add/Remove Database tab, 16administration, 13anonymous access, removing, 3application pools, 24, 30, 31ASP.NET impersonation
creating a user account, 10overview, 9process account, 9setting folder permissions, 29setting permissions on domain controllers, 39setting process account permissions, 38setting registry key permissions, 37setting user permissions, 29specifying the impersonation user, 14testing the impersonation user, 14understanding, 3user account, 9using, 1validating the ASP.NET process account, 13
ASP.NET process account, 9
Bbest practices
configuring ACT! Premium for Web, 30general, 27IIS, 30installing ACT! Premium for Web, 30planning ACT! installation, 28preparing the Web server, 29securing the Web server, 31troubleshooting, 31
Cchanging server timeout increment, 21configuration tips
ACT! Premium for Web, 30IIS, 30
configuration types, 5configurations
multiple‐server installation, 1, 28single‐server installation, 1, 28
configuring IISbest practices, 30for ACT! Premium for Web server application, 1Integrated Windows authentication, 3
Ddatabases
administrator rights, 16converting on Web server, 7creating on Web server, 7isolation in multiple hosted environments, 25locating, v, 2logging on, 16planning the location, 2removing access to, 13specifying, 15
differences between the ACT! and ACT! Premium for Web applications, ii
domain controller, setting permissions on, 39
Eexporting reports, ii
GGetting Started Wizard, 6
Administrator’s Guide 47

H - S
Hhardware requirements, ii
IIE shortcut menus, 18IIS Lockdown Wizard, 23impersonation
ASP.NET process account, 9creating a user account, 10on multiple‐server configurations, 11on single‐server configurations, 10overview, 9setting folder permissions, 29setting permissions on domain controllers, 39setting process account permissions, 38setting registry key permissions, 37specifying the impersonation user, 14testing the impersonation user, 14user account, 9validating the ASP.NET process account, 13
installingACT! Internet Synchronization Service, 8ACT! Network Synchronization Service, 8ACT! Premium for Web server application, 5as an ACT! for Windows user, 5IIS, 2on database server, 7on Web server, 6Outlook integration, 19planning for, 1, 28security preparations for, 3upgrading, 5
Integrated Windows authentication, 3Internet Explorer
configuring, 18required version, 17shortcut menus, 18
Internet Information Server (IIS)configuring, 1, 30connection limit, 28installing, 2, 30Lockdown Wizard, 23required version, iii
IP address, v, 2, 18, 29isolating databases, 25
Llocation of databases, 1Lockdown Wizard, 23log file, Web Site Administration tool, 32
Mmanaging the ACT! Premium for Web server
application, 13menus
IE shortcut, 18Windows shortcut, ii
Microsoft .NET Framework, 5Microsoft SQL Server, iv, 5, 29multiple hosted environment, 24multiple server configuration, 1
OOptions tab, 21Outlook integration
about, 19installing components, 19
Pplanning your database location, 2planning your installation, 1, 28preferences, sharing across Web servers, 41preparing your Web server, 2, 29
Rregistration, 11registry key permission for ASP.NET, 14reinstalling, 12reports, custom, iirequirements
Outlook integration, 17remote users, 17SQL Server and Windows, ivWeb server, ii
SSecure Sockets Layer (SSL), 25security
IIS Lockdown Wizard, 23precautions, 23preparing for, 3recovering from a compromise, 25securing Windows 2000, 23securing Windows 2003 Server, 23securing Windows XP, 23
server configurations, 1server timeout increment, changing, 21SharePoint 2003, configuring, 35shortcut menus, ii, 18single server configuration, 1software requirements, iisupplemental data, isolating, 25synchronization
in ACT! Premium for Web, ii
48 ACT! by Sage Premium for Web

S - W
Ap
pe
ndixe
s/Index
system requirementsOutlook integration, 17remote users, 17SQL Server and Windows, ivWeb server, ii
Ttimeout increment, changing on server, 21troubleshooting
Add/Remove Databases tab, 45best practices, 31User Account tab, 44Web Server tab, 43Web Site Administration tool log file, 32
trusted sites zone, 18
Uuninstalling, 12upgrading, 5User Account tab, 14user account, creating for impersonation, 10user preferences, sharing across Web servers, 41users, setting up access for, 17
Vvirtual directories
displaying available, 16specifying, 15using to create multiple Web sites, 24
virtual servers, 24
WWeb server
changing timeout increment, 21gathering information, 2preparing, 2, 29security best practices, 31security preparations for installing on, 3system requirements, ii
Web Server tab, 13Web Site Administration tool, 13, 30web.config file, 20, 35Windows shortcut menus, ii
Administrator’s Guide 49