Abstract - College of Businessbusiness.unr.edu/.../IS350ApplicationStructureLab.docx · Web...
36
27 IS 350 LAB 5 APPLICATION STRUCTURE Abstract Until now, you have worked with applications made up of a single form. In this lab, you will learn about the structure of more complex applications: You will create procedures (blocks of statements) that facilitate code reuse. You will work with applications having multiple forms – some created from templates and others created from a blank form. You will create developer-defined classes (Class blocks) and modules (Module blocks) As you work with multiple forms and classes, you will work more with the scope and visibility of variables and procedures. You will understand the difference between instance data and procedures and static data and procedures. You will use a few additional debugging tools that become useful when developing procedures. The application that you will complete in this lab is made up of multiple forms instead of a single form. It works with data stored about the application itself. You will also learn how to create reusable objects called classes. It is here that you learn the basics of object-oriented programming. Key Terms Class: A class is a template from which objects are created. TextBoxes, Buttons, and all other controls you have used are classes. When you draw a Button on a form, you are creating an object from its class. A class typically has data (properties), performs tasks (methods), and can handle events. Constructor: A procedure named New that gets called implicitly when a class instance gets created. Constructors can be created to accept arguments. Like Sub procedures, constructors do not
Transcript of Abstract - College of Businessbusiness.unr.edu/.../IS350ApplicationStructureLab.docx · Web...

IS 350 LAB 5APPLICATION STRUCTUREAbstractUntil now, you have worked with applications made up of a single form. In this lab, you will learn about the structure of more complex applications:
You will create procedures (blocks of statements) that facilitate code reuse. You will work with applications having multiple forms – some created from templates and
others created from a blank form. You will create developer-defined classes (Class blocks) and modules (Module blocks) As you work with multiple forms and classes, you will work more with the scope and visibility of
variables and procedures. You will understand the difference between instance data and procedures and static data and
procedures. You will use a few additional debugging tools that become useful when developing procedures.
The application that you will complete in this lab is made up of multiple forms instead of a single form. It works with data stored about the application itself. You will also learn how to create reusable objects called classes. It is here that you learn the basics of object-oriented programming.
Key Terms Class: A class is a template from which objects are created. TextBoxes, Buttons, and all
other controls you have used are classes. When you draw a Button on a form, you are creating an object from its class. A class typically has data (properties), performs tasks (methods), and can handle events.
Constructor: A procedure named New that gets called implicitly when a class instance gets created. Constructors can be created to accept arguments. Like Sub procedures, constructors do not return a value.
Event: As the user interacts with your program, they click buttons and perform other tasks. As they do, Windows sends these events to your program. Your program, in turn, has the opportunity to respond to those events through event handlers. The arguments to an event handler can pass information about the system at the time the event fired. For example, you can handle events related to the mouse. The corresponding arguments to the event handler contains status information about the mouse, such as which button was pressed.
Function procedure: A procedure declared with the Function keyword. Function procedures accept zero, one, or many arguments, and return a value having a data type.
Method: Class methods are designed to perform a task, such as making a bank deposit.
1
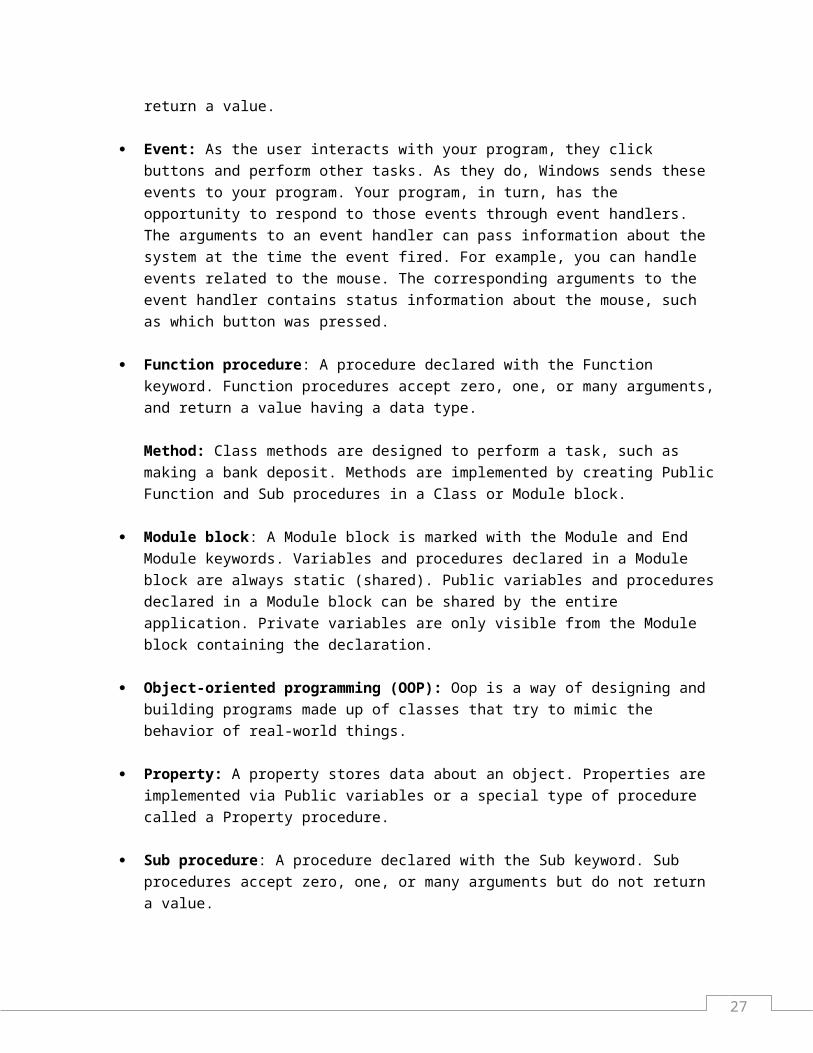
Methods are implemented by creating Public Function and Sub procedures in a Class or Module block.
Module block: A Module block is marked with the Module and End Module keywords. Variables and procedures declared in a Module block are always static (shared). Public variables and procedures declared in a Module block can be shared by the entire application. Private variables are only visible from the Module block containing the declaration.
Object-oriented programming (OOP): Oop is a way of designing and building programs made up of classes that try to mimic the behavior of real-world things.
Property: A property stores data about an object. Properties are implemented via Public variables or a special type of procedure called a Property procedure.
Sub procedure: A procedure declared with the Sub keyword. Sub procedures accept zero, one, or many arguments but do not return a value.
Sub Procedures and Arguments You have been working with Sub procedures since the beginning of this course. All event handlers are Sub procedures. In addition to creating event handlers, you can create other Sub procedures that you call explicitly from another Sub procedure, Function procedure, or event handler. There are several reasons for creating Sub procedures:
The code in an event handler can become complex having many statements. Identical code in several event handlers can be factored into one or more Sub procedures thereby making code easier to understand. Multiple event handlers can execute this same code.
Similar code that appears in multiple event handlers can be factored into a Sub procedure thereby reducing the size of a program and improving a program’s readability.
Function and Sub procedures become the methods of a Class or Module block.
There are two steps to working Sub procedures. First, you must create the Sub procedure(s). Second, you must write the code to call a Sub procedure. In the following example, you will create a Sub procedure that will clear all of the text boxes on the main form.
The following code segment shows how to declare a Sub procedure.
Private Sub ClearTextBoxes() txtName.Text = “” ‘ Clear the contents of the other text boxes.End Sub
Note the following about the above Sub procedure.
2
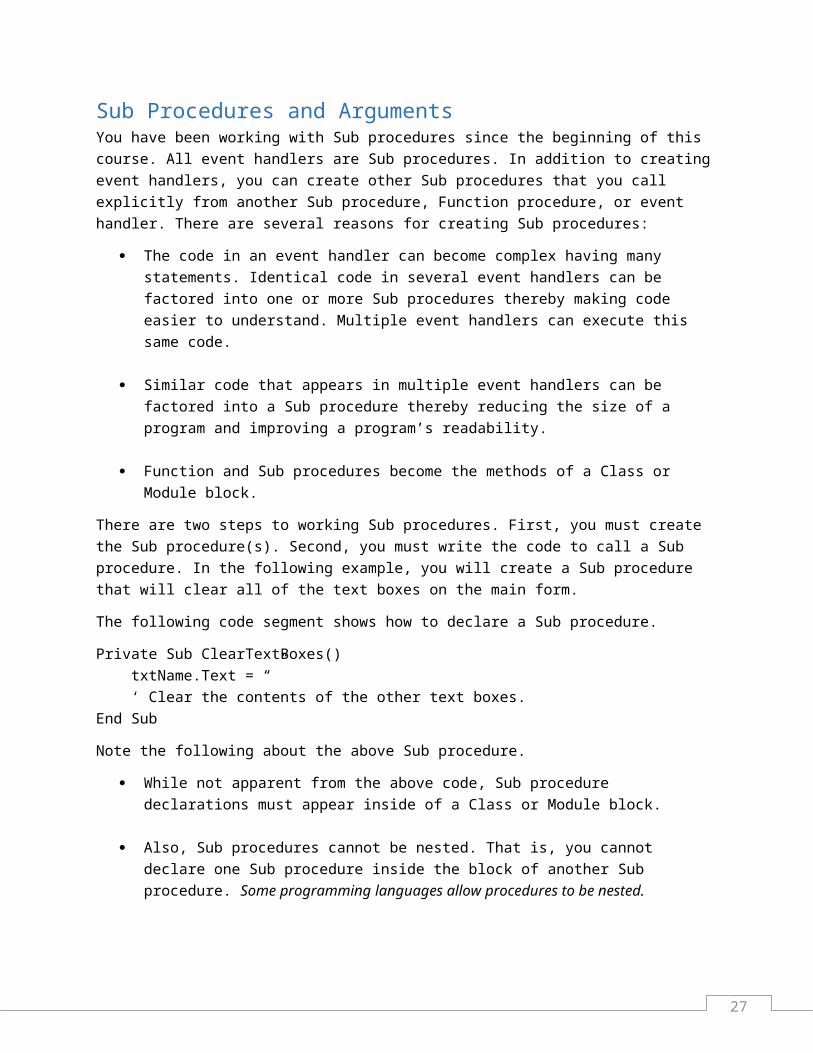
While not apparent from the above code, Sub procedure declarations must appear inside of a Class or Module block.
Also, Sub procedures cannot be nested. That is, you cannot declare one Sub procedure inside the block of another Sub procedure. Some programming languages allow procedures to be nested.
The Sub procedure is declared with the Private access modifier so the procedure can only be called from the class containing the declaration. This is logical as the procedure will only be useful to this form.
The Sub keyword denotes that the procedure is a Sub procedure.
Following the Sub keyword appears the procedure name. The rules for naming procedures is the same as the rules for naming variables. Note that a variable and procedure in a class should not have the same name.
The statements in the procedure assign an empty string to the text boxes.
The End Sub keywords mark the end of the procedure.
Calling a Sub Procedure There are a couple of syntax variations used to call procedures. You can call a Sub procedure using the Call keyword, followed by the name of the procedure to call. The following statement shows how to call the ClearTextBoxes() Sub procedure:
Call ClearTextBoxes()
Note that the Call keyword is optional so the following statement will also call the procedure:
ClearTextBoxes()
Passing Arguments to ProceduresBoth Sub and Function procedures (discussed next), can accept arguments. Arguments are the way that you send different data to a procedure each time it is called. You have been passing arguments to procedures throughout this course.
Dim S As String = "123"Dim i As Integeri = System.Convert.ToInt32(S)
In the above code segment, ToInt32() method of the System.Convert class is called with one argument having a data type of String. The function returns a value having a data type of Integer.
Here, you will create your own procedure that accepts one argument. While very simple, look at the following Sub procedure designed to format an instance of the TextBox control:
3

Private Sub FormatTextBox(argText As TextBox) argText.ForeColor = Color.LightBlue argText.BackColor = Color.DarkBlueEnd Sub
The above procedure accepts one argument. The argument is named argText. Any legal variable name could have been used. The data type of the argument is TextBox. So the syntax to declare an argument is argumentName As DataType, much like the syntax of a Dim or other variable declaration statement. A comma separates multiple argument declarations (shown later in this lab)
In addition to declaring variables using primary data types, you can declare a variable having a class (such as a TextBox) as its type.
The statements in the procedure use the argument to format the text box (passed as an argument)
Assuming that there are TextBox control instances named txtInput1 and txtInput2, you would call the FormatTextBox() Sub procedure as follows:
Call FormatTextBox(txtInput1)Call FormatTextBox(txtInput2)
So the above procedure will format the TextBox control instances named txtInput1 and txtInput2 exactly the same way by calling the same procedure. Suppose that you wanted to format a TextBox named txtOutput. You could call the same procedure with a different argument to accomplish this as follows:
Call FormatTextBox(txtOutput)
When you call a procedure, it must be called with the same number of arguments as the procedure expects. The above procedure expects one argument. In addition, the data types of the argument(s) must match. The procedure is declared having one argument of type TextBox. Thus, when the procedure is called, the argument must have a data type of TextBox. So, the following statements will cause compiler errors:
Call FormatTextBox()Call FormatTextBox(3)
The first statement causes an error because no arguments are passed to the procedure.
The second causes an error because the data type of the argument (Integer) does not match the argument in the procedure declaration (TextBox).
HANDS-ON STEP: Creating and Calling a Sub procedure:
In the following sequence of steps, you will create Sub procedures to clear the contents of all the form’s text boxes. You will also create procedures that to enable and disable the all of the text boxes on the main form.
4

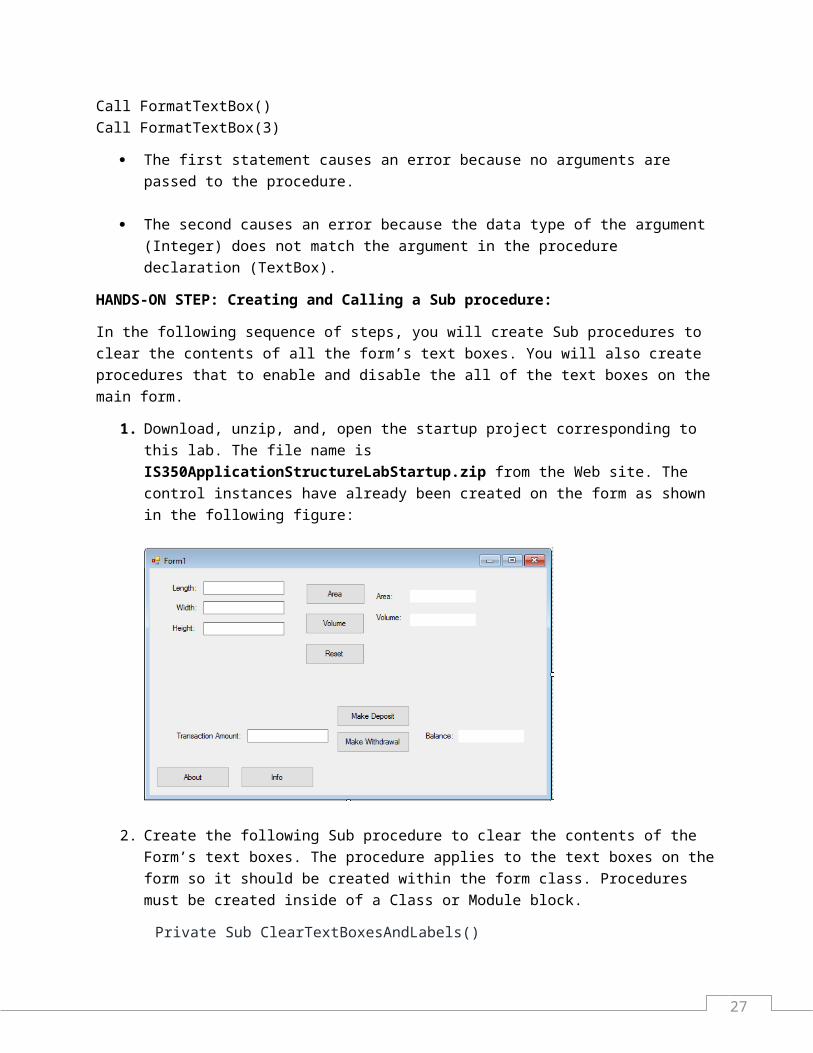
1. Download, unzip, and, open the startup project corresponding to this lab. The file name is IS350ApplicationStructureLabStartup.zip from the Web site. The control instances have already been created on the form as shown in the following figure:
2. Create the following Sub procedure to clear the contents of the Form’s text boxes. The procedure applies to the text boxes on the form so it should be created within the form class. Procedures must be created inside of a Class or Module block.
Private Sub ClearTextBoxesAndLabels() txtHeight.Text = "" txtWidth.Text = ""
txtLength.Text = "" txtAmount.Text = “”
lblArea.Text = "" lblVolume.Text = ""
lblBalance.Text = “” End Sub
3. Next, you can call the procedure. In the startup application, there is a button named btnReset. Enter the following statement in the button’s Click event handler to call the procedure that you just wrote.
ClearTextBoxesAndLabels()
4. Test the program. Enter some text into each of the text boxes. Click the Reset button to verify that you have cleared the content.
The Visual Studio debugging tools are very useful when you start creating procedures and more complicated programs. They allow you to watch a procedure as it is called, executes, and returns. In the following steps, you will run this first program with procedures and follow the execution path of those procedures.
5
HANDS-ON STEP: Tracing the execution path of a procedure:
1. Run the program. Enter some text in the text boxes. Click the Reset button. When you do, the contents of the text boxes should be cleared.
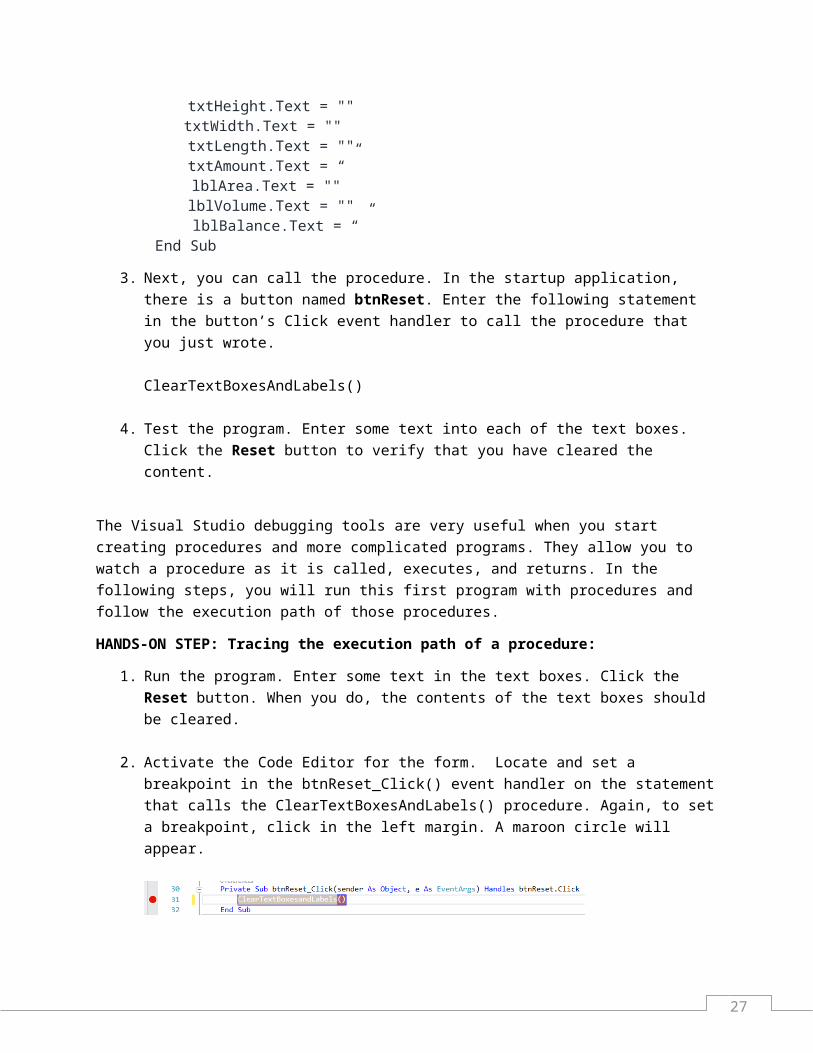
2. Activate the Code Editor for the form. Locate and set a breakpoint in the btnReset_Click() event handler on the statement that calls the ClearTextBoxesAndLabels() procedure. Again, to set a breakpoint, click in the left margin. A maroon circle will appear.
3. Go back to the running form window. Click the Reset button again. The breakpoint should be hit and execution suspended on the following statement:
4. Next, click Debug, Windows, Call Stack on the menu bar to display the Call Stack window. This window shows the procedures that have been called and the order in which those procedures have been called. The following window shows that the btnReset_Click() event handler has been called and the line number where the procedure appears in the form’s code. Your line numbers might differ. The line [External Code] indicates that the procedure was not called by this program but by Windows itself.
5. Click the Step Into button on the Debugging toolbar or press F11 to step into the procedure. The procedure should be highlighted in the Code Editor. If you look at the Call Stack window again, you see that the ClearTextBoxesAndLabels() procedure has been called from the btnReset_Click() event handler. Note that the most recently called procedure appears at the top of the list.
6
The form is made up of input controls and output controls. Next, you will create procedures to format the input controls and output controls so that they all have the same visual appearance. You will pass arguments to these procedures.
While the procedures might seem like overkill, they are not. As a program expands and you add new controls, you can just add the control name to one of the procedures and it will have the same formatting.
1. At the end of the Form1 class, create the following Sub procedure designed to format the input and output controls. The procedures each accept one argument having a data type of TextBox. Thus, the TextBox passed as an argument will be formatted. Make sure to create the procedure inside of the Class block.
Private Sub FormatInputControl(argInput As TextBox) argInput.BackColor = Color.Azure End Sub
Private Sub FormatOutputControl(argOutput As Label) argOutput.BackColor = Color.LightBlue End Sub
2. Now create the following procedures that will format the input controls and the output controls. Again, note that the name of the TextBox and Label control instance is passed as an argument to the procedure.
Private Sub FormatAllInputControls() FormatInputControl(txtHeight) FormatInputControl(txtWidth) FormatInputControl(txtLength) End Sub
Private Sub FormatAllOutputControls() FormatOutputControl(lblArea) FormatOutputControl(lblVolume) End Sub
3. Finally, you need to write the statements that will call the procedure. The formatting process will be performed once when the application loads.
Create and enter the following code in the Form’s Load event handler. The following procedure is a bit of a demonstration as the formatting could just as well be performed at design time.
Private Sub Form1_Load(sender As Object, e As EventArgs) _ Handles MyBase.Load
FormatAllInputControls() FormatAllOutputControls()
7

End Sub
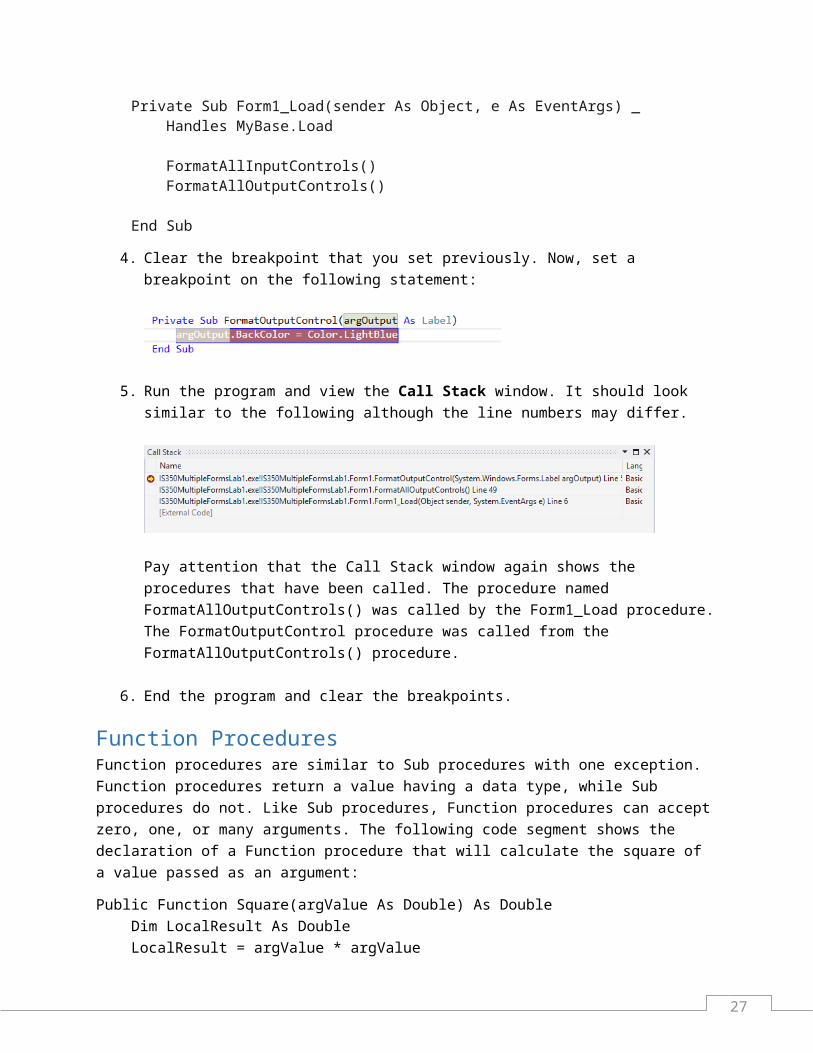
4. Clear the breakpoint that you set previously. Now, set a breakpoint on the following statement:
5. Run the program and view the Call Stack window. It should look similar to the following although the line numbers may differ.
Pay attention that the Call Stack window again shows the procedures that have been called. The procedure named FormatAllOutputControls() was called by the Form1_Load procedure. The FormatOutputControl procedure was called from the FormatAllOutputControls() procedure.
6. End the program and clear the breakpoints.
Function Procedures Function procedures are similar to Sub procedures with one exception. Function procedures return a value having a data type, while Sub procedures do not. Like Sub procedures, Function procedures can accept zero, one, or many arguments. The following code segment shows the declaration of a Function procedure that will calculate the square of a value passed as an argument:
Public Function Square(argValue As Double) As Double Dim LocalResult As Double LocalResult = argValue * argValue Return LocalResultEnd Function
Note the following about the above procedure:
The Function procedure is declared with the Public keyword so it is visible to other modules and classes.
The Function procedure is named Square().
The Function procedure accepts one argument having a data type of Double. The name of the argument is argValue.
8

All Function procedures return a value having a data type. In this example, the Function’s return data type is Double.
The code in the procedure multiplies the argument by itself and stores the result in the variable named LocalResult.
The Return statement returns the value of variable named LocalResult to the calling procedure. The Return statement can appear anywhere in a Function procedure and a procedure can have several Return statements. The Return statement cannot appear in a Sub procedure because Sub procedures do not return a value. When the Return statement is hit (executed), execution immediately returns to the calling procedure.
The following code segment shows how to call the above Function procedure:
Dim Result As DoubleResult = Square(3)
The first of the preceding statement declares a variable named Result designed to store the procedure’s result. The procedure name Square is called with one argument – the literal value 3. Function procedures return a value, which is stored on the right side of the assignment statement.
Again, the data types of procedure argument(s) must be compatible. The following statements will cause a syntax error because, a String cannot be converted implicitly to a Double. Again, we assume that strict type checking is enabled (Option Strict On).
Dim S As String = “142A”Dim Result As DoubleResult = Square(String)
Module BlocksTo date, all of the code you have written has been contained within a single form. However, most applications are not so small. As applications grow and become more complex, keeping them well-organized can be challenging but is important. In the following part of the lab, you will create Function procedures that will perform mathematical operations. Rather than putting all code into a form, you will factor the code into classes and modules that can be used again and again by other applications. For example, in this and other labs you will create reusable classes and modules to:
Perform input validation.
Perform simple mathematical functions.
Operate as objects, such as a bank account.
A Module block is declared as follows:
Option Strict OnModule MyMath ‘ Variable and procedure declarations.
9
End Module
Module blocks have the following characteristics:
The members of a Module block are always shared. Shared data will be discussed in more detail later in the lab.
Members of a Module block (variables and procedures) are called thru the module name rather than an instance variable. Again, this syntax will be discussed in more detail later in the lab.
Module blocks are often used for global variables and methods.
A Module block is marked with the Module and End Module statements.
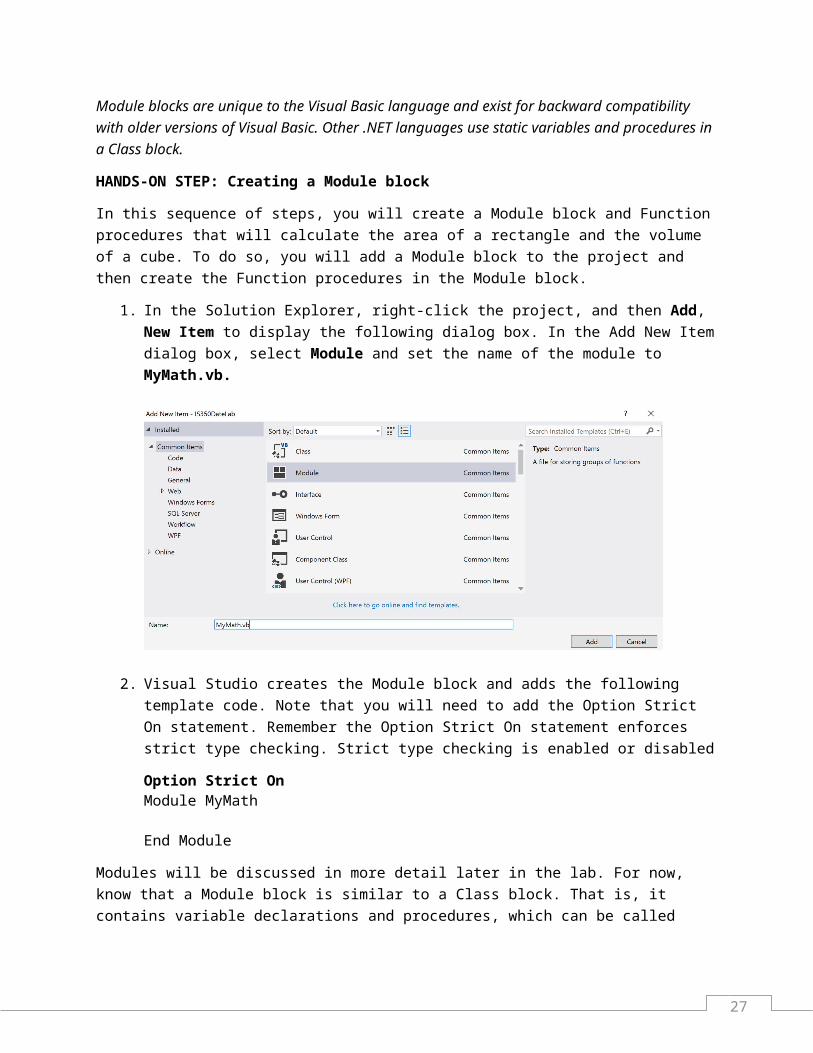
Module blocks are unique to the Visual Basic language and exist for backward compatibility with older versions of Visual Basic. Other .NET languages use static variables and procedures in a Class block.
HANDS-ON STEP: Creating a Module block
In this sequence of steps, you will create a Module block and Function procedures that will calculate the area of a rectangle and the volume of a cube. To do so, you will add a Module block to the project and then create the Function procedures in the Module block.
1. In the Solution Explorer, right-click the project, and then Add, New Item to display the following dialog box. In the Add New Item dialog box, select Module and set the name of the module to MyMath.vb.
2. Visual Studio creates the Module block and adds the following template code. Note that you will need to add the Option Strict On statement. Remember the Option Strict On statement enforces strict type checking. Strict type checking is enabled or disabled
Option Strict OnModule MyMath
10

End Module
Modules will be discussed in more detail later in the lab. For now, know that a Module block is similar to a Class block. That is, it contains variable declarations and procedures, which can be called from other classes. Next, you will create the Function procedures in the Module block.
1. Create the following procedures in the above Module block so that you code looks like the following. Make sure to create the code between the Module and End Module keywords.
Public Module MyMathPublic Function Area(argLength As Double, argWidth As Double) As Double
Return argLength * argWidthEnd Function
Public Function Volume(argLength As Double, argWidth As Double, argHeight As Double) As Double
Return argLength * argWidth * argHeightEnd Function
End Module
The above Module block is named MyMath. It has two functions named Area and Volume. The Area function accepts two arguments, and the Volume function accepts three. All arguments have a data type of Double. The functions return data type are also Double.
What is important to realize about the design of this application is that the above procedures and module do not rely on any other control instances. That is, they don’t rely on a form’s text boxes, or other code. Any application could possibly use these methods without knowing how they work. Good classes and modules try to minimize dependencies between other classes and modules, where possible.
2. On the main form, write the following statements in the btnArea_Click() event handler to call the Area function.
Dim length, width, area As Double length = System.Convert.ToDouble(txtLength.Text) width = System.Convert.ToDouble(txtWidth.Text) area = MyMath.Area(length, width) lblArea.Text = area.ToString()
The above code, converts the contents of the input text boxes to numeric values and stores those converted values in local variables named length and width. The next statement calls the Area method of the MyMath Module with the two arguments. The method in the Module returns a Double which is stored in the local variable area. The final statement converts the variable area to a string and display the result in the Label control instance named lblArea.
3. Now it’s your turn. Create the btnVolume_Click() event handler. Instead of calling MyMath.Area, call MyMath.Volume. The text box named txtHeight has already been declared.
11
Declare the additional variable and convert the text box to store the value. Call the MyMath.Volume method and display the result in the Label control instance named lblVolume.
4. Run the program. Enter values in the input widgets and click the Area and Volume buttons. You should see the results in the output Labels. If you do not, use the Debugging tools to determine the cause of the problem.
Understanding the Difference between Static Data and Instance DataAll procedures and global variables must be enclosed in a Class or a Module block. Variables and procedures operate much differently based on one important OOP concept.
Variables (and procedures) can be instance variables. To use an instance variable (or procedure), you must first create an instance of the underlying class. When working with instance variables, there a unique copy of the variable (data) for each class instance. As you will see, you create a class instance using the New keyword (constructor).
Variables (and procedures) can be static (called Shared in Visual Basic). When working with a static variable, there is one copy of the variable that is shared across all class instances (and Module blocks). Static variables are declared with the Visual Basic Shared keyword, when declared in a Class block. When declared in a Module block, all variables and procedures are implicitly shared, and the Shared keyword is illegal.
You will work more with classes and modules as you progress through this lab. The concept of shared and instance members might be best explained by example.
First examine the following Class and Module blocks:
Public Class TestClass Public Shared varShared As Integer Public varInstance As IntegerEnd Class
Public Module TestModule Public varShared As IntegerEnd Module
The Class block named TestClass has the following characteristics.
The class is declared with the Public access modifier so it is accessible to other classes and modules within the project.
Both variables are declared with the Public access modifier. So they are also accessible to other Class and Module blocks.
12
The variable named varShared is Shared so the variable is referenced through the class name, rather than an instance variable.
The variable named varInstnace is an instance variable. There is no special keyword to mark an instance variable in a class. All variables are instance variables unless marked with the Shared keyword.
Next look at the Module block named TestModule.
The Public module has one Public variable named varShared.
Even though the Shared keyword does not appear, the variable is shared, as all variables declared in a Module block are shared. In fact, the Shared keyword is illegal in a Module block. The following declaration in a Module bock will produce a syntax error: “Variables in modules cannot be declared as Shared:
Public Shared varShared As Integer
Now take a close look at how to use these instance and shared members. First, to reference a variable in a Module block, you use the Module name followed by the variable name as in
TestModule.varShared = 1
Working with a class is a bit trickier. You reference a Shared variable using the same syntax as you used to reference a shared variable in a Module block.
TestClass.VarShared = 1
However, to use the instance variables you have to first create the object by calling the default constructor as follows:
Dim TestInstance1 As New TestClass()Dim TestInstance2 As New TestClass()
The above statements create two instances of the class named TestClass. One object is stored in the variable TestInstance1, and the other is stored in the variable named TestInstance2. The following statements store values in the two instance variables:
TestInstance1.varInstance = 1TestInstance1.varInstance = 2
Now here is the important concept. The two object variables point to different objects. And each object (class instance) has its own data copy. So the following statements will print the values 1 and 2, respectively:
System.Console.WriteLine(TestInstance1.varInstance.ToString()) System.Console.WriteLine(TestInstance2.varInstance.ToString())
Note that if you try to reference an instance without having first created an object, an error called a null reference exception will occur. The following statements illustrate the problem.
13

Dim TestVariable1 As TestClassTestVariable1.varInstance = 1
HANDS-ON STEP: Understanding Instance and Shared Data
In this sequence of steps, you will reproduce the above code to declare the test module and classes. You will then write a few statements in the Form’s Load() event handler, and set breakpoints to see the execution path of shared and instance data.
1. On the form named Form1, enter the following Module and Class blocks at the end of the form. Make sure to create the blocks outside of the form Class, rather than inside the class.
Public Class Form1 . . . End Class
Public Class TestClass Public Shared varShared As Integer Public varInstance As IntegerEnd Class
Public Module TestModule Public varShared As IntegerEnd Module
2. Now, enter the following statements to in the Form’s Load() event handler to test the code that you just wrote.
TestModule.varShared = 1 TestClass.varShared = 1
Dim TestInstance1 As New TestClass() Dim TestInstance2 As New TestClass() TestInstance1.varInstance = 1 TestInstance1.varInstance = 2 System.Console.WriteLine(TestInstance1.varInstance.ToString())
System.Console.WriteLine(TestInstance2.varInstance.ToString())
3. Set a breakpoint on the following statement and run the program.
TestModule.varShared = 1
4. Press F11 to single step thru the program.
Creating Custom ClassesIn this part of the lab, you will work with the basics of object-oriented programming. To introduce object-oriented programming, you need to understand the following core concepts:
14

You create a Class block to declare a class. Classes often mimic real-world objects. For example, in this lab, you will create a class that implements a bank account with which you can make deposits or withdrawals.
Objects are created from classes. When you create a class instance thereby creating an object, a special procedure called a constructor executes. In Visual Basic, a constructor is a procedure named New.
A class can store data. The data stored in a class is called a property. Visual Basic implements properties via a special type of procedure called a Property procedure. Public variables can also be used to implement properties.
A class can perform tasks. The tasks a class can perform are called methods. Methods are created using Function and Sub procedures with the Public access modifier.
A class is not that much different than the Module block that you just created. However, you can create multiple instances of the same class (multiple objects). Each class instance has its own instance data.
HANDS-ON STEP: Adding a Class to a Project
In this part of the lab, you will create the BankAccount class already discussed.
1. On the menu bar, click Project, Add Class to display the following dialog box. In the dialog box, name the class BankAccount.vb.
2. The class is created and appears in the Code Editor as follows:
At this point, you have created the class. However, it will not yet do anything because you have yet to create any of the class’ properties or methods.
15

Class Data To understand class data, think about the controls that you have used so far. Each of them works exactly the same way but each stores its own data. That is, every TextBox has a Text property but each has a unique copy of the property and therefore stores its own value. In this example, you will create a Class to mimic a simple bank account. A bank account object will store a unique customer ID and a current balance. In subsequent labs, you will begin to work with lists and store multiple instance of this BankAccount class.
There are basically two ways to create instance data for a class.
The first is to declare a Public variable in a class. That variable can be read or written from any other class.
The second is to create what is called a Property procedure.
Object-oriented programming supports the idea of encapsulation. The rule of encapsulation dictates that data should not be modified directly through an assignment statement. Rather, its value should only be modified by code by way of methods or Property procedures. Suppose that you were to declare a Public variable to store a bank balance as follows:
Public BankBalance As Double
Any code that uses this class would be able to modify the BankBalance variable directly. Given the business rules of a bank account, this should not be possible. They only way to update a bank account balance is via a transaction such as a deposit or a withdrawal. However, it should be possible to get the bank balance without being able to change it. This is how you will implement the BankAccount class and this is the purpose of Property procedures.
Property procedures are often implemented by storing data in a variable that is hidden inside of the class (declared with the Private keyword). The following block declares a hidden variable and a property procedure using this technique:
Private HiddenAccountBalance As Double
Public Property GetBalance() As Double Get Return HiddenAccountBalance End Get Set(value As Double) HiddenAccountBalance = value End Set End Property
Property procedures are declared with the Property keyword followed by property name – GetBalance().
A Property procedure has a data type, which in the above code is a Double.
16
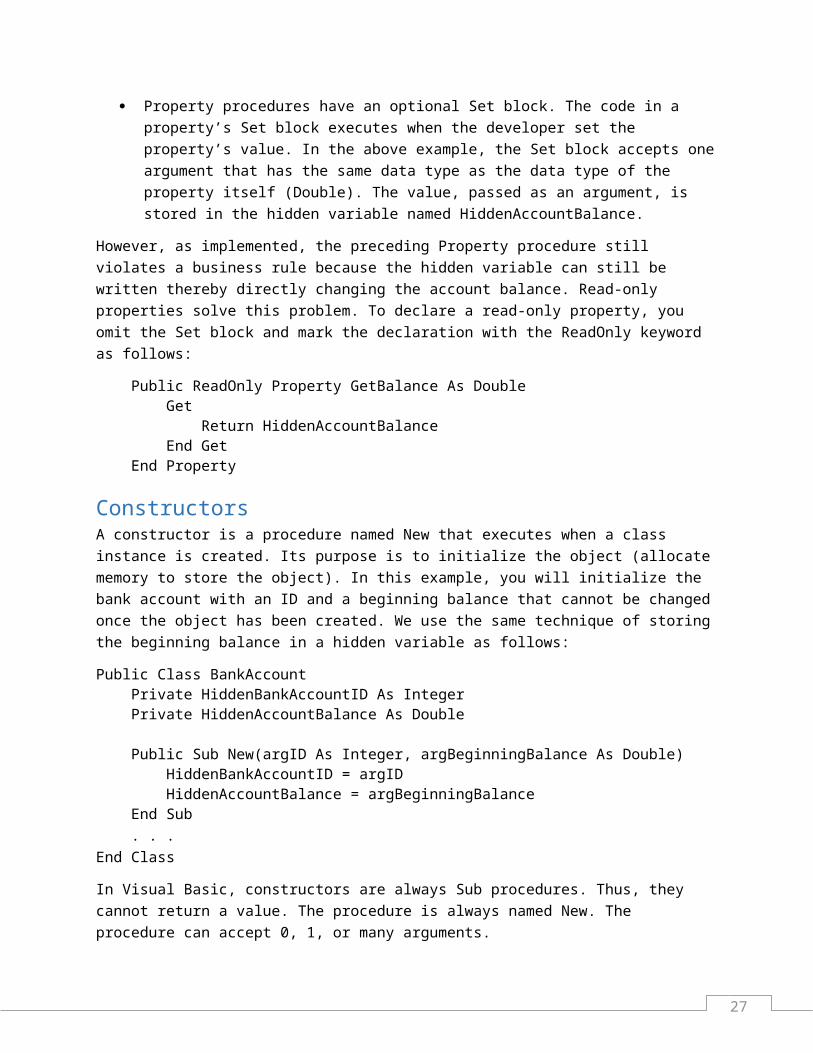
Property procedures have an optional Get block. The code in a property’s Get block executes when the developer reads the property’s value. In the above example, the Get block returns the value of the variable HiddenAccountBalance. The End Get keywords mark the end of a Get block.
Property procedures have an optional Set block. The code in a property’s Set block executes when the developer set the property’s value. In the above example, the Set block accepts one argument that has the same data type as the data type of the property itself (Double). The value, passed as an argument, is stored in the hidden variable named HiddenAccountBalance.
However, as implemented, the preceding Property procedure still violates a business rule because the hidden variable can still be written thereby directly changing the account balance. Read-only properties solve this problem. To declare a read-only property, you omit the Set block and mark the declaration with the ReadOnly keyword as follows:
Public ReadOnly Property GetBalance As Double Get Return HiddenAccountBalance End Get End Property
ConstructorsA constructor is a procedure named New that executes when a class instance is created. Its purpose is to initialize the object (allocate memory to store the object). In this example, you will initialize the bank account with an ID and a beginning balance that cannot be changed once the object has been created. We use the same technique of storing the beginning balance in a hidden variable as follows:
Public Class BankAccount Private HiddenBankAccountID As Integer Private HiddenAccountBalance As Double
Public Sub New(argID As Integer, argBeginningBalance As Double) HiddenBankAccountID = argID HiddenAccountBalance = argBeginningBalance End Sub . . . End Class
In Visual Basic, constructors are always Sub procedures. Thus, they cannot return a value. The procedure is always named New. The procedure can accept 0, 1, or many arguments.
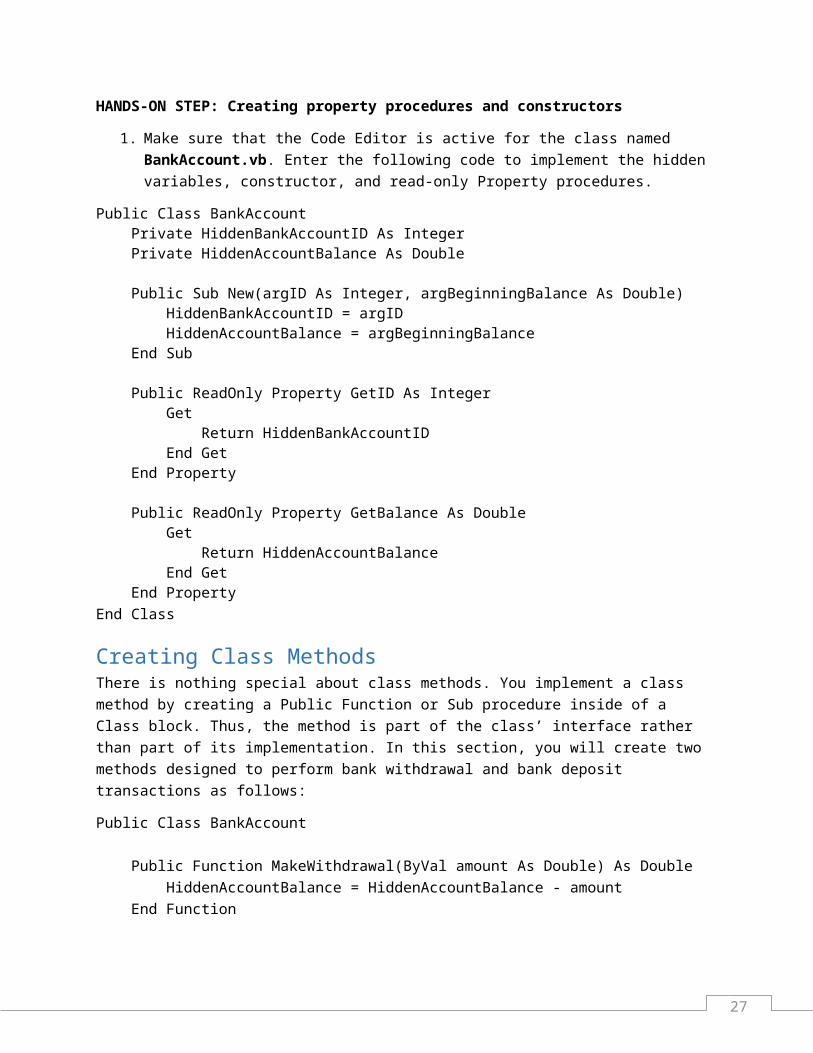
HANDS-ON STEP: Creating property procedures and constructors
1. Make sure that the Code Editor is active for the class named BankAccount.vb. Enter the following code to implement the hidden variables, constructor, and read-only Property procedures.
Public Class BankAccount Private HiddenBankAccountID As Integer
17

Private HiddenAccountBalance As Double
Public Sub New(argID As Integer, argBeginningBalance As Double) HiddenBankAccountID = argID HiddenAccountBalance = argBeginningBalance End Sub
Public ReadOnly Property GetID As Integer Get Return HiddenBankAccountID End Get End Property
Public ReadOnly Property GetBalance As Double Get Return HiddenAccountBalance End Get End PropertyEnd Class
Creating Class MethodsThere is nothing special about class methods. You implement a class method by creating a Public Function or Sub procedure inside of a Class block. Thus, the method is part of the class’ interface rather than part of its implementation. In this section, you will create two methods designed to perform bank withdrawal and bank deposit transactions as follows:
Public Class BankAccount
Public Function MakeWithdrawal(ByVal amount As Double) As Double HiddenAccountBalance = HiddenAccountBalance - amount End Function
Public Function MakeDeposit(ByVal amount As Double) As Double HiddenAccountBalance = HiddenAccountBalance + amount End Function
End Class
The above statements appear in the class named BankAccount
The Function procedure named MakeWithdrawal is declared with the Public access modifier. The Function (method) accepts one argument, a Double. The code in the procedure subtracts the withdrawal amount from the current balance (stored in the variable HIddenAccountBalance).
The Function named MakeDeposit works the same way but adds the deposit amount to the variable HiddenAccountBalance.
18
In the next lab where decision-making is discussed, you will learn how to enforce a business rule that prohibits a withdrawal that will cause the account to be overdrawn.
HANDS-ON STEP: Creating methods
In the steps that follow, you will develop the methods for the class.
1. Enter the following methods in the class named BankAccount. Note that it does not matter the order that the methods appear. Make sure that the method declarations appear immediately inside of the Class block.
Public Function MakeWithdrawal(ByVal amount As Double) As Double HiddenAccountBalance = HiddenAccountBalance - amount Return HiddenAccountBalance End Function
Public Function MakeDeposit(ByVal amount As Double) As Double HiddenAccountBalance = HiddenAccountBalance + amount Return HiddenAccountBalance End Function
Creating a Class Instance and Calling its MethodsSo far, you have created the BankAccount class. Now it’s time to use it. To work with a class, you first create an instance of it. Then you can call its methods.
Having declared the class, the following statements show how to create a class instance and call its methods.
Private CurrentAccount As New BankAccount(1, 100)CurrentAccount.MakeDeposit(100.00)CurrentAccount.MakeWithdrawal(50.00)
The first of the preceding statements creates an instance of the BankAccount class. The class instance is referenced through the variable named CurrentAccount. Note that the name BankAccount is the name of the class that you just created. Recall that the constructor requires two arguments, the ID and beginning balance. So here you are passing arguments to a constructor just as you would pass arguments to any Sub procedure. Here you are passing literal values but you could have just as well passed variables having compatible data types.
The next statement calls the MakeDeposit() method of the BankAccount class. The method was declared to accept one argument having a data type of Double. In the above code, the method is called with a literal floating point value (100.00).
The final statement calls the MakeWithdrawal method with one floating-point value (50.00).
HANDS-ON STEP: Working with a Class’ properties and methods
19

In this sequence of steps you will write the code to create the class instance and set its initial values. Then you will write the code to make deposits and withdrawals and to get the account balance.
1. There are different places in the application where you could create the account. And as you progress, you will learn about best practices to work with several objects at the same time. Here you will create the account once via a Form-level variable. Declare the following variable in the Form1 class, immediately after the Class declaration.
Private CurrentAccount As New BankAccount(1, 250.0)
2. This statement creates the bank account with and id of 1 and an initial value of $250.00.
Enter the following statement at the end of the Form1_Load() event handler to display the current balance when the form loads. This statement uses the GetBalance() method of the BankAccount instance (stored in the variable CurrentAccount). Since GetBalance() returns a double, the value is converted to a string and stored in the Text property of the Label.
lblBalance.Text = CurrentAccount.GetBalance().ToString()
3. Write the following statements in the btnMakeDeposit_Click() event handlerL
Private Sub btnMakeDeposit_Click(sender As Object, e As EventArgs) _
Handles btnMakeDeposit.Click Dim Amount As Double Dim NewBalance As Double Amount = System.Convert.ToDouble(txtAmount.Text) NewBalance = CurrentAccount.MakeDeposit(Amount) lblBalance.Text = NewBalance.ToString() End Sub
The above statements should be familiar. The contents of the TextBox named txtAmount are converted to a Double. The MakeDeposit() method is called, which returns the new balance. This value is converted to a String and displayed in a Label.
4. It’s up to you to write the code for the btnMakeWithdrawal_Click() event handler. The statements should be the same except you call the MakeWithdrawal() method rather than the MakeDeposit() method.
5. Test the program to verify that all is working. Consider again using the debugging tools to see how the class’ procedures are called.
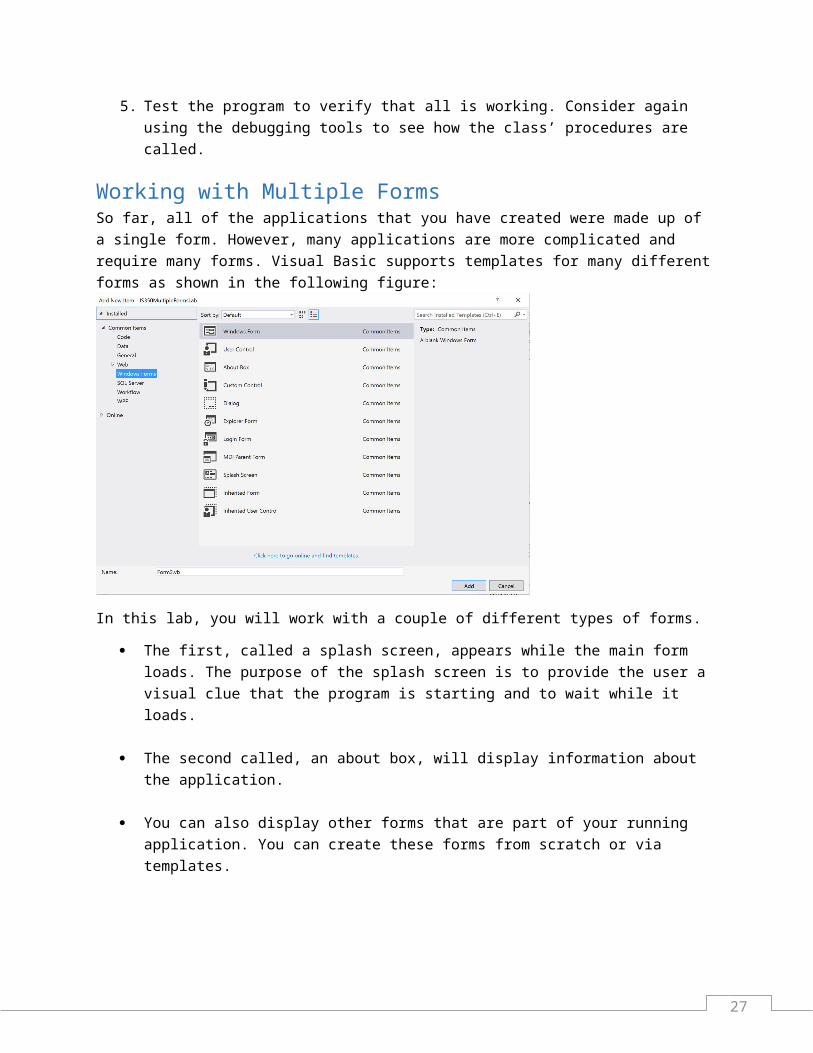
Working with Multiple Forms So far, all of the applications that you have created were made up of a single form. However, many applications are more complicated and require many forms. Visual Basic supports templates for many
20
different forms as shown in the following figure:
In this lab, you will work with a couple of different types of forms.
The first, called a splash screen, appears while the main form loads. The purpose of the splash screen is to provide the user a visual clue that the program is starting and to wait while it loads.
The second called, an about box, will display information about the application.
You can also display other forms that are part of your running application. You can create these forms from scratch or via templates.
Creating and Configuring a Splash ScreenA splash screen is just an ordinary form. However, it is configured a bit differently so that the run-time knows to render (display) the form as an introductory screen. To mark a form as a splash screen, you set the SplashScreen project property. This writes a line to the Application.myapp file. Visual Basic compiles the program so that the window (form) will appear as a splash screen.
<?xml version="1.0" encoding="utf-8"?><MyApplicationData xmlns:xsi="http://www.w3.org/2001/XMLSchema-instance" xmlns:xsd="http://www.w3.org/2001/XMLSchema"> <MySubMain>true</MySubMain> <MainForm>Form1</MainForm> <SingleInstance>false</SingleInstance> <ShutdownMode>0</ShutdownMode> <EnableVisualStyles>true</EnableVisualStyles> <AuthenticationMode>0</AuthenticationMode> <SplashScreen>SplashScreen1</SplashScreen> <SaveMySettingsOnExit>true</SaveMySettingsOnExit></MyApplicationData>
21
HANDS-ON STEP: Displaying a Splash Screen
1. On the menu, click Project, Add New Item. In the dialog box, select Forms and select Splash Screen. Name the splash screen SplashScreen.vb. The form is added to the project and displayed as shown in the following figure:
2. Next, you can designate the previous form as the application’s splash screen. In the Solution Explorer, right-click on the Project, and then click Properties. Make sure that the Application tab is selected, and scroll to the bottom of the page. The following screen should appear:
3. In the splash screen drop-down, select the Splash screen named SplashScreen, and close the page. This change sets the necessary application property so that the splash screen will be displayed for a few seconds while the main form loads.
4. Run the program, the splash screen should appear and then the main form should be rendered.
Understanding the Splash Screen and its ElementsIf you examine the code from the splash screen, you will likely see code that is unfamiliar to you. In this section, you will review some of this automatically generated code.
22
1. First, in the Solution Explorer, click the Show All Files button (highlighted in the following figure)
This causes all of the files that comprise the project to be displayed instead of the most common editable files. The following figure shows the Solution Explorer displaying all files and selected folders expanded:
2. Now, open the file named AssemblyInfo.vb. This file contains global information about your program, and is generated automatically when you create a Windows Forms project.
The following statements are called Assembly attributes. Assembly attributes are informational attributes about an assembly (your program). Assembly attributes are supported by all .NET languages. As you will see in a moment, you can read the values of these attributes at run-time.
<Assembly: AssemblyTitle("IS350ApplicationStructureLabComplete")><Assembly: AssemblyDescription("")><Assembly: AssemblyCompany("")><Assembly: AssemblyProduct("IS350ApplicationStructureLabComplete")><Assembly: AssemblyCopyright("Copyright © 2016")>
<Assembly: AssemblyTrademark("")> <Assembly: AssemblyVersion("1.0.0.0")>
<Assembly: AssemblyFileVersion("1.0.0.0")>
The above statements contain assembly attributes. This is information gets compiled into a program and can be read while the application runs.
Assembly attributes are enclosed in <> characters.
The word Assembly: is followed by the name of the directive, followed by the value enclosed in quotation marks. For example, the directive AssemblyTitle() has the value IS350ApplicationStructureComplete. In this regard, setting Assembly attribute values has the
23

same syntax as calling a function with arguments.
Other assembly directives have similar values.
The assembly information can be read at run-time via another group of .NET objects.
ApplicationTitle.Text = My.Application.Info.Title
The Visual Basic My object is a “convenience” object that gives developers access to various .NET objects. My.Application gives you access to application information stored in the assembly via My.Application.Info. The Title property reads the ApplicationTitle attribute.
Now that you have seen how assembly attributes are stored, you will now see how to read the value of those attributes as an application runs.
Visual Basic supports a predefined object (variable) named My. The My object provides an intuitive way to access selected .NET classes and to interact with the computer, application, and it’s settings.
The My.Application object provides information about the application itself.
The My.Computer object provides access computer configuration information such as the clock, keyboard, file system, audio, etc. The My.Computer object has a child object named Info that gets assembly information.
HANDS-ON STEP: Working with assembly attributes:
In the following sequence of steps, you will work with assembly attributes:
1. Activate the AssemblyInfo.vb file in the Code Editor, if necessary. Modify the AssemblyTitle and AssemblyProduct attributes as follows so that they contain your name.
<Assembly: AssemblyTitle("Ekedahl Multiple Forms Lab")><Assembly: AssemblyProduct("Ekedahl Multiple Forms Lab")>
2. Activate the Code Editor for the form named Form1 and enter the following statement at the end of the Form1_Load() event handler. This statement will display the assembly attribute in the form’s title bar.
Me.Text = My.Application.Info.Title
3. Test the program again. You should see the updated value in the form’s title bar.
Displaying Other FormsIt’s possible to create other forms from scratch or create them from templates. Once you have created another form, it can be displayed to the user. There are two different ways to display a form.
24

The Show() method of the Form class displays a second form. The user can navigate between one form to another when the Show() method is called.
The ShowDialog() method of the Form class display a form as a dialog box. Until the dialog box is closed, the user cannot select the first form. This method displays a form as what is called a modal dialog box.
HANDS-ON STEP: Displaying another form
In this sequence of steps, you will create and additional form (about box) from a template and display it as a modal dialog box. The About Box template works much like the template for the Splash Screen. It uses the My.Application object to get information from the assembly.
1. On the menu bar, click Project, Add New Item to display the Add New Item dialog box. Select Windows Forms. Select About Box as shown in the following figure.
2. Click the Add button.
The about box appears in the Windows form designer. As you can see, this is just another templated form. If you look at the code for the form. You will see that it reads the assembly information as you saw with the splash screen.
3. Open the Code Editor for the main form named Form1. Enter the following statement in btnAbout_Click() event handler to display the form.
AboutBox1.ShowDialog()
25

4. Run the program. Click the button. The about dialog box appears.
Communicating Data between Forms and Across and ApplicationWhen working with multiple forms, it is often necessary to communicate data (variables) from one form to another. It might also be necessary to share static and instance data across the application. It is in these cases where access modifiers come into play along with Module and Class blocks.
The following techniques can be used to share application data.
Public Data in a Module BlockIf you declare a Public variable in a Module block, that variable can be shared by the entire application. Remember that Module blocks are always shared so there is exactly one copy of a variable (data) shared by the entire application. Note that if you declare a Private variable in a Module block, then it can only be referenced by the Module block containing the declaration. Procedures declared in a
Module block are also implicitly shared.
In the following example, you will create another Module designed to store shared data. In this simple case, you will store the date and time the application was started. The Public variable could have also been implemented as a read-only property procedure. You will create a ReadOnly Property Procedure that will return the elapsed time.
HANDS-ON STEP: Using a Module block to read and write static data
1. On the menu bar, click Project, Add New Item to activate the Add New Item dialog box. Make sure that Module is selected. Set Name to SharedData.vb.
2. Click the Add button to create the Module and open the Code Editor. Enter the following statements in the Code Editor.
Module SharedData Public ApplicationStarted As DateTime Public ReadOnly Property ElapsedTime As TimeSpan
26
Get Return System.DateTime.Now() - ApplicationStarted End Get End PropertyEnd Module
3. Next, you need to initialize the variable named ApplicationStarted so that the application’s start time gets saved to the variable. When a program has a splash screen, the splash screen is loaded before the main form. Note that you can test this by setting breakpoints in the Load() event handlers for both forms and running the program.
Enter the following statement at the end of the SplashScreen_Load() event handler:
SharedData.ApplicationStarted = Now()
The left side of the above assignment statement references the ApplicationStarted member of the SharedData module. The current date and time is stored in the property (variable)
Creating and Displaying a Second FormSo far, the forms you have created have been created from templates. Visual Basic allows you to create your own custom forms. However, a custom form has no widgets drawn on it and no pre-created code.
HANDS-ON STEP: Creating a Second Form and displaying data
In the following steps, you will create a second form, display it, and display the shared data you just declared.
4. On the menu bar, click Project, Add Windows Form to display the Add New Item dialog box. Make sure that Windows Form is selected. Name the form frmInfo. Click Add to create the form.
5. Create a Label control instance along the bottom of the form. Name it lblElapsedTime.
6. Enter the following statement in the in the FormInfo_Load() event hander. Make sure that you enter the statement into the correct form.
lblElapsedTime.Text = SharedData.ElapsedTime.ToString()
The right side of the above assignment statement reads the ElapsedTime property of the SharedData module, and converts the result (a TimeSpan) to a string. That result is displayed in the label.
7. On the main form enter the following statement in the btnFrmInfo_Click() event handler. Again, make sure to enter the statement in the correct form.
frmInfo.Show()
27

8. Test the application. On the main form, click the button titled Info to display the informational form. The form should appear and display the elapsed program run time.
28