A DIVISION OF ROBERTSON EQUIPMENT CO. INC. - King Presskingpress.com/manuals/Pressroom...
45
A DIVISION OF ROBERTSON EQUIPMENT CO. INC. PRESS MAINTENANCE TROUBLESHOOTING AND “PRESSROOM SAFETY” MANUAL NOTICE Printing presses can cause serious injury if the operator is untrained or careless. Do not attempt to operate or service this machine unless you are trained and experienced and have read and understand the instructions in this manual. A complete "Pressroom Safety" section is included in front of the manual. This should be read and understood before working on the press. KING PRESS 13TH & MAIDEN LANE JOPLIN, MISSOURI 64801 PHONE 417-781-3700
Transcript of A DIVISION OF ROBERTSON EQUIPMENT CO. INC. - King Presskingpress.com/manuals/Pressroom...
A DIVISION OF ROBERTSON EQUIPMENT CO. INC.
PRESS MAINTENANCE
TROUBLESHOOTING
AND
“PRESSROOM SAFETY”
MANUAL
NOTICE Printing presses can cause serious injury if the operator is untrained or careless. Do not attempt to operate or service this machine unless you are trained and experienced and have read and understand the instructions in this manual. A complete "Pressroom Safety" section is included in front of the manual. This should be read and understood before working on the press.
KING PRESS 13TH & MAIDEN LANE JOPLIN, MISSOURI 64801 PHONE 417-781-3700

PRESSROOM SAFETY
2

PRESSROOM SAFETY
3
TABLE OF CONTENTS Page Description 4 Position the Press for Safety 4 Prepare for Safety 5 Safe Work Habits 5 Press Safety Features 6 Operating Safety 6 Maintenance Safety 7 Printing Unit Safety 7 Ladders, Steps, and Platforms 7 Hoist and Rollstand Safety 8 Splicer Safety 8 Folder Safety 9 Safe Handling of Printing Chemicals 10 Electrical Safety 11 Electrical and Pneumatic Lockout 12 Safety Labels 18 Pressmanship 19 Recommended Operating and Maintenance Supplies 20 Printing Unit Maintenance 24 Care Of Aluminum Cylinders 25 Press Wash Solvents To Avoid 26 Rollstand Maintenance 26 Folder Maintenance 27 Maintenance Schedules 30 Press Troubleshooting Chart 33 Printing Troubleshooting Chart 39 Press Problems Caused by Roller Defects 40 Press Adjustments - Troubleshooting

PRESSROOM SAFETY
4
All press personnel should learn and practice the following safety instructions and rules. Note that the words "press", "equipment", and "machine" used in this text are meant to apply to the total press package provided by King Press.

PRESSROOM SAFETY
5
POSITION THE PRESS FOR SAFETY 1. Position the machine so that adequate access to electrical components is provided. Maintenance and service
personnel will perform more safely when they have unobstructed access. 2. Provide enough clearance around the press to avoid congestion. Establish sufficient workspace and
passages between machines, walls, and partitions. Allow space for a firm well-balanced stance for lifting or making adjustments.
3. Electrically ground the machine. This will ensure that the machine will not be a source of electrical shock that
could be fatal. 4. Check the open positions of hinged doors and covers to be sure that they open fully. Prevent restrictions that
force an operator to work in obstructed or cramped quarters. An off-balance operator with a difficult reach is unsafe.
5. Maintain a clean and uncluttered work area. 6. Oil and ink spills are slippery and can cause falls. Clean up immediately. 7. Provide adequate lighting so workers can see where they are working. Avoid glare and shadow conditions.
PREPARE FOR SAFETY 1. Learn and abide by your company's safety regulations. They are meant to protect you. 2. Condition your mind for safety. Prepare yourself, be aware, and plan ahead. Remember being non-prepared
could cause a serious accident. An accident is more likely if you are untrained, inexperienced, or careless. 3. An operator should never attempt to run or maintain the press without first attaining the appropriate skills. The
lack of proper operating procedures, care, and attention, increases the potential hazards around the printing press. Be sure all operators are individually and thoroughly trained on the kinds of presses they will be running.
4. To ensure proper training, operators should receive oral and written instructions from their employer. King
Press strongly recommends that specific safe operating procedures be established and practiced for the different kinds of equipment in your plant.
5. Pursue safety. Establish a continuing program of safety checks and instructions for both operators and
maintenance personnel, and make certain the program is implemented. The primary objective of this program is to avoid personal injury and damage to the equipment.
6. Include safety in management duties. Press runs should always be supervised by a pressman experienced in
proper press procedures. In addition to production performance the supervisor's responsibility should also include monitoring of press crew actions that could affect personal safety or cause machine damage.
PRESSROOM SAFETY
6
SAFE WORK HABITS 1. Never lean against the machine or prop your hands or feet on it. You may be surprised or startled by machine
functions that could cause an unsafe reaction. 2. Clothing is always a potential safety hazard around rotating press equipment. Pressroom personnel should
exercise good judgment in the selection of clothing and avoid any type that could become caught in the machinery and cause a serious injury. Items that should not be worn around operating press equipment are neckties, long sleeves, rings, or dangling jewelry (neck chains, medallions, bracelets, watches, etc.).
3. Long hair is also potentially dangerous around moving machines and therefore should be covered or
contained to prevent entanglement in the equipment. 4. Safety shoes should be worn to prevent slipping and crushing. Latex gloves can provide protection against
strong chemicals or heat but must be used with extreme care around moving parts of the press. 5. Never carry rags in pockets. They may be caught by the machine and pull you into the press, causing an
injury. 6. Always maintain a safe pressroom floor. The floor surface must be non-slip textured and easy to clean to
remove oil, water, and other debris. Good housekeeping around the press equipment also improves safety as well as production.
7. Establish a reporting system for accidents and safety hazards. Include health problems, ventilation, poor
lighting, noise, and cluttered workspace. These items should be reported to management and corrected immediately.
8. Some support materials for the pressroom consist of chemicals, solvents, and inks that may be potential fire
hazards. All such chemicals must be kept in proper containers or special cabinets and stored in a safe location.
9. Stay alert and watch for the unsafe acts of others that could injure you. Conversely, you are responsible for
your actions to prevent injury to others working around you. 10. Horseplay must never be allowed in the pressroom. 11. Good housekeeping in the pressroom promotes safe working conditions, reduces waste, and increases
productivity and overall quality.
PRESS SAFETY FEATURES 1. An audible press start signal alerts personnel before the press is started. Signals for "Inch Forward," "Inch
Reverse," and "Run" to warn of impending press movement. 2. All drive line components (shafts, gears, couplings, etc.) are enclosed in guards to protect personnel. Both the
gearside and workside of the press are enclosed in cabinets for protection. 3. Lockout/Tagout devices should be used per OSHA regulation (subpart J-29 CFR 1910.147) for both electrical
and pneumatic energy sources. The lockouts should be used whenever maintenance is performed on either of these systems.
4. Warning and caution labels are strategically located around the press to alert the operator of potentially
hazardous conditions that may exist. 5. The Press Drive controls comply to the NPES American National Standard for Printing Press Drive Controls
(ANSI B65.1 1995) as well as both U.L. and C.S.A. electrical codes. Presses provided to EC countries comply to the CE Machinery Directive.

PRESSROOM SAFETY
7
6. The Press Drive incorporates an electrical emergency stop braking mechanism to minimize the time it takes
for the press to stop when a stop-ready/safe button is depressed. The press manual is structured around safety and is meant to be kept with the press for continuous study by operators.
OPERATING SAFETY 1. The press should never be operated without proper training, experience, and authority. 2. The press should never be operated at unsafe speeds. 3. The press should never be operated from any awkward or unsafe position. 4. Always LOCK-OUT press when making adjustments, performing maintenance, or preparing for printing. 5. Never remove a press from " LOCK-OUT " until you are sure all personnel are clear of rotating and moving
parts. 6. Make sure you are clear of rotating or moving press parts when the warning alarm sounds. This indicates that
press start-up is about to occur. 7. Safety devices on the press protect the operator from harm and protect the press from damage. Never defeat
or bypass any mechanical or electrical safety device or interlock. They are for your safety and should be functional at all times.
8. Guards and protective covers should never be opened when the equipment is running, nor should the
equipment be operated without the guards and covers properly installed. Never open or remove protective guards or press parts that are secured by wrench-type fasteners unless the electrical power to the press and/or air supply is locked out.
9. Moving parts of the press should never be touched while running. The press must be stopped and on
"LOCK-OUT" before any type of contact is made.
MAINTENANCE SAFETY 1. All maintenance procedures that involve removing or replacing equipment on the press or expose personnel
to hazardous moving mechanisms require that lockouts and tags be used on the power disconnects for all types of power involved. On some presses lockouts may be required on more than one power source due to the various kinds of equipment involved.
Lockouts and hazard identification tags must always be applied to the main power disconnect and/or
pneumatic air supply when any heavy maintenance or service is being performed. Tags identify the individual who locked the system as well as their location and activity. Lockouts must disconnect all sources of energy including electrical, and pneumatic when operations are performed that are not protected by standard guarding. Note that some presses have multiple power sources such as twin drives, motorized KJ8A/KJ40 delivery, or accessory equipment. All must be locked out during servicing.
2. When using compressed air for cleaning, be sure to use OSHA complying nozzles. Also wear safety glasses
and a dust mask. 3. Do not use damaged, broken, or improper tools to work on the press. Always use the appropriate tools and
immediately replace those that are broken or worn. 4. Never attempt to hand lubricate the rotating machinery while it is in motion. 5. Tools, oil cans, supplies, rags, or any other materials used in maintenance or production should not be left
standing on press frames, housings, platforms, or in the aisles. Unrestrained objects may fall into the
PRESSROOM SAFETY
8
machinery and cause damage. This kind of emergency could startle the operator and cause an unsafe reaction.
6. Accumulations of waste products such as paper dust, oil, and ink should be cleaned from the press platforms,
stairs, and floor to prevent falls that could cause injury. 7. Access cover plates should never be left open to present a hazard that could result in a serious injury or fall. 8. Before performing any operation that could endanger other personnel, you should properly alert them of your
intent.
PRINTING UNIT SAFETY 1. Always keep fingers clear of cylinders, rollers, and nip points. Never attempt to wipe any cylinders or rollers
while the press is in motion. Wiping rags can be pulled into the press taking your hand with it, causing serious injury.
2. Ink rollers and cylinders should never be wiped while the press is in motion. 3. No one should be in the aisle between printing units while the press is running. 4. Never attempt to clear paper jams in the unit with the machine in motion. Be certain the press is stopped and
placed in "LOCK-OUT". 5. Periodically check the plates for looseness or cracks. 6. Do not attempt to remove hickies while the press is moving.
LADDERS, STEPS, AND PLATFORMS 1. Avoid tripping and slipping by keeping tools, scrap paper, ink, oil, and other debris clear of ladders, steps, and
platforms. 2. When railings are provided as hand assists and safety barriers, they should be used only for that purpose.
Never sit or lean on railings. 3. For safety always descend ladders facing the rungs.
HOIST AND ROLLSTAND SAFETY 1. Be sure to put the press on "LOCK-OUT” before cleaning or any maintenance. Remember, rolls are driven by
web tension from the printing units. 2. Make certain the core shaft is the correct length for the rollstand. 3. Never attempt to load paper rolls without the safety collar in place on the core shaft. Without the collar you
may be injured if the roll of paper slips from the hoist while being loaded into the press. Never stand under a roll for any reason.
4. Be sure to use the center lift location on the lifting bar for full width rolls, and the offset lift location for half
width rolls. 5. Be sure the lifting hook safety latch is engaged and working correctly. 6. Inspect the roll hoist cables regularly. Check for fraying, kinks, or loose fittings. Paper roll hoists can cause
serious injury if press personnel are not clear when paper rolls are being lifted. Any deterioration of hoist equipment that presents a safety hazard should be corrected immediately.
7. Keep hands clear of the lifter bar and hooks when hoisting.

PRESSROOM SAFETY
9
8. Keep hands clear of core shaft when rolling the core shaft to the running position. 9. Keep hands clear of the rollstand dancer mechanism when turning the rollstand on or off. 10. When using compressed air for cleaning be sure to use OSHA complying nozzles. Also wear safety glasses
and a dust mask.
SPLICER SAFETY 1. Consult the operating manuals provided by the splicer manufacturer. 2. Be sure to put the press on "LOCK-OUT" before cleaning or maintenance. Remember, rolls are driven by web
tension from the printing units.
FOLDER SAFETY 1. Always put the press on "LOCK-OUT" before entering the folder for any reason. 2. Never attempt to clear paper jams in the folders with the machine in motion. Be certain the press is stopped
and placed on "LOCK-OUT". 3. When using compressed air for cleaning be sure to use OSHA complying nozzles. Also wear safety glasses
and a dust mask. 4. When cleaning or servicing the folder be careful to avoid sharp cutting knives, pins, perforator blades, slitters,
and perforator wheels.

PRESSROOM SAFETY
10
SAFE HANDLING OF PRINTING CHEMICALS 1. Always use the recommended chemical for the application. 2. Be sure to apply the chemicals in strict accordance with the supplier's instructions. Read the label and consult
with the supplier for any additional instructions. 3. When working with chemicals always wear protective gloves and eye shields. 4. Avoid splashing and spills. Use care when pouring. 5. Understand the kinds of chemicals in use. Know the required precautions and the first aid procedures for
each, in case of emergency. 6. Have eyewash station nearby and post the first aid procedures next to it. Know what to do for acid and alkali
burns. 7. Determine the injury possibilities for each chemical and solvent from the suppliers and prepare a first aid plan
for each. 8. Mix chemicals in ventilated areas only. 9. Wash off chemicals from skin immediately using soap and water. Rinse thoroughly. 10. Never use unknown chemicals. 11. Never add water to acid. Always add the acid last to water. 12. Store flammable chemicals and solvents according to proper OSHA code requirements. Use approved
containers. 13. Mark the containers and storage areas with the appropriate caution and warning signs. 14. Keep containers and storage areas clear of materials that could cause spontaneous combustion. 15. Always dispose of cleaning rags in safety containers. 16. Keep solvents and chemicals away from heaters, motors, or other spark or flame sources. 17. Use and store chemicals and solvents in a way that prevents spilling. 18. Containers must be marked with the identity of their contents.

PRESSROOM SAFETY
11
ELECTRICAL SAFETY All maintenance procedures that involve removing or replacing equipment on the press or expose personnel to hazardous moving mechanisms require that lockouts and tags be used on the power disconnects for all types of power involved. Lockouts may be required on more than one power source due to the various kinds of equipment involved. DANGER: High Voltages are present when incoming AC power is connected. Make all changes to the equipment
with the main disconnect locked in the "OFF" position. Failure to follow this procedure may cause serious personal injury, death, and/or equipment damage. (CAUTION: Some presses have multiple disconnects, and all of them should be locked off.)
DANGER: Press equipment should be installed, adjusted, and serviced by qualified electrical maintenance
personnel familiar with the operation of the equipment and the potential hazards. Failure to follow this practice may cause serious personal injury, death, and/or equipment damage.
DANGER: Observe the following safety procedures as well as the National Electrical Code recommendations,
and your plant procedures, when working on press equipment. Disregarding these precautions may cause serious personal injury, death, and possible equipment damage.
1. "LOCKOUT" means to place a lock on the main power disconnect after turning off the switch. Be sure to
understand when lockouts are needed. See "LOCKOUT" information section. 2. "TAGOUT" means to place an identification tag on the main power disconnect (switch) after it is turned off.
The tag should identify the person who locked it out as well as the area being serviced. Tagouts should be applied to all electrical devices where a lockout has been applied for maintenance work. Tags must be removed when the work is completed and the lock is removed.
3. Never make adjustments to the electrical system until you are sure all personnel are clear of rotating and
moving parts. 4. Safety devices should never be jumped or defeated in any way. These devices are designed to protect
personnel and equipment. 5. To avoid the danger of electrical shock, all maintenance personnel should use only insulated tools on
electrical and electronic equipment. 6. Employ extreme caution when using electronic instruments for testing and troubleshooting circuits with the
power on. Even low voltages under the right conditions can be lethal. Keep one hand in a pocket when servicing live equipment and avoid bracing yourself against the equipment.
7. Always check circuits for electrical voltages since capacitors can retain charges that cause electric shock
when the power switches are in the “OFF” position. 8. Jewelry (rings, wristwatches, bracelets, key chains, etc.) should not be worn while working with electrical and
electronic equipment. Insulated boots and gloves must be worn when the danger of high voltage electrical shock is present.
9. Never stand or sit on a wet surface when troubleshooting or maintaining electrical and electronic equipment. 10. Do not allow fluids of any kind to leak or spill into electrical or electronic circuits. 11. Spark arcs from electrical equipment can present a fire hazard if flammable solvents are nearby. Use extreme
caution to prevent ignition possibilities. NOTE: Arcing occurs inside the main drive motor as part of its normal operation. Clean the filter regularly, and be
extra careful to keep flammables away from this area (i.e. paper dust).

PRESSROOM SAFETY
12
ELECTRICAL AND PNEUMATIC LOCKOUT C A U T I O N
THE PROCEDURE OUTLINED BELOW WILL ONLY LOCKOUT EQUIPMENT PROVIDED BY KING PRESS. THE PROCEDURE WILL "NOT" LOCKOUT AUXILIARY DEVICES (NOT MADE BY KING PRESS) THAT MAY BE MOUNTED TO THE PRESS.
Examples of King Press Equipment Include:
Folders Consoles Printing Units Main D.C. Press Drive Controllers
Examples of Auxiliary Devices Include: Web Splicer Infeed Water Leveler Web Guide Cut-Off Control Web Severing Device Automix System Web Dryer Stacker Chiller Web Break Detector Silicone Applicator Former Blower Air Compressor Etc. Hydraulic (Grease Pump) Before service or maintenance of any kind is performed on a King Press, check the total machine to locate all types of energy sources. Included, are: Electrical Water Pneumatic Gas, LP or Natural Each Auxiliary item may have its own energy source. These must be independently locked out before service or maintenance.
ELECTRICAL LOCKOUT OF KING PRESS EQUIPMENT The electrical feed to a King Press comes through the large D.C. motor control enclosure (main drive for press). This enclosure has an "OFF-ON" handle mounted at the upper right hand side of the front door. Turn this handle to the off position, and padlock it in this position before service or maintenance. If there is more than one power source to the press such as twin drives, motorized KJ8A/KJ40 delivery, or accessory equipment, each one must be locked out as described above. If there is more than one D.C. motor controller on a press, each one must be locked out as described above.
PNEUMATIC LOCKOUT OF KING PRESS EQUIPMENT A lockout type three-way-valve is provided on the input to the main regulator-filter-lubricator assembly mounted on the back of the folder. When this valve is in the “OFF” position, it will stop air from flowing to the press, and bleed the press air pressure to zero PSI. This valve can be pad locked in this position for service and maintenance.
PRESSROOM SAFETY
13
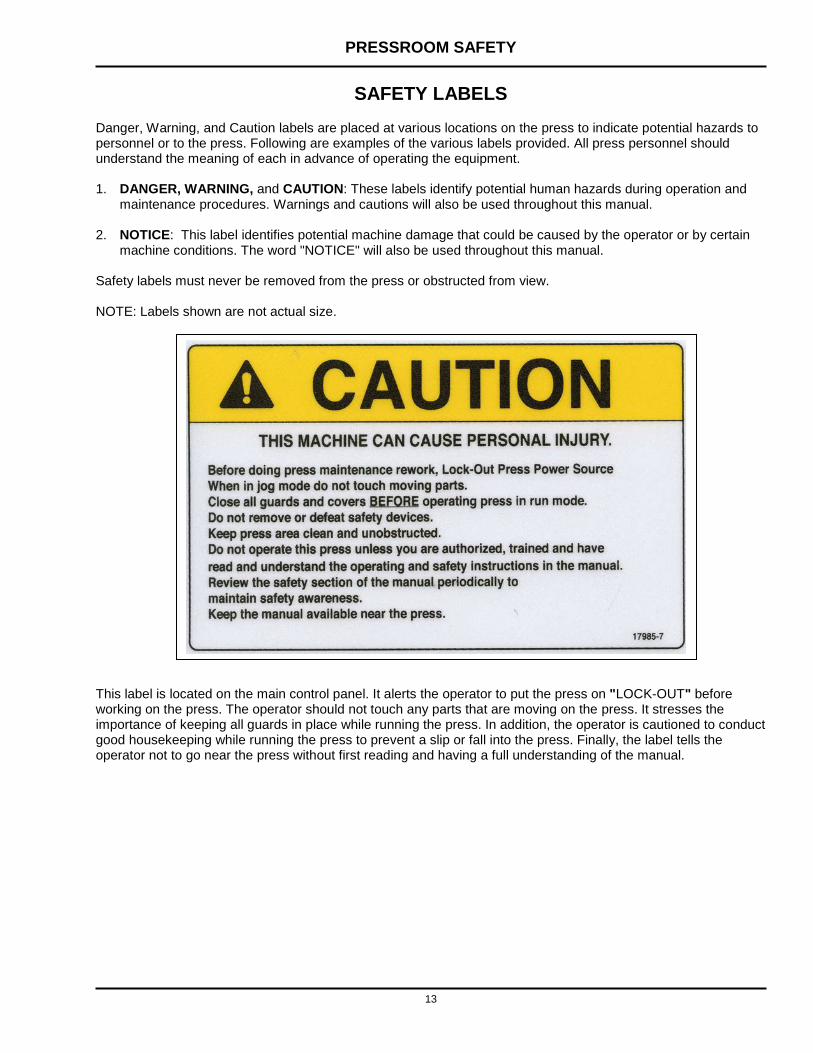
SAFETY LABELS Danger, Warning, and Caution labels are placed at various locations on the press to indicate potential hazards to personnel or to the press. Following are examples of the various labels provided. All press personnel should understand the meaning of each in advance of operating the equipment. 1. DANGER, WARNING, and CAUTION: These labels identify potential human hazards during operation and
maintenance procedures. Warnings and cautions will also be used throughout this manual. 2. NOTICE: This label identifies potential machine damage that could be caused by the operator or by certain
machine conditions. The word "NOTICE" will also be used throughout this manual. Safety labels must never be removed from the press or obstructed from view. NOTE: Labels shown are not actual size. This label is located on the main control panel. It alerts the operator to put the press on "LOCK-OUT" before working on the press. The operator should not touch any parts that are moving on the press. It stresses the importance of keeping all guards in place while running the press. In addition, the operator is cautioned to conduct good housekeeping while running the press to prevent a slip or fall into the press. Finally, the label tells the operator not to go near the press without first reading and having a full understanding of the manual.
PRESSROOM SAFETY
14
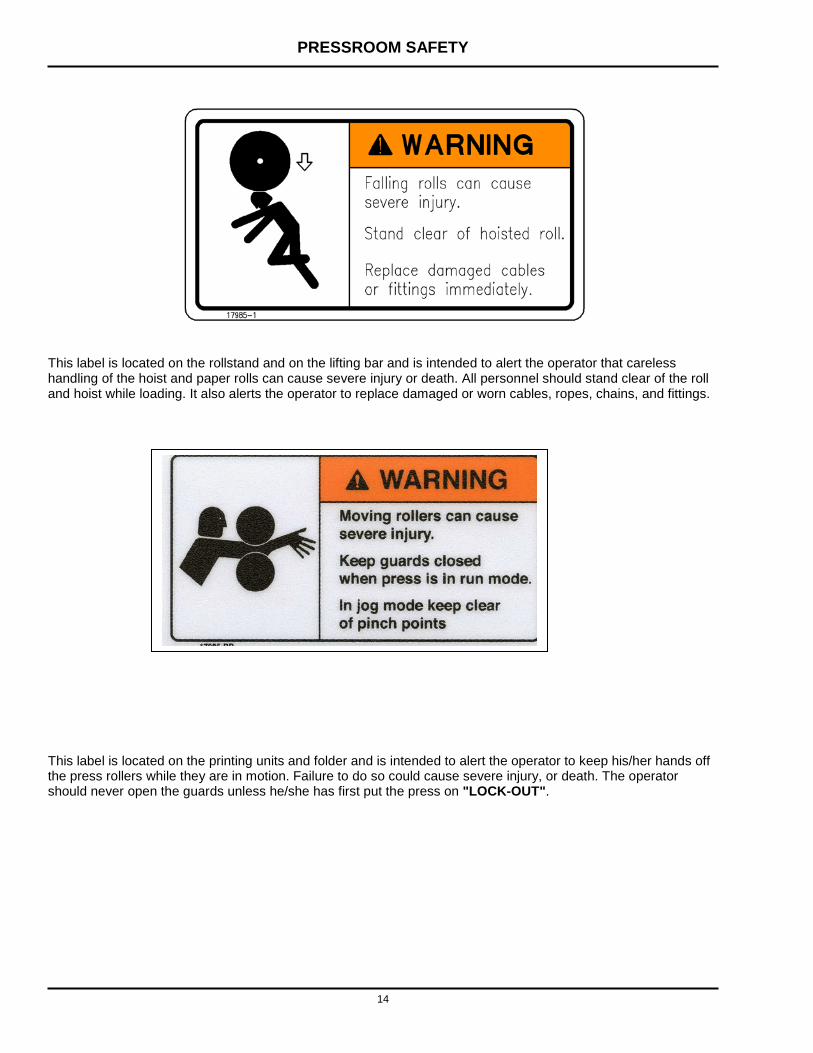
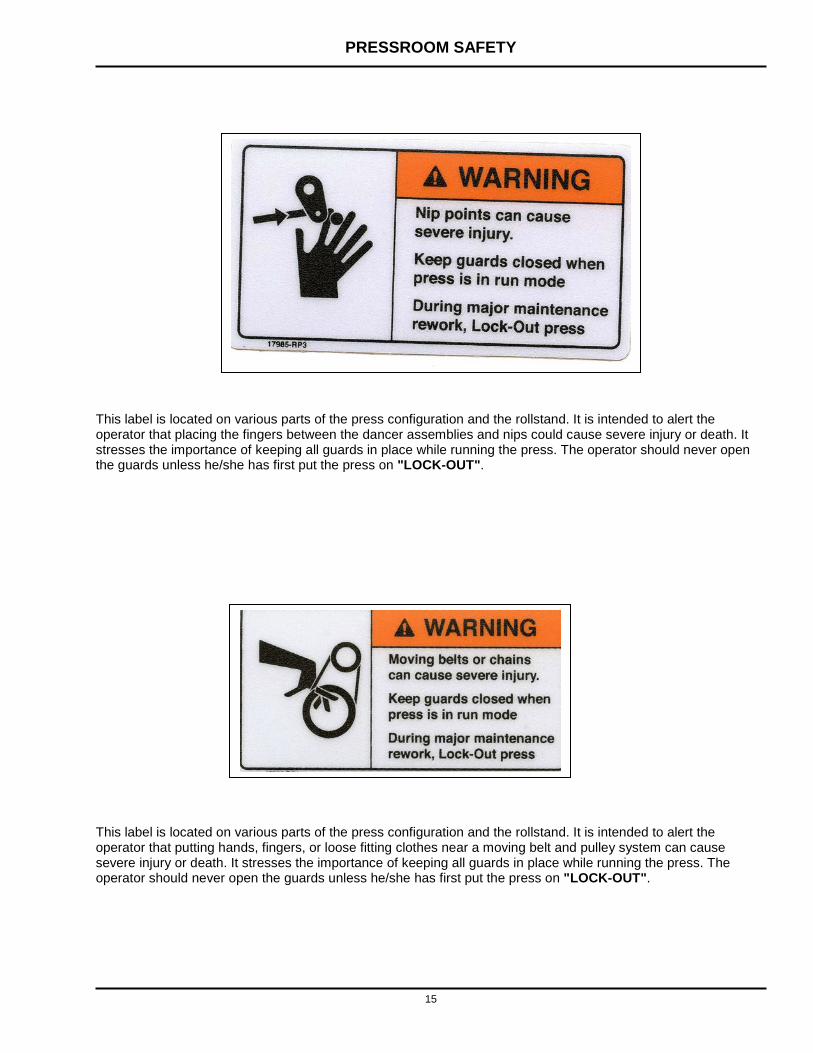
This label is located on the rollstand and on the lifting bar and is intended to alert the operator that careless handling of the hoist and paper rolls can cause severe injury or death. All personnel should stand clear of the roll and hoist while loading. It also alerts the operator to replace damaged or worn cables, ropes, chains, and fittings. This label is located on the printing units and folder and is intended to alert the operator to keep his/her hands off the press rollers while they are in motion. Failure to do so could cause severe injury, or death. The operator should never open the guards unless he/she has first put the press on "LOCK-OUT".
PRESSROOM SAFETY
15
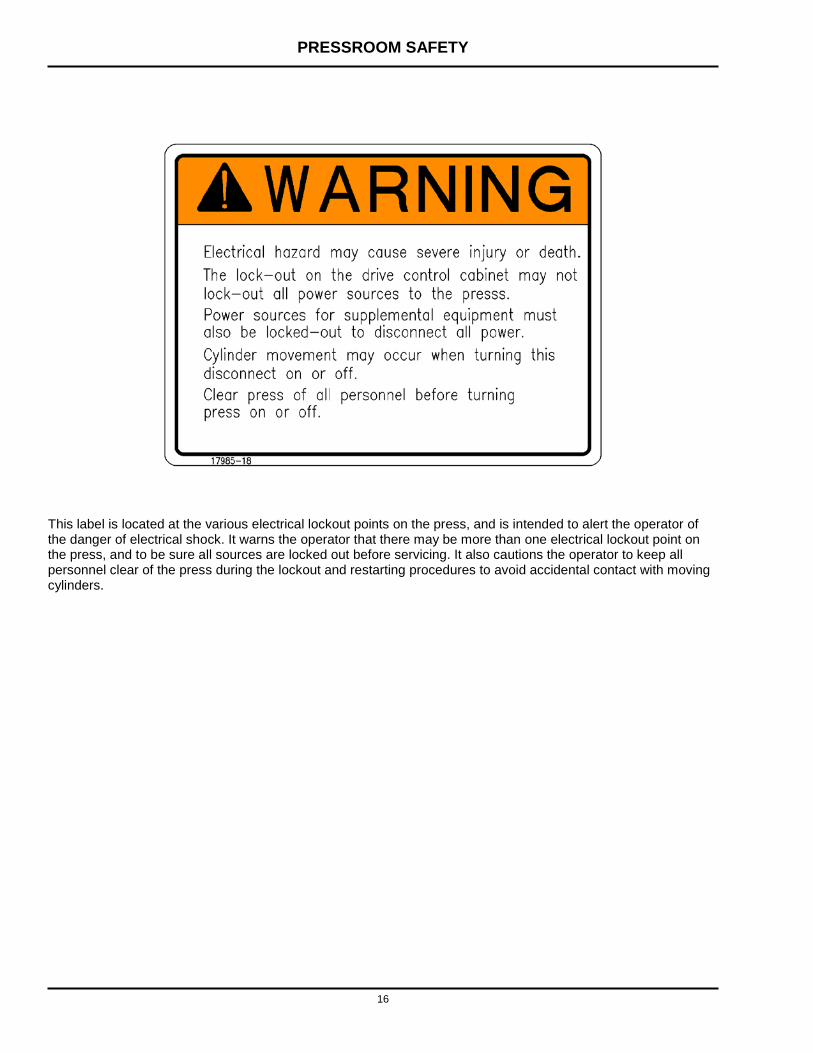
This label is located on various parts of the press configuration and the rollstand. It is intended to alert the operator that placing the fingers between the dancer assemblies and nips could cause severe injury or death. It stresses the importance of keeping all guards in place while running the press. The operator should never open the guards unless he/she has first put the press on "LOCK-OUT". This label is located on various parts of the press configuration and the rollstand. It is intended to alert the operator that putting hands, fingers, or loose fitting clothes near a moving belt and pulley system can cause severe injury or death. It stresses the importance of keeping all guards in place while running the press. The operator should never open the guards unless he/she has first put the press on "LOCK-OUT".
PRESSROOM SAFETY
16
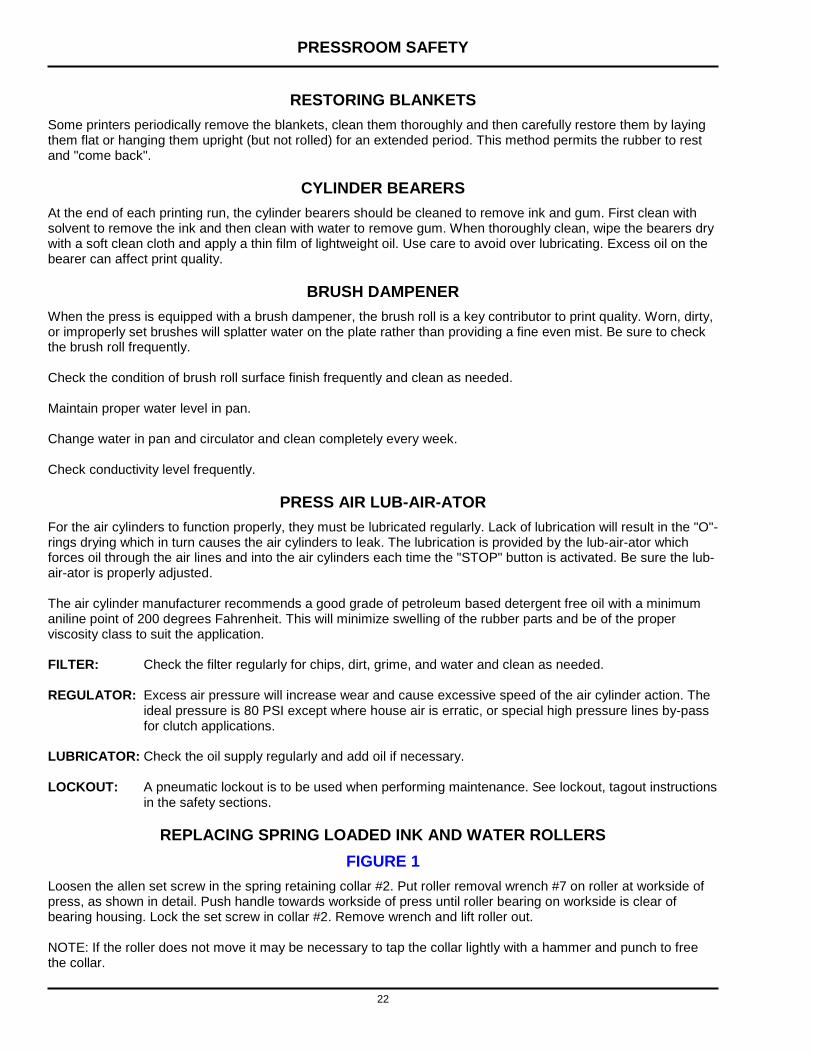
This label is located at the various electrical lockout points on the press, and is intended to alert the operator of the danger of electrical shock. It warns the operator that there may be more than one electrical lockout point on the press, and to be sure all sources are locked out before servicing. It also cautions the operator to keep all personnel clear of the press during the lockout and restarting procedures to avoid accidental contact with moving cylinders.

PRESSROOM SAFETY
17
This label is located on printing units, folders, and rollstands equipped with electrical devices, as well as press drive. It alerts the operator of the danger of electric shock that could cause severe injury or death if the devices or wiring is entered for service or repair. It also warns the operator to call a qualified electrician to perform any electrical repairs on the unit to avoid personal injury.

PRESSROOM SAFETY
18
This label is located at various locations on the press. It is intended to alert the operator to keep hands, body parts, loose clothing, and jewelry away from moving rotors. Failure to do so could cause severe injury or death. The operator should never open the guards unless he/she has first put the press on "LOCK-OUT".

PRESSROOM SAFETY
19
PRESSMANSHIP Many King Press owners report that quality printing is relatively easy to attain by following a few simple rules. In general, a clean press results in quality printing. The following recommendations are offered to help all King Press users achieve the best possible printing. 1. Keep the blankets clean. Blankets should be washed about every 50,000 impressions, or as needed. 2. Keep the ink rollers clean. Wash the ink rollers at the end of each day. 3. Clean the water system weekly. Empty the strainers and flush the system with hot water and bleach mix (1
gallon of bleach to 20 gallons of water), and finally, flush the system with clean water. 4. Clean the cylinder bearers daily. Remove ink, dried solvents, paper dust, and other contaminants to restore
the shiny metallic finish. Apply a small amount of oil to help repel debris and make cleaning easier. 5. Establish a rubber roller conditioning program to control glaze and to maintain proper shore A durometer
hardness. Consult with your roller supplier for their recommended deglazer-rejuvinator wash. 6. Establish a rotating schedule to check roller settings, so that all rollers are checked over a 3 week period. This
method catches the occasional weak set roll before print quality is affected. 7. Check the PH and conductivity level of the fountain solution frequently, and maintain a proper consistent
level. 8. Check the height of the blanket over the bearers every week, and repack if necessary to maintain about .003
over bearers (the actual height depends on the blanket brand and stock being printed). Low blankets cause piling and linting.
9. The units nearest the folder accumulate the most paper dust. These particular ink fountains should be
protected as much as possible from dust. The ink should be replaced more frequently to eliminate an accumulation of paper particles.
A continuing effort to attain clean rollers, clean and consistent fountain solution, clean blankets and clean ink, along with properly set rolls, will ensure high quality printing.

PRESSROOM SAFETY
20
RECOMMENDED OPERATING AND MAINTENANCE SUPPLIES This section provides a list of the tools and supplies recommended by King Press for operating your equipment.
RECOMMENDED SUPPLIES • Four Gallons of Pre-mixed Fountain Solution • Twenty Five Gallons of Blanket and Rolled Wash • Four Gallons of Dried Ink Remover • Blanket Restorer (Blanket Fix) • One Set of Blankets • Plate Cleaner • Twenty Five Packing Sheets (0.002 inch}) Mylar • Twenty Five Packing Sheets (0.003 inch}) Mylar • Twenty Five Packing Sheets (0.004 inch}) Mylar • Twenty Five Packing Sheets (0.005 inch}) Mylar • Twenty Five Packing Sheets (0.0075 inch}) Mylar • Twenty Five Packing Sheets (0.010 inch}) Mylar • One Roll of Industrial Absorbent Cotton • Six Cellulose Sponges • Ten Yards of Cheesecloth • 200 new Soft Rags, without any metal chips or hard places • One Gummed Tape Dispenser and Tape, 1 inch • Five Rolls of 1/2 inch Two Sided Splicing Tape • Plastic or Galvanized Pail • Oil Can with Flexible Spout • Steel Wool
SUGGESTED TOOLS • Crowbar (12 inch) • Wire Brush (6 inch) • Ink Knives, Scraper, and Spatula • Micrometer 1 inch • Feeler Gauge, 0.002 to 0.020 inch • Adjustable Pliers • Vise-Grip Pliers • Screwdrivers, 3 sizes • Flat Files, 3 sizes • Round File • Plastic Hammer • Flexible Ruler, 12 inch • Machinist Scale, 6 inch • Crescent Wrench, 14 inch • Industrial Single Edge Razor Blades • Allen Wrenches (0.05 to 9/16 inch in 32nd inch increments) • Open End Wrenches (1/4 to 1 inch in 16th inch increments) • Socket Wrenches (1/2 inch drive, 7/16 to 1 inch in 16th inch increments)

PRESSROOM SAFETY
21
PRINTING UNIT MAINTENANCE
C A U T I O N BEFORE MAKING ANY ADJUSTMENTS, LOCKOUT PRESS. KEEP FINGERS CLEAR OF THE PRESS WHEN JOGGING.
In addition to the maintenance suggestions below be sure to consult with the printing unit section of the manual for recommendations unique to your model.
BLANKET CARE It is recommended that only quality compressible blankets be used on King Presses. This will ensure sharp printing and will be more tolerant to smashes and batters. Blankets throughout the press must be the same type and quality, and packed exactly to the proper height. A routine should be established to frequently wash the blankets. Some printers periodically remove the blankets for restoration, but most simply replace old blankets with new. The frequency for restoring blankets should be based on the number of running hours on the blankets regardless of care. Before installing a blanket, wipe the cylinder clean with solvent to remove ink. If gum and dried fountain solution are present, use water. Be sure to dry the cylinder thoroughly and coat with a light film of oil to protect the cylinder before replacing the blanket.
C A U T I O N DO NOT ATTEMPT TO WIPE PLATES, BLANKETS, OR ROLLERS, WHILE THE PRESS IS RUNNING.
For presses equipped with reel rod lock-ups, an accumulation of gum, fountain solution, and ink in the lock-up slot can cause the blanket reel to seize in the cylinder. To prevent this, inspect the reel's operation and lubricate thoroughly before installing the blanket.
BLANKET CLEANING In preparation for cleaning, consult with the blanket manufacturer for their recommended cleaning wash. A clean blanket ensures that the blanket surface has a good affinity for inks so it can reproduce a perfect image from the plate. Before starting a new job, be sure all dried inks, varnishes, and glazing have been thoroughly removed. Glazing may require a special cleaning treatment. A good wash for blankets is a petroleum type solvent that has a boiling range between 190 degrees and 265 degrees Fahrenheit. Coal tar solvents are not recommended because they tend to deteriorate the blanket surface due to the high solvency of the solution. Conversely, the wash should not be too slow in drying as this causes the blanket to absorb the wash. This results in swelling, increased printing pressure, softening of the rubber, tacky surface, and embossing. In addition, a wash that dries too quickly does not sufficiently dissolve the ink for removal. Solvents that cause oxidation of the rubber should be avoided as glazing results and does not allow the blanket surface to accept the ink properly (turpentine is particularly a problem). Glazing, caused by either oxidation or dried ink varnishes can sometimes be washed away with blanket wax or pumice. Excessive wash should never be allowed on blanket edges as this loosens the rubber from the fabric backing and ruins the blanket. Blanket performance is also affected by packing. Be sure to check packing frequently and change as needed.
PRESSROOM SAFETY
22
RESTORING BLANKETS Some printers periodically remove the blankets, clean them thoroughly and then carefully restore them by laying them flat or hanging them upright (but not rolled) for an extended period. This method permits the rubber to rest and "come back".
CYLINDER BEARERS At the end of each printing run, the cylinder bearers should be cleaned to remove ink and gum. First clean with solvent to remove the ink and then clean with water to remove gum. When thoroughly clean, wipe the bearers dry with a soft clean cloth and apply a thin film of lightweight oil. Use care to avoid over lubricating. Excess oil on the bearer can affect print quality.
BRUSH DAMPENER When the press is equipped with a brush dampener, the brush roll is a key contributor to print quality. Worn, dirty, or improperly set brushes will splatter water on the plate rather than providing a fine even mist. Be sure to check the brush roll frequently. Check the condition of brush roll surface finish frequently and clean as needed. Maintain proper water level in pan. Change water in pan and circulator and clean completely every week. Check conductivity level frequently.
PRESS AIR LUB-AIR-ATOR For the air cylinders to function properly, they must be lubricated regularly. Lack of lubrication will result in the "O"-rings drying which in turn causes the air cylinders to leak. The lubrication is provided by the lub-air-ator which forces oil through the air lines and into the air cylinders each time the "STOP" button is activated. Be sure the lub-air-ator is properly adjusted. The air cylinder manufacturer recommends a good grade of petroleum based detergent free oil with a minimum aniline point of 200 degrees Fahrenheit. This will minimize swelling of the rubber parts and be of the proper viscosity class to suit the application. FILTER: Check the filter regularly for chips, dirt, grime, and water and clean as needed. REGULATOR: Excess air pressure will increase wear and cause excessive speed of the air cylinder action. The
ideal pressure is 80 PSI except where house air is erratic, or special high pressure lines by-pass for clutch applications.
LUBRICATOR: Check the oil supply regularly and add oil if necessary. LOCKOUT: A pneumatic lockout is to be used when performing maintenance. See lockout, tagout instructions
in the safety sections.
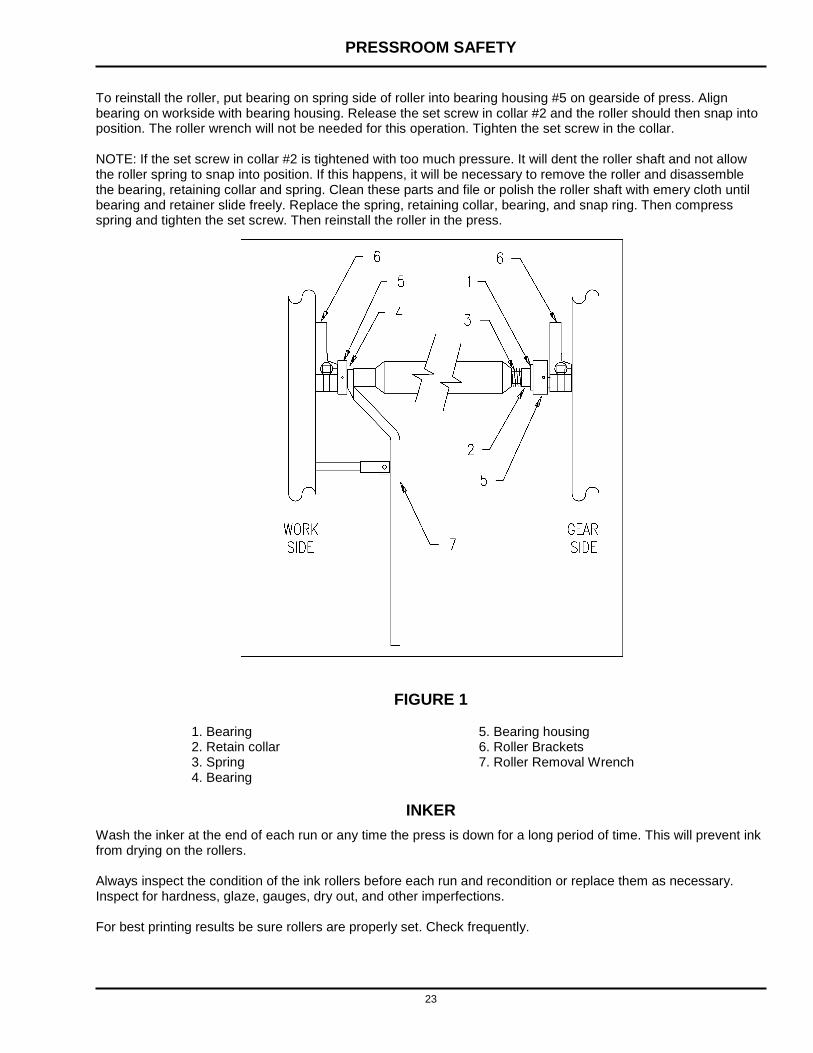
REPLACING SPRING LOADED INK AND WATER ROLLERS FIGURE 1
Loosen the allen set screw in the spring retaining collar #2. Put roller removal wrench #7 on roller at workside of press, as shown in detail. Push handle towards workside of press until roller bearing on workside is clear of bearing housing. Lock the set screw in collar #2. Remove wrench and lift roller out. NOTE: If the roller does not move it may be necessary to tap the collar lightly with a hammer and punch to free the collar.
PRESSROOM SAFETY
23
To reinstall the roller, put bearing on spring side of roller into bearing housing #5 on gearside of press. Align bearing on workside with bearing housing. Release the set screw in collar #2 and the roller should then snap into position. The roller wrench will not be needed for this operation. Tighten the set screw in the collar. NOTE: If the set screw in collar #2 is tightened with too much pressure. It will dent the roller shaft and not allow the roller spring to snap into position. If this happens, it will be necessary to remove the roller and disassemble the bearing, retaining collar and spring. Clean these parts and file or polish the roller shaft with emery cloth until bearing and retainer slide freely. Replace the spring, retaining collar, bearing, and snap ring. Then compress spring and tighten the set screw. Then reinstall the roller in the press.
FIGURE 1 1. Bearing 5. Bearing housing 2. Retain collar 6. Roller Brackets 3. Spring 7. Roller Removal Wrench 4. Bearing
INKER Wash the inker at the end of each run or any time the press is down for a long period of time. This will prevent ink from drying on the rollers. Always inspect the condition of the ink rollers before each run and recondition or replace them as necessary. Inspect for hardness, glaze, gauges, dry out, and other imperfections. For best printing results be sure rollers are properly set. Check frequently.

PRESSROOM SAFETY
24
CARE OF RUBBER ROLLS The rubber rollers in the inker and dampener are comprised of an elastomer (rubber) covered steel roll mounted in precision bearings. The elastomer portion of the roll is commonly called "RUBBER COVERING" and the steel portion is called the "CORE". The area where the bearing is mounted is called the "BEARING SURFACE". Since rubber rollers are involved with the lithographic process they directly affect print quality. Accordingly, a continued effort should be made to preserve the roller performance. The following guide lines will help with this goal. Use extreme care to avoid damaging the bearing surface. A damaged bearing surface will cause the roll to wobble and vibrate. When a roller is not in use the shaft ends should support it. This can be done using either a horizontal or vertical rack. The rubber covering should not set on anything during storage. Never set a roller directly on the rubber covering for an extended period of time or a "flat spot" will begin to set. A brief period of setting directly on the rubber is allowable. Stored rollers should be kept wrapped in waxed paper, plastic coated paper, or other paper similar to that supplied by the roll manufacturer. Always store the roll in a dark cool place away from heat and sunlight. Sunlight will cause oxidation, which hardens, shrinks, and cracks the rubber covering. Never store rollers near electric motors or other high voltage electrical equipment. Motors emit ozone that attacks the rubber covering. Never clean a roller with an improper solvent. Use only accepted commercial roller washes or solvents approved by the roller manufacturer.

PRESSROOM SAFETY
25
CARE OF ALUMINUM CYLINDERS Presses equipped with Aluminum cylinder bodies can be affected by corrosion when certain environmental conditions exist around the aluminum. When this occurs, the possible corrosion could eventually damage the aluminum cylinder surface enough to affect printing. This is not normally a problem when good housekeeping measures are applied to avoid a hostile environment. To prevent corrosion, it is essential that the blankets be removed from the cylinders monthly so that the cylinder surface can be cleaned and treated with a metal sealer. After removing the blankets, the cylinders should be washed thoroughly with solvents to remove dried ink, gum, and dried fountain solutions, and then washed with water to remove solvent film. After cleaning, thoroughly dry the cylinders and apply a thin coat of metal sealer. The plate cylinders should be similarly maintained monthly when there is an opportunity during a plate change. One brand of metal sealer that is effective in preserving aluminum cylinders is "Coricone 1700". This product is commercially available and is specially formulated to prevent corrosion, mildew, and electrolysis. Coricone meets MIL Spec. MIL-C-82594 for the protection of aluminum and is available from King Press or from various distributors of Coricone products. If a metal sealer is not on hand, apply a thin even coat of lightweight oil on the total body surface of the cylinder. Then apply a band of petroleum jelly at the ends of the cylinder, and at the leading and trailing edges of the gap. The petroleum jelly provides a barrier against moisture migrating under the blankets and plates. When cleaning a cylinder, pay particular attention to the leading and trailing edges of the lock-up slot where the cylinder is more vulnerable to the penetration of moisture and build-up of chemicals. Also, during cleaning, remove accumulations of gum, ink, and fountain solution from the lock-up slot. This enables free movement of the reel rod and prevents seizing in the lock-up cavity. After cleaning, lubricate the lock-up mechanism for the full length of the reel rod and oscillate the mechanism several times to distribute the oil around the reel rod. When certain metals (such as copper, brass, bronze, nickel, various copper alloys, and some other less common metals) come in contact with aluminum under moist conditions, electrolysis can occur. This electro-chemical action accelerates galvanic corrosion (particularly when combined with a high sodium, high acid, or high alkaline environment). To reduce the possibility of electrolysis the press frame should be grounded to earth to discharge stray currents (grounding to earth is included with King Press wiring via the ground wire in the power supply). To avoid electrolysis, do not use iron, steel, copper or brass tubing or fittings in the dampener water supply system and circulators. Always use plastic plumbing for this purpose. Sometimes, a press operator, when hastening clean-up, or catching a printing problem, may apply undesirable chemicals, or overly concentrated solutions directly from a "squirt bottle". Over time, this practice could lead to corrosion and thus the content of the squirt bottles should be carefully chosen. All press operators should be instructed on the correct dampening solutions, washes, solvents, and the proper method of application. It is sometimes possible to introduce harmful dissolved metals and chemicals into the fountain solution from local water supplies. The content of local water can vary greatly from one geographic location to another, and from weather fluctuation, season changes, and municipal treatment processes. Accordingly, it is advisable to periodically test the tap water for ph level and chemicals that affect the fountain solution, and for corrosion inducing chemicals such as strong salt concentration, excessive iron, and other hostile metals. If tap water with strong concentrations of dissolved materials is used without further treatment by the printer, it is particularly important to clean and treat the aluminum cylinders as described above. The care and maintenance of plates and blankets directly affect the printing cylinders. Be certain to read and understand these sections in the Press Manual. They will provide much useful information.

PRESSROOM SAFETY
26
PRESS WASH SOLVENTS TO AVOID The following is a general list of solvents to avoid when cleaning rubber printing rolls. Any use of these solvents should be carefully checked and approved by the manufacturer of the roll covering and blankets, before proceeding. NOTE: That the solvent names used are as shown on Material Data Safety Sheets (MSDS). TYPE REASONS CHLORINATED Methylene Chloride Evaporates rapidly and is non-flammable, but destroys all conventional graphic art rollers. Ozone depleter. Suspected carcinogen. Problems with biodegradability. 1,1,1 - Trichloroethane Non-flammable, Medium evaporation. Destroys all conventional graphic arts rollers. Problems with biodegradability and disposal. Ozone depleter. Suspected carcinogen. NOTE: Actually any chlorinated solvents are damaging to most roller covers. GLYCOLS ** EB (Butyl Cellosolve) Medium evaporation. Helps hold water. Tough on rollers unless well duluted. Suspected carcinogen. KEYTONES MEK (Methylethyl Ketone) Flammable, fast evaporation. Damages most conventional graphic arts rollers. Defats the skin. AROMATICS * Benzene Flammable. Fast evaporation. Known carcinogen. Destroys most conventional graphic arts rollers. * Toluene Flammable. Fast evaporation. Suspected carcinogen. Damages most graphic arts rollers. * Xylene Flammable. Medium evaporation. Suspected carcinogen. Damages most conventional graphic arts roller covers unless well diluted. MISCELLANEOUS Ethylacetate Flammable. Damages most conventional graphic arts roller covers. ** Pyrrolidone Damages most conventional graphic arts roller covers. Acids/Bases Many urethane rollers undergo reversion decomposition at PH values below 3.0 and above 9.0. * Never use any petroleum based solvents with EPDM covers. ** Found in some fountain solutions, especially those used as alcohol substitutes.

PRESSROOM SAFETY
27
ROLLSTAND MAINTENANCE In addition to the maintenance suggestions below be sure to consult with the rollstand section of the manual for recommendations unique to your rollstand model. Check condition of bronze bushings, brake drums/rotor, and brake linings/pads at each roll change. Wipe the drum/rotor and lining/pad surfaces clean.
C A U T I O N BEFORE MAKING ANY ADJUSTMENTS, LOCKOUT PRESS. KEEP FINGERS CLEAR OF THE PRESS WHEN JOGGING.
FOLDER MAINTENANCE In addition to the maintenance suggestions below be sure to consult with the folder section of the manual for recommendations unique to your folder model. Check all consumable parts such as folding pins, cutting knives, cutting rubbers, tucker blades, etc. before each start up and replace if necessary. Check all cheekwoods for free movements. Keep the folder clean. Paper scraps and accumulations of paper dust can cause malfunctions as well as excessive wear. Ink build up on former board, nip rolls, guides, etc. will mark the paper and affect the tension control of the webs. Carefully follow the lubrication instructions in the folder section and on the charts.
C A U T I O N BEFORE MAKING ANY ADJUSTMENTS, LOCKOUT PRESS. KEEP FINGERS CLEAR OF THE PRESS WHEN JOGGING.

PRESSROOM SAFETY
28
MAINTENANCE SCHEDULES The following schedules are based on the press being used daily to print 150,000 impressions. If the press is to be used more or less, the schedules should be adjusted accordingly.
ROLLSTAND - MAINTENANCE SCHEDULE
LUBRICATION SCHEDULE IN THE OPERATION, ADJUSTMENT, AND MAINTENANCE
LUBRICATE BRONZE CORE SHAFT BUSHINGS
DAILY
CHECK BRAKE LINERS FOR WEAR AND ADJUST OR REPLACE IF NECESSARY
EVERY OTHER DAY
LUBRICATE ALL OTHER MOVING PARTS ON ROLLSTAND
WEEKLY
PRINTING UNIT - MAINTENANCE SCHEDULE
LUBRICATION SCHEDULE IN THE OPERATION, ADJUSTMENT, AND MAINTENANCE
CHECK WATER DUCTOR ROLL AND WATER FORM ROLL COVER, REPLACE IF NECESSARY
DAILY
CHECK WATER LEVEL IN DAMPENER PAN AND CIRCULATOR
DAILY
CLEAN BEARERS DAILY CHECK OIL LEVEL IN THE LUB-AIR-ATOR
DAILY
CHECK WATER CONDUCTIVITY
DAILY
LUBRICATE ALL GREASE FITTINGS ON UNITS INCLUDING THE COUPLINGS BETWEEN UNITS
EVERY OTHER DAY
LUBRICATE ALL GEARS ON UNITS INCLUDING BRONZE GEARS ON WORKSIDE. ALL OIL CUPS AND OIL HOLES. ALL CHAINS ON UNITS
EVERY OTHER DAY
LUBRICATE ALL MOVING PARTS ON WORKSIDE SUCH AS CLUTCH RODS, LINK BRACKET, ENDS OF ALL
EVERY OTHER DAY

PRESSROOM SAFETY
29
VIBRATOR ROLLS, ETC. LUBRICATE GEARS ON POWER TRANSFER WORK SIDE BEHIND CONTROL PANEL
EVERY OTHER DAY
CLEAN UNITS COMPLETELY WEEKLY INSPECT RUBBER ROLLERS FOR WEAR
WEEKLY
CHECK INK, WATER DUCTOR ROLL SETTING AND INK WATER FORM ROLL SETTINGS WITH PULL STRIPS
WEEKLY
CLEAN FILTER AND CHANGE WATER IN WATER CIRCULATOR
WEEKLY
CHECK OIL LEVEL IN GEAR BOX
EVERY TWO WEEKS
CHECK AND CLEAN IF NECESSARY THE LUB-AIR-ATOR
EVERY TWO WEEKS
CHECK BELTS, CHAINS, GEARS, AND OTHER MOVING PARTS AND REPLACE AS NEEDED
EVERY TWO WEEKS
LUBRICATE LINESHAFT CLUTCHES
MONTHLY
CHANGE BLANKETS, LET BLANKETS REMOVED REST BEFORE REINSTALLING
MONTHLY
CHECK YOUR INVENTORY OF SPARE PARTS, MAKE SURE YOU HAVE NECESSARY SPARES ON HAND, IE: SHEAR PINS, BELTS, AIR VALVES, AIR FITTINGS, ETC.
MONTHLY
GREASE DOUBLE ECCENTRIC QUARTERLY LUBRICATE AIR CYLINDER PIVOT POINTS
QUARTERLY
CHANGE OIL AND CLEAN SUMP AND STRAINER IN OIL BATH UNITS
QUARTERLY

PRESSROOM SAFETY
30
FOLDER - MAINTENANCE SCHEDULE
LUBRICATION SCHEDULE IN THE OPERATION, ADJUSTMENT, AND MAINTENANCE
CLEAN FOLDER COMPLETELY DAILY LUBRICATE ALL GREASE FITTINGS INCLUDING BEARINGS ON LINE SHAFT AND POWER INPUT
EVERY OTHER DAY
LUBRICATE ALL GEARS INCLUDING OVERHEAD AND 1/4 FOLD GEARS
EVERY OTHER DAY
LUBRICATE 1/4 FOLD CHOPPER BEARINGS EVERY OTHER DAY LUBRICATE ALL BRONZE BUSHING EVERY OTHER DAY CHECK LEVEL OF OIL IN SUMP EVERY OTHER DAY CHECK OIL SUPPLY TO 1/4 FOLD CHOPPER GEAR BOX
EVERY OTHER DAY
CHECK ALL BELTS INCLUDING MOTOR BELT FOR WEAR
EVERY OTHER DAY
CHECK ALL MOVING PARTS FOR WEAR EVERY OTHER DAY LUBRICATE ALL CHAINS ON FOLDER AND EXTENSION DELIVERY TABLE
WEEKLY
GREASE ALL CAMS AND CAM FOLLOWERS WEEKLY CHECK OIL LEVEL IN ALL GEAR BOXES INCLUDING1/4 FOLD NIP GEAR BOX
WEEKLY
CHECK CUTTING KNIVES AND CUTTING BLOCKS FOR WEAR, REPLACE IF NECESSARY
WEEKLY
CHECK MOVABLE AND STATIONARY JAWS FOR WEAR, REPLACE IF NECESSARY
MONTHLY
CHECK MOVABLE AND STATIONARY NIP ROLLS FOR WEAR, REPLACE IF NECESSARY
MONTHLY
CHECK SPARE PARTS INVENTORY, MAKE SURE YOU HAVE THE NECESSARY PARTS ON HAND, IE: TUCKER BLADES, BELTS, PULL PINS, CUTTING BLOCKS, AND CUTTING KNIVES
MONTHLY
CHANGE OIL IN SUMP AND CLEAN STRAINER
QUARTERLY

PRESSROOM SAFETY
31
PRESS TROUBLESHOOTING SYMPTOMS: PROBABLE CAUSE: REMEDY: PILING ON INK ROLLERS (A) INK TOO STIFF OR TACKY (A) ADD REDUCING COMPOUND (B) INK HAS BECOME
EMULSIFIED WITH WATER (B) CLEAN UP AND READJUST
WATER AND INK SETTING (C) IMPROPER SETTINGS (C) CHECK SETTING TO
VIBRATOR POOR DISTRIBUTION OF INK ON ROLLERS
(A) INK TOO STIFF OR TACKY (A) ADD REDUCING COMPOUND
(B) INK ROLLER OUT OF
ROUND (B) REPLACE BAD ROLLERS
(C) INK ROLLER GLAZED (C) DEGLAZE ROLLER WITH
GLAZE REMOVER (D) UNEVEN DISTRIBUTION OF
INK FOUNTAIN (D) READJUST FOUNTAIN KEYS,
CLEAN INK ROLLER OF EXCESSIVE INK
(E) NOT PARALLEL (E) RESET ROLLERS STREAKS OR BANDS AROUND CYLINDER
(A) LOOSE BLANKET OR IMPROPER INK ROLLER PRESSURE OR ROLLERS OUT OF ROUND OR SLIPPING
(A) TIGHTEN BLANKET OR RESET PRESSURES
(B) DIRT OR GRIT EMBEDDED
IN ROLLERS (B) REPLACE OR CLEAN INK
FORM ROLLERS MOURNING BANDS ON MOLETON EDGES (DUCTOR DAMPENERS ONLY)
(A) IMPROPER WATER AND INK BALANCE
(A) ADJUST FOR INCREASE OF WATER TO WET ENDS OF MOLETON
(B) DIRTY MOLETON (B) REPLACE WITH NEW
MOLETON (C) FORM ROLLER OUT OF
ROUND (C) REPLACE WITH NEW
ROLLER STREAKS OR BANDS AROUND CYLINDER (DUCTOR DAMPENED ONLY)
(A) MOLETONS ARE DIRTY OR IMPROPERLY SET
(A) USE A NEW MOLETON AND RESET PRESSURE OF ROLLER
FILLING IN OF SCREEN AND RESERVES
(A) TOO MUCH INK BEING RUN (A) CUT BACK ON INK AT INK FOUNTAIN
SYMPTOMS: PROBABLE CAUSE: REMEDY:

PRESSROOM SAFETY
32
(B) INK TOO SOFT (B) ADD BODY GUM (C) TOO MUCH DRIER (C) USE INK FORMULATED FOR
STOCK (D) PRESS PRESSURES
INCORRECT (D) CHECK AND READJUST ALL
PRESS PRESSURES (E) PAPER COATING NOT OF
GOOD QUALITY (E) CHANGE TO ANOTHER
TYPE OF PAPER (F) UNDER PACKED BLANKETS (F) REPACK OR REPLACE MOTTLING OR UNEVEN APPEARANCE OF INK (POOR LIFTING)
(A) INK IS TOO HEAVY OR TOO THIN
(A) READJUST INK ACCORDINGLY TO REDUCE OR ADD BODY GUM TO BUILD UP
(B) INK TO SOFT (B) ADD BODY GUM (C) TOO MUCH DRIER (C) USE INK FORMULATED FOR
STOCK (D) PRESS PRESSURES
INCORRECT (D) CHECK AND READJUST ALL
PRESS PRESSURES (E) PAPER COATING NOT OF
GOOD QUALITY (E) CHANGE TO ANOTHER
TYPE OF PAPER (F) UNDER PACKED BLANKETS (F) REPACK OR REPLACE LOSS OF WEB TENSION AND CONTROL
(A) IMPROPER BLANKET PACKING
(A) REPACK AND CHECK BLANKET HEIGHT
(B) LOOSE BLANKETS (B) TIGHTEN BLANKETS (C) GLAZED, DIRTY, TACKY
BLANKETS (C) CLEAN AND RECONDITION
(D) TACKY INK (D) CONSULT INK SUPPLIER (E) IMPROPER ROLLSTAND
TENSION (E) ADJUST PER
INSTRUCTIONS (F) IMPROPER FOLDER NIP
ROLL SETTING (F) SET NIP ROLLS TIGHT
ENOUGH TO MARK WEB (G) IMPROPER RTF TROLLEY
PRESSURE (G) ADJUST PRESSURE
SYMPTOMS: PROBABLE CAUSE: REMEDY:

PRESSROOM SAFETY
33
INK ROLLERS STRIPPING, ROLLERS DO NOT ACCEPT INK
(A) ROLLERS GLAZED WITH REMOVER
(A) DEGLAZE ROLLERS
(B) COPPER ROLLERS NOT
EFFECTIVE (B) CLEAN AND TREAT
(C) EMULSIFICATION (C) APPLY WATER STOPS (D) TOO MUCH WATER BEING
RUN (D) CUT BACK WATER AT
FOUNTAIN (E) ROLLERS HAVE BECOME
DESENSITIZED (E) PUMICE AND ETCH INK
ROLLERS AS RECOMMENDED BY ROLLER MANUFACTURE
(F) FOUNTAIN SOLUTION TOO
ACIDIC (F) USE A PH TESTER TO TEST
FOUNTAIN SOLUTION: IF IT DOES NOT READ BETWEEN 4.5 AND 5.5, ADJUST FOUNTAIN SOLUTION
BLEED THROUGH, PAPER SHOWS IMAGE ON BACK OF PRINTED SHEET
(A) POOR GRADE OF PAPER WHICH IS TOO ABSORBENT
(A) REPLACE PAPER WITH ONE OF BETTER QUALITY
(B) INK HAS BEEN THINNED
WITH SOLVENT THAT IS ABSORBED TOO RAPIDLY INTO THE PAPER
(B) IF SOLVENT HAD BEEN ADDED BY THE PRINTER IN THE SHOP, IT IS BEST TO START WITH FRESH INK AND USE A LAY COMPOUND
SLUR OR DOUBLE IMAGE (A) BLANKET IS LOOSE (A) TIGHTEN BLANKET (B) WEB TENSION (B) ADJUST WEB

PRESSROOM SAFETY
34
PRINTING TROUBLESHOOTING SYMPTOMS: PROBABLE CAUSE: REMEDY: IMAGE WEAR, PREMATURE IMAGE BREAKDOWN
(A) UNDER-EXPOSURE (NEG. PLATES)
(A) CHECK EXPOSURE USING A SENSITIVITY GUIDE & PRODUCT LEAFLET
(B) PLATE EXPOSED TO
WHITE LIGHT BEFORE OR DURING DEVELOPMENT
(B) FOLLOW MANUFACTURES INSTRUCTIONS AND DEVELOP UNDER YELLOW LIGHTS
(C) ALKALINE FOUNTAIN
SOLUTION WITH UNBAKED POSITIVE PLATES
(C) CHECK PH: SHOULD BE NO HIGHER THAN 9.5. CHECK CONDUCTIVITY 1300 M/Mhos.
(D) FOUNTAIN SOLUTION TOO
ACIDIC (D) CHECK PH: SHOULD BE NO
LOWER THAN 4.5. CHECK CONDUCTIVITY 1300 M/Mhos.
(E) EXCESSIVE
PLATE/BLANKET PRESSURE OR ROLLER SETTINGS ON PLATE
(E) CHECK PRESS SETTING OR SET TO A MINIMUM
(F) ABRASIVE PAPER DUST
ON BLANKET (F) WASH BLANKET MORE
FREQUENTLY. CHANGE PAPER IF POSSIBLE
(G) INSUFFICIENT INK ON
IMAGE (G) RUN NORMAL INK WEIGHT
TO LUBRICATE AND PROTECT THE IMAGE FROM WEAR
(H) ALKALINE PLATE
CLEANER OR INCOMPATIBLE SOLVENT COMBINED IN PLATE CLEANER, BLANKET WASH, ETC.
(H) USE ONLY PRESS CHEMICALS WHICH ARE COMPATIBLE WITH PLATES
IMAGE BLINDING, IMAGE NOT TAKING INK OR "WALKS OFF"
(A) THICK GUM ON IMAGE (A) REMOVE THE GUM WITH WARM/HOT WATER, THEN USE FRESH GUM. ENSURE THAT THE GUM IS BUFFED DOWN TO A THIN FILM AFTER APPLICATION
SYMPTOMS: PROBABLE CAUSE: REMEDY:

PRESSROOM SAFETY
35
(B) SOLVENTS OR
DETERGENTS IN FOUNTAIN SOLUTION, DAMPENERS, SPONGE OR WATER BUCKET
(B) RINSE DAMPENERS PROPERLY AFTER CLEANING. AVOID WASH-UP SOLVENTS IN THE WATER SYSTEM. KEEP THE SPONGE AND WASH BUCKET CLEAN
(C) EXCESSIVE USE OF
PLATE CLEANERS (C) USE PLATE CLEANERS
WHEN ABSOLUTELY NECESSARY ACCORDING TO MANUFACTURERS INSTRUCTIONS
(D) EXCESSIVE FOUNTAIN
CONCENTRATE, OR ACID IN FOUNTAIN
(D) MAKE UP A FRESH FOUNTAIN IF NECESSARY. REDUCE CONCENTRATION BY 25%
(E) EXCESSIVE ALCOHOL
BEING USED (E) REDUCE THE ALCOHOL
CONTENT IF POSSIBLE TO 15%-18%
(F) WRONG FINISHER/GUM
USED (F) CONSULT MANUFACTURERS
PRODUCT LEAFLET (G) INK NOT FEEDING IMAGE
(POSSIBLE EMULSIFICATION ON START-UP) LACK OF WATER RESISTANCE
(G) CONSULT INK MANUFACTURER
(H) PLATE TO BLANKET
PRESSURE TO GREAT. (POSSIBLE SWOLLEN OR EMBOSSED BLANKET)
(H) CORRECT THE PRESSURE SETTING, OR IF BLANKET IS EMBOSSED REPLACE IT
STRIPPING, INKING ROLLER TAKING ON WATER INSTEAD OF INK
(A) INKING ROLLERS GLAZED OR CONTAMINATED WITH SOLVENTS, ETC.
(A) CARRY OUT A COMPLETE WASH-UP AND/OR USE A DE-GLAZING PRODUCT OR RUBBER REJUVENATOR
SCUMMING, NON-IMAGE AREAS BECOMING SENSITIVE
(A) DIRTY OR WORN DAMPENER COVERS
(A) CLEAN OR RE-COVER DAMPENERS
(B) PLATE INCORRECTLY DE-
SENSITIZED WHEN MADE (B) APPLY PLATE CONDITIONER,
BUFF DRY, RE-GUM AND DRY
SYMPTOMS: PROBABLE CAUSE: REMEDY:
PRESSROOM SAFETY
36
(C) INSUFFICIENT DEVELOPMENT
(C) DELETE A SMALL AREA IN THE BACK-GROUND THEN RUN THE PLATE. IF THIS STAYS CLEAN IT WOULD INDICATE INSUFFICIENT DEVELOPMENT OR BENCH CONTAMINATION. RE-MAKE THE PLATE TO MANUFACTURES' INSTRUCTIONS
(D) "DRY-UP" (SOMETIMES
INCORRECTLY CALLED OXIDATION). SMALL SPOTS OF INK ALL OVER THE PLATE ON START-UP, PLATE IS DRYING OUT AND PICKING UP INK FROM THE DAMPENERS
(D) CHECK FOR AIR FLOW ACROSS THE PRESS. CHECK PH IS NO LOWER THAN 4.5 CONDUCTIVITY: 1300 M/MHOS
(E) INK TOO SOFT OR
GREASY (E) STIFFEN THE INK WITH BODY
GUM. CONSULT INK SUPPLIER
(F) ABRASIVE PARTICLES IN
THE INK (F) HAVE THE INK RE-GROUND
OR REPLACE WITH A BETTER INK
(G) ABRASIVE PARTICLES IN
THE PAPER (G) REDUCE PLATE-TO-BLANKET
AND BACK-CYLINDER PRESSURE TO A MINIMUM
(H) HALF-TONES RUN WITH
TOO MUCH INK (H) RUN THE INK AS STIFF AND
SPARES AS POSSIBLE (I) SLURRING OF HALF-TONES (I) REDUCE INK FEED AND
REDUCE PLATE-TO-BLANKET AND BACK-CYLINDER PRESSURE TO A MINIMUM
PLATE TENDS TO SCUM AFTER ABOUT 10,000 TO 20,000 IMPRESSIONS
(A) INSUFFICIENT GUM IN THE FOUNTAIN SOLUTION
(A) MAKE SURE THE FOUNTAIN SOLUTION IS BETWEEN 1-2%. CHECKING THE PH IS NOT ENOUGH. CONDUCTIVITY RANGE: 1000-1300 M/MHOS
SCUM STREAKS APPEARING AROUND THE CYLINDER
(A) GREASY FOUNTAIN ROLLER OR GREASY DISTRIBUTING ROLLER
(A) WASH OR REPLACE THEM
SYMPTOMS: PROBABLE CAUSE: REMEDY: (B) SCUM STREAKS
APPEARING AROUND THE (B) WASH WITH ALCOHOL TO
REMOVE GREASE, THEN

PRESSROOM SAFETY
37
CYLINDER DESENSITIZE WITH GUM (C) UNEVEN DAMPENER
SETTING AGAINST PLATE, OR OSCILLATING ROLLER
(C) RESET DAMPENERS, CHECKING FOR EVEN PRESSURE FROM END TO END, AND THAT THE ECCENTRICS ARE IN THE SAME DIRECTION
SCUM STREAKS APPEARING ACROSS THE CYLINDER
(A) BOUNCING DAMPENER ROLLERS, SET TOO HARD TO THE PLATE
(A) RESET DAMPENER ROLLERS
CRACKING OR SPLITTING (A) PLATE LOOSE ON
CYLINDER. PLATE OUT OF SQUARE
(A) CLEAN LOCK-UP MECHANISM, CHECK THAT THE PLATE IS FITTED PROPERLY AND CHECK THAT THE PLATE IS BENT CORRECTLY
(B) PLATE INCORRECTLY
FITTED (B) UNEVEN TENSION ACROSS
THE PLATE DUE TO TWIST (C) PLATE PACKING HAS
'CREPT' ON THE CYLINDER. PLATE UNDER-PACKING SLIPPED DURING FITTING
(C) USE MACHINE OIL OR LIGHT GREASE TO HOLD PACKING
SLURRING; IMAGE DISTORTION OR DOT SMEARING, PARTICULARLY IN THE SHADOW AREAS; HORIZONTAL "BANDS" IN THE PRINT
(A) INCORRECT PLATE AND BLANKET PACKING RELATIONSHIP
(A) CHECK AND CORRECT PACKING WHERE NECESSARY
(B) TOO MUCH BACK-
CYLINDER PRESSURE WHEN PRINTING ON COATED PAPER
(B) RUN WITH MINIMUM PRESSURE. RUN STRONG INKS AS SPARINGLY AS POSSIBLE
(C) RUNNING TOO MUCH INK
ON COATED STOCK (C) REDUCE INK FEED
(D) INK ROLLERS SET TOO
HARD OR TIGHT INK ROLLER BEARINGS
(D) RELEASE ROLLER SETTINGS, SPIN FORM ROLLERS TO CHECK FOR FREENESS, THEN RESET CORRECTLY
SYMPTOMS: PROBABLE CAUSE: REMEDY: (E) BLANKET TENSION
INSUFFICIENT (E) TIGHTEN BLANKET
CORRECTLY
PRESSROOM SAFETY
38
(F) PILING OF PAPER COATING ON THE PRINTING AREAS OF THE BLANKET
(F) TRY A NO-PILE ADDITIVE
(G) LOOSE AND/OR SLIPPING
BLANKET (G) CHECK BLANKET AND
PACKINGS ARE CORRECT TINTING; A LIGHT TINT APPEARING ALL OVER THE PLATE AND SHEET CAN BE WASHED OFF THE PLATE WITH A DAMP SPONGE
(A) FOUNTAIN SOLUTION AND INK NOT COMPATIBLE
(A) CHANGE INK OR FOUNTAIN SOLUTION
(B) FOUNTAIN SOLUTION
EXTRACTING AN INK-EMULSIFYING AGENT FROM THE PAPER COATING
(B) STIFFEN INK WITH BODY GUM. AVOID FOUNTAIN SOLUTION CONTAINING 'WETTING' AGENTS. TRY ANOTHER PAPER
(C) EMULSIFICATION OF THE
INK (C) STIFFEN INK WITH BODY
GUM. RUN LESS WATER. CHECK FOUNTAIN SOLUTION CONTENT. CHANGE INK
(D) SOLVENTS OR
DETERGENTS HELD IN THE INK ROLLER AFTER WASH-UP
(D) CHANGE 'WASH-UP' SOLUTION TO A WATER MISCIBLE ONE AND USE A LITTLE WATER AFTER USING THE WASH-UP SOLUTION
(E) SOLVENTS OR
DETERGENTS HELD IN THE DAMPENERS AFTER WASHING
(E) ENSURE DAMPENERS ARE THOROUGHLY RINSED WITH WATER AFTER CLEANING
(F) DAMPENERS BADLY SET (F) RESET, PAYING PARTICULAR
ATTENTION TO THE PLATE DAMPENER TO RECIPROCATOR CONTACT
(G) GLAZED AND/OR
WRONGLY SET INKING ROLLERS
(G) DEGLAZE OR CHANGE ROLLERS AND RESET
(H) PLATE BEING FOGGED
PRIOR TO DEVELOPMENT (NEG)
(H) TRY A 'MILD' ETCH, OTHERWISE MAKE A NEW PLATE
SYMPTOMS: PROBABLE CAUSE: REMEDY: DOT GAIN; IMAGE ON PLATE GREATER THAN ON FILM
(A) OVER-EXPOSURE OF NEGATIVE PLATE
(A) CHECK EXPOSURE USING SENSITIVITY GUIDE AND PRODUCT LEAFLET

PRESSROOM SAFETY
39
(B) POOR FILM/PLATE CONTACT ON NEGATIVE PLATE
(B) CHECK STRIPPING TECHNIQUE, AND THAT EMULSION ON THE FILM IS FACE DOWN
(C) UNDER DEVELOPMENT (C) CHECK MANUFACTURERS’
INSTRUCTION (D) SOFT DOT NEGATIVES-
ALLOWING LIGHT TO PENETRATE THE EDGES OF THE DOT
(D) USE CONTACT NEGATIVES
(E) VEILED POSITIVES (E) CHECK CLEAR FILM FOR
OPACITY, ALSO DOT SHAPE DOT LOSS; IMAGE ON PLATE IS LESS OR SHARPER THAN ON FILM
(A) OVER-EXPOSURE ON POSITIVE PLATES. UNDER-EXPOSURE ON NEGATIVE PLATES
(A) CHECK EXPOSURE USING SENSITIVITY GUIDE AND PRODUCT LEAFLET
(B) POOR FILM TO PLATE
CONTACT ON POSITIVE PLATES
(B) CHECK AND/OR IMPROVE STRIPPING METHOD
(C) TOO MUCH WHITE LIGHT
IN PLATE ROOM (POSITIVE PLATES)
(C) ONLY WORK WITH YELLOW SAFE LIGHTS
(D) OVER-DEVELOPMENT (D) SOLID STEP 5-6, NEG PLATE.
CLEAR STEP 2, POS PLATE PRESS WEAR (A) ABRASIVE PAPER DUST (A) CLEAN BLANKET MORE
FREQUENTLY IF POSSIBLE (B) BADLY MILLED INK (B) INFORM INK SUPPLIERS (C) PLATE/BLANKET
OVERPACKED (C) CHECK PACKINGS
(D) BADLY SET INKING
ROLLERS (D) RESET INKERS TO PRESS
SPECIFICATIONS
PRESSROOM SAFETY
40
PRESS PROBLEMS CAUSED BY ROLLER DEFECTS SYMPTOMS: PROBABLE CAUSE: REMEDY: HICKIES (A) PICKED OR ABRADED
ROLLER SURFACE (A) REPLACE ROLLER
SCUMMING (A) TOO MUCH PRESSURE ON
INK FORM ROLLERS NECESSITATED BY IRREGULAR SURFACES
(A) REPLACE ROLLER
(B) DIRTY BAREBACK WATER
FORMS (B) CLEAN ROLLER
STRIPPING (A) ROLLERS DESENSITIZED (A) CLEAN ROLLERS (B) ROLLERS OUT OF ROUND (B) REPLACE ROLLERS (C) ROLLERS GLAZED (C) DEGLAZE ROLLERS STREAKING (A) ROLLERS OUT OF ROUND,
SLIPPING, OR ROLLER BOUNCE
(A) REPLACE ROLLERS
UNEVEN SOLIDS (A) PICKED, WORN, OR LOW
SPOTS ON ROLLERS (A) REPLACE ROLLERS
(B) GLAZED ROLLERS (B) DEGLAZE ROLLERS PLATE WEAR (A) ROLLERS TOO HARD (A) REPLACE ROLLERS INK SLUR AND DOT SPREAD (A) ROLLERS TOO HARD (A) REPLACE ROLLERS WEAK INK TRANSFER (A) ROLLERS TOO HARD (A) REPLACE ROLLERS PLATE IMAGE LOSS (A) ROLLERS TOO HARD (A) REPLACE ROLLERS

PRESSROOM SAFETY
41
PRESS ADJUSTMENTS-TROUBLESHOOTING
GENERAL SYMPTOMS Improper press adjustments can contribute to many common printing problems. When problems occur, always check press settings. Also remember that some problems can be traced to insufficient maintenance. 1. Plates scumming 2. Plates wearing 3. Dirty dampeners 4. Poor ink-water balance 5. Hickies 6. Excessive start-up waste 7. Mushy-dirty half tones 8. Weak solids 9. Ink offsetting on the facing page 10. Baggy webs 11. Lint piling 12. Webs breaking 13. Poor color registration 14. Burning brakes 15. Wrinkles over the former Proper adjustments to the inker, dampener, plate-to-blanket settings, and blanket-to-blanket settings are particularly critical in avoiding problems. These should be checked routinely.
ROLLER SETTINGS If incorrectly set, results are: 1. Plates scumming 2. Plates wearing 3. Dirty dampeners 4. Poor ink-water balance 5. Hickies 6. Excessive start-up waste When setting the inker or dampener form rolls it is important to remember that the form roller, must be driven by the vibrator roller, and not the plate. Always be sure to set the forms heavier to the vibrator than to the plate, and in that order. When setting the dampener forms use only enough pressure to wet the plate. Flooding must be avoided. Remember excessive roller pressure to the plate will probably cause plate wear and scumming. Dampener form rollers must be set for good water transfer but not so tight that the water is squeezed out of the roller. Rider and transfer rollers in the ink system must be set only tight enough to transfer the ink to the adjoining roller. Any excess pressure will cause heat build-up in the ink train and will eventually damage the rollers and wear the mechanical and electrical drive systems. An overheated inker will also cause the ink to dry on the roll and cause bits of dried ink and abraded rubber from the rollers to adhere to the plates and cause hickies.

PRESSROOM SAFETY
42
PLATE-TO-BLANKET SETTINGS If incorrectly set, results will be: 1. Mushy-dirty half tones 2. Weak solids 3. Ink offsetting on facing page 4. Lint piling 5. Plates wearing The plate-to-blanket pressure settings are by far the most important adjustments on an offset press. On bearer presses, the bearers must always be in contact and be free of dirt and dried ink.
BLANKET PACKING The blanket-to-blanket squeeze is particularly important for proper printing. If incorrect, results will be: 1. Baggy webs 2. Webs breaking 3. Poor color registration 4. Burning brakes 5. Wrinkles over former 6. Poor print quality It is also important to use a firm, hard packing to get good printing. A soft packing will give a soft, mush joint, with mushy half tones lacking contrast. The amount of blanket-to-blanket pressure should be only enough to give a good solid print. (See the section on blanket packing for complete instructions). Note that blanket squeeze in excess of 0.006 inch will result in over feeding of the web out of the unit and cause bagging. Running in this manner will require excess braking at the rollstand to provide tension to eliminate the bagging. In turn, excess braking will burn out brake linings. In addition, too much squeeze will probably smash the blankets and render them useless. Further, too much blanket-to-blanket pressure will cause the webs to adhere more tightly to the blankets. When excess pressure occurs the air is squeezed out of the blankets and causes the web to stick to the blanket that is carrying the most ink. Also, the excess pressure, plus the moisture on the web, will loosen a lot of fiber from the surface of the paper to produce lint build-up on the plate and blanket. This decreases print quality and results in more frequent blanket washing.
WEB CONTROL AND TENSION Web control and tension problems are widely varied and it is not possible to address all combined influences. It is possible however to apply the process of elimination to resolve the problem. Since the web originates at the rollstand and travels through the perfecting unit to the folder, we can analyze the web tension problems in the same order. The following discussions of the various press components include specific recommendations regarding tension.
ROLLSTAND King Press Rollstands are designed in a manner that assures good performance with a minimum of attention when operating the press normally. This is important since excessive web tension at the rollstand can cause web breaks while insufficient tension can cause control problems all the way through the printing unit to the folder. The condition of the web rolls must also be considered. A damaged, lopsided or unevenly wound roll can be a constant source of problems. Often these rolls can be run at slower speeds but when a control problem persists it is usually wise to lay the bad rolls aside and replace them with good rolls. Check the roll to see if it is slipping on the core chuck due to a poor lock-up.

PRESSROOM SAFETY
43
A visual inspection is generally all that is required to determine if the rollstand is working properly. The web tension should be maintained firm and constant and the tension lines of the paper should be straight forward toward the perfecting unit.
DRUM BRAKE ROLLSTANDS When multiple web tensions must be adjusted the drum brake rollstands can be taken off nominal and balanced to lessen the tension of the tight web and increase the tension of the loose webs. The proper web tension in the rollstand is obtained by adjusting the spring tension of the dancer roller. With the springs set, the brake turnbuckle linkage should be adjusted with the press running until the brake provides enough drag for the web to hold the dancer roll in position. (This is either 6 o'clock or 9 o'clock depending on model). If, after making the adjustments the proper braking action is not obtained, the brake is not making correct contact with the drum. Check the following: 1. Shoes worn out 2. Linkage bottoming in elongated slot 3. Shoes not properly installed 4. Binding of brake buffer spring clevis 5. Glazed brake liners 6. Damaged brake drums 7. Oil on brake liners 8. Bronze bushing worn in side frame letting shaft drop too low to center brake shoes around hub. Shim under
bushing or replace.
ERRATIC BRAKING This discussion specifically applies to the drum brake rollstand models. When running with a reasonably good roll of paper, the dancer roller should exhibit a minimum amount of oscillation and the brake action should be smooth. Although oscillation is normal with a damaged or lopsided roll, the defect may cause the brake to become erratic. Erratic brakes are as follows: 1. The bronze bearing may be worn and cause the core shaft to drop below the center-line of the brake
assembly. To correct, replace or shim the worn bearing. 2. If the dancer action becomes erratic it may be necessary to shim the brake lining to obtain slightly more
contact pressure. 3. Brakes that have become glazed can be cleaned with a wire brush. Glazing can be prevented by brushing the
brake liners periodically. Note: Never put oil on the brake liners. 4. The brake drum must be concentric with the core shaft and the shaft must be straight. If the drum is not
concentric, the brakes will grab on the high spots and cause excessive dancer roller oscillation. If they are found to be eccentric, machine the drums just enough to remove the high spots. If necessary straighten the core shaft relative to the drums. It may sometimes be necessary to shim the brake lining to fit the drum. This shaft should only be used on that particular rollstand.
5. Examine the brake linkage to see that it is not bottoming or binding in the elongated slot on the brake shoe.
Occasionally a pressman will forget to release the brake shoes before trying to remove a roll of paper and damage will result.
6. Brake shoes not seated properly. 7. Idler in dancer roll slipped allowing idler to rub side frame.

PRESSROOM SAFETY
44
8. The bolt in the elongated slot is too tight not allowing free movement of dancer roll.
BLANKETS AND WEB CONTROL The blanket cylinders are key contributors to web tension and control and it is particularly, important that the blankets are properly packed according to the instructions in the printing unit section. Blankets throughout the press must be the same type and quality, and packed exactly to the proper height. The circumference of the blanket cylinders determines exactly how much paper is pulled from the roll and fed through the press. Blanket packing, which determines the effective cylinder diameter and thus the circumference becomes one of the most crucial operations of the pressman. An over packed blanket of 0.001 will send a little over 0.006 too much paper to the folder with each cylinder revolution. This overfeed accumulates to some degree and causes a loose baggy web. Even a very small error can affect the feed amount. Under packed blankets will require excessive ink to attain acceptable color and coverage of solids. In turn, excessive ink causes tack which does not allow proper release of the web. Blankets must be mounted tightly on the cylinder as loose blankets will increase cylinder circumference and the blanket nip will be excessive. When mounting blankets be certain they are tight all the way across the cylinder and not loose at the edges. Blankets should be pulled tight using the special blanket wrench provided (Never use a cheater pipe when mounting compressible blankets). The surface of the blanket must be kept clean and velvety to the touch. Rubber blankets are susceptible to accumulating gum from plates and fountain solution and should be washed after each run with blanket wash and water. Blankets will also retain dried inks and become glazed. Dirty blankets cause many problems but can be particularly troublesome with web control problems. Clean blankets will also release the web quickly, whereas the web will cling or stick to tacky blankets. Tacky blankets can also be caused by gum from the plates. Removing the gum from the plates with water and a sponge at start-up will eliminate one of the most probable causes of tacky blankets. It is also not a good printing practice to allow gum to accumulate on the blankets, so periodically wash the blankets with water and blanket wash is advised. If a tacky ink condition exists, the ink supplier should be summoned to work out a formula suitable to the conditions or the press. Fountain solution from the dampener is bound to find its way under the blankets where it becomes absorbed by the under packing and fabric back of the blanket. It is therefore very important that the blankets be removed every two or three weeks and repacked using fresh, dry packing material. Before replacing the blankets, the cylinder should be wiped clean, using solvent if necessary, to remove ink; however, water should be used to remove gum and dried fountain solution. Be sure to wipe the cylinder dry and coat it with a very light film of oil before replacing the blanket.
INK AND WATER BALANCE It is always important to use as little ink and water as possible to achieve quality printing. Any condition that results in using excessive amounts will cause web stretch. If this occurs every mechanical adjustment pertaining to impression and roller settings is unjustifiably suspected. A dirty water system, even the solution itself, will also cause trouble in this respect. Typically, a web that stretches with every press revolution or clings to the blanket because of excessive ink results in poor web control.

PRESSROOM SAFETY
45
FOLDER It is possible to overfeed or starve a folder by abnormal conditions in the rollstand or perfecting units. The following are a few examples: 1. Infeed system: Although at the other end of the press, the infeed system in conjunction with the dimensions of the folder
cylinders determines the exact cut-off. Therefore excess paper fed to the folder will not only cause poor performance, but will result in a loose or baggy web between the perfecting unit and folder.
2. Rolls Top of Former (R.T.F.): The driven rollers in the folder overhead gathering section draw the web from the printing units and propel the
web into the folder. The spring loaded trolleys on the R.T.F. should be adjusted firm enough against the webs to obtain full benefit of the driven rollers. Insufficient trolley wheel pressure allows the webs to wander and contributes to looseness. Therefore trolleys must furnish enough nip to pull the proper amount of paper into the folder. Conversely, do not use excessive trolley wheel pressure as this may constrain the web flow. Carefully monitor this setting until a proper balance is achieved.
3. Slitter wheel: When slitting the web, be certain the slitter wheel is sharp. A dull wheel can actually impede web travel and
create a problem. With a power slitter, be sure the blade is properly set for depth and clearance (see folder section for specifics).
4. Dirty former: Be sure the former is clean. A build-up of ink on the former will tend to impede the flow of the inner web. 5. Folder nipper rollers: As the webs flow over the former they are drawn into the folder by the nip rolls and it is absolutely essential
that these rolls have enough bite of the multiple webs to hold the inner sheets. Worn nip rolls cannot bite into the paper and the circumference is decreased impairing effectiveness. The nips should be adjusted so they have a firm grip of the webs. After the press is up to speed and running
well, the nip roller pressure can usually be relieved slightly.
GENERAL PRESS 1. Wrinkling and poor web steering is often caused by idler rolls that have become out of tram. If retramming is
necessary on a velcro covered roll be sure to gage to the steel roll surface and not to the velcro.