3 d effects in ps
5
photoshop illustrator flash dreamweaver indesign golive after effects quarkxpress freeway final cut pro about the mag subscribe renewal gallery reviews columns free issue contact info staff home Forums Photoshop Illustrator Flash Dreamweaver InDesign GoLive After Effect QuarkXPress Painter Final Cut Pro Join the Mac Design Tip of the Day mailing list Email: Go Using Photoshop CS's 3D Tool BY Matt Kloskowski Hi and welcome back. Hopefully you enjoyed my first tutorial here at Mac Design online. By popular demand (not really, just thought I'd add that in myself), I'm back for a second one. I had some really positive feedback on the 3D effects and Illustrator tutorial from last time that I'm going to show you how to incorporate Photoshop into the 3D mix. First off, Photoshop has long been a tool that 3D artists turn to to create texture maps for their 3D programs. Well, now since Illustrator has 3D we can do the same thing. Better yet, since Adobe has really integrated the product line it will be very easy for us to create texture maps in Photoshop and drag them right into Illustrator. So follow along as we create a simple bowling ball and demonstrate a powerful technique. STEP 1 Create a new Photoshop canvas. We're going to be moving over to the vector world with this file so make it 1600 x 1200 in size so we don't have any problems. Set your foreground color to R:22 G:111 B:194 and your background color to R:155 G:227 B255. STEP 2 Next, choose Filter > Render > Clouds. You should get something similar to this picture. If you've ever seen a bowling ball (And believe me... I've seen way too many of them rolling far along the left and right side of the bowling lane into gutter-land), they have a marble cloud like appearance to them. This texture that we've just created is a marbleized looking texture that will look great once mapped on a sphere. Ads by Goooooogle Wholesale Adobe Software Buy any 2 Adobe titles and get 1 of your choice Free. www.locatorsinternational
-
Upload
syncmaster92 -
Category
Presentations & Public Speaking
-
view
62 -
download
0
Transcript of 3 d effects in ps
photoshop illustrator flash dreamweaver indesign golive after effects quarkxpress freeway final cut pro
about the mag
subscribe
renewal
gallery
reviews
columns
free issue
contact info
staff
home
Forums Photoshop
Illustrator
Flash
Dreamweaver
InDesign
GoLive
After Effect
QuarkXPress
Painter
Final Cut Pro
Join the MacDesign Tip of
the Day mailinglist
Email:
Go
Using Photoshop CS's 3D ToolBY Matt Kloskowski
Hi and welcome back. Hopefully you enjoyed my first tutorial here at Mac Design online.By popular demand (not really, just thought I'd add that in myself), I'm back for asecond one. I had some really positive feedback on the 3D effects and Illustrator tutorialfrom last time that I'm going to show you how to incorporate Photoshop into the 3Dmix. First off, Photoshop has long been a tool that 3D artists turn to to create texturemaps for their 3D programs. Well, now since Illustrator has 3D we can do the samething. Better yet, since Adobe has really integrated the product line it will be very easyfor us to create texture maps in Photoshop and drag them right into Illustrator. So followalong as we create a simple bowling ball and demonstrate a powerful technique.
STEP 1
Create a new Photoshop canvas. We're going to be moving over to the vectorworld with this file so make it 1600 x 1200 in size so we don't have anyproblems. Set your foreground color to R:22 G:111 B:194 and your backgroundcolor to R:155 G:227 B255.
STEP 2
Next, choose Filter > Render > Clouds. You should get something similar to thispicture. If you've ever seen a bowling ball (And believe me... I've seen way toomany of them rolling far along the left and right side of the bowling lane intogutter-land), they have a marble cloud like appearance to them. This texturethat we've just created is a marbleized looking texture that will look great oncemapped on a sphere.
Ads by Goooooogle
Wholesale AdobeSoftwareBuy any 2 Adobetitles and get 1 ofyour choice Free.www.locatorsinternational.com
STEP 3
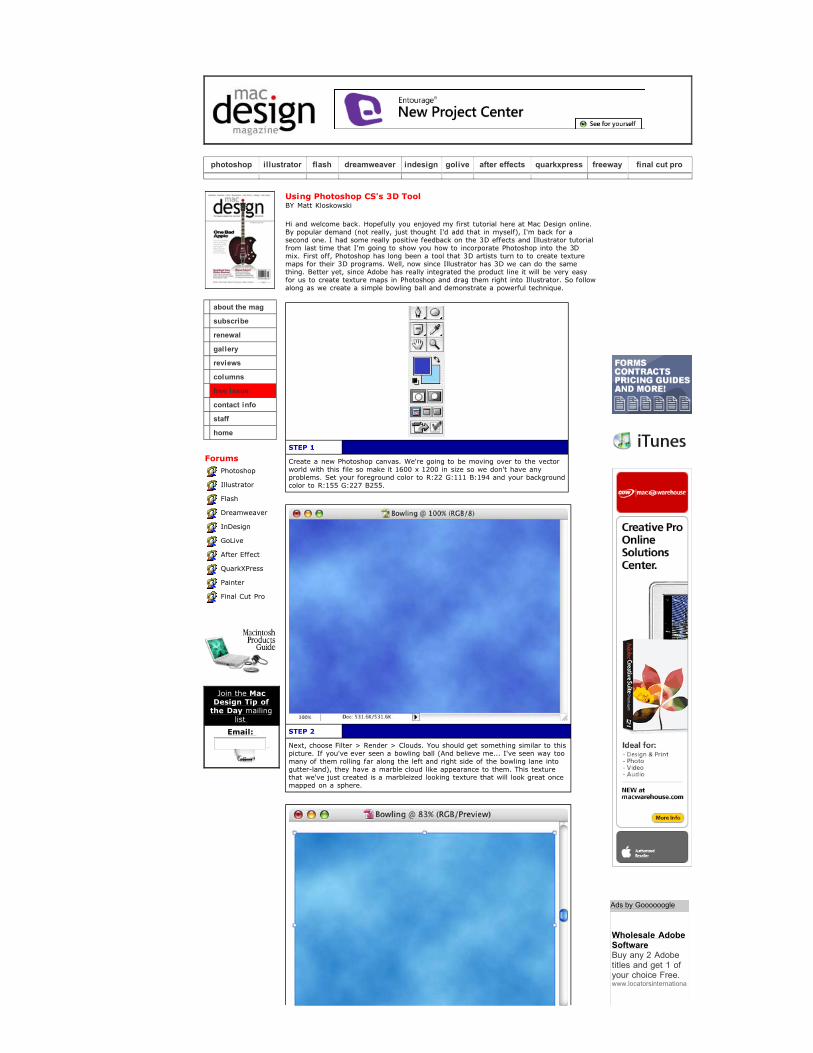
Now fire up Illustrator CS (Alert - processing hog.G3 users beware!) and createa new RGB document. Then try to position Photoshop and Illustrator so you cansee both on your screen. Next, go into Photoshop and use the Move Tool todrag the blue texture across into Illustrator. Now that's integration. Take thatMaya or Lightwave users!
STEP 4
Next, in Illustrator, choose Window > Symbols to display the Symbols palette.Remember that any artwork you wish to map to a 3D object in Illustrator needsto be a symbol first. So go ahead and drag the blue texture into the Symbolspalette.
STEP 5
Illustrator forStudentsAcademicSuperstore has lowpricing forstudents, teachersand schools.www.AcademicSuperstore.com
Adobe illustratorillustrator 11 -$99.95 illustrator10 - $79.95www.flashcorpsoftware.com
OEM Versions ofSoftwaresSave up to 80%on most popularsoftwares. Whypay more?OEM-Software.us
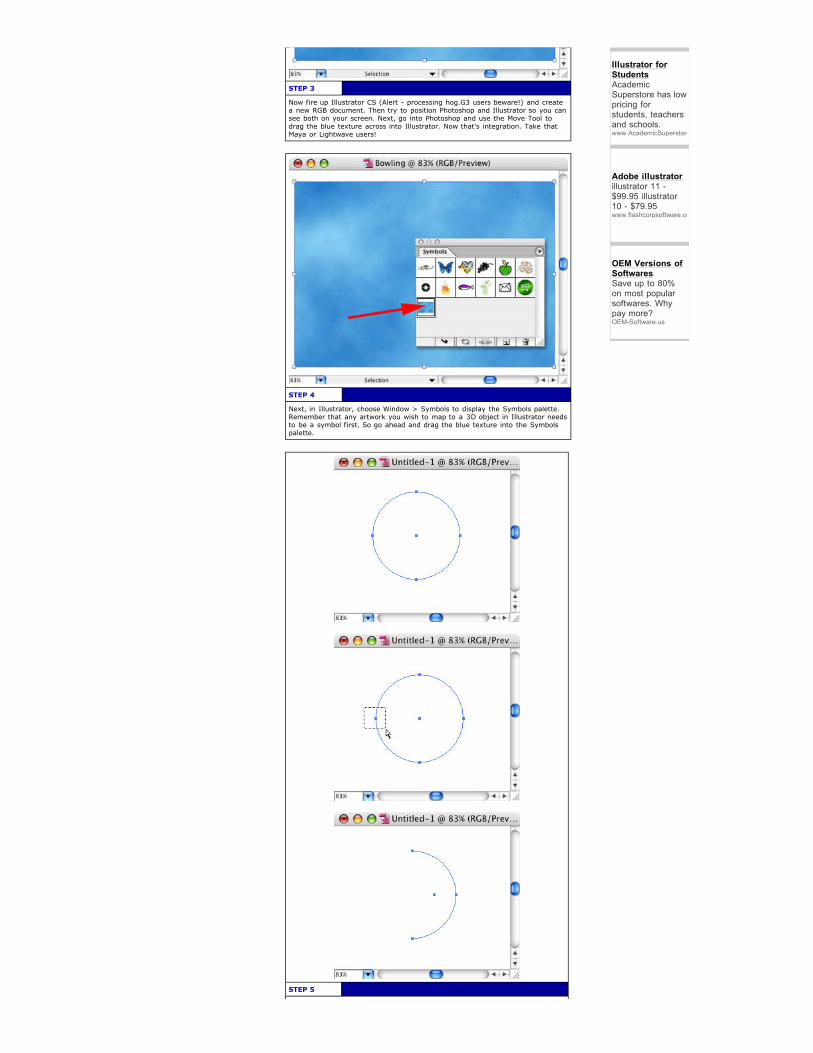
Next, hide or delete the blue texture. We won't be using it again in thisexercise. Now, using the Ellipse Tool, create a circle on the Artboard. Thendelete the leftmost anchor point from it so you are left with a shape similar tothe one here. This is very similar to the beach ball that we created last time.
STEP 6
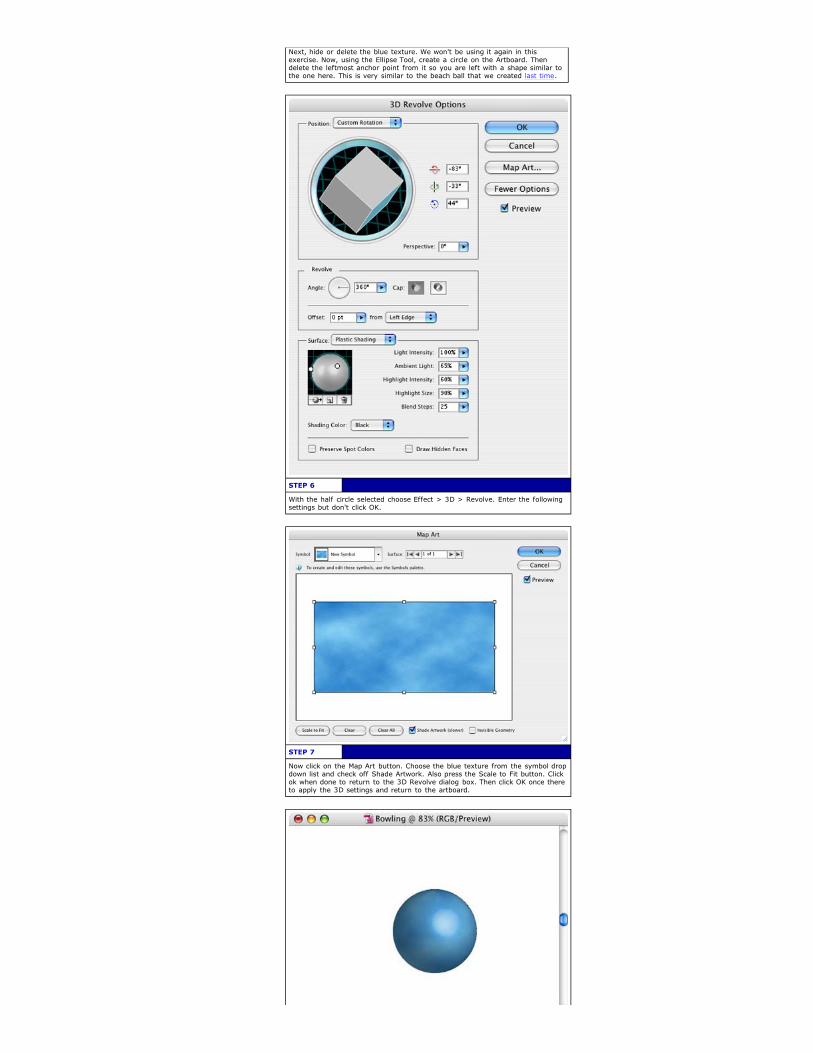
With the half circle selected choose Effect > 3D > Revolve. Enter the followingsettings but don't click OK.
STEP 7
Now click on the Map Art button. Choose the blue texture from the symbol dropdown list and check off Shade Artwork. Also press the Scale to Fit button. Clickok when done to return to the 3D Revolve dialog box. Then click OK once thereto apply the 3D settings and return to the artboard.
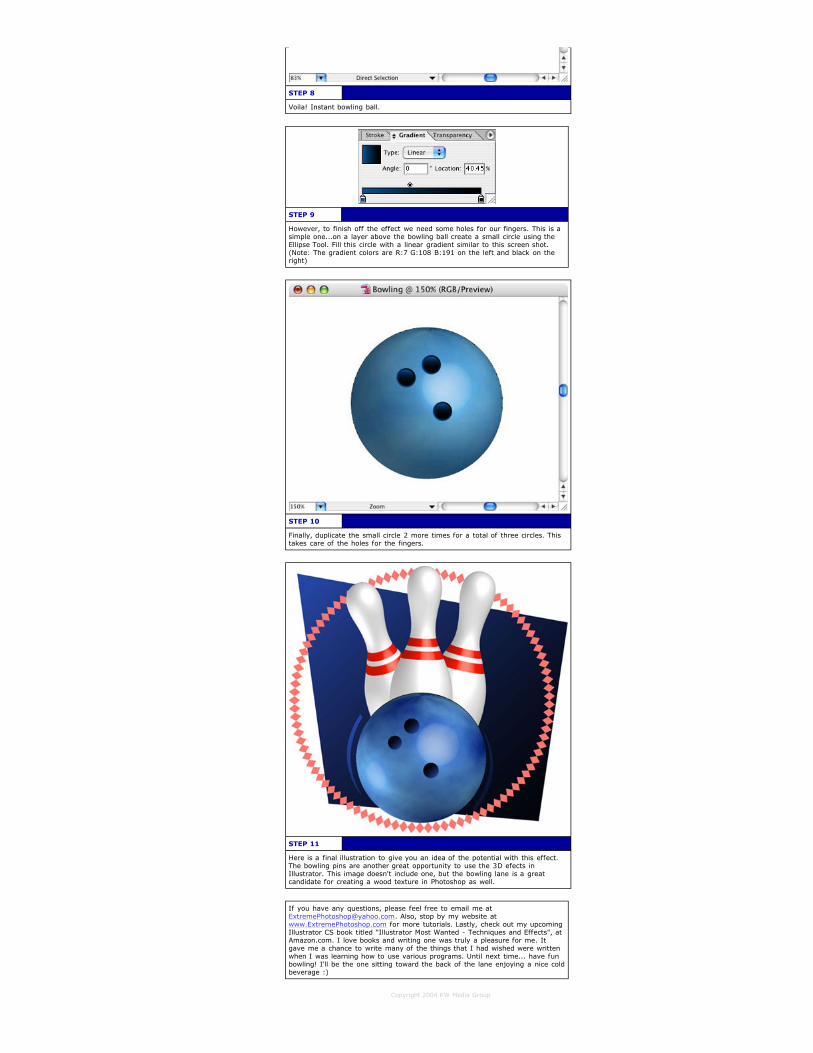
STEP 8
Voila! Instant bowling ball.
STEP 9
However, to finish off the effect we need some holes for our fingers. This is asimple one...on a layer above the bowling ball create a small circle using theEllipse Tool. Fill this circle with a linear gradient similar to this screen shot.(Note: The gradient colors are R:7 G:108 B:191 on the left and black on theright)
STEP 10
Finally, duplicate the small circle 2 more times for a total of three circles. Thistakes care of the holes for the fingers.
STEP 11
Here is a final illustration to give you an idea of the potential with this effect. The bowling pins are another great opportunity to use the 3D efects inIllustrator. This image doesn't include one, but the bowling lane is a greatcandidate for creating a wood texture in Photoshop as well.
If you have any questions, please feel free to email me [email protected]. Also, stop by my website atwww.ExtremePhotoshop.com for more tutorials. Lastly, check out my upcomingIllustrator CS book titled "Illustrator Most Wanted - Techniques and Effects", atAmazon.com. I love books and writing one was truly a pleasure for me. Itgave me a chance to write many of the things that I had wished were writtenwhen I was learning how to use various programs. Until next time... have funbowling! I'll be the one sitting toward the back of the lane enjoying a nice coldbeverage :)
Copyright 2004 KW Media Group

OUR PARTNERS • NAPP-PhotoshopUser • PlanetPhotoshop • Photoshop Videos • Scott Kelby Books • DVPA