2D Game Workflow
4
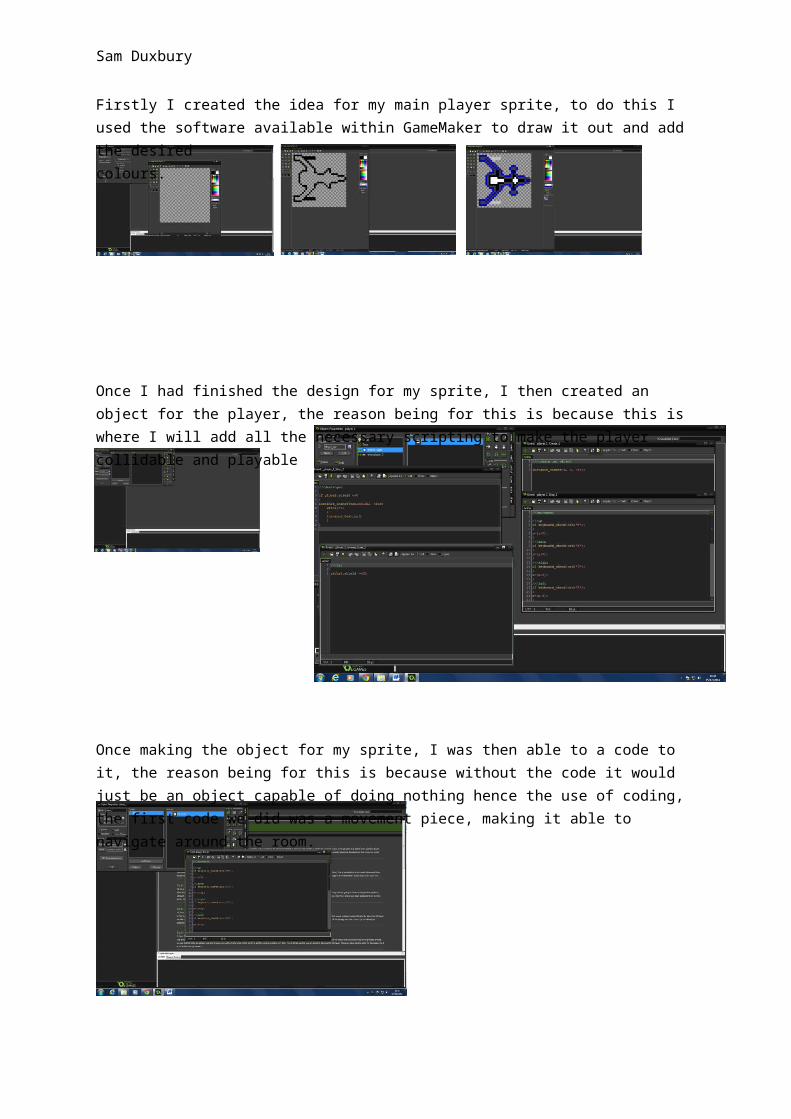
Sam Duxbury Firstly I created the idea for my main player sprite, to do this I used the software available within GameMaker to draw it out and add the desired colours. Once I had finished the design for my sprite, I then created an object for the player, the reason being for this is because this is where I will add all the necessary scripting to make the player collidable and playable Once making the object for my sprite, I was then able to a code to it, the reason being for this is because without the code it would just be an object capable of doing nothing hence the use of coding, the first code we did was a movement piece, making it able to navigate around the room.
-
Upload
samduxburygds -
Category
Education
-
view
50 -
download
0
Transcript of 2D Game Workflow
Sam Duxbury
Firstly I created the idea for my main player sprite, to do this I used the software available within GameMaker to draw it out and add the desired colours.
Once I had finished the design for my sprite, I then created an object for the player, the reason being for this is because this is where I will add all the necessary scripting to make the player collidable and playable
Once making the object for my sprite, I was then able to a code to it, the reason being for this is because without the code it would just be an object capable of doing nothing hence the use of coding, the first code we did was a movement piece, making it able to navigate around the room.
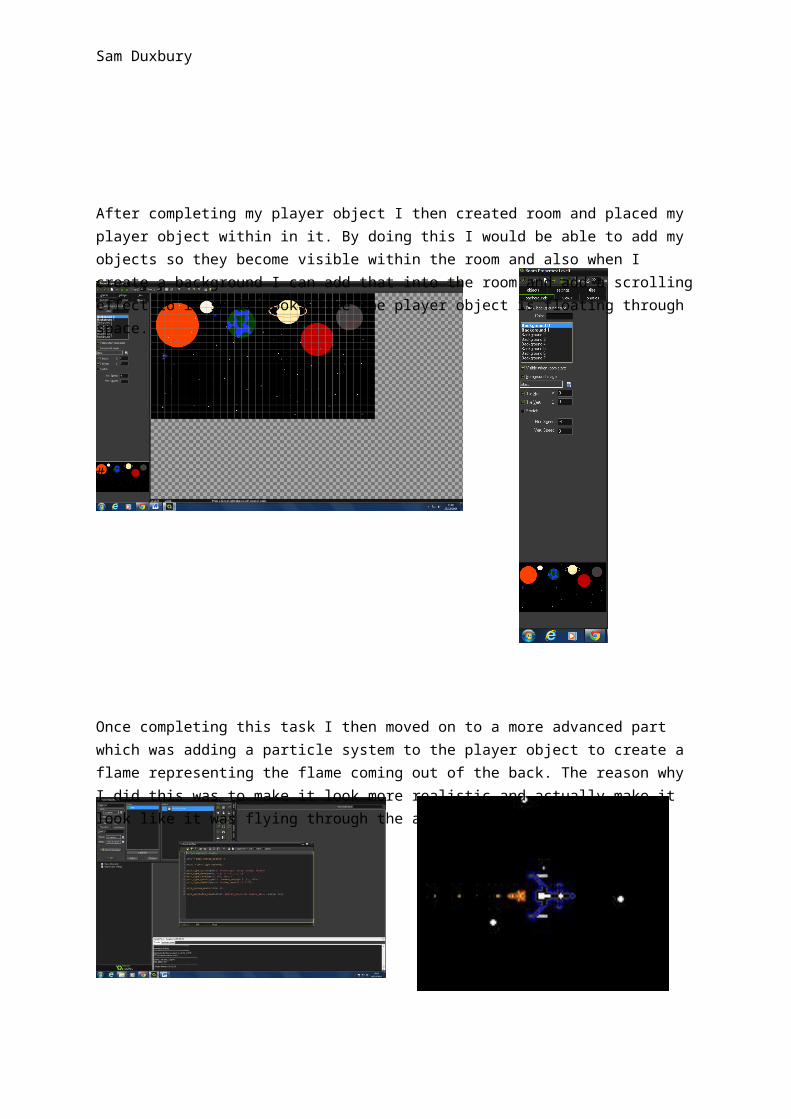
After completing my player object I then created room and placed my player object within in it. By doing this I would be able to add my objects so they become visible within the room and also when I create a background I can add that into the room and add a scrolling effect to it so it looks like the player object is floating through space.
Sam Duxbury
#
Once completing this task I then moved on to a more advanced part which was adding a particle system to the player object to create a flame representing the flame coming out of the back. The reason why I did this was to make it look more realistic and actually make it look like it was flying through the air.
Once the particle systems was up and running I was then able to start adding the projectile systems that would hit and destroy the images, this would first take me to create another sprite which would be the enemy.

Sam Duxbury
Now I have created the sprites for my enemies I was then able to create the projectile, this took a small piece of code to represent when the enemy was hit by it, it would then be destroyed and removed from the room along with the bullet.
Now I had created the shooting within the game I had to create a tally to keep track of my health and points within the current session, once again this would take an object and scripting within that object. This wasn’t the most challenging piece of code but did take some getting used to, to understand how the code worked.
Once I had completed all the in-game elements, I had to then make a main menu and game over screen for my game. To make this possible I would have to create another two rooms and place the necessary objects within them to make them work. Once placing the objects in, I had to create a code which made them interactive and did something every time they were clicked.

Sam Duxbury
Once completing all of necessary components of the main menu the last thing I had to do was add main menu sound which meant I had to import my chosen sound into GameMaker and then attach it to the rooms which I wanted it to play in.