


Languages
Pages
Legal


White Paper
Medical Display Calibration
CalMED Walkthrough
Rev. 1.1

CalMAN Setup Guide: CalMED Walkthrough
2
Introduction
There are two broad categories of patient images used in medical practices; radiology images and medical video images.
Radiology Images
Radiology images are scanner-sourced images that use some non-visible energy (e.g. x-ray, nuclear, ultrasound, magnetic) to form an interior view of
human body parts.
Medical Video Images
Medical video images are camera-sourced images that use visible light to form a surface view of human body parts or samples. Medical video may be motion video or still video images used in endoscopy, surgical, ophthalmology, dermatology, and microscopy applications.
Differences
Due to differing characteristics between scanner-sourced radiology images and camera-sourced medical video images, there are different performance requirements for displays used to render the two types of images. In the following sections, we first walk through a CalMED calibration for radiology
imaging displays. We then walk through calibration of medical video displays.
For more background on the types of medical monitors and the technical standards and practice guidelines that apply, see the paper Consistent Presentation Of Medical Images, available for download at: http://www.spectracal.com/Documents/White%20Papers/ConsistentPresentationofMedicalImages.pdf
Click a link below to jump to the desired section in this document:
Radiology Imaging Calibration
Medical Video Calibration

CalMAN Setup Guide: CalMED Walkthrough
3
Radiology Imaging Calibration
Jump to Medical Video Calibration
Radiology Imaging Workflow
The Radiology Imaging workflow that is provided with CalMED guides us through the process of calibrating a radiology imaging display by implementing industry standard radiology imaging guidelines from DICOM, AAPM, and ACR. An outline of the workflow (Figure 1) is viewable when you open the left hand CalMED panel.
Figure 1: An outline of the Radiology Imaging workflow appears when you open the
left hand CalMED panel. Sections 1 and 2 of the workflow, Initial Setup and
Workstation Analysis are used to test whether a display conforms to industry
standards. Sections 3 and 4, Display Optimization and Workstation Calibration, are
used to calibrate a display for conformance.
The workflow first guides us through measuring the ambient luminance, setting our minimum luminance target for the display, and then testing the display for conformance to the standard acceptance criteria. If the test shows the display to be in conformance, we can save, view, and/or print a conformance report for the display.
If the conformance test shows that the display is not in conformance, we can then proceed to the additional workflow steps to optimize any controls on the display and then calibrate the workstation. This would be followed by a repeat of the conformance test, to validate and document the display’s conformance to the standard acceptance criteria.

CalMAN Setup Guide: CalMED Walkthrough
4
Initial Setup
Ambient Luminance page
The first step in the Radiology Imaging calibration workflow, after meter and test pattern connections, is to measure the screen luminance that is produced by ambient room light reflecting from the screen. The on-screen instructions step us through the quick process of measuring the ambient luminance (Figure 2).
Figure 2: The Ambient Luminance page provides guidance on measuring a display's
ambient luminance and setting a desired minimum luminance target for
conformance testing and/or calibration.
The minimum luminance target for conformance testing or calibration is then
automatically calculated by applying the 4x multiple of the ambient luminance that is recommended by the ACR technical standard. If that is still below the lowest luminance target recommended by ACR (1.2 cd/m2 for mammo, 1.0 cd/m2 for diagnostic, 0.8 cd/m2 for clinical) or if we have a locally-determined minimum target, we can manually enter our desired minimum target.
Workstation Analysis
The Visual QC Tests and the Conformance Test pages in the Workstation Analysis section allow us to test a display for conformance to the DICOM, AAPM, and ACR standards. The Visual QC Tests page provides AAPM test patterns for qualitative (visual) conformance tests. The Conformance Test page performs a series of meter measurements for quantitative (measured) conformance tests.
CalMAN Setup Guide: CalMED Walkthrough
5
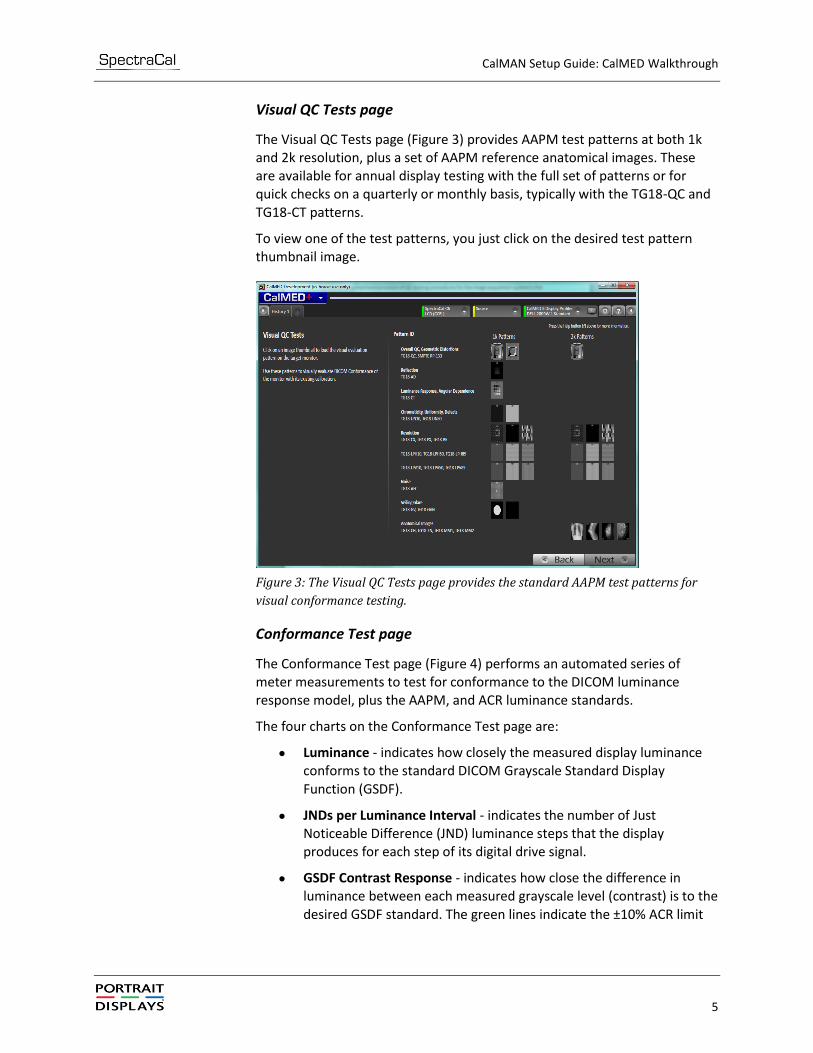
Visual QC Tests page
The Visual QC Tests page (Figure 3) provides AAPM test patterns at both 1k and 2k resolution, plus a set of AAPM reference anatomical images. These are available for annual display testing with the full set of patterns or for quick checks on a quarterly or monthly basis, typically with the TG18-QC and
TG18-CT patterns.
To view one of the test patterns, you just click on the desired test pattern thumbnail image.
Figure 3: The Visual QC Tests page provides the standard AAPM test patterns for
visual conformance testing.
Conformance Test page
The Conformance Test page (Figure 4) performs an automated series of meter measurements to test for conformance to the DICOM luminance response model, plus the AAPM, and ACR luminance standards.
The four charts on the Conformance Test page are:
Luminance - indicates how closely the measured display luminance conforms to the standard DICOM Grayscale Standard Display Function (GSDF).
JNDs per Luminance Interval - indicates the number of Just Noticeable Difference (JND) luminance steps that the display produces for each step of its digital drive signal.
GSDF Contrast Response - indicates how close the difference in luminance between each measured grayscale level (contrast) is to the desired GSDF standard. The green lines indicate the ±10% ACR limit

CalMAN Setup Guide: CalMED Walkthrough
6
for diagnostic displays and the red lines indicate the ±20% limit for clinical displays.
RGB Balance - indicates how closely red, green, and blue are balanced to each other to produce the desired color of gray (D65) at each tested luminance level.
There are numeric data fields for L’min, L’max, LR, GSDF Contrast deviation,
JNDs Per Luminance Step, and Grayscale deltaE. There are also pass/fail indicators to show which industry standards each of the measured data values either meet or fail. Hovering the mouse cursor over a pass/fail indicator identifies the standard for that particular indicator.
Figure 4: The Conformance Test page performs a series of automated display
measurements. It shows the measured data in charts and numeric data fields to
demonstrate whether the radiology imaging display conforms to the desired set of
industry standards.
Display Optimization
The Dynamic Range, RGB Adjust, and Luminance Adjust pages in the Display Optimization section allow us to adjust the controls that are available on the monitor. This allows us to optimize the capabilities of the display itself, before the workstation is calibrated. This gives the Workstation Calibration
process the largest capability for calibrating the monitor to conform to the medical standards.
Note: After a monitor’s internal controls have been optimized, they may not require additional adjustment during following calibrations, unless a user has adjusted the controls. Monitor controls should be locked out if possible, or their calibrated positions documented.

CalMAN Setup Guide: CalMED Walkthrough
7
Users should be trained to adjust image characteristics with the Window and Level controls in their viewing application, rather than by adjusting monitor controls. One touch of the monitor controls un-calibrates the monitor.
Dynamic Range page
The Dynamic Range page (Figure 5) guides you in adjusting the Contrast
control on the monitor to maximize the monitor’s dynamic range. The clipping chart helps you set the Contrast control as high as possible without the monitor clipping signals in that would cause some of the bright gray image details to be lost.
Figure 5: The clipping chart on the Dynamic Range page shows any signal clipping
on the upper end of the luminance range. This allows you to optimize the dynamic
range of the monitor.
RGB Adjust page
The RGB Adjust page (Figure 6) guides you in adjusting the RGB gain controls on the monitor (if available) to optimize the monitor’s RGB white balance to produce the desired white point color (D65).

CalMAN Setup Guide: CalMED Walkthrough
8
Figure 6: The RGB Adjust page provides RGB monitor controls on-screen to
facilitate optimizing the display's RGB white balance.
Luminance Adjust page
The Luminance Adjust page (not shown) guides you in adjusting the Backlight control on the monitor to set the monitor’s maximum luminance. The maximum luminance would typically be set for 420 cd/m2 for a mammography display, 350 cd/m2 for a primary diagnostic display, or 250-350 cd/m2 for a secondary clinical display.
Workstation Calibration
DICOM LUT page
The DICOM LUT page (Figure 7) allows you to automatically calibrate the workstation to the DICOM GSDF and D65 white point standards. The AutoCal button starts the process and the charts on the page show the calibration progress and effectiveness. A DICOM correction LUT is created and saved to the workstation’s graphics adapter.

CalMAN Setup Guide: CalMED Walkthrough
9
Figure 7: The AutoCal button on the DICOM LUT page begins the automatic process
of conforming the displays luminance response to the DICOM GSDF by creating a
corrective LUT.
Validate Conformance
Conformance Test page
The Conformance Test page (Figure 8) validates the monitor’s calibrated conformance to the DICOM GSDF luminance response model. The page provides graphic charts, numeric data, and pass/fail indicators to indicate the level of a monitor’s conformance to the various industry standards.

CalMAN Setup Guide: CalMED Walkthrough
10
Figure 81: The Conformance Test page presents the measure conformance data in
the form of charts, numeric data fields, and pass/fail indicators to allow you to
easily discern the level of a monitor’s conformance.
Conformance Report
The Save button on the Conformance Test page provides the option to save the calibration session data and view the report page. We can also directly create a pdf document containing the conformance report.
DICOM Advanced Report
The DICOM Advanced Report (Figure 9) provides a summary of target and measured values, plus pass/fail indicators to indicate conformance to various
levels of industry standards. The report also contains additional pages with GSDF Contrast, JNDs per Luminance Interval, and Luminance charts.
Figure 9: The DICOM Advanced Conformance Report compiles a summary of the
target values, measured values, and pass/fail results, as well as performance charts.
Radiology Workstation Test Schedule
Both AAPM and ACR recommend a regular schedule of workstation testing. Following is a typical test schedule that ensures continued compliance to industry standards, high reading efficiency, and no contribution to misdiagnoses due to poor image quality.

CalMAN Setup Guide: CalMED Walkthrough
11
Annual Tests - Performed by medical physicist
Test ambient lighting
Calibrate display(s)
o Run integrated calibration software, if available, or
o Calibrate with CalMED software and certified external meter.
Validate display conformance
o Perform full range of visual tests with test patterns.
o Conformance test with CalMED software and certified external meter.
Document Results
o Save CalMED conformance report.
Quarterly/Monthly Tests - Performed by medical physicist or QC tech
Test ambient lighting
Analyze display conformance
o Perform luminance response visual tests (review TG18-QC and TG18-CT patterns).
o Conformance test with CalMED software and certified external meter.
If poor conformance, calibrate display(s)
o Run integrated calibration software, if available, or
o Calibrate with CalMED software and certified external meter.
Validate display conformance
o Conformance test with CalMED software and certified external meter.
Document Results
o Save CalMED conformance report.
Daily/Weekly Tests - Performed by workstation user
Perform luminance response visual tests (review TG18-QC and/or TG18-CT patterns).
CalMAN Setup Guide: CalMED Walkthrough
12
Medical Video Calibration
Jump to Radiology Imaging Calibration
Medical Video Standards
Images viewed on medical video displays originate from cameras, rather than from scanners. These endoscopic and still image cameras are used in surgery, ER, clinics, dermatology and pathology, among others.
Camera-sourced medical images conform to the 1999 sRGB standard from the International Electrotechnical Commission (IEC). Consumer digital cameras and internet images also follow the sRGB standard, which was designed to be appropriate for brighter viewing environments. The sRGB luminance response model starts with a linear section just above black (gamma of 1), then transitions to a power function at higher levels, with a gamma of 2.4. The gamma over the entire luminance range averages to about 2.2.
The sRGB white point (D65) and color gamut (primary colors) are the same as for studio monitors and HDTV.
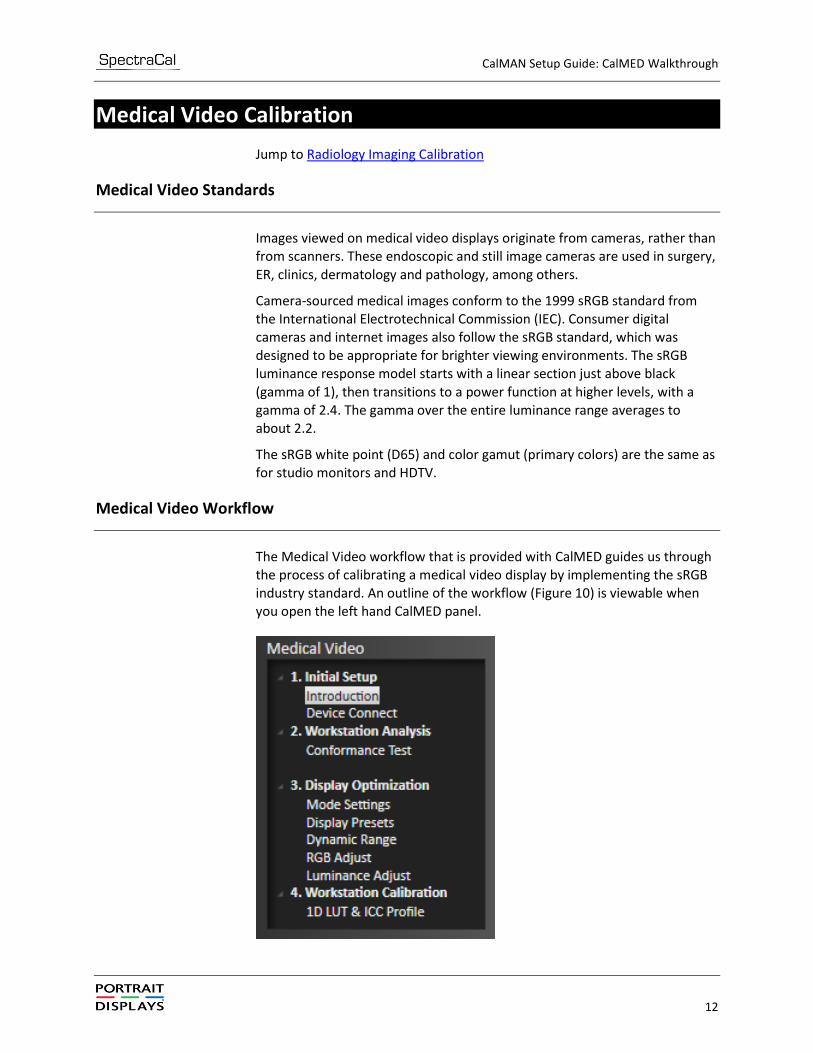
Medical Video Workflow
The Medical Video workflow that is provided with CalMED guides us through the process of calibrating a medical video display by implementing the sRGB industry standard. An outline of the workflow (Figure 10) is viewable when you open the left hand CalMED panel.

CalMAN Setup Guide: CalMED Walkthrough
13
Figure 10: An outline of the Medical Video workflow appears when you open the left
hand CalMED panel. Sections 1 and 2 of the workflow, Initial Setup and
Workstation Analysis are used to test whether a display conforms to industry
standards. Sections 3 and 4, Display Optimization and Workstation Calibration, are
used to calibrate a display for conformance.
The workflow first guides us through testing the medical video display for
conformance to the sRGB standard. If the test shows the display to be in conformance, we can save, view, and/or print a conformance report for the display.
If the conformance test shows that the display is not in conformance, we can then proceed to the additional workflow steps to optimize any controls on the display and then calibrate the workstation. This would be followed by a
repeat of the conformance test, to validate and document the display’s conformance to the sRGB standard.
Initial Setup
Device Connect
The Device Connect page in the Initial Setup section provides guidance for meter, test pattern, and display control connections to CalMED.
Workstation Analysis
The Conformance Test page (Figure 11) in the Workstation Analysis section performs an automated series of meter measurements to test for conformance to the sRGB standard.
The three luminance charts on the left side of the Conformance Test page are:
RGB Balance - indicates how closely red, green, and blue are balanced to each other to produce the desired color of gray (D65) at each tested luminance level.
Gamma - indicates how closely the luminance response follows the sRGB standard.
Luminance deltaE - indicates the amount of luminance error there is at each measured luminance level.

CalMAN Setup Guide: CalMED Walkthrough
14
Figure 112: The Conformance Test page performs a series of automated display
measurements. It shows the measured data in charts and numeric data fields to
demonstrate whether the medical video display conforms to the sRGB industry
standard.
The three chromaticity charts on the right side of the Conformance Test page are:
CIE Chromaticity (1976) - indicates how close the primary and secondary colors are to the sRGB chromaticity targets.
Gamut Luminance - indicates whether the luminance of each primary and secondary color is above or below the sRGB target for that color.
Chromaticity deltaE - indicates the amount of luminance error there is for each primary and secondary color.
There are also numeric data fields for total gamma, avg luminance delta error, Lmax, and avg chromaticity delta error.
Display Optimization
The Mode Settings, Display Presets, Dynamic Range, RGB Adjust, and Luminance Adjust pages in the Display Optimization section allow us to adjust the controls that are available on the monitor. This allows us to optimize the capabilities of the display itself, before the workstation is calibrated. This gives the Workstation Calibration process the largest capability for calibrating the display to conform to the medical standards.
Mode Settings
The Mode Settings page (Figure 12) guides you in selecting the viewing mode and color space mode (if available) that gets the monitor as close as possible to the desired operating characteristics.

CalMAN Setup Guide: CalMED Walkthrough
15
Figure 32: The CCT and Gamma charts on the Mode Settings page guide you in
selecting a viewing mode and color space mode (if available) to optimize the
monitor’s characteristics.
Display Presets
The Display Presets page (not shown) guides you in selecting the color temp and gamma presets (if available) that gets the monitor as close as possible to the desired operating characteristics.
Dynamic Range
The Dynamic Range page (Figure 13) guides you in adjusting the Contrast control on the monitor to maximize the monitor’s dynamic range. The clipping chart helps you set the Contrast control as high as possible without causing signal clipping in the monitor that would cause some of the bright gray image details to be lost.

CalMAN Setup Guide: CalMED Walkthrough
16
Figure 43: The clipping chart on the Dynamic Range page shows any signal clipping
on the upper end of the luminance range. This allows you to optimize the dynamic
range of the monitor.
RGB Adjust
The RGB Adjust page (Figure 14) guides you in adjusting the RGB gain controls on the monitor (if available) to optimize the monitor’s RGB white balance to produce the desired white point color (D65).
Figure 54: The RGB Adjust page provides RGB monitor controls on-screen to
facilitate optimizing the display's RGB white balance.

CalMAN Setup Guide: CalMED Walkthrough
17
Luminance Adjust
The Luminance Adjust page (not shown) guides you in adjusting the Backlight control on the monitor to set the monitor’s maximum luminance.
Workstation Calibration
1D LUT & ICC Profile page
The 1D LUT & ICC Profile page (Figure 15) allows you to automatically calibrate the workstation to the sRGB luminance response and D65 white point standards. An ICC profile is also created and saved to the workstation operating system. The AutoCal button starts the process and the charts on
the page show the calibration progress and effectiveness.
Figure 65: The AutoCal button on the 1D LUT & ICC Profile page starts the
automatic process of conforming the displays luminance response to the sRGB
luminance response model and color gamut by creating a corrective LUT and an
ICC profile.
Validate Conformance
The Conformance Test page (Figure 16) validates the monitor’s calibrated conformance to the sRGB standard. The page provides graphic charts and numeric data to indicate the level of a monitor’s conformance to the sRGB video standard.

CalMAN Setup Guide: CalMED Walkthrough
18
Figure 16: The Conformance Test page presents the measured conformance data in
the form of luminance charts, chromaticity charts, and numeric test results to
indicate the degree of conformance to the sRGB standard.
Conformance Report
The Save button on the Conformance Test page provides the option to save the calibration session data and view the report page. The Medical Video Conformance Report (Figure 17) provides the same luminance charts, chromaticity charts, and numeric data as the Conformance Test page, plus workstation and setup details.

CalMAN Setup Guide: CalMED Walkthrough
19
Figure 17: The Medical Video Conformance Report provides the same charts and
numeric data as the Conformance Test page, along with workstation and setup
information.
Conclusion
By maintaining conformance to the appropriate industry standards, both radiology imaging and medical video workstations will consistently render their respective images for efficient and accurate reading.
The CalMED Radiology Imaging and Medical Video workflows provide easy to use processes for routinely testing workstation conformance to standards and, when necessary, provide fast and accurate calibration processes to bring workstations into conformance. Both CalMED workflows provide conformance reports to fully document a workstation quality assurance program.

CalMAN Setup Guide: CalMED Walkthrough
20
About / Contact
About Portrait Displays
Portrait Displays, Inc., since 1993, is a leading application software provider (ASP) for PC, smartphone, and tablet displays. The Portrait Displays team now includes SpectraCal, the world’s leading provider of video display calibration software. The combined companies offer value-added, feature-rich solutions
to both OEM display manufacturers and end users seeking improved accuracy and manageability of their displays.
Portrait Displays, an Intel Capital Portfolio company, is a private corporation with headquarters in Pleasanton, California, USA with representatives in Europe, Taiwan, China, Japan, and Korea.
Contact Us
Submit a Technical Support Request:
http://calman.spectracal.com/techsupport.html
spectracal.com
+1-925-227-2700
Portrait Displays, Inc.
6663 Owens Drive
Pleasanton, CA 94588 USA
portrait.com
Top Related