


Languages
Pages
Legal

USER GUIDE
AirbrushMODEL NUMBER: BD-128
1YEAR
WARRANTY
After Sales SupportUK/N.IRELAND HELPLINE NO:WEBSITE:EMAIL:
01270 508530www.airbrushheaven.co.uk
Contents 1. Welcome Section
2. General Information & Safety Instructions
3. Contents & Features
4. Parts & Assembly
5. General Maintenance
6. Using the Airbrush
7. Specifications
7. Trouble Shooting
After Sales SupportUK/N.IRELAND HELPLINE NO:WEBSITE:EMAIL:
01270 508530www.airbrushheaven.co.uk
Welcome
Congratulations!
You have made an excellent choice with the purchase of this quality AIRBRUSH HEAVEN product.
By doing so you now have the assurance and peace of mind which comes from purchasing a product that has been manufactured to the highest standards of performance and saftey, supported by the high quality standards of Airbrush Heaven.
We want you to be compeletly satisfied with your purchase so this AIRBRUSH HEAVEN product is backed by a comprehensivemanufacturer’s 1 year warranty and outstanding after sales service through our helpline.
We hope you enjoy using this product for many years to come.
If you require technical support or in the unlikely event that yourpurchase is faulty, please telephone our helpline for immediateassistance. Faulty product claims made within the 1 year warrantyperiod will be repaired or replaced free of charge provided that you have a satisfactory proof of purchase (keep your receipt/invoice safe). This does not affect your statutory rights. However be aware that the warranty will become null and void if the product is found to have been deliberately damaged, misused and/or disassembled other than directed. See warranty certificate for full details at the back of this guide.
1
General Information &Safety Instructions• Industrial applications must follow OSHA requirements.
• Maintain a safe working environment. Keep the work area well lit and make sure there is adequate work space.
• Use the product only in a well ventilated area.
• Check for damaged parts including hoses before using thisproduct. Carefully check that it will operate properly and performits intended function. Replace or repair damaged or worn parts immediately.
• Always read and adhere to all safety warnings and instructionsprovided in the directions of the medium being used.
• Wear ANSI approved safety impact eye goggles and an ANSI approved dust mask or respirator when using this product.
• Do not exceed the maximum pressure rating of 50 PSI.
• Adult supervision is advised when children are using this product.
• The airbrush is designed only to spray non-flammable medium.Never spray petrol, paraffin, or any flammable liquids.
WARNING! The warnings, precautions, and instructions discussed in this manual cannot cover all possible conditions and situations that may occur. The operator must understand that common sense and caution are factors, which cannot be built into this product.
2
After Sales SupportUK/N.IRELAND HELPLINE NO:WEBSITE:EMAIL:
01270 508530www.airbrushheaven.co.uk
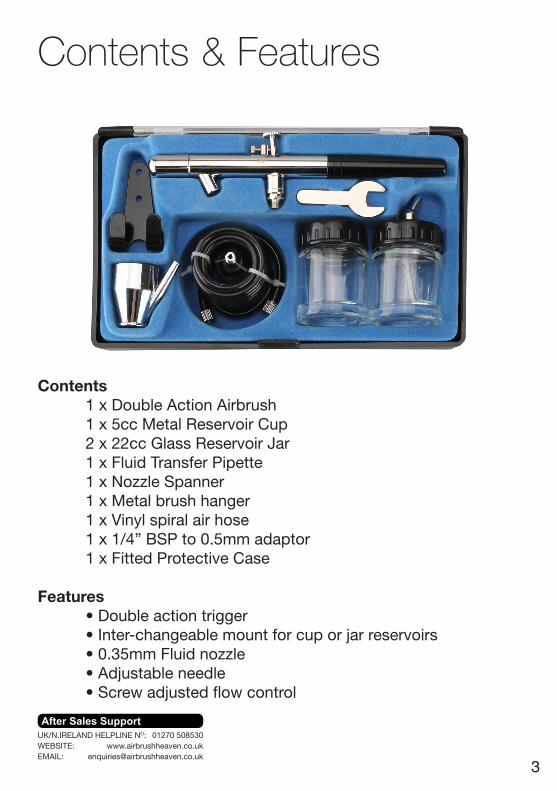
Contents 1 x Double Action Airbrush 1 x 5cc Metal Reservoir Cup 2 x 22cc Glass Reservoir Jar 1 x Fluid Transfer Pipette 1 x Nozzle Spanner 1 x Metal brush hanger 1 x Vinyl spiral air hose 1 x 1/4” BSP to 0.5mm adaptor 1 x Fitted Protective Case
Features • Double action trigger • Inter-changeable mount for cup or jar reservoirs • 0.35mm Fluid nozzle • Adjustable needle • Screw adjusted flow control
Contents & Features
3
After Sales SupportUK/N.IRELAND HELPLINE NO:WEBSITE:EMAIL:
01270 508530www.airbrushheaven.co.uk
1.2.3.4.5.6.7.8.9.
10.11.12.13.14.15.16.17.18.19.20.21.22.23.24.25.26.27.28.29.30.31.
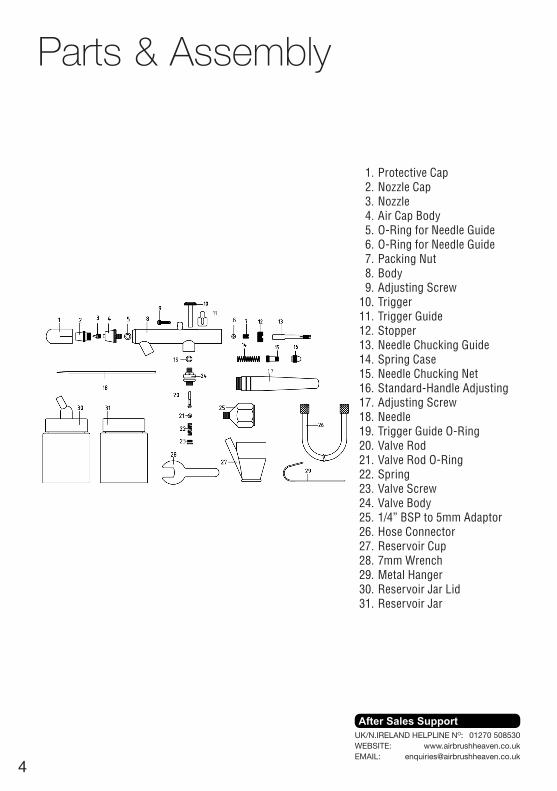
Parts & Assembly
4
Protective CapNozzle CapNozzleAir Cap BodyO-Ring for Needle GuideO-Ring for Needle GuidePacking NutBodyAdjusting ScrewTriggerTrigger GuideStopperNeedle Chucking GuideSpring CaseNeedle Chucking NetStandard-Handle AdjustingAdjusting ScrewNeedleTrigger Guide O-RingValve RodValve Rod O-RingSpringValve ScrewValve Body1/4” BSP to 5mm AdaptorHose ConnectorReservoir Cup7mm WrenchMetal HangerReservoir Jar LidReservoir Jar
After Sales SupportUK/N.IRELAND HELPLINE NO:WEBSITE:EMAIL:
01270 508530www.airbrushheaven.co.uk
5
Storage• Always disconnect the airbrush from its air supply source before
any maintenance on the airbrush body.• When not in use, tools and equipment should be kept in a dry
location to inhibit rust.
Basic Cleaning• Empty the reservoir cup or jar of used medium.• Remove and wipe clean the reservoir cup or jar.• Reattach the clean reservoir cup or jar and fill with the
appropriate cleaning solution.• Spray the cleaner through the airbrush until it sprays clear.• Unscrew and remove the handle.• Loosen the needle locking nut.• Pull the needle out & wipe down the needle.• Push the needle back into the airbrush & re-tighten the needle
locking nut carefully.• Replace the handle and screw back onto the airbrush body.• Re-connect to the airline & spray until dry.
Please Note:Spray into a cleaning jar or filter of some kind. This keeps overspray out of the air and you. We recommend the Clean Pot available from our website.
For full cleaning advice and video demonstrations please visit: www.airbrushheaven.co.uk
General Maintenance
After Sales SupportUK/N.IRELAND HELPLINE NO:WEBSITE:EMAIL:
01270 508530www.airbrushheaven.co.uk
6
Setting up & using the Airbrush• Attach the hose to the compressor.
(We recommend our AS-18A or AS-186 compressor for this model)• Set air pressure to 2-40 PSI on the compressor.• Remove the protection cap from the airbrush.• Add your chosen medium to the reservoir cup.• Press down on the trigger to allow air to flow through the brush.• Pull the trigger backwards to start spraying.
You can vary the amount of medium flow by tightening or loosening the adjusting screw at the rear of the airbrush.
Always test spray before starting your main project.
Mixing & Thining MediumGenerally, the most common medium used in conjunction with an airbrush is paint. It is highly recommended that you dilute yourmedium down to the same consistency as semi skimmed milk.
Read the directions on the container to see if thinners or water should be used to dilute the medium to the correct consistency.
When mixing medium, it’s highly recommended you use the same brand and type for best results.
Please Note:Use the correct solvent for thinning: Use lacquer thinner for all lacquer medium, paint thinner for all oil based medium, enamel thinners for all enamel based medium, acrylic thinners for acrylic and clean water for water based medium.
Aways read the label of your selected medium.
Using the Airbrush
After Sales SupportUK/N.IRELAND HELPLINE NO:WEBSITE:EMAIL:
01270 508530www.airbrushheaven.co.uk
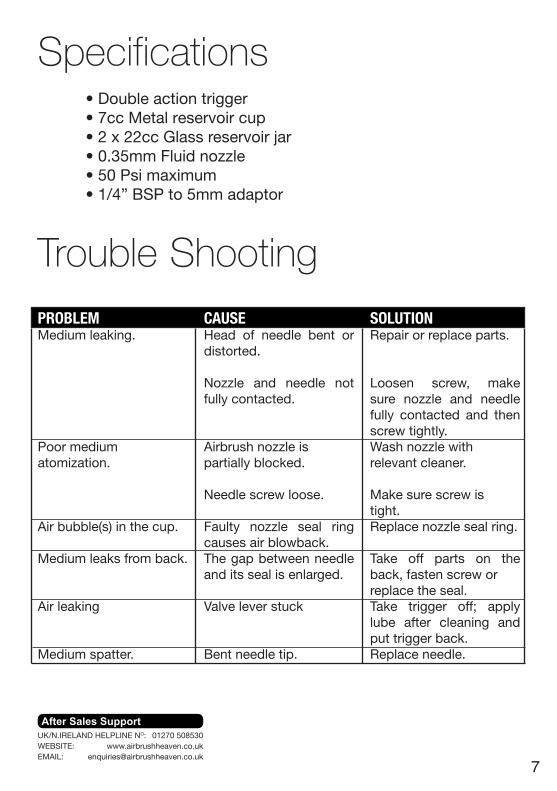
• Double action trigger • 7cc Metal reservoir cup • 2 x 22cc Glass reservoir jar • 0.35mm Fluid nozzle • 50 Psi maximum • 1/4” BSP to 5mm adaptor
Specifications
7
Trouble Shooting
PROBLEMMedium leaking.
Poor mediumatomization.
Air bubble(s) in the cup.
Medium leaks from back.
Air leaking
Medium spatter.
CAUSEHead of needle bent or distorted.
Nozzle and needle not fully contacted.
Airbrush nozzle ispartially blocked.
Needle screw loose.
Faulty nozzle seal ring causes air blowback.The gap between needle and its seal is enlarged.
Valve lever stuck
Bent needle tip.
SOLUTIONRepair or replace parts.
Loosen screw, make sure nozzle and needle fully contacted and then screw tightly.Wash nozzle withrelevant cleaner.
Make sure screw istight.Replace nozzle seal ring.
Take off parts on the back, fasten screw orreplace the seal.Take trigger off; apply lube after cleaning and put trigger back.Replace needle.
After Sales SupportUK/N.IRELAND HELPLINE NO:WEBSITE:EMAIL:
01270 508530www.airbrushheaven.co.uk
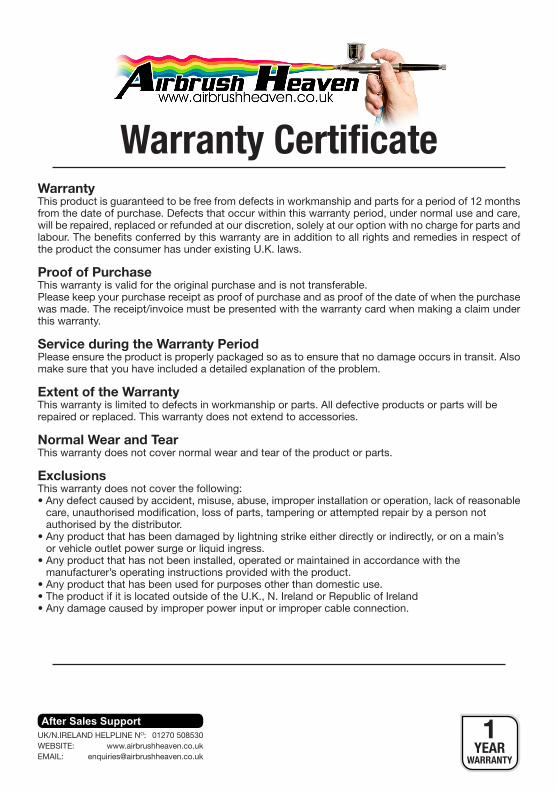
WarrantyThis product is guaranteed to be free from defects in workmanship and parts for a period of 12 months from the date of purchase. Defects that occur within this warranty period, under normal use and care, will be repaired, replaced or refunded at our discretion, solely at our option with no charge for parts and labour. The benefits conferred by this warranty are in addition to all rights and remedies in respect of the product the consumer has under existing U.K. laws.
Proof of PurchaseThis warranty is valid for the original purchase and is not transferable.Please keep your purchase receipt as proof of purchase and as proof of the date of when the purchase was made. The receipt/invoice must be presented with the warranty card when making a claim under this warranty.
Service during the Warranty PeriodPlease ensure the product is properly packaged so as to ensure that no damage occurs in transit. Also make sure that you have included a detailed explanation of the problem.
Extent of the WarrantyThis warranty is limited to defects in workmanship or parts. All defective products or parts will berepaired or replaced. This warranty does not extend to accessories.
Normal Wear and TearThis warranty does not cover normal wear and tear of the product or parts.
ExclusionsThis warranty does not cover the following:• Any defect caused by accident, misuse, abuse, improper installation or operation, lack of reasonable
care, unauthorised modification, loss of parts, tampering or attempted repair by a person not authorised by the distributor.
• Any product that has been damaged by lightning strike either directly or indirectly, or on a main’s or vehicle outlet power surge or liquid ingress.
• Any product that has not been installed, operated or maintained in accordance with the manufacturer’s operating instructions provided with the product.
• Any product that has been used for purposes other than domestic use.• The product if it is located outside of the U.K., N. Ireland or Republic of Ireland• Any damage caused by improper power input or improper cable connection.
Warranty Certificate
1YEAR
WARRANTY
After Sales SupportUK/N.IRELAND HELPLINE NO:WEBSITE:EMAIL:
01270 508530www.airbrushheaven.co.uk
Warranty CardAirbrush
Please keep your purchase receipt/invoice together with your warranty card
Fault Description:
Name:Address:
Date of purchase:
Location of purchase:
Service HelplineAIRBRUSH HEAVEN1 SOLWAY COURT,CREWE BUSINESS PARK,CW1 6LD
We recommend that you attach a photocopy of your receipt/invoice, showing the date of purchase, to this warranty card and keep it for your reference. In the event of a product fault, please call the After Sales Support team. Please ensure that you have the product details (as shown on this card) to hand so that the support team are able to respond as quickly and efficiently as possible.
1YEAR
WARRANTY
Model Number: BD-128
After Sales SupportUK/N.IRELAND HELPLINE NO:WEBSITE:EMAIL:
01270 508530www.airbrushheaven.co.uk

For further help, advice and video demonstrations please visit:www.airbrushheaven.co.uk
Top Related