


Languages
Pages
Legal

CS6611 MOBILE APPLICATION DEVELOPMENT LAB
VVIT Department of Computer Science and Engineering
22Dharmapuri – 636 703
Regulation : 2013
Branch : B.E. – CSE
Year & Semester : III Year / VI Semester
ICAL ENG
LAB MANUAL
CS6611-MOBILE APPLICATION DEVELOPMENT LAB
CS6611 MOBILE APPLICATION DEVELOPMENT LAB
VVIT Department of Computer Science and Engineering
ANNA UNIVERSITY: CHENNAI
REGULATION – 2013
SYLLABUS
CS6611 MOBILE APPLICATION DEVELOPMENT LABORATORY
OBJECTIVES:
The student should be made to:
Know the components and structure of mobile application development frameworks for
Android and windows OS based mobiles.
Understand how to work with various mobile application development frameworks. Learn
the basic and important design concepts and issues of development of mobile applications.
Understand the capabilities and limitations of mobile devices.
LIST OF EXPERIMENTS:
1 .Develop an application that uses GUI components, Font and Colours
2. Develop an application that uses Layout Managers and event listeners.
3. Develop a native calculator application.
4. Write an application that draws basic graphical primitives on the screen.
5. Develop an application that makes use of database.
6. Develop an application that makes use of RSS Feed.
7. Implement an application that implements Multi threading
8. Develop a native application that uses GPS location information.
9. Implement an application that writes data to the SD card.
10. Implement an application that creates an alert upon receiving a message.
11. Write a mobile application that creates alarm clock
TOTAL: 45 PERIODS
CS6611 MOBILE APPLICATION DEVELOPMENT LAB
VVIT Department of Computer Science and Engineering
INDEX
S.NO DATE EXPERIMENTSSIGNATURE
OF THESTAFF
REMARKS
1Develop an application that uses GUI components,Font and Colors
2Develop an application that uses Layout Managersand event listeners.
3 Develop a native calculator application.
4Write an application that draws basic graphicalprimitives on the screen.
5 Develop an application that makes use of database.
6 Develop an application that makes use of RSS Feed.
7Implement an application that implementsMulti-threading
8Develop a native application that uses GPS locationinformation.
9Implement an application that writes data to theSD card.
10Implement an application that creates an alert uponreceiving a message.
11 Write a mobile application that creates alarm clock
CS6611 MOBILE APPLICATION DEVELOPMENT LAB
VVIT Department of Computer Science and Engineering
Ex.No: 1Date :
Develop an application that uses GUI components, Font and Colours
Simple application to change font size and color of text view
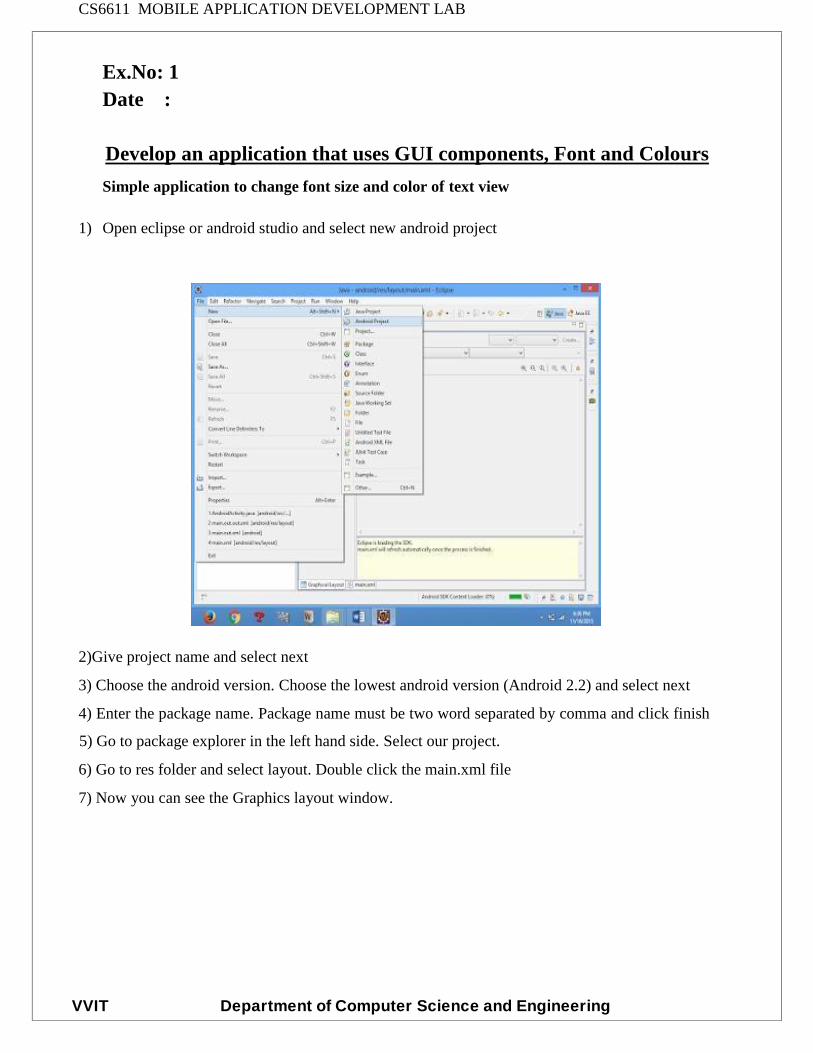
1) Open eclipse or android studio and select new android project
2)Give project name and select next
3) Choose the android version. Choose the lowest android version (Android 2.2) and select next
4) Enter the package name. Package name must be two word separated by comma and click finish
5) Go to package explorer in the left hand side. Select our project.
6) Go to res folder and select layout. Double click the main.xml file
7) Now you can see the Graphics layout window.

CS6611 MOBILE APPLICATION DEVELOPMENT LAB
VVIT Department of Computer Science and Engineering
8) Click the main.xml file and type the code below
Code:
<?xml version="1.0" encoding="utf-8"?>
<LinearLayout
xmlns:android="http://schemas.android.com/apk/res/android"
android:layout_width="fill_parent" android:layout_height="fill_parent"
android:orientation="vertical" >
<TextView
android:id="@+id/textView1"
android:layout_width="match_parent"
android:layout_height="wrap_content"
android:layout_margin="20sp"
android:gravity="center"
android:text="HELLO WORLD"
android:textSize="20sp"
android:textStyle="bold" />
<Button
android:id="@+id/button1"
android:layout_width="match_parent"
android:layout_height="wrap_content"
CS6611 MOBILE APPLICATION DEVELOPMENT LAB
VVIT Department of Computer Science and Engineering
android:gravity="center"
android:text="Change font size"
android:textSize="20sp" />
<Button
android:id="@+id/button2"
android:layout_width="match_parent"
android:layout_height="wrap_content"
android:gravity="center"
android:text="Change color"
android:textSize="20sp" />
<Button
android:id="@+id/button3"
android:layout_width="match_parent"
android:layout_height="wrap_content"
android:gravity="center"
android:text="Change font"
android:textSize="20sp" />
</LinearLayout>
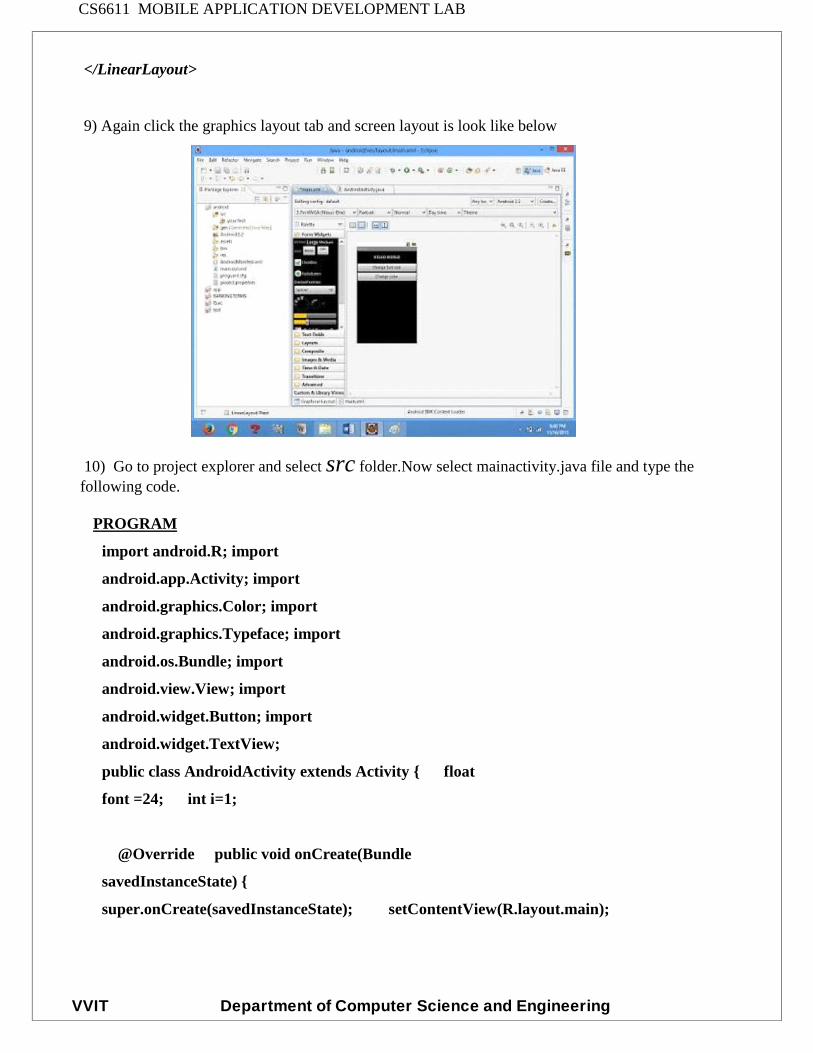
9) Again click the graphics layout tab and screen layout is look like below
10) Go to project explorer and select src folder.Now select mainactivity.java file and type thefollowing code.
CS6611 MOBILE APPLICATION DEVELOPMENT LAB
VVIT Department of Computer Science and Engineering
PROGRAM
import android.R; import
android.app.Activity; import
android.graphics.Color; import
android.graphics.Typeface; import
android.os.Bundle; import
android.view.View; import
android.widget.Button; import
android.widget.TextView;
public class AndroidActivity extends Activity
{ float font =24; int i=1;
@Override public void
onCreate(Bundle savedInstanceState) {
super.onCreate(savedInstanceState);
setContentView(R.layout.main);
final TextView t1=(TextView)
findViewById(R.id.textView1); Button
b1 = (Button) findViewById(R.id.button1);
b1.setOnClickListener(new
View.OnClickListener() {
public void onClick(View view) {
t1.setTextSize(font);
font=font+4; if(font==40)
font=20;
}
});
Button b2 = (Button)
findViewById(R.id.button2);
b2.setOnClickListener(new
View.OnClickListener() {

CS6611 MOBILE APPLICATION DEVELOPMENT LAB
VVIT Department of Computer Science and Engineering
public void onClick(View view) {
switch(i)
{ case 1:
t1.setTextColor(Color.parseColor("#0000FF
")); break; case 2:
t1.setTextColor(Color.parseColor("#00FF00
")); break; case 3:
t1.setTextColor(Color.parseColor("#FF0000"));
break; case 4:
t1.setTextColor(Color.parseColor("#800000"));
break;
} i++;
if(i==5)
i=1;
}
});
} }
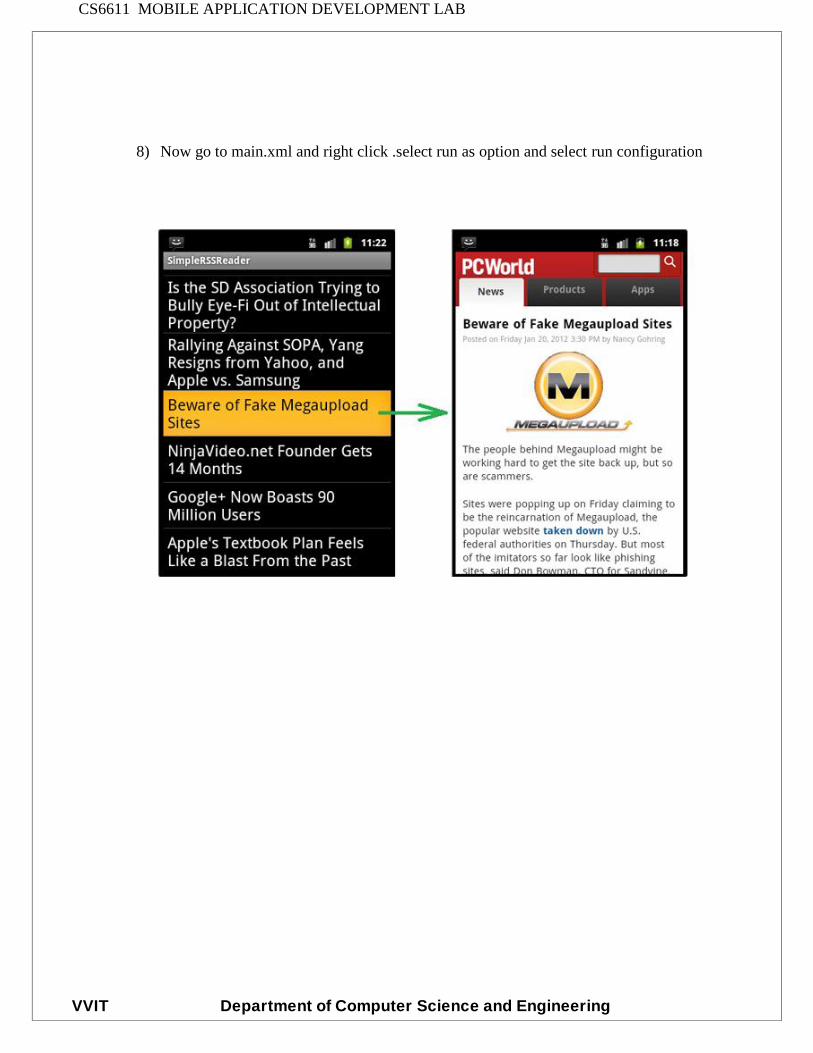
11) Now go to main.xml and right click .select run as option and select run configuration

CS6611 MOBILE APPLICATION DEVELOPMENT LAB
VVIT Department of Computer Science and Engineering
12) Android output is present in the android emulator as shown in below.
CS6611 MOBILE APPLICATION DEVELOPMENT LAB
VVIT Department of Computer Science and Engineering
Ex.No : 2Date :
DEVELOP AN APPLICATION THAT USES LAYOUT
MANAGERS AND EVENT LISTENERS
1) Open eclipse or android studio and select new android project
2) Give project name and select next
3) Choose the android version. Choose the lowest android version (Android 2.2) and select next
4) Enter the package name. Package name must be two word separated by comma and click finish
5) Go to package explorer in the left hand side. select our project.
6) Go to res folder and select layout. Double click the main.xml file. Add the code below
<RelativeLayout
xmlns:android="http://schemas.android.com/apk/res/android"
android:id="@+id/relativeLayout1" android:layout_width="fill_parent"
android:layout_height="fill_parent" >
<LinearLayout
android:id="@+id/linearLayout1"
android:layout_width="wrap_content"
android:layout_height="wrap_content"
android:layout_alignParentLeft="true"
android:layout_alignParentRight="true"
android:layout_alignParentTop="true" >
<TextView
android:layout_width="wrap_content"
android:layout_height="wrap_content"
android:layout_gravity="center"
android:text="ADDITION"
android:textSize="20dp" >

CS6611 MOBILE APPLICATION DEVELOPMENT LAB
VVIT Department of Computer Science and Engineering
</TextView>
</LinearLayout><LinearLayout
android:id="@+id/linearLayout2"
android:layout_width="wrap_content"
android:layout_height="wrap_content"
android:layout_alignParentLeft="true"
android:layout_alignParentRight="true"
android:layout_below="@+id/linearLayout1" >
<TextView
android:layout_width="wrap_content"
android:layout_height="wrap_content"
android:text="ENTER NO 1" >
</TextView><EditText
android:layout_width="wrap_content"
android:layout_height="wrap_content"
android:layout_weight="0.20"
android:id="@+id/edittext1"
android:inputType="number">
</EditText>
</LinearLayout><LinearLayout
android:id="@+id/linearLayout3"
android:layout_width="wrap_content"
android:layout_height="wrap_content"
android:layout_alignParentLeft="true"
android:layout_alignParentRight="true"
android:layout_below="@+id/linearLayout2" >
<TextView
android:layout_width="wrap_content"
android:layout_height="wrap_content"
android:text="ENTER NO 2" >
</TextView><EditText
android:layout_width="wrap_content"
CS6611 MOBILE APPLICATION DEVELOPMENT LAB
VVIT Department of Computer Science and Engineering
android:layout_height="wrap_content"
android:layout_weight="0.20"
android:id="@+id/edittext2"
android:inputType="number">
</EditText>
</LinearLayout><LinearLayout
android:id="@+id/linearLayout4"
android:layout_width="wrap_content"
android:layout_height="wrap_content"
android:layout_alignParentLeft="true"
android:layout_alignParentRight="true"
android:layout_below="@+id/linearLayout3" >
<Button
android:layout_width="wrap_content"
android:id="@+id/button1"
android:layout_height="wrap_content"
android:text="Addition"
android:layout_weight="0.50" />
<Button
android:layout_width="wrap_content"
android:id="@+id/button3"
android:layout_height="wrap_content"
android:text="subtraction"
android:layout_weight="0.50" />
<Button
android:layout_width="wrap_content"
android:id="@+id/button2"
android:layout_height="wrap_content"
android:text="CLEAR"
android:layout_weight="0.50" />
</LinearLayout>

CS6611 MOBILE APPLICATION DEVELOPMENT LAB
VVIT Department of Computer Science and Engineering
<View
android:layout_height="2px"
android:layout_width="fill_parent"
android:layout_below="@+id/linearLayout4"
android:background="#DDFFDD"/>
</RelativeLayout>
7) Now select mainactivity.java file and type the following code.
package layout.ne;
import android.app.Activity;
import android.os.Bundle;
import android.view.View;
import
android.view.View.OnClickListener;
import android.widget.Button; import
android.widget.EditText; import
android.widget.Toast;
public class LAYOUTActivity
extends Activity {
/** Called when the activity is first created. */ EditText
txtData1,txtData2; float num1,num2,result1,result2;
@Override
public void onCreate(Bundle
savedInstanceState) {
super.onCreate(savedInstanceSt
ate);
setContentView(R.layout.main);
Button add = (Button)
findViewById(R.id.button1);
add.setOnClickListener(new
CS6611 MOBILE APPLICATION DEVELOPMENT LAB
VVIT Department of Computer Science and Engineering
OnClickListener() { public
void onClick(View v) {
try
{
txtData1 = (EditText)
findViewById(R.id.edittext1);
txtData2 = (EditText)
findViewById(R.id.edittext2);
num1 =
Float.parseFloat(txtData1.getTe
xt().toString()); num2
=
Float.parseFloat(txtData2.getTe
xt().toString());
result1=num1+num2;
Toast.makeText(getBaseContext(),"ANSWER:"+result1,Toast.LENGTH_SHORT).show();
}
catch(Exception e)
{
Toast.makeText(getBaseContext(), e.getMessage(),
Toast.LENGTH_SHORT).show();
}
}
});
Button sub = (Button) findViewById(R.id.button3);
sub.setOnClickListener(new OnClickListener() {
public void onClick(View v) {
try
{
CS6611 MOBILE APPLICATION DEVELOPMENT LAB
VVIT Department of Computer Science and Engineering
txtData1 = (EditText) findViewById(R.id.edittext1);
txtData2 = (EditText) findViewById(R.id.edittext2); num1 =
Float.parseFloat(txtData1.getText().toString()); num2 =
Float.parseFloat(txtData2.getText().toString());
result2=num1-num2;
Toast.makeText(getBaseContext(),"ANSWER:"+result2,Toast.LENGTH_SHORT).show();
}
catch(Exception e)
{
Toast.makeText(getBaseContext(), e.getMessage(),
Toast.LENGTH_SHORT).show();
}
}
});
Button clear = (Button) findViewById(R.id.button2);
clear.setOnClickListener(new OnClickListener() {
public void onClick(View v) {
try
{
txtData1.setText("");
txtData2.setText("");
}
catch(Exception e)
{
Toast.makeText(getBaseContext(), e.getMessage(),
Toast.LENGTH_SHORT).show();
}
}
});
} }

CS6611 MOBILE APPLICATION DEVELOPMENT LAB
VVIT Department of Computer Science and Engineering
8) Now go to main.xml and right click .select run as option and select run configuration
9) Android output is present in the android emulator as shown in below.
CS6611 MOBILE APPLICATION DEVELOPMENT LAB
VVIT Department of Computer Science and Engineering
Ex.No : 3Date :
DEVELOP A NATIVE CALCULATOR APPLICATION
1) Open eclipse or android studio and select new android project
2) Give project name and select next
3) Choose the android version. Choose the lowest android version(Android 2.2) and select next
4) Enter the package name. package name must be two word separated by comma and click finish
5) Go to package explorer in the left hand side. select our project.
6) Go to res folder and select layout. Double click the main.xml file. Add the code below
Main.xml coding
<?xml version="1.0" encoding="utf-8"?>
<LinearLayout
xmlns:android="http://schemas.android.com/apk/res/android"
android:orientation="vertical"
android:layout_width="fill_parent"
android:layout_height="fill_parent">
<LinearLayout android:layout_width="match_parent"
android:layout_height="wrap_content"
android:id="@+id/linearLayout1"
android:layout_marginLeft="10pt"
android:layout_marginRight="10pt"
android:layout_marginTop="3pt">
<EditText android:layout_weight="1"
android:layout_height="wrap_content"
android:layout_marginRight="5pt"
android:id="@+id/etNum1"
android:layout_width="match_parent"
android:inputType="numberDecimal">
CS6611 MOBILE APPLICATION DEVELOPMENT LAB
VVIT Department of Computer Science and Engineering
</EditText><EditText
android:layout_height="wrap_content"
android:layout_weight="1"
android:layout_marginLeft="5pt"
android:id="@+id/etNum2"
android:layout_width="match_parent"
android:inputType="numberDecimal">
</EditText>
</LinearLayout><LinearLayout
android:layout_width="match_parent"
android:layout_height="wrap_content"
android:id="@+id/linearLayout2"
android:layout_marginTop="3pt"
android:layout_marginLeft="5pt"
android:layout_marginRight="5pt">
<Button android:layout_height="wrap_content" android:layout_width="match_parent"
android:layout_weight="1" android:text="+"
android:textSize="15pt"
android:id="@+id/btnAdd">
</Button><Button
android:layout_height="wrap_content"
android:layout_width="match_parent"
android:layout_weight="1" android:text="-"
android:textSize="15pt" android:id="@+id/btnSub">
</Button><Button
android:layout_height="wrap_content"
android:layout_width="match_parent"
android:layout_weight="1" android:text="*"
android:textSize="15pt" android:id="@+id/btnMult">
</Button><Button
android:layout_height="wrap_content"
android:layout_width="match_parent"

CS6611 MOBILE APPLICATION DEVELOPMENT LAB
VVIT Department of Computer Science and Engineering
android:layout_weight="1" android:text="/"
android:textSize="15pt"
android:id="@+id/btnDiv"></Button>
</LinearLayout><TextView
android:layout_height="wrap_content"
android:layout_width="match_parent"
android:layout_marginLeft="5pt"
android:layout_marginRight="5pt"
android:textSize="12pt"
android:layout_marginTop="3pt"
android:id="@+id/tvResult"
android:gravity="center_horizontal">
</TextView>
</LinearLayout>
7) Now select mainactivity.java file and type the following code. package
MainActivity.java coding package CALCU.CALU;
import android.app.Activity;
import android.os.Bundle;
import android.text.TextUtils;
import android.view.View;
import
android.view.View.OnClickListener;
import android.widget.Button; import
android.widget.EditText; import
android.widget.TextView;
public class CALCULATORActivity extends Activity implements OnClickListener {
EditText input1;
EditText input2;
Button addition;
Button subtraction;

CS6611 MOBILE APPLICATION DEVELOPMENT LAB
VVIT Department of Computer Science and Engineering
Button multiplication;
Button division;
TextView tvResult;
String oper = "";
@Override
public void onCreate(Bundle savedInstanceState) {
super.onCreate(savedInstanceState);
setContentView(R.layout.main); input1 =
(EditText) findViewById(R.id.etNum1); input2
= (EditText) findViewById(R.id.etNum2);
addition = (Button) findViewById(R.id.btnAdd);
subtraction = (Button) findViewById(R.id.btnSub);
multiplication = (Button) findViewById(R.id.btnMult);
division = (Button) findViewById(R.id.btnDiv);
tvResult = (TextView) findViewById(R.id.tvResult);
// set a listener
addition.setOnClickListener(this);
subtraction.setOnClickListener(this);
multiplication.setOnClickListener(this);
division.setOnClickListener(this);
}
@Override
public void onClick(View v) { // TODO Auto-generated method stub
float num1 = 0; float num2 = 0;
float result = 0;
CS6611 MOBILE APPLICATION DEVELOPMENT LAB
VVIT Department of Computer Science and Engineering
// check if the fields are empty if
(TextUtils.isEmpty(input1.getText().toString())
|| TextUtils.isEmpty(input2.getText().toString())) {
return; }
// read EditText and fill variables with numbers
num1 =
Float.parseFloat(input1.getText().toString());
num2 =
Float.parseFloat(input2.getText().toString());
// defines the button that has been clicked and performs the corresponding operation
// write operation into oper, we will use it later for
output switch (v.getId()) { case R.id.btnAdd:
oper = "+"; result
= num1 + num2;
break; case
R.id.btnSub:
oper = "-"; result
= num1 - num2;
break; case
R.id.btnMult:
oper = "*"; result
= num1 * num2;
break; case
R.id.btnDiv:
oper = "/"; result
= num1 / num2;
break;
default:
break;
}
CS6611 MOBILE APPLICATION DEVELOPMENT LAB
VVIT Department of Computer Science and Engineering
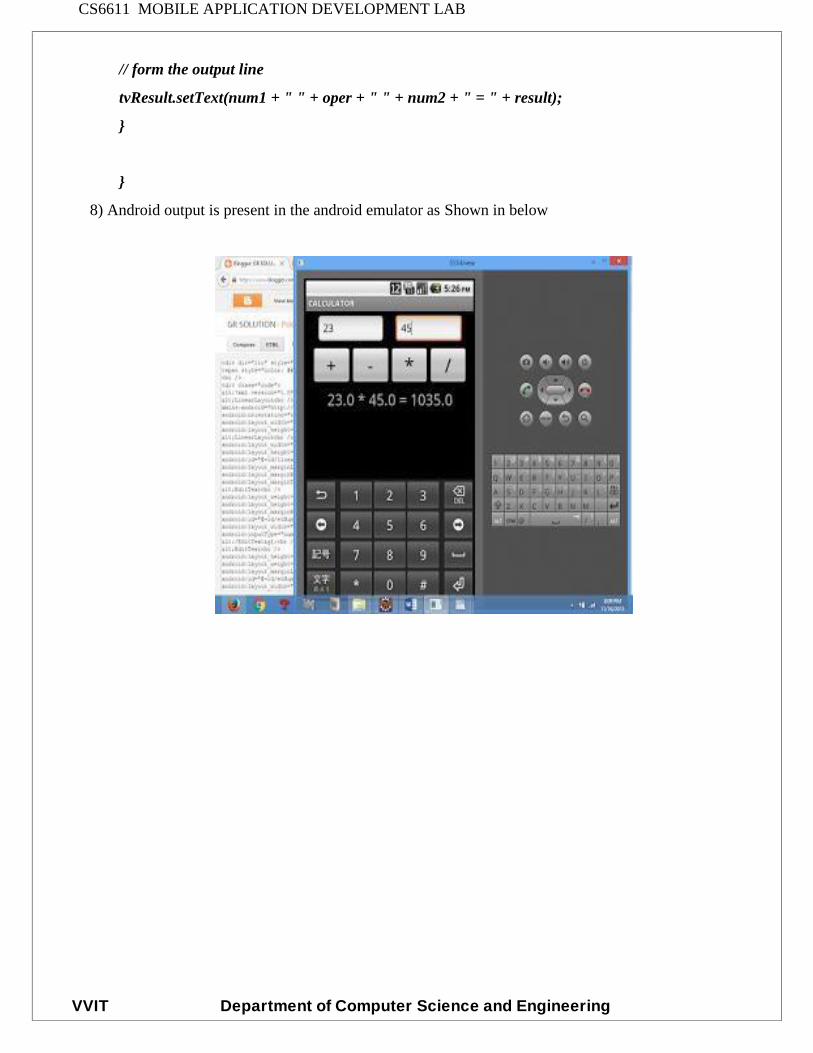
// form the output line
tvResult.setText(num1 + " " + oper + " " + num2 + " = " + result);
}
}
8) Android output is present in the android emulator as Shown in below

CS6611 MOBILE APPLICATION DEVELOPMENT LAB
VVIT Department of Computer Science and Engineering
Ex. No : 4Date :
WRITE AN APPLICATION THAT DRAWS BASIC GRAPHICAL
PRIMITIVES ON THE SCREEN IN ANDROID
1) Open eclipse or android studio and select new android project
2) Give project name and select next
3) Choose the android version. Choose the lowest android version(Android 2.2) and select next
4) Enter the package name. package name must be two word separated by comma and click
finish
5) Go to package explorer in the left hand side. select our project.
6) Go to res folder and select layout. Double click the main.xml file. Don’t change anything
in layout. Leave as default.
7) Now select mainactivity.java file and type the following code.
package Basic.primitive;
import
android.app.Activity;
import
android.content.Context;
import
android.graphics.Canvas
; import
android.graphics.Color;
import
android.graphics.Paint;
import
android.os.Bundle;
import
android.view.View;
CS6611 MOBILE APPLICATION DEVELOPMENT LAB
VVIT Department of Computer Science and Engineering
public class BasicprimitiveActivity extends Activity {
/** Called when the activity is first created. */
@Override
public void onCreate(Bundle savedInstanceState) {
super.onCreate(savedInstanceState);
setContentView(new myview(this));
}
private class myview extends View
{
public myview(Context context)
{
super(context);
}
@Override
protected void onDraw(Canvas canvas)
{
super.onDraw(canvas); Paint
paint=new Paint();
paint.setTextSize(40);
paint.setColor(Color.GREEN);
canvas.drawText("Circle", 55, 30,
paint);
paint.setColor(Color.RED);
canvas.drawCircle(100, 150,100, paint);
paint.setColor(Color.GREEN);
canvas.drawText("Rectangle", 255, 30, paint);
paint.setColor(Color.YELLOW); canvas.drawRect(250,
50,400,350, paint); paint.setColor(Color.GREEN);
canvas.drawText("SQUARE", 55, 430, paint);
paint.setColor(Color.BLUE); canvas.drawRect(50,
450,150,550, paint); paint.setColor(Color.GREEN);

CS6611 MOBILE APPLICATION DEVELOPMENT LAB
VVIT Department of Computer Science and Engineering
canvas.drawText("LINE", 255, 430, paint);
paint.setColor(Color.CYAN);
canvas.drawLine(250, 500, 350, 500, paint);
}
}
}
8) Now go to main.xml and right click .select run as option and select run configuration
9) Android output is present in the android emulator as shown in below.

CS6611 MOBILE APPLICATION DEVELOPMENT LAB
VVIT Department of Computer Science and Engineering
Ex.No : 5Date :
DEVELOP AN APPLICATION THAT MAKES USE OF
DATABASE
1) Open eclipse or android studio and select new android project
2) Give project name and select next
3) Choose the android version. Choose the lowest android version (Android 2.2) and select next
4) Enter the package name. package name must be two word separated by comma and click finish
5) Go to package explorer in the left hand side. select our project.
6) Go to res folder and select layout. Double click the main.xml file. Add the code below
<?xml version="1.0" encoding="utf-8"?>
<AbsoluteLayout
xmlns:android="http://schemas.android.com/apk/res/android"
android:id="@+id/myLayout" android:stretchColumns="0"
android:layout_width="fill_parent"
android:layout_height="fill_parent"><TextView
android:text="@string/title" android:layout_x="110dp"
android:layout_y="10dp"
android:layout_width="wrap_content"
android:layout_height="wrap_content"/><TextView
android:text="@string/empid"
android:layout_x="30dp"
android:layout_y="50dp"
android:layout_width="wrap_content"
android:layout_height="wrap_content"/><EditTe
xt android:id="@+id/editEmpid"
android:inputType="number"
android:layout_x="150dp"
android:layout_y="50dp"

CS6611 MOBILE APPLICATION DEVELOPMENT LAB
VVIT Department of Computer Science and Engineering
android:layout_width="150dp"
android:layout_height="40dp"/><TextView
android:text="@string/name"
android:layout_x="30dp"
android:layout_y="100dp"
android:layout_width="wrap_content"
android:layout_height="wrap_content"/><EditTe
xt android:id="@+id/editName"
android:inputType="text"
android:layout_x="150dp"
android:layout_y="100dp"
android:layout_width="150dp"
android:layout_height="40dp"/><TextView
android:text="@string/salary"
android:layout_x="30dp"
android:layout_y="150dp"
android:layout_width="wrap_content"
android:layout_height="wrap_content"/><EditText
android:id="@+id/editsalary"
android:inputType="number"
android:layout_x="150dp"
android:layout_y="150dp"
android:layout_width="150dp"
android:layout_height="40dp"/><Button
android:id="@+id/btnAdd"
android:text="@string/add"
android:layout_x="30dp"
android:layout_y="200dp"
android:layout_width="130dp"
android:layout_height="40dp"/><Button
android:id="@+id/btnDelete"
android:text="@string/delete"
CS6611 MOBILE APPLICATION DEVELOPMENT LAB
VVIT Department of Computer Science and Engineering
android:layout_x="160dp"
android:layout_y="200dp"
android:layout_width="130dp"
android:layout_height="40dp"/>n <Button
android:id="@+id/btnModify"
android:text="@string/modify"
android:layout_x="30dp"
android:layout_y="250dp"
android:layout_width="130dp"
android:layout_height="40dp"/><Button
android:id="@+id/btnView"
android:text="@string/view"
android:layout_x="160dp"
android:layout_y="250dp"
android:layout_width="130dp"
android:layout_height="40dp"/><Button
android:id="@+id/btnViewAll"
android:text="@string/view_all"
android:layout_x="85dp"
android:layout_y="300dp"
android:layout_width="150dp"
android:layout_height="40dp"/>
</AbsoluteLayout>
7)Go to values folder and select string.xml file. Replace the code below
<?xml version="1.0" encoding="utf-8"?>
<resources>
<string name="app_name">Employee detail1</string>
<string name="hello">Hello World, Employee detail Activity!</string><string
name="title">Employee Details</string>
<string name="empid">Enter Employee ID: </string>

CS6611 MOBILE APPLICATION DEVELOPMENT LAB
VVIT Department of Computer Science and Engineering
<string name="name">Enter Name: </string>
<string name="salary">Enter salary: </string>
<string name="add">Add Employee</string>
<string name="delete">Delete Employee</string>
<string name="modify">Modify Employee</string>
<string name="view">View Employee</string>
<string name="view_all">View All Employee</string>
</resources>
8) Now select mainactivity.java file and type the following code.In my coding maniactivity
name is EmployeedetailActivity.
package employee.detail;
//import android.R; import android.app.Activity; import android.app.AlertDialog.Builder;
import android.content.Context; import android.database.Cursor;
import
android.database.sqlite.SQLiteDatabase;
import android.os.Bundle; import
android.view.View;
import
android.view.View.OnClickListener;
import android.widget.Button; import
android.widget.EditText;
public class EmployeedetailActivity extends Activity implements OnClickListener {
EditText editEmpid,editName,editsalary;
Button btnAdd,btnDelete,btnModify,btnView,btnViewAll;
SQLiteDatabase db;
/** Called when the activity is first created. */
@Override
public void onCreate(Bundle savedInstanceState)
{
CS6611 MOBILE APPLICATION DEVELOPMENT LAB
VVIT Department of Computer Science and Engineering
super.onCreate(savedInstanceState);
setContentView(R.layout.main);
editEmpid=(EditText)findViewById(R.id.editEmpid);
editName=(EditText)findViewById(R.id.editName);
editsalary=(EditText)findViewById(R.id.editsalary);
btnAdd=(Button)findViewById(R.id.btnAdd);
btnDelete=(Button)findViewById(R.id.btnDelete);
btnModify=(Button)findViewById(R.id.btnModify);
btnView=(Button)findViewById(R.id.btnView);
btnViewAll=(Button)findViewById(R.id.btnViewAll);
btnAdd.setOnClickListener(this);
btnDelete.setOnClickListener(this);
btnModify.setOnClickListener(this);
btnView.setOnClickListener(this);
btnViewAll.setOnClickListener(this);
db=openOrCreateDatabase("EmployeeDB", Context.MODE_PRIVATE, null);
db.execSQL("CREATE TABLE IF NOT EXISTS employee(empid VARCHAR,name
VARCHAR,salary VARCHAR);");
}
public void onClick(View view)
{
if(view==btnAdd)
{
if(editEmpid.getText().toString().trim().length()==0||
editName.getText().toString().trim().length()==0||
editsalary.getText().toString().trim().length()==0)
{
showMessage("Error", "Please enter all values");
return;
}
db.execSQL("INSERT INTO employee
VALUES('"+editEmpid.getText()+"','"+editName.getText()+
CS6611 MOBILE APPLICATION DEVELOPMENT LAB
VVIT Department of Computer Science and Engineering
"','"+editsalary.getText()+"');");
showMessage("Success", "Record added");
clearText();
}
if(view==btnDelete)
{
if(editEmpid.getText().toString().trim().length()==0)
{
showMessage("Error", "Please enter Employee id");
return; }
Cursor c=db.rawQuery("SELECT * FROM employee WHERE
empid='"+editEmpid.getText()+"'", null);
if(c.moveToFirst())
{
db.execSQL("DELETE FROM employee WHERE
empid='"+editEmpid.getText()+"'");
showMessage("Success", "Record Deleted");
} else
{
showMessage("Error", "Invalid Employee id");
}
clearText();
}
if(view==btnModify)
{
if(editEmpid.getText().toString().trim().length()==0)
{
showMessage("Error", "Please enter Employee id");
return;
}
Cursor c=db.rawQuery("SELECT * FROM employee WHERE
CS6611 MOBILE APPLICATION DEVELOPMENT LAB
VVIT Department of Computer Science and Engineering
empid='"+editEmpid.getText()+"'", null);
if(c.moveToFirst())
{
db.execSQL("UPDATE employee SET
name='"+editName.getText()+"',salary='"+editsalary.getTe
xt()+ "' WHERE
empid='"+editEmpid.getText()+"'");
showMessage("Success", "Record Modified");
}
else
{
showMessage("Error", "Invalid Rollno");
}
clearText();
}
if(view==btnView)
{
if(editEmpid.getText().toString().trim().length()==0)
{
showMessage("Error", "Please enter Employee id");
return;
}
Cursor c=db.rawQuery("SELECT * FROM employee WHERE
empid='"+editEmpid.getText()+"'", null);
if(c.moveToFirst())
{
editName.setText(c.getString(1));
editsalary.setText(c.getString(2));
}
else
{

CS6611 MOBILE APPLICATION DEVELOPMENT LAB
VVIT Department of Computer Science and Engineering
showMessage("Error", "Invalid Employee id");
clearText();
}
}
if(view==btnViewAll)
{
Cursor c=db.rawQuery("SELECT * FROM employee", null);
if(c.getCount()==0)
{
showMessage("Error", "No records found"); return;
}
StringBuffer buffer=new StringBuffer(); while(c.moveToNext())
{
buffer.append("Employee id: "+c.getString(0)+"\n");
buffer.append("Name: "+c.getString(1)+"\n");
buffer.append("salary: "+c.getString(2)+"\n\n");
}
showMessage("Employee details Details", buffer.toString());
}
}
public void showMessage(String title,String message)
{
Builder builder=new Builder(this);
builder.setCancelable(true); builder.setTitle(title);
builder.setMessage(message);
builder.show();
}
public void clearText()
{
editEmpid.setText(""); editName.setText("");
editsalary.setText("");
editEmpid.requestFocus();

CS6611 MOBILE APPLICATION DEVELOPMENT LAB
VVIT Department of Computer Science and Engineering
}
}
7) Now go to main.xml and right click .select run as option and select run configuration
8) Android output is present in the android emulator as shown in below.

CS6611 MOBILE APPLICATION DEVELOPMENT LAB
VVIT Department of Computer Science and Engineering
Ex. No : 6Date :
DEVELOP AN APPLICATION THAT MAKES USE OF RSS FEED
1) Open eclipse or android studio and select new android project
2) Give project name and select next
3) Choose the android version. Choose the lowest android version (Android 2.2) and select next
4) Enter the package name. Package name must be two word separated by comma and click finish
5) Go to package explorer in the left hand side. Select our project.
6) Go to res folder and select layout. Double click the main.xml file
7) Now you can see the Graphics layout window.
8) Click the main.xml file and type the code below
Code:
<?xml version="1.0" encoding="utf-8"?>
<LinearLayout
xmlns:android="http://schemas.android.com/apk/res/android"
CS6611 MOBILE APPLICATION DEVELOPMENT LAB
VVIT Department of Computer Science and Engineering
android:layout_width="fill_parent" android:layout_height="fill_parent"
android:orientation="vertical" >
<TextView
android:id="@+id/textView1"
android:layout_width="match_parent"
android:layout_height="wrap_content"
android:layout_margin="20sp"
android:gravity="center"
android:text="HELLO WORLD"
android:textSize="20sp"
android:textStyle="bold" />
<Button
android:id="@+id/button1"
android:layout_width="match_parent"
android:layout_height="wrap_content"
android:gravity="center"
android:text="Change font size"
android:textSize="20sp" />
<Button
android:id="@+id/button2"
android:layout_width="match_parent"
android:layout_height="wrap_content"
android:gravity="center"
android:text="Change color"
android:textSize="20sp" />
<Button
android:id="@+id/button3"
android:layout_width="match_parent"
android:layout_height="wrap_content"
android:gravity="center"
android:text="Change font"
android:textSize="20sp" />
CS6611 MOBILE APPLICATION DEVELOPMENT LAB
VVIT Department of Computer Science and Engineering
</LinearLayout>
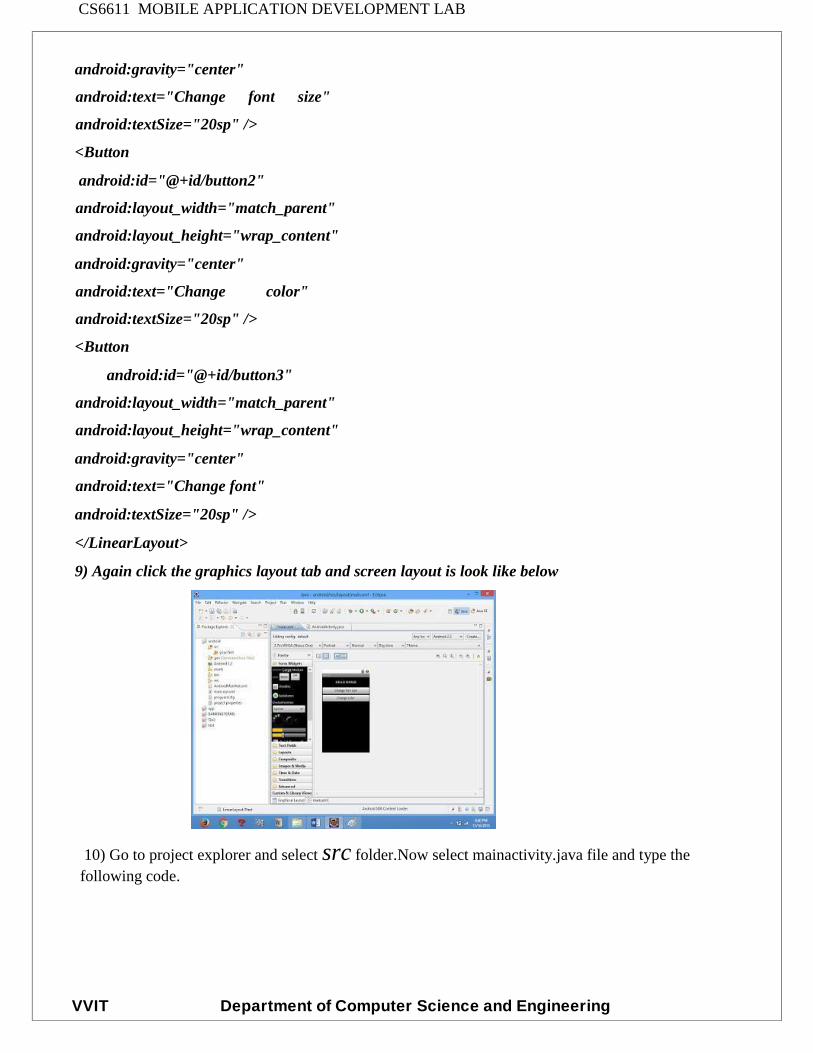
9) Again click the graphics layout tab and screen layout is look like below
10) Go to project explorer and select src folder.Now select mainactivity.java file and type thefollowing code.
PROGRAM
import android.R; import
android.app.Activity; import
android.graphics.Color; import
android.graphics.Typeface; import
android.os.Bundle; import
android.view.View; import
android.widget.Button; import
android.widget.TextView;
public class AndroidActivity extends Activity { float
font =24; int i=1;
@Override public void onCreate(Bundle
savedInstanceState) {
super.onCreate(savedInstanceState); setContentView(R.layout.main);
CS6611 MOBILE APPLICATION DEVELOPMENT LAB
VVIT Department of Computer Science and Engineering
final TextView t1=(TextView) findViewById(R.id.textView1); Button b1
= (Button) findViewById(R.id.button1);
b1.setOnClickListener(new View.OnClickListener() {
public void onClick(View view) {
t1.setTextSize(font);
font=font+4; if(font==40)
font=20;
}
});
Button b2 = (Button) findViewById(R.id.button2);
b2.setOnClickListener(new View.OnClickListener() {
public void onClick(View view) {
switch(i)
{ case 1:
t1.setTextColor(Color.parseColor("#0000FF"));
break; case 2:
t1.setTextColor(Color.parseColor("#00FF00"));
break; case 3:
t1.setTextColor(Color.parseColor("#FF0000"));
break; case 4:
t1.setTextColor(Color.parseColor("#800000"));
break;
} i++;
if(i==5)
i=1;
}
});
} }
CS6611 MOBILE APPLICATION DEVELOPMENT LAB
VVIT Department of Computer Science and Engineering
8) Now go to main.xml and right click .select run as option and select run configuration
CS6611 MOBILE APPLICATION DEVELOPMENT LAB
VVIT Department of Computer Science and Engineering
Ex. No: 7Date :
IMPLEMENT AN APPLICATION THAT IMPLEMENTS
MULTI THREADING
1) Open eclipse or android studio and select new android project
2) Give project name and select next
3) Choose the android version. Choose the lowest android version (Android 2.2) and select next
4) Enter the package name. Package name must be two word separated by comma and click finish
5) Go to package explorer in the left hand side. Select our project.
6) Go to res folder and select layout. Double click the main.xml file. Add the code below
<?xml version="1.0" encoding="utf-8"?>
<LinearLayout
xmlns:android="http://schemas.android.com/apk/res/android"
android:layout_width="match_parent"
android:layout_height="match_parent" android:orientation="vertical"
android:id="@+id/info" >
<Button
android:id="@+id/button1"
android:layout_width="match_parent"
android:layout_height="wrap_content"
android:onClick="fetchData"
android:text="Start MULTITHREAD" />
<TextView
android:id="@+id/textView1"
android:layout_width="wrap_content"
android:layout_height="wrap_content"
android:text="Main thread" />
</LinearLayout>

CS6611 MOBILE APPLICATION DEVELOPMENT LAB
VVIT Department of Computer Science and Engineering
7) Now select mainactivity.java file and type the following code.
package multi.threading;
//import your.first.R; import
android.app.Activity; import
android.os.Bundle; import
android.os.Handler; import
android.view.View; import
android.widget.TextView;
public class MultiThreadingActivity extends Activity
{ private TextView tvOutput; private static
final int t1 = 1; private static final int t2 = 2;
private static final int t3 = 3;
@Override
public void onCreate(Bundle savedInstanceState) {
super.onCreate(savedInstanceState);
setContentView(R.layout.main);
tvOutput = (TextView) findViewById(R.id.textView1);
}
public void fetchData(View v) {
tvOutput.setText("Main thread");
thread1.start();
thread2.start();
thread3.start();
}
Thread thread1 = new Thread(new Runnable() {
@Override public void
run() { for (int i = 0; i
< 5; i++) { try {

CS6611 MOBILE APPLICATION DEVELOPMENT LAB
VVIT Department of Computer Science and Engineering
Thread.sleep(1000); } catch
(InterruptedException e) {
e.printStackTrace();
}
handler.sendEmptyMessage(t1);
}
}
});
Thread thread2 = new Thread(new Runnable() {
@Override public void
run() { for (int i = 0; i
< 5; i++) { try {
Thread.sleep(1000); } catch
(InterruptedException e) {
e.printStackTrace();
}
handler.sendEmptyMessage(t2);
}
}
});
Thread thread3 = new Thread(new Runnable() {
@Override public void
run() { for (int i = 0; i
< 5; i++) { try {
Thread.sleep(1000);
} catch (InterruptedException e) {
e.printStackTrace();
}
handler.sendEmptyMessage(t3);
CS6611 MOBILE APPLICATION DEVELOPMENT LAB
VVIT Department of Computer Science and Engineering
}
}
});
Handler handler = new Handler() {
public void handleMessage(android.os.Message msg) {
if(msg.what == t1) {
tvOutput.append("\nIn thread 1");
}
if(msg.what == t2) {
tvOutput.append("\nIn thread 2");
}
if(msg.what == t3) {
tvOutput.append("\nIn thread 3");
}
}
};
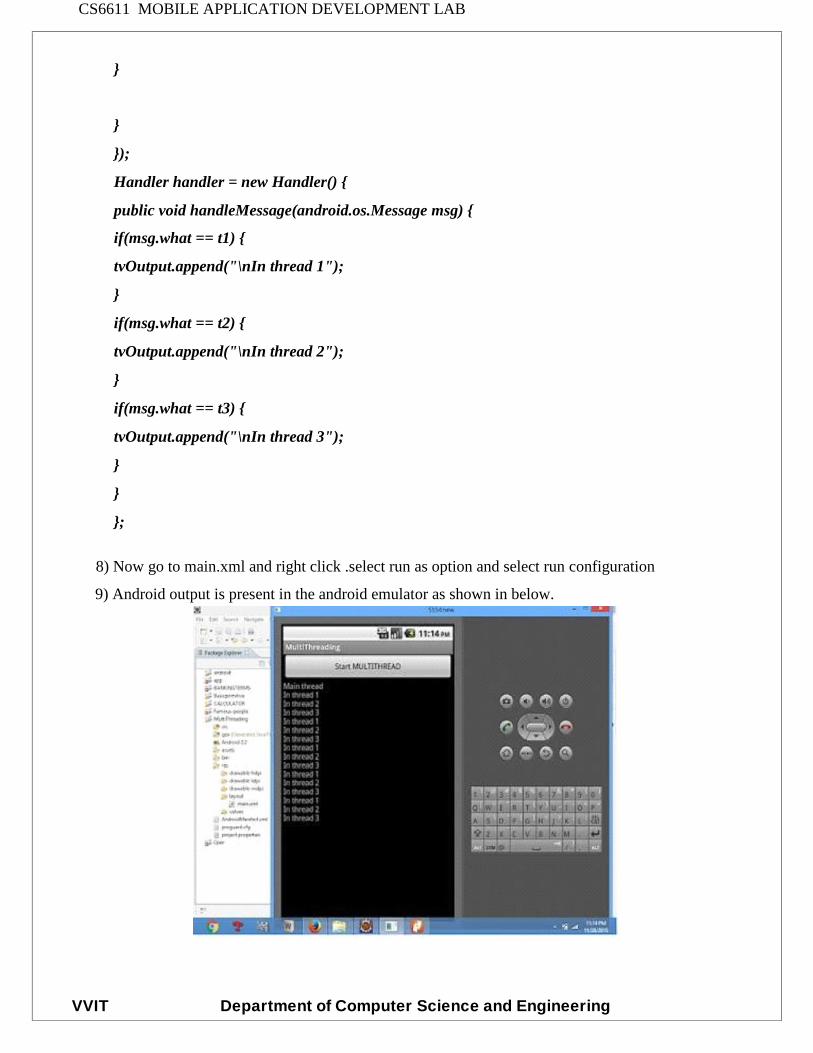
8) Now go to main.xml and right click .select run as option and select run configuration
9) Android output is present in the android emulator as shown in below.

CS6611 MOBILE APPLICATION DEVELOPMENT LAB
VVIT Department of Computer Science and Engineering
Ex.No : 8
Date :
DEVELOP A NATIVE APPLICATION THAT USES GPS
LOCATION INFORMATION
1) Open eclipse or android studio and select new android project
2) Give project name and select next
3) Choose the android version. Choose the lowest android version (Android 2.2) and select
next
4) Enter the package name. package name must be two word separated by comma and click
finish
5) Go to package explorer in the left hand side. select our project.
6) Go to res folder and select layout. Double click the main.xml file. Add the code below
<?xml version="1.0" encoding="utf-8"?>
<RelativeLayout
xmlns:android="http://schemas.android.com/apk/res/android"
android:id="@+id/relativeLayout1"
android:layout_width="match_parent"
android:layout_height="match_parent" >
<Button
android:id="@+id/show_Location
"
android:layout_width="wrap_cont
ent"
android:layout_height="wrap_cont
ent
android:text="Show_Location"
android:layout_centerVertical="tr
ue"
CS6611 MOBILE APPLICATION DEVELOPMENT LAB
VVIT Department of Computer Science and Engineering
android:layout_centerHorizontal="true"
/>
</RelativeLayout>
7) Now select mainactivity.java file and type the following code. In my coding man activity
name is GPSlocation Activity. Package gps.location;
//import android.R;
import
android.app.Activity;
import
android.os.Bundle;
import
android.view.View;
import
android.widget.Butto
n; import
android.widget.Toast
;
public class GPSlocationActivity extends Activity {
/** Called when the activity is first created. */
Button btnShowLocation;
GPStrace gps;
@Override
public void onCreate(Bundle savedInstanceState) {
super.onCreate(savedInstanceState);
setContentView(R.layout.main);
btnShowLocation=(Button)findViewById(R.id.show_Location);
btnShowLocation.setOnClickListener(new View.OnClickListener() {
@Override
public void onClick(View v) {

CS6611 MOBILE APPLICATION DEVELOPMENT LAB
VVIT Department of Computer Science and Engineering
// TODO Auto-generated method stub
gps=new GPStrace(GPSlocationActivity.this);
if(gps.canGetLocation()){
double latitude=gps.getLatitude();
double longitude=gps.getLongtiude();
Toast.makeText(getApplicationContext(),"Your Location is
\nLat:"+latitude+"\nLong:"+longitude, Toast.LENGTH_LONG).show();
}
else
{
gps.showSettingAlert();
}
}
});
}
}
8) Go to src folder and Right Click on your package folder and choose new class and give the
class names as GPS trace

CS6611 MOBILE APPLICATION DEVELOPMENT LAB
VVIT Department of Computer Science and Engineering
9) Select the GPStrace.java file and paste the following code.
Package gps.location;
import android.app.AlertDialog;
import android.app.Service;
import android.content.Context;
import
android.content.DialogInterface;
import android.content.Intent;
import android.location.Location;
import
android.location.LocationListener
; import
android.location.LocationManage
r; import android.os.Bundle;
import android.os.IBinder; import
android.provider.Settings;
public class GPStrace extends Service implements
LocationListener{ private final Context context; boolean
isGPSEnabled=false; boolean canGetLocation=false; boolean
isNetworkEnabled=false;
Location
location; double
latitude; double
longtitude;
private static final long MIN_DISTANCE_CHANGE_FOR_UPDATES=10;
private static final long MIN_TIME_BW_UPDATES=1000*60*1;
protected LocationManager locationManager;
public GPStrace(Context context)
{
this.context=conte
xt;
getLocation();

CS6611 MOBILE APPLICATION DEVELOPMENT LAB
VVIT Department of Computer Science and Engineering
}
public Location getLocation()
{
try{
locationManager=(LocationManager) context.getSystemService(LOCATION_SERVICE);
isGPSEnabled=locationManager.isProviderEnabled(LocationManager.GPS_PROVIDER)
;
isNetworkEnabled=locationManager.isProviderEnabled(LocationManager.NETWORK_PR
OVI DER);
if(!isGPSEnabled && !isNetworkEnabled){
}else{
this.canGetLocation=true;
if(isNetworkEnabled){
locationManager.requestLocationUpdates(
LocationManager.NETWORK_PROVIDER,
MIN_TIME_BW_UPDATES,
MIN_DISTANCE_CHANGE_FOR_UPDATES,this);
}
if(locationManager!=null){
location=locationManager.getLastKnownLocation(LocationManager.NETWORK_PROVI
DER)
;
if(location !=null){
latitude=location.getLatitude();
longtitude=location.getLongitude();
}
}
CS6611 MOBILE APPLICATION DEVELOPMENT LAB
VVIT Department of Computer Science and Engineering
}
if(isGPSEnabled){
if(location==null){
locationManager.requestLocationUpdates(LocationManager.GPS_PROVIDER,MIN_TIM
E_B
W_UPDATES, MIN_DISTANCE_CHANGE_FOR_UPDATES, this);
if(locationManager!=null){
location=locationManager.getLastKnownLocation(LocationManager.GPS_PROV
IDER); if(location!=null){
latitude=location.getLatitude();
longtitude=location.getLongitude();
}
}
}
}
}
catch(Exception e)
{
e.printStackTrace();
}
return location;
}
public void stopUsingGPS(){
if(locationManager!=null){
locationManager.removeUpdates(GPStrace.this);
} } public double
getLatitude(){
if(location!=null){
latitude=location.getLatitude();
CS6611 MOBILE APPLICATION DEVELOPMENT LAB
VVIT Department of Computer Science and Engineering
}
return latitude;
}
public double getLongtiude(){
if(location!=null){
longtitude=location.getLatitude();
}
return longtitude;
}
public boolean canGetLocation(){
return this.canGetLocation;
}
public void showSettingAlert(){
AlertDialog.Builder alertDialog=new AlertDialog.Builder(context);
alertDialog.setTitle("GPS is settings"); alertDialog.setMessage("GPS is not
enabled.Do you want to go to setting menu?");
alertDialog.setPositiveButton("settings", new DialogInterface.OnClickListener() {
@Override
public void onClick(DialogInterface dialog,int which){
Intent intent=new Intent(Settings.ACTION_LOCATION_SOURCE_SETTINGS);
context.startActivity(intent);
}
});
alertDialog.setNegativeButton("cancel", new DialogInterface.OnClickListener() {
@Override
public void onClick(DialogInterface dialog, int which) {
// TODO Auto-generated method stub
dialog.cancel();
}
});
CS6611 MOBILE APPLICATION DEVELOPMENT LAB
VVIT Department of Computer Science and Engineering
alertDialog.show();
}
@Override
public void onLocationChanged(Location location) {
// TODO Auto-generated method stub
}
@Override
public void onProviderDisabled(String provider) {
// TODO Auto-generated method stub
}
@Override
public void onProviderEnabled(String provider) {
// TODO Auto-generated method stub
}
@Override
public void onStatusChanged(String provider, int status, Bundle extras) {
// TODO Auto-generated method stub
}
@Override
public IBinder onBind(Intent
intent) { // TODO Auto-generated
method stub return null;
}
}
10)Go to manifest.xml file and add the code below
<uses-permission
android:name="android.permission.ACCESS_FINE_LOCATION"/>

CS6611 MOBILE APPLICATION DEVELOPMENT LAB
VVIT Department of Computer Science and Engineering
<uses-permission
android:name="android.permission.INTERNET"/>
11) Now go to main.xml and right click .select run as option and select run
configuration
12) Android output is present in the android emulator as shown in below.
CS6611 MOBILE APPLICATION DEVELOPMENT LAB
VVIT Department of Computer Science and Engineering
Ex.No : 9Date :
IMPLEMENT AN APPLICATION THAT WRITES DATA TO THE
SD CARD
1) Open eclipse or android studio and select new android project
2) Give project name and select next
3) Choose the android version. Choose the lowest android version (Android 2.2) and select next
4) Enter the package name. Package name must be two word separated by comma and click
finish
5) Go to package explorer in the left hand side. Select our project.
6) Go to res folder and select layout. Double click the main.xml file. Add the code below
<?xml version="1.0" encoding="utf-8"?>
<LinearLayout
xmlns:android="http://schemas.android.com/apk/res/android"
android:layout_width="fill_parent"
android:layout_height="fill_parent"
android:background="#ff0000ff" android:orientation="vertical" >
<EditText
android:id="@+id/editText1"
android:layout_width="match_parent"
android:layout_height="wrap_content" >
<requestFocus />
</EditText>
<Button
android:id="@+id/button1"
android:layout_width="match_parent"
android:layout_height="wrap_content"
android:text="SAVE DATA" />
<Button
CS6611 MOBILE APPLICATION DEVELOPMENT LAB
VVIT Department of Computer Science and Engineering
android:id="@+id/button2"
android:layout_width="match_parent"
android:layout_height="wrap_content"
android:text="SHOW DATA" />
<TextView
android:id="@+id/textView1"
android:layout_width="wrap_content"
android:layout_height="wrap_content"
/>
</LinearLayout>
7) Now select mainactivity.java file and type the following code.
package save.sd;
import java.io.File; import
java.io.FileInputStream; import
java.io.FileNotFoundException;
import java.io.FileOutputStream;
import java.io.IOException; import
java.io.InputStreamReader; import
java.io.OutputStreamWriter; import
android.app.Activity; import
android.os.Bundle; import
android.os.Environment; import
android.view.View; import
android.widget.Button; import
android.widget.EditText; import
android.widget.TextView; import
android.widget.Toast;
public class SavedatasdcardActivity extends Activity {
/** Called when the activity is first created. */
Button save,load;
EditText message;
TextView t1;

CS6611 MOBILE APPLICATION DEVELOPMENT LAB
VVIT Department of Computer Science and Engineering
String Message1;
@Override
public void onCreate(Bundle savedInstanceState) {
super.onCreate(savedInstanceState);
setContentView(R.layout.main); save=(Button)
findViewById(R.id.button1); load=(Button)
findViewById(R.id.button2); message=(EditText)
findViewById(R.id.editText1); t1=(TextView)
findViewById(R.id.textView1);
save.setOnClickListener(new View.OnClickListener(){
public void onClick(View v){
//Get message from user store in message1 variable
Message1 =message.getText().toString(); try{
//Create a new folder called MyDirectory in SDCard
File sdcard=Environment.getExternalStorageDirectory();
File directory=new File(sdcard.getAbsolutePath()+"/MyDirectory");
directory.mkdirs();
//Create a new file name textfile.txt inside MyDirectory
File file=new File(directory,"textfile.txt");
//Create File Outputstream to read the file
FileOutputStream fou=new FileOutputStream(file);
OutputStreamWriter osw=new OutputStreamWriter(fou);
try{
//write a user data to file
osw.append(Message1);
osw.flush();
osw.close();
Toast.makeText(getBaseContext(),"Data
Saved",Toast.LENGTH_LONG).show();
}catch(IOException e){
e.printStackTrace();
CS6611 MOBILE APPLICATION DEVELOPMENT LAB
VVIT Department of Computer Science and Engineering
}
}catch (FileNotFoundException e){
e.printStackTrace();
}
}
});
load.setOnClickListener(new View.OnClickListener(){
public void onClick(View v){
try{
File sdcard=Environment.getExternalStorageDirectory();
File directory=new File(sdcard.getAbsolutePath()+"/MyDirectory");
File file=new File(directory,"textfile.txt");
FileInputStream fis=new FileInputStream(file);
InputStreamReader isr=new InputStreamReader(fis);
char[] data=new char[100];
String final_data="";
int size;
try{
while((size=isr.read(data))>0)
{
//read a data from file
String read_data=String.copyValueOf(data,0,size);
final_data+=read_data;
data=new char[100];
}
//display the data in output
Toast.makeText(getBaseContext(),"Message:"+final_data,Toast.LENGTH_LONG).show()
;
}catch(IOException e){
e.printStackTrace();
}
CS6611 MOBILE APPLICATION DEVELOPMENT LAB
VVIT Department of Computer Science and Engineering
}catch (FileNotFoundException e){
e.printStackTrace();
}
}
});
}
}
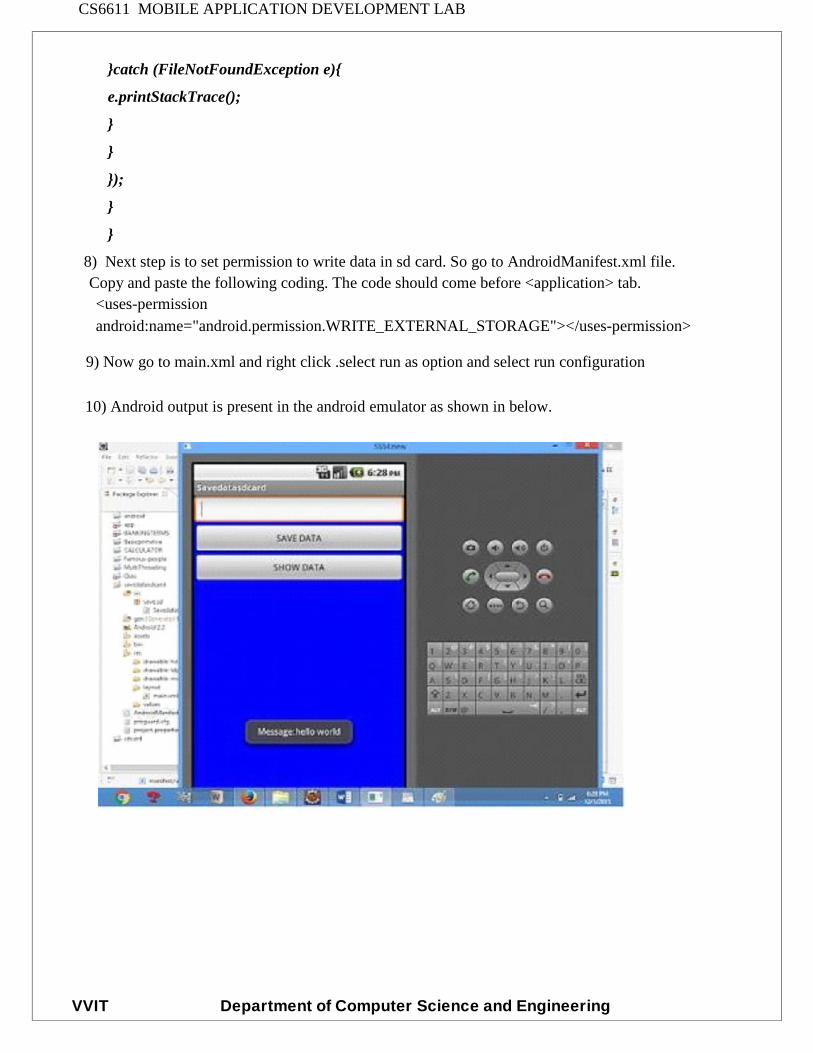
8) Next step is to set permission to write data in sd card. So go to AndroidManifest.xml file.Copy and paste the following coding. The code should come before <application> tab.<uses-permissionandroid:name="android.permission.WRITE_EXTERNAL_STORAGE"></uses-permission>
9) Now go to main.xml and right click .select run as option and select run configuration
10) Android output is present in the android emulator as shown in below.
CS6611 MOBILE APPLICATION DEVELOPMENT LAB
VVIT Department of Computer Science and Engineering
Ex.No: 10Date :
IMPLEMENT AN APPLICATION THAT CREATES AN ALERT
UPON RECEIVING A MESSAGE IN ANDROID
1) Open eclipse or android studio and select new android project
2) Give project name and select next
3) Choose the android version. Choose the lowest android version(Android 2.2) and select next
4) Enter the package name. package name must be two word separated by comma and click
finish
5) Go to package explorer in the left hand side. select our project.
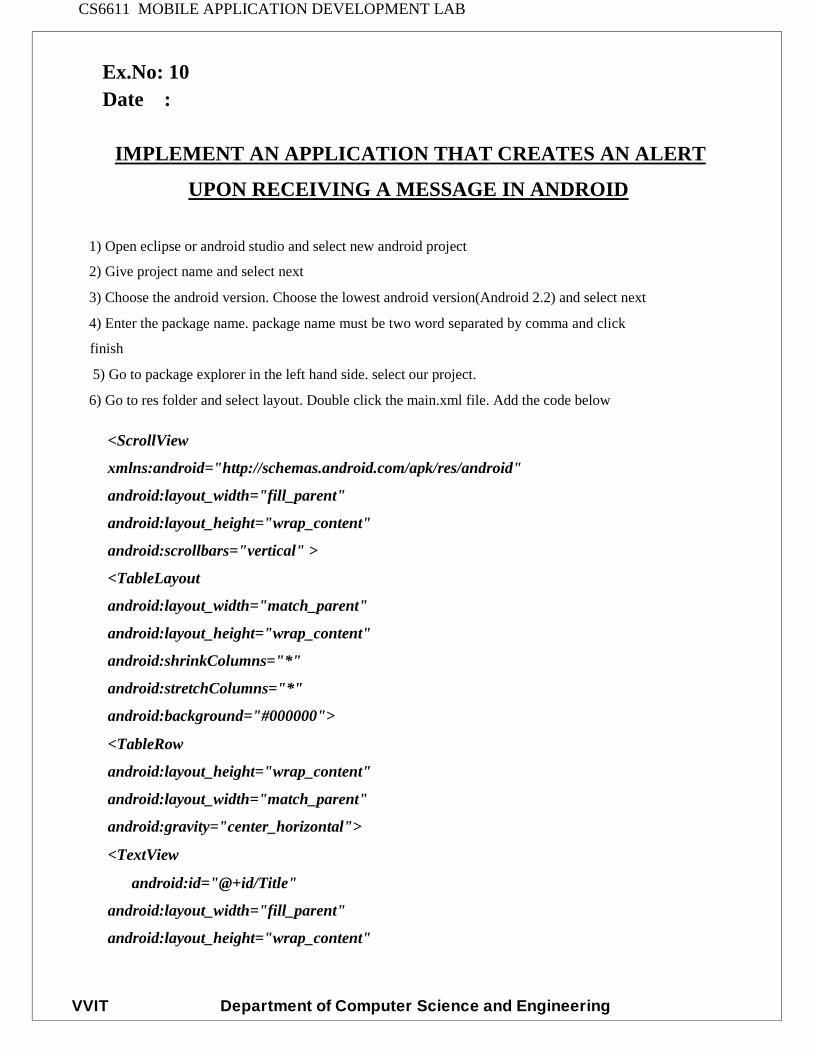
6) Go to res folder and select layout. Double click the main.xml file. Add the code below
<ScrollView
xmlns:android="http://schemas.android.com/apk/res/android"
android:layout_width="fill_parent"
android:layout_height="wrap_content"
android:scrollbars="vertical" >
<TableLayout
android:layout_width="match_parent"
android:layout_height="wrap_content"
android:shrinkColumns="*"
android:stretchColumns="*"
android:background="#000000">
<TableRow
android:layout_height="wrap_content"
android:layout_width="match_parent"
android:gravity="center_horizontal">
<TextView
android:id="@+id/Title"
android:layout_width="fill_parent"
android:layout_height="wrap_content"

CS6611 MOBILE APPLICATION DEVELOPMENT LAB
VVIT Department of Computer Science and Engineering
android:layout_margin="5px"
android:focusable="false"
android:focusableInTouchMode="false"
android:gravity="center_vertical|center_hori
zontal" android:text="QUIZ"
android:textSize="25sp"
android:textStyle="bold" />
<View
android:layout_height="2px"
android:layout_marginTop="5dip"
android:layout_marginBottom="5dip"
android:background="#DDFFDD"/>
</TableRow>
<TableRow
android:layout_height="wrap_content"
android:layout_width="match_parent"
android:gravity="center_horizontal">
<TextView
android:layout_width="match_parent"
android:layout_height="wrap_content"
android:textSize="18sp"
android:text="1.CAPTIAL OF INDIA"
android:layout_span="4"
android:padding="18dip"
android:textColor="#ffffff"/>
</TableRow><TableRow
android:id="@+id/tableRow1"
android:layout_height="wrap_content"
android:layout_width="match_parent">
<RadioGroup
android:id="@+id/answer1"
android:layout_width="match_parent"

CS6611 MOBILE APPLICATION DEVELOPMENT LAB
VVIT Department of Computer Science and Engineering
android:layout_height="wrap_content"
android:layout_weight="0.4" >
<RadioButton
android:id="@+id/answer1A"
android:layout_width="match_parent"
android:layout_height="wrap_content"
android:textColor="#ffffff"
android:text="CHENNAI" />
<RadioButton
android:id="@+id/answer1B"
android:layout_width="match_parent"
android:layout_height="wrap_content"
android:textColor="#ffffff"
android:text="NEW DELHI" />
<RadioButton
android:id="@+id/answer1C"
android:layout_width="match_parent"
android:layout_height="wrap_content"
android:textColor="#ffffff"
android:text="MUMBAI" />
<RadioButton
android:id="@+id/answer1D"
android:layout_width="match_parent"
android:layout_height="wrap_content"
android:textColor="#ffffff"
android:text="HYDERBAD" />
</RadioGroup>
</TableRow><TableRow
android:layout_height="wrap_content"
android:layout_width="match_parent"
android:gravity="center_horizontal">
<TextView

CS6611 MOBILE APPLICATION DEVELOPMENT LAB
VVIT Department of Computer Science and Engineering
android:layout_width="match_parent" android:layout_height="wrap_content"
android:textSize="18sp" android:text="2. CAPTIAL OF
RUSSIA?" android:layout_span="4"
android:padding="18dip" android:textColor="#ffffff"/>
</TableRow>
<TableRow
android:id="@+id/tableRow2"
android:layout_height="wrap_content"
android:layout_width="match_parent">
<RadioGroup
android:id="@+id/answer2"
android:layout_width="match_parent"
android:layout_height="wrap_content"
android:layout_weight="0.4" >
<RadioButton
android:id="@+id/answer2A"
android:layout_width="match_parent"
android:layout_height="wrap_content"
android:textColor="#ffffff"
android:text="WARSAW " />
<RadioButton
android:id="@+id/answer2B"
android:layout_width="match_parent"
android:layout_height="wrap_content"
android:textColor="#ffffff"
android:text="BERLIN" />
<RadioButton
android:id="@+id/answer2C"
android:layout_width="match_parent"
android:layout_height="wrap_content"
android:textColor="#ffffff"
android:text="MASCOW " />

CS6611 MOBILE APPLICATION DEVELOPMENT LAB
VVIT Department of Computer Science and Engineering
<RadioButton
android:id="@+id/answer2D"
android:layout_width="match_parent"
android:layout_height="wrap_content"
android:textColor="#ffffff"
android:text="CANEBRA " />
</RadioGroup>
</TableRow><TableRow
android:layout_height="wrap_content"
android:layout_width="match_parent"
android:gravity="center_horizontal">
<Button
android:id="@+id/submit"
android:layout_width="wrap_content"
android:layout_height="wrap_content"
android:gravity="center"
android:text="Submit" />
</TableRow>
</TableLayout></ScrollView>
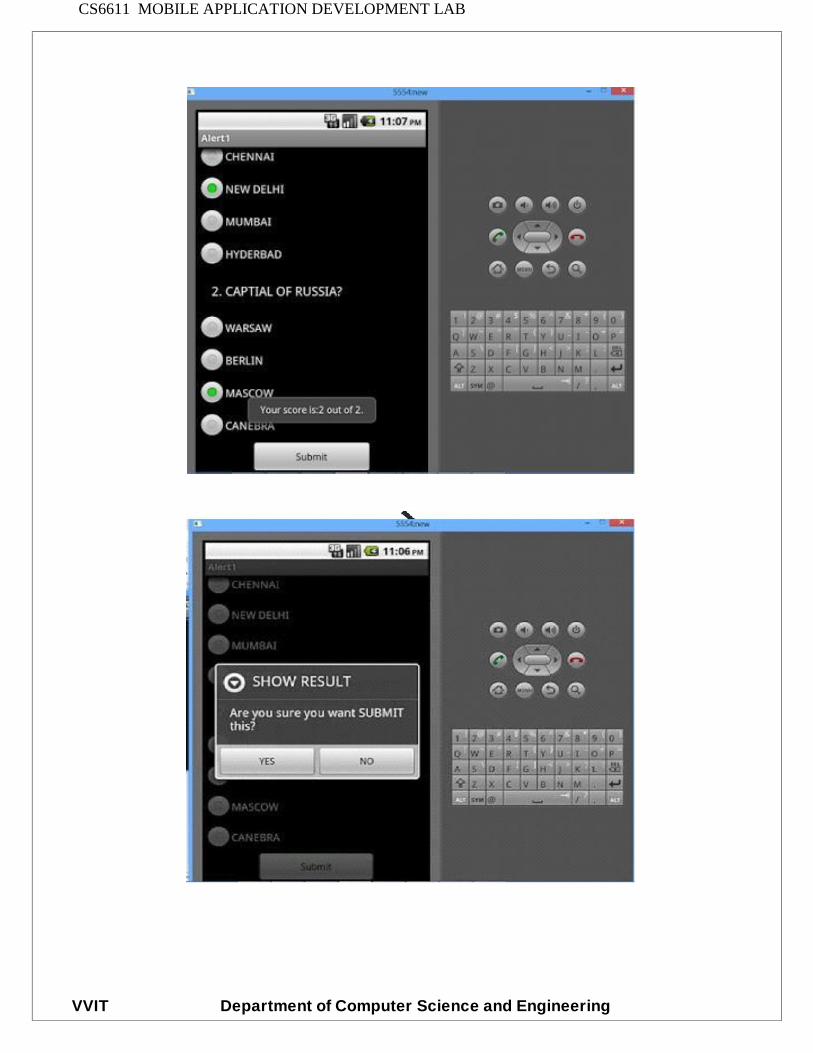
7) Now select mainactivity.java file and type the following code. In my coding man activity name is
Alert1Activity.
8) Now go to main.xml and right click .select run as option and select run configuration
9) Android output is present in the android emulator as shown in below.
CS6611 MOBILE APPLICATION DEVELOPMENT LAB
VVIT Department of Computer Science and Engineering

CS6611 MOBILE APPLICATION DEVELOPMENT LAB
VVIT Department of Computer Science and Engineering
Ex.No : 11Date :
WRITE A MOBILE APPLICATION THAT CREATES ALARM
CLOCK
1. Android ManifestAndroidManifest.xml
We need to give uses-permission for WAKE_LOCK, other than that the AndroidManifest.xml is
pretty standard one. Just need to include the service and receiver.
<?xml version="1.0" encoding="utf-8"?>
<manifest xmlns:android="http://schemas.android.com/apk/res/android"
package="com.javapapers.androidalarmclock">
<uses-permission android:name="android.permission.WAKE_LOCK" />
<application
android:allowBackup="true" android:icon="@drawable/ic_launcher"
android:label="@string/app_name" android:theme="@style/AppTheme">
<activity
android:name=".AlarmActivity" android:label="@string/app_name">
<intent-filter>
<action android:name="android.intent.action.MAIN" />
<category android:name="android.intent.category.LAUNCHER" />
</intent-filter>
</activity><service
android:name=".AlarmService" android:enabled="true" />
<receiver android:name=".AlarmReceiver" />
</application>
</manifest>
CS6611 MOBILE APPLICATION DEVELOPMENT LAB
VVIT Department of Computer Science and Engineering
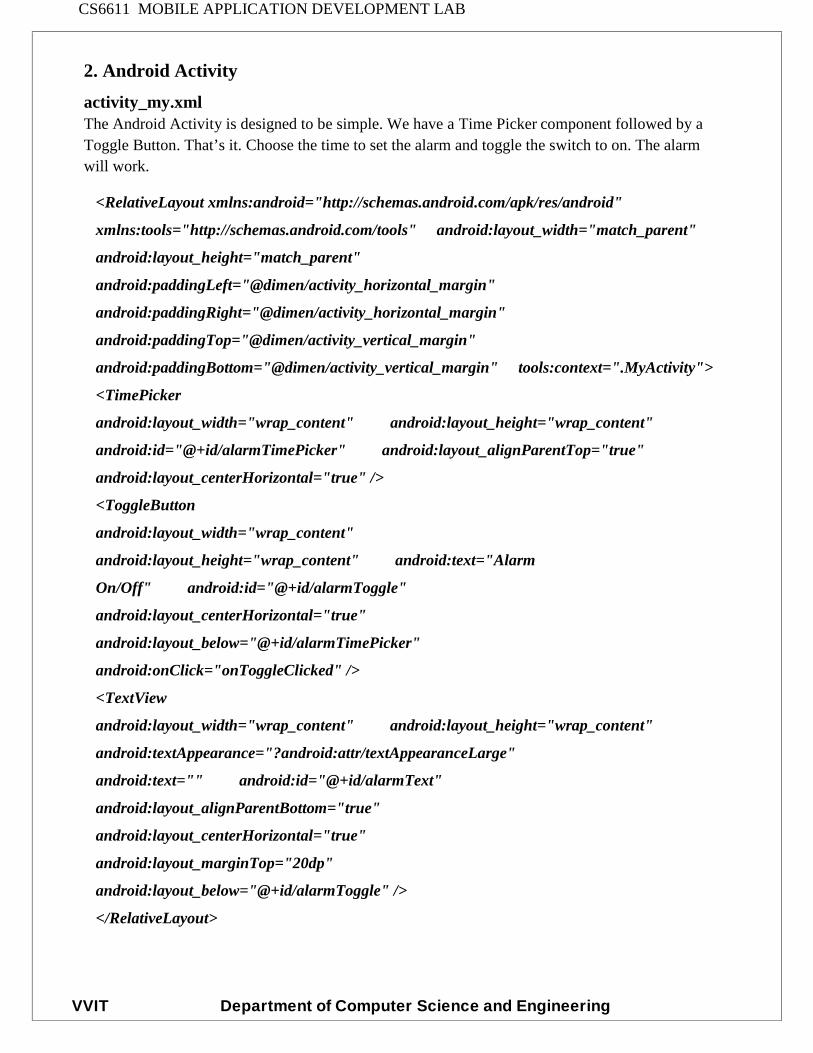
2. Android Activity
activity_my.xmlThe Android Activity is designed to be simple. We have a Time Picker component followed by aToggle Button. That’s it. Choose the time to set the alarm and toggle the switch to on. The alarmwill work.
<RelativeLayout xmlns:android="http://schemas.android.com/apk/res/android"
xmlns:tools="http://schemas.android.com/tools" android:layout_width="match_parent"
android:layout_height="match_parent"
android:paddingLeft="@dimen/activity_horizontal_margin"
android:paddingRight="@dimen/activity_horizontal_margin"
android:paddingTop="@dimen/activity_vertical_margin"
android:paddingBottom="@dimen/activity_vertical_margin" tools:context=".MyActivity">
<TimePicker
android:layout_width="wrap_content" android:layout_height="wrap_content"
android:id="@+id/alarmTimePicker" android:layout_alignParentTop="true"
android:layout_centerHorizontal="true" />
<ToggleButton
android:layout_width="wrap_content"
android:layout_height="wrap_content" android:text="Alarm
On/Off" android:id="@+id/alarmToggle"
android:layout_centerHorizontal="true"
android:layout_below="@+id/alarmTimePicker"
android:onClick="onToggleClicked" />
<TextView
android:layout_width="wrap_content" android:layout_height="wrap_content"
android:textAppearance="?android:attr/textAppearanceLarge"
android:text="" android:id="@+id/alarmText"
android:layout_alignParentBottom="true"
android:layout_centerHorizontal="true"
android:layout_marginTop="20dp"
android:layout_below="@+id/alarmToggle" />
</RelativeLayout>
CS6611 MOBILE APPLICATION DEVELOPMENT LAB
VVIT Department of Computer Science and Engineering
AlarmActivity.java
Alarm Activity uses the Alarm Manager to set the alarm and send notification on alarm trigger.
package com.javapapers.androidalarmclock;
import android.app.Activity; import
android.app.AlarmManager; import
android.app.PendingIntent; import
android.content.Intent; import
android.os.Bundle; import
android.util.Log; import
android.view.View; import
android.widget.TextView; import
android.widget.TimePicker; import
android.widget.ToggleButton;
import java.util.Calendar; public
class AlarmActivity extends Activity
{
AlarmManager alarmManager; private
PendingIntent pendingIntent; private
TimePicker alarmTimePicker; private
static AlarmActivity inst; private TextView
alarmTextView;
public static AlarmActivity instance() {
return inst; }
@Override
public void onStart() {
super.onStart(); inst =
this; }
@Override
protected void onCreate(Bundle savedInstanceState) {
super.onCreate(savedInstanceState); setContentView(R.layout.activity_my);

CS6611 MOBILE APPLICATION DEVELOPMENT LAB
VVIT Department of Computer Science and Engineering
alarmTimePicker = (TimePicker) findViewById(R.id.alarmTimePicker); alarmTextView
= (TextView) findViewById(R.id.alarmText);
ToggleButton alarmToggle = (ToggleButton) findViewById(R.id.alarmToggle);
alarmManager = (AlarmManager) getSystemService(ALARM_SERVICE);
}
public void onToggleClicked(View view) { if
(((ToggleButton) view).isChecked()) {
Log.d("MyActivity", "Alarm On");
Calendar calendar = Calendar.getInstance();
calendar.set(Calendar.HOUR_OF_DAY,
alarmTimePicker.getCurrentHour());
calendar.set(Calendar.MINUTE, alarmTimePicker.getCurrentMinute());
Intent myIntent = new Intent(AlarmActivity.this, AlarmReceiver.class);
pendingIntent = PendingIntent.getBroadcast(AlarmActivity.this, 0, myIntent, 0);
alarmManager.set(AlarmManager.RTC, calendar.getTimeInMillis(), pendingIntent);
} else {
alarmManager.cancel(pendingIntent); setAlarmText("");
Log.d("MyActivity", "Alarm Off");
} }
public void setAlarmText(String alarmText) { alarmTextView.setText(alarmText);
}
}
3. Alarm Receiver
AlarmReceiver.javathis is the one that receives the alarm trigger on set time. From here we initiate different actions
to notify the user as per our choice. I have given three type of notifications, first show a message
to user in the activity UI, second play the alarm ringtone and third send an Android notification
message. So this is the place to add enhancement for different types of user notifications.
package com.javapapers.androidalarmclock;

CS6611 MOBILE APPLICATION DEVELOPMENT LAB
VVIT Department of Computer Science and Engineering
import android.app.Activity; import
android.content.ComponentName; import
android.content.Context; import
android.content.Intent; import
android.media.Ringtone; import
android.media.RingtoneManager; import
android.net.Uri;
import android.support.v4.content.WakefulBroadcastReceiver; public class
AlarmReceiver extends WakefulBroadcastReceiver {
@Override
public void onReceive(final Context context, Intent intent) {
//this will update the UI with message AlarmActivity inst =
AlarmActivity.instance(); inst.setAlarmText("Alarm! Wake up!
Wake up!");
//this will sound the alarm tone
//this will sound the alarm once, if you wish to
//raise alarm in loop continuously then use MediaPlayer and setLooping(true)
Uri alarmUri =
RingtoneManager.getDefaultUri(RingtoneManager.TYPE_ALARM
); if (alarmUri == null) { alarmUri =
RingtoneManager.getDefaultUri(RingtoneManager.TYPE_NOTIFICATION);
}
Ringtone ringtone = RingtoneManager.getRingtone(context, alarmUri); ringtone.play();
//this will send a notification message
ComponentName comp = new ComponentName(context.getPackageName(),
AlarmService.class.getName());
startWakefulService(context, (intent.setComponent(comp)));
setResultCode(Activity.RESULT_OK);
}
}

CS6611 MOBILE APPLICATION DEVELOPMENT LAB
VVIT Department of Computer Science and Engineering
4. Alarm Notification Message
AlarmService.javaThe receiver will start the following Intent Service to send a standard notification to the user.
package com.javapapers.androidalarmclock;
import android.app.IntentService; import
android.app.NotificationManager; import
android.app.PendingIntent; import
android.content.Context; import
android.content.Intent;
import android.support.v4.app.NotificationCompat; import
android.util.Log;
public class AlarmService extends IntentService { private
NotificationManager alarmNotificationManager;
public AlarmService() {
super("AlarmService"); }
@Override
public void onHandleIntent(Intent intent) { sendNotification("Wake Up! Wake
Up!");
}
private void sendNotification(String msg) {
Log.d("AlarmService", "Preparing to send notification...: " + msg);
alarmNotificationManager = (NotificationManager) this
.getSystemService(Context.NOTIFICATION_SERVICE);
PendingIntent contentIntent = PendingIntent.getActivity(this, 0, new Intent(this,
AlarmActivity.class), 0);
NotificationCompat.Builder alamNotificationBuilder = new
NotificationCompat.Builder(

CS6611 MOBILE APPLICATION DEVELOPMENT LAB
VVIT Department of Computer Science and Engineering
this).setContentTitle("Alarm").setSmallIcon(R.drawable.ic_launcher)
.setStyle(new NotificationCompat.BigTextStyle().bigText(msg))
.setContentText(msg);
alamNotificationBuilder.setContentIntent(contentIntent);
alarmNotificationManager.notify(1, alamNotificationBuilder.build());
Log.d("AlarmService", "Notification sent."); }
}
Top Related