


Languages
Pages
Legal


Integrate Discoverer 10g with Oracle Applications 11.5.10.2
High Level Steps
1> Install Infra Oracle Application Server, OID – Page no 22> Install Middleware components including discoverer and portal – page no 173> Upgrade the database of the infra from 10.1.0.4 to 10.1.0.5 - page no 264> Apply patch 5861907 to upgrade the apps server from 10.1.2 to 10.1.2.2 – page no 295> Connect to Discoverer viewer/Plus - Page no 44
6> Configure Discoverer Desktop and Discoverer Admin Edition on Windows XP – page no 47
Assumptions
Server Name: linux1Oracle Applications 11.5.10.2Red Hat 4.0 – update 4Vision Instance
Server Name: linux2 – Current InstallationDiscoverer 10g (Infra and middleware)Red Hat 4.0 – update 4
linux1Oracle Apps 11i
linux2Discoverer 10g
Windows XPDiscoverer Desktop AndDiscoverer Admin

Reference: http://appsdbablog.com/blog/2006/10/installing_10g_application_ser.html
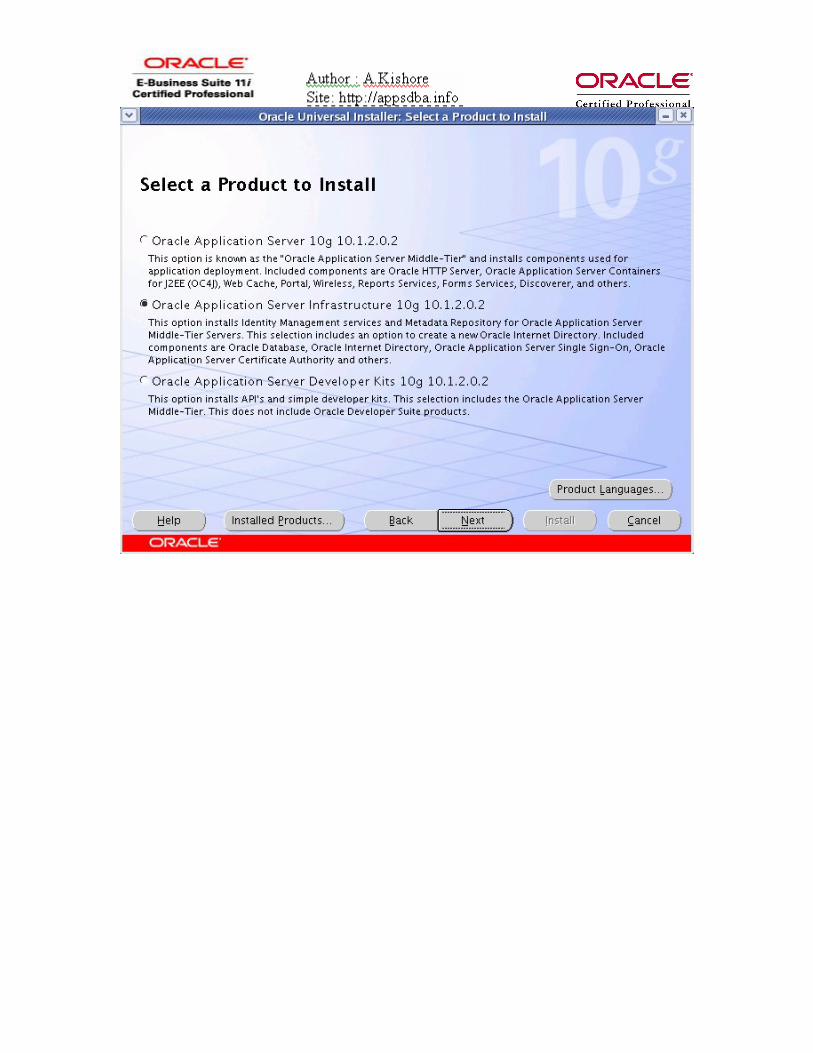
The Oracle Application Server is divided into two main server side components which are infrastructure and middle tier. Apart from there it also includes developer kits.
These components can be installed on the same server but must have separate ORACLE_HOMEs. Also the infrastructure must be installed first after which you must install your middle tier components as the meta data repository is a part of the infrastructure installation.
The Version of Oracle Application Server is 10.1.2.0
Download the software from http://otn.oracle.com
http://www.oracle.com/technology/software/products/ias/htdocs/101202.html
2. OS DirectoriesNext we will make a directory structure to hold your application server components.
# cd /u03# mkdir oracleAS# chmod -R 777 oracleAS
3. OS User AccountsHaving two seperate OS accounts for the infrastructure and middle tier comapnets make it easier to manage the installation.
# useradd -g dba -d /u03/oracleAS/asinf asinf# useradd -g dba -d /u03/oracleAS/asmid asmid
chgrp dba /u03/oracleASchmod g+w /u03/oracleAS
4.Oracle Inventory
Make sure to set your oracle inventory location to a accessible location.
vi /etc/oraInst.locinventory_loc=/u03/oracleAS/oraInventoryinst_group=dba
5. Starting the installation.The installation has to be started as the infrastructure user (asinf), but executing the runInstaller executable. The first screen is the welcome screen
su – asinf./installer


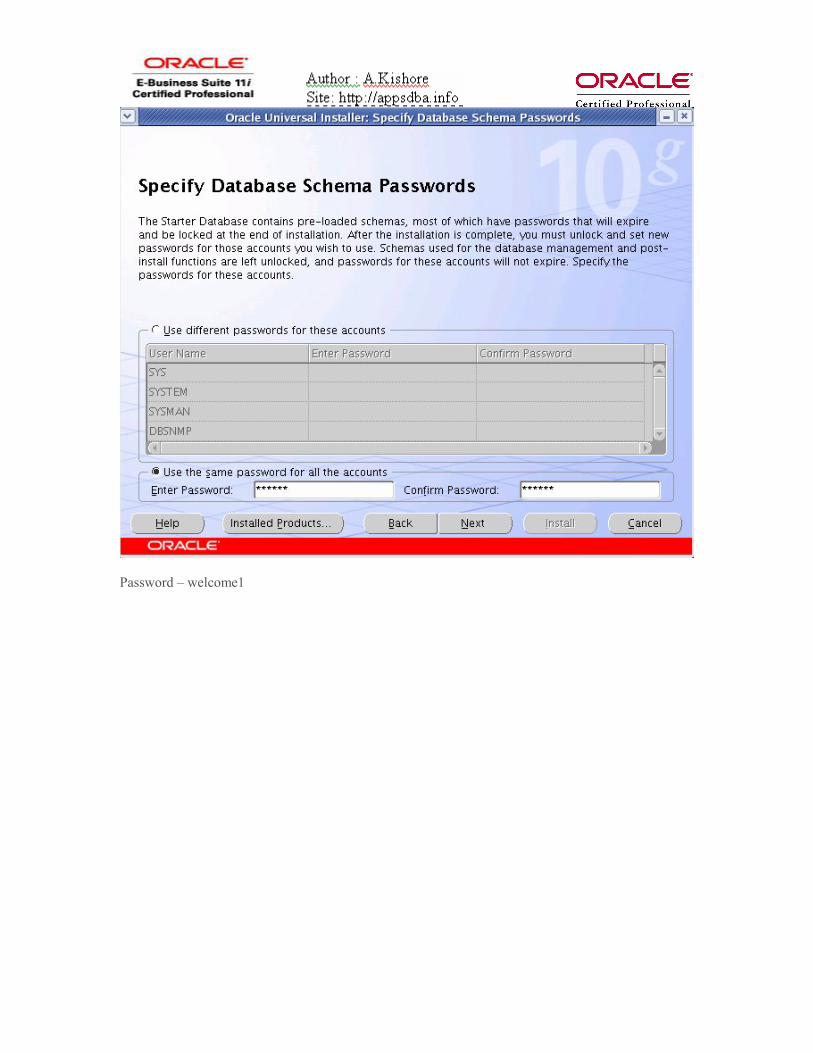
Password – welcome1

Instance name - orassoPassword – welcome1

To reset orcladmin passwdalter user ods modified by oracle10gasoidpasswd connect=infra unlock_su_acct=trueoidpasswd
Also can use resetiASpasswd.sh
To check ldap server is running or not$ORACLE_HOME/ldap/bin/ldapcheck
You should see something like:
Checking Oracle Internet Directory Processes ...
Process oidmon is Alive as PID 6338 <---guardian processProcess oidldapd is Alive as PID 6412 <---ldap dispatcherProcess oidldapd is Alive as PID 6404 <---ldap serverNot Running ---- Process oidrepld <-----Only shows if OID Replication was setup$

Install Middleware discoverer and portalsu – asmid
./runInstaller
cd /usr/app/oracleASchmod -R 777 oraInventory


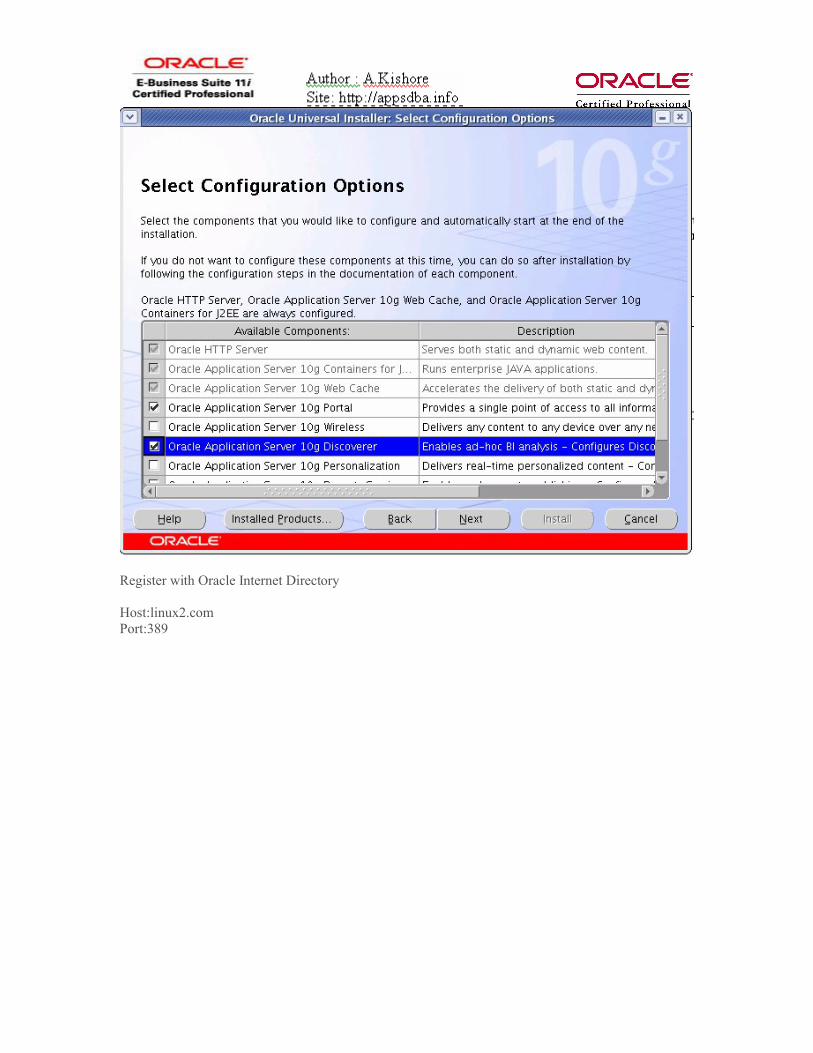
Register with Oracle Internet Directory
Host:linux2.comPort:389
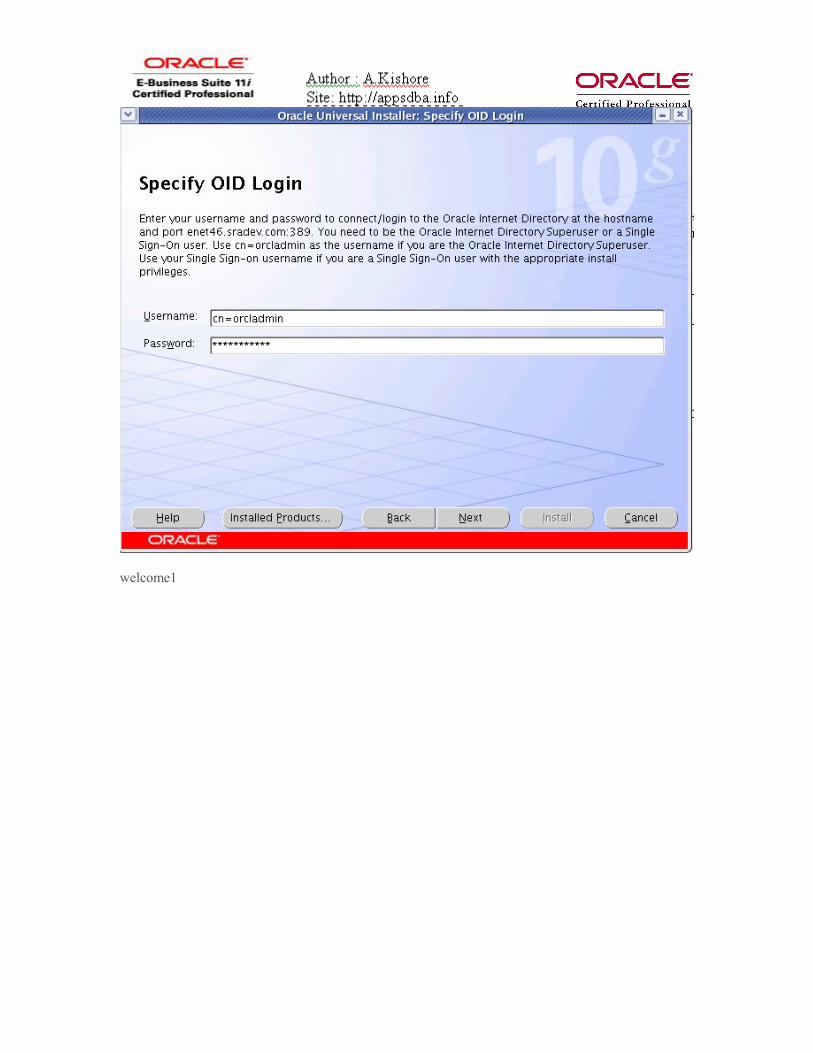
welcome1

Instance Name: middemo1Ias_admin_password=welcome1Confirm password=welcome1


Upgrade the database of the infra from 10.1.0.4 to 10.1.0.5
Download the patch
Stop the middle tier componentsStop all the infra components
Apply database patch p4505133_10105_LINUX


Sqlplus “/as sysdba”
1. Enter the following SQL*Plus commands: 2. SQL> STARTUP UPGRADE3. SQL> SPOOL patch.log4. SQL> @?/rdbms/admin/catpatch.sql5. SQL> SPOOL OFF6. Restart the database: 7. SQL> SHUTDOWN8. SQL> STARTUP9.10.Run the utlrp.sql script to recompile all invalid PL/SQL packages now
instead of when the packages are accessed for the first time. This step is optional but recommended.
SQL> @?/rdbms/admin/utlrp.sql

Apply patch 5861907 to upgrade the application server from 10.1.2 to 10.1.2.2
All infra components should be started including datatabase, OIDUpgrade application server from 10.1.2 to 10.1.2.2
Change the oracle_home accordingly – will need to toggle couple of times


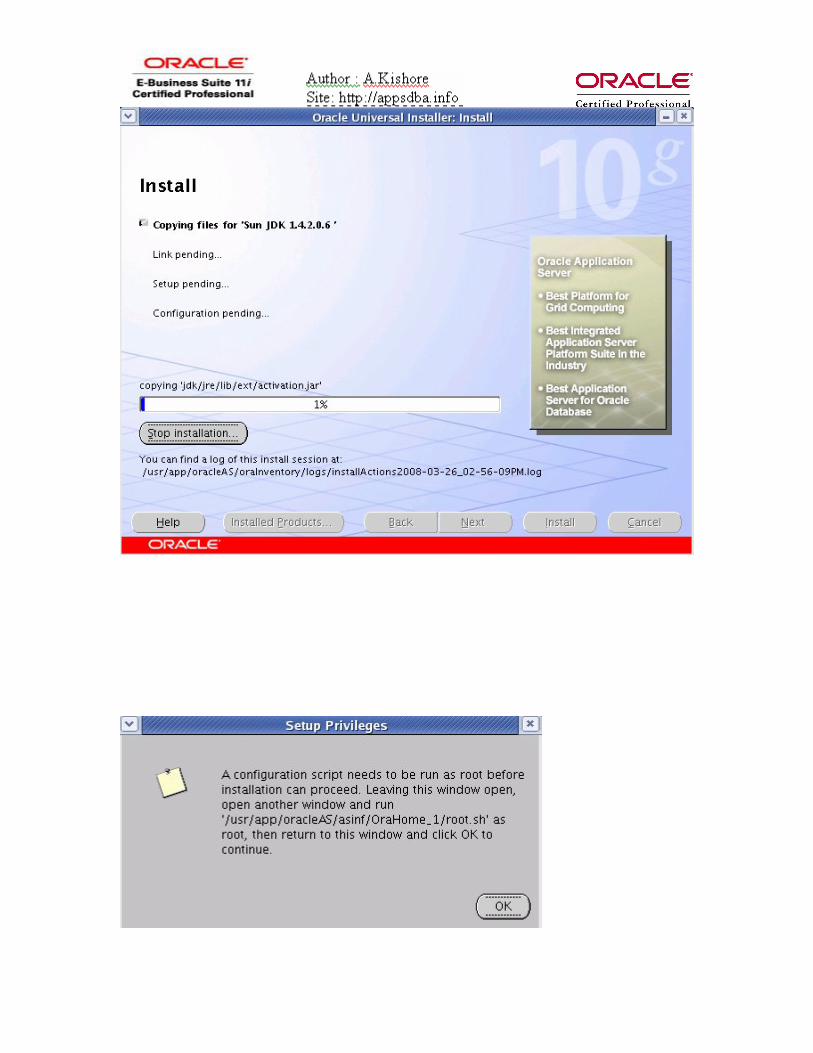
Click ok

welcome1

welcome1
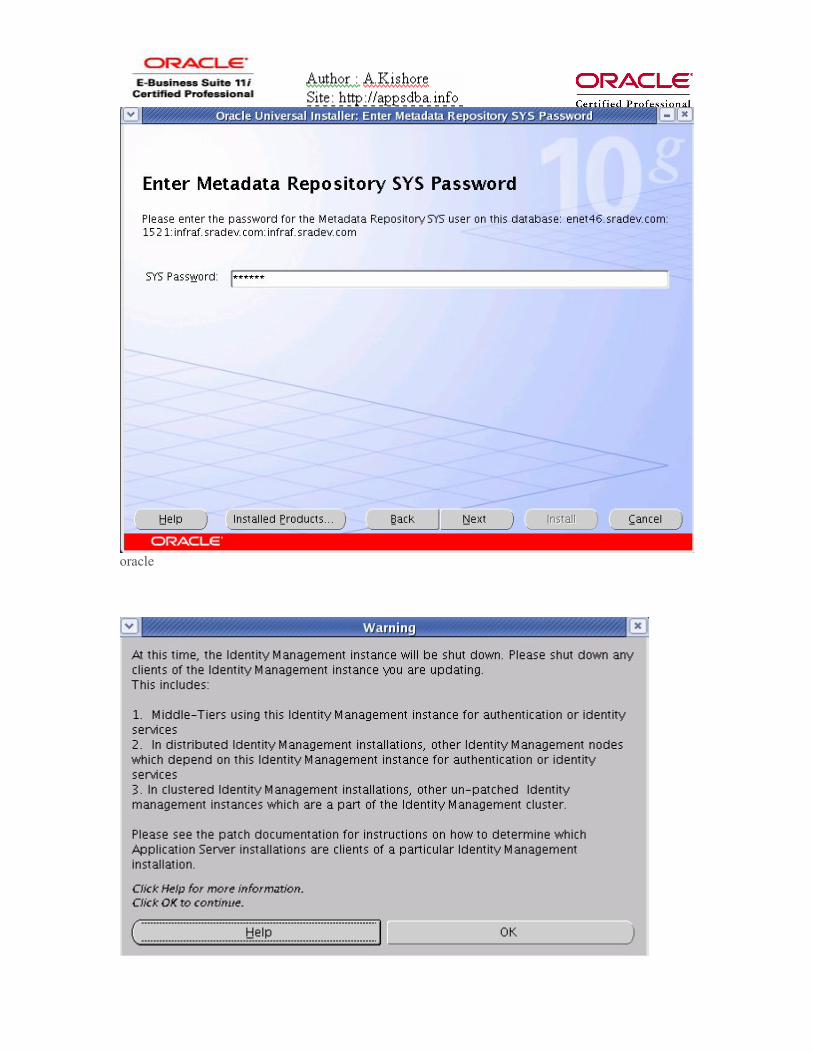
oracle

Click ok


Apply the patch on middle tier
Check that all the services on the middle tier are stopped
su – asmid./runInstaller


http://linux2.com:7777/pls/orasso - login using orcladmin/welcome1

http://linux2.com:7777/oiddas - login using orcladmin/welcome1
Click Directory

orcladmin/welcome1

Connect to Discoverer Viewer
To know the Discoverer versionstrings –a dis51ws | grep “Discoverer Version:”Discoverer Version:Server 10.1.2.54.25
http://linux2.com:7778
Log on to Discoverer Viewer
Connect to Oracle Applications
Connect to – Oracle ApplicationsUser Name – sysadminPassword – password

Database=vis
Select Responsibility
Responsibility-Select Responsibility
Select End User Layer – EUL_US
http://linux2.com:7778


Configure Discoverer Desktop and Discoverer Admin Edition on Windows XP
3.Install Internet Developer Suite 10g (Optional)
3.1. Install Internet Developer Suite 10g containing Discoverer 10.1.2 Administration Edition on a Windows PC if you wish to use Discoverer Administration Edition to customize your Discoverer End User Layer. Refer to Oracle Business Intelligence Discoverer Administration Guide 10g Release 2 (10.1.2).
3.2. Apply the latest certified Discoverer Administration Edition Patchset
3.2. Apply the latest certified Discoverer Administration Edition Patchset
1. Download AS Patchset 10.1.2.2.0 delivered via patch 4960210 from Oracle Metalink and follow the installation instructions provided in the patch README to install the patch on your Discoverer Administration Edition Server.
2. Download the one-off patch 5985072 for your Discoverer Server node from Oracle Support and follow the installation instruction provided in the patch README.
3.3. Set Windows Registry Settings
If you are using Discoverer Administration Edition on Windows to refresh your End User Layer, please follow the steps below to set necessary registry settings.
On the Windows PC running Discoverer 10.1.2 Administration Edition:
3.3.1 Back up your current Microsoft Windows Registry
3.3.2 Open the Windows Registry editor and create or update the following registry keys
Registry Key DataTypeValu
e
HKEY_CURRENT_USER\Software\Oracle\Discoverer 10\Database\EnableTriggers
REG_DWORD
1
HKEY_CURRENT_USER\Software\Oracle\Discoverer 10\Database\DefaultPreserveDisplayPropertyForRefresh
REG_DWORD 1
3.4. Copy Database Connection file

On your Discoverer 10.1.2 Administration Edition node, create a directory where you will copy the dbc files of one or more 11i instances you are setting up Discoverer with, for example D:\secure. Copy the dbc file from the $FND_TOP/secure directory of the 11i instance you are setting up Discoverer with to the directory you just created. Then create a Windows System Variable FND_SECURE to specify the directory you just created, for example D:\secure.
F:\secure\vis.dbc
3.5. Update tnsnames.ora file
On your Discoverer 10.1.2 Administration Edition node, update file %ORACLE_HOME%/network/admin/tnsnames.ora and include the tnsnames entry to connect to your Oracle E-Business Suite Release 11i database. Use the same entry as exists in the tnsnames.ora file on your Oracle E-Business Suite Release 11i application tier server node. The database name must match the two_task entry in the dbc file.
Registry Key DataTypeValu
e
HKEY_CURRENT_USER\Software\Oracle\Discoverer 10\Database\EnableTriggers
REG_DWORD
1
HKEY_CURRENT_USER\Software\Oracle\Discoverer 10\Database\DefaultPreserveDisplayPropertyForRefresh
REG_DWORD 1
3.4. Copy Database Connection file
On your Discoverer 10.1.2 Administration Edition node, create a directory where you will copy the dbc files of one or more 11i instances you are setting up Discoverer with, for example D:\secure. Copy the dbc file from the $FND_TOP/secure directory of the 11i instance you are setting up Discoverer with to the directory you just created. Then create a Windows System Variable FND_SECURE to specify the directory you just created, for example D:\secure.
3.5. Update tnsnames.ora file
On your Discoverer 10.1.2 Administration Edition node, update file %ORACLE_HOME%/network/admin/tnsnames.ora and include the tnsnames entry to connect to your Oracle E-Business Suite Release 11i

database. Use the same entry as exists in the tnsnames.ora file on your Oracle E-Business Suite Release 11i application tier server node. The database name must match the two_task entry in the dbc file.
Step 3
Copy Database Connection file
cd $ORACLE_HOME/discoverer
mkdir secure
Replace the OPatch with the latest one.
cp
cd C:\Kishore\Discoverer\disc_patch\p5985072_101220_WINNT\5985072
set ORACLE_HOME=C:\oracle\BIToolsHome_2
C:\Kishore\Discoverer\disc_patch\p5985072_101220_WINNT\5985072>c:\Perl561\bin\Perl.exe c:\oracle\BIToolsHome_2\OPatch\opatch.pl apply
http://www.activestate.com/store/account/download_wizard.aspx?ConId=5badf4de-99bc-436e-9bc7-23025d439393&LicId=c9cf40ff-2b5b-47f5-9b16-93318cc59ad8
opatch version

Print Cancel
Tools Option

File – connect
Discoverer Desktop Steps are also same


Top Related