


Languages
Pages
Legal


© 2012 www.pemnet.com 1 1
HP Spectre X360 30th September 2015
by Larry
PennEngineering®
© 2012 www.pemnet.com 2 2
HP Spectre X360
Details & Findings
Pictures and Description of the
HP Spectre X360 and the
Disassembly Process.

© 2012 www.pemnet.com 3
HP Spectre X360
Teardown – Bottom cover Total eight M2 screws with T5 Torx drivers are removed from bottom cover of the notebook. These 8 screws are engaged in female threads on middle main chassis. Two screws located in hinge corners area are longer than others. The screw details are as below: •Thread: M2 •QTY: 2pcs •OAL: 7.9mm
•QTY: 6pcs •OAL: 3.9mm
•Head Thickness: 0.4mm •Head Diameter: 3.35mm •Nylok: Yes (Blue) •Plating: Pearl Nickel •Driver: T5 Torx •Material: Carbon steel

© 2012 www.pemnet.com 4 4
HP Spectre X360
Teardown – Bottom cover
Aluminum bottom cover
After remove the bottom cover, all components of battery, speakers, fan, hinges and integrated main PCB can be seen on main chassis.
© 2012 www.pemnet.com 5 5
HP Spectre X360
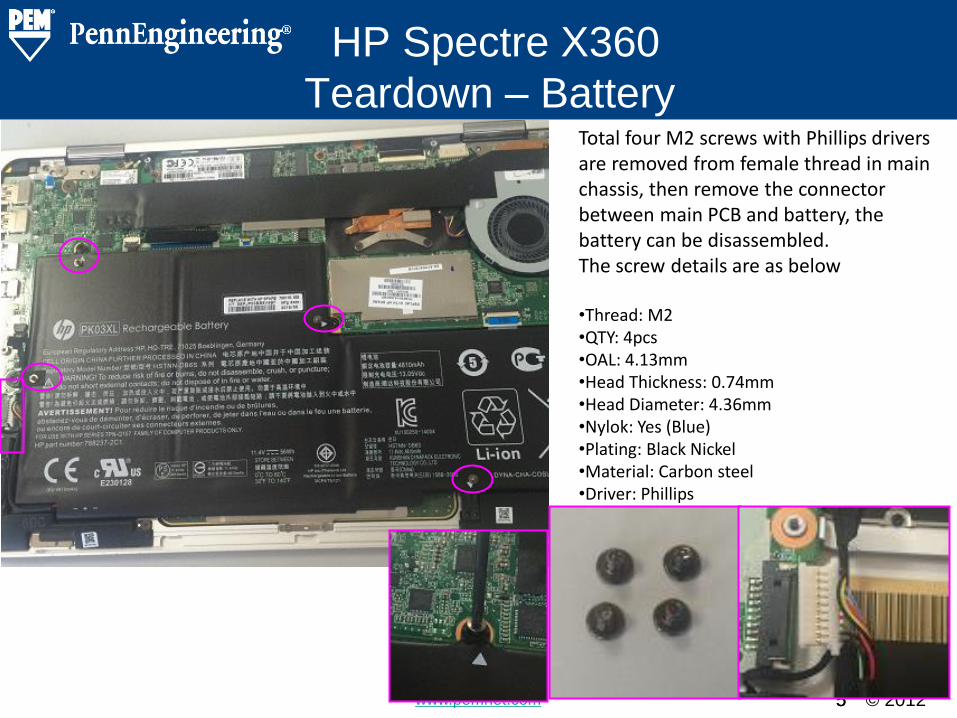
Teardown – Battery Total four M2 screws with Phillips drivers are removed from female thread in main chassis, then remove the connector between main PCB and battery, the battery can be disassembled. The screw details are as below •Thread: M2 •QTY: 4pcs •OAL: 4.13mm •Head Thickness: 0.74mm •Head Diameter: 4.36mm •Nylok: Yes (Blue) •Plating: Black Nickel •Material: Carbon steel •Driver: Phillips

© 2012 www.pemnet.com 6 6
HP Spectre X360
Teardown – Battery
After remove the battery, we can see the touch unit on main chassis. A soft PCB is used to connect mail PCB with touch unit.

© 2012 www.pemnet.com 7 7
HP Spectre X360
Teardown – Speakers
Total three M2 screws with Phillips drivers are removed from female thread in main chassis, then remove the connector between main PCB and speakers, the two speakers can be disassembled. The screw details are as below •Thread: M2 •QTY: 3pcs •OAL: 2.8mm •Head Thickness: 0.44mm •Head Diameter: 4.34mm •Plating: Black Nickel •Driver: Phillips •Material: Carbon steel

© 2012 www.pemnet.com Confidential 8 Confidential 8
HP Spectre X360
Teardown – Touch unit Total five M1.6 screws with Phillips drivers are removed from female thread in main chassis, then remove the soft PCB between main PCB and touch unit, the touch unit can be disassembled. The screw details are as below •Thread: M1.6 •QTY: 5pcs •OAL: 2.42mm •Head Thickness: 0.35mm •Head Diameter: 3.8mm •Nylok: Yes (Blue) •Plating: Bright Nickel •Driver: Phillips •Material: Carbon steel

© 2012 www.pemnet.com Confidential 9 Confidential 9
HP Spectre X360
Teardown – Fan Total two M2 screws with Phillips drivers are removed from standoffs (see page22) on keyboard then remove the connector between main PCB and fan, the fan can be disassembled. On the fan, two M1.6 self-tapping screws are used to fix the top sheet in plastic body. The screw details are as below
• Thread: M2 • QTY: 2pcs • OAL: 4.13mm • Head Thickness: 0.73mm • Head Diameter: 4.34mm • Nylok: Yes (Blue) • Plating: Black Nickel • Driver: Phillips • Material: Carbon steel
• Thread: M1.6 Remform self-tapping • QTY: 2pcs • OAL: 2.5mm • Head Thickness: 0.26mm • Head Diameter: 2.4mm • Nylok: Yes (Blue) • Plating: Black Zinc • Driver: Phillips • Material: Carbon steel

© 2012 www.pemnet.com 10 10
HP Spectre X360
Teardown – SD card reader One M2 screw with Phillips driver is removed from female thread in main chassis then remove the soft PCB between main PCB and SD card reader, the SD card reader can be disassembled. The screw details are as below •Thread: M2 •QTY: 1pcs •OAL: 2.71mm •Head Thickness: 0.34mm •Head Diameter: 4.46mm •Nylok: Yes (Blue) •Plating: Black Nickel •Driver: Phillips •Material: Carbon steel

© 2012 www.pemnet.com 11 11
HP Spectre X360
Teardown
Above picture is taken after remove bottom cover, battery, speakers, touch unit, fan and SD card reader.
© 2012 www.pemnet.com Confidential Confidential 12
HP Spectre X360
Teardown – Heat Sink
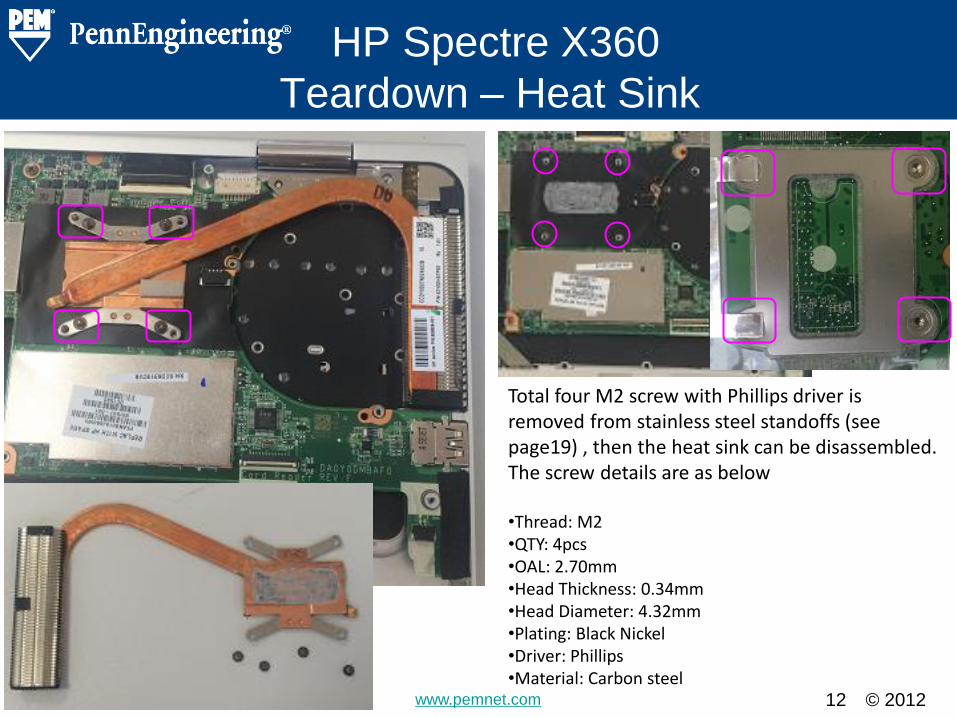
Total four M2 screw with Phillips driver is removed from stainless steel standoffs (see page19) , then the heat sink can be disassembled. The screw details are as below •Thread: M2 •QTY: 4pcs •OAL: 2.70mm •Head Thickness: 0.34mm •Head Diameter: 4.32mm •Plating: Black Nickel •Driver: Phillips •Material: Carbon steel
© 2012 www.pemnet.com 14
HP Spectre X360
Teardown – Main PCB
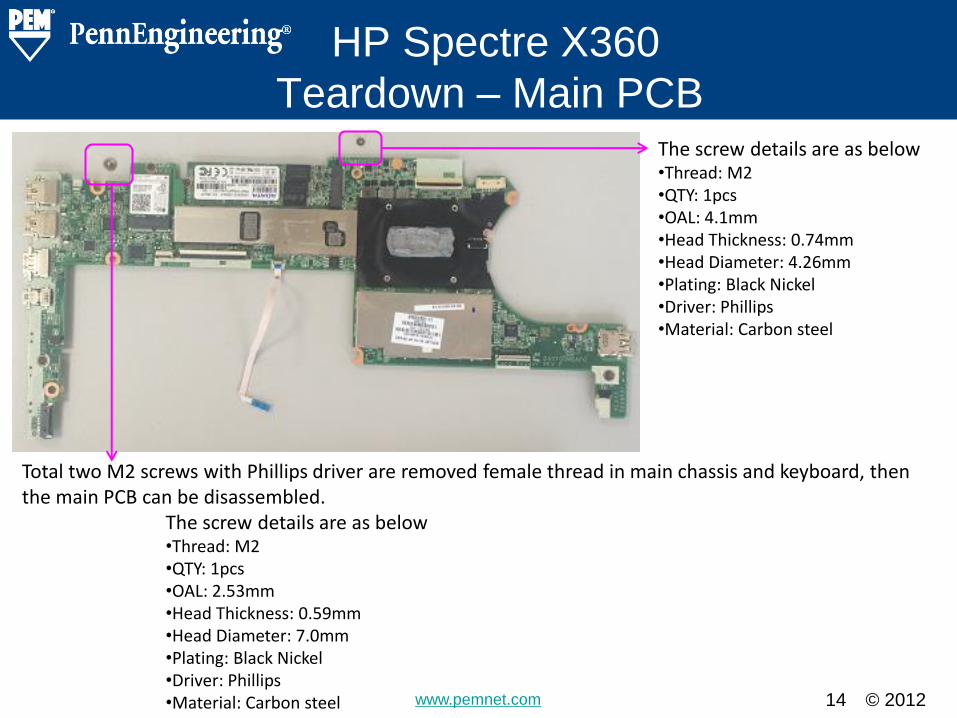
Total two M2 screws with Phillips driver are removed female thread in main chassis and keyboard, then the main PCB can be disassembled.
The screw details are as below •Thread: M2 •QTY: 1pcs •OAL: 2.53mm •Head Thickness: 0.59mm •Head Diameter: 7.0mm •Plating: Black Nickel •Driver: Phillips •Material: Carbon steel
The screw details are as below •Thread: M2 •QTY: 1pcs •OAL: 4.1mm •Head Thickness: 0.74mm •Head Diameter: 4.26mm •Plating: Black Nickel •Driver: Phillips •Material: Carbon steel

© 2012 www.pemnet.com Confidential Confidential 15
HP Spectre X360
Teardown – Main PCB
Total two M2 screws with Phillips drivers are removed from two blind SMT standoffs (see page18) to disassembly two sub-PCB’s. The screw details are as below •Thread: M2 •QTY: 2pcs •OAL: 2.76mm •Head Thickness: 0.41mm •Head Diameter: 4.34mm •Plating: Black Nickel •Driver: Phillips •Material: Carbon steel
© 2012 www.pemnet.com 16
HP Spectre X360
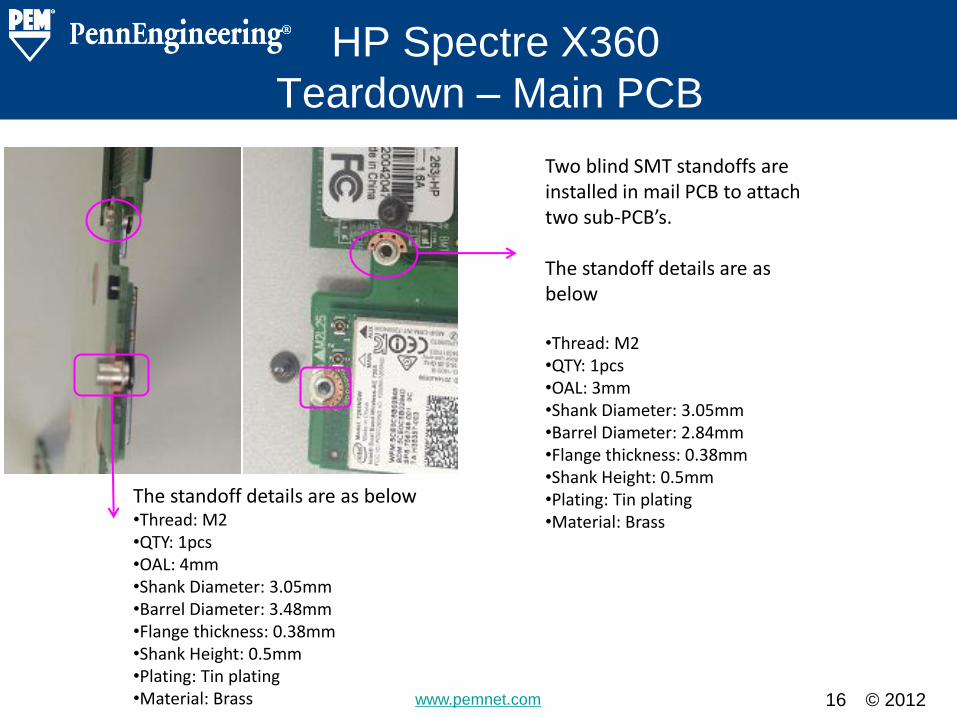
Teardown – Main PCB
Two blind SMT standoffs are installed in mail PCB to attach two sub-PCB’s. The standoff details are as below •Thread: M2 •QTY: 1pcs •OAL: 3mm •Shank Diameter: 3.05mm •Barrel Diameter: 2.84mm •Flange thickness: 0.38mm •Shank Height: 0.5mm •Plating: Tin plating •Material: Brass
The standoff details are as below •Thread: M2 •QTY: 1pcs •OAL: 4mm •Shank Diameter: 3.05mm •Barrel Diameter: 3.48mm •Flange thickness: 0.38mm •Shank Height: 0.5mm •Plating: Tin plating •Material: Brass

© 2012 www.pemnet.com 17
HP Spectre X360
Teardown – Main PCB
Total four standoffs are installed in 0.5mm panel then the panel is adhered with main PCB. The standoff details are as below •Thread: M2 •QTY: 4pcs •OAL: 2.9mm •Hex: 4.0mm •Barrel Diameter: 3.45mm •Panel thickness: 0.5mm •Material: 303 Stainless steel

© 2012 www.pemnet.com
HP Spectre X360
Teardown – Keyboard
Hinges &
Earplug
Hinges &
Power plug
After remove main PCB, we can see the keyboard is fixed in main chassis by screws.

© 2012 www.pemnet.com
HP Spectre X360
Teardown – Keyboard Keyboard front side view
Total 56 screws with Phillips drivers are used to fix keyboard into male thread in main chassis. The female threads are tapped in aluminum chassis. The screw details are as below •Thread: M1.2 •QTY: 56pcs •OAL: 1.45mm •Head Thickness: 0.37mm •Head Diameter: 2.33mm •Barrel Diameter: 3.45mm •Plating: Black Nickel •Driver: Phillips •Material: Carbon steel

© 2012 www.pemnet.com
HP Spectre X360
Teardown – Keyboard
Total 5 standoffs are installed in 0.2mm thickness keyboard cover panel by flaring installation. The standoff details are as right
•Thread: M2 •QTY: 5pcs •OAL: 2.5mm •Flange Thickness: 1mm •Flange Diameter: 5mm •Barrel Diameter: 3.45mm •Barrel Height: 1.05mm •Material: 303 Stainless steel

© 2012 www.pemnet.com
HP Spectre X360
Teardown – Hinge & Earplug & Power Plug
Total 6 screws with Phillips drivers are used to fix hinges, earplug unit and power plug unit with main chassis.
•Thread: M2 •QTY: 1pcs •OAL: 4.15mm •Head Thickness: 0.76mm •Head Diameter: 4.35mm •Nylok: Yes (Blue) •Plating: Black Nickel •Material: Carbon steel
•Thread: M2 •QTY: 1pcs •OAL: 2.15mm •Head Thickness: 0.46mm •Head Diameter: 4.91mm •Nylok: Yes (Blue) •Plating: Bright Nickel •Material: Carbon steel
•Thread: M2.5 •QTY: 4pcs •OAL: 4.1mm •Head Thickness: 0.76mm •Head Diameter: 6.74mm •Nylok: Yes (Blue) •Plating: Bright Nickel •Material: Carbon steel

© 2012 www.pemnet.com 22 22
Fasteners Summary
The notebook of HP Spectre X360 has a very beautiful cosmetic design and the design is easy to do teardown and repair. Total 106 fasteners are used in it. The list is as below: • Clinch Standoffs: 4pcs
• Self-Tapping Thread Screws: 2pcs
• Machine Thread Screws: 93pcs
• SMT Standoffs: 2pcs
• Flaring Standoffs: 5pcs

© 2012 www.pemnet.com 23
Alternate Solutions
PennEngineering® recommendations of alternate hardware and cost savings
opportunities.
Section Heading Slide – Do Not Remove
© 2012 www.pemnet.com 24
Alternate Solutions
Section Heading Slide – Do Not Remove
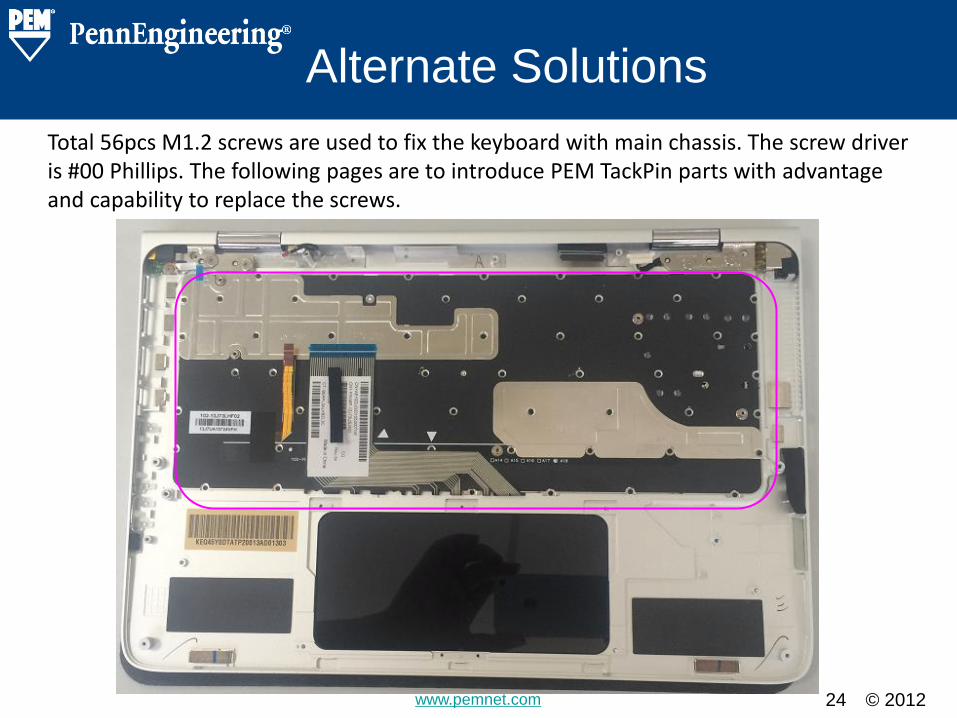
Total 56pcs M1.2 screws are used to fix the keyboard with main chassis. The screw driver is #00 Phillips. The following pages are to introduce PEM TackPin parts with advantage and capability to replace the screws.

© 2012 www.pemnet.com 25
Alternate Solutions
Section Heading Slide – Do Not Remove
Low-
profile
head
Interference
fit eliminates
hole
tolerance
Tapered
tip assists
location
Positive engagement,
360˚ metal contact.
Will not loosen.
With Screw
Typical screw related issues include
costly tapping, cross-threading,
torque control and vibration backout.
With TackPin™ Fastener
TACKPIN™
How to work?
© 2012 www.pemnet.com 26
Alternate Solutions
Section Heading Slide – Do Not Remove
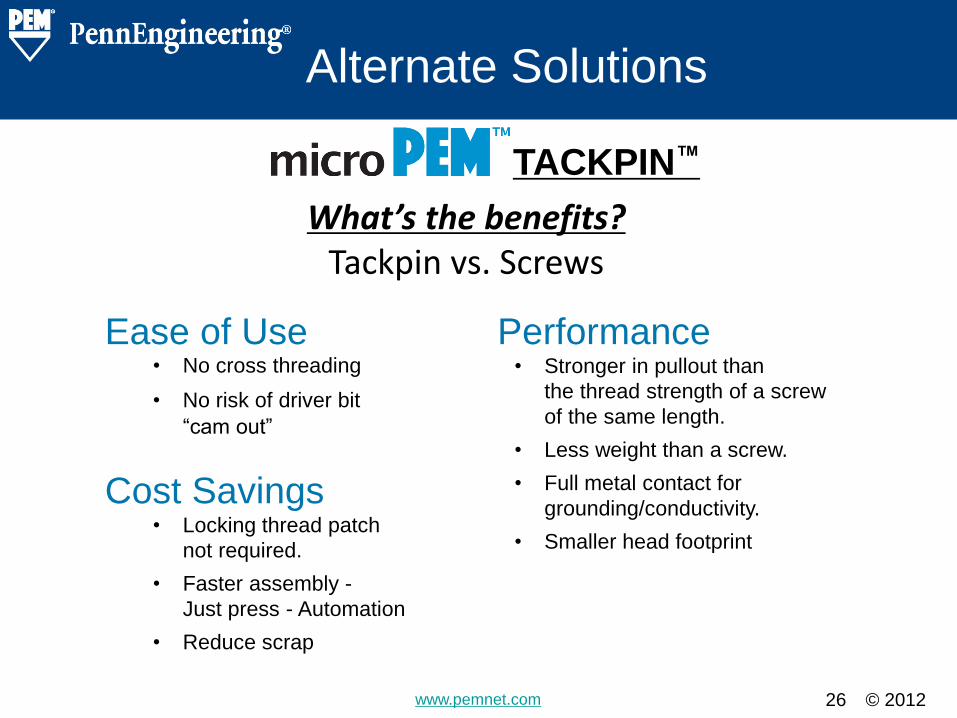
TACKPIN™
What’s the benefits? Tackpin vs. Screws
Ease of Use • No cross threading
• No risk of driver bit
“cam out”
Cost Savings • Locking thread patch
not required.
• Faster assembly -
Just press - Automation
• Reduce scrap
Performance • Stronger in pullout than
the thread strength of a screw
of the same length.
• Less weight than a screw.
• Full metal contact for
grounding/conductivity.
• Smaller head footprint
© 2012 www.pemnet.com 27
Alternate Solutions
Section Heading Slide – Do Not Remove
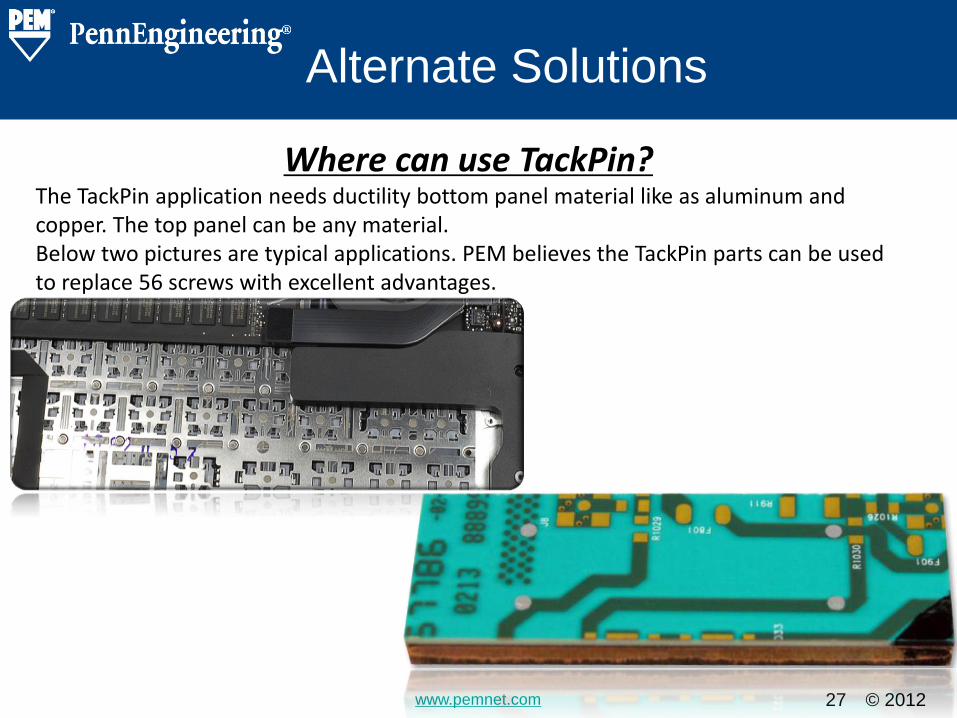
Where can use TackPin? The TackPin application needs ductility bottom panel material like as aluminum and copper. The top panel can be any material. Below two pictures are typical applications. PEM believes the TackPin parts can be used to replace 56 screws with excellent advantages.
© 2012 www.pemnet.com 28
Alternate Solutions
Section Heading Slide – Do Not Remove
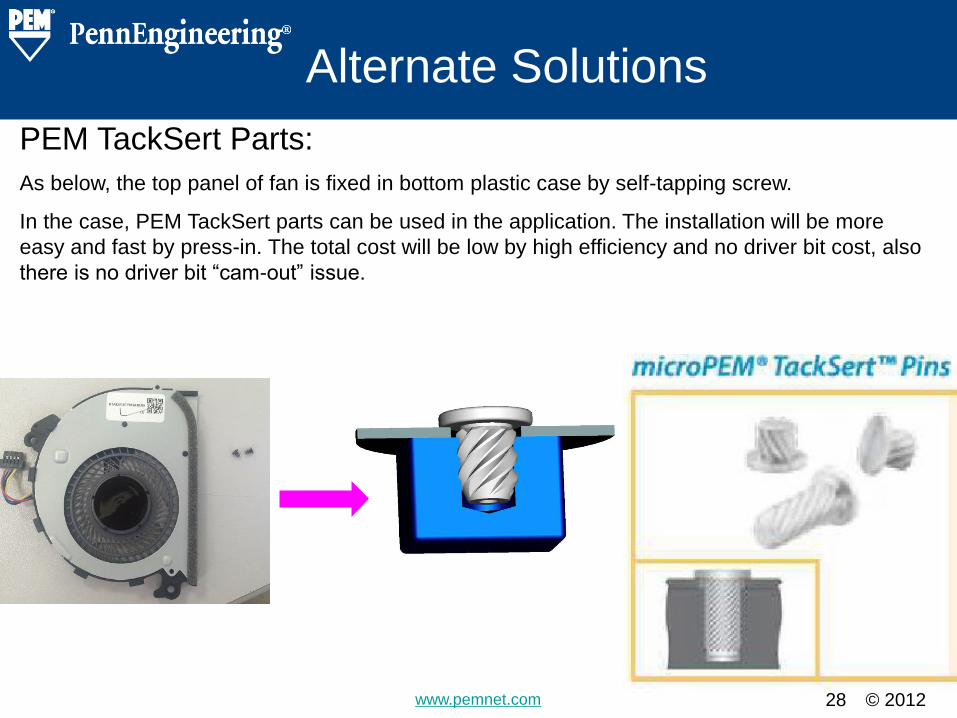
PEM TackSert Parts:
As below, the top panel of fan is fixed in bottom plastic case by self-tapping screw.
In the case, PEM TackSert parts can be used in the application. The installation will be more
easy and fast by press-in. The total cost will be low by high efficiency and no driver bit cost, also
there is no driver bit “cam-out” issue.

© 2012 www.pemnet.com 29
Alternate Solutions
Section Heading Slide – Do Not Remove
Clinch standoffs alternate solution:
PEM can provide standard MSO4 clinching standoffs made by
different materials and sizes to meet more limited application area,
and the minimum sheet thickness could be 0.3mm.

© 2012 www.pemnet.com 30
Alternate Solutions
Section Heading Slide – Do Not Remove
SMT standoffs alternate solution:
To two used SMT standoffs, PEM can provide two options. One is to use
snap SMT part, this can save one component and remove sub-PCB by
manual. Another is to use PEM design hex standoffs, this can achieve
much higher Torque-out performance.

© 2012 www.pemnet.com 31
Alternate Solutions
Section Heading Slide – Do Not Remove
Flaring standoffs alternate solution:
To five flaring standoffs for 0.2mm panel thickness, PEM MSOFS product
line also can be used in the application or even thinner to 0.1mm.

© 2012 www.pemnet.com 32
Alternate Solutions
Section Heading Slide – Do Not Remove
Micro Screws alternate solution:
PEM can provide all off these screws of both machine thread and self-
tapping thread with different design solutions. PEM has license with Torx
and Torx Plus driver and self-tapping thread patent as like TAPTITE,
FASTITE, REMFORM and REMFORM “F”.
TAPTITE 2000® "SP"™
© 2012 www.pemnet.com 33
Conclusions and Summary
Section Heading Slide – Do Not Remove
The HP Spectre X360 is notebook with excellent design.
Cosmetically, the full solid aluminum body is perfect. The
design also provides easy repair. Most fasteners are
screws and the mated female threads are tapped in the
main chassis. Most screws are used to fix the keyboard
with the main chassis.
PEM has provided alternative solutions to these fasteners,
and we believe our solutions can help our customers
recoup their costs.
Top Related