


Languages
Pages
Legal


33A-1
GROUP 33A
FRONT SUSPENSION
CONTENTS
GENERAL DESCRIPTION. . . . . . . . . 33A-2
FRONT SUSPENSION DIAGNOSIS . 33A-3INTRODUCTION TO FRONT SUSPENSION DIAGNOSIS . . . . . . . . . . . . . . . . . . . . . . . . 33A-3FRONT SUSPENSION DIAGNOSIS TROUBLESHOOTING STRATEGY . . . . . . 33A-3SYMPTOM CHART. . . . . . . . . . . . . . . . . . . 33A-3SYMPTOM PROCEDURES . . . . . . . . . . . . 33A-4
SPECIAL TOOLS. . . . . . . . . . . . . . . . 33A-6
ON-VEHICLE SERVICE. . . . . . . . . . . 33A-7FRONT WHEEL ALIGNMENT CHECK AND ADJUSTMENT . . . . . . . . . . . . . . . . . . . . . . 33A-7LOWER ARM BALL JOINT END PLAY CHECK . . . . . . . . . . . . . . . . . . . . . . . . . . . . 33A-8BALL JOINT DUST COVER CHECK . . . . . 33A-8
STRUT ASSEMBLY. . . . . . . . . . . . . . 33A-9REMOVAL AND INSTALLATION . . . . . . . . 33A-9INSPECTION . . . . . . . . . . . . . . . . . . . . . . . 33A-9DISASSEMBLY AND ASSEMBLY . . . . . . . 33A-10INSPECTION . . . . . . . . . . . . . . . . . . . . . . . 33A-13
LOWER ARM . . . . . . . . . . . . . . . . . . . 33A-14REMOVAL AND INSTALLATION . . . . . . . . 33A-14INSPECTION. . . . . . . . . . . . . . . . . . . . . . . . 33A-15BALL JOINT DUST COVER REPLACEMENT . . . . . . . . . . . . . . . . . . . . . 33A-16LOWER ARM PILLOW BALL BUSHING REPLACEMENT . . . . . . . . . . . . . . . . . . . . . 33A-17
STABILIZER BAR* . . . . . . . . . . . . . . . 33A-19REMOVAL AND INSTALLATION . . . . . . . . 33A-19INSPECTION. . . . . . . . . . . . . . . . . . . . . . . . 33A-22
CROSSMEMBER BAR. . . . . . . . . . . . 33A-23REMOVAL AND INSTALLATION . . . . . . . . 33A-23
SPECIFICATIONS . . . . . . . . . . . . . . . 33A-23FASTENER TIGHTENING SPECIFICATIONS. . . . . . . . . . . . . . . . . . . . 33A-23GENERAL SPECIFICATIONS . . . . . . . . . . 33A-24SERVICE SPECIFICATIONS . . . . . . . . . . . 33A-24
WARNINGS REGARDING SERVICING OF SUPPLEMENTAL RESTRAINT SYSTEM (SRS) EQUIPPED VEHICLES
WARNING• Improper service or maintenance of any component of the SRS, or any SRS-related component, can lead to
personal injury or death to service personnel (from inadvertent firing of the air bag) or to the driver and passenger (from rendering the SRS inoperative).
• Service or maintenance of any SRS component or SRS-related component must be performed only at an authorized MITSUBISHI dealer.
• MITSUBISHI dealer personnel must thoroughly review this manual, and especially its GROUP 52B - Supplemental Restraint System (SRS) before beginning any service or maintenance of any component of the SRS or any SRS-related component.
NOTEThe SRS includes the following components: SRS air bag control unit, SRS warning light, front impact sensors, air bag module,clock spring, and interconnecting wiring. Other SRS-related components (that may have to be removed/installed in connectionwith SRS service or maintenance) are indicated in the table of contents by an asterisk (*).

GENERAL DESCRIPTIONFRONT SUSPENSION33A-2
GENERAL DESCRIPTIONM1332000100195
A MacPherson strut independent suspension-type suspension is used for the front suspension. Aggres-sive use of special components that include Mitsub-ishi Motor�s own inverted struts and forged aluminum parts reduces weight to create a suspension that gives superior performance made with competition use in mind.
FEATURES (COMPARED TO THE LANCER).
Inverted strutsUse of inverted struts ensures smooth shock absorber action even during high speed cornering that places high lateral G-force on the suspension..
Coil springsThe coil spring rate was optimized and high-response spring material is used to achieve high durability and reduce weight..
Lower arm assemblyUse of forged aluminum reduces load on the coil springs and produces nimble suspension action. In addition, outer casings and stoppers on the front bushings (A-point) and pillow ball bushings in the rear (G-point) improves the feeling of stiffness and stroke. Increased size of the ball on the ball joints at the knuckle connection (B-point) also improve reli-ability.
.
StabilizerA change to pillow ball joints for the stabilizer link improves stabilizer efficiency to deliver a high level of stability..
CrossmemberA reinforcing bar (front axle crossmember bar) that connects the left and right lower arm mounts (A-points) increases lateral rigidity. This improves steer-ing feel and adds extra stiffness when cornering..
Strut insulatorInput from the strut has been changed from a sepa-ration pattern to a unified one and the use of a metal bearing achieves greater rigidity, durability, and lower friction..
AlignmentA wider track and optimization of roll center height improves cornering response throughout the range from initial response through to the cornering limit.
TSB Revision

FRONT SUSPENSION DIAGNOSISFRONT SUSPENSION 33A-3
CONSTRUCTION DIAGRAM
FRONT SUSPENSION DIAGNOSISINTRODUCTION TO FRONT SUSPENSION DIAGNOSIS
M1332009000225If the front suspension is faulty, the vehicle will not run straightforward or noise will occur. Incorrect wheel alignment, malfunction of strut assembly, sta-bilizer bar, coil spring, or worn or out-of-balance tires can cause these problems.
FRONT SUSPENSION DIAGNOSIS TROUBLESHOOTING STRATEGYM1332009100211
Use these steps to plan your diagnostic strategy. If you follow them carefully, you will be sure that you have exhausted most of the possible ways to find a front suspension fault.1. Gather information from the customer.
2. Verify that the condition described by the customer exists.
3. Find and repair the malfunction by following the Symptom Chart and Symptom Procedures.
4. Verify malfunction is eliminated.
SYMPTOM CHARTM1332009400256
AC211383AB
STABILIZER BAR
LOWER ARM ASSEMBLY�(FORGED ALUMINUM)
FRONT AXLE No.1 �CROSSMEMBER
STRUT �(INVERTED STRUT)
STRUT INSULATOR
COIL SPRING
STABILIZER LINK�(PILLOW BALL JOINT)
FRONT AXLE �CROSSMEMBER BAR
LOWER ARM BUSHING�(PILLOW BALL BUSHING)
A-POINT
A-POINTG-POINT
B-POINT
SYMPTOM INSPECTION PROCEDURE
REFERENCE PAGE
Steering wheel is heavy, vibrates or pulls to one side 1 P.33A-4Excessive body rolling 2 P.33A-4Poor ride 3 P.33A-4Unequal ride height 4 P.33A-5Noise 5 P.33A-5
TSB Revision

FRONT SUSPENSION DIAGNOSISFRONT SUSPENSION33A-4
SYMPTOM PROCEDURES
INSPECTION PROCEDURE 1: Steering Wheel Is Heavy, Vibrates or Pulls to One Side
DIAGNOSIS
STEP 1. Check the tires.Refer to GROUP 31, Diagnosis P.31-2.Q: Are the tires in normal condition?
YES : Go to Step 2.NO : If out of balance, balance the tires as
necessary. If excessively worn, replace the tires as necessary and go to Step 5.
STEP 2. Check the wheel alignment.Refer to P.33A-7.Q: Is the wheel alignment correct?
YES : Go to Step 3.NO : Adjust it, then go to Step 5.
STEP 3. Check the lower arm ball joint.Q: Is the ball joint in good condition?
YES : Go to Step 4.NO : Replace the lower arm assembly, then go to
Step 5.
STEP 4. Check the coil spring.Q: Is the coil spring in good condition?
YES : Go to Step 5.NO : Replace it, then go to Step 5.
STEP 5. Retest the system.Q: Is the malfunction eliminated?
YES : The procedure is complete.NO : Return to Step 1.
INSPECTION PROCEDURE 2: Excessive Body Rolling
DIAGNOSIS
STEP 1. Check for broken or deteriorated stabilizer bar.Q: Is the stabilizer bar in good condition?
YES : Go to Step 2.NO : Replace it, then go to Step 3.
STEP 2. Check the strut assembly for damage.Q: Is the strut assembly in good condition?
YES : Go to Step 3.NO : Replace it, then go to Step 3.
STEP 3. Retest the system.Q: Is the malfunction eliminated?
YES : The procedure is complete.NO : Return to Step 1.
INSPECTION PROCEDURE 3: Poor Ride
DIAGNOSIS
STEP 1. Check for improper tire inflation pressure.Refer to GROUP 31, On-vehicle Service − Tire Infla-tion Pressure Check P.31-6.Q: Is the tire inflation correct?
YES : Go to Step 2.NO : Adjust it, then go to Step 4.
STEP 2. Check for broken or deteriorated coil spring(s).Q: Are the coil spring(s) broken or deteriorated?
YES : Replace the coil spring(s), then go to Step 4.
NO : Go to Step 3.
STEP 3. Check for strut assembly damage.Q: Is the strut assembly damaged?
YES : Replace it, then go to Step 4.NO : Go to Step 4.
TSB Revision

FRONT SUSPENSION DIAGNOSISFRONT SUSPENSION 33A-5
STEP 4. Retest the system.Q: Is the malfunction eliminated?
YES : The procedure is complete.NO : Return to Step 1.
INSPECTION PROCEDURE 4: Unequal Ride Height
DIAGNOSIS
STEP 1. Check for broken or deteriorated coil spring(s).Q: Is the coil spring(s) broken or deteriorated?
YES : Replace it, then go to Step 2.NO : Go to Step 2.
STEP 2. Retest the system.Q: Is the malfunction eliminated?
YES : The procedure is complete.NO : Return to Step 1.
INSPECTION PROCEDURE 5: Noise
DIAGNOSIS
STEP 1. Check for lack of lubrication.Q: Is lubrication inadequate?
YES : Lubricate it, then go to Step 5.NO : Go to Step 2.
STEP 2. Check the tightened parts for looseness as well as the bushings for wear.Q: Are the tightened parts and bushings in good
condition?YES : Go to Step 3.NO : Replace it, then go to Step 5.
STEP 3. Check for broken coil spring.Q: Is the coil spring broken?
YES : Replace it, then go to Step 5.NO : Go to Step 4.
STEP 4. Check for strut assembly damage.Q: Is the strut assembly damaged?
YES : Replace it, then go to Step 5.NO : Go to Step 5.
STEP 5. Retest the system.Q: Is the malfunction eliminated?
YES : The procedure is complete.NO : Return to Step 1.
TSB Revision

SPECIAL TOOLSFRONT SUSPENSION33A-6
SPECIAL TOOLSM1332000600264
TOOL TOOL NUMBER AND NAME
SUPERSESSION APPLICATION
• A: MB991237Spring compressor body
• B: MB991238Arm set
MIT221369 or general service tool
Coil spring compression
MB991680Wrench and socket set• A: MB991681
Wrench• B: MB991682
Socket
− Strut assembly disassembly and reassembly
MB991006Preload socket
MB990228-01 Lower arm ball joint rotation starting torque measurement
MB990326Preload socket
General service tool Lower arm ball bushing rotation starting torque measurement
MB990800Ball joint dust cover installer
MB990800-01or General service tool
Lower arm ball joint dust cover press-in
MB991237
A
B
MB991680
AB
MB991006
MB990326
MB990800
TSB Revision

ON-VEHICLE SERVICEFRONT SUSPENSION 33A-7
ON-VEHICLE SERVICEFRONT WHEEL ALIGNMENT CHECK AND ADJUSTMENT
M1331000900370
Measure wheel alignment with alignment equipment on a level surface. The front suspension, steering system, wheels, and tires should be serviced to normal condition before measuring wheel alignment..
TOE-INStandard value: 0 ± 2 mm (0 ± 0.08 inch)
1. Adjust the toe-in by undoing the clip and jam nut, and turning the left and right tie rod turnbuckles by the same amount (in opposite directions).NOTE: The toe will move out as the left turnbuckle is turned toward the front of the vehicle and the right turnbuckle is turned toward the rear of the vehicle.
2. Install the clip and tighten the jam nut to the specified torque.
Tightening torque: 52 ± 2 N⋅m (38 ± 2 ft-lb)3. Confirm that the toe-in is at the standard value.
MB990651Bar
Lower arm pillow ball bushing removal and press-fitting
MB991816Bushing remover & installer base
MB991576Base
MB991897Ball joint remover
MB991113-01, MB990635-01 or General service tool
Knuckle and tie rod end ball joint disconnectionNOTE: Steering linkage puller (MB990635 or MB991113) is also available to disconnect knuckle and tie rod end ball joint.
TOOL TOOL NUMBER AND NAME
SUPERSESSION APPLICATION
MB990883
MB991576
AC106827
AC006074 AB
JAM NUT
CLIP
TSB Revision

ON-VEHICLE SERVICEFRONT SUSPENSION33A-8
4. Use a turning radius gauge to check that the steering angle is at the standard value.
Standard value:
.
CAMBER, CASTER AND KINGPIN INCLINATIONStandard value:
NOTE: .1. *: difference between right and left wheels must be less
than 30'2. Caster and kingpin inclination are preset at the factory and
cannot be adjusted.
SELECTION THE CAMBERSelect the camber by the installation direction of the allow of
the connecting bolt of the strut assembly and the knuckle.• -1°00' ± 30': Install the bolt turning the allow to the direc-
tion of vehicle inside.• -2°00' ±30': Install the bolt turning the allow to the direc-
tion of vehicle outside.
LOWER ARM BALL JOINT END PLAY CHECKM1332010900039
1. Raise the vehicle.2. Remove the stabilizer bar from the lower arm assembly.3. Move the lower arm up and down with your hands to check
for an excessive play in the axial direction of the ball joint. If there is an excessive play, replace the lower arm assembly.
BALL JOINT DUST COVER CHECKM1332008600280
1. Press the dust cover with your finger to check that there are no cracks or damage in the dust cover.
2. If the dust cover is cracked or damaged, replace the lower arm assembly.NOTE: If the dust cover is cracked or damaged, it is possible that there may also be damage to the ball joint.
Inner wheel 31°45' ± 1°30'
Outer wheel (for reference) 27°15'
Items Specifications
Camber (Selectable from 2 options)
-1°00' ± 30'* or -2°00' ± 30'*
Caster 3°55' ± 30'*
Kingpin inclination 13°45' ± 1°30'
AC211728
<Camber: -1˚00´>
AB
<Camber: -2˚00´>
TSB Revision

STRUT ASSEMBLYFRONT SUSPENSION 33A-9
STRUT ASSEMBLYREMOVAL AND INSTALLATION
M1332001100262
INSPECTIONM1332001200214
• Check for oil leaks from the strut assembly.• Check the strut assembly for damage or deformation.
Post-installation Operation• Front Wheel Alignment Check and Adjustment (Refer to
P.33A-7).
AC006076AC
3
5
21
4
44 ± 5 N·m�33 ± 3 ft-lb
167 ± 9 N·m�123 ± 7 ft-lb
REMOVAL STEPS1. FRONT WHEEL SPEED SENSOR
HARNESS BRACKET2. BRAKE HOSE BRACKET
3. KNUCKLE CONNECTION4. STRUT MOUNTING NUT5. STRUT ASSEMBLY
REMOVAL STEPS (Continued)
TSB Revision

STRUT ASSEMBLYFRONT SUSPENSION33A-10
DISASSEMBLY AND ASSEMBLYM1332001300255
Required Special Tools:• MB991237: Spring Compressor Body• MB991238: Arm Set• MB991681: Wrench• MB991682: Socket
AC211747
3
1
2
3
4
5
60 ± 10 N·m�45 ± 7 ft-lb
6
7
8
9
AB
DISASSEMBLY STEPS1. STRUT COVER
<<A>> >>A<< 2. STRUT NUT3. STRUT INSULATOR4. SPRING UPPER SEAT5. STRUT DAMPER6. STRUT COVER7. COIL SPRING
8. SPRING LOWER PAD<<B>> 9. FRONT SUSPENSION STRUT
DISASSEMBLY STEPS (Continued)
TSB Revision

STRUT ASSEMBLYFRONT SUSPENSION 33A-11
DISASSEMBLY SERVICE POINTS.
<<A>> STRUT NUT REMOVALCAUTION
• Do not tighten the bolt of special tool MB991237 too tight. Special tool MB991237 will be broken if the allow-able tightening torque of 74 N⋅m (54 ft-lb) is exceed.
• Install special tool MB991238 evenly, and so that the maximum length will be attained within the installation range.
• Do not use an impact wrench to tighten the bolt of spe-cial tool MB991237, otherwise the special tool will break.
1. Use special tools MB991237 and MB991238 to compress the coil spring.
WARNINGDo not use an impact wrench to remove the strut nut.• Vibration of the impact wrench will cause special
tools MB991237 and MB991238 to slip and cause personal injury.
• Vibration of the impact wrench will cause the valve inside the strut to dropout.
2. Use special tools MB991681 and MB991682 loosen the strut nut.
.
AC001085AB
MB991238 MB991237
AC006091AB
MB991681
MB991682
TSB Revision

STRUT ASSEMBLYFRONT SUSPENSION33A-12
<<B>> FRONT SUSPENSION STRUT REMOVALWARNING
Wear goggles when drilling to protect your eyes from flying metal debris.The gas must be discharged from the front suspension strut assembly before discarding it. Place the strut horizontally with its piston rod extended. Then drill a hole of approximately 3 mm (0.1 inch) in diameter at the location shown in the illustration and discharge the gas.
ASSEMBLY SERVICE POINTS.
>>A<< STRUT NUT INSTALLATION1. Ensure that the bearing is seated correctly.2. Install special tools MB991237 and MB991238 to the strut
same as its removal.CAUTION
Do not use an impact wrench to tighten the bolt of special tool MB991237, otherwise the special tool will break.3. While the coil spring is being compressed by the special
tools, temporarily tighten the strut nut.
4. Align the hole in the strut spring lower seat with the hole in the upper spring seat.NOTE: Using a rod as shown facilitates the alignment.
5. Correctly align both ends of the coil spring with the grooves in the spring seat, and then loosen the special tools.
AC001087
AC001085AB
MB991238 MB991237
AC006091AD
ROD
2
TSB Revision

STRUT ASSEMBLYFRONT SUSPENSION 33A-13
CAUTIONDo not use an impact wrench to tighten the strut nut, oth-erwise the strut nut will be damaged. Vibration of the impact wrench will cause the valve inside the strut to drop-out.6. Using special tools MB991681 and MB991682, tighten the
strut nut to 60 ± 10 N⋅m (45 ± 7 ft-lb).
7. After tightening strut nut, fill the multi purpose grease to the bearing part of strut insulator.
INSPECTIONM1332001400155
• Check the strut bearing for wear or rust.• Check the rubber parts for damage or deterioration.• Check the coil spring for deformation, deterioration or dam-
age.• Check the front suspension strut for deformation.
AC211766� AB
MB991681
MB991682
AC211769
TSB Revision

LOWER ARMFRONT SUSPENSION33A-14
LOWER ARMREMOVAL AND INSTALLATION
M1332001600267
CAUTION• During maintenance, take care not to contact the parts or tools to the caliper because the paint of
caliper will be scratched. And if there is brake fluid on the caliper, wipe out quickly.• *: Indicates parts which should be temporarily tightened, and then fully tightened with the vehicle
on the ground in an unladen condition.
Post-installation Operation• Check the Dust Cover for Cracks or Damage by Pushing
it with Your Finger.• Front Wheel Alignment Check and Adjustment (Refer to
P.33A-7).
AC211785AB
5
3
186 ± 10 N·m*�138 ± 7 ft-lb*
108 ± 10 N·m�80 ± 7 ft-lb
39 ± 5 N·m�29 ± 3 ft-lb
2
5
4
1
39 ± 5 N·m�29 ± 3 ft-lb
167 ± 9 N·m�123 ± 7 ft-lb
3
REMOVAL STEPS1. STABILIZER LINK NUT2. LOWER ARM AND KNUCKLE
CONNECTION
<<A>> 3. LOWER ARM AND CROSSMEMBER CONNECTION
4. STABILIZER BAR BRACKET5. LOWER ARM ASSEMBLY
REMOVAL STEPS (Continued)
TSB Revision

LOWER ARMFRONT SUSPENSION 33A-15
REMOVAL SERVICE POINT.
<<A>> LOWER ARM AND CROSSMEMBER DISCONNEC-TIONLift the transmission with a transmission jack, and then with-draw the front mounting bolt on the left lower arm assembly.
INSPECTIONM1332001700242
Required Special Tools:• MB991006: Preload Socket• MB990326: Preload Socket
.
LOWER ARM BALL JOINT BREAKAWAY TORQUE CHECK1. After shaking the ball joint stud several times, use special
tool MB991006 to measure the breakaway torque of the ball joint.
Standard value: 0.5 − 3.4 N⋅m (4.4 − 30.1 in-lb)2. When the measured value exceeds the standard value,
replace the lower arm assembly.3. When the measured value is lower than the standard value,
check that the lower arm ball joint turns smoothly without excessive play. If there is no excessive play, the ball joint can be reused.
.
AC006133AB
MOUNTING BOLTGARAGE JACK
PIECE OF WOOD
AC211826AB
BALL JOINT
MB991006
BALL JOINT
TSB Revision

LOWER ARMFRONT SUSPENSION33A-16
PILLOW BALL BUSHING ROTATION STARTING TORQUE CHECK1. Insert the bolt to the lower arm pillow ball bushing, in the
opposite direction, insert the washer then install the nut. After rotating the inner sleeve (contained washer) several times, measure the rotation starting torque of the lower arm pillow ball bushing using special tool MB990326.
Standard value: 0.5 − 3.0 N⋅m (4.4 − 26.6 in-lb)2. When the measured value exceeds the standard value,
replace the pillow ball bushing.3. When the measured value is lower than the standard value,
check that the lower arm pillow ball bushing turns smoothly without excessive play. If there is no excessive play, the pillow ball bushing can be reused.
.
LOWER ARM BALL JOINT DUST COVER CHECK1. Check the dust cover for cracks or damage by pushing it
with your finger.2. If the dust cover is cracked or damaged, replace the lower
arm.NOTE: Cracks or damage to the dust cover may cause damage to the ball joint. When it is damaged during service work, replace the dust cover.
BALL JOINT DUST COVER REPLACEMENTM1332008200237
Required Special Tool:• MB990800: Ball Joint Remover and Installer
If the dust cover is damaged accidentally during service work, replace the dust cover as follows:1. Remove the dust cover.2. Apply multipurpose grease to the lip and inside of the dust
cover.3. Using special tool MB990800, press the dust cover until it
contacts the lower arm assembly.4. Press the dust cover with your finger to check that there are
no cracks or damage in the dust cover.
AC211844AB
PILLOW BALL JOINT
PILLOW BALL�BUSHING
MB990326
AC006135AB
MB990800
DUST COVER
TSB Revision

LOWER ARMFRONT SUSPENSION 33A-17
LOWER ARM PILLOW BALL BUSHING REPLACEMENT
M1332008100315
Required Special Tools:• MB990651: Bar• MB991576: Base• MB991816: Bushing Remover & Installer base
Replace the bushing as follows:
1. Use special tools MB990651, MB991576 and MB991816 to drive out the bushing.
2. Set the bushing to the lower arm assembly in order to the direction of bushing marking is upper, and of the opening is the direction as shown in the illustration.
AC211847AB
PILLOW BALL �BUSHING
AC211849
MB990651
MB991576MB991576
LOWER ARM�ASSEMBLY
MB991816AB
AC211851
MARKING
60˚�
AB
TSB Revision

LOWER ARMFRONT SUSPENSION33A-18
3. Use special tools MB990651, MB991576 and MB991816 to press in the bushing until its outer tube is flush with the lower arm assembly surface.
AC211852
MB990651
MB991576
LOWER ARM�ASSEMBLY
MB991816AB
OUTER TUBE
TSB Revision
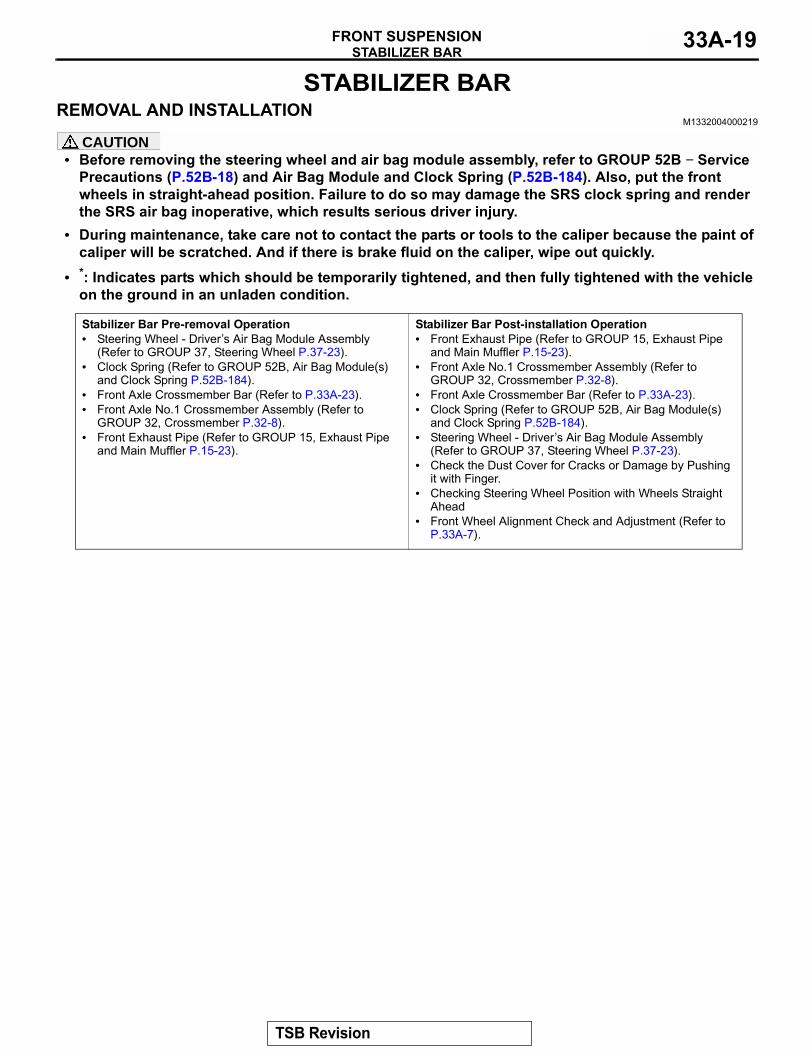
STABILIZER BARFRONT SUSPENSION 33A-19
STABILIZER BARREMOVAL AND INSTALLATION
M1332004000219
CAUTION• Before removing the steering wheel and air bag module assembly, refer to GROUP 52B − Service
Precautions (P.52B-18) and Air Bag Module and Clock Spring (P.52B-184). Also, put the front wheels in straight-ahead position. Failure to do so may damage the SRS clock spring and render the SRS air bag inoperative, which results serious driver injury.
• During maintenance, take care not to contact the parts or tools to the caliper because the paint of caliper will be scratched. And if there is brake fluid on the caliper, wipe out quickly.
• *: Indicates parts which should be temporarily tightened, and then fully tightened with the vehicle on the ground in an unladen condition.
Stabilizer Bar Pre-removal Operation• Steering Wheel - Driver�s Air Bag Module Assembly
(Refer to GROUP 37, Steering Wheel P.37-23).• Clock Spring (Refer to GROUP 52B, Air Bag Module(s)
and Clock Spring P.52B-184).• Front Axle Crossmember Bar (Refer to P.33A-23).• Front Axle No.1 Crossmember Assembly (Refer to
GROUP 32, Crossmember P.32-8).• Front Exhaust Pipe (Refer to GROUP 15, Exhaust Pipe
and Main Muffler P.15-23).
Stabilizer Bar Post-installation Operation• Front Exhaust Pipe (Refer to GROUP 15, Exhaust Pipe
and Main Muffler P.15-23).• Front Axle No.1 Crossmember Assembly (Refer to
GROUP 32, Crossmember P.32-8).• Front Axle Crossmember Bar (Refer to P.33A-23).• Clock Spring (Refer to GROUP 52B, Air Bag Module(s)
and Clock Spring P.52B-184).• Steering Wheel - Driver�s Air Bag Module Assembly
(Refer to GROUP 37, Steering Wheel P.37-23).• Check the Dust Cover for Cracks or Damage by Pushing
it with Finger.• Checking Steering Wheel Position with Wheels Straight
Ahead• Front Wheel Alignment Check and Adjustment (Refer to
P.33A-7).
TSB Revision

STABILIZER BARFRONT SUSPENSION33A-20
Required Special Tool:• MB991897: Ball Joint Remover
AC211904AB
7
N25 ± 5 N·m�19 ± 3 ft-lb
39 ± 5 N·m�29 ± 3 ft-lb
1
108 ± 10 N·m�80 ± 7 ft-lb
49 ± 10 N·m�37 ± 7 ft-lb167 ± 9 N·m�
123 ± 7 ft-lb
52 ± 7 N·m*�39 ± 5 ft-lb*
9
8
21 ± 4 N·m�16 ± 2 ft-lb
518 ± 2 N·m�13 ± 2 ft-lb
6
10
4
3
39 ± 5 N·m�29 ± 3 ft-lb
STABILIZER BAR REMOVAL STEPS
1. STABILIZER LINK2. STABILIZER BAR BRACKET 3. LOWER ARM AND KNUCKLE
CONNECTION <<A>> 4. TIE ROD END KNUCKLE
CONNECTION5. STEERING SHAFT COVER6. STEERING GEAR AND
JOINT CONNECTION BOLT
7. REAR ROLL STOPPER CONNECTING BOLT
<<B>> >>A<< 8. STABILIZER BRACKET<<B>> >>A<< 9. STABILIZER BUSHING<<B>> >>A<< 10. STABILIZER BAR
STABILIZER BAR REMOVAL STEPS (Continued)
TSB Revision

STABILIZER BARFRONT SUSPENSION 33A-21
REMOVAL SERVICE POINTS.
<<A>> TIE ROD END AND KNUCKLE DISCONNECTIONCAUTION
• Do not remove the nut from ball joint. Loosen it and use special tool MB991897 to avoid possible damage to ball joint threads.
• Hang special tool MB991897 with a cord to prevent it from falling.
1. Install special tool MB991897 as shown in the figure.
2. Turn the bolt and knob as necessary to make the jaws of special tool MB991897 parallel, tighten the bolt by hand and confirm that the jaws are still parallel.NOTE: When adjusting the jaws in parallel, make sure the knob is in the position shown in the figure.
3. Tighten the bolt with a wrench to disconnect the tie rod end.
.
<<B>> STABILIZER BRACKET/STABILIZER BUSHING/STABILIZER BAR REMOVALCarry out the following operations to ensure working space in order to remove the fixture, the bushing and the stabilizer bar.1. Use a transmission jack to hold the crossmember, and then
remove the crossmember mounting nuts and bolts.CAUTION
Be careful not to lower the crossmember excessively, oth-erwise the power steering return hose bracket may deform.2. Lower the crossmember until the fixture, the bushing and
the stabilizer bar can be removed.
AC208247AC
CORD
BOLT
MB991897NUT
BALL JOINT
AC106821
KNOB
PARALLEL
BOLT
GOOD
BAD AB
AC211916AC211916
WOODEN BLOCK
TRANSMISSION �JACK
AB
TSB Revision

STABILIZER BARFRONT SUSPENSION33A-22
INSTALLATION SERVICE POINTS.
>>A<< STABILIZER BAR/STABILIZER BUSHING/FIXTURE/INSTALLATION Align the stabilizer bar identification mark with the right end of the bushing (LH).
INSPECTIONM1332002000224
• Check the stabilizer bushings for wear and deterioration.• Check the stabilizer bar for deterioration or damage.• Check all bolts for condition and straightness.
.
STABILIZER LINK BALL JOINT TURNING TORQUE CHECKRequired Special Tool:• MB990326: Preload Socket
1. After shaking the ball joint stud several times, install the nut to the stud and use special tool MB990326 to measure the turning torque of the ball joint.
Standard value: 1.7 − 3.2 N⋅m (15 − 28 in-lb)2. When the measured value exceeds the standard value,
replace the stabilizer link.3. When the measured value is lower than the standard value,
check that the ball joint turns smoothly without excessive play. If so, it is possible to re-use that ball joint.
.
STABILIZER LINK BALL JOINT DUST COVER CHECK1. Check the dust cover for cracks or damage by pushing it
with your finger.2. If the dust cover is cracked or damaged, replace the
stabilizer link.NOTE: Cracks or damage of the dust cover may cause damage to the ball joint.
AC006141AG
STABILIZER �BRACKET (LH)
OUTSIDE OF�VEHICLE
STABILIZER �BUSHING (LH)
�
IDENTIFICATION�MARK
AC001129
MB990326
AB
TSB Revision

CROSSMEMBER BARFRONT SUSPENSION 33A-23
CROSSMEMBER BARREMOVAL AND INSTALLATION
M1332016100042
SPECIFICATIONSFASTENER TIGHTENING SPECIFICATIONS
M1332008500197
AC206989FRONT AXLE �CROSSMEMBER BAR AB
49 ± 10 N·m�37 ± 7 ft-lb
ITEM SPECIFICATIONFront axle crossmember barFront axle crossmember bar bolt 49 ± 10 N⋅m (37 ± 7 ft-lb)Lower arm assemblyLower arm to crossmember connection bolt (Rear) 167 ± 9 N⋅m (123 ± 7 ft-lb)Lower arm to crossmember connection bolt (Front) 186 ± 10 N⋅m (138 ± 7 ft-lb)Lower arm to knuckle connection nut 108 ± 10 N⋅m (80 ± 7 ft-lb)Stabilizer barCrossmember to body connection bolt and nut 167 ± 9 N⋅m (123 ± 7 ft-lb)Crossmember bolt 49 ± 10 N⋅m (37 ± 7 ft-lb)Rear roll stopper connection nut 52 ± 7 N⋅m (39 ± 5 ft-lb)Stabilizer bar bracket bolt 39 ± 5 N⋅m (29 ± 3 ft-lb)Stabilizer bracket bolt 21 ± 4 N⋅m (16 ± 2 ft-lb)Steering gear and joint connecting bolt 18 ± 2 N⋅m (13 ± 2 ft-lb)Lower arm to knuckle connection nut 108 ± 10 N⋅m (80 ± 7 ft-lb)Tie rod end to knuckle connection nut 25 ± 5 N⋅m (19 ± 3 ft-lb)
TSB Revision

SPECIFICATIONSFRONT SUSPENSION33A-24
GENERAL SPECIFICATIONSM1332000200192
COIL SPRING
SERVICE SPECIFICATIONSM1332000300304
Strut assemblyStrut nut (self-locking nut) 60 ± 10 N⋅m (48 ± 4 ft-lb)Strut assembly to body connection nut 44 ± 5 N⋅m (33 ± 3 ft-lb)Strut assembly to knuckle connection nut 167 ± 9 N⋅m (123 ± 7 ft-lb)
ITEM SPECIFICATION
ITEM SPECIFICATIONWire diameter mm (in.) 14 (0.6)Average diameter mm (in.) 155 (6.1)Free length mm (in.) 286 (11.3)
ITEM SPECIFICATIONToe-in mm (in.) 0 ± 2 (0 ± 0.08)Steering angle Inner wheel 31°45' ± 1°30'
Outer wheel (reference) 27°15'Camber (selectable from 2 options) −1°00' ± 30' or −2°00� ± 30� (Left/right
deviation within 30')Caster 3°55' ± 30' (Left/right deviation within 30')Kingpin inclination 13°45' ± 1°30'Lower arm ball joint breakaway torque N⋅m (in-lb) 0.5 − 3.4 (4.4 − 30.1)Lower arm pillow ball bushing rotation starting torque N⋅m (in-lb)
0.5−3.0 (4.4−26.6)
Stabilizer link ball joint turning torque N⋅m (in-lb) 1.7 − 3.2 (15 − 28)
TSB Revision
Top Related