


Languages
Pages
Legal

Exploring Other FreeHand Features – Lesson 3 1
Exploring Other FreeHand Features
Lesson 3
2 Exploring Other FreeHand Features – Lesson 3
Objectives Take advantage of additional FreeHand
features. Use contour gradients. Use the Trace tool and the Trace wand. Work with symbols. Create and use master pages. Define and use brush strokes. Use envelopes and the perspective grid.
3 Exploring Other FreeHand Features – Lesson 3
Additional FreeHand Features Macromedia FreeHand MX includes
the following helpful features: Contour gradients Brush strokes Symbol editing Master pages
You will learn about and use all of these features in this lesson.
4 Exploring Other FreeHand Features – Lesson 3
Use the contour gradient The color gradation for the contour
gradient follows the perimeter of the shape being filled.
To apply the contour gradient: Select the object or objects to be modified. Select the Fill property on the Object panel. Select Gradient from the fill type pop-up
menu. Select Contour from the gradient type pop-
up menu. You can drag color swatches to the gradient
ramp to change the colors of the gradient.
5 Exploring Other FreeHand Features – Lesson 3
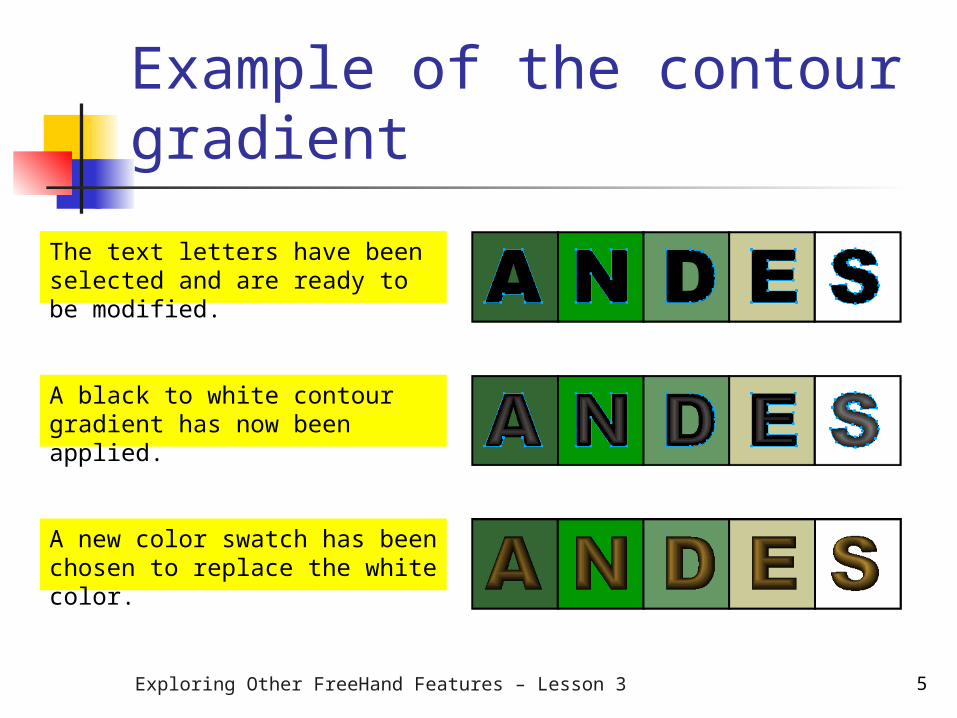
Example of the contour gradient
The text letters have been selected and are ready to be modified.
A black to white contour gradient has now been applied.
A new color swatch has been chosen to replace the white color.
6 Exploring Other FreeHand Features – Lesson 3
Create new objects with the Trace tool The Trace tool can be used to create a
new object by tracing an existing object. Settings in the Trace Tool dialog box
affect the result of the trace operation. The Trace tool creates a vector image of
the object being traced. Group the image after it is created so
you can select the entire vector image with one click of the mouse.
7 Exploring Other FreeHand Features – Lesson 3
The Trace Tool dialog box
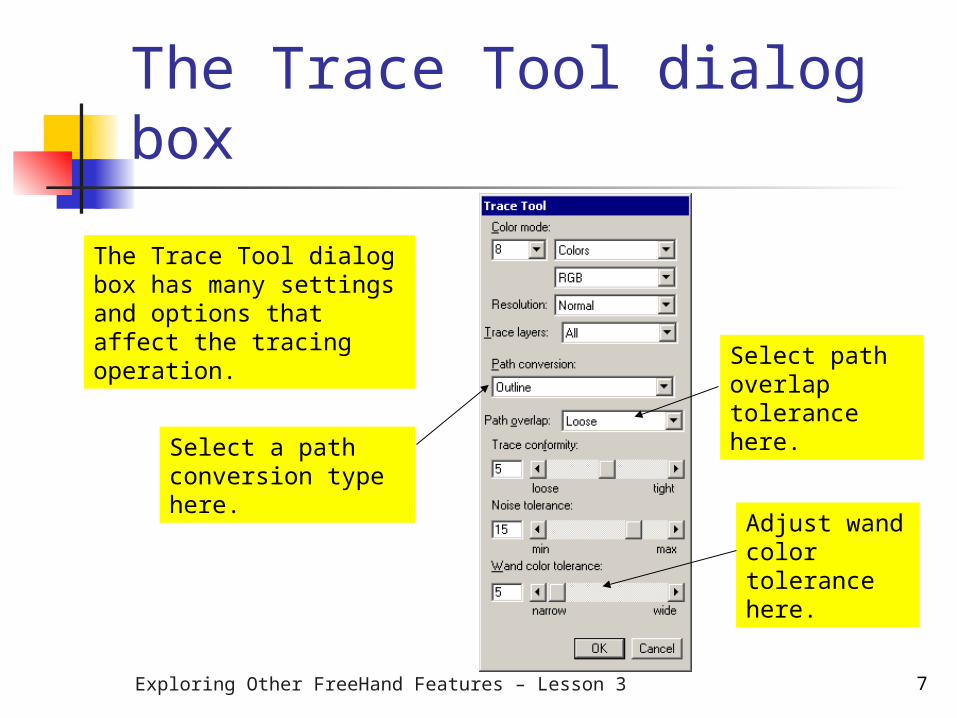
The Trace Tool dialog box has many settings and options that affect the tracing operation.
Adjust wand color tolerance here.
Select a path conversion type here.
Select path overlap tolerance here.
8 Exploring Other FreeHand Features – Lesson 3
Use the Trace wand to select color The Trace wand is similar to the Trace tool,
except it selects sections of your document based on color.
Its selection is not limited to a single object, but is based purely on color tolerance as specified in the Trace Tool dialog box.
Click in an area containing the color to be selected and a moving marquee appears around the perimeter of the selection.
Use the Wand Options panel to indicate what conversion method is to be used for the selected area.
9 Exploring Other FreeHand Features – Lesson 3
FreeHand symbols can save time editing a document An object in a document that will be used
multiple times can be saved as a symbol in a library.
Each occurrence of the symbol in a document is called an instance.
If the symbol is modified (reshaped, resized, recolored, etc.), every instance of the symbol within the document is automatically updated, making edits faster and safer.
10 Exploring Other FreeHand Features – Lesson 3
Use the Library panel to manage and create symbols
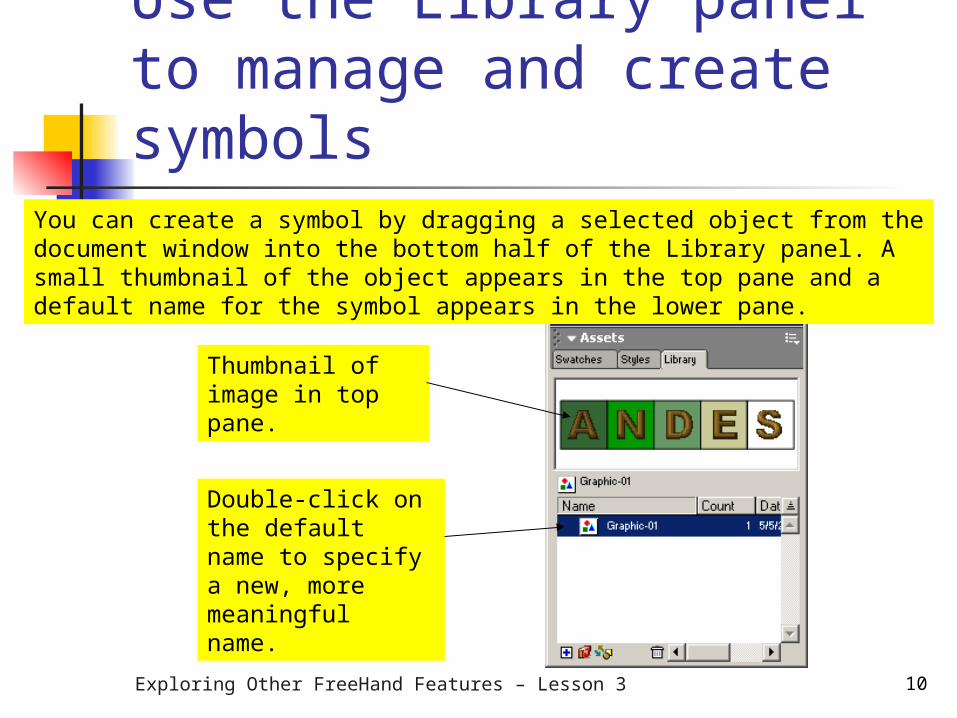
You can create a symbol by dragging a selected object from the document window into the bottom half of the Library panel. A small thumbnail of the object appears in the top pane and a default name for the symbol appears in the lower pane.
Thumbnail of image in top pane.
Double-click on the default name to specify a new, more meaningful name.
11 Exploring Other FreeHand Features – Lesson 3
Use master pages in your documents Master pages allow you to create a common
style or template for multiple pages. Add backgrounds, borders, images, text,
and other items to a master page that will be visible on printed pages in your document.
When a page layout must be updated, update the master. The changes are automatically applied to all other pages that are affected.
12 Exploring Other FreeHand Features – Lesson 3
Create and add a master page To create a master page:
Open the Options menu in the Document panel for the page to be specified as a master page.
Select the Convert to Master Page option. The page is converted to a symbol and appears in
the Library panel with a default name. To add master pages to your document:
While the desired page is displayed in the Document window, open the Options menu in the Document panel.
Click Add pages. Specify the number of pages to add, and the master
page will be replicated that number of times.
13 Exploring Other FreeHand Features – Lesson 3
FreeHand brush strokes
Brush strokes are symbols that can be saved and used to apply borders and animations.
Brush strokes are graphics that can be mapped to a path whenever they are needed.
14 Exploring Other FreeHand Features – Lesson 3
Create and save brush strokes To create a brush stroke:
Select an object in the document. Click the Modify menu, click Brush, and then click
Create Brush. Select the Copy option to open the Edit Brush dialog
box. Enter a name for the brush stroke, set any other
desired options, and click OK. Use the Pencil tool to draw a path in the desired
shape. With the new path still selected, click the Add Stroke
button in the Object panel and select Brush from the stroke type pop-up menu.
Select the desired brush from the list of available brushes.
15 Exploring Other FreeHand Features – Lesson 3
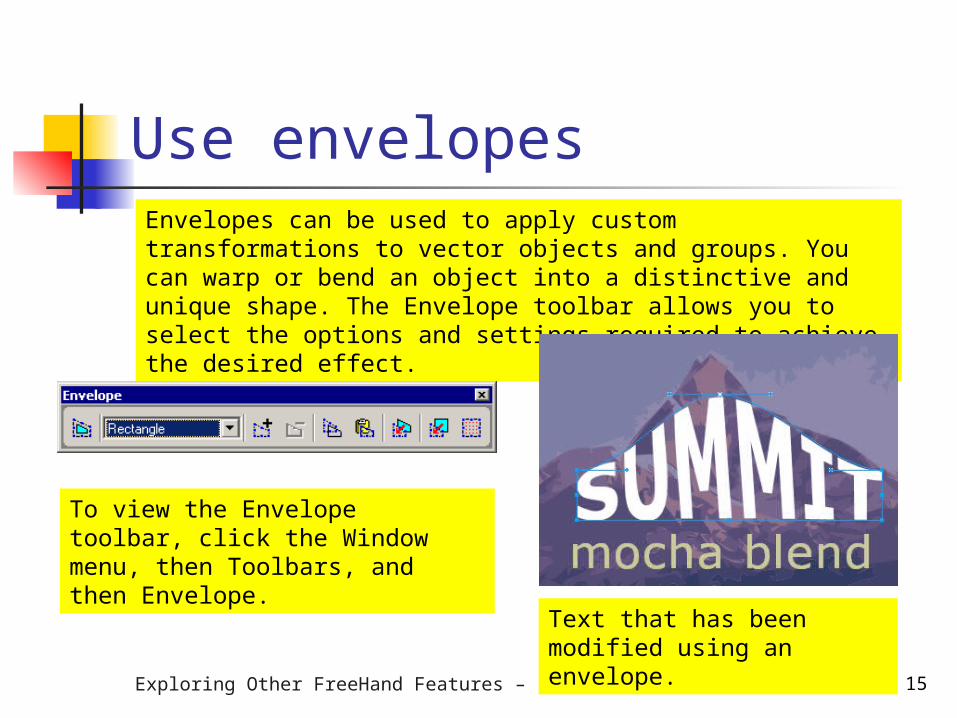
Use envelopesEnvelopes can be used to apply custom transformations to vector objects and groups. You can warp or bend an object into a distinctive and unique shape. The Envelope toolbar allows you to select the options and settings required to achieve the desired effect.
Text that has been modified using an envelope.
To view the Envelope toolbar, click the Window menu, then Toolbars, and then Envelope.
16 Exploring Other FreeHand Features – Lesson 3
Create 3-D objects using the perspective grid The perspective grid provides basic 3-D
rendering functions to FreeHand. The perspective grid displays guidelines
that converge to a vanishing point. The number of lines in the grid and the
number of vanishing points can be altered to fit your needs.
Dragging an object over the perspective grid using the Perspective tool allows you to move the object in 3-dimensional space.
17 Exploring Other FreeHand Features – Lesson 3
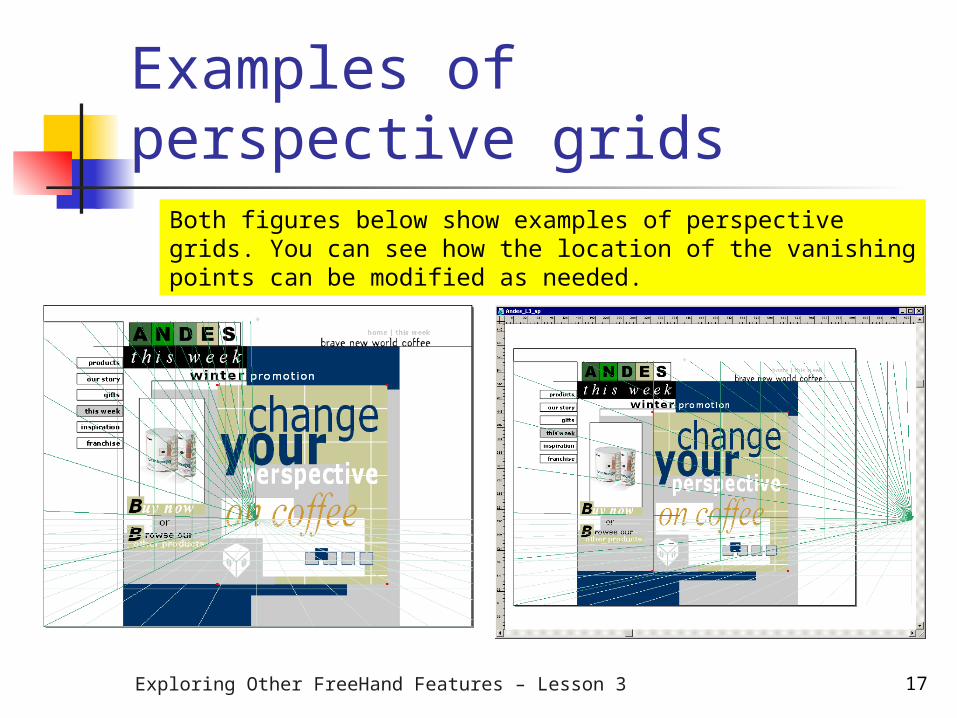
Examples of perspective grids
Both figures below show examples of perspective grids. You can see how the location of the vanishing points can be modified as needed.
18 Exploring Other FreeHand Features – Lesson 3
Summary
In this lesson, you learned to: Take advantage of additional FreeHand
features. Use contour gradients. Use the Trace tool and the Trace wand. Work with symbols. Create and use master pages. Define and use brush strokes. Use envelopes and the perspective grid.
Top Related