


Languages
Pages
Legal


DRESS UP AS...
Gold card
Pencil
Ruler
Serrated scissors
Black marker pen
Gold glitter
TO MAKE THE GOLDEN TICKET
1. Draw a rectangle on the back of some gold card. Cut out with serrated scissors. If you don’t have any it really doesn’t matter—just use regular scissors!
willy wonka
OUTFITTIPS• If you don’t have a
suitable jacket, add some cardboard lapels to a dark top for a super-quick solution!
2. Write Golden Ticket on the card with a black marker pen and decorate round the edges. For a bit of sparkle, add a little gold glitter. There you have it!
from Roald Dahl’s Charlie and the chocolate factory
✓
✓
✓
✓
✓
✓
YOU WILL NEED
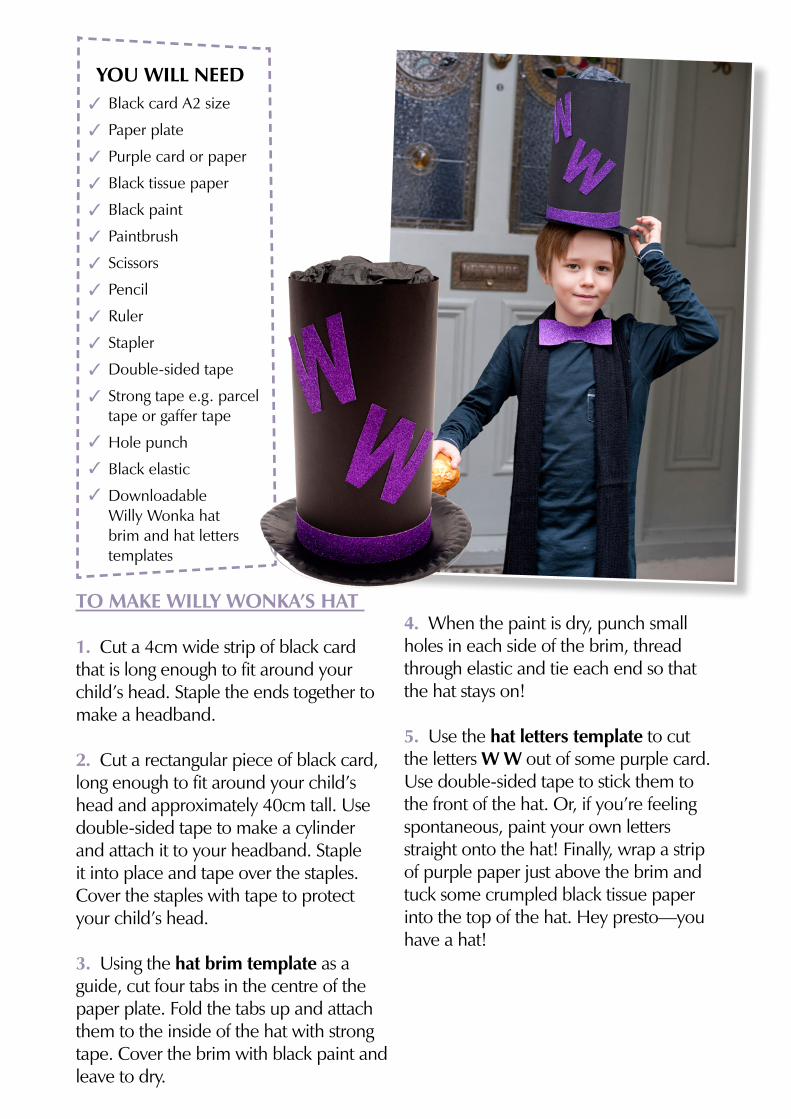
TO MAKE WILLY WONKA’S HAT
1. Cut a 4cm wide strip of black card that is long enough to fit around your child’s head. Staple the ends together to make a headband.
2. Cut a rectangular piece of black card, long enough to fit around your child’s head and approximately 40cm tall. Use double-sided tape to make a cylinder and attach it to your headband. Staple it into place and tape over the staples. Cover the staples with tape to protect your child’s head.
3. Using the hat brim template as a guide, cut four tabs in the centre of the paper plate. Fold the tabs up and attach them to the inside of the hat with strong tape. Cover the brim with black paint and leave to dry.
4. When the paint is dry, punch small holes in each side of the brim, thread through elastic and tie each end so that the hat stays on!
5. Use the hat letters template to cut the letters W W out of some purple card. Use double-sided tape to stick them to the front of the hat. Or, if you’re feeling spontaneous, paint your own letters straight onto the hat! Finally, wrap a strip of purple paper just above the brim and tuck some crumpled black tissue paper into the top of the hat. Hey presto—you have a hat!
Black card A2 size
Paper plate
Purple card or paper
Black tissue paper
Black paint
Paintbrush
Scissors
Pencil
Ruler
Stapler
Double-sided tape
Strong tape e.g. parcel tape or gaffer tape
Hole punch
Black elastic
Downloadable Willy Wonka hat brim and hat letters templates
✓
✓
✓
✓
✓
✓
✓
✓
✓
✓
✓
✓
✓
✓
✓
YOU WILL NEED
1. Print out one of the bow-tie templates and cut out the pieces. Place the bow piece on the purple paper, then draw and cut around it twice. Draw and cut around the strip.
2. Use double-sided tape to stick the two bow pieces back-to-back. Wrap the strip around the middle of the bows and fix with a piece of tape. You can keep your bow-tie plain or, for some extra pizzazz, paint some spots on it!
3. Push a piece of black elastic through the back of the bow-tie, tie around neck and knot into place.
Purple card or paper (or sparkly or foiled paper)
Pencil
Scissors
Double-sided tape
Black elastic
Downloadable bow-tie template (there are two sizes to choose from)
✓
✓
✓
✓
✓
✓
YOU WILL NEEDTO MAKE WILLY WONKA’S BOW-TIE
Find other fantastic book-inspired fancy dress ideas at bookaid.org/worldbookday© Book Aid International, Registered Charity no. 313869, Company no. 880754, 39-41 Coldharbour Lane, London SE5 9NR
Willy Wonka © Quentin Blake
Don’t forget to add your copy of Charlie and the Chocolate Factory or Charlie and the Great Glass Elevator to read on the day.
Cardboard tube e.g. a wrapping paper roll
Newspaper
Masking tape
Brown and gold paint
Paintbrush
Black marker pen
Black tape
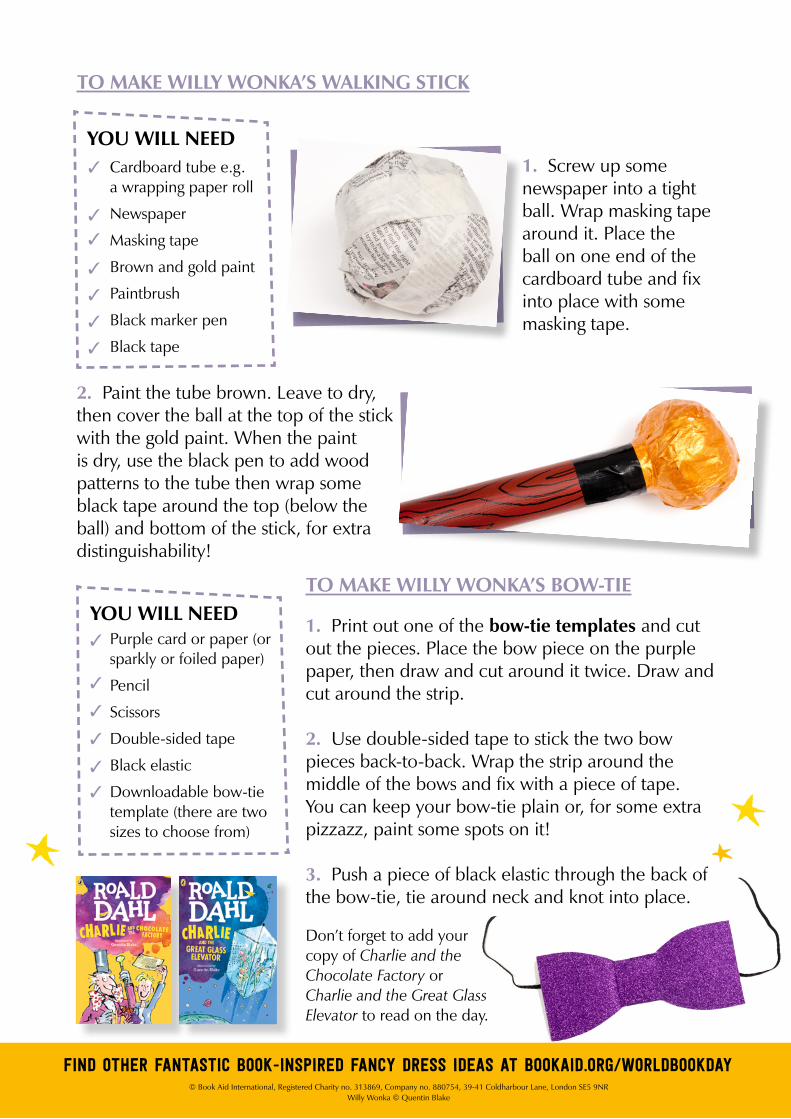
TO MAKE WILLY WONKA’S WALKING STICK
1. Screw up some newspaper into a tight ball. Wrap masking tape around it. Place the ball on one end of the cardboard tube and fix into place with some masking tape.
2. Paint the tube brown. Leave to dry, then cover the ball at the top of the stick with the gold paint. When the paint is dry, use the black pen to add wood patterns to the tube then wrap some black tape around the top (below the ball) and bottom of the stick, for extra distinguishability!
✓
✓
✓
✓
✓
✓
✓
YOU WILL NEED
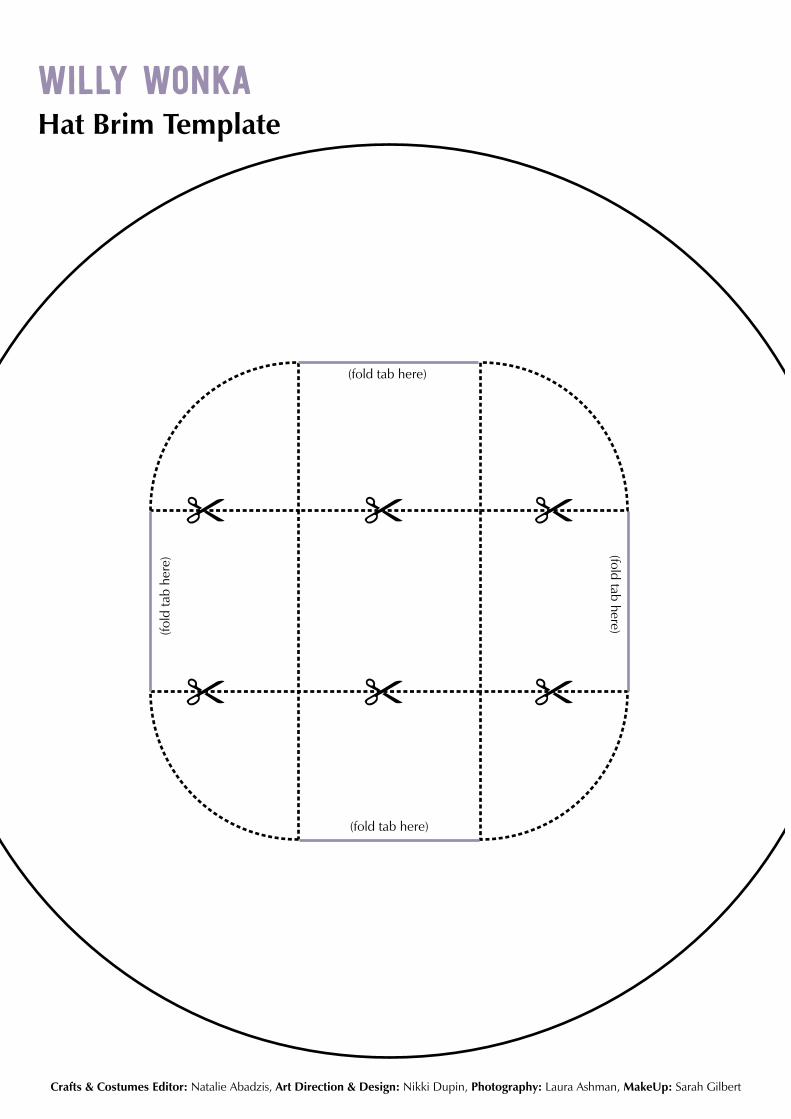
WILLY WONKAHat Brim Template
Crafts & Costumes Editor: Natalie Abadzis, Art Direction & Design: Nikki Dupin, Photography: Laura Ashman, MakeUp: Sarah Gilbert
(fold tab here)
(fold tab here)(fold
tab
here
)
(fold tab here)
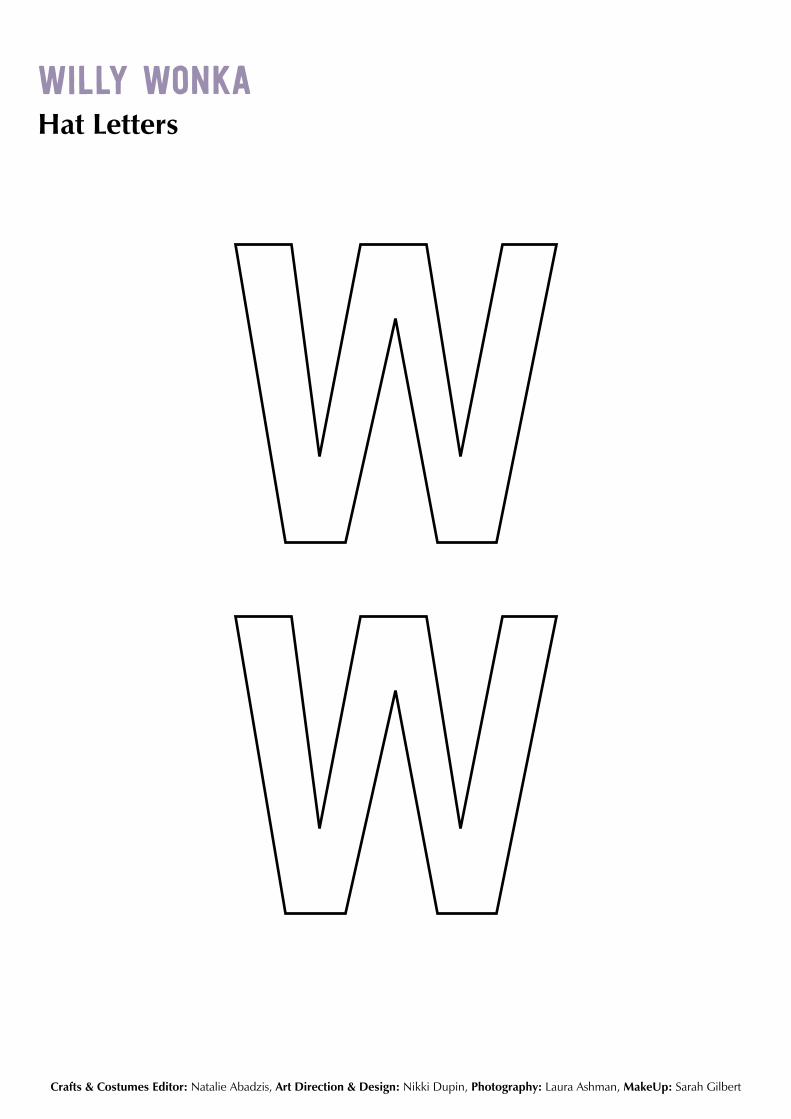
WILLY WONKAHat Letters
Crafts & Costumes Editor: Natalie Abadzis, Art Direction & Design: Nikki Dupin, Photography: Laura Ashman, MakeUp: Sarah Gilbert
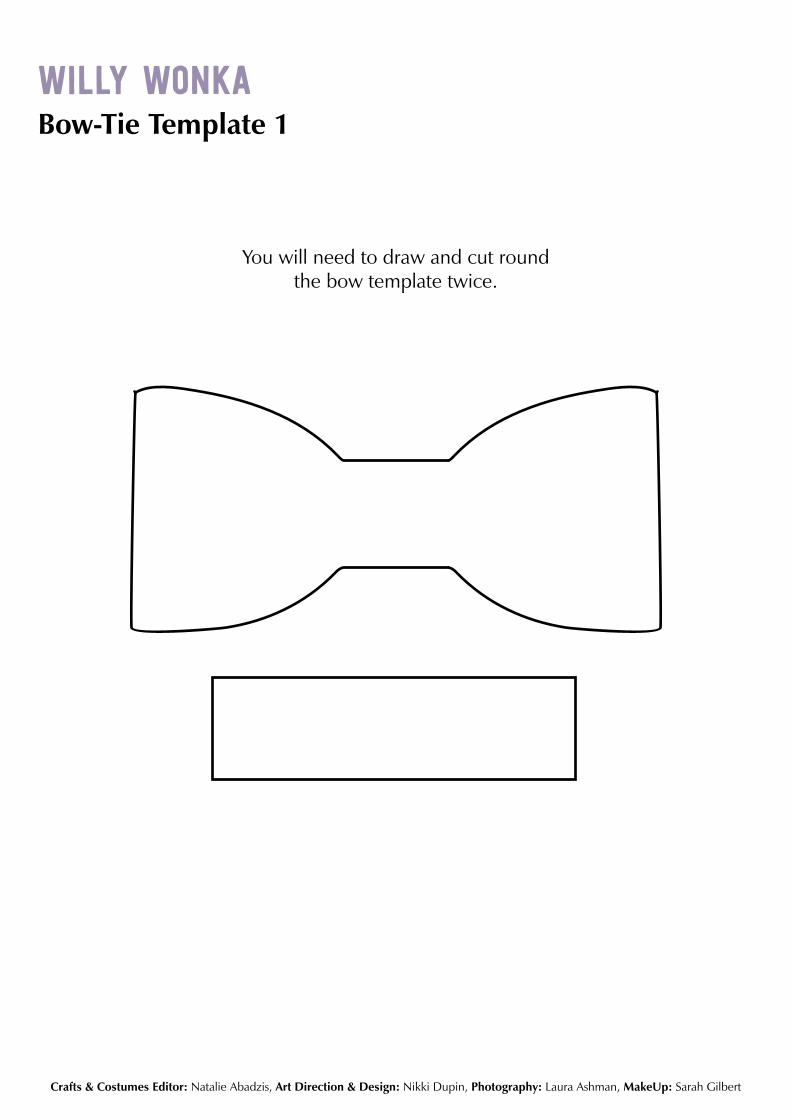
WILLY WONKABow-Tie Template 1
You will need to draw and cut round the bow template twice.
Crafts & Costumes Editor: Natalie Abadzis, Art Direction & Design: Nikki Dupin, Photography: Laura Ashman, MakeUp: Sarah Gilbert

WILLY WONKABow-Tie Template 2
You will need to draw and cut round the bow template
twice.
Crafts & Costumes Editor: Natalie Abadzis, Art Direction & Design: Nikki Dupin, Photography: Laura Ashman, MakeUp: Sarah Gilbert
•
•
Paint on spots for some added Willy Wonka style!
Top Related