


Languages
Pages
Legal

Dam Inundation Mapping Tool User Guide
This Dam Inundation Mapping Tool delineates estimated inundation areas given a location of dam
points and estimated dam height data. Please follow the steps below in order to successfully create
inundation polygon.
This tool is currently compatible with ArcGIS 10.0, 10.1, 10.2, and 10.4.0.
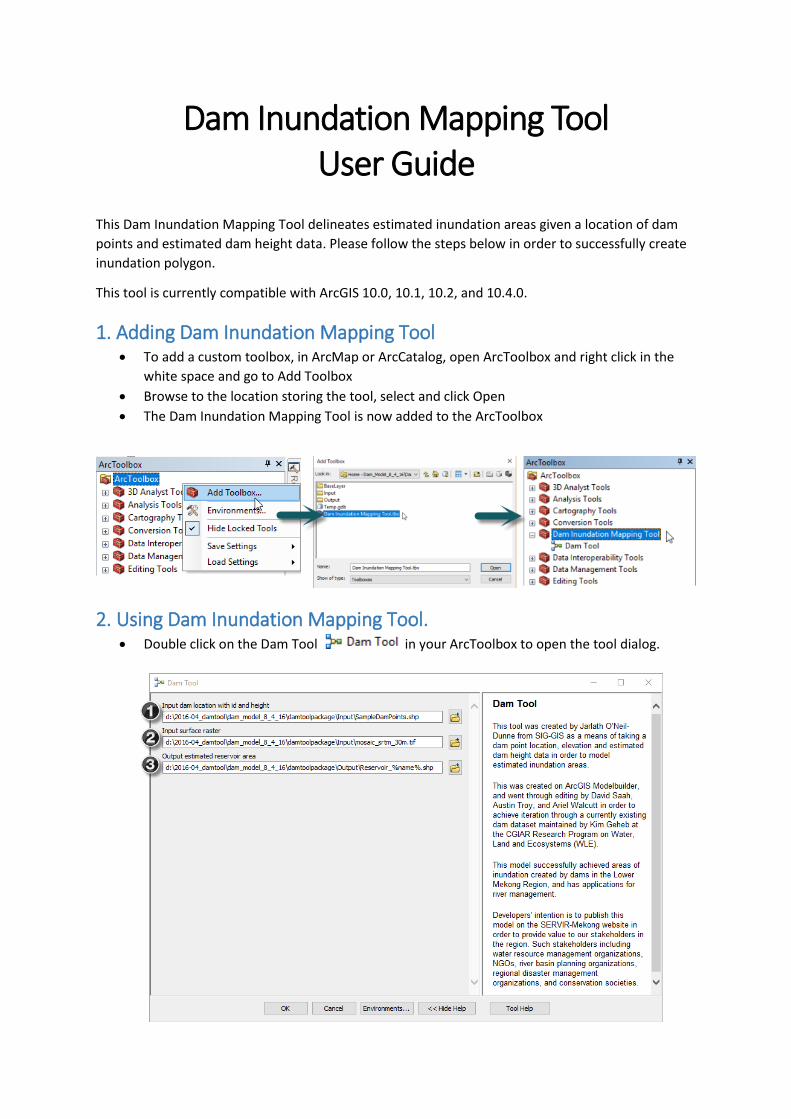
1. Adding Dam Inundation Mapping Tool To add a custom toolbox, in ArcMap or ArcCatalog, open ArcToolbox and right click in the
white space and go to Add Toolbox
Browse to the location storing the tool, select and click Open
The Dam Inundation Mapping Tool is now added to the ArcToolbox
2. Using Dam Inundation Mapping Tool. Double click on the Dam Tool in your ArcToolbox to open the tool dialog.
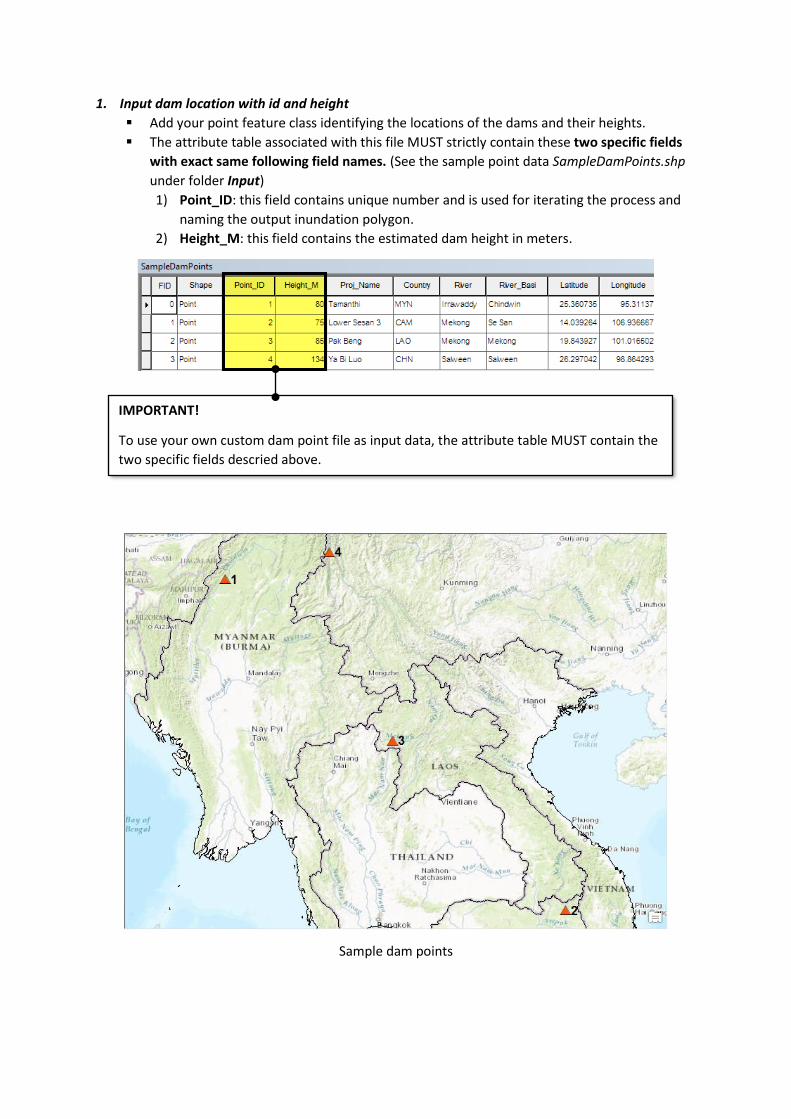
1. Input dam location with id and height
Add your point feature class identifying the locations of the dams and their heights.
The attribute table associated with this file MUST strictly contain these two specific fields
with exact same following field names. (See the sample point data SampleDamPoints.shp
under folder Input)
1) Point_ID: this field contains unique number and is used for iterating the process and
naming the output inundation polygon.
2) Height_M: this field contains the estimated dam height in meters.
Sample dam points
IMPORTANT!
To use your own custom dam point file as input data, the attribute table MUST contain the
two specific fields descried above.
2. Input raster surface
Add your digital elevation model as the input raster surface.
A mosaicked 30-meter resolution elevation data from the SRTM (Shuttle Radar Topography
Mission) covering Cambodia, Laos, Myanmar, Thailand, and Vietnam is also provided as a
separate zip package.
In case you want to acquire the 30-meter SRTM for your area of interest, please visit
http://dwtkns.com/srtm30m/
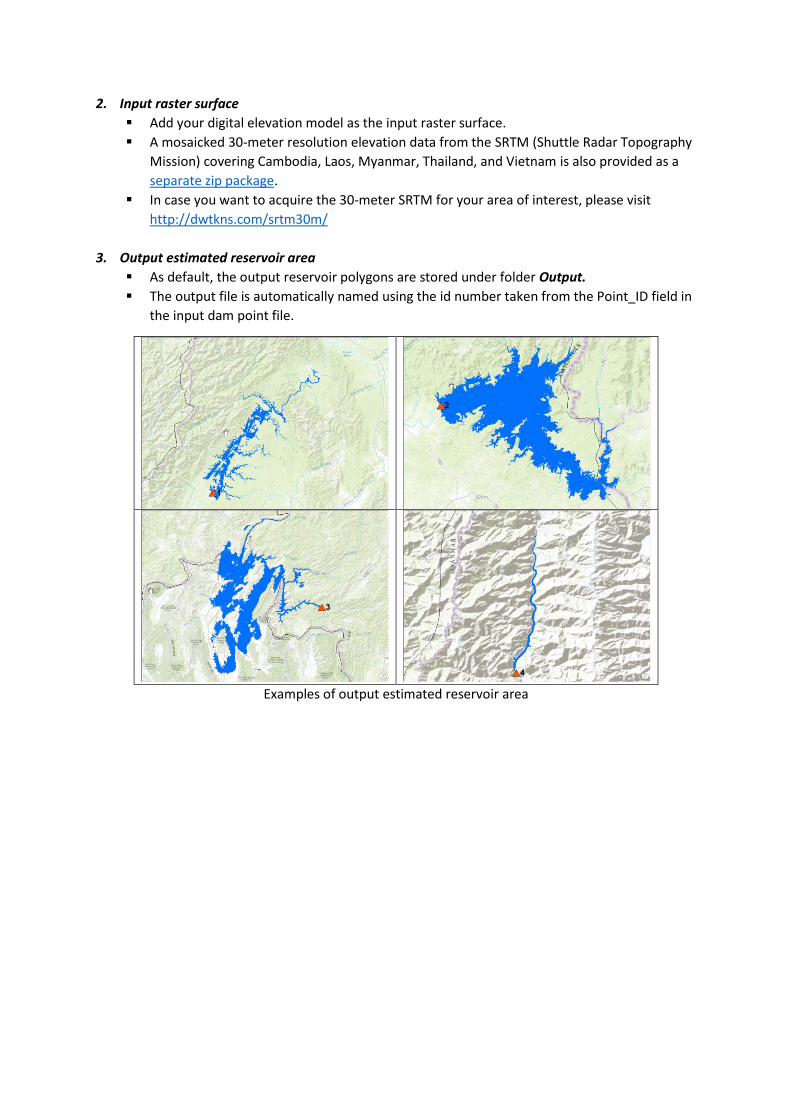
3. Output estimated reservoir area
As default, the output reservoir polygons are stored under folder Output.
The output file is automatically named using the id number taken from the Point_ID field in
the input dam point file.
Examples of output estimated reservoir area

Dam Inundation Mapping Tool Quick Start Guide
1. Add Dam Inundation Mapping Tool into ArcToolbox
2. Under Dam Inundation Mapping Tool, Double click on the Dam Tool 3. Add your point feature class identifying the locations of the dams and their heights.
4. Add your own digital elevation model. 5. Click OK to run the tool. The result will be automatically stored under
\\DamToolPackage\Output\ 6. To use custom datasets, please see the user guide.
Top Related