


Languages
Pages
Legal

1 / 10
INTRODUCTION
Micro: bit is an ARM-based embedded system designed by the BBC of England,
which is equipped with Bluetooth, accelerometer, electronic compass, three buttons,
and a display consisting of 5x5 LED lattice. It is mainly used for computer education
addressed to teenagers.
You can use the BBC micro: bit to build any cool gadgets, whether it's a robot or a
musical instrument, you can make anything you can imagine.
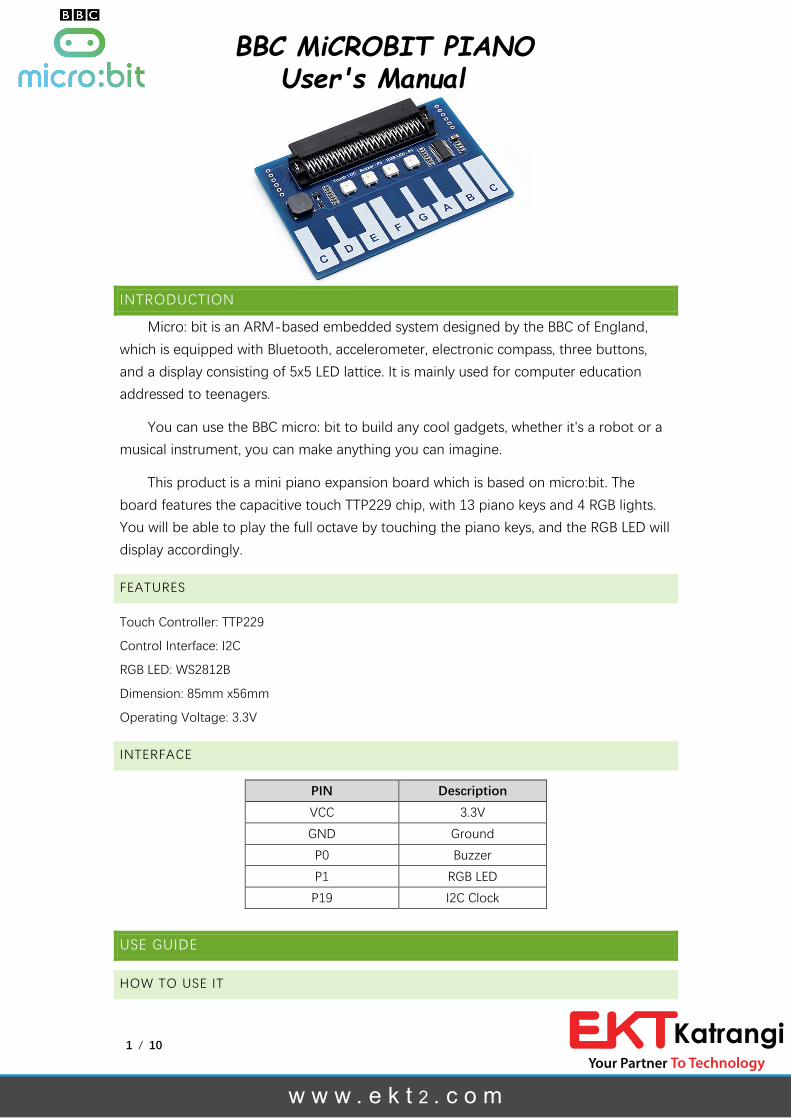
This product is a mini piano expansion board which is based on micro:bit. The
board features the capacitive touch TTP229 chip, with 13 piano keys and 4 RGB lights.
You will be able to play the full octave by touching the piano keys, and the RGB LED will
display accordingly.
FEATURES
Touch Controller: TTP229
Control Interface: I2C
RGB LED: WS2812B
Dimension: 85mm x56mm
Operating Voltage: 3.3V
INTERFACE
PIN Description
VCC 3.3V
GND Ground
P0 Buzzer
P1 RGB LED
P19 I2C Clock
USE GUIDE
HOW TO USE IT
w w w . e k t 2 . c o m
BBC MiCROBIT PIANOUser's Manual

Piano for micro:bit User Manual
2 / 10
As for its use, micro:bit officially recommends two programming methods:
http://microbit.org/code/
As you can see, the official recommendation is to use JavaScript and Python. In
their website, there are examples of these two programming languages. Click on “Let’s
Code” to open the corresponding official website.
JAVASCRIPT
Use any browser to open Micro:bit's website as shown below.
https://makecode.microbit.org/
w w w . e k t 2 . c o m

Piano for micro:bit User Manual
3 / 10
Click “Projects”, then “My stuff” and “New Project” to create a new project. Also, you can
import previous projects, or refer to other people's projects and examples;
On the left of micro:bit, there’s an analog display area. When the corresponding blocks are
placed in the building blocks area, its dynamic effects will be displayed in response to them.
In the middle of the selecting area there are some common building blocks packages.
Respectively, these are the basic functions, input, music, LED lights, Radio, loops, logic, variables,
and Math and Control. By combining them together it can be achieved any kind of interesting
effects. There are also more advanced control blocks further below. Thus, mastering the basic
building blocks will allow the student to explore deeper levels of control.
On the right side is the block programming operation area, you can see two options on the
top: Blocks and JavaScript. Click on “Blocks” to place blocks inside. Click on “JavaScript” to see
generated code. Little students not familiar with JavaScript should better use “Blocks”. By default,
in Blocks, you can place the blocks you need in the placement area. Let’s micro:bit display!
INSTALL A BUILDING BLOCK PACKAGE
After the most basic operations introduction is done, let’s get straight the point. What do
we need to do with our new piano module?
First click “Advanced” and scroll to the bottom to find and click “Add Package” .
w w w . e k t 2 . c o m

Piano for micro:bit User Manual
4 / 10
In the pop-up box, note that the url should be added with a space:
https://github.com/waveshare/TouchPiano
On the searching result, click “piano for micro:bit”. This way you’ll have added the blocks to
control the piano module.
Next, we will continue installing the “Neopixel” block package, which is the control module
of the RGB lights. Similarly, click on “Advanced”->“Add Package”, then input in the popup
window the following url: https://github.com/Microsoft/pxt-neopixel
The last two installed libraries will appear on the left of the blank space.
w w w . e k t 2 . c o m

Piano for micro:bit User Manual
5 / 10
BASIC USE
Clicking on “WSTouchPiano” you should see as below:
The functions of each block are as follows:
Hereby declare: the following are sample tutorials.
1. PLAYING PIANO
Placement steps
Go to “Basic”, and place “forever” slot into the blank space on the right. Place the “Play
Piano” block of WSTouchPiano inside the “forever” slot. Click “Download” button on the bottom
left to save the project, move the .hex file to the micro:bit drive to transfer the code into your
micro:bit, and insert micro:bit to Piano's interface module. Now, you can observe our experiment
outcome!
w w w . e k t 2 . c o m

Piano for micro:bit User Manual
6 / 10
Removing blocks and slots:
Move back those blocks or slots that are not needed in the programming area to the block
selection area on the left.
Experiment phenomenon
Touch the white piano keys from left to right, and in turn, DO, RE, MI, FA, SOL, LA, SI, DO.
On each time you touch, the RBG LED lights up different colors. Of course, when you touch the
key is in between of two white keys, it’ll produce a tone higher than the key is on its left, and a
tone lower that the key is on its right.
2 DETERMINE KEY PRESSING.
Placement steps
Within “Logic” package, place “if then” slot to the right area. This block is used to make a
logic evaluation. If a given event is true, “then” performs some action. On the “if then” slot, click
the blue button next to “if”. This will pop up a small box. Drag the “else if” slot from within this
small box to the “if then” slot on the right. Go to Basic, and drag the “show leds” block to “then”
inside, and click on the corresponding LED for red.
Experiment phenomenon
w w w . e k t 2 . c o m

Piano for micro:bit User Manual
7 / 10
When touching the piano key C, micro:bit will display “C”, if you touch D, then micro:bit will
also display D, if nothing is touched, it won’t displaying anything.
3 CONTROLLING RGB LED COLORS
Placement steps
Here we will omit some of the basics as they are mentioned above in this tutorial.
Drag the “set LED_Color” 4-row block directly off the WSTouchPiano. Here the difference is
at the back of each LED_Color. Add to the back of each LED_color block 4 new blocks as follows.
LED1 and LED2, which are in WSTPPiano, and LED3 and LED4 by clicking “… More” just under
Neopixel
Note that: right after red, green, blue there’s a small field to fill in numbers. In fact this block
is made of the composition of the three primary colors called RGB. Each color can set a
brightness level of 256, within the range 0-255. By combining 3 different colors range, it can
produce 256 x 256 x 256 different colors. You can look up color table on the Internet for each
corresponding color combination.
Experiment phenomenon
When a piano key C is pressed, the four LEDs on the board will light in red, green, yellow
and blue respectively.
w w w . e k t 2 . c o m

Piano for micro:bit User Manual
8 / 10
4 CONTROLLING THE BUZZER
Placement steps
Drag off the “play tone” block from “Music” and click the first parameter. A piano keyboard
will show up. Click the Middle C. The second parameter is used for tone length, which is the
beat.
Experiment phenomenon
When the C key is pressed, the buzzer will ring one DO beat note.
LANGUANGE
If you are not used to read in English, you can set to other language like Chinese as follows:
At the top, click on the “gear symbol” -> Language, in the pop-up window, scroll down and
select simplified Chinese (China). That will set up the interface to Chinese language.
w w w . e k t 2 . c o m

Piano for micro:bit User Manual
9 / 10
USING THE PYTHON
Visit the official python programming website of micro:bit: http://python.microbit.org/v/1
You can see the following interface.
w w w . e k t 2 . c o m
w w w . e k t 2 . c o m

Piano for micro:bit User Manual
10 / 10
In turn, written above you can see the corresponding picture:
Download: Download the program to micro:bit.
Save: Save the python program to the computer.
Load: upload the local python program to the editor.
Snippets: These are the definitions and usages of common statements.
Help: Ask for Help with a more detailed description of the editor's usage.
You can download the program from the product information corresponding to our
website, and upload the WSTouchPiano is in the folder to the editor.
Within Visual Programming there are the following functions.
TouchPress():Listens to the key press and return the corresponding key value.
ShowRGB (RGB): Displays the color of four corresponding lights, where RGB are four tuples with
three elements each, that is (0, 255, 255), (0, 255, 255), (0, 255, 255), (0, 255, 255).
PlayPiano(): Keeps listening to key pressing. When the key is pressed, the four RGB lights up any
random colors, as well as the buzzer emits the corresponding sound at the same time.
For learning more about control functions, please refer to micro:bit official python library, If you
don't know the python library, you can find micro:bit's python library in the following places:
https://github.com/bbcmicrobit/micropython
http://microbit-micropython.readthedocs.io/en/latest/index.html
w w w . e k t 2 . c o m

1
1
2
2
3
3
4
4
D D
C C
B B
A A
1M
R11M
R21M
R31M
R41M
R51M
R61M
R71M
R8
GND K0
K1
K2
K3
K4
K5
K6
K7
100nF
C7GND
aveshareW
SLPSENA1
TP32
TP23
SENADJ04
TP15
TP06
TP157
TP148
SENADJ39
TP1310
TP1211
SDA12
SDO13
SCL14 SLPSENB 15TP11 16TP10 17SENADJ2 18TP9 19TP8 20TEST 21TP7 22TP6 23SENADJ1 24TP5 25TP4 26VDD 27VSS 28U1
TTP229L
0-50pFC1
0-50pFC2
0-50pFC4
0-50pFC3
0-50pFC5
0-50pFC6GND
GND
GND
SDO
TEST
K0K1
K2K3
K4K5
K6K7
K8K9
K10K11
K12K13
K14K15
10K
R10
10K
R11Micro:bit Piano Board
1 23 45 67 89 1011 1213 1415 1617 1819 2021 2223 2425 2627 2829 3031 3233 3435 3637 3839 4041 4243 4445 4647 4849 5051 5253 5455 5657 5859 6061 6263 6465 6667 6869 7071 7273 7475 7677 7879 8081 82
H41
H41
3V3
GND
GND
LED1/P3 LED1/P3P0 P0
LED2/P4 LED2/P4KEY_A/P5 KEY_A/P5LED9/P6LED8/P7P1
P2
GND
P8LED7/P9LED3P10KEY_B/P11P12
SCK/P13MISO/P14MOSI/P15P16
SCL/P19SDA/P20
3V3/P173V3
GND
GND
LED9/P6LED8/P7P1
P2
GND
P8LED7/P9LED3P10KEY_B/P11P12
SCK/P13MISO/P14MOSI/P15P16
SCL/P19SDA/P20
3V3/P17
3V3/P18 3V3/P18SDA/P20
SCL/P19
3V3
3V3
3V3
P0
12
Buzzer
B1
180R13
SDA/P20
SCL/P19
10uF/25V
C8
Q1NPN_SOT23
GND
3V3
D11N4148
GND
VDD
DOUTVSS
DIN
L1
WS2812B
VDD
DOUTVSS
DIN
L2
WS2812B
VDD
DOUTVSS
DIN
L3
WS2812B
P1
3V3
GND GND
VDD
DOUTVSS
DIN
L4
WS2812BGND
PIANO_B
PIANO_A
PIANO_A#
PIANO_G#PIANO_GPIANO_F#
PIANO_FPIANO_E
PIANO_D#PIANO_D
PIANO_C#PIANO_C
PIANO_C1
123456
H1
Header 6
3V3GNDP0P1SCL/P19SDA/P20
123456
H2
Header 6
3V3GND
SCK/P13MISO/P14MOSI/P15
P2
Micro:bit GPIO
RGB LED
Buzzer
Touch
I2C
Top Related