


Languages
Pages
Legal

Your new favorite
are in the cards!techniques
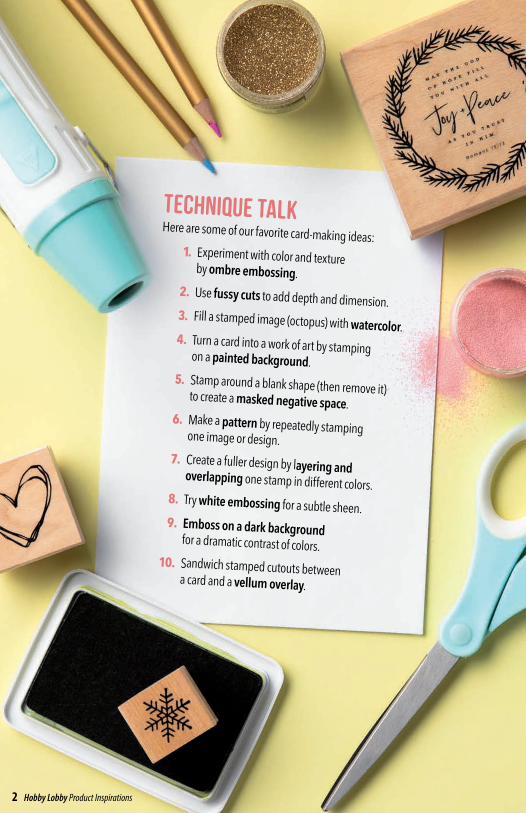
TECHNIQUE TALKHere are some of our favorite card-making ideas:
1. Experiment with color and texture by ombre embossing. 2. Use fussy cuts to add depth and dimension. 3. Fill a stamped image (octopus) with watercolor. 4. Turn a card into a work of art by stamping on a painted background. 5. Stamp around a blank shape (then remove it) to create a masked negative space. 6. Make a pattern by repeatedly stamping one image or design. 7. Create a fuller design by layering and overlapping one stamp in different colors. 8. Try white embossing for a subtle sheen. 9. Emboss on a dark background for a dramatic contrast of colors.10. Sandwich stamped cutouts between a card and a vellum overlay.
2 Hobby Lobby Product Inspirations

1
2
6
7
8
9
10
3
45
STATIONERY
CENTRALCreating your own cards is 100%
doable with stamps, ink (the embossing
kind is especially handy for these DIYs!)
and a few basic paper-crafting tools.
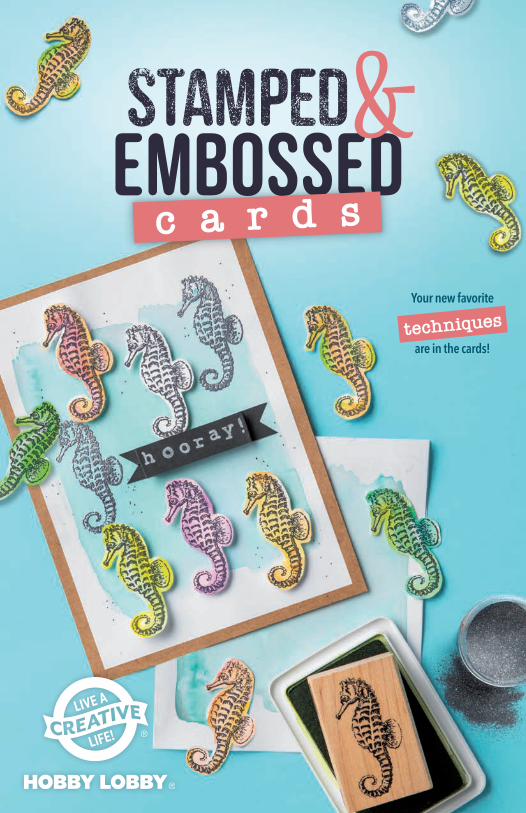
ON THE COVER:
We used a variety of techniques on this swim-sational card:
watercolor, fussy cuts, DIY pattern and embossing.
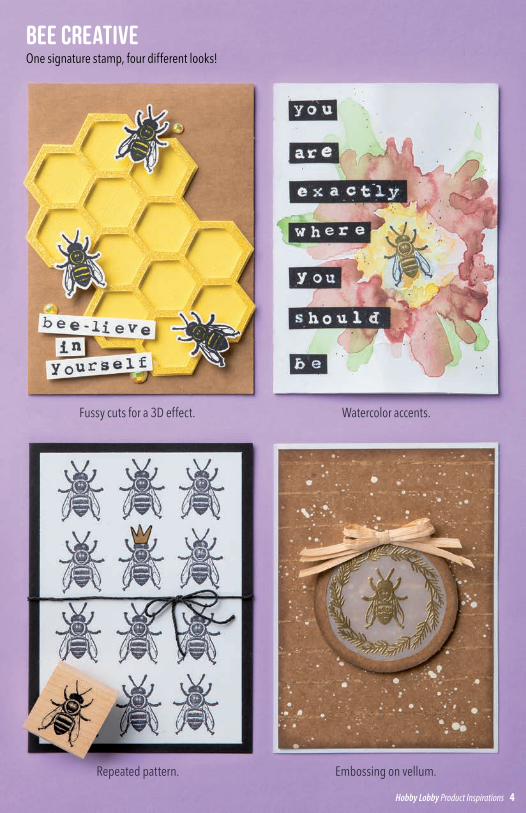
BEE CREATIVEOne signature stamp, four different looks!
Fussy cuts for a 3D effect. Watercolor accents.
Embossing on vellum.Repeated pattern.
Hobby Lobby Product Inspirations 4
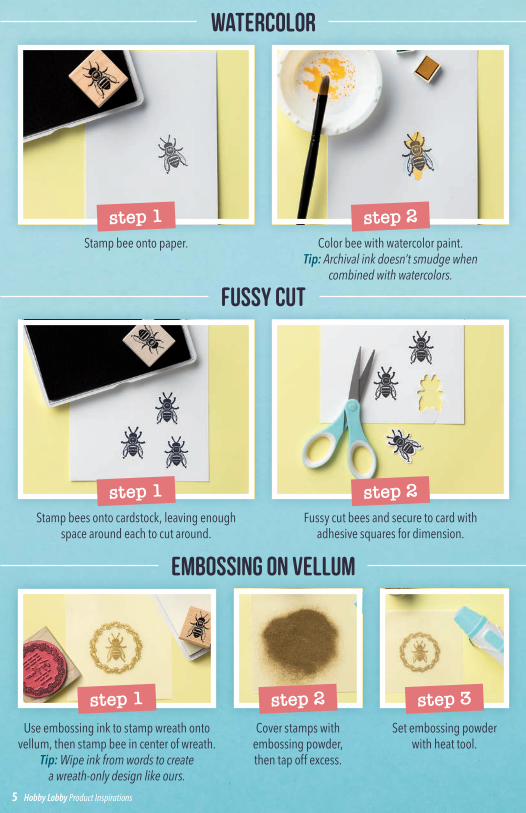
WATERCOLOR
FUSSY CUT
EMBOSSING ON VELLUM
step 1
step 1
step 1 step 3step 2
step 2
step 2
Stamp bee onto paper.
Stamp bees onto cardstock, leaving enough space around each to cut around.
Use embossing ink to stamp wreath onto vellum, then stamp bee in center of wreath.
Tip: Wipe ink from words to create a wreath-only design like ours.
Cover stamps with embossing powder, then tap off excess.
Set embossing powder with heat tool.
Color bee with watercolor paint. Tip: Archival ink doesn’t smudge when
combined with watercolors.
Fussy cut bees and secure to card with adhesive squares for dimension.
5 Hobby Lobby Product Inspirations
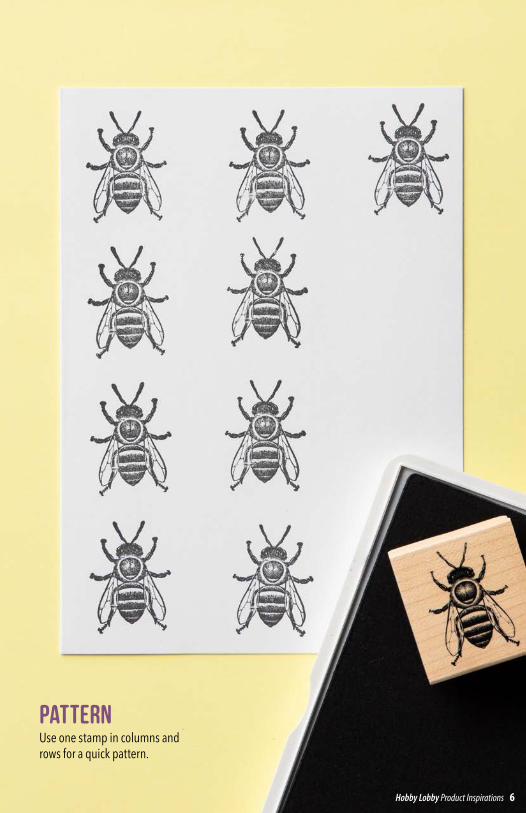
PATTERNUse one stamp in columns and rows for a quick pattern.
Hobby Lobby Product Inspirations 6
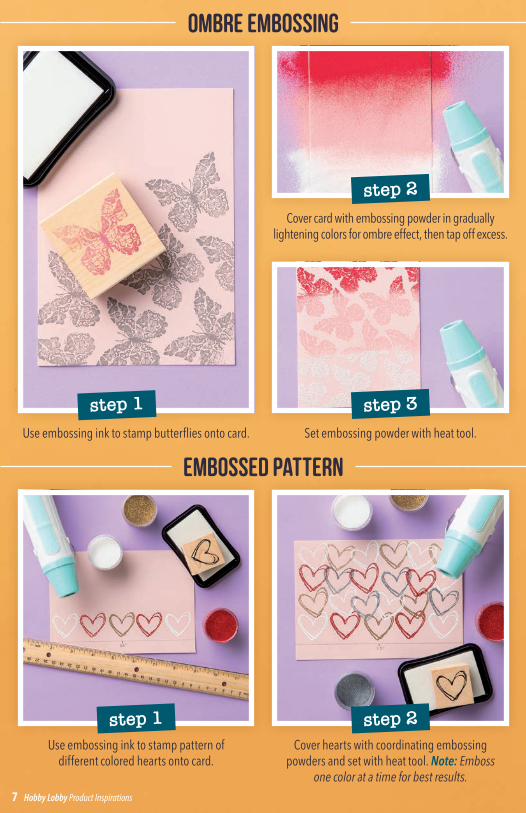
OMBRE EMBOSSING
step 1 step 3
step 2
Use embossing ink to stamp butterflies onto card.
Cover card with embossing powder in gradually lightening colors for ombre effect, then tap off excess.
Set embossing powder with heat tool.
EMBOSSED PATTERN
step 1 step 2Use embossing ink to stamp pattern of
different colored hearts onto card.Cover hearts with coordinating embossing
powders and set with heat tool. Note: Emboss one color at a time for best results.
7 Hobby Lobby Product Inspirations
MASKED NEGATIVE SPACE
VELLUM OVERLAY
step 1
step 1
step 3
step 2
step 2
step 4
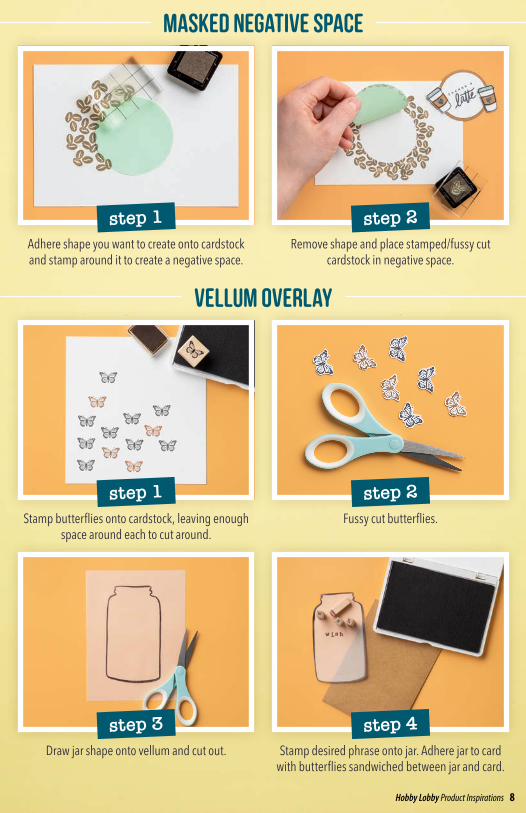
Adhere shape you want to create onto cardstock and stamp around it to create a negative space.
Stamp butterflies onto cardstock, leaving enough space around each to cut around.
Draw jar shape onto vellum and cut out.
Remove shape and place stamped/fussy cut cardstock in negative space.
Fussy cut butterflies.
Stamp desired phrase onto jar. Adhere jar to card with butterflies sandwiched between jar and card.
Hobby Lobby Product Inspirations 8

WATERCOLOR
step 1 step 2Stamp mermaid onto smooth cardstock. Color mermaid with watercolor pencils and then
fussy cut. Paint card with watercolors and secure mermaid to card with adhesive squares.
Stamp third layer and embellish with colored pens. Stamp and emboss desired design onto
separate piece of paper for pop-up accent.
LAYERING
Stamp first layer onto card.
Stamp and emboss second layer.
step 3step 2
step 1
©2020 Hobby Lobby® • • www.hobbylobby.com •• • • Paper Crafts - 1999325
DO NOT ALLOW CHILDREN TO COMPLETE PROJECTS ALONE. ADULT SUPERVISION REQUIRED.
Top Related