


Languages
Pages
Legal

ABAP Digital Signature guide for NFE
Installing the SAP Cryptographic Library
For the digital signature of NFE data in the SAP system using Secure Store and Forward (SSF) you
must install the SAP Cryptographic Library (SAPCRYPTOLIB) as described in SAP Note 662340 -
SSF Encryption Using the SAPCryptolib.
This is the prerequisite for the instructions in this manual:
1. NFE Incoming:
Importing the CA certificates for verification of the digital signature of incoming NF-es
2. NFE Outgoing:
Customizing the private certificate for digital signature of outgoing NF-es

1 NFE Incoming
Page 2
1 NFE Incoming
Importing the CA certificates for verification of the digital signature of incoming
NF-es
1.1 Creating the PSE for NFE Signature Check
From the Administration workplace use transaction STRUST – SSF: Trust Manager and create a
self-signed PSE for SSF NFE signature validation:

1.1 Creating the PSE for NFE Signature Check
Page 3
Confirming suggestion of PSE:
1 NFE Incoming
Page 4
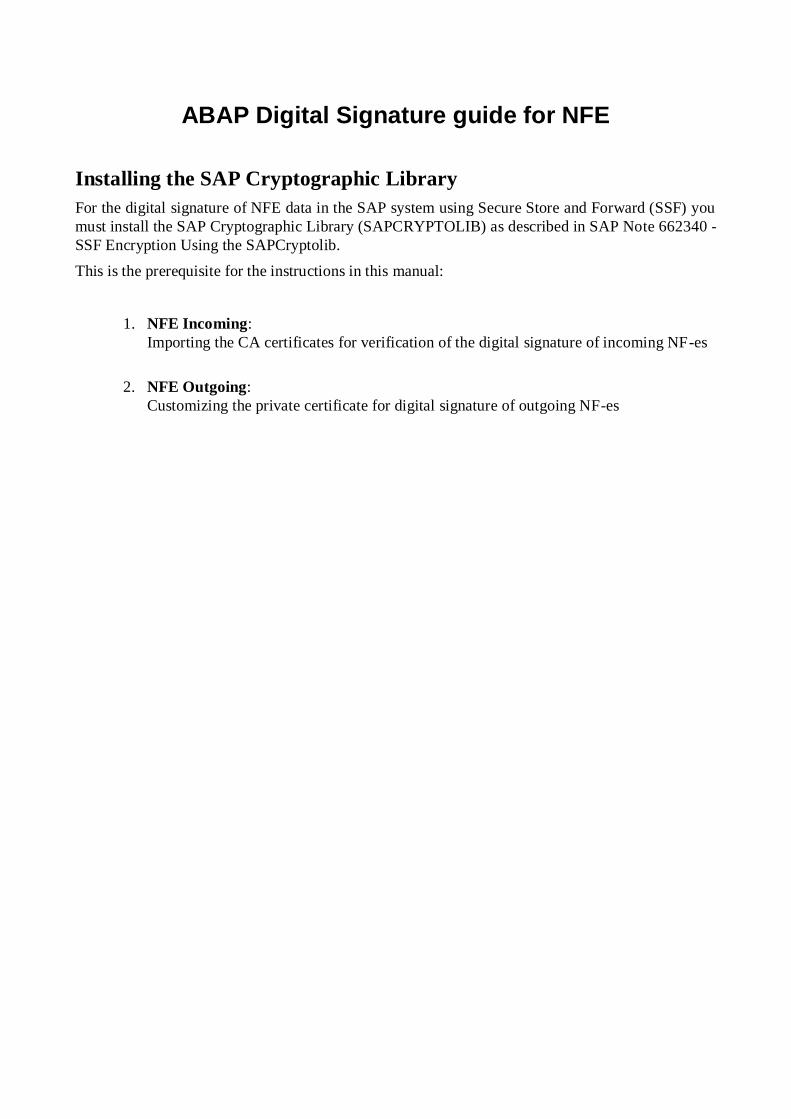
1.2 Import CA certificates
After receive the message “Data saved successfully”, import the CA certificate of the issuer (the
certification authority) of the signing certificate (encoded in the XML tag
<X509Certificate>).
To ensure that the certificate is OK you can download the CA certificate with full chain from the
certification authority’s Web site as described in attachment Structure_of_ICP-Brazil.pdf and
import the Certificate with full chain in internet explorer:
1.2 Import CA certificates
Page 5
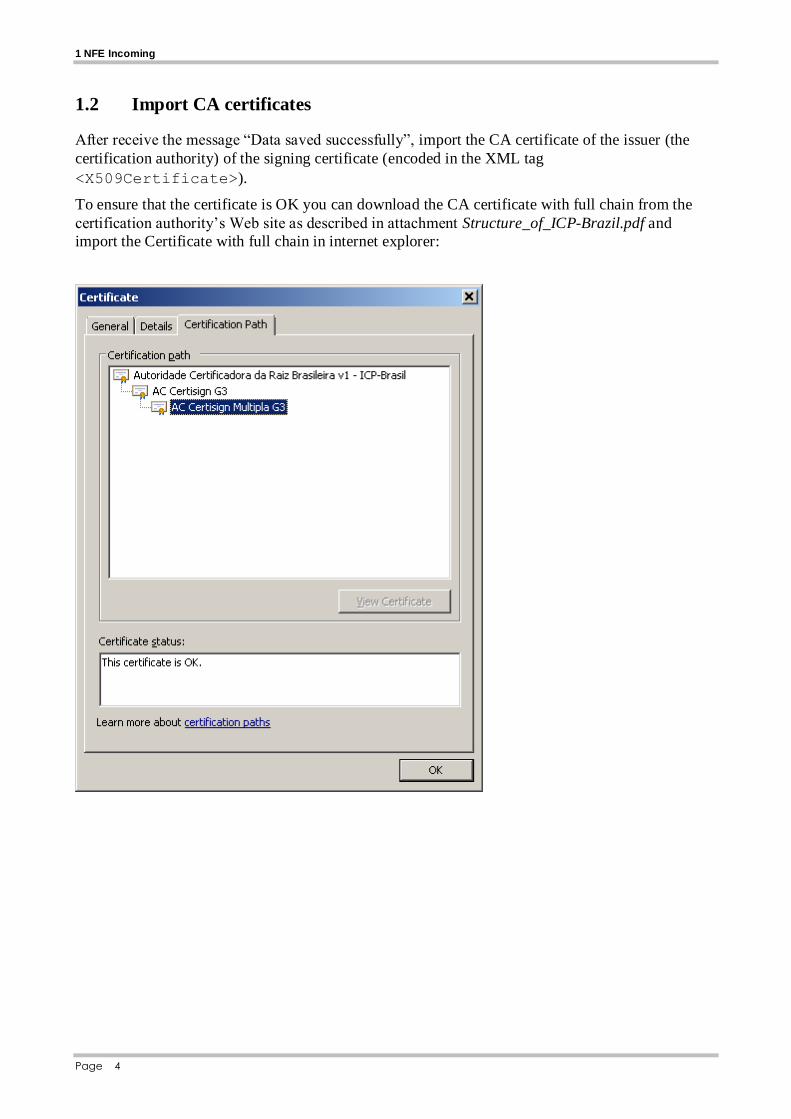
Import the CA certificate of the certification authority in STRUST:
1 NFE Incoming
Page 6
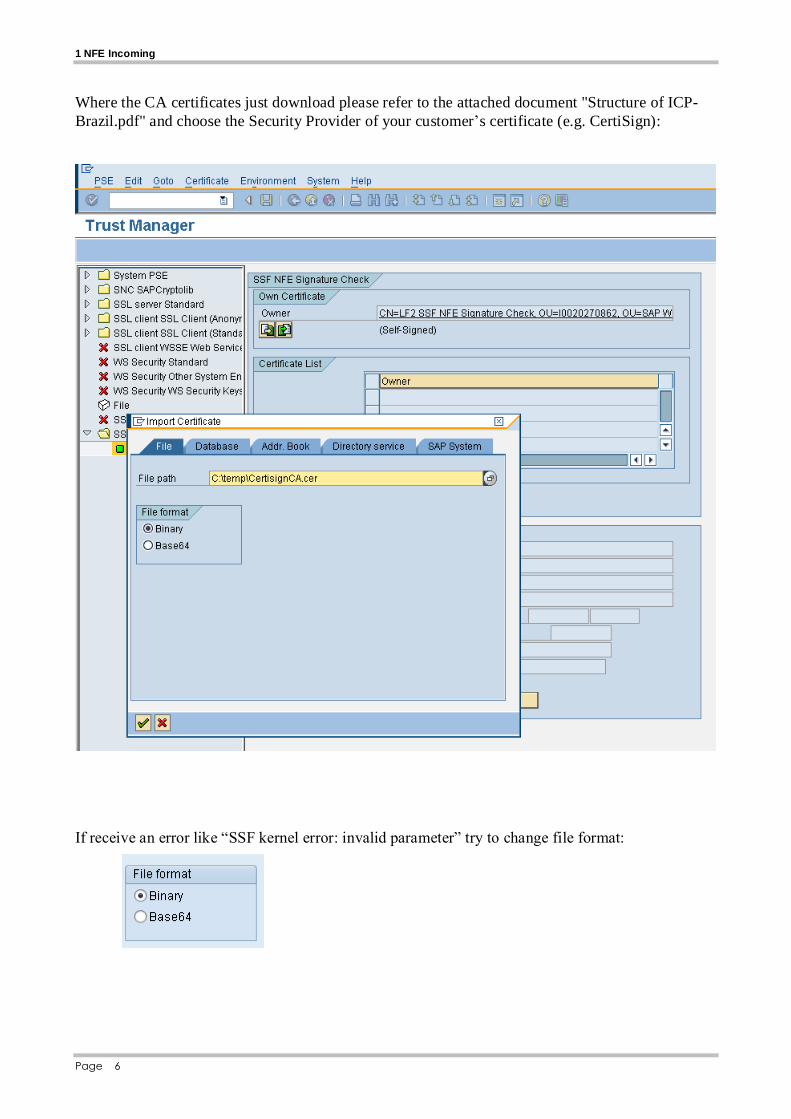
Where the CA certificates just download please refer to the attached document "Structure of ICP-
Brazil.pdf" and choose the Security Provider of your customer’s certificate (e.g. CertiSign):
If receive an error like “SSF kernel error: invalid parameter” try to change file format:

0
Page 7
The certificate will be shown on Certificate box:
Click on Add to Certificate List
1 NFE Incoming
Page 8
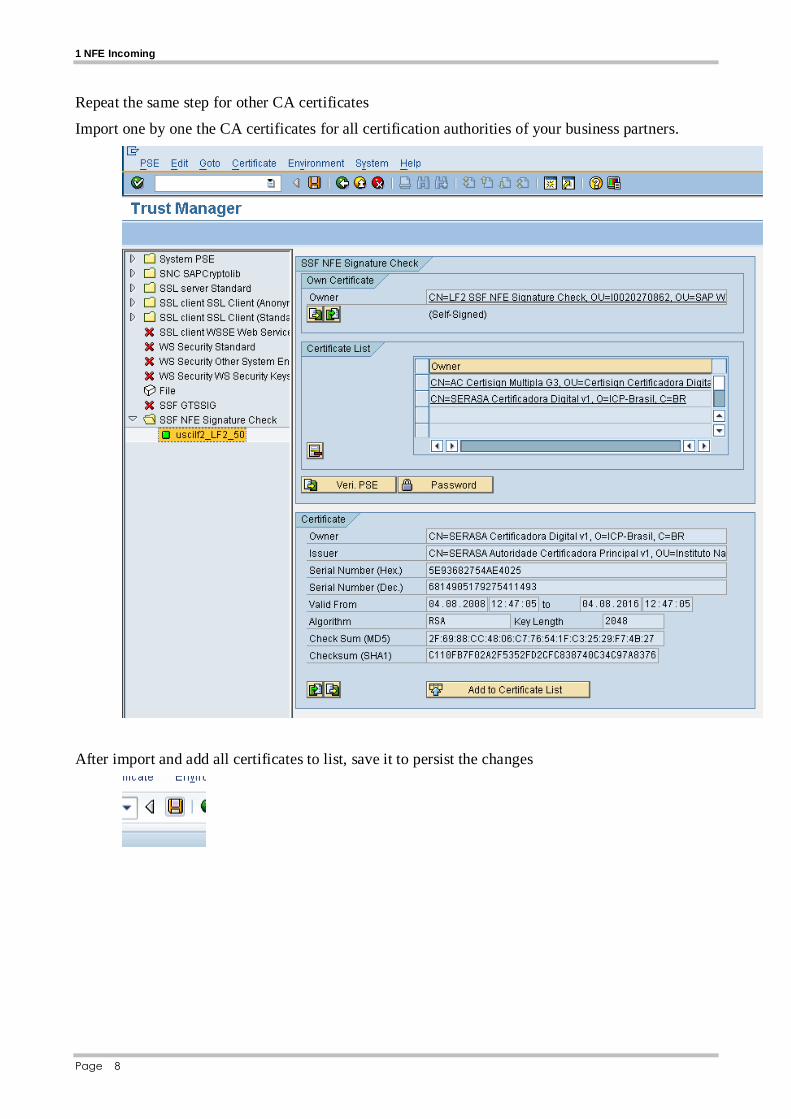
Repeat the same step for other CA certificates
Import one by one the CA certificates for all certification authorities of your business partners.
After import and add all certificates to list, save it to persist the changes
2.1 Create PSE
Page 9
2 NFE Outgoing
Customizing the private certificate for digital signature of outgoing NF-es
2.1 Create PSE
Use tool SAPGENPSE to create PSE from existing private certificate as described in http://help.sap.com/saphelp_nw04s/helpdata/EN/0d/9ce63bab134b39a52e340255d7650c/frameset.htm:
sapgenpse import_p12 -p file.pse file_name.p12
or
sapgenpse import_p12 -p file.pse file_name.pfx
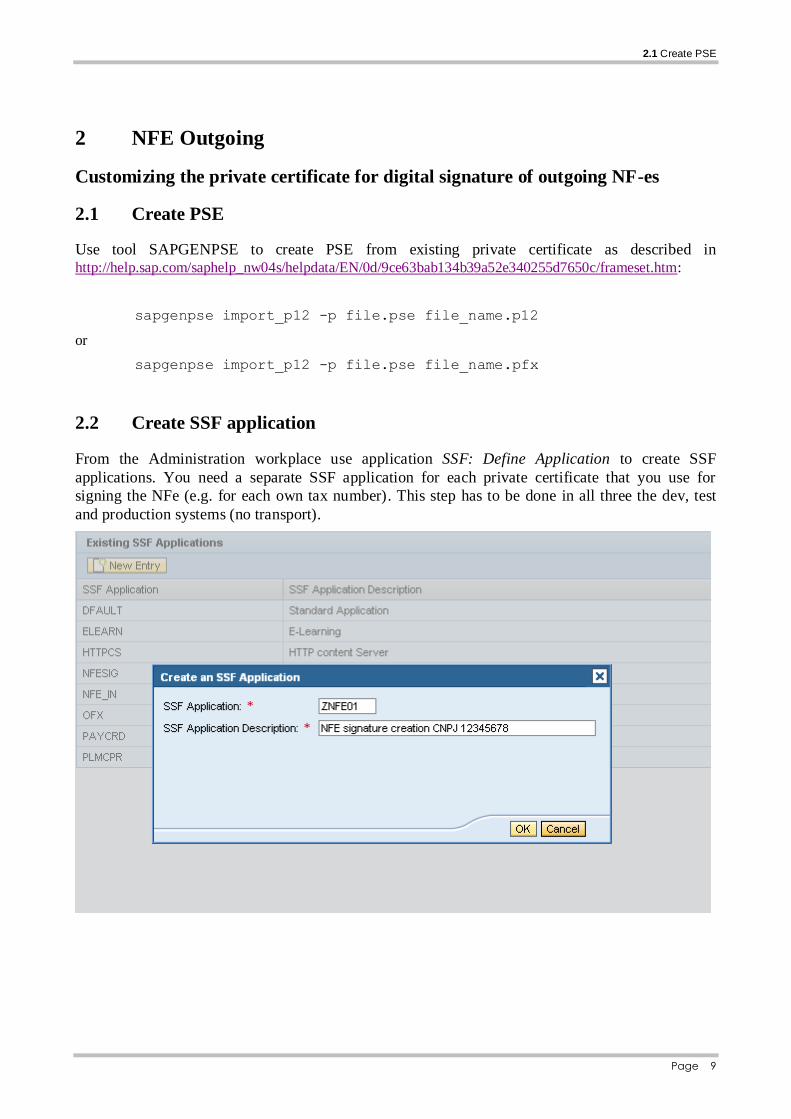
2.2 Create SSF application
From the Administration workplace use application SSF: Define Application to create SSF
applications. You need a separate SSF application for each private certificate that you use for
signing the NFe (e.g. for each own tax number). This step has to be done in all three the dev, test
and production systems (no transport).

2 NFE Outgoing
Page 10
2.3 Set Application Parameters
From the Administration workplace use transaction SSFA – SSF: Set Application Parameters
Create the configuration for ZNFE01 (for sign NF-es)
2.3 Set Application Parameters
Page 11
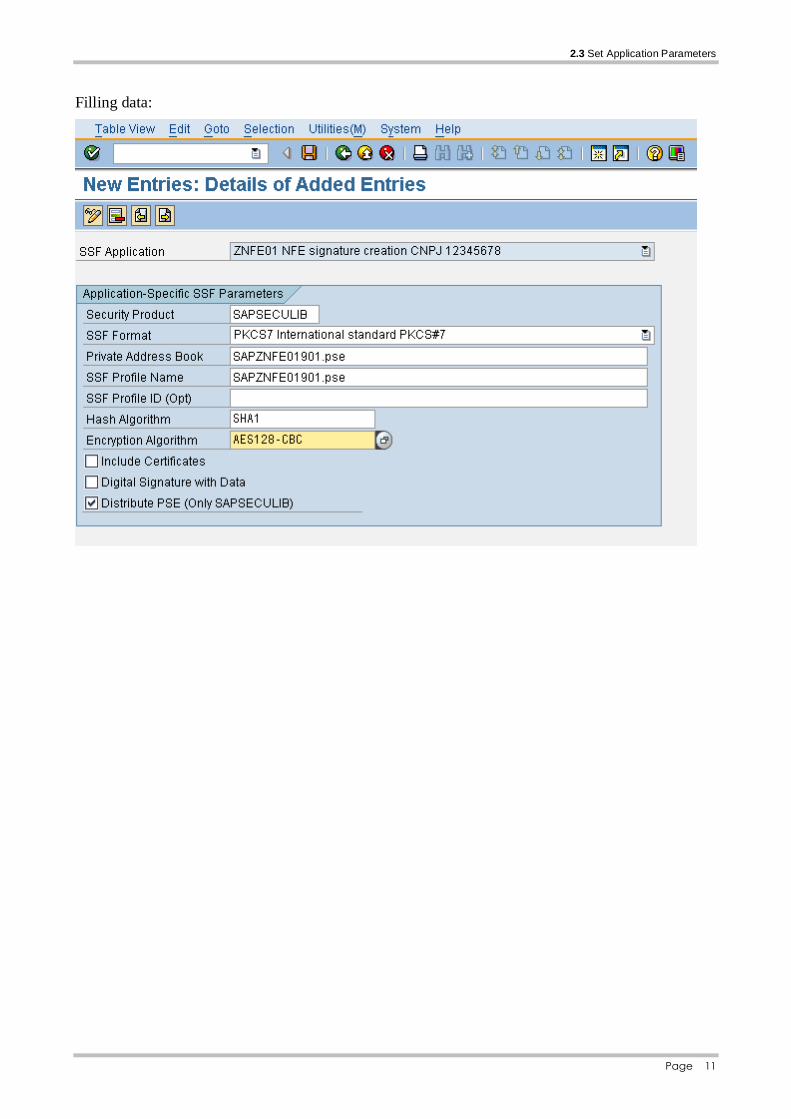
Filling data:
2 NFE Outgoing
Page 12
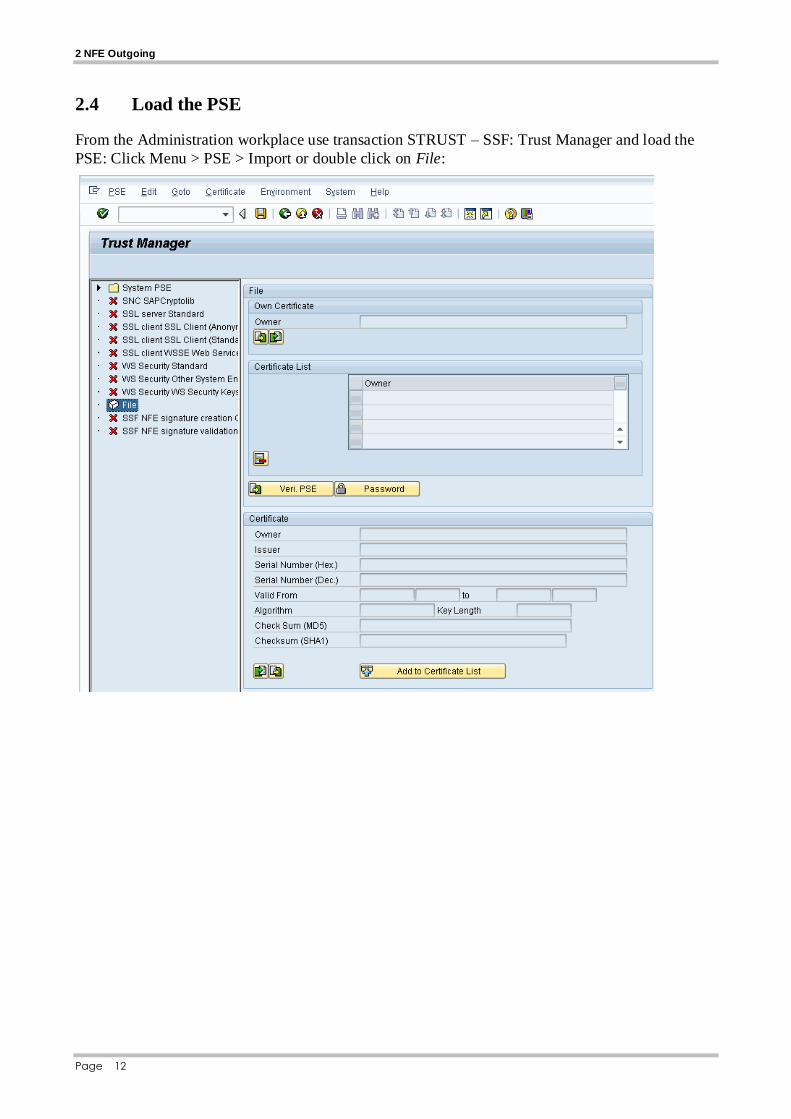
2.4 Load the PSE
From the Administration workplace use transaction STRUST – SSF: Trust Manager and load the
PSE: Click Menu > PSE > Import or double click on File:

2.4 Load the PSE
Page 13
Select the PSE generated with command "sapgenpse import_p12", which is copied from server to
local machine:
Inform the password of PSE
2 NFE Outgoing
Page 14
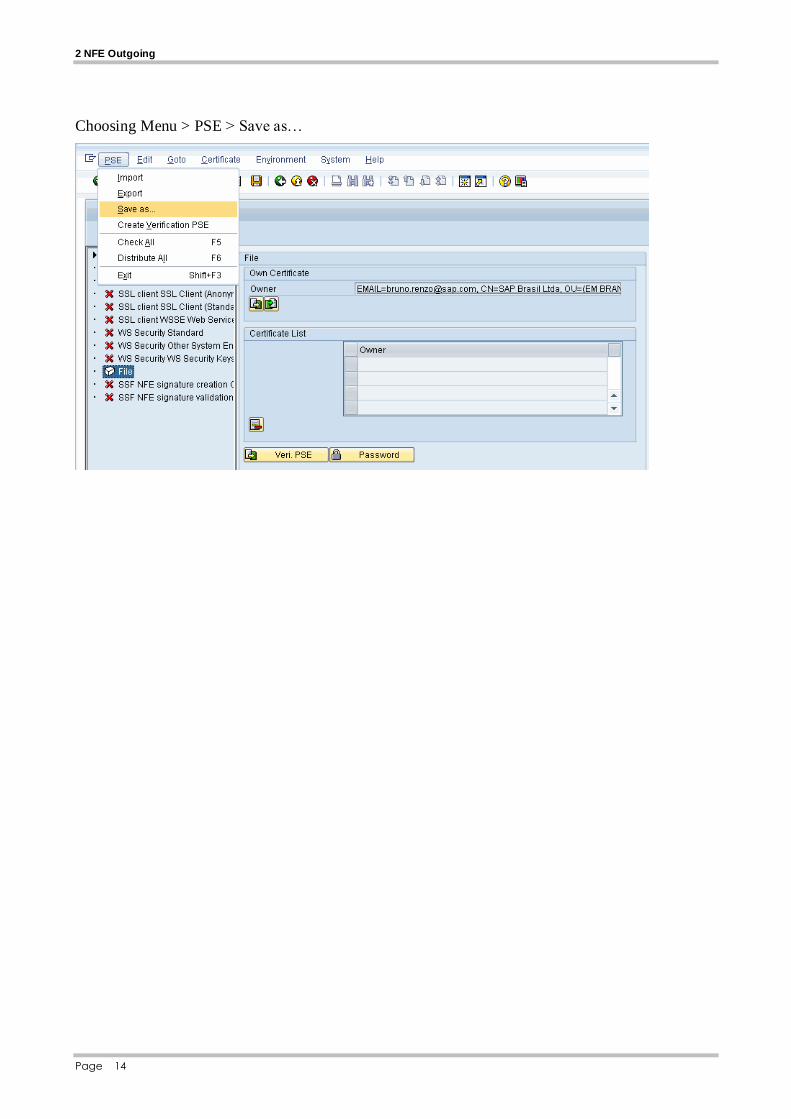
Choosing Menu > PSE > Save as…

2.4 Load the PSE
Page 15
Select SSF application on Save PSE as box, and select and confirm the proper SSF for signature
which are being created:
2 NFE Outgoing
Page 16
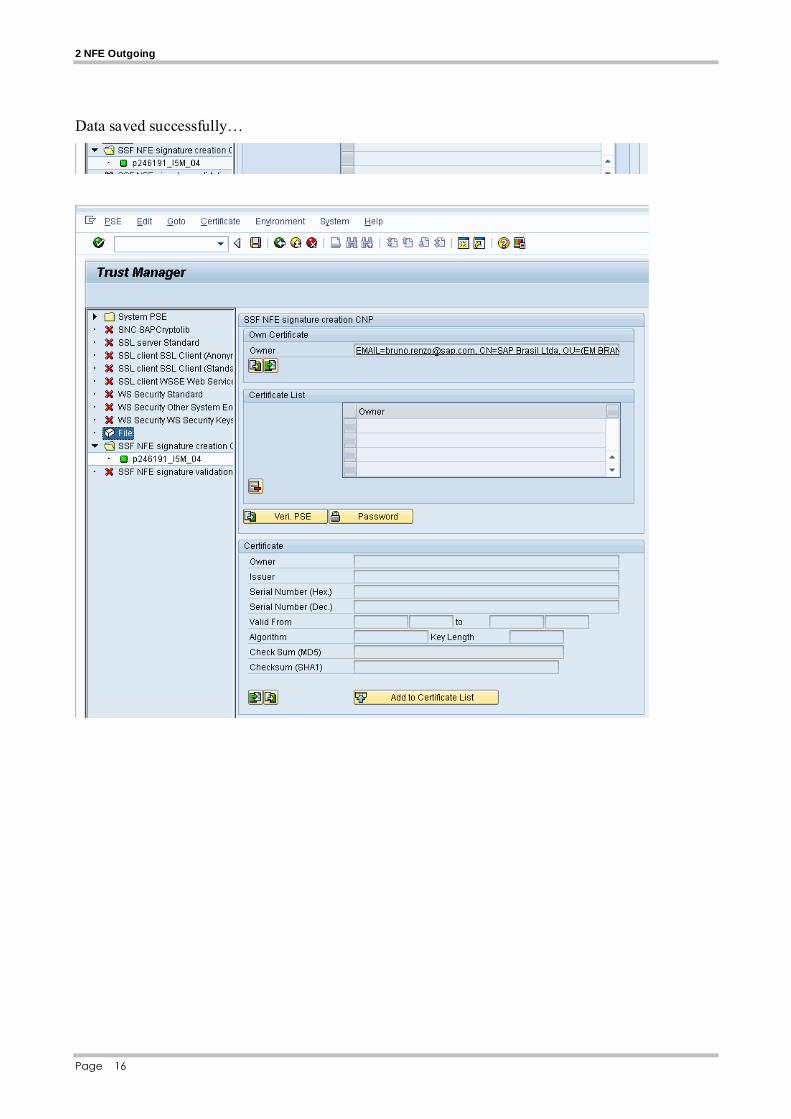
Data saved successfully…
Top Related