Zetadocs for Microsoft Dynamics NAV Installation...
104
Zetadocs for Microsoft Dynamics NAV Installation Guide Version history Version: 3.0 Published: 18/11/2009 Equisys plc Equisys House 32 Southwark Bridge Road London SE1 9EU United Kingdom Tel + 44 (0)20 7203 4000 Fax +44 (0)20 7203 4005 Equisys Inc 30,000 Mill Creek Avenue Suite 335 Alpharetta GA 30022 USA Tel +1 (770) 772 7201 Fax +1 (770) 442 5789 www.equisys.com Contact: Equisys Technical Support, [email protected] Copyright Notice Copyright © 2009 Equisys plc, London 1991 ” 2009. All rights reserved. No part of this document may be reproduced or transmitted in any form or by any means, electronic or mechanical, including photocopying, without the prior written permission of Equisys plc. All trademarks are acknowledged.
Transcript of Zetadocs for Microsoft Dynamics NAV Installation...

Zetadocs for Microsoft Dynamics NAV
Installation Guide
Version history
Version: 3.0
Published: 18/11/2009
Equisys plc
Equisys House
32 Southwark Bridge Road
London SE1 9EU
United Kingdom
Tel + 44 (0)20 7203 4000
Fax +44 (0)20 7203 4005
Equisys Inc
30,000 Mill Creek Avenue
Suite 335
Alpharetta GA 30022
USA
Tel +1 (770) 772 7201
Fax +1 (770) 442 5789
www.equisys.com
Contact: Equisys Technical Support, [email protected]
Copyright Notice
Copyright © 2009 Equisys plc, London 1991 ” 2009. All rights reserved.
No part of this document may be reproduced or transmitted in any form or by any means, electronic or
mechanical, including photocopying, without the prior written permission of Equisys plc.
All trademarks are acknowledged.

Zetadocs for NAV Installation Guide
Introduction
This edition 18/11/2009 © Copyright Equisys plc 2009 All trademarks acknowledged All rights reserved Page 2
Contents
1. Introduction ............................................................................................................ 4 1.1 Microsoft Dynamics NAV Compatibility .................................................................................................4 1.2 Installation Pack Contents ....................................................................................................................4 1.3 Technical Specifications .......................................................................................................................4
2. Overview of Zetadocs for NAV ................................................................................. 5 2.1 Document Delivery ...............................................................................................................................5 2.2 Document Archiving and Retrieval ........................................................................................................5 2.3 Document Capture (requires the Zetadocs Server upgrade) .................................................................5
3. How Zetadocs Delivers Documents from NAV ......................................................... 5
4. Assessing your Installation Requirements ............................................................. 8 4.1 SharePoint Archiving and Integration (Included as Standard) ..............................................................8 4.2 Zetadocs Server (Optional Module) ......................................................................................................8 4.3 Zetafax Server (Requires the Zetafax Upgrade Module) .......................................................................8
5. Installation Overview .............................................................................................. 9 5.1 Installation steps to be performed on the server or servers .................................................................9 5.2 Installation steps to be performed on each client machine................................................................. 10
6. Zetadocs Client ..................................................................................................... 10 6.1 Installing Zetadocs for NAV Client ....................................................................................................... 10 6.2 Install Zetadocs for NAV Help Files ..................................................................................................... 11 6.3 Configuring Zetadocs Client Licensing ................................................................................................ 12
7. Installing the Zetadocs for NAV Connector ........................................................... 13 7.1 Creating a test NAV system ................................................................................................................. 13 7.2 Terminology ........................................................................................................................................ 14 7.3 NAV License ........................................................................................................................................ 14 7.4 Backing up the existing NAV Objects .................................................................................................. 14 7.5 Importing Zetadocs for NAV Objects ................................................................................................... 14
8. Additional steps required for Document Archiving ................................................15 8.1 Table Changes Required for Archiving ................................................................................................ 15 8.2 Form Changes to Enhance SharePoint Archiving and Retrieval ........................................................... 16
9. Zetadocs Configuration ......................................................................................... 19 9.1 Importing the Zetadocs Standard Configuration Data......................................................................... 19 9.2 Understanding Zetadocs for NAV Standard Configuration .................................................................. 21 9.3 Setting the Zetadocs System Settings ................................................................................................22 9.4 Template Settings ...............................................................................................................................23 9.5 Zetadocs System Rules .......................................................................................................................24 9.6 Zetadocs Report Settings ....................................................................................................................26 9.7 Zetadocs System and Company Rules ................................................................................................29 9.8 Zetadocs Document Queue Setup ......................................................................................................32
10. Modifying NAV Reports to work with Zetadocs ..................................................... 32 10.1 Backup Reports ..................................................................................................................................33 10.2 Import the Zetadocs for NAV Report Template ....................................................................................33 10.3 Global, Local and Text Constants ........................................................................................................33 10.4 Code Segments ...................................................................................................................................33 10.5 Version Code.......................................................................................................................................37
11. Using Preconfigured Document Templates ........................................................... 37 11.1 Preconfigured Document Template Features ......................................................................................37 11.2 Template Wizard - Adding an attachment to a template .....................................................................38 11.3 Replacing the stationery .....................................................................................................................38 11.4 Adjusting the Email message ..............................................................................................................40

Zetadocs for NAV Installation Guide
Introduction
This edition 18/11/2009 © Copyright Equisys plc 2009 All trademarks acknowledged All rights reserved Page 3
12. Testing the Zetadocs for NAV Solution ................................................................. 41 12.1 Full Cycle Test Scenario ...................................................................................................................... 41 12.2 Detailed Component Testing ..............................................................................................................45
13. Migrating to the live database .............................................................................. 48 13.1 Exporting the Configuration ................................................................................................................48 13.2 Exporting any Modified Forms, Tables or Reports ...............................................................................48 13.3 Importing Zetadocs to the Live NAV System .......................................................................................48
14. Routine Activities .................................................................................................. 49 14.1 Operational Checklist .........................................................................................................................49 14.2 Security Hardening .............................................................................................................................49 14.3 Performing a Zetadocs for NAV Backup ..............................................................................................50
15. Upgrading your Zetadocs for NAV system ............................................................. 52 15.1 Zetadocs for NAV Client ......................................................................................................................52 15.2 Zetadocs for NAV Objects ...................................................................................................................55 15.3 NAV Reports........................................................................................................................................56 15.4 Upgrading other Zetadocs Components .............................................................................................56
16. Uninstalling Zetadocs for NAV .............................................................................. 56 16.1 Uninstallation Overview ......................................................................................................................56 16.2 Rollback of NAV Reports .....................................................................................................................57 16.3 Removing Zetadocs for NAV Objects ...................................................................................................57 16.4 Uninstalling the Zetadocs Client .........................................................................................................58 16.5 Uninstall Zetadocs for NAV Client Help Files .......................................................................................58
17. Architecture Overview ........................................................................................... 59 17.1 Typeless Public and Private Code .......................................................................................................59 17.2 Data Processing Flow ..........................................................................................................................59 17.3 Summary ............................................................................................................................................ 61
18. Send Any Report ................................................................................................... 61 18.1 Permissions ........................................................................................................................................62 18.2 Simply Send ........................................................................................................................................62 18.3 Configured Send .................................................................................................................................63 18.4 Custom Send ......................................................................................................................................64
19. Bespoke Contacts and Company Types ................................................................. 67 19.1 Company Types ..................................................................................................................................67 19.2 Contacts ..............................................................................................................................................69
20. Zetadocs-Customize codeunit ............................................................................... 70 20.1 OverrideSendResult ............................................................................................................................70 20.2 GetAdditionalEmbComms ...................................................................................................................73
21. Advanced Zetadocs for NAV Report Writing .......................................................... 74 21.1 Zetadocs Report Code Overview .........................................................................................................75 21.2 Types of Reports .................................................................................................................................75 21.3 Import the Zetadocs for NAV Report Template ....................................................................................77 21.4 Global, Local and Text Constants ........................................................................................................77 21.5 Modifying the reports .........................................................................................................................77 21.6 Copy Loop ...........................................................................................................................................84 21.7 Modifications Necessary for the Role Tailored Client Reports ............................................................85 21.8 Creating and Troubleshooting Zetadocs for NAV Reports ...................................................................85 21.9 Optional Zetadocs Report Format ....................................................................................................... 91
22. APPENDIX ............................................................................................................. 92 22.1 Troubleshooting .................................................................................................................................92 22.2 Zetadocs for NAV Object List ...............................................................................................................94 22.3 Zetadocs for NAV Menusuite ..............................................................................................................96 22.4 Installing in a Terminal Services Environment ....................................................................................97
Zetadocs for NAV Installation Guide
Introduction
This edition 18/11/2009 © Copyright Equisys plc 2009 All trademarks acknowledged All rights reserved Page 4
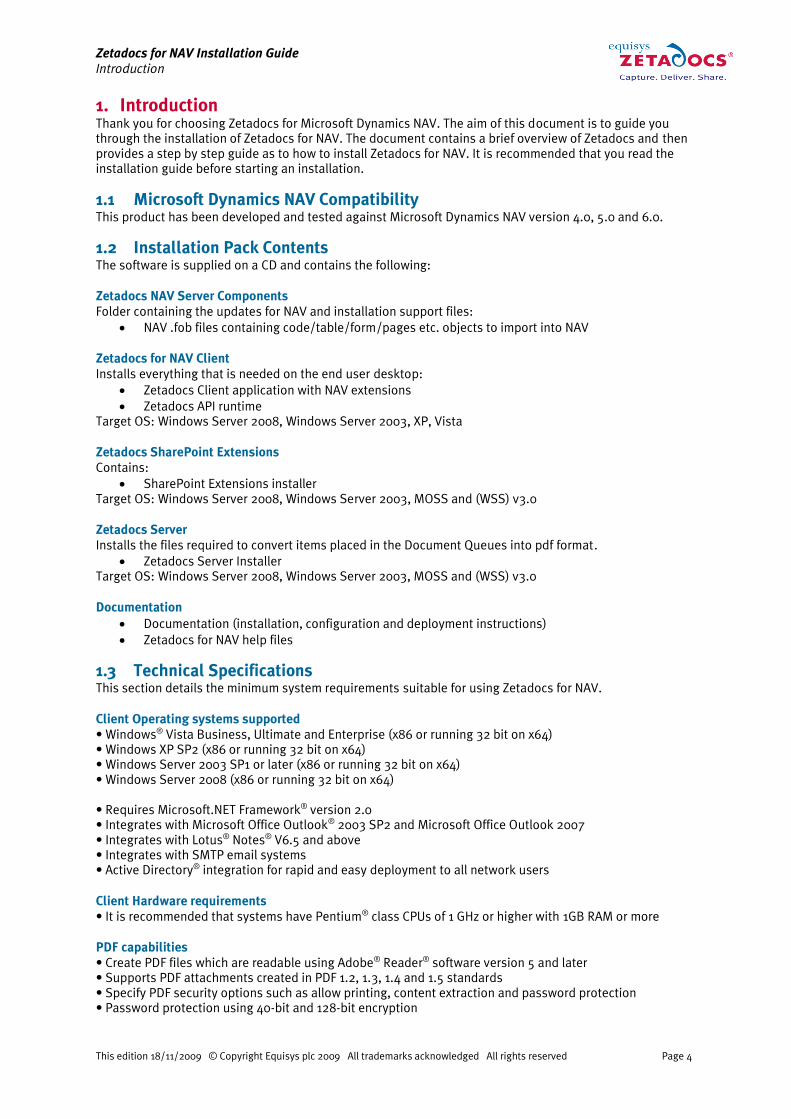
1. Introduction
Thank you for choosing Zetadocs for Microsoft Dynamics NAV. The aim of this document is to guide you
through the installation of Zetadocs for NAV. The document contains a brief overview of Zetadocs and then
provides a step by step guide as to how to install Zetadocs for NAV. It is recommended that you read the
installation guide before starting an installation.
1.1 Microsoft Dynamics NAV Compatibility
This product has been developed and tested against Microsoft Dynamics NAV version 4.0, 5.0 and 6.0.
1.2 Installation Pack Contents
The software is supplied on a CD and contains the following:
Zetadocs NAV Server Components
Folder containing the updates for NAV and installation support files:
NAV .fob files containing code/table/form/pages etc. objects to import into NAV
Zetadocs for NAV Client
Installs everything that is needed on the end user desktop:
Zetadocs Client application with NAV extensions
Zetadocs API runtime
Target OS: Windows Server 2008, Windows Server 2003, XP, Vista
Zetadocs SharePoint Extensions
Contains:
SharePoint Extensions installer
Target OS: Windows Server 2008, Windows Server 2003, MOSS and (WSS) v3.0
Zetadocs Server
Installs the files required to convert items placed in the Document Queues into pdf format.
Zetadocs Server Installer
Target OS: Windows Server 2008, Windows Server 2003, MOSS and (WSS) v3.0
Documentation
Documentation (installation, configuration and deployment instructions)
Zetadocs for NAV help files
1.3 Technical Specifications
This section details the minimum system requirements suitable for using Zetadocs for NAV.
Client Operating systems supported
“ Windows®
Vista Business, Ultimate and Enterprise (x86 or running 32 bit on x64)
“ Windows XP SP2 (x86 or running 32 bit on x64)
“ Windows Server 2003 SP1 or later (x86 or running 32 bit on x64)
“ Windows Server 2008 (x86 or running 32 bit on x64)
“ Requires Microsoft.NET Framework®
version 2.0
“ Integrates with Microsoft Office Outlook®
2003 SP2 and Microsoft Office Outlook 2007
“ Integrates with Lotus®
Notes®
V6.5 and above
“ Integrates with SMTP email systems
“ Active Directory®
integration for rapid and easy deployment to all network users
Client Hardware requirements
“ It is recommended that systems have Pentium®
class CPUs of 1 GHz or higher with 1GB RAM or more
PDF capabilities
“ Create PDF files which are readable using Adobe®
Reader®
software version 5 and later
“ Supports PDF attachments created in PDF 1.2, 1.3, 1.4 and 1.5 standards
“ Specify PDF security options such as allow printing, content extraction and password protection
“ Password protection using 40-bit and 128-bit encryption

Zetadocs for NAV Installation Guide
Overview of Zetadocs for NAV
This edition 18/11/2009 © Copyright Equisys plc 2009 All trademarks acknowledged All rights reserved Page 5
Other software requirements
“ Integrates with NAV version 4.0, version 5.0 and version 6.0 (x86 or running 32 bit on x64).
“ Supports Microsoft Office SharePoint Server (MOSS) 2007 and Windows SharePoint Services (WSS) v3.0
(x86 or running 32 bit on x64).
Glossary of Terms
2. Overview of Zetadocs for NAV
Zetadocs for NAV helps accounts departments streamline business processes, reduce the costs of handling
paper documents and enhance customer service. It enables Microsoft Dynamics NAV users to create and
deliver statements, invoices, remittances and other financial documents instantly from their PC. Zetadocs
archives documents to Microsoft SharePoint so they can be retrieved promptly, enabling users to respond
to queries instantly.
Zetadocs for NAV enhances document workflows in NAV in 3 main areas:
2.1 Document Delivery
Producing, packaging and posting statements, invoices and remittances is a time consuming and costly
process. Zetadocs for NAV enables users to deliver accounting documents instantly by email or fax,
removing the cost of printing and postage and reducing the time accounts staff spend on administrative
tasks. Simple rules can be set up to deliver business documents appropriately by email and fax, as well as
being printed, so that customers can have the choice of how they receive information. Zetadocs for NAV
makes it straightforward for users to create and send NAV documents singly or in batches.
2.2 Document Archiving and Retrieval
Zetadocs for NAV automatically archives copies of all documents that have been sent, allowing for quick
retrieval. Accounts staff will no longer waste time searching for paper documents and storage costs will be
reduced, helping companies to meet compliance guidelines. Zetadocs for NAV archives to SharePoint so
that non NAV users such as sales people can access key documents easily, without relying on assistance
from the accounts team.
2.3 Document Capture (requires the Zetadocs Server upgrade)
Zetadocs for NAV manages the capture and storage of paper and electronic documents that are entered on
NAV. For example, it can store copies of inbound sales orders electronically, whether they are received on
paper, by fax or by email. This reduces the risk of incoming documents being lost or misfiled. If you choose
to install the Zetadocs Server it will automatically convert compatible documents into pdf in preparation for
storage in SharePoint.
3. How Zetadocs Delivers Documents from NAV
When printing a report that has been setup for Zetadocs, a Sales Order report for example, you are actually
running a special Zetadocs stub report. This stub report alerts Zetadocs that you are running a Sales Order
report and instructs NAV to run the report. After selecting the desired records and selecting print Zetadocs
analyses each record in turn against the Zetadocs Rules. These rules we be covered in more depth later in
the system configuration section 9.5 but basically a rule is a collection of settings which are applied when
sending a document. These include details such as the recipient, delivery method (Email, Fax, Hard Copy),
Archiving settings and the Zetadocs Template to apply.
Zetadocs for NAV rules come in four levels which allow you to automate your document delivery, on printing
a document to Zetadocs the rules are applied in descending order until one matches the situation.
Using rules it is possible to be highly specific about the way documents are handled allowing a great deal of
automation of the delivery process.
Term Description
Document Any printable document that can be printed to the Zetadocs printer.
Typically refers to an NAV Report in this document.
Report A NAV Report

Zetadocs for NAV Installation Guide
How Zetadocs Delivers Documents from NAV
This edition 18/11/2009 © Copyright Equisys plc 2009 All trademarks acknowledged All rights reserved Page 6
Rules Levels:
1. The Default Rule ” a basic rule that can be used by any Zetadocs enabled report.
2. Per Document Set ” specific settings for Zetadocs enabled documents by type.
3. Per Company ” specific settings for Zetadocs enabled documents by company.
4. Per Company, per Document Set ” specific settings applied to specific document types when sent
to a specific company.
Rule levels are much easier to understand by looking at an example. The diagram in Figure 1 demonstrates
the delivery process which should help you trace the document delivery process as we work through the
example.
Our NAV user needs to send out three Sales Orders to different customers called Sample Company 1, 2 and
3. In an effort to cut down on delivery costs the standard way of sending documents (default level 1 rule) is
to send using email and SharePoint archiving is on, the standard way of sending Sales Orders is via Email
using the Sales Order Template (Lv2 rule per document set). There are numerous other settings available
when creating rules but we will focus on delivery method to keep this example simple.
Record 1 Sales Order 33659
Company Sample Company 1
Rule Setup No specific company rules (Lv3 and Lv4 rules).
Record 2 Sales order 33660
Company Sample Company 2
Rule Setup This company likes to receive all correspondence via Fax (Lv3 per Company Rule).
Record 3 Sales Order 33661
Company Sample Company 3
Rule Setup This company like to receive most correspondence via fax however they are happy to receive
Sales Orders via email (Lv3 and Lv4 rules).
On selecting Print in the Sales Order card they are asked to filter to the desired records, on pressing Print
again each record in the print job will be processed in turn. On processing the Zetadocs rule settings are
interrogated to determine the delivery information to associate with the record.
For our first record this would set delivery to email and the template to the Sales Order template. The
details necessary to delivery and archive are attached as Embedded Commands.
The second record is then considered, the level 3 rule for this means that Fax is the chosen delivery method
again the details necessary to delivery and archive are attached as Embedded Commands.
The final record has both level 3 and 4 rules, as level 4 rules override those below the document is set to be
delivered by email. The records are then gathered together and sent as a single print job to the Zetadocs
Client. Here the embedded commands are removed and analysed, the templates are applied and the email
message body is created as shown below with values from NAV in red. This provides automated generation
of personalised correspondence, with the delivery information also set the documents are ready to be
delivered and archived.
Subject: Order Confirmation for order number: 33659 for Sample Company 1
Message Body:
FAO: John Smith
Dear Customer, I'm pleased to attach your order confirmation, reference number 33659.
Kind regards,
Sales Team

Zetadocs for NAV Installation Guide
How Zetadocs Delivers Documents from NAV
This edition 18/11/2009 © Copyright Equisys plc 2009 All trademarks acknowledged All rights reserved Page 7
Figure 1 - Zetadocs for NAV Document Delivery Overview
1
.
2
.
3
.
4
.
5
.
Microsoft
Dynamics NAV
Document
Recipient
NAV
Report
Output
Document
Recipient
Document
Recipient
Zetadocs Client
Print to Zetadocs
NAV
Report
Output
NAV
Report
Output
Archive
NAV
Report
Output
Filter to Desired Records
NAV
Report
Output
NAV
Report
Output
Print NAV Report
Zetadocs
Embedded
Commands
NAV
Record
Output
Zetadocs
Embedded
Commands
NAV
Record
Output
Zetadocs
Embedded
Commands
NAV
Record
Output
The report is selected for printing, options are provided to filter out the desired
records.
Each record has embedded commmands created and attached based on the
Zetadocs rules.
Once all selected records are processed they are passed to Zetadocs as a single
print job.
Zetadocs removes the embedded commands and analyes them for the delivery
information.
Addressing, stationery and the message body are created and the documents are
delivered to the recipients and archived.
1
.
2
.
3
.
4
.
5
.

Zetadocs for NAV Installation Guide
Assessing your Installation Requirements
This edition 18/11/2009 © Copyright Equisys plc 2009 All trademarks acknowledged All rights reserved Page 8
4. Assessing your Installation Requirements
We would recommend that before you begin your installation that you assess which of the various optional
Zetadocs elements you wish to add to your system. The items below are all optional components of
Zetadocs for NAV.
4.1 SharePoint Archiving and Integration (Included as Standard)
In a SharePoint enabled company, Zetadocs for NAV offers the ability to archive backup copies of
correspondence in a highly customizable archive. It does this by storing metadata against the archived
document that makes it easy to locate records or customer related documents, or to search based on your
own criteria. If you are intending archive to SharePoint from Zetadocs for NAV we would recommend
carrying out that part of this installation first before carrying on with the rest of the Zetadocs for NAV
installation. If you are intending to use SharePoint proceed to the SharePoint Extensions Installation Guide
on your product CD which is also available to download from here.
4.2 Zetadocs Server (Optional Module)
The Zetadocs Server application is an optional component of Zetadocs for Microsoft Dynamics. It is required
for systems that intend to make use of the Document Queue and recommended for systems using
SharePoint archiving. It runs on a server and converts documents placed into a specific Shared Network
folder into PDF/A format.
This enables the document queue to work by converting inbound documents into PDF/A format and making
them available to users of the document queue. As standard the document queue supports a variety of file
types, allowing viewing and archive of these documents to SharePoint. All incoming documents are either
saved or scanned to the chosen network folder and converted into a pdf file before appearing in the
document queue. This enables an NAV user to view all inbound documents and from the document queue
create a suitable corresponding NAV entry e.g. raise an order in NAV upon receiving one from a customer.
On creation of the NAV record the received document is archived and associated to the NAV record with
metadata before being removed from the queue.
4.3 Zetafax Server (Requires the Zetafax Upgrade Module)
If the Zetadocs for NAV system is to support delivery by fax, then the Zetafax server needs to be installed.
Zetafax is a separate product available from Equisys for more details please contact [email protected].

Zetadocs for NAV Installation Guide
Installation Overview
This edition 18/11/2009 © Copyright Equisys plc 2009 All trademarks acknowledged All rights reserved Page 9
5. Installation Overview
The aim of this section is to provide you with an overview of the installation process it may not apply.
Shown next is an outline of the major steps involved when performing a full install using the standard
configuration data.
Figure 2 - Zetadocs Install Process
5.1 Installation steps to be performed on the server or servers
1. Installing the Zetadocs SharePoint Extensions (Optional)
Creation of the Zetadocs Archive Document library and installation of the Zetadocs for NAV
search web parts, including user access control.
2. Installing the Zetafax Server Engine (Requires the Zetafax Upgrade Module)

Zetadocs for NAV Installation Guide
Zetadocs Client
This edition 18/11/2009 © Copyright Equisys plc 2009 All trademarks acknowledged All rights reserved Page 10
Installation and configuration procedure of the fax engine, including licensing and
registration, enabling users and setting up fax devices.
3. Installing the Zetadocs for NAV Client
Installation and configuration procedure for the Zetadocs for NAV client, including
licensing and registration, enabling users and setting up shared folders.
4. Importing the Zetadocs for NAV Connector
Installation of the Zetadocs for NAV granules within Microsoft Dynamics NAV. Using the
NAV Pane Designer to configure them, including setting up the Zetadocs for NAV System
tables and adding code to existing NAV objects.
5. Zetadocs for NAV Configuration
Importing the standard configuration data.
Adjusting standard data to fit in your requirements.
6. Installing the Zetadocs Server (Requires upgrade module)
Installs the Zetadocs Server which converts documents placed in the document queue
folders into pdf format.
5.2 Installation steps to be performed on each client machine
7. Installing the Zetadocs for NAV Client
Installing the Zetadocs for NAV Client Installation and configuration procedure for the
Zetadocs for NAV client, including licensing and registration, enabling users and setting up
shared folders.
8. Installing the Zetafax Client (optional requires the purchase of the additional Zetafax module)
9. Testing the Zetadocs for NAV Solution
Verify the functionality end to end and gain customer acceptance.
6. Zetadocs Client
This section describes the installation of client applications which includes the Zetadocs Client, the runtime
API and the NAV Extensions. Zetadocs for NAV operates in conjunction with the Zetadocs Client version 4.1
or later and requires a Zetadocs Client ‚Automation‛ license to enable the batch document management
features used by NAV. If you are intending to integrate your Zetadocs for NAV system with a SharePoint site
then we would recommend that you install the SharePoint extensions before the Zetadocs for NAV Client.
To do this please refer to the Zetadocs for Microsoft Dynamics NAV SharePoint Extensions Installation
Guide located on your product CD.
Before embarking on the install of the Zetadocs Client it is recommended that if you install the items listed
below if you intend to make use of them.
Install the SharePoint Extensions
Install the Zetafax Server
6.1 Installing Zetadocs for NAV Client
Zetadocs for NAV needs to be installed onto the server as well as any intended client machines; the
principle difference is the type of install selected from the installation dialog with server installations
requiring either Administration or Custom installations. These options are clearly marked in the steps
outlined below.
Note: If you are installing in a Terminal Services Environment please see the section 22.4 Installing in a
Terminal Services Environment.
Ensure the currently logged in user has local administration rights on the machine that is being
installed upon.

Zetadocs for NAV Installation Guide
Zetadocs Client
This edition 18/11/2009 © Copyright Equisys plc 2009 All trademarks acknowledged All rights reserved Page 11
o This is required to install pre-requisite components used in Zetadocs. These permissions
can be elevated temporarily for the installation.
Insert the Zetadocs for NAV CD.
When the CD Browser runs, follow the menu options to the Zetadocs for NAV Client installation.
Select the option to begin installing the Zetadocs for NAV Client.
The Zetadocs for NAV Client installer is a combination of installers. You will initially be prompted to install
two pre-requisites, the Zetadocs Client and Zetadocs API runtime. When you begin installing the Zetadocs
Client you will be prompted with the installation option for Zetadocs PDF. There are also a number of pre-
requisites for the Zetadocs Client which must be installed first. Please follow the installation dialogs with
this ordered check list.
Install pre-requisites Zetadocs Client and Zetadocs API
o Zetadocs Client
Choose language
Install pre-requisites of Zetadocs Client (If Zetadocs Client has previously been
installed on the machine this dialog may not appear as pre-requisites will already
be installed)
Choose Installation Directory
Choose Installation Type
Evaluation
Administration
o Typically only installed by an administrator on the server
machine. Installs the Zetadocs Client and the Zetadocs Admin
Configuration application for licensing and network
configurations of Zetadocs.
Standard
o Typically the most used installation on regular client machines.
o Zetadocs API
Once completed the Zetadocs Client will ask you Finish and launch the Zetadocs PDF Configuration
program. De-select the Zetadocs PDF Configuration program option and select Finish, we will use the
configuration program later. The Zetadocs for NAV Client Installer will appear.
Proceed through the wizard and you will be asked to select the Install Type, this depends on the
machine you are installing on with the Typical install generally being used for client machine setup.
Administrator and Custom installs are generally done on a server as they include the creation of
shared network folders.
o Typical
Is generally used for additional client users.
o Administrator
Automatically creates the Shared Folders for the Templates, Sales document
queue and Purchase document queue.
o Custom
Allows you to manually specify the shared folder locations for the Templates and
document queues.
Select Next to install the network folders as per your selections, you should now have completed installing
the Zetadocs for NAV Client.
6.2 Install Zetadocs for NAV Help Files
Classic Client
The Zetadocs for NAV help files need to be copied to the Microsoft Dynamics NAV help folder on each
machine and given names that will not clash with other help files. This folder may contain other help files
which may already use the ‘a’ post-fix name. In this case you should change the file names to an unused
post-fix letter between a and j (e.g. change to addin_f.chm and addin_f.hh). Note that the post-fix on both
file names must match.
There are 2 files:

Zetadocs for NAV Installation Guide
Zetadocs Client
This edition 18/11/2009 © Copyright Equisys plc 2009 All trademarks acknowledged All rights reserved Page 12
addin_a.chm
addin_a.hh
They should be copied from:
<CD Browser>\Zetadocs NAV Client\NAV Help
For NAV 4.0 & 5.o systems copy to:
Program Files\Microsoft Dynamics NAV\CSIDE Client\ENG
Substitute ENG for the language pertinent to the install e.g. ENU for US systems.
For NAV 6.o systems copy to:
Program Files\Microsoft Dynamics NAV\60\Classic\ENG
Substitute ENG for the language pertinent to the install e.g. ENU for US systems.
Alternatively it can be copied to the equivalent installation folder of Microsoft Dynamics NAV on the
machine.
Role Tailored Client
The Zetadocs for NAV help files need to be copied to the Microsoft Dynamics NAV help folder and given
names that will not clash with other help files. There are 2 files:
addin_a.chm
addin_a.hh
They should be copied from:
<CD Browser>\Zetadocs NAV Client\NAV Help
To:
Program Files\Microsoft Dynamics NAV\60\RoleTailored Client\en-US
Alternatively it can be copied to the equivalent installation folder of Microsoft Dynamics NAV on the
machine. This folder may contain other help files which may already use the ‘a’ post-fix name. In this case
you should change the file names to an unused post-fix letter between a and j (e.g. change to addin_f.chm
and addin_f.hh). Note that the post-fix on both file names must match. You may need to restart the
Microsoft Dynamics NAV server.
To do this got to Start and then click Run, in the Open box, type services.msc, and then press
ENTER.
Under Services, right-click Microsoft Dynamics NAV Server, and then click Restart.
6.3 Configuring Zetadocs Client Licensing
Before you can start using Zetadocs you must license and register it, enable users and setup file sharing
folders for storage of company accessories (templates, stationery and attachments). The Zetadocs PDF
configuration program is automatically installed as part of your Zetadocs system when you select the
Administration install option during installation. This program allows you to manage your Zetadocs PDF
program across your network, allowing licensing, registration, shared folders and user accounts to be
modified.
Note: When installing on a client machine following a successful server installation you do not need to
licence Zetadocs. Further the recommended Zetadocs install type for client setups is Typical which does not
install the Zetadocs PDF Configuration program.
Zetadocs Client Licensing and Setup
Actions:
Launch the Zetadocs PDF Configuration.
Choose the license location (General Tab).
o Active Directory (requires that user has access rights to write to AD)
o Shared Network Folder
Enter your Zetadocs license number and company name and register online.
Enter your registration key on receiving the registration success email.
Add the required users.

Zetadocs for NAV Installation Guide
Installing the Zetadocs for NAV Connector
This edition 18/11/2009 © Copyright Equisys plc 2009 All trademarks acknowledged All rights reserved Page 13
Set up a shared network folder for NAV Templates (Recommended that you select the location
specified in the Zetadocs for NAV Client install, it is required if you intend to use the NAV templates
provided).
Leave Network Archiving off if you are using SharePoint as an archive.
Zetadocs Client
Actions:
Start the client.
If using Active Directory licensing, Zetadocs should locate the license automatically, otherwise, go
to Tools Options\Licensing and enter the path to the network folder containing the Zetadocs
license.
Restart client if necessary.
You can confirm that you are successful if the splash screen shows the Automation tag beside the
number of users.
Figure 3 - Zetadocs Client Splash Screen
Please refer to the Zetadocs Client Help for further information on configuring the Zetadocs Client.
7. Installing the Zetadocs for NAV Connector
This section details how to install the Zetadocs for NAV Connector, the connector contains the elements
which need to be imported into NAV to enable documents to be passed to the Zetadocs Client for delivery.
Installing the connector consists of:
Importing of Zetadocs for NAV objects fob file
Importing of Zetadocs for NAV tables fob file (optional)
Importing of Zetadocs for NAV forms fob file (optional)
Importing the Standard Configuration Data
To reduce downtime and ensure that no complications occur on the live system it is recommended that you
perform the importing of the NAV objects and configuration data on a duplicate of your live database. Once
the objects and configuration have been imported the system can be adjusted to match your requirements.
When you have a Zetadocs configuration that you are happy with this can be exported using the Zetadocs
Configuration Export form. This will produce an xml file which will enable you to transfer the setup onto the
live system much more quickly and with more confidence.
7.1 Creating a test NAV system
Creating a test NAV system is recommended as in conjunction with our Zetadocs Configuration Export form
you are able to create your Zetadocs for NAV system in a test environment. The configuration can then be
exported meaning that the live system will operate as desired immediately after completing the importing
of the Zetadocs for NAV objects and config.xml file. If you are not intending to setup your system in a test

Zetadocs for NAV Installation Guide
Installing the Zetadocs for NAV Connector
This edition 18/11/2009 © Copyright Equisys plc 2009 All trademarks acknowledged All rights reserved Page 14
environment then continue from section 7.2 below and skip section 13 IntroductionMigrating to the live
database.
There are a number of ways to create a copy of your existing NAV database, depending on the version of
NAV and the type of database being used. If the method outlined below doesn’t match your setup then
please refer to your NAV support documentation for additional details.
Creating a copy of your NAV database
Open the NAV client and open the database in question.
From the main menu select ToolsBackup.
Save a copy of your NAV database in a safe location.
Select FileOpen and then select the newly create duplicate system.
You are now ready to begin importing the Zetadocs for NAV objects and Standard Configuration.
7.2 Terminology
Zetadocs for NAV Objects
This is how we define the NAV objects that we add to the database and are all within our object
range 9009959 - 9001018.
This is how we define the existing NAV objects which we modify to integrate Zetadocs for NAV with
an existing database. To assist in the installation of our interfaces we provide many interface .fob
and .txt files for different languages and versions.
7.3 NAV License
To successfully install Zetadocs for NAV you require a Zetadocs for NAV VAR NFR granule to be added to
your license.
Required Granules
To use Zetadocs for NAV you require the Zetadocs for NAV Granule to be added to your license.
Granule 9009961 – Zetadocs Execute Granule
Granule 9009970 – Zetadocs for NAV Granule
Optional Granules
To take advantage of Zetadocs for NAV integration with NAV Contacts you require the Contact Management
Granule.
Granule 5500 – Contact Management
Granule 5510 – Contact Management - Basic
Optionally you can also purchase the Zetadocs for NAV SDK Granule which allows the running of
customizations made in the Zetadocs Customization codeunit 9009962.
Granule 9009980 – Zetadocs for NAV SDK
7.4 Backing up the existing NAV Objects
In order to be able to uninstall Zetadocs for NAV software it is necessary to backup the Navision objects
before installing the Zetadocs for NAV objects. Please perform the following tasks:
Open the Navision client and connect to/open the Navision database.
Open the Object Designer (ToolsObject Designer).
Click on All button in the designer menu.
Select All objects (CTRL + A).
Select Export Objects in file menu (FileExport).
Export objects to a Backup of Objects before Zetadocs for NAV3.0.fob file.
Keep the Backup of Objects before Zetadocs for NAV3.0.fob in a safe place.
7.5 Importing Zetadocs for NAV Objects
Before you import the Zetadocs for NAV objects, you must ensure that you have completed the instructions
on installing the Zetadocs for NAV Client as a local administrator on the machine from which you intend to
import the Zetadocs for NAV objects into your NAV database. This ensures that relevant automation objects

Zetadocs for NAV Installation Guide
Additional steps required for Document Archiving
This edition 18/11/2009 © Copyright Equisys plc 2009 All trademarks acknowledged All rights reserved Page 15
are installed on that machine to enable compilation of the Zetadocs for NAV objects when imported into
NAV.
Actions:
Log into Microsoft NAV as a user with SUPER user permission rights to allow you to import new
objects into the NAV database.
Open the object designer (Shift + F12) and import the relevant file to the NAV system you are
running from the table below by selecting FileImport.
The files are included on your Zetadocs for NAV CD. They can be found in <CD Drive>:\Zetadocs
NAV Server Components\ followed by the relevant country code and NAV version e.g. <CD
Drive>:\Zetadocs NAV Server Components\DE\5.00\Zetadocs for NAV V3.0 Objects - NAV5.00.fob
NAV Version Fob file to use
NAV 6.00 (2009) Zetadocs for NAV V3.0 Objects - NAV6.00.fob
NAV 5.00 Zetadocs for NAV V3.0 Objects - NAV5.00.fob
NAV 4.00 Zetadocs for NAV V3.0 Objects - NAV4.00.fob
Assuming there are no collisions with existing objects continue importing objects and ensure that
there have been no compilation errors. If you have object collisions or compilation errors refer to
the troubleshooting section at the end of this document.
8. Additional steps required for Document Archiving
For systems which intend to make use of archiving you will need to adjust to some existing NAV tables to
add a Zetadocs Archive ID field. This field is required to successfully archive documents from NAV and in the
case of SharePoint archives to retrieve them from within NAV.
8.1 Table Changes Required for Archiving
The table changes required for archiving can be performed in two different ways. Firstly there is a set of fob
files located on the product CD which can be imported, these versions of the tables are based upon the
original vanilla tables provided as part of your version of NAV. To these the relevant fields have been added,
as such if your system does not contain modified versions of these tables you can import these tables. NAV
will check for collisions on import, if these occur they should be reviewed whereby you will be able to
decide whether to import the fob file or ignore this step and perform the adjustments manually.
Importing the Tables fob file
The following actions must be followed by someone using a world 1 database version 5.00. If your system is
different, you need to select the file that is relevant to your system.
Actions:
Log into Microsoft NAV as a user with SUPER user permission rights to allow you to import new
objects into the NAV database.
Open the object designer (Shift + F12) and import the interfaces file included on your Zetadocs for
NAV CD.
Zetadocs for NAV V3.0Interfaces – NAVW15.00 (Tables).fob
It can be found in <CD Drive>:\Zetadocs NAV Server Components\<language code>\<database
version>\.
If there are no collisions continue with the import. Should collisions occur it is recommended that
you export your existing objects, and then compare the version of the objects with the text file
versions of the interfaces detailed above. This will determine the safety of the available
merge/replace options available in the import worksheet.
If it is impossible to merge to tables in your database, please refer to below for instructions on how to
modify the tables manually.
Modifying NAV Tables Manually
To enable archiving and retrieval of reports using Zetadocs for NAV you must add a field to a number of
tables in your database. This is done to link the records from the table with the archived documents. This is
done by adding a custom Zetadocs GUID field to the table. This must be done to the table before attempting
to send a report based upon it. The following actions will guide you through the process.

Zetadocs for NAV Installation Guide
Additional steps required for Document Archiving
This edition 18/11/2009 © Copyright Equisys plc 2009 All trademarks acknowledged All rights reserved Page 16
Actions:
Log into Microsoft NAV as a user with SUPER user permission rights to allow you to import new
objects into the NAV database.
Open the object designer (Shift + F12) and navigate to the tables listed below.
Before adding the field you need to pick a field no. from the free range which is available in all
related tables. This is to maintain documents referencing after operations such as posting. For
example: If I add the ‚Zetadocs Archive ID‛ field to Table 36 ” Sales Header with field no. 50000,
then I should add the same field in Table 112 ” Sales Invoice Header with the same field no.
Add a field called ‚Zetadocs Archive ID‛ of type GUID with your chosen field no. You must enter
the name exactly as stated. Upper and lower casing must be correct as well as spacing.
Changes to be made to the Tables
To enable archiving and retrieval of reports to and from SharePoint Zetadocs for NAV fields are added to the
following tables. This is to link that record with the archived documents.
Table No. Table Name Field No. Name Data Type
18 Customer 9009959 or your choice from the
free range of Field No.’s
Zetadocs Archive ID GUID
36 Sales Header 9009959 or your choice from the
free range of Field No.’s
Zetadocs Archive ID GUID
110 Sales Shipment
Header
9009959 or your choice from the
free range of Field No.’s
Zetadocs Archive ID GUID
112 Sales Invoice
Header
9009959 or your choice from the
free range of Field No.’s
Zetadocs Archive ID GUID
114 Sales Cr.Memo
Header
9009959 or your choice from the
free range of Field No.’s
Zetadocs Archive ID GUID
6660 Return Receipt
Header
9009959 or your choice from the
free range of Field No.’s
Zetadocs Archive ID GUID
23 Vendor 9009959 or your choice from the
free range of Field No.’s
Zetadocs Archive ID GUID
38 Purchase Header 9009959 or your choice from the
free range of Field No.’s
Zetadocs Archive ID GUID
120 Purch Rcpt. Header 9009959 or your choice from the
free range of Field No.’s
Zetadocs Archive ID GUID
122 Purch. Inv. Header 9009959 or your choice from the
free range of Field No.’s
Zetadocs Archive ID GUID
124 Purch. Cr. Memo
Hdr.
9009959 or your choice from the
free range of Field No.’s
Zetadocs Archive ID GUID
6650 Return Shipment
Header
9009959 or your choice from the
free range of Field No.’s
Zetadocs Archive ID GUID
8.2 Form Changes to Enhance SharePoint Archiving and Retrieval
The form interface enable users of the NAV system to access the Zetadocs Rules and Archive from
throughout various cards as shown in figure 5 below. These changes are not essential to archiving but they
do add functionality, for example in the figure below selecting Zetadocs Rules would open the Zetadocs
Customer Rule Card for the customer selected. Likewise it would also enable you to search the archive for
documents pertaining to this customer. To make the required changes we have provided a Form Interfaces
fob file for the W1 versions of NAV only. If you are integrating with an international database version (e.g.
GB, ES, IT) then please refer to the following section for instructions on how to modify the forms manually.

Zetadocs for NAV Installation Guide
Additional steps required for Document Archiving
This edition 18/11/2009 © Copyright Equisys plc 2009 All trademarks acknowledged All rights reserved Page 17
Figure 4 – Customer Card with Zetadocs Rules menu item added
Importing the Forms fob file
Actions:
Log into Microsoft NAV as a user with SUPER user permission rights to allow you to import new
objects into the NAV database.
Open the object designer (Shift + F12) and import the interfaces file included on your Zetadocs for
NAV CD relevant to the version and language of your install.
Zetadocs for NAV V3.0 Interfaces – NAVW15.00 (Forms).fob
It can be found in <CD Drive>:\Zetadocs NAV Server Components\<language code>\<database version>\.
If there are no collisions continue with the import. If there is a collision it is recommended that you
export your existing objects and compare version of the objects with the text file versions of the
interfaces detailed above to determine the safety of the available merge/replace options in the
import worksheet. If it is impossible to replace or modify the existing forms in your database,
please refer to the following section for instructions on how to modify the existing forms manually.
Modifying NAV Forms Manually
If when attempting to import the Zetadocs for NAV forms into NAV you have collisions which make it
impractical to import the forms the following manual steps can be performed to provide the same
functionality.
Zetadocs Rules
To allow users to adjust the rules for a customer or vendor from an option on the relevant card we require a
modification of the customer and vendor rule cards. The steps outlined below will add the Zetadocs Rules
menu item to the Customer button on the Customer card, see the above figure, and the Vendor button on
the Vendor card.
For the Customer Card
Open the object designer (Shift + F12)
Open the Form in Design View.
Select the Customer button.
Right Click and select menu items.
Scroll down and create the new menu item Zetadocs Rules.
Set the Action to RunObject.
In the RunObject field enter Form Zetadocs Custom Rule Card.
Select View Properties menu item or press Shift+F4.
Set the run form link to Customer No. = FIELD(No.).

Zetadocs for NAV Installation Guide
Additional steps required for Document Archiving
This edition 18/11/2009 © Copyright Equisys plc 2009 All trademarks acknowledged All rights reserved Page 18
Repeat this process for the Vendor Card using Vendor No. = FIELD(No.).
SharePoint Archiving
The following changes enable searching of SharePoint for existing archived documents. Before making
these form changes you must ensure that you have applied the tables changes detailed earlier.
Form No. Form Name Change Instructions
21
26
41
42
43
44
507
6630
130
132
134
6660
49
50
51
52
509
6640
138
6650
140
136
Customer Card
Vendor Card
Sales Quote
Sales Order
Sales Invoice
Sales Credit Memo
Blanket Sales Order
Sales Return Order
Posted Sales Shipment
Posted Sales Invoice
Posted Sales Credit Memo
Posted Return Receipt
Purchase Quote
Purchase Order
Purchase Invoice
Purchase Credit Memo
Blanket Purchase Order
Purchase Return Order
Posted Purchase Invoice
Posted Return Shipment
Posted Purchase Credit Memo
Posted Purchase Receipt
Adding the
Zetadocs Archive
Search menu
item
1. Open the form in the object designer
2. Select the FORM button.
3. Select all the forms detailed on the left using CTRL +
Left Click.
4. Export the objects to text file. FileExport.
5. Locate the appropriate Zetadocs for NAV Interfaces
(Forms) text file for your NAV version (4.0, 5.0 or
6.0) on your Zetadocs for NAV CD from the W1
folder.
Either use a file comparison tool or search for
‚Zetadocs Archive ID‛ to identify the menuitem
code to copy and paste into the respective
objects.NOTE: the code differs between the
company cards Customer/Vendor and the other
record cards so you should copy and paste from
the correct objects.
6. Copy and Paste the separator and menuitem code
from the Zetadocs for NAV Interfaces text file and
pasted into the respective area in your exported
forms text file.
7. Save changes and import your updated text file in to
NAV.
8. Add the ‚EQX.XX‛ identifier to the Version List for
each of the modified table. (Where X.XX is the
Zetadocs for NAV version)
9. Compile the modified forms
10. Check that the appropriate menu items have been
created by running the form and check the modified
menu buttons.
11. If you commonly update databases of this version it
is recommended that you label and save your
updated objects in a .fob file for use in future
installations.
Figure 5 - Zetadocs Archive Menuitem Code
Zetadocs for NAV Installation Guide
Zetadocs Configuration
This edition 18/11/2009 © Copyright Equisys plc 2009 All trademarks acknowledged All rights reserved Page 19
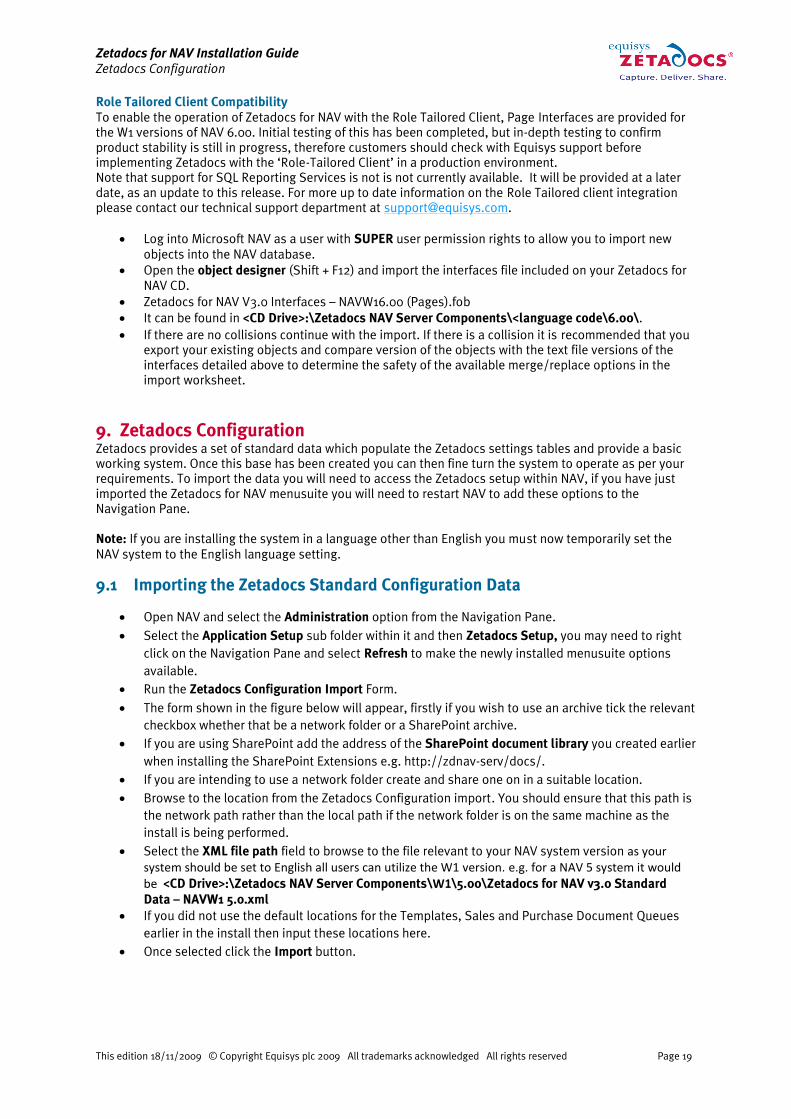
Role Tailored Client Compatibility
To enable the operation of Zetadocs for NAV with the Role Tailored Client, Page Interfaces are provided for
the W1 versions of NAV 6.00. Initial testing of this has been completed, but in-depth testing to confirm
product stability is still in progress, therefore customers should check with Equisys support before
implementing Zetadocs with the ‘Role-Tailored Client’ in a production environment.
Note that support for SQL Reporting Services is not is not currently available. It will be provided at a later
date, as an update to this release. For more up to date information on the Role Tailored client integration
please contact our technical support department at [email protected].
Log into Microsoft NAV as a user with SUPER user permission rights to allow you to import new
objects into the NAV database.
Open the object designer (Shift + F12) and import the interfaces file included on your Zetadocs for
NAV CD.
Zetadocs for NAV V3.0 Interfaces ” NAVW16.00 (Pages).fob
It can be found in <CD Drive>:\Zetadocs NAV Server Components\<language code\6.00\.
If there are no collisions continue with the import. If there is a collision it is recommended that you
export your existing objects and compare version of the objects with the text file versions of the
interfaces detailed above to determine the safety of the available merge/replace options in the
import worksheet.
9. Zetadocs Configuration
Zetadocs provides a set of standard data which populate the Zetadocs settings tables and provide a basic
working system. Once this base has been created you can then fine turn the system to operate as per your
requirements. To import the data you will need to access the Zetadocs setup within NAV, if you have just
imported the Zetadocs for NAV menusuite you will need to restart NAV to add these options to the
Navigation Pane.
Note: If you are installing the system in a language other than English you must now temporarily set the
NAV system to the English language setting.
9.1 Importing the Zetadocs Standard Configuration Data
Open NAV and select the Administration option from the Navigation Pane.
Select the Application Setup sub folder within it and then Zetadocs Setup, you may need to right
click on the Navigation Pane and select Refresh to make the newly installed menusuite options
available.
Run the Zetadocs Configuration Import Form.
The form shown in the figure below will appear, firstly if you wish to use an archive tick the relevant
checkbox whether that be a network folder or a SharePoint archive.
If you are using SharePoint add the address of the SharePoint document library you created earlier
when installing the SharePoint Extensions e.g. http://zdnav-serv/docs/.
If you are intending to use a network folder create and share one on in a suitable location.
Browse to the location from the Zetadocs Configuration import. You should ensure that this path is
the network path rather than the local path if the network folder is on the same machine as the
install is being performed.
Select the XML file path field to browse to the file relevant to your NAV system version as your system should be set to English all users can utilize the W1 version. e.g. for a NAV 5 system it would be <CD Drive>:\Zetadocs NAV Server Components\W1\5.00\Zetadocs for NAV v3.0 Standard
Data – NAVW1 5.0.xml
If you did not use the default locations for the Templates, Sales and Purchase Document Queues
earlier in the install then input these locations here.
Once selected click the Import button.

Zetadocs for NAV Installation Guide
Zetadocs Configuration
This edition 18/11/2009 © Copyright Equisys plc 2009 All trademarks acknowledged All rights reserved Page 20
Figure 6 – Zetadocs Configuration Import Form
A warning message will appear informing you that the import will clear all Zetadocs setup data
from the tables, select Yes to continue.
A final warning screen will appear asking you if you are sure you wish to import the data, select Yes
to install the data.
Figure 7 – Zetadocs Report Selections form
Next you will be asked to select the reports you wish to setup to operate as Zetadocs enabled
reports, select the checkboxes next to the reports you desire.
Zetadocs for NAV Installation Guide
Zetadocs Configuration
This edition 18/11/2009 © Copyright Equisys plc 2009 All trademarks acknowledged All rights reserved Page 21
On selecting OK you will be asked to confirm that you enable/disable reports for sending by E-mail
and fax, select yes to continue.
The report selections table will then be updated to run the Zetadocs reports instead of the previous
report. The previous report value will be stored elsewhere enabling the Zetadocs report to call for it
when report printing is selected.
Note: If you are installing the system in a language other than English you can now return the NAV system
to the desired language.
You will now have a basic system setup and should be able to print any reports setup earlier and they will
be delivered as per the rules contained in the standard data.
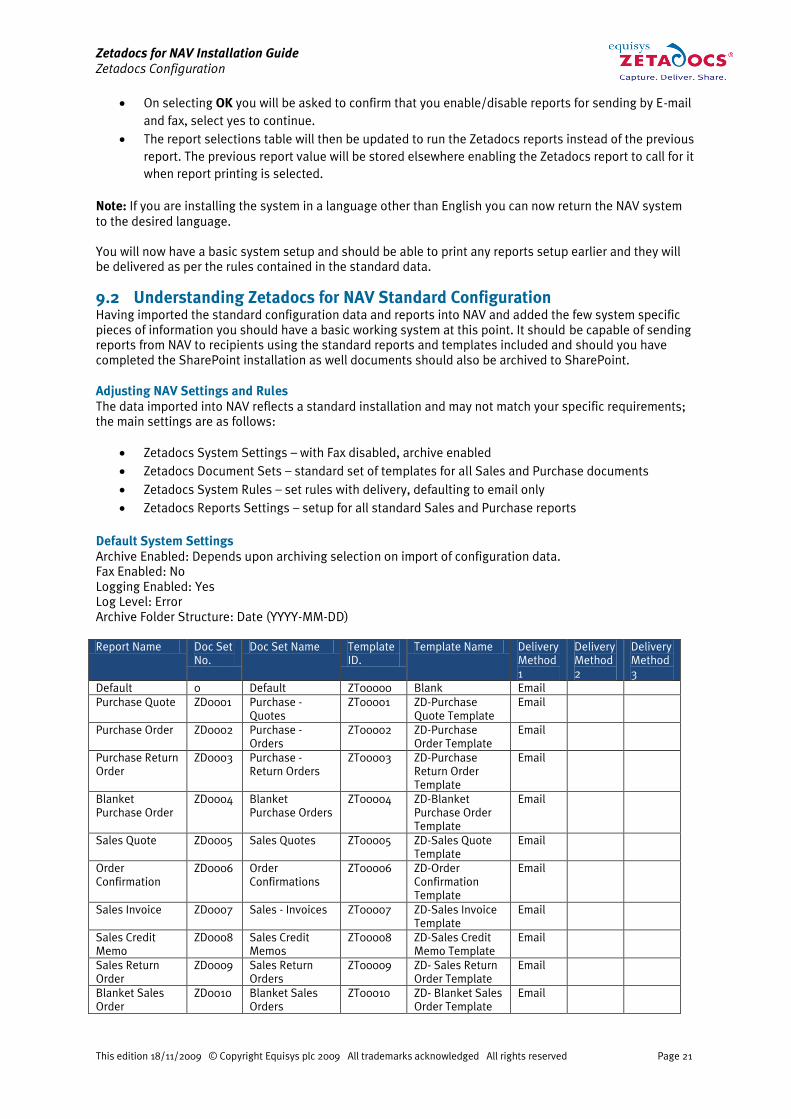
9.2 Understanding Zetadocs for NAV Standard Configuration
Having imported the standard configuration data and reports into NAV and added the few system specific
pieces of information you should have a basic working system at this point. It should be capable of sending
reports from NAV to recipients using the standard reports and templates included and should you have
completed the SharePoint installation as well documents should also be archived to SharePoint.
Adjusting NAV Settings and Rules
The data imported into NAV reflects a standard installation and may not match your specific requirements;
the main settings are as follows:
Zetadocs System Settings ” with Fax disabled, archive enabled
Zetadocs Document Sets ” standard set of templates for all Sales and Purchase documents
Zetadocs System Rules ” set rules with delivery, defaulting to email only
Zetadocs Reports Settings ” setup for all standard Sales and Purchase reports
Default System Settings
Archive Enabled: Depends upon archiving selection on import of configuration data.
Fax Enabled: No
Logging Enabled: Yes
Log Level: Error
Archive Folder Structure: Date (YYYY-MM-DD)
Report Name Doc Set
No.
Doc Set Name Template
ID.
Template Name Delivery
Method
1
Delivery
Method
2
Delivery
Method
3
Default 0 Default ZT00000 Blank Email
Purchase Quote ZD0001 Purchase -
Quotes
ZT00001 ZD-Purchase
Quote Template
Purchase Order ZD0002 Purchase -
Orders
ZT00002 ZD-Purchase
Order Template
Purchase Return
Order
ZD0003 Purchase -
Return Orders
ZT00003 ZD-Purchase
Return Order
Template
Blanket
Purchase Order
ZD0004 Blanket
Purchase Orders
ZT00004 ZD-Blanket
Purchase Order
Template
Sales Quote ZD0005 Sales Quotes ZT00005 ZD-Sales Quote
Template
Order
Confirmation
ZD0006 Order
Confirmations
ZT00006 ZD-Order
Confirmation
Template
Sales Invoice ZD0007 Sales - Invoices ZT00007 ZD-Sales Invoice
Template
Sales Credit
Memo
ZD0008 Sales Credit
Memos
ZT00008 ZD-Sales Credit
Memo Template
Sales Return
Order
ZD0009 Sales Return
Orders
ZT00009 ZD- Sales Return
Order Template
Blanket Sales
Order
ZD0010 Blanket Sales
Orders
ZT00010 ZD- Blanket Sales
Order Template

Zetadocs for NAV Installation Guide
Zetadocs Configuration
This edition 18/11/2009 © Copyright Equisys plc 2009 All trademarks acknowledged All rights reserved Page 22
Remittance
Advice Journal
ZD0011 Remittance
Advice - Journals
ZT00011 ZD-Remittance
Advice Journal
Template
Statements ZD0012 Statements ZT00012 ZD- Statements
Template
Purchase
Invoice
ZD0013 Purchase
Invoice
ZT00013 ZD-Sales Invoice
Template
Work Order ZD0014 Work Orders ZT00014 Email
Purchase Credit
Memo
ZD0015 Purchase Credit
Memo
ZT00015 Email
By examining this table you should be able to identify the areas where the standard document delivery
settings differ from your needs. The steps below will explain how to adjust these settings.
9.3 Setting the Zetadocs System Settings
To modify the default Zetadocs System Settings:
Open NAV and select the Administration option from the Navigation Pane.
Select the Application Setup sub folder within it and then Zetadocs Setup.
Select the Zetadocs System Settings form.
Archiving Enabled
Enables archiving to Microsoft SharePoint (MOSS/WSS). When disabled, standard network folder archiving
can be enabled via the Zetadocs Administration Configuration, however, this does not support any of the
Zetadocs for NAV search features.
Fax Enabled
Requires the installation of a Zetafax system. For instructions on Zetafax installation please refer to the
Zetafax Setup guide located on the Zetafax product CD. NOTE: When faxing is disabled on the Zetadocs
System Settings form the system does not prevent the creation of rules including fax, however, attempts to
use fax addressing may prompt warnings during sending any documents that attempt to use fax addressing
will be displayed in the Zetadocs Batch Delivery Settings Dialog as an error.
Logging Enabled
To be used for troubleshooting installations and support issues. Enabling logging causes a text based log to
be written to each NAV user Windows %Temp% folder (ZetadocsNAV.log). The Log Level specifies the
amount of detail in the log.
Log Level
ERROR ” Only writes error information to the log
WARNING ” Writes any potentially problematic and error information to the log
DEBUG- Writes all levels of detail for troubleshooting difficult problems. Recommended only when
obtaining support or during installation and configuration.
SharePoint Site
To be used in conjunction with Archiving Enabled, this setting should be the address of your SharePoint
document library, should you be utilizing one.

Zetadocs for NAV Installation Guide
Zetadocs Configuration
This edition 18/11/2009 © Copyright Equisys plc 2009 All trademarks acknowledged All rights reserved Page 23
Figure 8 - Zetadocs System Settings
9.4 Template Settings
Zetadocs Templates combine stationery overlays and attachment documents as well as supplementary
addressing for any document sent using that template from the Zetadocs Client. The templates can be
created in the Zetadocs Client and saved to a shared network location. For more information on creating
Zetadocs Templates and setting up Zetadocs Shared Network folders please consult the Zetadocs Client
help. Zetadocs will already have created entries for each type of report supported, these can be modified in
the Zetadocs Client, the section on document templates explains this further. Should you wish to change
the template a report uses, for example if you wished to send out all correspondence for a period with
special attachments or a message as part of a special offer. Then you can create additional templates in the
Zetadocs client and assign them by doing the following.
Open NAV and select the Administration option from the Navigation Pane.
Select the Application Setup sub folder within it and then Zetadocs Setup.
Select the Zetadocs Templates form.
Select TemplateList or press F5.
Choose the Template you wish to modify and select OK.
Select Path to choose another template.
The name field will automatically populate, add a suitable Description and close the form.
Zetadocs for NAV Installation Guide
Zetadocs Configuration
This edition 18/11/2009 © Copyright Equisys plc 2009 All trademarks acknowledged All rights reserved Page 24
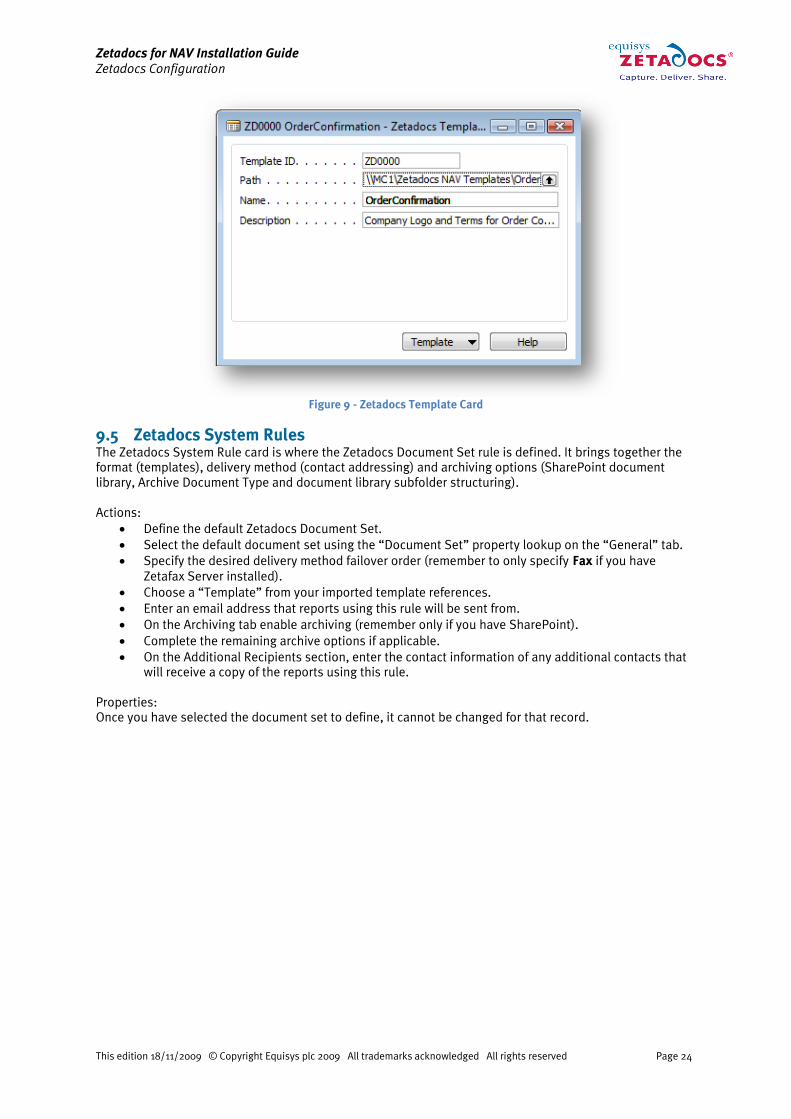
Figure 9 - Zetadocs Template Card
9.5 Zetadocs System Rules
The Zetadocs System Rule card is where the Zetadocs Document Set rule is defined. It brings together the
format (templates), delivery method (contact addressing) and archiving options (SharePoint document
library, Archive Document Type and document library subfolder structuring).
Actions:
Define the default Zetadocs Document Set.
Select the default document set using the ‚Document Set‛ property lookup on the ‚General‛ tab.
Specify the desired delivery method failover order (remember to only specify Fax if you have
Zetafax Server installed).
Choose a ‚Template‛ from your imported template references.
Enter an email address that reports using this rule will be sent from.
On the Archiving tab enable archiving (remember only if you have SharePoint).
Complete the remaining archive options if applicable.
On the Additional Recipients section, enter the contact information of any additional contacts that
will receive a copy of the reports using this rule.
Properties:
Once you have selected the document set to define, it cannot be changed for that record.

Zetadocs for NAV Installation Guide
Zetadocs Configuration
This edition 18/11/2009 © Copyright Equisys plc 2009 All trademarks acknowledged All rights reserved Page 25
Figure 10 - Zetadocs System Rule Card – General Tab
General Tab
Delivery Method Priority: Implies that if the contact information being used during the sending of
a document that uses this rule is missing addressing information, the next highest priority method
will be used. For example, if the Delivery Method Priority was ‚E-Mail, Fax, Hard-copy‛ and the
contact information being used had no email information but did have fax information, then fax
addressing would be used. Similarly, if there was neither email or fax information, then the
document would be printed from Zetadocs to the local system default printer.
Template: Optional.
Email From: Optional. The user must have access to send emails using the address entered. If left
blank the user’s default email account will be used.
Comments: Field for any additional information you may wish to add.
Additional Recipients: Optional. This field is available on both the general and archiving tabs.
Enter additional recipients either by selecting a contact or by entering the information manually.
The delivery methods available are E-Mail (To, CC or BCC) and Fax. You can enter a maximum of 5
additional recipients for a system rule. E-Mail distribution lists are supported but they must be
entered as their full E-Mail address and not an alias (E.g. [email protected])

Zetadocs for NAV Installation Guide
Zetadocs Configuration
This edition 18/11/2009 © Copyright Equisys plc 2009 All trademarks acknowledged All rights reserved Page 26
Figure 11 - Zetadocs System Rule Card – Archiving Tab
Archiving Tab
Archive Sent Documents: Determines whether Zetadocs for NAV will attempt to archive sent
documents.
Archive Library: Only specify the SharePoint document library name, not the full URL.
Archive URL: Displays the full target archive library by concatenating the SharePoint Site from the
Zetadocs System Settings and the Archive Library property.
Folder Name Structure: Subdivides archived documents into subfolders of the SharePoint
document library based on information from the sent record. The Custom radio button allows you
to specify new folder structuring values. Currently, no others have been implemented.
o COMPANY ” The recipient NAV Customer name
o DATE ” The Date with a format specified by the ‚Date Folder Naming‛ property
o DOCTYPE ” The Archive Document Type as specified for the current Zetadocs Document
Set, or its override in the Zetadocs Report Settings
Date Folder Naming” Allows you to specify the format of the date folder structure in the
SharePoint archive. E.g. YYYY-MM-DD, DD-MM-YYYY, MM-DD-YYYY etc.
9.6 Zetadocs Report Settings
The Zetadocs Report Settings is where Zetadocs enabled reports can be associated with a particular
Zetadocs Document Set and therefore a rule definition for sending (template, delivery method, archiving
settings, additional recipients). It is also where recipient information settings are specified. For the basic
setup, it is necessary to add the correct field no.’s for the company and contact fields to this table.

Zetadocs for NAV Installation Guide
Zetadocs Configuration
This edition 18/11/2009 © Copyright Equisys plc 2009 All trademarks acknowledged All rights reserved Page 27
Figure 12 - Zetadocs Report Settings Card – General Tab
Properties:
A report can only be associated with one Zetadocs Document Set.
Many reports can be associated with one Zetadocs Document Set.
General Tab
Report ID: The Report ID is unique value given to identify each report.
Report Name: This field is populated when the Report ID is selected.
Document Set No.: The Document Set No. corresponds to the key field of the Zetadocs System Rule
Table linking the report to rules for its distribution.
Document Set Name: Contains the name of the rule that is being applied to the report, it is
determined via the Document Set No. selection.
Archive Document Type: this Archive Document Type overrides the Archive Document Type
specified in the Zetadocs Document Set for a particular report.
Default Batch Name: When a report prints a number of records to Zetadocs they are held in a batch
in the Zetadocs Client. This field allows you to specify a name for the batch that will be visible in
the Zetadocs Client document explorer.
Comments: Field for any additional information you may wish to add.

Zetadocs for NAV Installation Guide
Zetadocs Configuration
This edition 18/11/2009 © Copyright Equisys plc 2009 All trademarks acknowledged All rights reserved Page 28
Figure 13 - Zetadocs Report Settings Card – Table Mapping Tab
Table Mapping Tab
Company Type Code: This specifies a table relation between the report record and the recipient.
For example, the standard Sales Quote report is to be sent to a Customer. Therefore, we select
‘CUST’ for the Company Type Code from the Company Type Code List.
Company No. Field No.: Specifies the field no. of the field in the table the report is based on where
the Company No. should be taken from. For example, the standard Sales Quote report is based on
the Sales Header table. The Customer No. in the Sales Header table is the field ‚Sell-to Customer
No.‛ field no. 2.
Contact No. Field No.: Specifies the field no. of the field in the table the report is based on where
the Contact No. should be taken from. For example, the standard Sales Quote report is based on
the Sales Header table. The Contact No. in the Sales Header table is field ‚Sell-to Contact No.‛ field
no. 5052.
Record No. Field No.: Specifies the field no. of the field in the table the report is based on where
the records No. should be taken from. This can be used as a dynamic field for writing the record no.
into a template message as a reference to the recipient and also as a searchable field in the
Zetadocs SharePoint archive.
Figure 14 - Zetadocs Report Settings Card – Options Tab

Zetadocs for NAV Installation Guide
Zetadocs Configuration
This edition 18/11/2009 © Copyright Equisys plc 2009 All trademarks acknowledged All rights reserved Page 29
Options Tab
Show Delivery Dialog: Controls the display of the delivery dialogs which allow run-time user
overriding of send results.
Show Batch Delivery Dialog: Controls the display of the delivery dialog which allows the user to
view and fix any send result errors.
Preview in Zetadocs Client: Controls the default value of previewing the Zetadocs documents in
the Zetadocs Client before sending. If the delivery dialog is shown the default can be overridden by
the user.
Test Mode: This field allows the administrator to prevent the report from printing the report results
to Zetadocs. It is useful when troubleshooting problems on a live system. When the report is run it
will run as normal up to the point of printing the report documents to Zetadocs.
9.7 Zetadocs System and Company Rules
The Zetadocs System Rules were explained earlier as the ability to define how a message being sent is
delivered (Email, Fax or Hard-Copy), how it is formatted (Zetadocs Templates), from which address the
message is sent and where it is archived. By now you should realize each Zetadocs Document Set can have
a separate definition of these sending settings.
Zetadocs for NAV also has Company Rules, these are the Zetadocs Customer Rules and the Zetadocs Vendor
Rules which add another level of control. The sending rules are best explained as a set of override rule
definitions. It can be viewed as a 4 level system which overrides particular rule settings dependent upon the
document set, the company or a combination of both.
LEVELS:
1. The Default Rule
o Allows you to specify a basic rule that can be used by any Zetadocs enabled report.
2. Per Document Set
o Allows you to specify more specific settings for Zetadocs enabled documents by type.
3. Per Company
o All Zetadocs enabled documents being sent to a particular company can have the
following rule settings overridden (This includes documents which are being sent using
either the Level 1 or a Level 2 rule settings):
i. The contact information to which the document will be sent
ii. The method of delivery by which the document will be sent (Email, Fax, Hard-
Copy)
4. Per Company, per Document Set
o All Zetadocs enabled documents being sent to a particular company and that are part of a
particular document set can have the following rule settings overridden (this includes
documents which are being sent using either the Level 1 or a Level 2 rule settings and has
had some settings already overridden by a Level 3 rule settings)
i. The Zetadocs Template that will be applied to the document
ii. The contact information to which the document will be sent
iii. The method of delivery by which the document will be sent (Email, Fax, Hard-
Copy)
To visualize this, let’s look at the forms below to describe a use case. In this example the NAV Administrator
has set up a document set for order confirmations. It has been set so that Order confirmations are sent via
E-mail with the order confirmation template.
The Zetadocs System Rule card shows the level 1 rule that will apply to all documents by default unless
overridden by a higher level rule. In this case documents are sent using email with the default template. We
can also set the archiving options on the Archiving Tab, in this example we will set the system not to
archive.

Zetadocs for NAV Installation Guide
Zetadocs Configuration
This edition 18/11/2009 © Copyright Equisys plc 2009 All trademarks acknowledged All rights reserved Page 30
Figure 15 – Level 1 Zetadocs System Rule Card
The level 2 rule details shown below apply to all documents with the document set Order Confirmation,
meaning that any Order Confirmation document will be sent using the ZD- Order Confirmation Template
whilst the others will use the level 1 rule and thus the default template.
Figure 16 - Level 2 Zetadocs System Rule Card
During discussions with the staff at the company in our example the sales staff have requested that all
correspondence between us and them be sent to Mindy Martin, with the exception of Order Confirmations.
So the Default document set has the contact details adjusted to contain the contact details of Mindy Martin.

Zetadocs for NAV Installation Guide
Zetadocs Configuration
This edition 18/11/2009 © Copyright Equisys plc 2009 All trademarks acknowledged All rights reserved Page 31
Figure 17 - Level 3 rule shown on Customer Rule Card
They have requested that Order Confirmations should instead go to John Emory by fax. The figure below
shows how this would be set up. This is done by adjusting the Order Confirmation rule set up for level 2 and
adding that it should use the alternate contact John Emory and to deliver it by fax.
Figure 18 - Level 4 rule shown in the Customer Rule List
Starting from the top then, the internal processing determines the send settings by building the results from
the lower level rules up. Assume we are sending an order confirmation and it uses the document set
ZD00006 – Orders Confirmations.
This will determine from Level 1 & 2 above:
Delivery Method: Email
Template: ZT00006 - Order
Archiving Settings: Do not archive
Contact: Use Default contact

Zetadocs for NAV Installation Guide
Modifying NAV Reports to work with Zetadocs
This edition 18/11/2009 © Copyright Equisys plc 2009 All trademarks acknowledged All rights reserved Page 32
When we consult the Level 3 Rules we see that any document being sent to ‚The Canon Group PLC‛ (from
the Level 3 figure above) will be sent to ‚Mindy Martin‛ instead of the contact specified in the record we are
printing from.
This would mean:
Delivery Method: Email
Template: ZD0000 - Default
Archiving Settings: Do not archive
Contact: Mindy Martin
However, the Order Confirmation document has been made part of ZD00006, therefore the Level 4 settings
will be applied and it will be sent to John Emory and by fax.
So the final settings will be:
Delivery Method: Fax
Template: ZD0006 ” Order Confirmation
Archiving Settings: Do not archive
Contact: John Emory
Additional Recipients
The additional recipients define in the system and company rules do not override those from the lower level
rule as the other settings do. They are additive. If additional recipients are added for a document set
(ZD00006 ” Order Confirmations for example), any document sent using that document set will be
addressed to these additional recipients, along with the additional recipients set at a higher level.
9.8 Zetadocs Document Queue Setup
Users who have purchase the Zetadocs Server upgrade can make use of the Zetadocs Sales Document
Queue and the Zetadocs Purchase Document Queue. These features are not available without this upgrade
module, for more details on what the Zetadocs Server can offer click here. Note that the archiving details
below only pertain to inbound documents stored in the document queue. Any documents sent using
Zetadocs will be archived based upon the rules pertinent to the particular document.
Name: The name of the Document Queue.
Location: The location of the document queue folder specified during section 9.1, this is where
document are saved to have them converted and appear
Archive Library: Only specify the SharePoint document library name, not the full URL.
Archive URL: Displays the full target archive library path.
Folder Name Structure: Subdivides archived documents into subfolders of the SharePoint
document library based on information from the sent record.
o COMPANY ” The recipient NAV Customer name
o DATE ” The Date with a format specified by the ‚Date Folder Naming‛ property
o DOCTYPE ” The Archive Document Type as specified for the current Zetadocs Document
Set, or its override in the Zetadocs Report Settings
Date Folder Naming” Allows you to specify the format of the date folder structure in the
SharePoint archive. E.g. YYYY-MM-DD, DD-MM-YYYY, MM-DD-YYYY etc.
10. Modifying NAV Reports to work with Zetadocs
This section details the changes required to enable a NAV report to be sent using Zetadocs. If you have
already selected a report and enabled it earlier in section Error! Reference source not found. then you do
not need to perform these steps for that report. This section covers the enabling of reports which are not
provided as standard by Zetadocs but which can, in most circumstances, be enabled by these steps. To
make the process simpler and faster there is a template report in the Zetadocs for NAV installation pack
which contains only the elements that are to be added to an existing report to enable it for sending. It is
recommended that you complete the previous sections of this installation document before attempting to
create a Zetadocs for NAV report, because much of the code to be added to an existing report depends
upon other Zetadocs for NAV objects.
Please follow each of the steps listed in the section below in the order they appear.
Note: This method works for most reports; however, due to the customizable nature of reports it may not fit
all reports exactly. Therefore, the location of where to insert the code below may need to vary but the code

Zetadocs for NAV Installation Guide
Modifying NAV Reports to work with Zetadocs
This edition 18/11/2009 © Copyright Equisys plc 2009 All trademarks acknowledged All rights reserved Page 33
will remain the same. For additional printing options in reports and troubleshooting the building of a report
see the section on report building in the Appendix.
10.1 Backup Reports
In order to be able to uninstall the Zetadocs for NAV software it is necessary to backup the Navision reports
you are editing before installing the Zetadocs for NAV objects. Alternatively, reports can be duplicated and
saved with new report ID’s before adding the Zetadocs for NAV changes. Either way it is important to add
the Version List EQ3.0 after saving the completed report.
Open the Navision client and connect to/open the Navision database.
Open the Object Designer (ToolsObject Designer).
Click on Report button in the designer menu.
Select all the reports that you are going to edit for Zetadocs for NAV.
Select Export objects in file menu (FileExport).
Export objects to a Backup of Reports before Zetadocs for NAV3.0.fob file.
Keep the Backup of Objects before Zetadocs for NAV3.0.fob in a safe place.
10.2 Import the Zetadocs for NAV Report Template
The additions report provides help when modifying reports to enable sending with Zetadocs, it contains
many code samples you will need to include in your report.
Actions:
The additions report fob file for NAV can be found in <CD Drive>:\Zetadocs NAV Server
Components\Zetadocs for NAV Additions Report 9009959. There is only one version of this file
which is valid for the different localized versions of NAV.
In the event that the Zetadocs additions report collides with an existing item, please refer to the section
troubleshooting at the end of this document.
We will refer to this report from now on as the template and to the report you are editing as the report.
Note: The template is based on the ‚Sales Header‛ table.
10.3 Global, Local and Text Constants
Open the template in the Report Designer and view the C/AL Globals (ViewCA/L Globals).
Select all global variables (Ctrl + A), right-click and select Copy.
Open the report and view the C/AL Globals.
Scroll to the bottom of any existing Globals in your report and select the blank global variable row,
right-click and select Paste to paste the additional Zetadocs Globals into the report.
You must now repeat the above steps to copy and paste all the Text Constants from the template into your
report.
10.4 Code Segments
Next you need to add code to your report. The code is provided here and is also available in the Zetadocs
Additions Report as an example of its completed form to assist you. Some of the code requires you to insert
the main data item name and the number of your report. These are indicated by <param description> in the
pasted code.
Create Zetadocs Embedded Commands Data Item
In the report designer select an empty row and create a new data item of type Integer called
Zetadocs Embedded Commands.
Move the data item up to just below your main data item and indent once so that it will be the first
page of output in your report and set the properties and code as below.
Open the template in the Report Designer and view the sections (ViewSections)
Select the three textboxes located in the Zetadocs Embedded Commands, Body(1) section
Copy and Paste the three textboxes to the same section in your report.
Code
Report - OnPreReport

Zetadocs for NAV Installation Guide
Modifying NAV Reports to work with Zetadocs
This edition 18/11/2009 © Copyright Equisys plc 2009 All trademarks acknowledged All rights reserved Page 34
//--EQ3.0„
ZetadocsSend := TRUE;
noError := TRUE;
IF NOT ZetadocsSendResultGen.Initialize(<Report No.>) THEN
BEGIN
CLEAR(ZetadocsUtilities);
CLEAR(ZetadocsSendResultGen);
CLEAR(ZetadocsPrnRem);
CurrReport.QUIT;
END
ELSE BEGIN
IF <Main DataItem Name>.FIND('-') THEN
REPEAT
BEGIN
// Get the RecordID
IF noError THEN
BEGIN
RecRef.GETTABLE(<Main DataItem Name>);
IF NOT ZetadocsSendResultGen.AddRecord(RecRef.RECORDID) THEN
BEGIN
noError := FALSE;
CLEAR(ZetadocsUtilities);
CLEAR(ZetadocsSendResultGen);
CLEAR(ZetadocsPrnRem);
CurrReport.QUIT;
END;
END;
END;
UNTIL <Main DataItem Name>.NEXT = 0;
IF noError THEN
IF NOT ZetadocsSendResultGen.ResolveSendInfo() THEN BEGIN
CLEAR(ZetadocsUtilities);
CLEAR(ZetadocsSendResultGen);
CLEAR(ZetadocsPrnRem);
CurrReport.QUIT;
END;
END;
//--EQ3.0„
Report – OnPostReport
//--EQ3.0--
CLEAR(ZetadocsUtilities);
CLEAR(ZetadocsSendResultGen);
CLEAR(ZetadocsPrnRem);
//--EQ3.0„
Primary Data Item – OnAfterGetRecord
(E.g. Sales Invoice Header data item as shown in Figure 5.)
//--EQ3.0--
RecRef.GETTABLE(<Main DataItem Name>);
IF ZetadocsSendResultGen.IsToBeSkipped(RecRef.RECORDID) THEN
BEGIN
CurrReport.SKIP;
END;
//--EQ3.0--
Zetadocs Embedded Commands – OnPreDataItem
//--EQ3.0--
SETRANGE(Number,1,1);

Zetadocs for NAV Installation Guide
Modifying NAV Reports to work with Zetadocs
This edition 18/11/2009 © Copyright Equisys plc 2009 All trademarks acknowledged All rights reserved Page 35
//--EQ3.0--
Zetadocs Embedded Commands – OnAfterGetRecord
//--EQ3.0--
RecRef.GETTABLE(<Main DataItem Name>);
ZetadocsEmbComms:= ZetadocsSendResultGen.GetRecordEmbComms(RecRef.RECORDID,
ZetadocsEmbCommsAction);
CASE ZetadocsEmbCommsAction OF
ZetadocsEmbCommsAction::Error:
BEGIN
CLEAR(ZetadocsUtilities);
CLEAR(ZetadocsSendResultGen);
CLEAR(ZetadocsPrnRem);
CurrReport.QUIT;
END
END; //CASE
ZetadocsCustComms := ZetadocsSendResultGen.GetRecordCustComms(RecRef.RECORDID,
ZetadocsEmbCommsAction);
CASE ZetadocsEmbCommsAction OF
ZetadocsEmbCommsAction::Error:
BEGIN
CLEAR(ZetadocsUtilities);
CLEAR(ZetadocsSendResultGen);
CLEAR(ZetadocsPrnRem);
CurrReport.QUIT;
END
END; //CASE
ZetadocsMultRecComms := ZetadocsSendResultGen.GetRecordMultRecComms(RecRef.RECORDID,
ZetadocsEmbCommsAction);
CASE ZetadocsEmbCommsAction OF
ZetadocsEmbCommsAction::Error:
BEGIN
CLEAR(ZetadocsUtilities);
CLEAR(ZetadocsSendResultGen);
CLEAR(ZetadocsPrnRem);
CurrReport.QUIT;
END
END; //CASE
//--EQ3.0--
Zetadocs Embedded Commands – OnPostDataItem
//--EQ3.0--
CurrReport.NEWPAGE;
//--EQ3.0--
Zetadocs Embedded Commands , Body (1) - OnPreSection
//--EQ3.0„
CurrReport.PAGENO := CurrReport.PAGENO - 1;
//--EQ3.0„
Properties
(Data Item) Zetadocs Embedded Commands – DataItemTableView: ‚SORTING(Number)‛
(Report) Report – ShowPrintStatus: No

Zetadocs for NAV Installation Guide
Modifying NAV Reports to work with Zetadocs
This edition 18/11/2009 © Copyright Equisys plc 2009 All trademarks acknowledged All rights reserved Page 36
Figure 19 – Adding Zetadocs Embedded Commands DataItem
CopyLoop
If your report contains a copy loop data item that outputs more than one copy of the report per print, then
you must edit the loop to only output one copy when sending using Zetadocs. An example of the standard
copy loop with the additional logic is in the template. NOTE: THIS IS NOT THE EXACT CODE TO PASTE. YOU
MUST EDIT YOUR COPY LOOP TO ONLY RUN ONCE WHEN (ZetadocsSend = TRUE)
IF (NoOfLoops <= 0) THEN
NoOfLoops := 1;
IF (ZetadocsSend) THEN
NoOfLoops := 1;
SETRANGE(Number,1,NoOfLoops);
Modifications Necessary for the Role Tailored Client Reports
To enable Role Tailored Client reports to be sent successfully using Zetadocs for NAV you will need to adjust
the reports using the following steps.
Open the Navision client and connect to/open the Navision database.
Open the Object Designer (ToolObject Designer).
Click on Report button in the designer menu.
Select the reports that you are going to edit for Zetadocs for NAV.
Select Export in file menu (FileExport).
Export the report as a .txt file.
Open the file using a notepad.exe or another suitable program.
Scroll down through the file until you reach the RDLDATA.
Delete everything contained within the curly brackets {}.
Save the changes to the file.
Go to NAV and open the Object Designer (ToolObject Designer).
Click on Report button in the designer menu.
Select (FileImport) and re-import the modified report.

Zetadocs for NAV Installation Guide
Using Preconfigured Document Templates
This edition 18/11/2009 © Copyright Equisys plc 2009 All trademarks acknowledged All rights reserved Page 37
Repeat the process for any remaining reports you intend to use in conjunction with Zetadocs for
NAV.
10.5 Version Code
Once you have saved the report add EQ3.0 to the Version List column in the Object Designer. Adding this
value is essential to ensure easy identification of reports modified for Zetadocs for NAV, in particular, for
uninstalling Zetadocs for NAV at a later point.
11. Using Preconfigured Document Templates
Zetadocs for NAV has a number of preconfigured document templates included within it to make setting up
a system quicker and easier. These templates contain Zetadocs stationery and a message body which have
been deliberately constructed to provide a starting point from which to build and customize your system.
Should you wish to construct your own templates instructions on manually creating them are available in
the help installed with the Zetadocs Client. You should though find it easier to follow the instructions here
to modify the standard templates to your needs.
Note: If you are installing in a language other than English you should first check your templates folder as it
should contain a folder with templates specific to your language. Copy these files into the main templates
folder replacing the existing English language templates before proceeding with the steps below.
11.1 Preconfigured Document Template Features
The document templates contain Zetadocs stationery and a suitably generic message body reflective of
each templates purpose.
Attachments
The document templates come without an attachment included to allow you to include your own company
specific documents like terms and conditions that you may wish to distribute.
Stationery
A single stationery file has been provided which by default is applied to all ZD Templates included with your
installation. This means you would only be required to update this stationery once for it to apply to all
document templates.
Message Body Text
The message body text contains a default message which would form the email message body and subject
when the document is sent using Zetadocs for NAV. This allows for the use of dynamics fields to populate
information from NAV automatically into the email reducing the time required to process business
documents. In the message in section 11.4 you can clearly see several examples of these fields.
Viewing the Template details
To view the Zetadocs for NAV template details simply:
Open the Zetadocs Client.
Select the Shared network folder setup earlier containing your templates in the accessories pane
on the right hand side using the folder drop down box shown in figure 3. If the accessories pane is
not displayed select the Accessories button from the toolbar to display it.
Ensure the Type drop down box is set to Templates.
Double click on the Template you wish to adjust to open the Document Template Wizard.
The pages of the wizard cover contain:
1. An Introduction to templates
2. Assignment of attachments
3. Assignment of Stationery
4. Email properties
5. Template Review and Save

Zetadocs for NAV Installation Guide
Using Preconfigured Document Templates
This edition 18/11/2009 © Copyright Equisys plc 2009 All trademarks acknowledged All rights reserved Page 38
Figure 20 – Opening the Document Template Wizard
11.2 Template Wizard - Adding an attachment to a template
The preconfigured templates supplied do not come with an attachment included as this would make them
unusable ’out of the box’ as such if you require attachments to be sent along with your business documents
then please follow the steps below.
Any file that you use on a regular basis can be stored as an attachment file for ease of use. These files can
be attached to any spooled document prior to sending quickly and easily using the Accessories tool. By
specifying an attachment in a template you ensure it is always included when a document is sent using that
template with Zetadocs for NAV.
Note: That if your attached file is large this may reduce performance when sending large batches as the
attachment would have to be processed for each document delivered. As such we would recommend that
you check to ensure that attachments are as efficient in terms of memory required as possible.
To add an attachment simply:
Copy your desired attachment (e.g. terms and conditions) in pdf format into the shared folder
location, likely to be in the form \\ServerName\Zetadocs Templates\
Open the Zetadocs Client and select the template you wish to modify by double clicking on it in the
Accessories pane, see Figure 20.
The template wizard will open, Select Next to reach the attachments step of the wizard.
Select the Shared Network Folder by selecting the Folder drop down box.
Your attachment should appear as one of the attachment options.
Select the attachment and click the Add button.
Select Next to be taken to the stationery template wizard page. If you are happy with the existing
settings in the remaining wizard steps skip past them using next and select Finish to save your
changes.
11.3 Replacing the stationery
The templates comes with stationery included, this single piece of stationery is applied to all of the
templates provided. As such by simply replacing this one file you can ensure your stationery is applied to all
of the provided templates.
Note: That if your stationery file requires a large amount of memory this may reduce the performance of
Zetadocs when sending large batches. This is because it would have to be processed for each page of each
document delivered. To reduce the size of this document we would recommend ensuring that any images
used are of a suitable format, quality and size. We would also recommend that users avoid scanning their
existing paper stationery as this creates large files, it is better instead to isolate and extract any images or
required elements before recreating the overall effect using word for example. It should be possible to
create stationery of a suitable quality which is around 30kb's in size or less.

Zetadocs for NAV Installation Guide
Using Preconfigured Document Templates
This edition 18/11/2009 © Copyright Equisys plc 2009 All trademarks acknowledged All rights reserved Page 39
Adding company stationery to the Zetadocs client
To add your stationery to the Zetadocs Client simply open your existing company stationery and print it
selecting the Zetadocs PDF printer using the steps below.
Open your stationery in Word or another suitable application. The standard stationery has been
provided to you in Word format in the templates folders as well, so you can adjust and print that if
desired.
Select print and select Zetadocs PDF as your printer.
This will open the Zetadocs client with your stationery within it.
Select the File menu and then Save As Stationery.
You will then be prompted to provide the name and save location of the stationery, you should
select the shared network folder mentioned earlier this is likely to be in the form
\\ServerName\Zetadocs Templates\.
If you wish to apply this stationery to the existing preconfigured templates this file should be
named ZD - Stationery.zds this will over-right the existing standard stationery and will now be
used by all of the templates provided.
Should you wish to apply this stationery to a single template, name the file as you see fit then open
the Zetadocs client.
Next open the template wizard by double clicking on the template you wish to modify.
Go to the third page of the wizard using the next button the screen shown in Figure 21 will appear.
Select your stationery by selecting the Folder drop down box and selecting the Shared Network
folder.
Selecting the existing stationery from the selected stationery window as shown.
Figure 21 – The Document Template Wizard
Click the Remove button.
Select your new stationery file and press Add.
Select Next to be taken to the email message template wizard page. If you are happy with the
existing message select next again and then select Finish to save your changes.

Zetadocs for NAV Installation Guide
Using Preconfigured Document Templates
This edition 18/11/2009 © Copyright Equisys plc 2009 All trademarks acknowledged All rights reserved Page 40
11.4 Adjusting the Email message
The preconfigured templates contain an email message populated with dynamics field data from NAV and
static text generically phrased to allow them to be applicable in a number of situations. The messages, like
the one shown below, work with NAV to automatically create a personalised message that contains contact
details, names, order numbers and organization names.
Messages using Dynamics Fields
Subject: Order Confirmation for order number: %%[ZetadocsRecordNo] for %%[Organization]
Message Body:
FAO: %%[Name]
Dear Customer,
I'm pleased to attach your order confirmation, reference number %%[ZetadocsRecordNo].
Kind regards,
Sales Team
When sent using the Zetadocs for NAV Client these fields are replaced with the corresponding fields from
NAV, and would appear thus:
Message with Dynamic Fields Populated
Subject: Order Confirmation for order number: 300381 for Equisys plc
Message Body:
FAO: John Smith
Dear Customer,
I'm pleased to attach your order confirmation, reference number 300381.
Kind regards,
Sales Team
By amending the document template you will be able change the content of every email message sent using
that template. It is possible to include a variety of other dynamically populated fields within your email; by
default you will have access to the following:
%%[Name]
%%[FirstName]
%%[Surname]
%%[ZetadocsCompanyNo]
%%[ZetadocsRecordNo]
%%[Organization]
%%[ZetadocsArchiveID]

Zetadocs for NAV Installation Guide
Testing the Zetadocs for NAV Solution
This edition 18/11/2009 © Copyright Equisys plc 2009 All trademarks acknowledged All rights reserved Page 41
Figure 22 - Document Template Wizard – Email Message Body
It is possible to include other dynamic fields however these require the use of the SDK Granule, this setup
will be explored in the Advanced Configuration Guide.
To adjust the email message you need to view the template in the Zetadocs Client using the document
template wizard. To open the document template wizard for a particular template follow the steps in section
11.1.
The first three pages of the wizard contain:
1. An introduction to templates
2. The assignment of attachments
3. The selection of stationery
Click Next on each page to move past these wizard stages until you reach the email properties
page (see Figure 21 above).
Adjust this content to match your needs remembering that the dynamic fields use the format
%%[Name] and will be replaced in the message by the corresponding NAV value.
Click Next to review the templates contents and select Finish to save your changes.
12. Testing the Zetadocs for NAV Solution
This section shows how to test all the components of the Zetadocs for NAV product are installed and
configured correctly. First it covers a full cycle scenario to test the product as a whole and then some tests
for individual components. As a minimum we recommend that you carry out the full cycle scenario testing to
confirm that the system is correctly installed and configured.
12.1 Full Cycle Test Scenario
Before running through this test, please ensure that all the prerequisites have been met.

Zetadocs for NAV Installation Guide
Testing the Zetadocs for NAV Solution
This edition 18/11/2009 © Copyright Equisys plc 2009 All trademarks acknowledged All rights reserved Page 42
Prerequisites
Create a No. Series for the Document Sets and for the Templates and assign them through the
Zetadocs No. Series form.
Figure 23 - Zetadocs No. Series
Create a Zetadocs Template from the Zetadocs Client. The template should have some recipient
information, an attachment, stationery and some text in the email body text. Name it Order
Confirmation.
Create another Zetadocs Template and name it Invoice.
Create two custom Sales reports, one of Order Confirmations and one for Invoices
Add those two reports to the Zetadocs Report Settings list.
Figure 24 - Zetadocs Report Settings
Set up some network folders to store and access the templates, the documents for the Document
Queues etc.
Test
For a full end-to-end scenario follow the steps below:
Set up a definition of the Document Set for a Sales Order by going to the Zetadocs Document Set
Card form.

Zetadocs for NAV Installation Guide
Testing the Zetadocs for NAV Solution
This edition 18/11/2009 © Copyright Equisys plc 2009 All trademarks acknowledged All rights reserved Page 43
Figure 25 - Zetadocs Document Set Card
Add a Zetadocs Template using the Zetadocs Template Card.
Figure 26 - Zetadocs Template Card
Set up both the sales and purchase Document Queue locations using the Zetadocs Sales Doc
Queue Setup / Zetadocs Purch. Doc. Queue Setup.

Zetadocs for NAV Installation Guide
Testing the Zetadocs for NAV Solution
This edition 18/11/2009 © Copyright Equisys plc 2009 All trademarks acknowledged All rights reserved Page 44
Figure 27 - Zetadocs Document Queue Setup
Set up a System Rule in the Zetadocs System Rule list using the System Rule Card ” the default
System Rule should cover the minimum information necessary and should include the email as the
delivery method and should have a template selected. On the Archive tab the Archive Sent
Documents option should be checked and you should also add a contact in the additional
recipients tab.
Figure 28 - Default System Rule Card
Create an original document in Microsoft Word that would represent an example Sales Order and
place it into a shared network folder that the Sales Document Queue is setup to monitor.
View that original document from the Zetadocs Sales Document Queue form.

Zetadocs for NAV Installation Guide
Testing the Zetadocs for NAV Solution
This edition 18/11/2009 © Copyright Equisys plc 2009 All trademarks acknowledged All rights reserved Page 45
Figure 29 – Zetadocs Sales Document Queue
Create a NAV Sales Order based on the original document using the Create menu button on the
Zetadocs Sales Document Queue form.
Archive the original document to SharePoint by closing down the Sales Order form (it will archive
the document automatically).
Open the just created NAV Sales Order and add any further info needed.
Send the NAV Sales Order to the Zetadocs Client by printing it.
Confirm in the Zetadocs Client that the correct template has been applied to the printed Order.
Send the Order to the recipient.
Confirm that the sent document has been archived in SharePoint and can be associated with the
original document.
12.2 Detailed Component Testing
This section contains instructions for how to test specific components of the Zetadocs for NAV system.
Document Queue
This section details how to test that the Document Queue is functioning correctly. The following tests are
valid for both the Sales Document Queue and the Purchase Document Queue. The terminology ‚Zetadocs
Document Queue‛ in this section is used to describe both document queues.
Check Scanning (Optional)
If a scanning device is connected, perform the following checks to ensure correct operation.
Click the Queue Scan... button to initiate scanning which uses the Zetadocs client settings.
Scan a document; once scan is complete the user should be prompted to name the document.
Figure 30 – Enter Scanned Document Name

Zetadocs for NAV Installation Guide
Testing the Zetadocs for NAV Solution
This edition 18/11/2009 © Copyright Equisys plc 2009 All trademarks acknowledged All rights reserved Page 46
Upon Save, the scanned document name should appear in the Zetadocs Document Queue as the
latest entry. The file (typically ‚filename.pdf‛) should also be in the Zetadocs Document Queue
shared folder location.
Check Shared Location Updating
Create an email with an attachment and save it as a .msg file into the Zetadocs Document Queue’s
shared folder location.
Select the QueueRefresh menu button and ensure that the saved email.msg file is now in the
Document Queue converted into pdf format.
Select the entry in the Zetadocs Document Queue and click ItemView, ensure that the item is
viewable in pdf format
Select the entry in the Zetadocs Document Queue and click ItemView Original, ensure that the
item is viewable in its original format.
Check Printing
Select the scanned .pdf file and click ItemPrint, when prompted select a physical printer and
click print. Ensure that the document prints to the printer.
Select the recently added email with attachment(s) now stored as a pdf file and click ItemPrint,
when prompted select a physical printer and click Print. Ensure that the document prints to the
printer and that the attachments are printed out also.
Check Delete
Select an entry in the Zetadocs Document Queue and click ItemDelete. Ensure that the
document is removed from the Queue and also that it successfully deletes the file from the
Zetadocs Document Queue network folder location.
Send to Zetadocs Client
The Zetadocs Client can deliver your NAV documents by email or fax and it can also send them to a physical
printer. You can setup the NAV Client to do that per Document Set and/or per Company (Customer or
Vendor). Setting up the Zetadocs System Rules for each Document Set or setting up the Zetadocs
Customer/Vendor Rules for each Document Set you can test where each Document Set will be delivered
and how.
Change the Delivery Address of the Default System Rule to Fax to test sending to a recipient by fax or
change the Delivery Address to Hard Copy to test printing a hard copy through the Zetadocs Client where
the template will be applied. Zetadocs for NAV can send a batch of NAV documents to independent
recipients. To test this feature create a number of Sales Orders and print them like in the previous example
described in the Full Cycle Scenario section. This time you will see the batch document in the Zetadocs
Client which it will include the Sales Orders from NAV Client with the templates applied. If you have the
‚Preview Documents in Zetadocs Client Before Sending‛ option unchecked the Zetadocs Client will begin
sending all the documents in the batch automatically after loading the batch. It is suggested you leave it
checked until familiar with the printing and sending.
Zetadocs Rules
Zetadocs for NAV has the ability to create rules to determine the way a NAV document will be send and to
whom depending on certain circumstances. Zetadocs System Rules are the Level 1 and 2 rules. Zetadocs
Customer/Vendor Rules are the Level 3 and 4 rules. The Default System Rule set up for the Full Cycle
Scenario section is Level 1 rule. Let’s test the rest of the rule levels.
Level 2 Rule Test
Create a Document Set and name it Invoice.
Add the Invoice template you created earlier in the Zetadocs Template List.
Create a Zetadocs System Rule and select the Document Set to be the new Invoice and set the
Template to be the Invoice template.

Zetadocs for NAV Installation Guide
Testing the Zetadocs for NAV Solution
This edition 18/11/2009 © Copyright Equisys plc 2009 All trademarks acknowledged All rights reserved Page 47
Figure 31 - System Rule Invoice
Print a NAV Invoice and check in the Zetadocs Client that the Template Invoice has been applied.
Level 3 Rule Test
Go to the Customer Card with whom you have made an order.
Click the Customer Button and select Zetadocs Rules.
The Zetadocs Customer Rule Card will open.
Select the Delivery Tab and select a sending option other than Use Default and/or change the
delivery address (by changing any of those settings on that page you create a Level 3 Rule for that
customer).
Figure 32 - Customer Card - Zetadocs Tab page
Send an Order to this customer and check that the NAV document has been delivered to the correct
recipient.

Zetadocs for NAV Installation Guide
Migrating to the live database
This edition 18/11/2009 © Copyright Equisys plc 2009 All trademarks acknowledged All rights reserved Page 48
Level 4 Rule Test
Go to the Customer Card whose Customer you have made an order.
Click the Customer Button and select Zetadocs Rules.
The Zetadocs Customer Rule Card will open.
Create a Customer Rule (Level 4 rule) for this particular customer.
Print a NAV document and check in the Zetadocs Client that the appropriate settings from that
Customer Rule have been applied.
13. Migrating to the live database
At this stage the system configuration and testing to ensure that your system operates as expected should
be complete. If you have been performing these steps on a test version of your system you can now migrate
it to the live database. The process is very similar to the steps taken in sections 7 and 8 save that the
configuration file that you will be importing is now configured to your requirements.
This requires a number of steps:
Exporting the Configuration
Exporting any Modified Forms, Tables or Reports
Importing the Zetadocs for NAV Objects
Importing any Modified Forms, Tables or Reports
Importing the xml file with your configuration
13.1 Exporting the Configuration
The Zetadocs Configuration Export form will export all of the configuration data specific to Zetadocs, if you
have modified data in other tables this will not be exported.
From the Navigation pane select the Administration option.
From the options that appear, select Application Setup and then Zetadocs Setup.
Select the Zetadocs Configuration Export option.
In the window that appears select a suitable name and location for your configuration export and
click Export.
13.2 Exporting any Modified Forms, Tables or Reports
If you have modified any forms or tables as part of your install then there are a number of ways for this to
be implemented on your live system. Firstly you can repeat the instructions in chapter 8 to import the
provided table and form fob files, secondly you can manually perform the changes as per the instructions in
chapter 8. Finally you can export the tables and forms in question and import them to your live system.
If you have any reports that you have modified to work with Zetadocs (e.g. those not supplied as standard)
these too can be exported from your test system and then imported into the live system.
13.3 Importing Zetadocs to the Live NAV System
The steps to import the Zetadocs for NAV system to your live system are the same as those utilised earlier
in chapter Error! Reference source not found. save that different files are imported. Instead of importing the
config.xml file and tables/forms.fob files straight from the Zetadocs for NAV CD you simply select the
configuration xml file you created during the export and any modified versions of your tables and forms. The
steps below outline this process, for more in depth instructions please review chapters Error! Reference
source not found. and 8.
Backup the existing NAV Objects.
Import the Zetadocs for NAV Objects file relevant to your language and NAV version from the
product CD.
Import any modified reports.
If you are using Document Archiving import the Zetadocs for NAV v3.0 Interfaces (Tables) fob file
relevant to your language and NAV version from your product CD or import the modified tables
from your test system.

Zetadocs for NAV Installation Guide
Routine Activities
This edition 18/11/2009 © Copyright Equisys plc 2009 All trademarks acknowledged All rights reserved Page 49
If you are using SharePoint Archiving import the Zetadocs for NAV v3.0 Interfaces (Forms) fob file
relevant to your language and NAV version from your product CD or import the modified forms from
your test system.
Import the xml file with your configuration from the test system.
Copy across any your Zetadocs Templates.
Once you have imported the configuration you should perform a series of tests see chapter 12 for suitable
examples.
14. Routine Activities
This section contains details on performing routine tasks and other procedures which may be required to
maintain an operable system.
14.1 Operational Checklist
Use these checklists periodically to record operations.
Checklist: System Operation
Follow the checklist to verify system operation.
Completed Task
Check the operation of each Zetadocs enabled NAV report.
Check and verify that messages print to the Zetadocs Client successfully.
Check and verify that messages deliver successfully.
Check and verify that messages archive successfully.
Check the number of documents printed, delivered and archived match.
Check the operation of each Zetadocs enabled NAV report.
Checklist: Event Logs
Check event logs using the following checklist.
Completed Task
Filter application and system logs on each NAV Client to see all Zetadocs errors Note
repetitive warning and error logs.
Filter application and system logs on the SharePoint server to see all Office SharePoint
search and crawl errors. Note repetitive warning and error logs
Respond to discovered failures and problems with the aid of the Troubleshooting section of
this guide.
Checklist: Check NAV and SharePoint Backups
Complete this checklist to check supporting systems backups.
Completed Task
Ensure that the recommended minimum backup strategy - a daily online backup - is
completed.
Verify that the previous backup operation completed.
Analyze and respond to errors and warnings during the backup operation.
Follow the established procedure for tape rotation, labeling, and storage.
Verify that the transaction logs were successfully purged (if your backup type is purging
logs).
Make sure that backups complete under service level agreements (SLA).
14.2 Security Hardening
Zetadocs for NAV provides the ability to print and send NAV information and in that respect consideration
should be made as to ensuring the safety of both the information and the method of delivery. As Zetadocs
integrates with Microsoft Dynamics NAV and Microsoft Office Outlook as standard for the source and
destination of the information attention should be paid to the access permissions with NAV to particular
data. Overall best practices should be followed for the deployment of NAV and Office Outlook.

Zetadocs for NAV Installation Guide
Routine Activities
This edition 18/11/2009 © Copyright Equisys plc 2009 All trademarks acknowledged All rights reserved Page 50
Similarly the setup and configuration forms within Zetadocs for NAV are recommended for access only by an
NAV Administrator and therefore access permission roles should be set up to this effect as with the other
areas of NAV. For general advice on Security Hardening for NAV and other general recommendations please
refer to the ‚Navision Security Hardening Guide‛ which is downloadable from
http://www.mibuso.com/dlinfo.asp?FileID=474 .
Zetadocs Setup
Some features of Zetadocs for NAV involve the use of shared network folders. It is strongly recommended
that only the necessary users are granted access to these folders. Examples of these are: Zetadocs
Template folders, Zetadocs Document Queue folders.
The Zetadocs Configuration, which contains details of enabled users, license and location of shared
network folders, is stored in the domain partition of Active Directory. Optionally this configuration can be
stored on a network share; it is also strongly recommended that only the necessary users are granted
access to this folder.
SharePoint Security
If integrating with Microsoft SharePoint as a document archive, consideration should be made as to the
access permissions of users to view potentially sensitive archived information. For general security
recommendations for Microsoft SharePoint Server please refer to Microsoft documentation. Some
information on security hardening can be found here http://technet.microsoft.com/en-
us/library/cc262849.aspx .
From Zetadocs for NAV, rules can be setup to change the archive location of documents dependant on type
and with the use of the Zetadocs SDK granule and writing some code in the Zetadocs-Customization
codeunit per record archive locations can be set dependant on content. For this reason it is recommended
to consider access permissions when creating the Zetadocs System Rules.
14.3 Performing a Zetadocs for NAV Backup
This section describes how to perform backups of a Zetadocs for Microsoft Dynamics NAV system. This
enables you to safeguard your organizations information resources by holding extra copies in secure
locations and enables you to restore your systems following problems with the original data.
How Zetadocs for NAV Backup integrates with NAV Backup
Zetadocs for NAV has additional tables contained within NAV which when NAV is fully backed up will also be
included within the backup meaning that there is no additional overhead in performing the standard
operation. There are however elements to Zetadocs for NAV which exist separately from NAV which will
require additional steps to include in a complete backup.
Document Queues ” The Zetadocs Document Queues are centralized folders for processing documents
from, in essence a virtual in tray. The Zetadocs Document Queues operates by accessing a shared network
folders which contains documents received by NAV via email, fax or scanned from hard copy sources. As the
folder is not part of NAV it will not be backed up during an NAV backup as such it is desirable to backup the
network folders separately.
SharePoint Archive ” If the archiving options in Zetadocs have been configured to archive documents into a
SharePoint archive then this to would need to be backed up separately as well to ensure that the record of
processed documents is not lost. The backup of this data falls under the standard backup of a SharePoint
system and therefore may be part of your existing backup procedure.
Preparations before Backing up
It is important to have a clear strategy for dealing with system backups as it is both business critical and
also a legal requirement that backups of essential business data be kept. There are obviously a number of
decisions to be made when backing up:
Identify the data to be backed up
Frequency and Timing of the Backup
Storage Format
Storage Location

Zetadocs for NAV Installation Guide
Routine Activities
This edition 18/11/2009 © Copyright Equisys plc 2009 All trademarks acknowledged All rights reserved Page 51
Performing an NAV System Backup
To perform a backup follow the standard NAV backup instructions, a full system backup will include both
NAV and the Zetadocs elements integrated into NAV.
Backing up the Zetadocs Document Queues
To backup the document queues you need to simply locate the network folders and copy those folders to
the assigned storage location for your backup.
Locate the network folders which contain the contents of your document queues. This will be
specified in the Zetadocs Sales Document Queue Form shown below and the Zetadocs Purchase
Document Queue Form.
Figure 33 - Zetadocs Purchase Document Queue Setup
Copy the folders (or the specific elements you desire) to your backup storage location.
Backing up your SharePoint System
Backup of all SharePoint site and document libraries for Zetadocs for NAV are covered in a standard
Microsoft SharePoint backup. For more information please refer to:
SharePoint MOSS: Administering backup and recovery for Office SharePoint Server 2007
SharePoint WSS: Administering backup and recovery for Windows SharePoint Services 3.0
Restoring a Zetadocs for NAV system
To restore your Zetadocs for NAV system following problems with the original data you need to restore 3
separate elements. The NAV system backup itself which contains the additional Zetadocs elements, the
document queue backup and the SharePoint archive.
Preparations for Restoring your System
It is important to have a clear strategy for dealing with system restorations as it is critical to the business
that the system can be restored. There are obviously a number of decisions to be made when restoring the
system:
Identify the storage location for the backup
Identify which backup data set is to be restored
Restoring your Zetadocs for NAV System
At some point you may need to restore your system using a backup, this will restore the Zetadocs for NAV
system excluding the document queue and the SharePoint archive which will be covered later in this guide.
To restore your system follow the standard restore instructions as laid down in NAV.
Backups that were exported with the Microsoft Dynamics NAV backup facility can be imported by using
Tools, Restore. You should always restore the database backup into a new (empty) database.
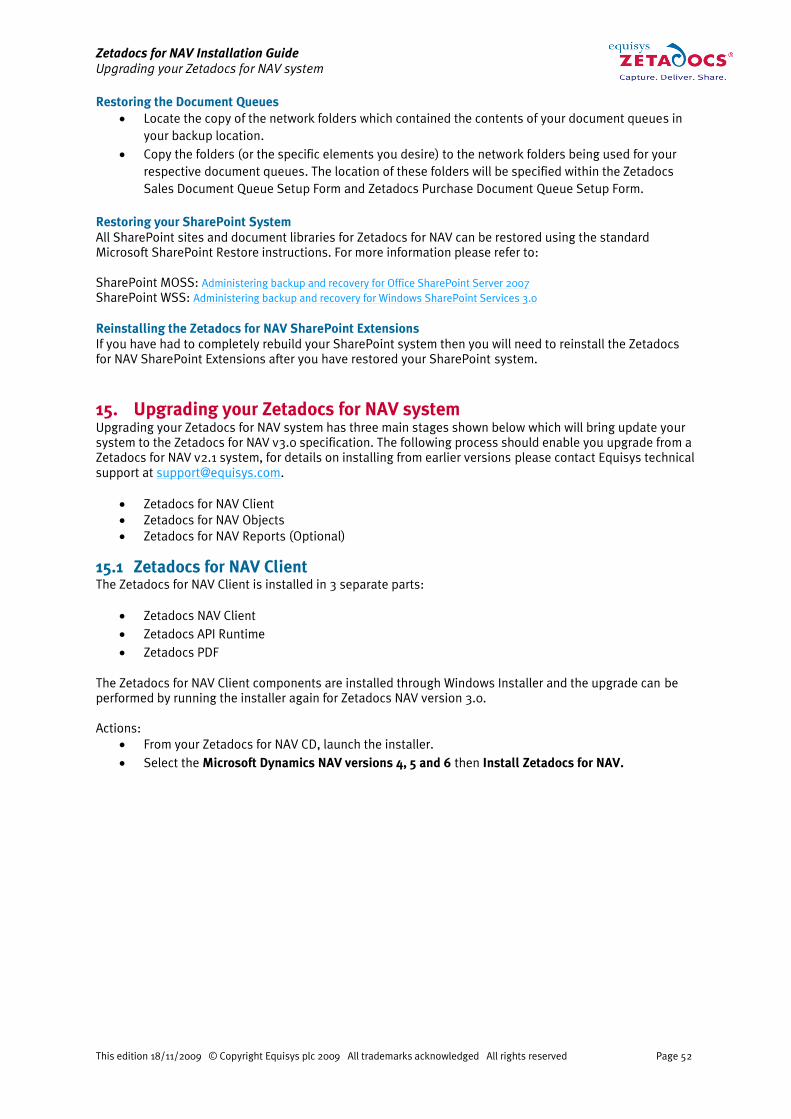
Zetadocs for NAV Installation Guide
Upgrading your Zetadocs for NAV system
This edition 18/11/2009 © Copyright Equisys plc 2009 All trademarks acknowledged All rights reserved Page 52
Restoring the Document Queues
Locate the copy of the network folders which contained the contents of your document queues in
your backup location.
Copy the folders (or the specific elements you desire) to the network folders being used for your
respective document queues. The location of these folders will be specified within the Zetadocs
Sales Document Queue Setup Form and Zetadocs Purchase Document Queue Setup Form.
Restoring your SharePoint System
All SharePoint sites and document libraries for Zetadocs for NAV can be restored using the standard
Microsoft SharePoint Restore instructions. For more information please refer to:
SharePoint MOSS: Administering backup and recovery for Office SharePoint Server 2007
SharePoint WSS: Administering backup and recovery for Windows SharePoint Services 3.0
Reinstalling the Zetadocs for NAV SharePoint Extensions
If you have had to completely rebuild your SharePoint system then you will need to reinstall the Zetadocs
for NAV SharePoint Extensions after you have restored your SharePoint system.
15. Upgrading your Zetadocs for NAV system
Upgrading your Zetadocs for NAV system has three main stages shown below which will bring update your
system to the Zetadocs for NAV v3.0 specification. The following process should enable you upgrade from a
Zetadocs for NAV v2.1 system, for details on installing from earlier versions please contact Equisys technical
support at [email protected].
Zetadocs for NAV Client
Zetadocs for NAV Objects
Zetadocs for NAV Reports (Optional)
15.1 Zetadocs for NAV Client
The Zetadocs for NAV Client is installed in 3 separate parts:
Zetadocs NAV Client
Zetadocs API Runtime
Zetadocs PDF
The Zetadocs for NAV Client components are installed through Windows Installer and the upgrade can be
performed by running the installer again for Zetadocs NAV version 3.0.
Actions:
From your Zetadocs for NAV CD, launch the installer.
Select the Microsoft Dynamics NAV versions 4, 5 and 6 then Install Zetadocs for NAV.

Zetadocs for NAV Installation Guide
Upgrading your Zetadocs for NAV system
This edition 18/11/2009 © Copyright Equisys plc 2009 All trademarks acknowledged All rights reserved Page 53
Figure 34 - Zetadocs for NAV Installer
Select the Zetadocs for NAV Client (32 or 64 bit) option relevant to your operating environment.
You may be asked if you want to perform an upgrade of Zetadocs NAV Client. Select Yes.
Figure 35 - Zetadocs for NAV Client Upgrade
Follow the instructions of the installer and select Yes when asked to perform an upgrade of the
Zetadocs NAV Client prerequisites (Zetadocs PDF and Zetadocs API Runtime).
During the Zetadocs for NAV Client install you will see the following dialog:

Zetadocs for NAV Installation Guide
Upgrading your Zetadocs for NAV system
This edition 18/11/2009 © Copyright Equisys plc 2009 All trademarks acknowledged All rights reserved Page 54
Figure 36 - Select Install Type
Select Typical if you are upgrading a network user.
Select Custom if you are upgrading the server installation.
Should you want to use your existing Zetadocs Document Queue and templates shared folders you
need to disable the Document Queue folder and Zetadocs Template creation options.
Select Next to continue.
Figure 37 - Network Folder Locations
Once the installation is finished, ensure that your license information is still valid for the version of
Zetadocs that you are using. You can validate your license by using the Zetadocs PDF Configuration
program.

Zetadocs for NAV Installation Guide
Upgrading your Zetadocs for NAV system
This edition 18/11/2009 © Copyright Equisys plc 2009 All trademarks acknowledged All rights reserved Page 55
15.2 Zetadocs for NAV Objects
Most of the configuration for Zetadocs version 2.1 will work for Zetadocs v3.0 once the new objects are
imported, but we strongly recommend that the current configuration is backed up for security reasons. The
following steps will tell you how to backup the Zetadocs for NAV objects before you upgrade.
Actions:
Open the NAV Client and log on to the database.
Navigate to the Zetadocs Administration section (Administration Tab Application Setup
Zetadocs Setup).
Run the Zetadocs Report Settings form.
Press Ctrl + A to select all records and then press CTRL + E to export the records to an Excel file for
backup. Save the Excel file as a backup of your reports configuration. Alternatively you can export
to Notepad or WordPad should Excel not be available.
Repeat steps 3 and 4 for the Zetadocs Company Types form, the Zetadocs System Rules form, the
Zetadocs Customer Rules form, the Zetadocs Vendor Rules form, the Zetadocs Templates form
and the Zetadocs Document Sets form in that order. Note that you will not be able to delete the
default document set.
Note that all the reports that were created for Zetadocs version 2.1 will work with Zetadocs version 3.0
without any modifications. Therefore, there is no need to export them during the upgrade process.
You are now ready to import the Zetadocs for NAV 3.0 objects in your database. The instructions given here
are for NAV 5.0. You must pick the file that’s appropriate for the version of NAV you are using.
Actions:
From NAV, import the Zetadocs for NAV 3.0 Objects ” NAV5.00.fob file. You will be prompted to
open the Import Worksheet.
Figure 38 - Objects Import
Once in the Import Worksheet, do not merge the new tables with the existing ones, you must
replace them. Ensure that all objects will be replaced. Note that the v3.0 menusuite will be
imported as part of the upgrade. This new menusuite contains links to the new report printing
objects. If you do not intend to upgrade to these new reports then you may want to delete these
menu items from the menusuite after import. These are the ‚Documents by E-mail and Fax‛ menu
items in ‚Order Processing‛ of ‚Sales and Marketing‛ and ‚Purchase‛.

Zetadocs for NAV Installation Guide
Uninstalling Zetadocs for NAV
This edition 18/11/2009 © Copyright Equisys plc 2009 All trademarks acknowledged All rights reserved Page 56
Figure 39 - Documents by E-mail and Fax Menu item
Once all the Zetadocs for NAV objects have been imported, ensure that the existing configuration has been
kept intact by going through the forms of the Zetadocs application setup. Recover configuration from the
backup excel spreadsheet if needed.
15.3 NAV Reports
If upgrading from Zetadocs for NAV 2.1 all reports that have been modified for Zetadocs for NAV will work
consistently with version 3.0 and require no modifications.
Note: That you should not select any of your existing modified reports from the Zetadocs Reports Selection
Form as this could potentially result in duplication of the Zetadocs Embedded Commands and
delivery/archiving problems.
15.4 Upgrading other Zetadocs Components
Zetadocs has a number of other components that can be installed as part of a Zetadocs for NAV system.
These are the Zetadocs for NAV SharePoint Extensions and the Zetadocs Server upgrade, should either of
these require upgrading please refer to their specific installation guides.
16. Uninstalling Zetadocs for NAV
16.1 Uninstallation Overview
This section gives an overview of the uninstallation process. Each step is covered in more detail in the
following sections of this manual. It is recommended that you follow these steps in order.
Rollback of NAV Reports
Uninstalling the Zetadocs for NAV Objects
o Remove the Zetadocs for NAV objects and existing object modifications from within
Microsoft Dynamics NAV.
Uninstalling the Zetadocs for NAV Client
Uninstalling the Zetadocs SharePoint Extensions (Optional- may not have been installed)
o Removal of the Zetadocs Archive Document library and uninstallation of the Zetadocs for
NAV search web parts.
Verify all components have been removed successfully

Zetadocs for NAV Installation Guide
Uninstalling Zetadocs for NAV
This edition 18/11/2009 © Copyright Equisys plc 2009 All trademarks acknowledged All rights reserved Page 57
16.2 Rollback of NAV Reports
To restore you original report versions you should have either backed up the original versions of your
reports or you produced new versions of your existing reports with different report ID’s.
Different Report ID’s
Open the Navision client and connect to/open the Navision database.
Open the Object Designer (ToolsObject Designer).
Click the Report button on the Object Designer.
Set a filter *EQ* on the Version List column.
Select all Zetadocs reports (CTRL+ A).
Click on Delete in the Toolbar (F4).
Click Yes to delete selected lines.
Restoring Backed Up Reports
Open the Navision client and connect to/open the Navision database.
Open the Object Designer (ToolsObject Designer).
Select Import Objects in file menu (FileImport).
Find and select the Backup of Reports before Zetadocs for NAV3.0.fob file.
Choose Yes to import all objects.
Click No to open Import Worksheet.
Click Replace All.
Click Ok.
16.3 Removing Zetadocs for NAV Objects
This section details the removal of Zetadocs for NAV objects and editing restored NAV objects back to their
original configuration.
Removing changes to existing NAV objects
Before you can import the old object versions you must clear all values in the Zetadocs archive id field in all
tables modified by Zetadocs for NAV. A function has been created to help do this in the Zetadocs
Integration code unit (9009959). The function is called RemoveArchiveIDFromTables and takes one boolean
parameter. If this parameter is set to true, the function will expect all archive id fields to have the number
9009959. If the parameter is false the function will cycle through all tables and all fields looking for the
Zetadocs Archive ID field and clearing it out.
Warning, once this function has been run there will be no way to recover the Zetadocs Archive IDs that have
been lost and therefore there will be no link between NAV records and reports archived to SharePoint.
To call this function it is suggested that you do the following:
Create a new form.
Add a button to the form.
In C/AL Globals, add a variable called ZDInt of type codeunit with a subtype of Zetadocs-
Integration.
In the on push event for the button add the following code:
ZDInt.RemoveArchiveIDFromTables(TRUE);
Save and compile the form.
Run the form and press the button. You will be prompted if you want to continue. Press Yes if you
want to proceed. The Zetadocs Archive ID fields will now have been cleared.
Delete the form that you just created.
Importing the Backed up objects
Open the Navision client and connect to/open the Navision database.
Open the Object Designer (ToolObject Designer).
Select Import Objects in file menu (FileImport).
Find and select the Backup of Objects before Zetadocs for NAV3.0.fob file.
Choose Yes to import all objects.
Click No to open Import Worksheet.
Put an *EQ* filter on column Existing Object Version List.
Click Replace All.

Zetadocs for NAV Installation Guide
Uninstalling Zetadocs for NAV
This edition 18/11/2009 © Copyright Equisys plc 2009 All trademarks acknowledged All rights reserved Page 58
Click Ok.
Uninstalling the Zetadocs for NAV Objects
Click on the All button in the Object Designer menu.
Put an *EQ*filter on column Version List.
o Compare the remaining object list with the object list table in the Appendix to ensure you will
not delete tables unnecessarily.
Select table Zetadocs Settings (9009959)
Perform the next steps for all Zetadocs for NAV tables in the following order:
o 9009963 to 9009982
o 9009960 to 9009962
Click Run.
Select all lines (CTRL + A).
Click on Delete in the Toolbar (F4).
Click Yes to delete selected lines.
Close Table Run (Esc).
Once this has been complete for all tables in the specified ranges.
Select all Zetadocs for NAV objects (CTRL+ A).
Click on Delete in the Toolbar (F4).
Click Yes to delete selected lines.
Note: You may not have permissions to delete all the objects, such as some codeunits. In this case it is ok
to leave the codeunits on the system as they will not be used.
16.4 Uninstalling the Zetadocs Client
This section describes how to uninstall the client applications which include the Zetadocs Client, the
runtime API and the NAV Extensions. The Zetadocs for NAV Client installation is performed using a
combination of installers. You will need to uninstall each of these to remove the Zetadocs for NAV Client.
You will need to uninstall the Zetadocs for NAV and the two pre-requisites, the Zetadocs Client and
Zetadocs API runtime.
Figure 40 - Add Remove Programs
Open Add/Remove programs (Windows XP) or Programs and Features (Windows Vista) or other
uninstallation utility relevant to the environment you are operating in.
Select Zetadocs NAV Client from the program list and select uninstall.
Select Zetadocs PDF from the program list and select uninstall.
Select Zetadocs API Runtime from the program list and select uninstall.
16.5 Uninstall Zetadocs for NAV Client Help Files
The Zetadocs for NAV help files should have been copied to the Microsoft Dynamics NAV help folder and
given names that will not clash with other help files.
These files were originally:

Zetadocs for NAV Installation Guide
Architecture Overview
This edition 18/11/2009 © Copyright Equisys plc 2009 All trademarks acknowledged All rights reserved Page 59
addin_a.chm
addin_a.hh
This folder may have contained other help files which may have used the ‘a’ post-fix name. As such you
should select and open the addin_a.chm file and identify whether it is the Zetadocs for NAV help file. If it is
not then try the next unused post-fix letter between a and j until you locate the Zetadocs for NAV help files.
Note that the post-fix on both file names must match. (e.g. addin_f.chm and addin_f.hh) Once identified
these files should be deleted from:
Program Files\Microsoft Dynamics NAV\CSIDE Client\ENG
Or removed from the equivalent installation folder of Microsoft Dynamics NAV on the machine.
17. Architecture Overview
The Zetadocs for NAV Addin can be split into 2 main areas, data and processing. The installation guide dealt
primarily with setting up the data that would determine our report formatting and send information when
sent to the Zetadocs Client. We saw how reports could be grouped into Document Sets which share a
common rule for formatting and archiving and we saw how rules can be stored which alter formatting and
send information dependant on who we were sending to. It is assumed then that we have a good
understanding of the information involved in sending a report using Zetadocs for NAV. In this architectural
overview the process of collating the sending information, which we refer to as the ‚Send Results‛, is
explained. This includes a breakdown of the main processing areas and their use in integrating with NAV as
well as an insight into the customization potential and extensibility of Zetadocs for NAV.
17.1 Typeless Public and Private Code
The Zetadocs for NAV processing code is split into two categories, public and private. Public being NAV
objects that we have installed which are editable by a VAR, and private, the objects that are not editable.
This is more commonly known in NAV as having ‚Modify‛ rights on the codeunit or not. The code is also
written so that it is typeless, meaning it is not compiled against specific tables in NAV, all data access is
done using table and field references and therefore the code is adaptable to work with any data set. This
concept will become clearer as we progress through the examples in this document. The core processing
codeunits of Zetadocs for NAV are private as this allows us to be able to provide upgradable object versions
of our core processing engine without additional work necessary from a VAR to copy and reconfigure
customization they have made. To ensure that we still remain a highly customizable solution we ensure that
all our processing data is typeless and all interactions with existing NAV data and objects remain public,
and are therefore editable by a VAR.
17.2 Data Processing Flow
Now let’s look at the flow of data that occurs when sending a report. The following diagram helps to
visualize the process and will aid us in discussing the relevant parts of the product.
As you can see from the diagram it starts with a NAV report that has been modified for Zetadocs for NAV. A
report is generally based on a set of records that are used to produce some report output, a document for
each record. The records contain information that relates to a contact and possibly a company, to whom the
report should be sent (i.e. the recipient). Sometimes that information can be a direct table reference to an
existing table that represents a contact or company for example, or it may contain some other form of
references which can be used to find the contact information from another source. This could be a look up
table of some sort based on some bespoke logic. The Zetadocs Send Results Gen codeunit is the central
processing controller and builds a runtime list of send results in a temporary table of type ‚Zetadocs Send
Result‛ for each record in the report.

Zetadocs for NAV Installation Guide
Architecture Overview
This edition 18/11/2009 © Copyright Equisys plc 2009 All trademarks acknowledged All rights reserved Page 60
Zetadocs
Integration
Zetadocs
Customization
Codeunit
Zetadocs Send Results Gen
Zetadocs Send
Results
Initialize
Add Record
ResolveSendInfo
GetEmbComms
TableTemporary Table
NAV Report
Records
NAV Tables
TableTable
Table
Zetadocs Settings
Tables
1.
3.
2.
4.3
.
3. 4.
Data Query
Records
(Filtered Table)
Integration
Functions
Override
Functions
Notation
Private Public
Figure 41 - Zetadocs for NAV Architecture Diagram
Interfacing with the Zetadocs Send Results Gen codeunit (1.)
A report modified for Zetadocs for NAV will call the four trigger functions on the Zetadocs Send Results Gen
codeunit. Firstly, Initialize (1.) is called to set the report that is being printed. The initialization information
allows us to determine what report settings, if any, have been specified (2.). After initialization we start to
process individual record specifics. Each record reference is passed to the send results codeunit by calling
AddRecord (1.). Each record is then processed to extract the contact information (3.). Depending on who the
company is we may apply specific rules covering how the contact or the template is determined. When all
rules and settings have been applied the ‚Zetadocs Customize‛ codeunit is called to offer overriding of the
result (4.) (This requires the Zetadocs for NAV SDK Granule). Once all the records have been added
ResolveSendInfo (1.) is called which will offer run-time user override and error resolution dialogs. The final

Zetadocs for NAV Installation Guide
Send Any Report
This edition 18/11/2009 © Copyright Equisys plc 2009 All trademarks acknowledged All rights reserved Page 61
step is for the report to request the formatted embedded commands text to print for each report by calling
GetEmbComms (1.). Once again a call is made to offer the ability to add additional embedded commands in
the Zetadocs-Customize codeunit (4.) before returning the full text of embedded commands to the report.
These embedded commands are then extracted by the Zetadocs Client after printing to the Zetadocs printer.
Querying the Zetadocs Settings (2.)
Based on the ID of the report that is being printed we can determine what template and archiving settings
to use for the report and potentially how to automatically find the company and contact references from the
report records. Internally the Zetadocs Send Results Gen codeunit will query the Zetadocs Report Settings
using the report ID. These settings control the flow of processing from this point on.
Figure 42 - Zetadocs Report Settings
Resolving the Company and Contact Information (3.)
This can happen in a number of ways depending on the Zetadocs Report Settings for that report. The report
settings control whether the Zetadocs Send Results Gen codeunit can copy the company and contact
references from a field in the record or whether it should call out to the ‚Zetadocs-Integration‛ codeunit for
the information. It is in this public codeunit that a VAR will implement their custom integration code for their
system. This is explained in more detail in a later section of this guide; however, this should highlight the
main purpose of the Zetadocs-Integration codeunit and the Zetadocs Send Result table being public. It
means that when we need to access data from typed NAV tables this code is exposed to the VAR developer
to allow them to integrate or customize successfully. The private Zetadocs Send Results Gen codeunit only
correlates and manages the data, unaware of its meaning (typelessly).
Overriding in Customize Codeunit (4.)
There is the ability to alter the Zetadocs Send Results record directly in this codeunit before continuing with
sending of a report. Each send result is passed to this codeunit by calling OverrideSendResult internally in
the Zetadocs Send Results Gen codeunit. This gives the VAR a great opportunity to implement customized
business logic above that offered by Zetadocs for NAV. An example would be altering the recipient (contact)
depending on the value of an order. The second potential customization is to add additional embedded
commands for tailoring email messages using dynamic fields in Zetadocs Templates or adding extra
metadata to be archived with the document.
17.3 Summary
Now that we have been introduced to the architectural overview of Zetadocs for NAV it should be easier for
us to understand the sections which follow and begin to allow us to imagine the potential customizations
and workflow that could be created with the Zetadocs for NAV Addin.
18. Send Any Report
In the installation guide we saw how to configure Zetadocs for NAV to send reports from the Sales Order
and Purchasing processes. We edited the NAV reports for Zetadocs for NAV and set the report settings to
point at the Customer or Vendor reference for that report and the respective Contact reference. With this
information Zetadocs for NAV was able to extract the references and query the names, email addresses and

Zetadocs for NAV Installation Guide
Send Any Report
This edition 18/11/2009 © Copyright Equisys plc 2009 All trademarks acknowledged All rights reserved Page 62
fax addresses of the contact, as well as, cross reference the company (Customer or Vendor) reference with
the associated Zetadocs Customer or Vendor rules tables to apply per company formatting and addressing
logic. This however is not the limit of Zetadocs for NAV functionality. This principle of field reference and
related information resolution can be applied to almost any report. In this section we will see how small
changes in the report settings can control and alter the information used to address, format, send and
archive a report using Zetadocs for NAV.
18.1 Permissions
Before we enable more reports for sending there are some permission considerations to consider. The
Zetadocs-Integration codeunit has a function that is called by the Zetadocs Send Results Gen codeunit to
set the Zetadocs Archive ID for any record being archived. This is here to allow a VAR to add to the
permissions of this public codeunit any tables they wish to send and archive using Zetadocs for NAV. For
this reason please follow these instructions for each report you wish to enable for archiving.
Determine the table type (<TableName>) of the record you are sending in the AddRecord command
in your report. (This is the record which will have the Zetadocs Archive ID set in it.)
Modify the table is the table designer. Add the ‚Zetadocs Archive ID‛ field (case sensitive, type
GUID)
Ensure that the field no. you choose for this field is the same as other tables in the posting line to
ensure correct copying of the archive id across the tables during posting.
Modify the permissions on the Zetadocs-Integration codeunit (9009963) to include ‚TableData
<TableName> =rm‛
18.2 Simply Send
Perhaps you have no requirement for the power of the rules support provided by Zetadocs for NAV for a
particular report or number of reports. You simply want to give your users the ability to manually address a
report at runtime using contact information in NAV and send using Zetadocs. For example you need to send
the Warehouse Shipping Status report to someone who does not have access to that report in NAV. This is
simply done by not associating the Zetadocs edited version of the report with any Zetadocs Document Set
in the Zetadocs Report Settings. The following instructions explain how to set this up.
1. Edit the desired report for Zetadocs for NAV (See the ‚Single Recipient‛ report style in section 21.)
2. Do not enter any report settings in the Zetadocs Report Settings for your modified report.
3. Set the printer selection for your modified report to Zetadocs (Administration\General\Printer
Selections in NAV).
Now when the report is run you should see the Zetadocs Delivery Dialog where you can select your
addressing and template information.

Zetadocs for NAV Installation Guide
Send Any Report
This edition 18/11/2009 © Copyright Equisys plc 2009 All trademarks acknowledged All rights reserved Page 63
Figure 43 - Zetadocs Delivery Dialog
18.3 Configured Send
It should be clear by now from the installation guide that by setting the ‚Company Type Code‛, ‚Company
No. Field No.‛ and ‚Contact No. Field No.‛ fields in the Zetadocs Report Settings that you can configure
Zetadocs for NAV to automatically resolve your contact information and apply company specific rules if they
exist. In this way it is possible to reference any fields which contain the right type of reference (i.e.
customer/vendor or contact etc). There is some logic to the application of these settings that is important to
know to help decide what settings to enter but it also gives the opportunity for some variations in
configuration.
Zetadocs Report Settings Field No.’s Reference Logic (Pseudo Code)
IF Company Type Code <> NULL THEN IF Company No. Field No. <> NULL THEN Get the Company No. from Record using Field No. ELSE CALL Integration codeunit GetCompanyForReport for VAR to get Company No. END END Send Result.VALIDATE(Company No., Company No. Value) IF Contact No. Field No. <> NULL THEN Get the Contact No. from Record using Field No. ELSE CALL Integration codeunit GetContactForReport for VAR to get Contact No. END Send Result.VALIDATE(Contact No., Contact No. Value) From this it is important to notice the order that validation happens in as this coordinates with the Zetadocs
Send Result table OnValidate trigger code for ‚Company No.‛ and ‚Contact No.‛. Since the company
information is validated first no contact reference will be set yet. We can check for this and default to using
the company’s communication information, later when the contact reference is validated we can override

Zetadocs for NAV Installation Guide
Send Any Report
This edition 18/11/2009 © Copyright Equisys plc 2009 All trademarks acknowledged All rights reserved Page 64
the addressing information (email, fax). This provides the fallback addressing logic of Zetadocs for NAV so
that if a record has a blank reference for a contact we will still end up with the company correspondence
information. This means that we can deliberately control what information is used by altering the settings. It
also means that this behavior can be customized by the VAR by implementing the get trigger functions in
the Zetadocs-Integration codeunit and/or changing the OnValidate triggers in the Zetadocs Send Result
table.
Company Type Code Company No. Field No. Contact No. Field No. Resulting Addressing
Info Used
SET SET SET Contact Info unless the
reference in record is
blank THEN Company
Info
SET NULL SET Contact Info unless the
reference in record is
blank THEN Company
Info using Company
Reference implemented
by VAR
SET NULL NULL Contact Info using
Contact Reference
Implemented by VAR
unless that reference is
blank THEN Company
Info using Company
Reference implemented
by VAR
NULL NULL SET Contact Info
NULL SET SET/NULL Invalid ” You must
specify a company type
to enable use of
company field.
Table - Zetadocs Report Settings Addressing Information Control Options
To get a strong understanding of this it is recommended that you review the OnValidate triggers for
‚Company No.‛ and ‚Contact No.‛ in the Zetadocs Send Result table and familiarize yourself with the
trigger functions in the Zetadocs-Integration codeunit. These are explained in detail in the next section.
18.4 Custom Send
We saw in the last section how selecting certain report settings can control the flow of the operation of the
Zetadocs processing codeunits. By exploiting these settings and implementing the trigger functions in the
Zetadocs-Integration codeunit we can highly customize our report sending. In this section we will focus on
the trigger functions in the Zetadocs-Integration codeunit and explain how they can be used.
GetZetadocsArchiveID
WARNING: This function should be left unchanged. It is only exposed in this codeunit to allow a VAR to add
additional permissions to the codeunit for reading and writing the Zetadocs Archive ID value to and from
additional tables!
OverrideSendSettings
Apart from setting up the company and contact field number references in the Zetadocs Report Settings
there are a number of other options that control the display options and the report batch information
settings. During the Initialize function (See Architecture Overview) these settings are copied in to a
temporary table called the Zetadocs Send Settings. This gives us the ability to adjust these settings at
runtime. Once the report settings have been copied into the temporary send settings table described, the
Zetadocs Send Results Gen codeunit calls the OverrideSendSettings trigger function in the Zetadocs-
Integration codeunit. Here you can modify the settings based on some logic for that send instance. Let’s
have a look at the Zetadocs Send Settings table.
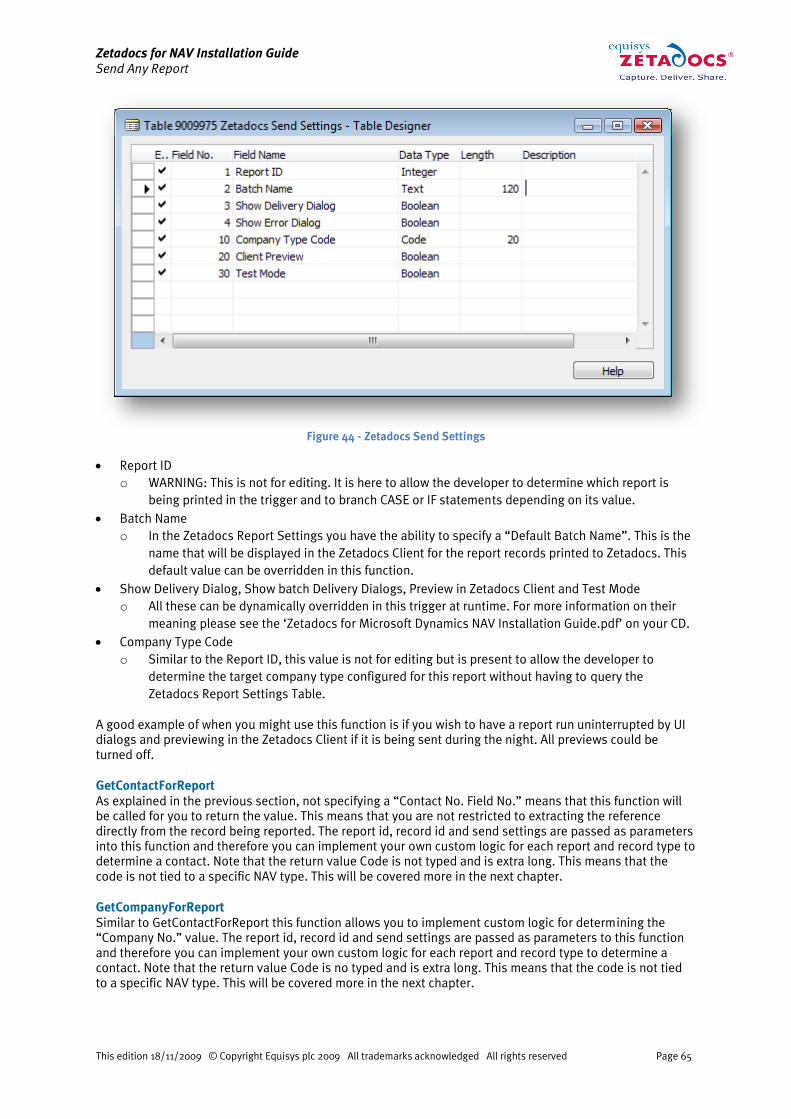
Zetadocs for NAV Installation Guide
Send Any Report
This edition 18/11/2009 © Copyright Equisys plc 2009 All trademarks acknowledged All rights reserved Page 65
Figure 44 - Zetadocs Send Settings
Report ID
o WARNING: This is not for editing. It is here to allow the developer to determine which report is
being printed in the trigger and to branch CASE or IF statements depending on its value.
Batch Name
o In the Zetadocs Report Settings you have the ability to specify a ‚Default Batch Name‛. This is the
name that will be displayed in the Zetadocs Client for the report records printed to Zetadocs. This
default value can be overridden in this function.
Show Delivery Dialog, Show batch Delivery Dialogs, Preview in Zetadocs Client and Test Mode
o All these can be dynamically overridden in this trigger at runtime. For more information on their
meaning please see the ‘Zetadocs for Microsoft Dynamics NAV Installation Guide.pdf’ on your CD.
Company Type Code
o Similar to the Report ID, this value is not for editing but is present to allow the developer to
determine the target company type configured for this report without having to query the
Zetadocs Report Settings Table.
A good example of when you might use this function is if you wish to have a report run uninterrupted by UI
dialogs and previewing in the Zetadocs Client if it is being sent during the night. All previews could be
turned off.
GetContactForReport
As explained in the previous section, not specifying a ‚Contact No. Field No.‛ means that this function will
be called for you to return the value. This means that you are not restricted to extracting the reference
directly from the record being reported. The report id, record id and send settings are passed as parameters
into this function and therefore you can implement your own custom logic for each report and record type to
determine a contact. Note that the return value Code is not typed and is extra long. This means that the
code is not tied to a specific NAV type. This will be covered more in the next chapter.
GetCompanyForReport
Similar to GetContactForReport this function allows you to implement custom logic for determining the
‚Company No.‛ value. The report id, record id and send settings are passed as parameters to this function
and therefore you can implement your own custom logic for each report and record type to determine a
contact. Note that the return value Code is no typed and is extra long. This means that the code is not tied
to a specific NAV type. This will be covered more in the next chapter.

Zetadocs for NAV Installation Guide
Send Any Report
This edition 18/11/2009 © Copyright Equisys plc 2009 All trademarks acknowledged All rights reserved Page 66
GetHardCopyPrinter
This function is always called to get the printer to use for the current user when the delivery method is set
to ‚Hard Copy‛. It defaults to using the NAV Printer Selections setting for that user for that report otherwise
it uses the user’s system default printer. It is provided here to allow you to change this logic.
GetOutputFileName
When a report is printed to Zetadocs, converted to a pdf and sent to a recipient it is desirable to be able to
name that pdf file something relevant. This function is called from the AddRecord function in the Zetadocs
Send Results Gen codeunit (i.e. once per report record) to allow you to specify independent file names.
GetRecordNoForReport
Similar to the Company No. Field No. and Contact No. Field No. settings in the Zetadocs Report Settings
there is an option to specify the Record No. Field No. This field’s purpose is primarily for customizing
Zetadocs message content. For example it is often desirable to include a Ref. number in the subject of email
correspondence. This can be set by adding %%[ZetadocsRecordNo] into the subject of a Zetadocs Template.
Figure 45 - Zetadocs Template Wizard
Once again this field no. reference setting operates similar to Contact No. Field No. such that if the field is
left blank in the Zetadocs Report Settings then this function will be called from the AddRecord function in
the Zetadocs Send Results Gen codeunit. This may be necessary if your reference number is composed of
more than one field value. If so these field values could be concatenated and returned from this function.
GetCompanyRule
This function is exposed here for a number of reasons. Firstly it allows the customization of rules
dynamically at runtime but primarily it can used in conjunction with the Company Type Code to provide
company rules for bespoke company types (i.e. types other than Customer and Vendor). This is explained in
more detail in the next chapter. The important thing to note about this function is the parameter that is
passed. The ‚Zetadocs Company Rule‛ is another temporary table maintained in the Zetadocs Send Results
Gen codeunit. This is used to get the rule override information irrespective of the company type. This will
become clearer in the next chapter. It is recommended that you review the implementation of this trigger
function in the Zetadocs-Integration codeunit to further your understanding.

Zetadocs for NAV Installation Guide
Bespoke Contacts and Company Types
This edition 18/11/2009 © Copyright Equisys plc 2009 All trademarks acknowledged All rights reserved Page 67
19. Bespoke Contacts and Company Types
Due to the nature of NAV system installations and the hugely customizable potential it is acceptable that
some systems may or may not use the company tables ‚18 Customer‛ and ‚23 Vendor‛. Similarly some
systems may not use the Contact Management Module or the native NAV ‚5050 Contact‛ table. These
entities may have bespoke tables, this section details how Zetadocs for NAV can be integrated into such
systems. This section focuses on the abstract relationship between the ‚Zetadocs Company Types‛ table
and the tables that represent these types. We will also see how Zetadocs for NAV can be extended to
integrate with other existing native company types.
19.1 Company Types
Zetadocs for NAV integrates with two native company types in its initial configuration, Customer and
Vendor. However, the code which directly accesses these tables is kept in 2 locations that are public to a
NAV VAR. As an example of how one could implement a new bespoke company type or in fact edit one of
the existing company types CUST and VEND the following example is presented.
NOTE: the Zetadocs Sales Document Queue form (9009962) operates for the Sales process only and uses
direct references to the Customer and Contact names field in the ‚Sales Header‛ table. If you have modified
the Sales Header table (36) to work with your bespoke Customer and/or Contact implementations then you
may need to alter the references to ‚Sell-to Customer ..‛ and ‚Sell-to Contact ...‛ field references.
BANK Example
Consider the business relation BANK. To integrate Zetadocs for NAV with reports that are sent to BANK
contacts you would follow these instructions.
Create a Zetadocs Company Type ‚BANK‛
Figure 46 - Zetadocs Company Types
Implement the BANK ‚IF‛ case to get the bank name and addressing information from your bank
table in the Zetadocs Send Result table (9009968) similar to the CUST case.

Zetadocs for NAV Installation Guide
Bespoke Contacts and Company Types
This edition 18/11/2009 © Copyright Equisys plc 2009 All trademarks acknowledged All rights reserved Page 68
Figure 47 - Zetadocs Send Result Table Code
Also update the Company No. - OnLookup trigger and Contact No. - OnLookup trigger to include
the IF case for your BANK type.
Update the tbContName – OnLookup trigger in the Zetadocs Delivery Form (9009966) to use the
correct ContactBusinessRelation information if necessary.

Zetadocs for NAV Installation Guide
Bespoke Contacts and Company Types
This edition 18/11/2009 © Copyright Equisys plc 2009 All trademarks acknowledged All rights reserved Page 69
Figure 48 - Zetadocs Delivery Form “tbContName” textbox
Then in the Zetadocs Report Settings set the BANK Company Type for the report that has BANK
recipients and set the respective ‚Company No. Field No.‛ and ‚Contact No. Field No.‛ references
for the report source table.
If you have implemented a bespoke ‚Customer‛ table for use with Sales and Marketing then you
may need to update the Zetadocs Sales Document Queue Form (9009962) to use your bespoke
Customer record type references where necessary.
19.2 Contacts
Similar to Company it is possible that there may be a bespoke implementation of Contact information or
there may be a requirement to change the default contact address resolution logic of Zetadocs for NAV.
Validating
As has been explained the Zetadocs Report Settings the ‚Contact No. Field No.‛ determines whether the
contact reference can be extracted from a field in the record that is passed to the Zetadocs Send Results
Gen codeunit or whether this is implemented by the VAR and called from the codeunit. Once the reference
has been set in the ‚Contact No.‛ field in the Zetadocs Send Result table the OnValidate trigger is called.
Therefore to modify the contact addressing resolution or to change the code to use a bespoke contact table
you must follow these instructions:
Modify the Contact No. – OnValidate trigger in the Zetadocs Send Result table (9009968) to get the
name and addressing information from your bespoke contact.

Zetadocs for NAV Installation Guide
Zetadocs-Customize codeunit
This edition 18/11/2009 © Copyright Equisys plc 2009 All trademarks acknowledged All rights reserved Page 70
Figure 49 - Zetadocs Send Result table - Contact No. code
Modify the Contact No. – OnLookup trigger in the Zetadocs Send Result table (9009968) to use the
correct ContactBusinessRelation information dependant on the ‚Company Type Code‛.
Update the Zetadocs Delivery Form (9009966) references to contact information to use your
bespoke contact record type and correct ContactBusinessRelation information if necessary.
If you have implemented a bespoke ‚Customer‛ table for use with Sales and Marketing then you
may need to update the Zetadocs Sales Document Queue Form (9009962) to use your bespoke
contact record type references where necessary.
20. Zetadocs-Customize codeunit
By now you should have a good idea of what this codeunit is for. Up until now we have been exploring the
internal processing and control flow of the Zetadocs for NAV Addin. By using specific settings and writing
some code in the Zetadocs-Integration codeunit and the Zetadocs Send Result table triggers it is possible to
completely integrate and customize Zetadocs for NAV into an NAV system. We have also seen the potential
to implement business specific logic into the sending mechanism and expand on the Zetadocs for NAV
product functionality. There is still however room to take it further.
This section details the two basic functions in the Zetadocs-Customize codeunit (9009962) that allow the
implementation of more business specific send logic as well as document formatting and archiving
customizations.
20.1 OverrideSendResult
As the name suggests this function gives you the whole send result. At this point the result has been
completely resolved by Zetadocs and any custom code that has been implemented by you in the various
areas explained earlier in this document. This then allows you to modify the completed record as a whole.
The only place the results can be edited after this are in the Zetadocs Delivery Dialogs or the Zetadocs
Errors Dialogs depending on your display settings for these dialogs, as specified in the Zetadocs Report
Settings (potentially overridden by the OverrideSendSettings in the Zetadocs-Integration codeunit).
Let’s examine the Zetadocs Send Result table a little more closely now for the first time.

Zetadocs for NAV Installation Guide
Zetadocs-Customize codeunit
This edition 18/11/2009 © Copyright Equisys plc 2009 All trademarks acknowledged All rights reserved Page 71
Figure 50 - Zetadocs Send Result
Some of these fields will be familiar from having worked with the Zetadocs Company Rule used in the
GetCompanyRule trigger function in the Zetadocs-Integration codeunit. Let’s break them up into their
respective parts and get familiar with their use and how we can exploit this to implement our specific
business logic and workflow.
Record Fields (1 – 2)
The Record ID and Record No. represent the typeless and typed references to the record we are sending.
Record ID is used by the core processing of Zetadocs for NAV to tie the send results and records together.
Record No. is what will ultimately be passed to Zetadocs for use as an external reference by either the
recipient or in archiving to SharePoint. For more information on Record No. click here.
Example Usage:
Having the Record ID of what you are sending means you can get that record and query or use values from
that record to implement logic for changing other fields in the Zetadocs Send Result.
Company Fields (10 – 12)
These fields and their use should be extremely clear by now. The Company Type Code allows us to integrate
with native and bespoke company tables such as Customer, Vendor and one of your own design. Company
No. and Company Name are then obvious references to the id and display name of the company.
Delivery Method (20)
This controls the addressing that is selected for sending, E-Mail, Fax or Hard Copy. Some obvious
customization possibilities include implementing a company policy such as ‚Any company sensitive
information should not be emailed under any circumstance and should be faxed or printed only.‛
Depending on particular reports or recipients the delivery method could be checked or changed to uphold
company policy.

Zetadocs for NAV Installation Guide
Zetadocs-Customize codeunit
This edition 18/11/2009 © Copyright Equisys plc 2009 All trademarks acknowledged All rights reserved Page 72
Contact Fields (30 – 31)
In collaboration with the Company fields these fields can integrate with native and bespoke systems for
contact addressing information resolution. By setting and validating this field is it possible to pull the
information from the contact based on the logic that is implemented in the Zetadocs Send Result table
triggers as discussed previously.
Addressing Fields (40 – 60)
Provides the ability to set additional email recipients in the Cc and Bcc fields, these fields are without
relationships to the contact and company references that may or may not be present in the send result
record. This means that addressing information can be taken from anywhere for the respective email, cc,
bcc, fax and print addressing fields. Care should be taken to clear the company and contact no. fields before
setting these values manually.
Archiving Fields (70 – 72)
Set in the Zetadocs System Rule that you have associated with a report via the Zetadocs Report Settings,
the archiving settings are available for per record modification. This can be used for example in deciding
whether or not the document is archived depending on its content or changing the archiving location to a
limited permissions document library in SharePoint, or sub categorizing documents using the Zetadocs
Archive Document Type.
Properties:
Archiving Enabled ” per document archiving
Archive Location ” the archive connection string takes the following format
o ‚sharepoint: <site> , <archive library>[/subfolder[/subfolder…]]‛
Archive Document Type ” for an in-depth explanation of this please refer to the ‘Zetadocs for
Microsoft Dynamics NAV SharePoint Components Installation Guide.pdf’ on your CD.
Customization Examples:
Zetadocs Archive ID (80)
WARNING: This field will contain data which contains a reference for an NAV record to archived documents.
It should not be edited or you risk breaking the archive search functionality of Zetadocs for NAV.
Zetadocs Template Fields
The ‚Zd Template Name‛ field is set automatically as the ‚Zd Template ID‛ field has a table relation with the
Zetadocs Template table. The uses of this field are fairly obvious, change the Zetadocs template being used
depending on some custom business logic.
Error Fields
The Zetadocs Send Result table (9009968) has a trigger function CheckErrors. This function is called for
each results record in the Zetadocs Send Results Gen codeunit during the ResolveSendInfo function. This
happens after all possible modifications of the send result values have taken place in the Zetadocs-
Integration trigger functions and Zetadocs-Customize codeunit override function OverrideSendResult. This
function checks the addressing information (email, fax, and printer) against the specified ‚Delivery Method‛
(Email, Fax, Hard Copy) to pre-empt potential send failures in the Zetadocs Client. If an error is found in a
Zetadocs Send Result record the ‚Error‛ field is set to TRUE and a description of the error written in ‚Error
description‛. It is possible to implement your own error checks by editing the code in the CheckErrors
function in the Zetadocs Send Result table. Note that the presence of an just 1 error record in the Zetadocs
Send Result record for a particular send will cause the ‚Zetadocs Batch Delivery Dialog‛ to display IF the
‚Zetadocs Send Settings‛ for that send has ‚Show Batch Delivery Dialog‛ set to TRUE otherwise all errors
will be marked as Skip = TRUE.
Skip
When Skip = TRUE this will cause the report to use CurrReport.Skip for the associated record. For example if
your report contains 3 reports and one is marked to skip then only 2 will be printed to Zetadocs. If the
Zetadocs Batch Delivery Dialog is displayed either by there being errors in the send results or by the user
choosing to preview the send results, they can manually set a report to skip particular report records.

Zetadocs for NAV Installation Guide
Zetadocs-Customize codeunit
This edition 18/11/2009 © Copyright Equisys plc 2009 All trademarks acknowledged All rights reserved Page 73
Figure 51 - Zetadocs Batch Delivery Dialog
Output File Name
When a report is printed to Zetadocs and split into the addressable documents each document is given a
name. It is desirable to be able to control the name of these documents as it will be the name of the PDF file
produced and attached to emails as well as archived to SharePoint. This field allows you to set that
document name. A good example of its use would be to generate the name based on the type of report and
the record no. For example: ‚Order Confirmation: 10045‛. Using the RecordID you can retrieve any
information about the record for generating the output file name.
20.2 GetAdditionalEmbComms
In the final stage of the reporting process for Zetadocs for NAV the GetRecordCustComms function is called
from the report on the Zetadocs Send Results Gen codeunit to retrieve the formatted embedded commands
which represent the send result for each report record. Internally in the Zetadocs Send Results Gen codeunit
we create the Zetadocs embedded commands but before we return it we call this trigger function
GetAdditionalEmbComms in the Zetadocs-Customize codeunit. This allows you to return additional
embedded commands which can be used to customize your document message subject and body text as
well as additional archive metadata to associate with the document when it is archive.
Dynamic Fields
Dynamic Fields are name/value pairs that can be used to pass any information to Zetadocs. The format of
the command is:
%%[field: <name>, <value>]
For Example:
%%[field: salutation, Mr.]
By using this in conjunction with a Zetadocs Templates you can personalize the message as follows.
%%[field: salutation, Mr.]
%%[field:name, McCarthy]
%%[field: company, Widgets Inc.]
%%[field: quote_number, 1234]
%%[field: myname, Sam]
Document Template
When merged to a document template containing the following text:
Zetadocs for NAV Installation Guide
Advanced Zetadocs for NAV Report Writing
This edition 18/11/2009 © Copyright Equisys plc 2009 All trademarks acknowledged All rights reserved Page 74
Dear %%[salutation] %%[name]
I'm pleased to attach your quotation as discussed along with our conditions of sale and product brochure.
Our quotation number for your reference is %%[quote_number], please include this on your sales order.
Regards,
%%[myname]
Expected Output
Zetadocs creates the following email message body:
Dear Mr. McCarthy
I'm pleased to attach your quotation as discussed along with our conditions of sale and product brochure.
Our quotation number for your reference is 1234, please include this on your sales order.
Regards,
Sam
Archiving Metadata
It is also possible to archive any of the dynamic fields as metadata. To do this the embedded command
should include the ARCHIVE flag at the end. Here is the format:
%%[field: <name>, <value>, ARCHIVE]
For Example:
%%[field: Postcode, N7 0JE , ARCHIVE]
Whether the dynamic field is used in personalizing the message or not its value name pair will be passed to
the SharePoint archive as a content type column. There are a couple of things to note about this. If the
column name does not exist already in SharePoint it will need to be created, as a column of the content type
specified this needs to be done in SharePoint in advance. Zetadocs documents default to using a
‚Zetadocs‛ content type. If you have specified an ‚Archive Document Type‛ in either the Zetadocs
Document Sets table or the Zetadocs Report Settings table then the content type will be a child type of the
Zetadocs content type. NOTE: It is recommended that the SharePoint columns are created before archiving
a document and that it is well tested before roll out.
These fields can then be used to search on SharePoint. The Zetadocs-Utilities codeunit exposes a search
function which can perform a column search in SharePoint.
SharePointSearch
This command in the Zetadocs utilities will launch your web browser and search the specified field for the
specified value.
SharePointSearch(Text <fieldname>, Text <fieldvalue>, Boolean <ShowSearchPage>)
For Example:
SharePointSearch(‘Postcode’, ‘N7 0JE’,FALSE)
When <ShowSearchPage> is false you will be directed to the search results. When it is true you will be taken
to the Zetadocs Search page with the ‘Postcode’ pre-populated in the search form. This does however
require modifying the search page as per the instructions in the Zetadocs for Microsoft Dynamics NAV
SharePoint Extensions Installation Guide.
21. Advanced Zetadocs for NAV Report Writing
The different reports available in NAV can be modified to enable them to be sent using Zetadocs. The
modifications that need to be made to a report depend on how that report is structured. A report modified
by the operations described in this section will output one page of embedded commands at the beginning
of each one of the report documents. The embedded commands will contain information related to the
automated addressing, formatting and archiving of the report document. This section describes how to
modify different types of reports to enable them to be sent using Zetadocs.
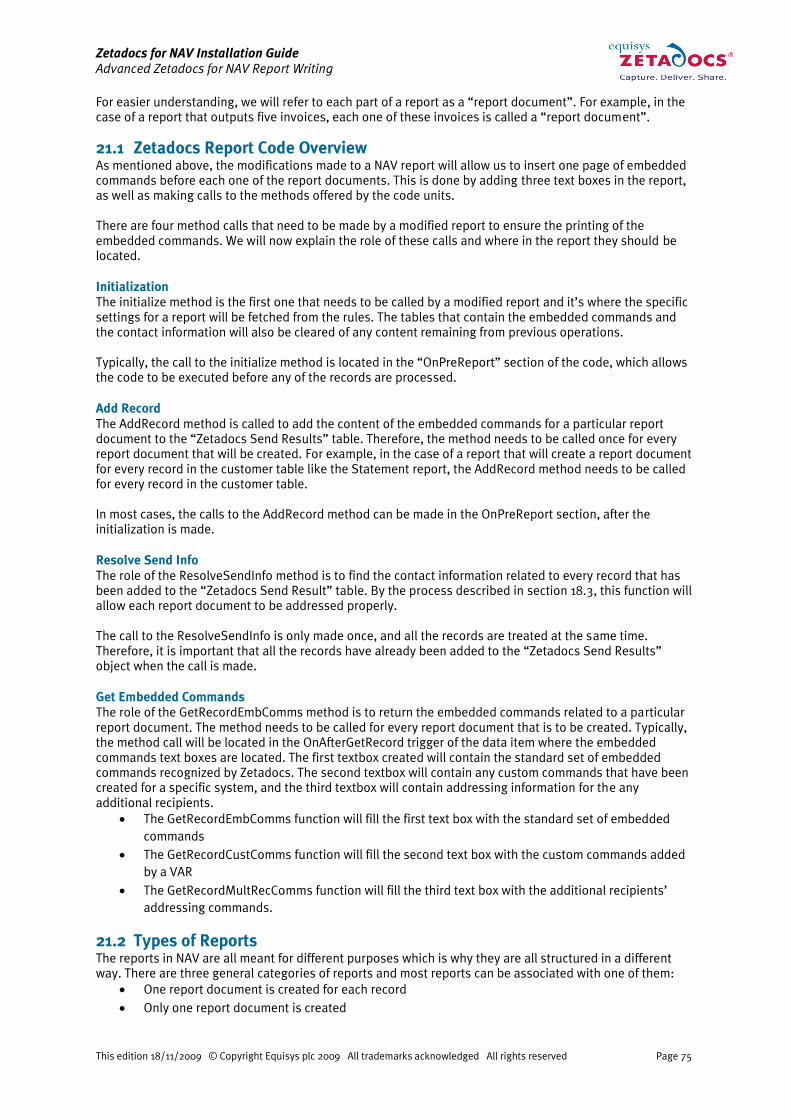
Zetadocs for NAV Installation Guide
Advanced Zetadocs for NAV Report Writing
This edition 18/11/2009 © Copyright Equisys plc 2009 All trademarks acknowledged All rights reserved Page 75
For easier understanding, we will refer to each part of a report as a ‚report document‛. For example, in the
case of a report that outputs five invoices, each one of these invoices is called a ‚report document‛.
21.1 Zetadocs Report Code Overview
As mentioned above, the modifications made to a NAV report will allow us to insert one page of embedded
commands before each one of the report documents. This is done by adding three text boxes in the report,
as well as making calls to the methods offered by the code units.
There are four method calls that need to be made by a modified report to ensure the printing of the
embedded commands. We will now explain the role of these calls and where in the report they should be
located.
Initialization
The initialize method is the first one that needs to be called by a modified report and it’s where the specific
settings for a report will be fetched from the rules. The tables that contain the embedded commands and
the contact information will also be cleared of any content remaining from previous operations.
Typically, the call to the initialize method is located in the ‚OnPreReport‛ section of the code, which allows
the code to be executed before any of the records are processed.
Add Record
The AddRecord method is called to add the content of the embedded commands for a particular report
document to the ‚Zetadocs Send Results‛ table. Therefore, the method needs to be called once for every
report document that will be created. For example, in the case of a report that will create a report document
for every record in the customer table like the Statement report, the AddRecord method needs to be called
for every record in the customer table.
In most cases, the calls to the AddRecord method can be made in the OnPreReport section, after the
initialization is made.
Resolve Send Info
The role of the ResolveSendInfo method is to find the contact information related to every record that has
been added to the ‚Zetadocs Send Result‛ table. By the process described in section 18.3, this function will
allow each report document to be addressed properly.
The call to the ResolveSendInfo is only made once, and all the records are treated at the same time.
Therefore, it is important that all the records have already been added to the ‚Zetadocs Send Results‛
object when the call is made.
Get Embedded Commands
The role of the GetRecordEmbComms method is to return the embedded commands related to a particular
report document. The method needs to be called for every report document that is to be created. Typically,
the method call will be located in the OnAfterGetRecord trigger of the data item where the embedded
commands text boxes are located. The first textbox created will contain the standard set of embedded
commands recognized by Zetadocs. The second textbox will contain any custom commands that have been
created for a specific system, and the third textbox will contain addressing information for the any
additional recipients.
The GetRecordEmbComms function will fill the first text box with the standard set of embedded
commands
The GetRecordCustComms function will fill the second text box with the custom commands added
by a VAR
The GetRecordMultRecComms function will fill the third text box with the additional recipients’
addressing commands.
21.2 Types of Reports
The reports in NAV are all meant for different purposes which is why they are all structured in a different
way. There are three general categories of reports and most reports can be associated with one of them:
One report document is created for each record
Only one report document is created

Zetadocs for NAV Installation Guide
Advanced Zetadocs for NAV Report Writing
This edition 18/11/2009 © Copyright Equisys plc 2009 All trademarks acknowledged All rights reserved Page 76
One report document is created for a group of records
One report document per record
This is the most common type of report in which a report document will be created for every record of the
table the report is based on. For example, a report of that type based on the ‚Customer‛ table would detail
every transaction made by one customer in a report document. The next report document would detail the
transactions made by another customer and so on. Typically, every report document created will be sent to
a different recipient. Examples of that type of report are the Statement report and the Blanket Sales Order
report.
Figure 52 - One report document per record report
Only one report document
These reports are only creating one report document, regardless of the number of records in the table. The
content of a report of that type will generally be a list and the recipient will receive the entire report. In the
case of a report based on the customer table for example, this report would print a list of customer, rather
than details of transactions made by that customer. Examples of this type or report are the Customer ” List
report and the Vendor ” List report.
Figure 53 - Only one report document

Zetadocs for NAV Installation Guide
Advanced Zetadocs for NAV Report Writing
This edition 18/11/2009 © Copyright Equisys plc 2009 All trademarks acknowledged All rights reserved Page 77
One report document per group of records
This type of report is very similar to the first type of report but instead of creating a report document for
each record of the table it is based on, a report document is created for a group of records from the table it
is based on. Records are grouped together when they share a similar value in one of the fields from the
table the report is based on. For example, all the records from the ‚Vendor Ledger Entry‛ table that have the
same value under the ‚Vendor No.‛ field would be grouped together in a section of the report. Examples of
this type of report are the Remittance Advice ” Entries and Remittance Advice - Journal report.
Figure 54 - One report document per group of records
21.3 Import the Zetadocs for NAV Report Template
Before you start modifying a report, ensure that the Zetadocs for NAV template has been imported into the
object designer.
Report 59999
‚<CD Drive>:\Zetadocs NAV Server Components\ Zetadocs Additions Report.txt‛
We will refer to this report from now on as the template and to the report you are editing as the report.
Note: The template will not compile.
21.4 Global, Local and Text Constants
Open the template in the Report Designer and view the C/AL Globals (ViewCA/L Globals)
Select all Global variables (Ctrl + A), right-click and select Copy
Open the report and view the C/AL Globals
Scroll to the bottom of any existing Globals in your report and select the blank global variable row,
right-click and select Paste to paste the additional Zetadocs Globals into the report.
You must now repeat the above steps to copy and paste all the Text Constants from the template into your
report.
21.5 Modifying the reports
The code that you need to add to your report varies depending on the report type. This section will guide
you through the modifications that need to be made.
Note: Due to the customizable nature of the reports in NAV, the steps described below may not fit all
reports exactly. Therefore, the location of where to insert the code below may need to vary but the code will
remain similar. Also, the placement and sizing of the Zetadocs embedded commands text box may need to
be tailored to ensure that the first page of each report is dedicated to the embedded commands only and
that subsequent page numbers are decremented accordingly. For additional printing options in reports and
troubleshooting the building of a report see the section 22.1 on report building in the appendices.

Zetadocs for NAV Installation Guide
Advanced Zetadocs for NAV Report Writing
This edition 18/11/2009 © Copyright Equisys plc 2009 All trademarks acknowledged All rights reserved Page 78
One report document per record
To modify that type of report, follow the instructions described in Section 10.
Only one report document
This type of report prints information extracted directly from the table it is based on (rather than
information related to the table it is based on) which makes the structure of the report different: the content
of the report is created in the main data item’s section. To describe the differences in the process, we will
use the ‚Customer ” List‛ report as an example.
If you open the report designer and then select ViewSections for the ‚Customer ” List‛ report, you will
see that all the sections of the report are created under in the main data item. Since the Zetadocs
embedded commands need to appear before anything else in a report, we need to create a data item and
locate it above the main data item.
Step 1: Create Zetadocs Embedded Commands Data Item
In the report designer select an empty row and create a new data item of type ‚Integer‛ called
‚Zetadocs Embedded Commands‛.
Move the data item up above the main data item and do not indent it.
View the sections of your report (View Sections) and you should see a section called ‚Zetadocs
Embedded Commands, Body (1)‛
Select the ‚Zetadocs Embedded Commands, Body (1)‛ section, insert a new section (F3) and select
the ‚Header‛ section type.
You should now have a ‚Zetadocs Embedded Commands, Header (1)‛ above the ‚Zetadocs
Embedded Commands, Body (2)‛ section. Select the ‚Zetadocs Embedded Commands, Body(2)‛
section and delete it (Edit Delete)
Open the template in the Report Designer and view the sections (View Sections)
Select the three textboxes in the ‚Zetadocs Embedded Commands, Body(1)‛ section
Copy and Paste the textboxes to the ‚Zetadocs Embedded Commands, Header (1)‛ section in your
report.
Figure 55 - Customer - List Report
A report like the ‚Customer ” List‛ report is generally meant for internal use and the intended recipient is
not determined by the content of the report. Instead of creating a rule associated with the report and
changing it every time the report is printed, the following steps will allow the information to be entered by
the user at runtime.
Step 2: Create a temporary contact variable
In the report designer select an empty line and select View C/AL Code (F9)
From the code windows, select View C/AL Globals and navigate to the ‚Variables‛ tab.
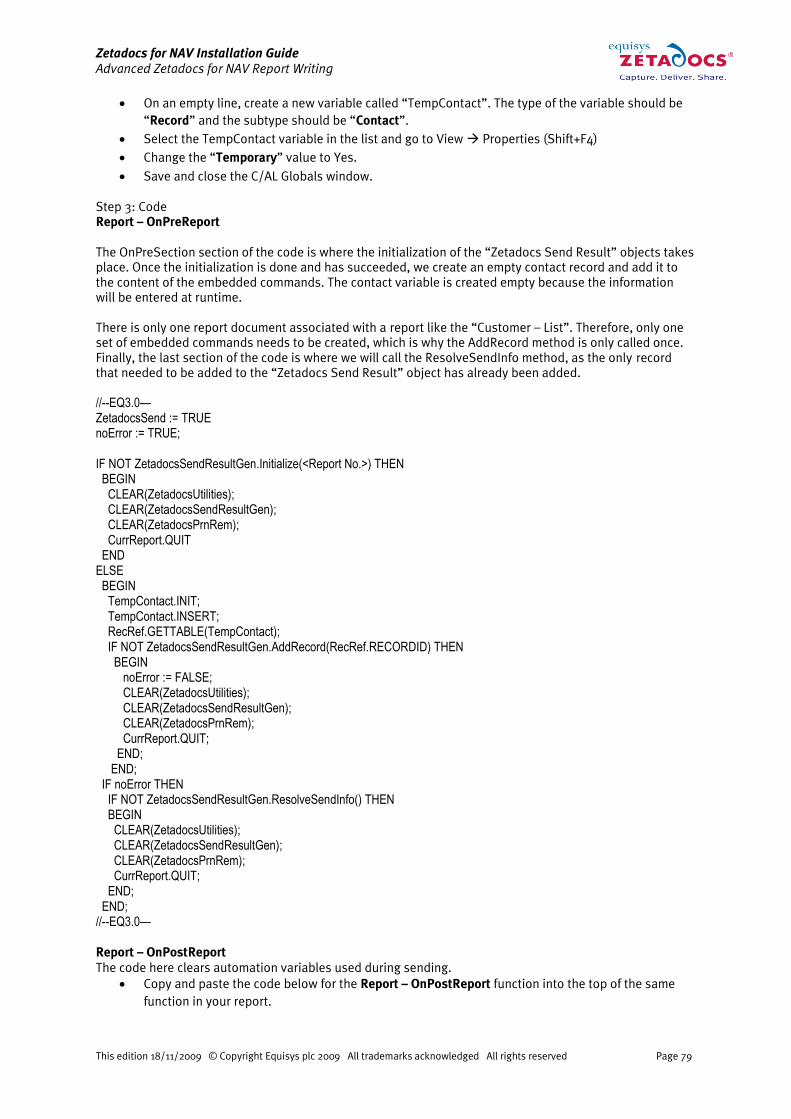
Zetadocs for NAV Installation Guide
Advanced Zetadocs for NAV Report Writing
This edition 18/11/2009 © Copyright Equisys plc 2009 All trademarks acknowledged All rights reserved Page 79
On an empty line, create a new variable called ‚TempContact‛. The type of the variable should be
‚Record‛ and the subtype should be ‚Contact‛.
Select the TempContact variable in the list and go to View Properties (Shift+F4)
Change the ‚Temporary‛ value to Yes.
Save and close the C/AL Globals window.
Step 3: Code
Report – OnPreReport
The OnPreSection section of the code is where the initialization of the ‚Zetadocs Send Result‛ objects takes
place. Once the initialization is done and has succeeded, we create an empty contact record and add it to
the content of the embedded commands. The contact variable is created empty because the information
will be entered at runtime.
There is only one report document associated with a report like the ‚Customer ” List‛. Therefore, only one
set of embedded commands needs to be created, which is why the AddRecord method is only called once.
Finally, the last section of the code is where we will call the ResolveSendInfo method, as the only record
that needed to be added to the ‚Zetadocs Send Result‛ object has already been added.
//--EQ3.0— ZetadocsSend := TRUE noError := TRUE; IF NOT ZetadocsSendResultGen.Initialize(<Report No.>) THEN BEGIN CLEAR(ZetadocsUtilities); CLEAR(ZetadocsSendResultGen); CLEAR(ZetadocsPrnRem); CurrReport.QUIT END ELSE BEGIN TempContact.INIT; TempContact.INSERT; RecRef.GETTABLE(TempContact); IF NOT ZetadocsSendResultGen.AddRecord(RecRef.RECORDID) THEN BEGIN noError := FALSE; CLEAR(ZetadocsUtilities); CLEAR(ZetadocsSendResultGen); CLEAR(ZetadocsPrnRem); CurrReport.QUIT; END; END; IF noError THEN IF NOT ZetadocsSendResultGen.ResolveSendInfo() THEN BEGIN CLEAR(ZetadocsUtilities); CLEAR(ZetadocsSendResultGen); CLEAR(ZetadocsPrnRem); CurrReport.QUIT; END; END; //--EQ3.0— Report – OnPostReport
The code here clears automation variables used during sending.
Copy and paste the code below for the Report – OnPostReport function into the top of the same
function in your report.

Zetadocs for NAV Installation Guide
Advanced Zetadocs for NAV Report Writing
This edition 18/11/2009 © Copyright Equisys plc 2009 All trademarks acknowledged All rights reserved Page 80
//--EQ3.0-- CLEAR(ZetadocsUtilities); CLEAR(ZetadocsSendResultGen); CLEAR(ZetadocsPrnRem); //--EQ3.0—
Zetadocs Embedded Commands – OnAfterGetRecord
In this part of the code, we will get the set of embedded commands that will be printed on the first page of
the report document.
//--EQ3.0-- RecRef.GETTABLE(TempContact); //Get the standard set of embedded commands ZetadocsEmbComms:= ZetadocsSendResultGen.GetRecordEmbComms(RecRef.RECORDID, ZetadocsEmbCommsAction); CASE ZetadocsEmbCommsAction OF ZetadocsEmbCommsAction::Error: BEGIN CLEAR(ZetadocsUtilities); CLEAR(ZetadocsSendResultGen); CLEAR(ZetadocsPrnRem); CurrReport.QUIT; END END; //CASE //Get the custom embedded commands, added by the VAR ZetadocsCustComms := ZetadocsSendResultGen.GetRecordCustComms(RecRef.RECORDID, ZetadocsEmbCommsAction); CASE ZetadocsEmbCommsAction OF ZetadocsEmbCommsAction::Error: BEGIN CLEAR(ZetadocsUtilities); CLEAR(ZetadocsSendResultGen); CLEAR(ZetadocsPrnRem); CurrReport.QUIT; END END; //CASE //Get the multiple recipients embedded commands ZetadocsMultRecComms := ZetadocsSendResultGen.GetRecordMultRecComms(RecRef.RECORDID, ZetadocsEmbCommsAction); CASE ZetadocsEmbCommsAction OF ZetadocsEmbCommsAction::Error: BEGIN CLEAR(ZetadocsUtilities); CLEAR(ZetadocsSendResultGen); CLEAR(ZetadocsPrnRem); CurrReport.QUIT; END END; //CASE RecRef.GETTABLE(TempContact); IF ZetadocsSendResultGen.IsToBeSkipped(RecRef.RECORDID) THEN BEGIN CurrReport.SKIP; END; //--EQ3.0--

Zetadocs for NAV Installation Guide
Advanced Zetadocs for NAV Report Writing
This edition 18/11/2009 © Copyright Equisys plc 2009 All trademarks acknowledged All rights reserved Page 81
Zetadocs Embedded Commands – OnPostDataItem
The following line of code is added to ensure that nothing but the embedded commands gets printed on the
first page of the report document.
//--EQ3.0-- CurrReport.NEWPAGE; //--EQ3.0--
Zetadocs Embedded Commands, Header (1) – OnPreSection
When printing a report, adding this line of code will allow your report to keep a valid page count (i.e. the
embedded commands will be located on page 0 and the beginning of the report document is located on
page 1).
//--EQ3.0— CurrReport.PAGENO := CurrReport.PAGENO - 1; //--EQ3.0—
One report document created for a group of records
The modification of a report where the records are grouped before they are printed requires a few more
operations, as the embedded commands will be created for a group of records instead of a single record.
We will use the Remittance Advice ” Entries as an example of such a report.
If you open the report designer and then select View Sections, you will notice that some of the sections of
the report are created in the main data item. Since the Zetadocs embedded commands need to appear
before anything else in a report, we need to insert the embedded commands text box and locate it above
the other sections. This will ensure that nothing appears before the embedded commands when the report
is printed.
Step 1: Create Zetadocs Embedded Commands Data Item
In the report designer select an empty row and create a new data item. The type of that new data
item needs to be the same as the main data item. Call it ‚Zetadocs Embedded Commands‛.
Move the data item up above the main data item and do not indent it.
View the sections of your report (View Sections) and you should see a section called ‚Zetadocs
Embedded Commands, Body (1)‛
Select the section directly below ‚Zetadocs Embedded Commands, Body (1)‛. Insert a new section
(F3) and select the ‚Group Header‛ section type.
Select the section called ‚Zetadocs Embedded Commands, Body (1) and delete it (Edit Delete).
The newly created section should be called ‚<main data item name>, GroupHeader (1)‛ and should
be empty. It should be located above all the other sections of your report.
Open the template in the Report Designer and view the sections (View Sections)
Select the three textboxes in the ‚Zetadocs Embedded Commands, Body (1)‛ section
Copy and Paste the textboxes to the ‚<main data item name>, GroupHeader (1)‛ section in your
report.

Zetadocs for NAV Installation Guide
Advanced Zetadocs for NAV Report Writing
This edition 18/11/2009 © Copyright Equisys plc 2009 All trademarks acknowledged All rights reserved Page 82
Figure 56 - Remittance Advice – Entries Report
Because the records treated by the report are grouped, we need to reproduce the conditions under which
the records are grouped to be able to know how many sets of embedded commands will be created.
Creating a temporary table in which we keep track of the groups of records will allow us to do that.
Step 2: Create a temporary record variable
In the report designer select the main data item (which is now the second one in the list, directly
below the Zetadocs Embedded Commands data item)
Select View C/AL Code (F9) and navigate to the OnAfterGetRecord function. You should be able
to see how the records are grouped together (i.e. which field is used to group the records
together). For example, a report in which the records are grouped together when they use the
same <Field Name>, you would see code like : <variable>.GET(<Field Name>);
Note: For this section, this variable will be referred to as <variable>, a variable of type ‚Record‛
and the field name will be referred to as <Field Name>.
View C/AL Globals and navigate to the ‚Variables‛ tab. You will find the <variable> in that list
and it will be of type ‚Record‛.
Navigate to an empty line and create a new variable called ‚Temp‛. The type of the variable should
be ‚Record‛ and the Subtype should be the same as the Subtype from the <variable> mentioned
above.
Select the Temp variable in the list and go to View Properties (Shift+F4)
Change the ‚Temporary‛ value to Yes.
Save and close the C/AL Globals window.
In the OnAfterGetRecord function, under the code <variable>.GET(<Field Name>), add the code:
Temp.GET(<Field Name>);
Figure 57 - The records are grouped by “Vendor No.” in the Remittance Advice – Entries report
Step 3: Code

Zetadocs for NAV Installation Guide
Advanced Zetadocs for NAV Report Writing
This edition 18/11/2009 © Copyright Equisys plc 2009 All trademarks acknowledged All rights reserved Page 83
Report – OnPreReport
At this point in the code, the records cannot be grouped together because the records that will be
processed by the report are still unknown. For that reason, the initialization is the only thing done in this
section:
noError := TRUE; IF NOT ZetadocsSendResultGen.Initialize(<Report No.>) THEN BEGIN CLEAR(ZetadocsUtilities); CLEAR(ZetadocsSendResultGen); CLEAR(ZetadocsPrnRem); CurrReport.QUIT; END; Report – OnPostReport
Don’t forget the clean up code in the OnPostReport, otherwise successfully ran reports may become locked.
CLEAR(ZetadocsUtilities); CLEAR(ZetadocsSendResultGen); CLEAR(ZetadocsPrnRem);
Zetadocs Embedded Commands – OnAfterGetRecord
The following section of code is where we will group the records and store them in a temporary table. It is
important to understand that only one set of embedded commands is created for a group of records, which
is why the record is only added when the <Field Name> is not already present in the table.
IF NOT Temp.GET(<Field Name>) THEN BEGIN <variable>.GET(<Field Name>); Temp := <variable>; Temp.INSERT; RecRef.GETTABLE(Temp); IF NOT ZetadocsSendResultGen.AddRecord(RecRef.RECORDID) THEN BEGIN noError := FALSE; CLEAR(ZetadocsUtilities); CLEAR(ZetadocsSendResultGen); CLEAR(ZetadocsPrnRem); CurrReport.QUIT; END; END; CurrReport.SKIP; Zetadocs Embedded Commands – OnPostDataItem
By the time the OnPostDataItem trigger is executed, the records have all been added. The ResolveSendInfo
method will fetch the contact information from the different groups of records.
IF noError THEN IF NOT ZetadocsSendResultGen.ResolveSendInfo() THEN BEGIN CLEAR(ZetadocsUtilities); CLEAR(ZetadocsSendResultGen); CLEAR(ZetadocsPrnRem); CurrReport.QUIT; END;
Main Data Item – OnAfterGetRecord
The records have already been grouped at this point so the content of the embedded commands can be
fetched. This code must be added at the end of the OnAfterGetRecord.
//--EQ3.0--

Zetadocs for NAV Installation Guide
Advanced Zetadocs for NAV Report Writing
This edition 18/11/2009 © Copyright Equisys plc 2009 All trademarks acknowledged All rights reserved Page 84
RecRef.GETTABLE(<Main DataItem Name>); ZetadocsEmbComms:= ZetadocsSendResultGen.GetRecordEmbComms(RecRef.RECORDID, ZetadocsEmbCommsAction); CASE ZetadocsEmbCommsAction OF ZetadocsEmbCommsAction::Error: BEGIN CLEAR(ZetadocsUtilities); CLEAR(ZetadocsSendResultGen); CLEAR(ZetadocsPrnRem); CurrReport.QUIT; END END; //CASE ZetadocsCustComms := ZetadocsSendResultGen.GetRecordCustComms(RecRef.RECORDID, ZetadocsEmbCommsAction); CASE ZetadocsEmbCommsAction OF ZetadocsEmbCommsAction::Error: BEGIN CLEAR(ZetadocsUtilities); CLEAR(ZetadocsSendResultGen); CLEAR(ZetadocsPrnRem); CurrReport.QUIT; END END; //CASE ZetadocsMultRecComms := ZetadocsSendResultGen.GetRecordMultRecComms(RecRef.RECORDID, ZetadocsEmbCommsAction); CASE ZetadocsEmbCommsAction OF ZetadocsEmbCommsAction::Error: BEGIN CLEAR(ZetadocsUtilities); CLEAR(ZetadocsSendResultGen); CLEAR(ZetadocsPrnRem); CurrReport.QUIT; END END; //CASE RecRef.GETTABLE(<Main Data Item Name>); IF ZetadocsSendResultGen.IsToBeSkipped(RecRef.RECORDID) THEN BEGIN CurrReport.SKIP; END; //--EQ3.0--
Zetadocs Embedded Commands, Header (1) - OnPreSection
//--EQ3.0— CurrReport.PAGENO := CurrReport.PAGENO - 1; //--EQ3.0—
21.6 Copy Loop
If your report contains a copy loop data item that outputs more than one copy of the report per print, then
you must edit the loop to only output one copy when sending using Zetadocs. An example of the standard
copy loop with the additional logic is in the template. Note: THIS IS NOT THE EXACT CODE TO PASTE. YOU
MUST EDIT YOUR COPY LOOP TO ONLY RUN ONCE WHEN (ZetadocsSend = TRUE)
IF (NoOfLoops <= 0) THEN NoOfLoops := 1; IF (ZetadocsSend) THEN NoOfLoops := 1;

Zetadocs for NAV Installation Guide
Advanced Zetadocs for NAV Report Writing
This edition 18/11/2009 © Copyright Equisys plc 2009 All trademarks acknowledged All rights reserved Page 85
SETRANGE(Number,1,NoOfLoops);
21.7 Modifications Necessary for the Role Tailored Client Reports
To enable Role Tailored Client reports to be sent successfully using Zetadocs for NAV you will need to adjust
the reports using the following steps.
Open the Navision client and connect to/open the Navision database.
Open the Object Designer (ToolObject Designer).
Click on Report button in the designer menu.
Select the reports that you are going to edit for Zetadocs for NAV.
Select Export in file menu (FileExport).
Export the report as a .txt file.
Open the file using a notepad.exe or another suitable program.
Scroll down through the file until you reach the RDLDATA.
Delete everything contained within the curly brackets {}.
Save the changes to the file.
Go to NAV and open the Object Designer (ToolObject Designer).
Click on Report button in the designer menu.
Select (FileImport) and re-import the modified report.
Repeat the process for any remaining reports you intend to use in conjunction with Zetadocs for
NAV.
21.8 Creating and Troubleshooting Zetadocs for NAV Reports
This section provides a detailed description of the changes required to enable a report for sending using
Zetadocs. Understanding how it works will make it much easier when trying to enable a report which is in an
unusual format. An explanation as to the function of each piece of code that needs to be added to a report
is given to help understanding. To make the process simpler and faster there is also the template report in
the Zetadocs for NAV installation pack which contains the elements that are to be added to an existing
report to enable it for sending. It is recommended that you complete the previous sections of this
installation document before attempting to create a Zetadocs for NAV report, because much of the code to
be added to an existing report depends upon other Zetadocs for NAV objects.
Please note that these instructions appear long and are written to accommodate people with little NAV
development experience. Once understood, modifying a report should only take a matter of minutes.
Report Overview
The goal in editing a report to enable it for Zetadocs is to build a list of embedded commands to be written
on a separate page at the start of each record report. So for a report which is run for 4 records there will be
1 page inserted before each record output totaling 4 pages in all. There are a number of options for where
the code provided is added into a report, what follows is our suggestion as it will work with most of the
reports supported.
Required Code Overview:
Send Results Generation call
o All records passed to Zetadocs codeunit to resolve Document Set rules for sending
settings and recipient information.
Error and user specified record skipping
o Code to skip records which have a send results error or records marked by the user to
be explicitly skipped.
Embedded Command Generation call
o For each record generating the required embedded commands from the send results.
Zetadocs Embedded Commands Section
o An area in the report to put textboxes where the embedded commands will be written.
Optional code Overview:
Print for Zetadocs option

Zetadocs for NAV Installation Guide
Advanced Zetadocs for NAV Report Writing
This edition 18/11/2009 © Copyright Equisys plc 2009 All trademarks acknowledged All rights reserved Page 86
o Request Form radio buttons. Report option to allow user to choose output format of
the report, normal or Zetadocs.
o Additional code to suppress output of embedded commands when printing report
normally.
Import the Template Zetadocs for NAV Report
Ensure that the Zetadocs for NAV report template has been imported into the object designer.
Report 9009959
‚<CD Drive>:\Zetadocs NAV Server Components\Zetadocs for NAV V3.0 Additions Report
9009959.txt‛
We will refer to this report from now on as the template and to the report you are editing as the report.
NOTE: The template is based on the ‚Sales Header‛ table as an example. You must edit the code to use the
table your report is based on as instructed.
Global, Local and Text Constants
Open the template in the Report Designer and view the C/AL Globals (View CA/L Globals)
Select all global variables (Ctrl + A), right-click and select Copy
Open the report and view the C/AL Globals
Scroll to the bottom of any existing globals in your report and select the blank global variable row,
right-click and select Paste to paste the additional Zetadocs Globals into the report.
You must now repeat the above steps for the Text Constants:
Code Segments
Next you need to copy the code from the template to your report
Open the template in the Report Designer again and select an empty data item row.
Figure 58 – Zetadocs Template Report in Report Designer
Press F9 or View C/AL Code to view the PreReport Triggers.
Report – OnPreReport
The code here initializes the Zetadocs codeunit and passes each record being sent to query the rules tables
and sets the appropriate send information for each record.
Copy and paste the code below for the Report – OnPreReport function into the top of the same
function in your report.

Zetadocs for NAV Installation Guide
Advanced Zetadocs for NAV Report Writing
This edition 18/11/2009 © Copyright Equisys plc 2009 All trademarks acknowledged All rights reserved Page 87
Now edit the function parameters and function calls in place. These are signified by <param
description> in the code below.
o <Report No.> - The ID of your report.
o <Main DataItem Name> - This is the name of the first DataItem in your report. Typically it is
the name of the table upon which your report is based.
Code:
ZetadocsSend := TRUE;
noError := TRUE;
IF NOT ZetadocsSendResultGen.Initialize(<Report No.>) THEN
BEGIN
CLEAR(ZetadocsUtilities);
CLEAR(ZetadocsSendResultGen);
CLEAR(ZetadocsPrnRem);
CurrReport.QUIT;
END
ELSE
BEGIN
IF <Main DataItem Name>.FIND('-') THEN
REPEAT
BEGIN
// Get the RecordID
IF noError THEN
BEGIN
RecRef.GETTABLE(<Main DataItem Name>);
IF NOT ZetadocsSendResultGen.AddRecord(RecRef.RECORDID) THEN
BEGIN
noError := FALSE;
CLEAR(ZetadocsUtilities);
CLEAR(ZetadocsSendResultGen);
CLEAR(ZetadocsPrnRem);
CurrReport.QUIT;
END;
END;
END;
UNTIL <Main DataItem Name>.NEXT = 0;
IF noError THEN
IF NOT ZetadocsSendResultGen.ResolveSendInfo() THEN BEGIN
CLEAR(ZetadocsUtilities);
CLEAR(ZetadocsSendResultGen);
CLEAR(ZetadocsPrnRem);
CurrReport.QUIT;
END;
END;
Report – OnPostReport
The code here clears automation variables used during sending.
Copy and paste the code below for the Report – OnPostReport function into the top of the same
function in your report.
Code:
CLEAR(ZetadocsUtilities);
CLEAR(ZetadocsSendResultGen);
CLEAR(ZetadocsPrnRem);
Zetadocs Embedded Commands Data Item
This data item is added to provide a location to put the Zetadocs Embedded commands text box. The goal is
to insert a page before each record report which will contain the embedded commands to be read by the

Zetadocs for NAV Installation Guide
Advanced Zetadocs for NAV Report Writing
This edition 18/11/2009 © Copyright Equisys plc 2009 All trademarks acknowledged All rights reserved Page 88
Zetadocs Client. This page will then be removed from the resulting document and therefore should not
contain any report data. For some reports such as the ‚Statement‛ report, where each page has a recurring
header which contains the customer address information then placement of the Zetadocs embedded
command text box may need to be different and resized to force all report data to be printed from page 2
onwards.
In the report designer select an empty row and create a new data item of type ‚Integer‛ called
‚Zetadocs Embedded Commands‛.
Move the data item up to just below your main data item and indent once so that it will be the first
page of output in your report.
Select the Zetadocs Embedded Commands data item in your report and press Shift + F4 or View
Properties.
Set the properties DataItemTableView to ‚SORTING(Number)‛ or alternatively cut and paste this
property value from the equivalent in the template.
Return to the template report designer select View Sections.
Select the three textboxes called ‚ZetadocsEmbComms‚, ‚ZetadocsCustComms‛ and
‚ZetadocsMultRecComms‛ in the Zetadocs Embedded Commands section and copy to clipboard
(Ctrl + C).
View the sections on your report and paste (Ctrl + V) the textbox into the Zetadocs Embedded
Command section.
Zetadocs Embedded Commands, Body(1) – OnPreSection
As we are adding an additional page which will be removed from the final document we need to decrement
the page numbers. This must be done in this section trigger OnPreSection
Open the report designer for the template.
Select View Sections from the main menu.
Select the Zetadocs Embedded Commands, Body(1) section and press F9 to view the code.
Copy the code below for the Zetadocs Embedded Commands, Body(1) – OnPreSection function.
Paste the code into the top of the same function in your report.
Code:
CurrReport.PAGENO := CurrReport.PAGENO ” 1;
Figure 59 – Adding Zetadocs Embedded Commands DataItem
Zetadocs Embedded Commands – OnPreDataItem
Ensures we only write one set of embedded commands per record.
Return to the report designer for the template.
Select the DataItem Zetadocs Embedded Commands and press F9 to view the code.

Zetadocs for NAV Installation Guide
Advanced Zetadocs for NAV Report Writing
This edition 18/11/2009 © Copyright Equisys plc 2009 All trademarks acknowledged All rights reserved Page 89
Copy the code below for the Zetadocs Embedded Commands – OnPreDataItem function .
Paste the code into the top of the same function in your report.
Code:
SETRANGE(Number,1,1);
Zetadocs Embedded Commands – OnAfterGetRecord
The code here queries the Zetadocs Send Results Gen codeunit for the embedded commands to be written
onto the report page in the Zetadocs Embedded Commands textboxes. The first textbox created will contain
the standard set of embedded commands recognized by Zetadocs. The second textbox will contain any
custom commands that have been created for a specific system, and the third textbox will contain
addressing information for the any additional recipients.
Copy the code below for the Zetadocs Embedded Commands - OnAfterGetRecord function.
Paste the code into the top of the same function in your report.
Now edit the function parameters and function calls in place. These are signified by <param
description> in the code below.
o <Main DataItem Name> - This is the name of the first DataItem in your report. Typically it is
the name of the table upon which your report is based.
Code:
RecRef.GETTABLE(<Main DataItem Name>);
ZetadocsEmbComms:= ZetadocsSendResultGen.GetRecordEmbComms(RecRef.RECORDID,
ZetadocsEmbCommsAction);
CASE ZetadocsEmbCommsAction OF
ZetadocsEmbCommsAction::Error:
BEGIN
CLEAR(ZetadocsUtilities);
CLEAR(ZetadocsSendResultGen);
CLEAR(ZetadocsPrnRem);
CurrReport.QUIT;
END
END; //CASE
ZetadocsCustComms := ZetadocsSendResultGen.GetRecordCustComms(RecRef.RECORDID,
ZetadocsEmbCommsAction);
CASE ZetadocsEmbCommsAction OF
ZetadocsEmbCommsAction::Error:
BEGIN
CLEAR(ZetadocsUtilities);
CLEAR(ZetadocsSendResultGen);
CLEAR(ZetadocsPrnRem);
CurrReport.QUIT;
END
END; //CASE
ZetadocsMultRecComms := ZetadocsSendResultGen.GetRecordMultRecComms(RecRef.RECORDID,
ZetadocsEmbCommsAction);
CASE ZetadocsEmbCommsAction OF
ZetadocsEmbCommsAction::Error:
BEGIN
CLEAR(ZetadocsUtilities);
CLEAR(ZetadocsSendResultGen);
CLEAR(ZetadocsPrnRem);
CurrReport.QUIT;
END
END; //CASE
Zetadocs Embedded Commands – OnPostDataItem
Copy the code below for the Zetadocs Embedded Commands – OnPostDataItem function.
Paste the code into the top of the same function in your report.
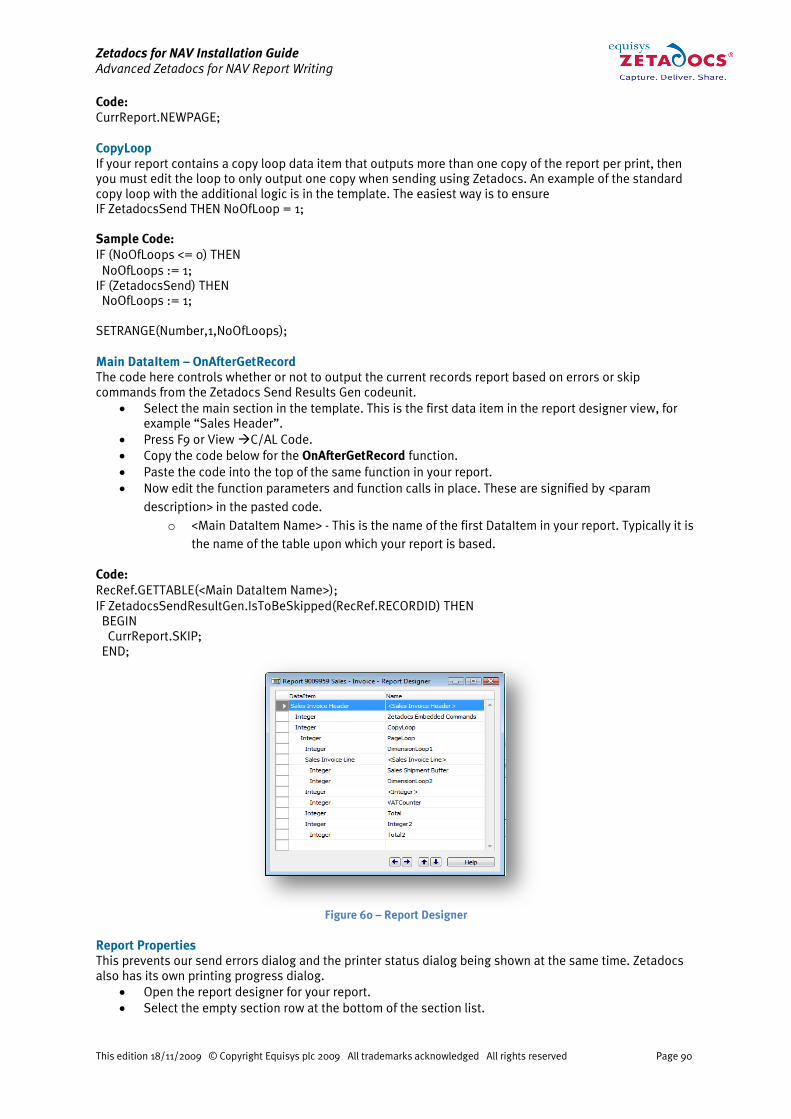
Zetadocs for NAV Installation Guide
Advanced Zetadocs for NAV Report Writing
This edition 18/11/2009 © Copyright Equisys plc 2009 All trademarks acknowledged All rights reserved Page 90
Code:
CurrReport.NEWPAGE;
CopyLoop
If your report contains a copy loop data item that outputs more than one copy of the report per print, then
you must edit the loop to only output one copy when sending using Zetadocs. An example of the standard
copy loop with the additional logic is in the template. The easiest way is to ensure
IF ZetadocsSend THEN NoOfLoop = 1;
Sample Code:
IF (NoOfLoops <= 0) THEN
NoOfLoops := 1;
IF (ZetadocsSend) THEN
NoOfLoops := 1;
SETRANGE(Number,1,NoOfLoops);
Main DataItem – OnAfterGetRecord
The code here controls whether or not to output the current records report based on errors or skip
commands from the Zetadocs Send Results Gen codeunit.
Select the main section in the template. This is the first data item in the report designer view, for
example ‚Sales Header‛.
Press F9 or View C/AL Code.
Copy the code below for the OnAfterGetRecord function.
Paste the code into the top of the same function in your report.
Now edit the function parameters and function calls in place. These are signified by <param
description> in the pasted code.
o <Main DataItem Name> - This is the name of the first DataItem in your report. Typically it is
the name of the table upon which your report is based.
Code:
RecRef.GETTABLE(<Main DataItem Name>);
IF ZetadocsSendResultGen.IsToBeSkipped(RecRef.RECORDID) THEN
BEGIN
CurrReport.SKIP;
END;
Figure 60 – Report Designer
Report Properties
This prevents our send errors dialog and the printer status dialog being shown at the same time. Zetadocs
also has its own printing progress dialog.
Open the report designer for your report.
Select the empty section row at the bottom of the section list.

Zetadocs for NAV Installation Guide
Advanced Zetadocs for NAV Report Writing
This edition 18/11/2009 © Copyright Equisys plc 2009 All trademarks acknowledged All rights reserved Page 91
Press Shift + F4 or click View Properties.
Set the ShowPrinterStatus to No.
Completed Report
Shown here is a working report of three records. Note the inserted pages with the Zetadocs embedded
commands at pages 1, 3 and 5.
Figure 61 - Zetadocs Enabled Report Preview
21.9 Optional Zetadocs Report Format
There may be a situation where you want the ability to print the report as you used to and also to be able to
print it with the embedded commands to Zetadocs without having to duplicate the report in the system. The
follow instruction allows you to add some additional code to your reports to make this possible. To decide
between the output formats they desire the user selects the ‚Printing Action‛ option on the request form of
the report.
Figure 62 - Optional Zetadocs Report Format Request Form
Already Added Zetadocs Code
All the code that you have added to the Zetadocs report must be optionally run. This means we must only
perform the code if we want to output the printed report in Zetadocs format to the Zetadocs Printer.
Go back and locate the code that was pasted into the following triggers.
o Report ” OnPreReport
o Zetadocs Embedded Commands ” OnAfterGetRecord
o Zetadocs Embedded Commands ” OnPostDataItem

Zetadocs for NAV Installation Guide
APPENDIX
This edition 18/11/2009 © Copyright Equisys plc 2009 All trademarks acknowledged All rights reserved Page 92
o Main DataItem ” OnAfterGetRecord
Add the following red code around the already added code to ensure it only gets run when the
Zetadocs option is selected
Code:
//Before added code
CASE ZetadocsPrintOption OF
ZetadocsPrintOption::Zetadocs:
BEGIN
//Added Zetadocs Report code
//After added code
END;
END;
Request Form
Once again open the template (Zetadocs Additions Report) in the Report Designer.
Click ViewRequest Form.
Select all controls (Ctrl + A) on the request form and copy (Ctrl + C).
Open the request form for your report.
Paste the controls on to the request form and move to a suitable position.
Request Form – OnInit
In the template request form designer, view the Request Form code (press F9 or ViewCA/L).
Copy the code below for the OnInit function.
Paste the code into the top of the same function in your report.
Code:
ZetadocsPrintOption := ZetadocsPrintOption::Zetadocs;
Zetadocs Embedded Commands, Body(1) - OnPreSection
Open the report designer for your report.
Click ViewSections
Select the Zetadocs Embedded Commands, Body(1) section and press F9
In the Zetadocs Embedded Commands, Body(1) - OnPreSection function replace the previously
added code with the code below.
Code:
CASE ZetadocsPrintOption OF
ZetadocsPrintOption::Zetadocs:
BEGIN
CurrReport.SHOWOUTPUT(TRUE);
CurrReport.PAGENO := CurrReport.PAGENO ” 1;
END;
ELSE
CurrReport.SHOWOUTPUT(FALSE);
END;
22. APPENDIX
22.1 Troubleshooting
This section provides help with resolving common problems with the system. To assist in trouble shooting
problem with the Zetadocs system there are a number of log files which can help diagnose a problem or
assist in getting the configuration of the system correct.
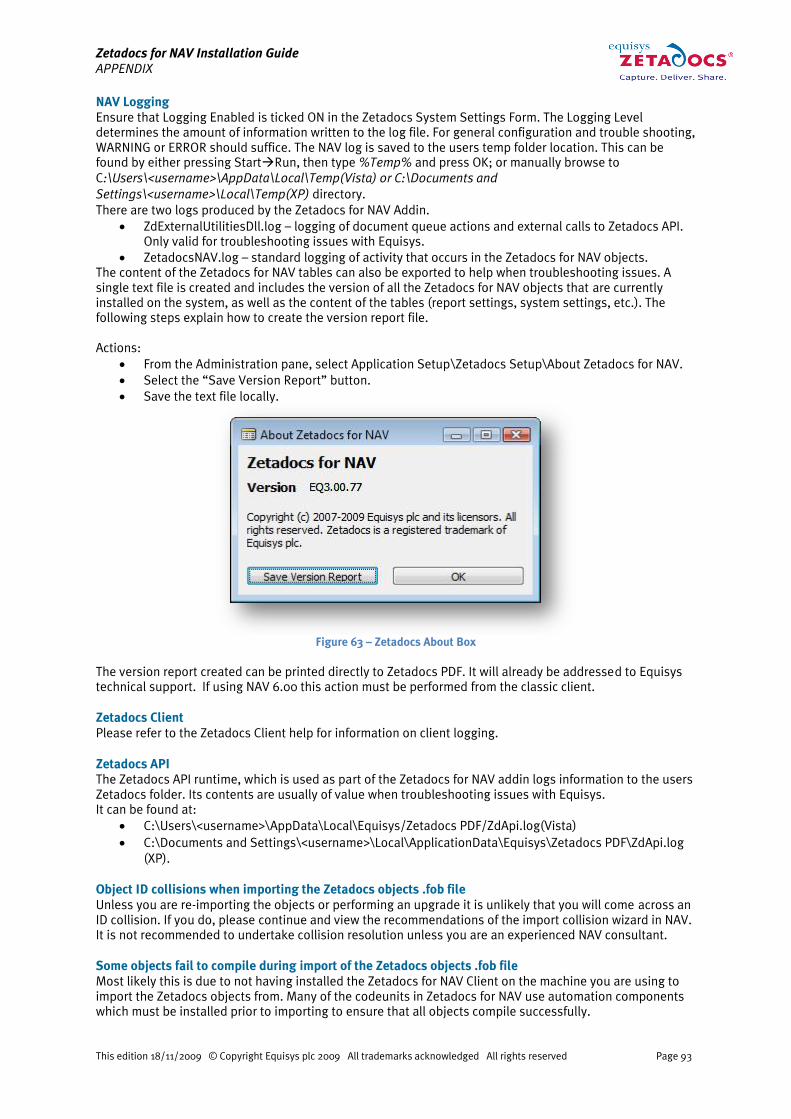
Zetadocs for NAV Installation Guide
APPENDIX
This edition 18/11/2009 © Copyright Equisys plc 2009 All trademarks acknowledged All rights reserved Page 93
NAV Logging
Ensure that Logging Enabled is ticked ON in the Zetadocs System Settings Form. The Logging Level
determines the amount of information written to the log file. For general configuration and trouble shooting,
WARNING or ERROR should suffice. The NAV log is saved to the users temp folder location. This can be
found by either pressing StartRun, then type %Temp% and press OK; or manually browse to
C:\Users\<username>\AppData\Local\Temp(Vista) or C:\Documents and
Settings\<username>\Local\Temp(XP) directory.
There are two logs produced by the Zetadocs for NAV Addin.
ZdExternalUtilitiesDll.log ” logging of document queue actions and external calls to Zetadocs API.
Only valid for troubleshooting issues with Equisys.
ZetadocsNAV.log ” standard logging of activity that occurs in the Zetadocs for NAV objects.
The content of the Zetadocs for NAV tables can also be exported to help when troubleshooting issues. A
single text file is created and includes the version of all the Zetadocs for NAV objects that are currently
installed on the system, as well as the content of the tables (report settings, system settings, etc.). The
following steps explain how to create the version report file.
Actions:
From the Administration pane, select Application Setup\Zetadocs Setup\About Zetadocs for NAV.
Select the ‚Save Version Report‛ button.
Save the text file locally.
Figure 63 – Zetadocs About Box
The version report created can be printed directly to Zetadocs PDF. It will already be addressed to Equisys
technical support. If using NAV 6.00 this action must be performed from the classic client.
Zetadocs Client
Please refer to the Zetadocs Client help for information on client logging.
Zetadocs API
The Zetadocs API runtime, which is used as part of the Zetadocs for NAV addin logs information to the users
Zetadocs folder. Its contents are usually of value when troubleshooting issues with Equisys.
It can be found at:
C:\Users\<username>\AppData\Local\Equisys/Zetadocs PDF/ZdApi.log(Vista)
C:\Documents and Settings\<username>\Local\ApplicationData\Equisys\Zetadocs PDF\ZdApi.log
(XP).
Object ID collisions when importing the Zetadocs objects .fob file
Unless you are re-importing the objects or performing an upgrade it is unlikely that you will come across an
ID collision. If you do, please continue and view the recommendations of the import collision wizard in NAV.
It is not recommended to undertake collision resolution unless you are an experienced NAV consultant.
Some objects fail to compile during import of the Zetadocs objects .fob file
Most likely this is due to not having installed the Zetadocs for NAV Client on the machine you are using to
import the Zetadocs objects from. Many of the codeunits in Zetadocs for NAV use automation components
which must be installed prior to importing to ensure that all objects compile successfully.

Zetadocs for NAV Installation Guide
APPENDIX
This edition 18/11/2009 © Copyright Equisys plc 2009 All trademarks acknowledged All rights reserved Page 94
Things to check for (in order):
You have installed the Zetadocs for NAV Client on the machine you are using to import the
Zetadocs objects
You are logged in as the user who installed the Zetadocs for NAV Client
If the above are true but you are still having problems try uninstalling and re-installing the
Zetadocs for NAV Client
When you run the Customer/Vendor Card no information is displayed in the Zetadocs tab
Copy and pasting the Zetadocs subform control on to the Zetadocs tab should copy all required subform
links. If you are experiencing problems check the following property values on the subform control on the
Zetadocs tab:
SubFormID: Zetadocs Customer Rule Subform
SubFormLink: Customer No.=FIELD(No.),Zd Rule ID No.=CONST(0)
OR For Vendors
SubFormID: Zetadocs Vendor Rule Subform
SubFormLink: Vendor No.=FIELD(No.),Zd Rule ID No.=CONST(0)
22.2 Zetadocs for NAV Object List
Type ID NAME Status
Table 9009959 Zetadocs System Settings New
Table 9009960 Zetadocs Template New
Table 9009961 Zetadocs Document Queue Item New
Table 9009962 Zetadocs Sales Document Queue New
Table 9009963 Zetadocs System Rule New
Table 9009964 Zetadocs Customer Rule New
Table 9009965 Zetadocs Report Settings New
Table 9009966 Zetadocs Document Set New
Table 9009968 Zetadocs Send Result New
Table 9009970 Zetadocs No. Series New
Table 9009971 Zetadocs Vendor Rule New
Table 9009973 Zetadocs Company Type New
Table 9009974 Zetadocs Company Rule New
Table 9009975 Zetadocs Send Settings New
Table 9009976 Zetadocs Sys. Rule Recip. Line New
Table 9009977 Zetadocs Cus. Rule Recip. Line New
Table 9009978 Zetadocs Ven. Rule Recip. Line New
Table 9009979 Zetadocs Company Rul Rcp. Line New
Table 9009982 Zetadocs Purch. Doc. Queue New
Form 9009959 Zetadocs System Settings New
Form 9009960 Zetadocs Template Card New
Form 9009961 Zetadocs Template List New
Form 9009962 Zetadocs Sales Document Queue New
Form 9009963 Zetadocs System Rule card New
Form 9009964 Zetadocs Customer Rule Subform New
Form 9009965 Zetadocs Report Settings List New
Form 9009966 Zetadocs Delivery New
Form 9009967 Zetadocs Batch Delivery New
Form 9009968 Zetadocs Batch Errors New
Form 9009969 Zetadocs Document Sets New
Form 9009970 Zetadocs System Rule List New
Form 9009971 Zetadocs Customer Rule Card New
Form 9009972 Zetadocs Customer Rule List New
Form 9009973 Zetadocs No. Series New
Form 9009974 Zetadocs Sales Doc Queue Setup New
Form 9009975 Zetadocs Printer Reminder New
Form 9009976 Zetadocs Vendor Rule Subform New
Form 9009977 Zetadocs Vendor Rule Card New

Zetadocs for NAV Installation Guide
APPENDIX
This edition 18/11/2009 © Copyright Equisys plc 2009 All trademarks acknowledged All rights reserved Page 95
Type ID NAME Status
Form 9009978 Zetadocs Vendor Rule List New
Form 9009979 Zetadocs Report Settings Card New
Form 9009980 Zetadocs Company Type List New
Form 9009981 Zetadocs Data Import New
Form 9009982 Zetadocs Purch. Document Queue New
Form 9009983 Zetadocs Purch Doc Queue Setup New
Form 9009984 Zetadocs Document Set Card New
Form 9009985 Zetadocs About Box New
Form 9009986 Zetadocs Sys. Rul Rcp. Subform New
Form 9009987 Zetadocs Cus. Rul Rcp. Subform New
Form 9009988 Zetadocs Ven. Rul Rcp. Subform New
Form 9009989 Zetadocs Cust. Rule Cont. Info New
Form 9009990 Zetadocs Cust. Rule Temp. Info New
Form 9009991 Zetadocs Vend. Rule Cont. Info New
Form 9009992 Zetadocs Vend. Rule Temp. Info New
Form 9009993 Zetadocs Cus. Add Rcp. Info. New
Form 9009994 Zetadocs Ven. Add Rcp. Info. New
Form 9009995 Zetadocs Delivery Edit New
XMLPort 9009959 Zetadocs Xml Port New
Codeunit 9009959 Zetadocs-Utilities New
Codeunit 9009960 Zetadocs-Send Results Gen New
Codeunit 9009961 Zetadocs-Embedded Commands Gen New
Codeunit 9009962 Zetadocs-Customize New
Codeunit 9009963 Zetadocs-Integration New
Codeunit 9009964 Zetadocs-Automation New
Menusuite 55 Zetadocs for NAV New
NAV 6.00 Objects:
Type ID NAME Status
Page 9009961 Zetadocs Template List New
Page 9009962 Zetadocs Sales Document Queue New
Page 9009966 Zetadocs Delivery New
Page 9009967 Zetadocs Batch Delivery New
Page 9009968 Zetadocs Batch Errors New
Page 9009969 Zetadocs Document Sets New
Page 9009971 Zetadocs Customer Rule Card New
Page 9009972 Zetadocs Customer Rule List New
Page 9009975 Zetadocs Printer Reminder New
Page 9009977 Zetadocs Vendor Rule Card New
Page 9009978 Zetadocs Vendor Rule List New
Page 9009982 Zetadocs Purch. Document Queue New
Page 9009985 Zetadocs About Box New
Page 9009987 Zetadocs Cus. Rul Rcp. Subform New
Page 9009988 Zetadocs Ven. Rul Rcp. Subform New
Page 9009989 Zetadocs Cust. Rule Cont. Info New
Page 9009990 Zetadocs Cust. Rule Temp. Info New
Page 9009991 Zetadocs Vend. Rule Cont. Info New
Page 9009992 Zetadocs Vend. Rule Temp. Info New
Page 9009993 Zetadocs Cus. Add Rcp. Info. New
Page 9009994 Zetadocs Ven. Add Rcp. Info. New
Page 9009995 Zetadocs Delivery Edit New
Existing Objects:
Type ID NAME Status
Table 18 Customer Modified
Table 36 Sales Header Modified
Table 112 Sales Invoice Header Modified

Zetadocs for NAV Installation Guide
APPENDIX
This edition 18/11/2009 © Copyright Equisys plc 2009 All trademarks acknowledged All rights reserved Page 96
Type ID NAME Status
Table 114 Sales Cr.Memo Header Modified
Table 110 Sales Shipment Header Modified
Table 6660 Return Receipt Header Modified
Table 23 Vendor Modified
Table 38 Purchase Header Modified
Table 122 Purch. Inv. Header Modified
Table 124 Purch. Cr. Memo Hdr. Modified
Table 120 Purch. Rcpt. Header Modified
Table 6650 Return Shipment Header Modified
Form 21 Customer Card Modified
Form 41 Sales Quote Modified
Form 42 Sales Order Modified
Form 43 Sales Invoice Modified
Form 44 Sales Credit Memo Modified
Form 507 Blanket Sales Order Modified
Form 6630 Sales Return Order Modified
Form 130 Posted Sales Shipment Modified
Form 132 Posted Sales Invoice Modified
Form 134 Posted Sales Credit Memo Modified
Form 6660 Posted Return Receipt Modified
Form 26 Vendor Card Modified
Form 49 Purchase Quote Modified
Form 50 Purchase Order Modified
Form 51 Purchase Invoice Modified
Form 52 Purchase Credit Memo Modified
Form 509 Blanket Purchase Order Modified
Form 6640 Purchase Return Order Modified
Form 138 Posted Purchase Invoice Modified
Form 6650 Posted Return Shipment Modified
Form 140 Posted Purchase Credit Memo Modified
Form 136 Posted Purchase Receipt Modified
22.3 Zetadocs for NAV Menusuite
The menusuite changes listed here are a general guideline for giving regular or administrator NAV user’s
access to the Zetadocs features and configuration forms. It is up to the installer what level of access
permissions are given to configuration forms after they finish the installation. It is assumed, that in
situations where a system administrator in the client company has an understanding of the Zetadocs for
NAV system and is capable of editing the rules and settings, that access to these forms would remain for
the system administrator after installation.
The following table shows the list of menu items and groups to be created using the Navigation Pane
Designer (Alt + F12) for configuration. As mentioned before, it may be preferable to remove some of the
items on completion of installation and configuration. This is should be decided by the installer.
Type Caption Location Object Type and ID
Item Zetadocs Sales Document
Queue
Sales & Marketing\Order
Processing (Group)
Form 9009962 ” Zetadocs Sales Document
Queue
Item Zetadocs Purchase Document
Queue
Purchase\Order Processing
(Group)
Form 9009982 ” Zetadocs Purch. Document
Queue
Group Zetadocs Setup Administration\Application Setup
(Group)
Item Zetadocs No. Series Administration\Application
Setup\Zetadocs Setup (Group)
Form 9009973 ” Zetadocs No. Series
Item Zetadocs System Settings Administration\Application
Setup\Zetadocs Setup (Group)
Form 9009959 ” Zetadocs System Settings

Zetadocs for NAV Installation Guide
APPENDIX
This edition 18/11/2009 © Copyright Equisys plc 2009 All trademarks acknowledged All rights reserved Page 97
Type Caption Location Object Type and ID
Item Zetadocs Templates Administration\Application
Setup\Zetadocs Setup (Group)
Form 9009960 ” Zetadocs Template Card
Item Zetadocs Document Sets Administration\Application
Setup\Zetadocs Setup (Group)
Form 9009984 ” Zetadocs Document Set Card
Item Zetadocs System Rules Administration\Application
Setup\Zetadocs Setup (Group)
Form 9009963 ” Zetadocs System Rule Card
Item Zetadocs Customer Rules Administration\Application
Setup\Zetadocs Setup (Group)
Form 9009971 ” Zetadocs Customer Rule Card
Item Zetadocs Vendor Rules Administration\Application
Setup\Zetadocs Setup (Group)
Form 9009977 ” Zetadocs Vendor Rule Card
Item Zetadocs Report Settings Administration\Application
Setup\Zetadocs Setup (Group)
Form 9009965 ” Zetadocs Report Settings
Item Zetadocs Sales Doc. Queue
Setup
Administration\Application
Setup\Zetadocs Setup (Group)
Form 9009974 ” Zetadocs Sales Doc Queue
Setup
Item Zetadocs Purch. Doc. Queue
Setup
Administration\Application
Setup\Zetadocs Setup (Group)
Form 9009983 ” Zetadocs Purch Doc Queue
Setup
Item Zetadocs Company Types Administration\Application
Setup\Zetadocs Setup (Group)
Form 9009980 ” Zetadocs Company Type List
Item Zetadocs Configuration Import Administration\Application
Setup\Zetadocs Setup (Group)
Form 9009981 ” Zetadocs Configuration Import
Item About Zetadocs for NAV Administrator\Application
Setup\Zetadocs Setup (Group)
Form 9009985 ” Zetadocs About Box
Zetadocs for NAV Role Tailored Client Menusuite Changes
Type Caption Location Object Type and ID
Item Zetadocs Sales Document
Queue
Sales & Marketing\Order
Processing (Group)
Page 9009962 ” Zetadocs Sales Document
Queue
Item Zetadocs Purchase Document
Queue
Purchase\Order Processing
(Group)
Page 9009982 ” Zetadocs Purch. Document
Queue
Group Zetadocs Setup Administration\Application Setup
(Group)
Item Zetadocs Customer Rules Administration\Application
Setup\Zetadocs Setup (Group)
Page 9009971 ” Zetadocs Customer Rule Card
Item Zetadocs Vendor Rules Administration\Application
Setup\Zetadocs Setup (Group)
Page 9009977 ” Zetadocs Vendor Rule Card
Item About Zetadocs for NAV Administrator\Application
Setup\Zetadocs Setup (Group)
Page 9009985 ” Zetadocs About Box
22.4 Installing in a Terminal Services Environment
Follow the steps below to ensure successful installation in a Terminal Services Environment.
Overview of Installation:
Checking that your scenario is supported.
Ensuring you are logged in as an Administrator.
Ensuring the Terminal Server is set to Application Server/Terminal Server mode.
Ensuring the permissions are granted to install kernel-mode printer drivers on Windows 2003
systems.
Installing the Zetadocs NAV client through Add/Remove programs (directly on the terminal server
and not from within an RDP session).

Zetadocs for NAV Installation Guide
APPENDIX
This edition 18/11/2009 © Copyright Equisys plc 2009 All trademarks acknowledged All rights reserved Page 98
Testing the Zetadocs NAV client.
On some systems due to default Windows security settings, Zetadocs PDF printer drivers are not
automatically installed. The following information will allow you to manually configure these drivers.
Check that your scenario is supported
Firstly you need to verify that your intended scenario is supported.
Supported Scenarios
Remote Session mode
An application (e.g. NAV) and Zetadocs are installed onto the terminal server. A single remote session is
opened onto the server. The user opens an application (e.g. NAV) in the remote session, and prints to the
Zetadocs PDF printer. Zetadocs client will launch automatically within the remote session. Zetadocs is able
to start Microsoft Outlook in the remote session.
Published Application mode
An application (e.g. NAV) and Zetadocs client are installed onto the terminal server. An application (e.g.
NAV) runs as a published application and prints to the Zetadocs PDF printer. In this scenario Zetadocs client
starts up in the same window as the published application. When both applications terminate, the
published application window closes down automatically.
Unsupported Scenarios
Remote mode
An application (e.g. NAV) is installed on a client machine and Zetadocs is installed on the terminal server.
An application (e.g. NAV) is opened on the client but not within a remote session. The client application is
still able to see the shared Zetadocs PDF printer on the remote server. However, the application cannot
print to the printer in this case.
Mixed mode
An application (e.g. NAV) is installed on the terminal server and the Zetadocs client is installed on a client
machine. In this mode, NAV runs as a published application (in a remote session) and prints to the Zetadocs
PDF printer. The user starts up Zetadocs client on the client machine (not in a remote session). In this
scenario the client is unable to pick up the printed files from the server and so this scenario is not
supported.
Ensure you are logged in as an Administrator
Log on to the terminal server system as a user with administrative rights.
Ensure that the Terminal Server is set to Application Server/Terminal Server mode
Before installation, the terminal server must be switched into Application Server mode (Windows 2000) or
Terminal Server mode (Windows 2003).
See http://support.microsoft.com/default.aspx?scid=kb;en-us;306626& sd=tech for more details.
Ensure permissions are granted to install kernel-mode printer drivers (Windows 2003 only)
From the Start menu select run.
In the run dialog type gpedit.msc and press OK.

Zetadocs for NAV Installation Guide
APPENDIX
This edition 18/11/2009 © Copyright Equisys plc 2009 All trademarks acknowledged All rights reserved Page 99
Figure 64 – Run window
Browse to the disallow installation of printers using kernel-mode drivers option in Computer
configuration|Adminstrative Templates|Printers:
Figure 65 – Group Policy
Use the right click menu to open the Properties dialog.
Set this option to Disabled and select OK.

Zetadocs for NAV Installation Guide
APPENDIX
This edition 18/11/2009 © Copyright Equisys plc 2009 All trademarks acknowledged All rights reserved Page 100
Figure 66 - Properties
Install Zetadocs NAV Client through Add/Remove programs
Note: Installing the Zetadocs Client application and printers should be done by logging onto the terminal
server system and not via a terminal session.
Start the Add or Remove Programs control panel applet.
Click on Add New Programs then click on the CD or Floppy. (as below)

Zetadocs for NAV Installation Guide
APPENDIX
This edition 18/11/2009 © Copyright Equisys plc 2009 All trademarks acknowledged All rights reserved Page 101
Figure 67 – Add Remove Programs
When prompted to insert a program disk, click Next then Browse.
Figure 68 – Start Installation Program

Zetadocs for NAV Installation Guide
APPENDIX
This edition 18/11/2009 © Copyright Equisys plc 2009 All trademarks acknowledged All rights reserved Page 102
Figure 69 – Run Installation Program Dialog
Locate the file setup.exe. Select it and click the Open button.
On the Run Installation Program dialog box, click Next.
If prompted with an Open File – Security Warning click Run.
Figure 70 – Security Warning
The Zetadocs PDF installation will now start, select the language you wish to install, then click OK.

Zetadocs for NAV Installation Guide
APPENDIX
This edition 18/11/2009 © Copyright Equisys plc 2009 All trademarks acknowledged All rights reserved Page 103
Figure 71 – Language Selection
Zetadocs client should install successfully. Click Finish to complete the installation.
Click Next on the Windows After Installation dialog box. Then Finish.
To verify the Zetadocs printer has installed correctly, browse to the Printers and Faxes folder, there
should be a Zetadocs printer installed.
Note: If the installation of Zetadocs client has failed for some reason, please refer to the following Microsoft
TechNet article:
http://www.microsoft.com/technet/prodtechnol/windowsserver2003/library/ServerHelp/447dad75-28f5-
4e99-80f8-17ad2359ba66.mspx
Publish Microsoft NAV for use with Zetadocs Client.
On the Citrix server, run Citrix Access Management Console from Start | All Programs | Citrix |
Management Consoles.
Expand Citrix Resources | Presentation Server | < Citrix farm>
Figure 72 – Citrix Access Management Console
Right click on Applications and select New | Publish Application.
Give the published application a name and description. Click Next.
Choose Application and Access from server. Click Next.
You will now need to browse to your Microsoft NAV executable. The default path is C:\Program
Files\Microsoft Dynamics NAV\CSIDE Client\fin.exe (or finsql.exe depending on whether you are
running the SQL version). Click Next.
Choose a Citrix server which will publish the application. Click Next.

Zetadocs for NAV Installation Guide
APPENDIX
This edition 18/11/2009 © Copyright Equisys plc 2009 All trademarks acknowledged All rights reserved Page 104
Enable the users and/or groups who can access the published application. Click Next.
Continue with the wizard enabling any features you wish to use. Click on Finish at the end.
Test the Zetadocs Client from a Published Application.
Run Program Neighbourhood from Start | Programs | Citrix | Citrix Access Clients | Program
Neighbourhood.
Open Microsoft NAV. Create a sample document by printing from a report which has been modified
for Zetadocs for NAV.
Print your sample document to the Zetadocs PDF printer.
Once the document has been successfully printed Zetadocs client will be started and the printed
document will appear in the document explorer window.
Send the document via email, hard copy or fax.