
Yeast Breads - Sol de TerraceTerminology Kneading: Process in which dough develops gluten to give...
24
Yeast Breads Terminology, Ingredients, & Procedures Galore! ☺
Transcript of Yeast Breads - Sol de TerraceTerminology Kneading: Process in which dough develops gluten to give...

Yeast Breads
Terminology, Ingredients, & Procedures Galore! ☺

Terminology
Kneading:
Process in which dough develops gluten to give the dough shape and structure.
Gluten
Protein that forms when flour and liquid are mixed.
Provides elasticity, shape and texture for the bread.
You only want to stir/mix quick breads a little to form a small amount of gluten
You want to stir/mix (knead) yeast breads a lot to form a large amount of gluten.

Terminology
Proofing: Final rise of yeast breads before baking. Dough doubles in size.
Proof box- cabinet that controls temp and humidity.
Fermentation: Yeast converts sugar into alcohol and carbon dioxide. Requires room temperature ~ 80-85 F (cooler temperatures will
take longer to react)

INGREDIENTS
1. Bread flour or all-purpose flour
Main ingredient- provides structure
Flour forms the basis for your bread.
Atmospheric conditions will make a difference…
You may not use the recommended amount of flour every
time.
DO NOT use cake flour!
Cake flour forms weak gluten

INGREDIENTS2. Water or milk:
Moisten, dissolve and combine other ingredients
Water activates the yeast.
Dissolve active dry yeast in warm water (115’F) to make the yeast
grow.
Water too cold= growth will not take place
Water too hot= growth action will be killed
Need to dissolve yeast in the water for 8-10 minutes (no stirring!!!)
Yeast will start to foam.

INGREDIENTS3. Yeast- living organism
Needs food (sugar) AND warmth and moisture in order to grow
Produces carbon dioxide gas; acts as leavening agent
Types:
Basic instant yeast = Bread Machine Yeast
Active Dry Yeast-
Needs to be activated by pouring it in warm water prior to mixing it into
the dough.
Fast Rising or “RapidRise” Yeast-
Eliminates the step of softening the yeast

General Tips About Yeast
If yeast is expired, throw it away
If you want to test to see if your yeast it too old…
Test it by adding ½ tsp sugar to the water and yeast.
If the yeast is alive, it will foam within 10 minutes.
(don’t touch)

INGREDIENTS continued…
4. Sugar
Food for yeast
Sugar adds sweetness
Will caramelize in the oven and give the crust a nice brown
color
INGREDIENTS
5. Fat
Flavor
Richness
Tenderness
Traps air and causes the dough layers to separate

INGREDIENTS
6. Salt- controls the yeast
Salt slows down the yeast and helps control the fermentation
process.
Adds flavor to bread
Prevents dough from getting sticky and hard to handle.
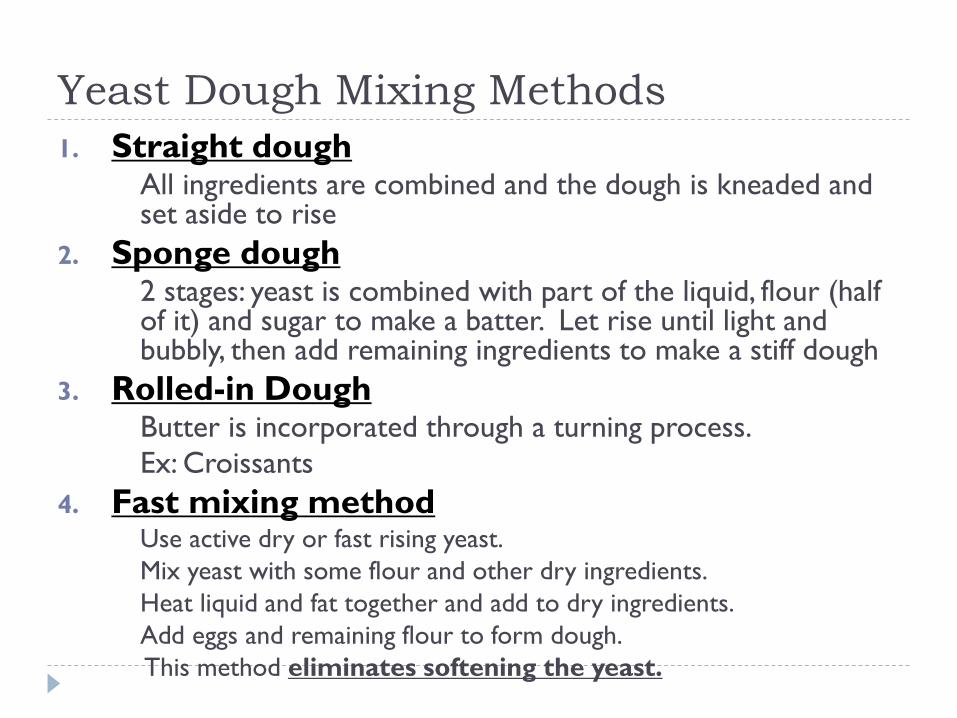
Yeast Dough Mixing Methods
1. Straight doughAll ingredients are combined and the dough is kneaded and set aside to rise
2. Sponge dough2 stages: yeast is combined with part of the liquid, flour (half of it) and sugar to make a batter. Let rise until light and bubbly, then add remaining ingredients to make a stiff dough
3. Rolled-in DoughButter is incorporated through a turning process.
Ex: Croissants
4. Fast mixing methodUse active dry or fast rising yeast.
Mix yeast with some flour and other dry ingredients.
Heat liquid and fat together and add to dry ingredients.
Add eggs and remaining flour to form dough.
This method eliminates softening the yeast.

STRAIGHT DOUGH
METHOD
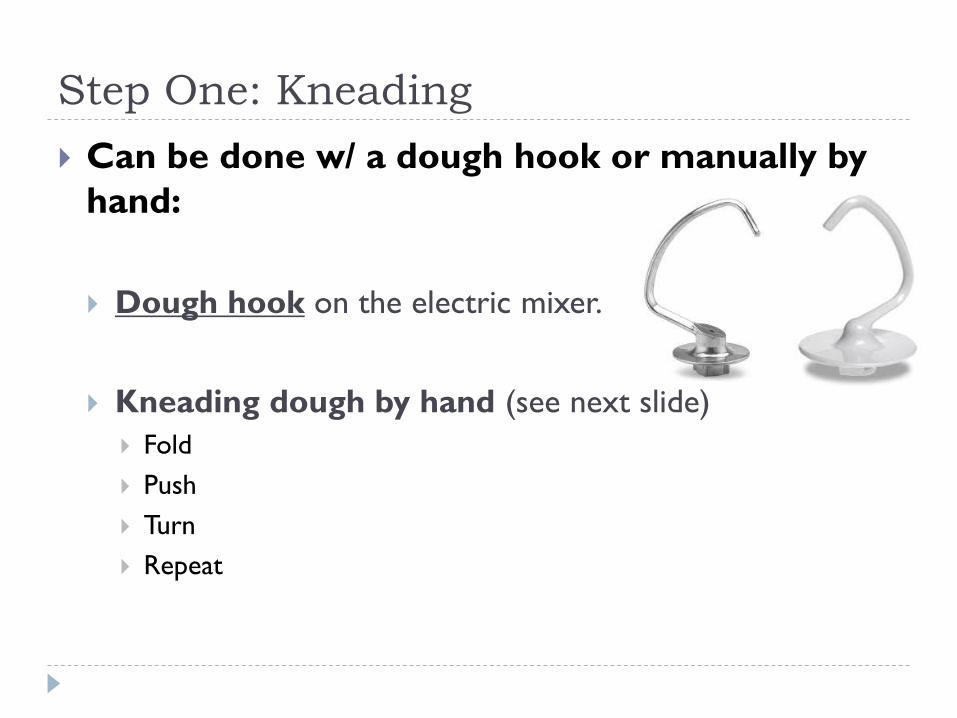
Step One: Kneading
Can be done w/ a dough hook or manually by
hand:
Dough hook on the electric mixer.
Kneading dough by hand (see next slide)
Fold
Push
Turn
Repeat

Kneading by Hand
Key Steps
1. Add just enough flour to the dough and your hands to keep the dough from sticking
2. Pat dough into a ball, which may feel sticky.
3. Flatten dough and fold it toward you.
4. Using the heels of your hands, push the dough away with a rolling motion.
5. Rotate dough a quarter turn and repeat the ‘fold, push and turn’ steps.
6. Keep kneading dough until it becomes smooth and elastic.
7. Use a little more flour if dough becomes too sticky, always working the flour into the ball of dough.
8. The process is complete in about 4 to 10 minutes, or when the dough is smooth, satiny and elastic, and when you poke it, the dough springs back.

Step 2: Resting
To create maximum resting conditions for the dough:
1. Cover the top of the mixing bowl loosely with a
damp, clean cloth or plastic wrap sprayed with
nonstick cooking spray.
2. Set the dough in a warm, draft-free place.
With Active Dry Yeast keep dough covered until it doubles
in size, anywhere from1-2 hours.
With RapidRiseYeast, let the dough rest for 10 minutes.
It is not required to double in size.

Step 3: Shaping
The type of bread you are making may vary the shaping process.
Scones Doughnuts Breadsticks Pizza Rolls Fry bread Bread Cloverleaf Croissants Snakes Breads Twists Butterfly rolls Bow knots Pretzels Pizza dough Braid

Step 3: Shaping for Regular Loaves
1. Lightly flour the work surface; shape the dough into a smooth ball.
2. Use a rolling pin to form a rectangle.
3. Beginning at the short end of the rectangle, roll the dough tightly to
make a loaf shape.
4. Pinch the seam and ends of the rolled dough with your fingers to seal it
closed.
5. Place dough, seam side down, in greased baking pan.
6. If you are using a recipe that requires a distinctive shape, follow these
same basic instructions but shape accordingly.

Step 4: Testing
To determine if your dough passes the ‘doubled in size’
stage:
1. Press the tips of two fingers lightly and quickly
about 1/2 inch into the dough.
2. If the impression you made stays, the dough is
doubled.

Step 5: Baking
May require one of the following prior to baking:
Wash: glaze of egg and water.
Provides color and shine, helps to attach toppings
Ex. Bagels and Soft Pretzels
Slashing
Cutting dough before baking, allows gas to escape- design
Ex. French Bread

Step 5: Baking
Follow precisely the recipe’s directions for preheating and
baking.
Use an oven thermometer for accuracy.
Place the baking pans several inches apart on the
center oven rack.
In the first five minutes in the oven, your bread will have one last growth spurt.

Step 5: Baking continued…
Oven temperatures may vary, so check your loaves about
10 minutes before recipe says they should be done.
If loaves are browning excessively, remove them from the oven and make
an aluminum foil ‘tent’ to shield them, and then return them to the oven.
Internal temperature should be between 190°F-205°F; baked loaves
should be evenly browned.
After turning bread out of the pan, tap the bottom or
side of the loaf. If it sounds hollow, the bread is done.

Step 6: Cooling
Cool bread on a wire rack to prevent it from getting
soggy from steam accumulating on the bottom of the pan.

Step 7: Storing
To keep your freshly baked bread at peak goodness:
Keep it wrapped and stored in a bread box at room
temperature.
Seal it tightly and keep it in a cool, dry place.
Keep it out of the refrigerator; cold temperature dries bread
out and promotes staling.
For longer term storage, freeze it in an airtight plastic bag or
tin foil.
Helpful Resources
WATCH Video Link- Amish White Bread
READ Q & A about general bread baking techniques