Xerox CentreWareTM for HP OpenView NNM Users Guide
37
Xerox CentreWare TM for HP OpenView NNM Users Guide Version 3.0
Transcript of Xerox CentreWareTM for HP OpenView NNM Users Guide

Xerox CentreWareTM
for HP OpenView NNM
Users Guide Version 3.0

© 2006 by Xerox Corporation. All rights reserved. Copyright protection claimed includes all forms and matters of copyright material and information now allowed by statutory or judicial law or hereinafter granted, including without limitation, material generated from the software programs which are displayed on the screen such as styles, templates, icons, screen displays, looks, etc. Xerox, CentreWareTM and all Xerox products mentioned in this publication are trademarks of Xerox Corporation ®. Products and trademarks of other companies are also acknowledged.
OpenView is a trademark of HP - All rights reserved. The “HP Certified application” mark is a trademark of HP and is used by Developer under license. HP is not responsible in any way for and does not warrant the operation of this Developer’s Application.
Copyright © 2006 Hewlett-Packard Development Company, L.P.
Microsoft and Windows are registered trademarks of Microsoft Corporation. Other trademarks and trade names may be used in this document to refer to either the entities claiming the marks and names or their products. Xerox Corporation disclaims any proprietary interest in trademarks and trade names other than its own. Changes are periodically made to this document. Changes, technical inaccuracies and typographical errors will be corrected in subsequent editions. Technical updates will be included in subsequent editions. Published in the United States of America.
2 Xerox CentreWareTM for HP OpenView NNM User Guide

Introduction
Table of Contents Table of Contents .......................................................................................................... 3 Introduction .................................................................................................................... 5
How to use this Document.................................................................................. 6 For initial installation............................................................................... 6 For day-to-day tasks................................................................................. 6
Key Benefits and Features .................................................................................. 7 System Requirements .......................................................................................... 8
2000/XP/2003 Hardware Requirements .............................................. 8 Solaris Hardware Requirements .......................................................... 8 HP-UX Hardware Requirements ......................................................... 8 Software Requirements .................................................................. 9
Before You Start CentreWareTM for HP OpenView NNM.............................. 10 CentreWareTM for HP OpenView NNM ...................................................................... 11 Software Installation ................................................................................................... 11
Web Installation.................................................................................................. 11 Using CentreWareTM for HP OpenView NNM ........................................................... 13
The HP OpenView NNM Interface .................................................................... 13 Xerox Printers Map ............................................................................................. 14 Device Discovery................................................................................................. 14 Xerox Device Icons............................................................................................. 15 Xerox Agent Icon ................................................................................................ 15 Device Status....................................................................................................... 16 Status Propagation Modification....................................................................... 16 Device Specific Alarms ....................................................................................... 17 Menu Items for Xerox Devices ......................................................................... 18
Web Browser Menu Item....................................................................... 18 Xerox Trap Registration / UnRegistration Menu Items......................... 19 Single Trap Selection Menu................................................................... 20 Register All Devices Menu.................................................................... 20 UnRegister Device Selection Menu....................................................... 21 UnRegister All Devices Menu ............................................................... 21 Confirming SNMP Trap Registration at the Device.............................. 22 SNMP MIB Browser Menu Item........................................................... 23 Xerox Usage Counter Menu Items ........................................................ 24 Configure Usage Utility Menu Item ...................................................... 25 View Report Menu Item ........................................................................ 26
3 Xerox CentreWareTM for HP OpenView NNM User Guide

Export Report Menu Item ...................................................................... 27 Delete Usage Counter Data Menu Item................................................. 28 Events..................................................................................................... 29 Parameters.............................................................................................. 30
MIBs Loaded During Installation ...................................................................... 31 Troubleshooting ........................................................................................................... 32 Appendix A – Xerox Installer / Un-Installer ........................................................... 35
2000/XP/2003 Installer ...................................................................................... 35 Solaris / HPUX Installer...................................................................................... 36 2000/XP/2003 Un-Installer ......................................................................... 37 Solaris / HPUX ..................................................................................................... 37 Un-Installer .......................................................................................................... 37
4 Xerox CentreWareTM for HP OpenView NNM User Guide

Introduction
Introduction
This User guide describes the installation and features of Xerox CentreWareTM for HP OpenView Network Node Manager. As an enterprise network management application, OpenView provides the ability to view and centrally manage network resources. With the addition of the CentreWareTM snap-in for OpenView NNM, this application can additionally provide the status of Xerox devices on the network. When successfully installed, you will be able to view all of the discovered Xerox network devices under one map in OpenView NNM. In addition, CentreWareTM for HP OpenView NNM enables OpenView NNM to: • Discover Xerox networked devices with HP OpenView. • Provide special status and notifications to HP OpenView
NNM users about Xerox devices. Device status will be enhanced by a rich MIB data set available via web server in certain Xerox networked devices.
• Display standard OpenView NNM color coding for the Xerox Printer Agent icon.
• Automatically notify the user about Xerox device events and problems through the use of SNMP event traps.
• Install and compiles the Xerox MIB structure. • Automate trap registration for supported Xerox devices. • Launch CentreWareTM Internet Services using a standard
web browser. NOTE: This assumes all Xerox networked devices will include an Embedded Web Server.
5 Xerox CentreWareTM for HP OpenView NNM User Guide

How to use this Document
How to use this Document
This document assumes that you have a working knowledge and familiarity with HP OpenView NNM. Only procedures that result from installation of the CentreWareTM for HP OpenView NNM snap-in are described in this document. You may print all or part of this document at any time from your Adobe Acrobat reader by clicking the File menu and then selecting Print. You may then select a single page, a range of pages, or the entire document for printing.
For initial installation Read and follow this section: CentreWareTM for HP OpenView NNM Software Installation
For day-to-day tasks Read and follow these sections: Using CentreWareTM for HP OpenView NNM Troubleshooting
6 Xerox CentreWareTM for HP OpenView NNM User Guide

Key Benefits and Features
Key Benefits and Features
Feature Benefits
Device Discovery Provides the automatic identification of Xerox devices on your network and presents them with recognizable icons.
Color-Coded Device Status Automatically changes the color in the device icon to reflect the device status in the Xerox Printers map.
Access to embedded web server (CentreWareTM Internet Services)
If your device contains an embedded web server (CentreWareTM Internet Services), you can easily access it by selecting Server Home Page under the OpenView Tools menu Web Browser selection.
Custom Domain for Xerox Devices
Managing the Xerox devices on your network is made much easier by displaying all the discovered Xerox devices in a single domain.
SNMP Trap Support Provides option for registering with Xerox networked devices for SNMP Traps automatically, without having to configure each device individually.
Access to Xerox CentreWareTM Web Server
If you’ve configured access to a Xerox CentreWareTM Web server using the Tools->Xerox CWW Server-> Server Configuration, you can easily launch the server homepage by using the Tools->Xerox CWW Server-> CentreWare Web Launch.
7 Xerox CentreWareTM for HP OpenView NNM User Guide

Before You Start CentreWareTM for HP OpenView NNM
System Requirements
This solution modifies existing HP OpenView NNM files and adds a few files to your hard disk. The total hardware requirements are as follows:
2000/XP/2003 Hardware Requirements
• Pentium PC • Minimum 512 Megabytes RAM • 50 Megabytes Hard Disk Space
Solaris Hardware Requirements
• Sun SPARCstation • 512 MB RAM minimum • 100 MB free disk space
HP-UX Hardware Requirements
• HP 9000 or PA RISC based HP machine • 512 MB RAM minimum • 100 MB free disk space
8 Xerox CentreWareTM for HP OpenView NNM User Guide

Software Requirements
Software Requirements
2000/XP/2003 The following software must be installed on your PC before installing CentreWareTM for HP OpenView NNM. • Windows 2000/XP/2003 with latest service pack • HP OpenView NNM Version 7.0 or later • Microsoft Internet Explorer 6.0 or later – OR –
Netscape Navigator version 6.0 or later. Solaris • Solaris (version 6 - 9) with semaphores enabled, and
which includes either: • The Common Desktop Environment (CDE) • X Windows and OSF/Motif • HP OpenView NNM Version 7.0 or later • Netscape Navigator version 6.0 or later • Common Desktop Environment (CDE) Help library
files: /usr/dt/lib/libDTHelp.so.1 /usr/dt/lib/libDtSvc.so.1
• GCC libraries: libgcc-3.2-solX-sparc-local.gz or later HP-UX • HP-UX 11.0, 11i or higher • CDE common Desktop environment (CDE) • XWindows and OSF Motif (HP VUE) • HP OpenView NNM Version 7.0 or later • Netscape Navigator version 6.0 or later • Common Desktop Environment (CDE) Help library
files: /usr/dt/lib/libDTHelp.1 /usr/dt/lib/libDtSvc.1
9 Xerox CentreWareTM for HP OpenView NNM User Guide

Before You Start CentreWareTM for HP OpenView NNM
Before You Start CentreWareTM for HP
OpenView NNM
Connect your device to an active network with appropriate cabling. Ensure the device has a valid, unique IP address.
10 Xerox CentreWareTM for HP OpenView NNM User Guide

CentreWareTM for HP OpenView NNM Software Installation
CentreWareTM for HP OpenView NNM Software Installation
Web Installation NOTE** Make sure that you change the file attribute to executable, before running it.
The latest version of CentreWareTM for HP OpenView NNM is available from the Xerox Website at: http://www.xerox.com Perform the following steps to install CentreWareTM for HP OpenView NNM: 2000/XP/2003 1. After downloading the file to a temporary folder,
double click on the icon to extract the files.
3. r
4.
5. fied and
te. Follow the instructions on your screen.
. omplete, start HP OpenView
2. lder.
UX.bin
2. Double click the file CWare4HPOV<x.x.x>Win.exe
The software will begin the installation process. Aftea few moments, the Install Shield Wizard will load.
This software will be installed in the same folder that contains the HP OpenView software. The un-installer will be created in the folder shown in the destination panel. To change the folder, click on the Browser button and select the desired folder, then click Next.
Select Next again to begin. The necessary files in your HP OpenView environment will be modicopied to the selected folder along with any additional files required.
6. The installation process will take some time to comple
7 When the install is cNNM.
Solaris-HPUX 1. Ensure you are logged in as the root user.
After downloading the file to a temporary foBrowse to folder in File Manager.
3. Double click the file Solaris: CWare4HPOV<x.x.x>Sol. bin HPUX: CWare4HPOV<x.x.x>HP
11 Xerox CentreWareTM for HP OpenView NNM User Guide

Before You Start CentreWareTM for HP OpenView NNM
5.
6. lation process will take some time to complete. Follow the instructions on your screen.
7. When the install is complete, start HP OpenView NNM.
4. The software will begin the installation process. After a few moments, the Install Shield Wizard will start.
Select Next again to begin. The necessary files in and your HP OpenView environment will be modified
copied to the selected folder along with any additional files required.
The instal
12 Xerox CentreWareTM for HP OpenView NNM User Guide

Using CentreWareTM for HP OpenView NNM
Using CentreWareTM for HP OpenView NNM
The HP OpenView NNM Interface
This section describes the features of HP OpenView NNM made available by the installation of CentreWareTM for HP OpenView NNM. Only those features of OpenView that are directly related to the CentreWareTM functionality will be described. For additional information on HP OpenView NNM, go to the OpenView Home page at: http://www.hp.com An example of the HP OpenView User Interface is shown in the figure below. Note that the standard features of the application are accessed via the Menu bar at the top of the display, and the Tool bar situated below it.
On this display, there are two domains displayed on the “map” that is the work space for the OpenView NNM application. Of these two domains, only the Xerox Printers domain is generated by CentreWareTM for HP OpenView NNM.
13 Xerox CentreWareTM for HP OpenView NNM User Guide

Using CentreWareTM for HP OpenView NNM
Xerox Printers Map
The CentreWareTM generated Xerox Printers domain represents all the Xerox devices that were discovered on the network. Double clicking this icon will cause these devices to be displayed in a map view that shows each Xerox device. 2000/XP/2003 If this icon is right-clicked, a secondary dialog is displayed by selecting Xerox Device Display from the resulting menu. The dialog is shown below. It is used to provide statistics, including the number of devices found under the Xerox Printers icon, and their status.
Device Discovery
HP OpenView NNM provides the discovery of Xerox devices. CentreWareTM for HP OpenView NNM additionally enables the identification of these device types as Xerox devices and the assignment of a unique Xerox icon to them.
14 Xerox CentreWareTM for HP OpenView NNM User Guide
Using CentreWareTM for HP OpenView NNM
Xerox Device Icons
Xerox Agent Icon
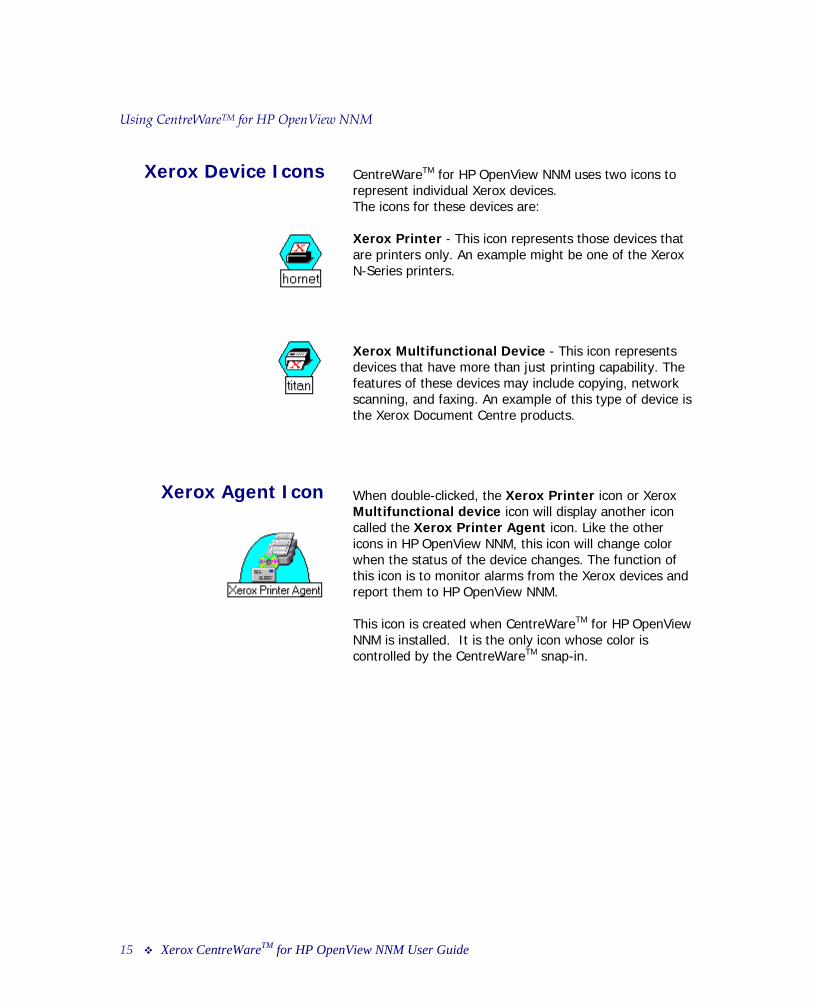
CentreWareTM for HP OpenView NNM uses two icons to represent individual Xerox devices. The icons for these devices are: Xerox Printer - This icon represents those devices that are printers only. An example might be one of the Xerox N-Series printers. Xerox Multifunctional Device - This icon represents devices that have more than just printing capability. The features of these devices may include copying, network scanning, and faxing. An example of this type of device is the Xerox Document Centre products. When double-clicked, the Xerox Printer icon or Xerox Multifunctional device icon will display another icon called the Xerox Printer Agent icon. Like the other icons in HP OpenView NNM, this icon will change color when the status of the device changes. The function of this icon is to monitor alarms from the Xerox devices and report them to HP OpenView NNM. This icon is created when CentreWareTM for HP OpenView NNM is installed. It is the only icon whose color is controlled by the CentreWareTM snap-in.
15 Xerox CentreWareTM for HP OpenView NNM User Guide

Using CentreWareTM for HP OpenView NNM
Device Status
Status Propagation Modification
The Xerox Printer Agent icon will be color-coded to represent the current status of the devices in the Xerox Printers map. The color-coded status for the Xerox Printers map is provided via the CentreWareTM Snap-in. The Agent icon in the IP map will not affect the status or coloring of the IP map. Therefore the IP map will maintain device status as if CentreWareTM for HP OpenView NNM was not installed. The color of the icon is determined by the return code from the device. Under the control of HP OpenView NNM, the color will also propagate to the top of the Xerox Printers map, providing top level indication of problems that exist at lower levels in the map structure. This propagation is controlled by HP OpenView NNM, not CentreWareTM for HP OpenView NNM. The relation between the color-code and the device status is presented in the following table.
Xerox Printer Agent Color
Critical Red
Warning Light Blue
Other or no alert Green
NOTE: The default propagation rule set used by HP NNM will not propagate the most critical error to the actual printer icon in the Xerox Printers map. To set the status propagation at the HP NNM GUI, select the map->properties->[status propagation]. Change the setting from “Default" to "Propagate Most Critical."
16 Xerox CentreWareTM for HP OpenView NNM User Guide

Using CentreWareTM for HP OpenView NNM
Device Specific Alarms
To view alarms for a specific device: Select the device and open it to see the Xerox Agent icon. Select the Xerox Agent icon. Select the pull down menu. Fault->Alarms.
17 Xerox CentreWareTM for HP OpenView NNM User Guide

Using CentreWareTM for HP OpenView NNM
Menu Items for Xerox Devices
NOTE** If the Server Home Page is not available, complete the following steps.
There are a series of OpenView NNM menu items that are created when CentreWareTM for HP OpenView NNM is installed. These menu items reside on the Tools menu on the OpenView Menu bar.
Web Browser Menu Item Many Xerox devices contain embedded web server. HP OpenView NNM automatically detects whether a device contains one and launches CentreWareTM Internet Services though the Server Home Page menu selection. Internet Services provides a variety of features for configuring and monitoring your device. Consult the manuals and CDs delivered with your device for details on Xerox CentreWareTM Internet Services. The Web Browser menu item is used to launch CentreWareTM Internet Services for the selected device. To use this feature perform the following steps:
1. Right click a Xerox device.
2. Select Server Home Page.
The web br3. owser for the workstation will be launched, and CentreWareTM Internet Services for the device will be displayed.
es, edit General Attributes.
button.
The value should change to True.
6. Click OK.
7. Click OK.
8. Right click on Xerox device.
9. Select Server Home Page.
1. Right click the Xerox device.
2. Select Object Properties.
3. In Attribut
4. Click on the Edit Attributes
5. Click on isHTTPSupported
18 Xerox CentreWareTM for HP OpenView NNM User Guide

Using CentreWareTM for HP OpenView NNM
Xerox Trap Registration / UnRegistration Menu Items The Xerox Trap Registration and Xerox Trap UnRegistration menu item will allow the user to select and enable/disable the type of trap configuration desired for the managing workstation. Traps are used to provide an alert, the instant an error at the device occurs, rather than waiting for the next status poll. They also provide more detailed troubleshooting information when a device is experiencing a problem. There are two possible selections for Trap Registration. With Single Selection, the user selects a specific Xerox device. Only the device selected will be registered. Any alerts for that device will be seen in the managing workstation’s Alarms Browser. With Register All Devices, the managing workstation is registered at all discovered Xerox networked devices to receive traps. As with Single Selection, any alerts for the devices are seen in the managing workstation’s Alarms Browser. There are two possible selections for Trap UnRegistration. With UnRegister Device, the user selects a specific Xerox device. Only the device selected will be unregistered. Even if, traps from the device are disabled, status will still be maintained by polling. With the UnRegister All Devices, the managing workstation is removed from all discovered Xerox networked devices trap send list. As with UnRegister Device, even if, traps from the devices are disabled, status will still be maintained by polling.
19 Xerox CentreWareTM for HP OpenView NNM User Guide

Using CentreWareTM for HP OpenView NNM
Single Trap Selection Menu This trap configuration registers the selected device. Only one device can be selected at a time. To use the Single Selection configuration, perform the following steps:
1. Select a Xerox device.
Select the To2. ols -> Xerox Trap Registration -> Single
4.er for the
g p
3. on will be registered at all discovered and managed Xerox networked devices.
4. The SNMP information for registered devices will be captured and displayed in the Alarms Browser for the managing workstation.
Selection.
3. The Xerox device will be configured to recognize themanaging workstation.
The SNMP information for registered device will be captured and displayed in the Alarms Browsmanaging workstation.
Register All Devices Menu Using Register All Devices, all discovered Xerox devices are registered. To use ices, perform the followinste s:
Register All Dev
1. Select a Xerox device.
2. Select the Tools -> Xerox Trap Registration -> Register All Devices.
The managing workstati
20 Xerox CentreWareTM for HP OpenView NNM User Guide

Using CentreWareTM for HP OpenView NNM
2.
4. tus will be
To u step
3. The managing workstation will be removed from all discovered and managed Xerox networked devices.
4. Traps will no longer be sent from the devices. Status will be maintained by polling.
UnRegister Device Selection Menu This trap configuration unregisters the selected device. Only one device can be selected at a time. To use the UnRegister Device configuration, perform the following steps:
1. Select a Xerox device.
Select the Tools -> Xerox Trap UnRegistration -> UnRegister Device menu.
3. The managing workstation will be removed from the selected Xerox device.
Traps will no longer be sent from the device. Stamaintained by polling.
UnRegister All Devices Menu Using UnRegister All Devices, all discovered Xerox devices are unregistered.
se UnRegister All Devices, perform the following s:
1. Select a Xerox device.
2. Select the Tools -> Xerox Trap UnRegistration ->UnRegister All Devices menu.
21 Xerox CentreWareTM for HP OpenView NNM User Guide

Using CentreWareTM for HP OpenView NNM
Confirming SNMP Trap Registration
at the Device
To confirm SNMP Trap Registration on a specific Xerox device, perform the following steps:
1. Right click the Xerox device.
2. Select Server Home Page.
The web browser for the workstation will be TM
3.
NOTE: The procedure and screen may vary between e
launched, and CentreWare Internet Services for the device will be displayed.
4. Select the Properties tab.
5. Select Connectivity, Protocols and SNMP.
6. The screen below is displayed.
Xerox devices. If the device supports traps, locate thSNMP configuration page for your device.
NOTE***If the Server Home Page is not available, refer to the “Web Browser Menu Item” section.
22 Xerox CentreWareTM for HP OpenView NNM User Guide

Using CentreWareTM for HP OpenView NNM
SNMP MIB Browser Menu Item The Tools -> SNMP MIB Browser selection will display a MIB browser that allows the user to search for, select, view, and set values for MIB OIDs. The MIB Browser is a standard feature of the HP OpenView application, and is not installed with CentreWareTM for HP OpenView NNM. However, when CentreWareTM for HP OpenView NNM is installed, the OIDs for Xerox networked devices are installed, and can be viewed with the SNMP MIB Browser.
Using this browser, the user can access any MIB OID in the configuration. The browser will then allow the user to view the contents of the OID for evaluation and troubleshooting.
23 Xerox CentreWareTM for HP OpenView NNM User Guide

Using CentreWareTM for HP OpenView NNM
NOTE** The Configure Usage Utility needs to complete before data viewing/exporting can be initiated.
Xerox Usage Counter Menu Items 2000/XP/2003 The Xerox Usage Counter menu items allows user to configure the schedule for collecting Usage counters for the discovered Xerox devices. It also allows user to view and export the collected Usage data. NOTE: This utility is supported on windows platforms only. There are three selections for Usage Counter. Configure Usage Utility, Enables configuration of Usage data collection time. This selection automates the daily Usage data collection at the user’s scheduled time. View Reports, Enables viewing single device or all devices report in html format in Internet Explorer. Export Data, Enables export of the single device or all devices report in .csv format in... <NNMDIR>\XUsageCount\ folder. A maximum of 10 backup files are created in the... <NNMDIR>\XUsageCount\ folder, for every Single and All Devices export. The export file naming convention used by the application is... For All Devices..... Xrx_UsageCount_All.csv For Single Device.....Xrx_UsageCount_<IPAddr>.csv. The backup files are named as... For All Devices..... Xrx_UsageCount_All_<n>.csv For Single Device.. Xrx_UsageCount_<IPAddr>_<n>.csv. Where <n> ranges from 1 --- 10. Once the limit of 10 is reached, the user is prompted with the appropriate message and all the previous 10 exported files are backed-up in the <NNMDIR>\XUsageCount\BackUp folder.
24 Xerox CentreWareTM for HP OpenView NNM User Guide

Using CentreWareTM for HP OpenView NNM Now, if user disables Server Fax option & enables the
Embedded Fax option for the device, then in the next poll, Usage Counter application will now store the counters for Embedded Fax option and the field values for the counters pertaining to Server Fax option will be stored and viewed in reports as 0.
Usage Counter application for any device that supports Embedded Fax and Server Fax service options, will store the counters based on the options that are enabled when the device is polled to fetch usage Counters. For example, if the device has Server Fax option enabled, when Usage Counter application polls it, counters pertaining to Server Fax option will be stored.
With Delete Usage Counter Data option selection, the user can delete 1) Data between a selected date range for the chosen device or all devices and 2) All data for the chosen device or all devices.
Configure Usage Utility Menu Item To perform the usage configuration, perform the following steps:
1 Select a Xerox device.
2 Select the Tools -> Xerox Usage Counter -> Configure Usage Utility menu.
3 Enter the time in the dialog box (As shown in the screen below).
4 Press OK to register your changes.
25 Xerox CentreWareTM for HP OpenView NNM User Guide

Using CentreWareTM for HP OpenView NNM
View Report Menu Item To use the View Report option, perform the following steps:
1 Select a Xerox device.
2 Select the Tools -> Xerox Usage Counter -> View Reports menu.
3 Select either Single Selection or All Devices option.
4 Select the desired options in the dialog box (As shown in the screen below).
5 Press OK to view the report in Internet explorer (As shown in the screen below).
26 Xerox CentreWareTM for HP OpenView NNM User Guide

Using CentreWareTM for HP OpenView NNM
Export Report Menu Item To use the Export Report option, perform the following steps:
1 Select a Xerox device.
2 Select the Tools ->Xerox Usage Counter -> Export Reports menu.
3 Select either Single Selection or All Devices option.
4 Select the desired options in the dialog box (As shown in the screen below).
5 Press OK to Export the report to <NNMDIR>\XusageCount\ Folder (As shown in the screen below).
27 Xerox CentreWareTM for HP OpenView NNM User Guide

Using CentreWareTM for HP OpenView NNM
Delete Usage Counter Data Menu Item To use the Delete Usage Counter Data option, perform the following steps:
1 Select a Xerox device.
2 Select Tools -> Xerox Usage Counter -> Delete Usage Counter Data menu.
3 Select either Single Selection or All Devices option.
4 Select the desired options in the dialog box (As shown in the screen below).
5 Press OK to delete the historical Usage Counter Data.
6 Select OK in the dialog box (As shown in the screen
below) to continue with the deletion.
28 Xerox CentreWareTM for HP OpenView NNM User Guide

Using CentreWareTM for HP OpenView NNM
Trapd.conf file entries The trapd.conf contains definitions for the handling of SNMP traps (generated by SNMP agents) and events (generated by applications registered with pmd). It includes information on how to format log entries (logged to trapd.log) and what action to take, if any, upon receiving an event. For Xerox CentreWareTM for HP Openview plugin to handle events received from the Xerox, Tektronix and other supported devices, the plugin creates three enterprises and one event entry corresponding to each enterprise namely. Enterprise Identifier Xerox .1.3.6.1.4.1.253.8.62 Tektronix .1.3.6.1.4.1.128.2.1 printerV1Alert .1.3.6.1.2.1.43.18.2 Events Identifier Xerox_trap .1.3.6.1.4.1.253.8.62.* Tek_trap .1.3.6.1.4.1.128.2.1.* V1Alerts .1.3.6.1.2.1.43.18.2.* The Category definition for CentreWareTM for NNM entries is set as 0(IGNORE), because the status Alarm Log is populated via plugin application Xrx_TrapAction.
Events The Event definitions identify and provide triggers for the events defined in the Trapd.conf file. The event definitions added by Xerox CentreWareTM for NNM are EVENT V1Alerts .1.3.6.1.2.1.43.18.2.* "IGNORE" Normal FORMAT EXEC Xrx_TrapAction $A $S $G SDESC This event informs the Alarm Browser that a V1 trap event from the device has been received and it needs to be logged in the Alarm Browser using Xrx_TrapAction application in the action block. EDESC
29 Xerox CentreWareTM for HP OpenView NNM User Guide
Using CentreWareTM for HP OpenView NNM
EVENT Tek_Trap .1.3.6.1.4.1.128.2.1.* "IGNORE" Normal FORMAT EXEC Xrx_TrapAction $A $S $G SDESC This event informs the Alarm Browser that a trap event from the Tektronix Device has been received and it needs to be logged in the Alarm Browser using Xrx_TrapAction application in the action block. EDESC EVENT Xerox_Trap .1.3.6.1.4.1.253.8.62.* "IGNORE" Normal FORMAT EXEC Xrx_TrapAction $A $S $G SDESC This event informs the Alarm Browser that a trap event from the Xerox Device has been received and it needs to be logged in the Alarm Browser using Xrx_TrapAction application in the action block. EDESC
Parameters NOTE: Xrx_TrapAction takes three parameters $A (IP Address) $S (Specific trap) $G (Generic Trap) $A, $S, $G are NNM defined operators that take the appropriate value from the SNMP PDU received by NNM. FORMAT Tag in the above entries is used for displaying the event in trapd.log and xnmevents. It is left blank because the status Alarm Log is populated via plugin application Xrx_TrapAction. The description within SDESC tags is displayed in the description field of the Event configuration window.
30 Xerox CentreWareTM for HP OpenView NNM User Guide

Using CentreWareTM for HP OpenView NNM
MIBs Loaded During Installation
In the following table is a list of the MIBs loaded during installation of CentreWareTM for HP OpenView NNM, accompanied by a brief description of the MIB. NOTE: All Xerox devices support a subset of the included MIB modules. IETF MIBs are supported by all Xerox devices.
MIB Name Description
Xerox.mib Xerox Common MIB module.
31 Xerox CentreWareTM for HP OpenView NNM User Guide

Using CentreWareTM for HP OpenView NNM
Troubleshooting If you have problems after you have installed CentreWareTM for HP OpenView NNM, consult the table below.
Symptoms Possible Causes Solution
Installation gives a message box reading “HP OpenView demand level is not set to All Levels. Please exit the setup, set the demand level to All Levels from the NNM GUI and then proceed with setup process.” and then exits. Windows only.
The Demand level of the NNMapplication is not set to the appropriate value.
1. Before running the CentreWare™ install, open the NNM GUI.
2. From the menu bar, click Map->Properties. It will open a new window named “Map Properties”.
3. Click on the “Applications” tab, select IP Map from the List Box and press the button labeled “Configure for this map”.
4. Highlight the field named On-Demand.
5. Select “All Levels”.
6. Click the “Verify” button, and upon verification, press the “OK” button.
7. On the “Map Properties” click the “OK” button. It performs some configuration.
8. After the NNM completes configuration, close the NNM window.
9. Begin the installation again.
A Xerox device is not discovered.
The SNMP agent is not working properly in the node. There is a problem with the network connectivity. The Network in which the Device exists is unmanaged.
Ping the Xerox device. Ping the Xerox device. Contact the Network Administrator.
A Xerox device is still not discovered.
The sysObjectId entry in the oid_to_sym , or oid_to_type is missing.
Make the sysObjectId entries in each file using the proper format.
Icon on the map is not the The object’s SysObjectId in 1. Verify the sysObjectId entries in the
32 Xerox CentreWareTM for HP OpenView NNM User Guide

Using CentreWareTM for HP OpenView NNM
proper Xerox device icon. the file oid_to_sym is not properly entered.
oid_to_sym file in the proper format.
2. Run ovtopofix -a
Icon on the map is still not the proper Xerox device icon map after running ovtopofix –a.
Device attributes have not been polled.
Follow the process below:
1. Delete the device from Xerox Map and the IP Map
2. Ping the device IP address using HP OpenView Ping utility.
3. The printer should now have the correct attributes.
Trap Registration gives a message box reading... “The preferred SNMP Address field for the selected device (objected = <ID>, SelectionName = <IP ADDRESS>) is either missing or not set. Desired operation cannot be performed.”
The OpenView framework during device discovery fails to set the “Preferred SNMP Address” field value to the device’s IP Address.
In the NNM GUI…
1. Select the Devices symbol in the Xerox Map, and right click using the mouse.
2. Select “Object Properties…” and click. It will pop the “Object Properties” dialog box. Under “Attributes” double click “General Attributes”. It will pop “Attributes for object…” dialog box.
3. Select the “Preferred SNMP address” attribute. It will pop the “Set Attribute Value” dialog box.
4. Type in the IP Address of the device in the edit box and click the OK button.
Even after running the usagecounter “Configure Usage Utility”, “Data not found for selected device(s).”error message appears, when data view/export is initiated.
Windows Task scheduler service is either not installed or is not running.
None of the devices discovered in the Xerox Map, have usage counters implemented.
Install the Task scheduler service via “Add or Remove Program” option in windows. If the service is already installed, set the service status to start.
Let NNM discover the devices that have usage counters implemented or if the user has the ip address of the desired device/s, use seed file to speed up the discovery process. Refer to the NNM Manual Managing_Your_Network.pdf installed along with NNM for details on using seed file.
33 Xerox CentreWareTM for HP OpenView NNM User Guide

Using CentreWareTM for HP OpenView NNM
The Usage counter application does not store counters for a device, that is discovered in Xerox map, is online and supports counters.
The OpenView framework during device discovery fails to set the 'Preferred SNMP Address' field value to the device’s IP Address.
In the NNM GUI…
1. Select the Device symbol in the Xerox Map, and right click using the mouse.
2. Select “Object Properties…” and click. It will pop the “Object Properties” dialog box. Under “Attributes” double click “General Attributes.” It will pop “Attributes for object …” dialog box.
3. Select the “Preferred SNMP Address” attribute. It will pop the “Set Attribute Value” dialog box.
4. Type in the IP Address of the device in the edit box and click the OK button.
NOTE: Most of the errors generated by the CentreWareTM for HP OpenView NNM are logged in a log file. For more information, look into the log file ("install directory"\XrxLog.txt).
34 Xerox CentreWareTM for HP OpenView NNM User Guide

Appendix A – Xerox Installer / Un-installer
Appendix A – Xerox Installer / Un-Installer
2000/XP/2003 Installer
The installer is a simple Install-Shield application that will automate the addition of the files and perform the required configuration. The installer will copy bitmap images and registration files into the HP OpenView installation directory. It will also edit several files to enable the identification of Xerox devices in HP OpenView. In the information below, the installation directory is given as C:\OpenView. The installation directory drive is selectable and may be different for your installation. The modifications performed by the installer are as follows. The installer will:
1. Edit the file c:\OpenView\conf\oid_to_type.
2. Edit the file c:\OpenView\conf\oid_to_sym.
3.
fields\C
ss
nView\conf\C, to
. Create the domain Xerox Printers.
9. Copy the Xerox MIB files to C:\OpenView\snmp_mibs\vendor\Xerox and load them.
Add new .exes and .dlls under c:\OpenView\bin directory.
4. Add new file xrx_fields under c:\OpenView\for Xerox device specific database fields.
5. Add new bitmaps for Xerox devices to the C:\OpenView\bitmaps\C folder and register them.
6. Add the new files to the C:\OpenView\symbols\C folder to add new Xerox printer device symbol cladefinitions.
7. Modify trapd.conf file under C:\Opeenable CentreWareTM to log traps received from Xerox devices.
8
35 Xerox CentreWareTM for HP OpenView NNM User Guide
Using CentreWareTM for HP OpenView NNM
Solaris / HPUX Installer
The modifications performed by the installer are as follows. The installer will:
1. Edit the file /etc/opt/OV/share/conf/oid_to_type.
2. Edit the file /etc/opt/OV/share/conf/oid_to_sym.
3. Add new binaries and shared libs under /opt/OV/bin.
Add new file Xrx_
4. Fields.frf under vice specific
efinitions.
t/OV/share/conf/C
8. Create the domain Xerox Devices.
9. Copy Xerox MIB files to /var/opt/OV/share/snmp_mibs/Vendor/Xerox and load them.
/etc/opt/OV/share/fields/C for Xerox dedatabase fields.
5. Add new bitmaps for Xerox devices to /etc/opt/OV/share/bitmaps/C and register them.
6. Add new files to /etc/opt/OV/share/symbols/C for new Xerox printer device symbol class d
7. der /etc/opModify trapd.conf file unto enable CentreWareTM to log traps received from Xerox devices.
36 Xerox CentreWareTM for HP OpenView NNM User Guide

Appendix A – Xerox Installer / Un-installer
. Start services by executing ovstart.
HPOV/_uninst/Cware4HPOVU
on. .
rresponding to TM P OpenView.
g installation.
2. Delete all files copied.
3. Start services by executing ovstart.
2000/XP/2003 Un-Installer
Solaris / HPUX Un-Installer
To run the un-installer, use Add/Remove Programs in the Windows Control Panel. The un-installer will remove all files copied by the Installer, undo any file changes, and run the custom executable XPlugin_Uninstall.exe. This will remove the Xerox printer icon, subclass definition, and the alarm object corresponding to CentreWareTM for HP OpenView. It will additionally:
1. d to files during installation. Remove the lines adde
2. Delete all files copied.
3 In a terminal window run the following command: opt/Xerox/Cware4/
ninst<x.x.x>.bin. NOTE: User may find multiple _uninst folders, followed
ith a numeric value, say _uninst1, _uninst2 and sowGo to the latest one and then run the un-installer This will remove the Xerox printer icon, subclass efinition, and the alarm object cod
CentreWare for H It will additionally:
1. Remove the lines added to files durin
37 Xerox CentreWareTM for HP OpenView NNM User Guide