Xero Setup Course - natbooks.com.au · National Bookkeeping Xero Setup Course Workbook ©2016 Steve...
51
©2015 COPYRIGHT: Steve Slisar owns the copyright for this publication. This publication or parts of it may not be reproduced in any form physical or digital without the written consent of the copyright owner. National Bookkeeping Xero Setup Course Workbook Xero Setup Course Training Workbook 1 bookkeeping basics, bank accounts, chart of accounts
Transcript of Xero Setup Course - natbooks.com.au · National Bookkeeping Xero Setup Course Workbook ©2016 Steve...

©2015 COPYRIGHT: Steve Slisar owns the copyright for this publication. This publication or parts of it may not be reproduced in any form
physical or digital without the written consent of the copyright owner. National Bookkeeping Xero Setup Course Workbook
Xero Setup Course
Training Workbook 1
bookkeeping basics, bank accounts, chart of accounts
National Bookkeeping Xero Setup Course Workbook www.natbooks.com.au
©2016 Steve Slisar 1 Phone: 1300 886 456
Pre-requisites You should have a certain number of skills already if you are going to progress further with any
word processing program. You should know:
a) How to use a Computer (Beginners 101),
b) How to open and save a file (Beginners 102),
c) How to move around the text in a document (Beginners 103), and
d) How to make changes (edit) to text (Beginners 103).
e) How to access and navigate around a website (Internet 105)
f) Basic Bookkeeping terminology and concepts
Cloud Bookkeeping Service
Get the best bookkeeper rather than the closest bookkeeper and use online
service to reduce the cost for data entry, perform better credit management
and get faster and more accurate performance reports:
• Xero allows multiple user access from any location.
• Bank Feeds and Expense Management software makes data entry fast and cheap.
• Use a low-cost bookkeeper for regular daily and weekly tasks
• Get your BAS lodged on time and remain compliant with the ATO
Visit Find a Good Bookkeeper for more information.
End of Quarter, BAS, Reporting & Cashflow
Some need high end bookkeepers & BAS Agents for ATO compliance,
others want to know their information is accurate and correct according to
ATO benchmarks and for their own business & financial health. Includes:
• Correct coding of complicated transactions.
• Well-structured chart of accounts for accurate reporting.
• Cashflow, Profit & Loss and Balance Sheet reporting and interpretation.
• Lodgement service with ATO BAS Portal
Visit BAS Services for more information.

National Bookkeeping Xero Setup Course Workbook www.natbooks.com.au
©2016 Steve Slisar 2 Phone: 1300 886 456
Table of Contents PRE-REQUISITES..................................................................................................................................................... 1
DIGITAL AND CONTENT MARKETING ................................................................. ERROR! BOOKMARK NOT DEFINED.
PROFESSIONAL BUSINESS TELEPHONE SYSTEM ................................................. ERROR! BOOKMARK NOT DEFINED.
BOOKKEEPING BASICS INTRODUCTION ................................................................................................................. 3
DIY ACCOUNTING ......................................................................................................................................................... 3 VIDEO - DIY ACCOUNTING INTRODUCTION ........................................................................................................................ 3 VIDEO - DIY ACCOUNTING - CHARTS OF ACCOUNTS ............................................................................................................ 5 VIDEO - DIY ACCOUNTING - TAX CODES ............................................................................................................................ 8 VIDEO - DIY ACCOUNTING - CASH VS. ACCRUAL ACCOUNTING METHODS ............................................................................. 11 VIDEO - DIY ACCOUNTING - DEBITS-CREDITS-INCOME-EXPENSES: ....................................................................................... 13 VIDEO - DIY ACCOUNTING - INTRO TO CREDIT CONTROL .................................................................................................... 17
XERO SETUP - INTRO & SETUP A COMPANY FILE.................................................................................................. 20
XERO 101 - INTRO TO XERO ACCOUNTING SOFTWARE ....................................................................................................... 20 XERO 102 - FREE SOFTWARE TRIAL ................................................................................................................................ 21 XERO 103 - SETUP - ORGANISATIONAL SETTINGS .............................................................................................................. 23 XERO 104 - SETUP - FINANCIAL SETTINGS ....................................................................................................................... 24 XERO 105 - SETUP - INVOICE SETTINGS AND USERS ........................................................................................................... 27 INVITE USERS ............................................................................................................................................................. 27
ADD FOREIGN CURRENCIES USED BY YOUR ORGANISATION ............................................................................... 27
XERO 106 - SETUP - CHART OF ACCOUNTS ........................................................................................................... 28
HOW WOULD YOU LIKE TO SETUP YOUR CHART OF ACCOUNTS .......................................................................................... 28 CONFIRM YOUR CHART OF ACCOUNTS ........................................................................................................................... 28 XERO 107 - SETUP - ACCOUNT BALANCES ....................................................................................................................... 30
SET YOUR CONVERSION DATE ............................................................................................................................. 30
ENTER YOUR ACCOUNT BALANCES AS AT 30TH JUNE 2013 .................................................................................. 30
SET-UP COMPLETE ............................................................................................................................................... 31
XERO 108 - SETUP - INVOICE SETTINGS - DEFAULT ............................................................................................... 32
XERO 109 - SETUP - INVOICE SETTINGS - EMAIL SETTINGS .................................................................................................. 35 XERO 110 - SETUP - DASHBOARD - WATCHLIST ................................................................................................................ 37 XERO 111 - SETUP - CONTACTS - ADD NEW CONTACT (T1) ................................................................................................ 41 XERO 201 - SETUP - ADD BANK ACCOUNT ...................................................................................................................... 45 XERO 202 - SETUP - ADD CREDIT CARD .......................................................................................................................... 46 XERO 203 - SETUP - ADD PAYPAL ACCOUNTS .................................................................................................................. 47 XERO 204 - SETUP - MANAGE BANK ACCOUNTS ON DASHBOARD ........................................................................................ 48
WHAT’S NEXT ...................................................................................................................................................... 50
ARE YOU LOOKING FOR WORK? ...................................................................................................................................... 50 WANT A CERTIFICATE IV IN BOOKKEEPING? .......................................................................... ERROR! BOOKMARK NOT DEFINED. WANT TO START YOUR OWN BOOKKEEPING BUSINESS? ....................................................................................................... 50
National Bookkeeping Xero Setup Course Workbook www.natbooks.com.au
©2016 Steve Slisar 3 Phone: 1300 886 456
Bookkeeping Basics Introduction
DIY Accounting
This section contains some videos that will give you a general introduction to Accounting and
Bookkeeping. We go through things such as the Australian Tax codes and what these may be
used for, Debit and Credit principals in an accounting sense and the meaning behind Cash and
Accrual accounting.
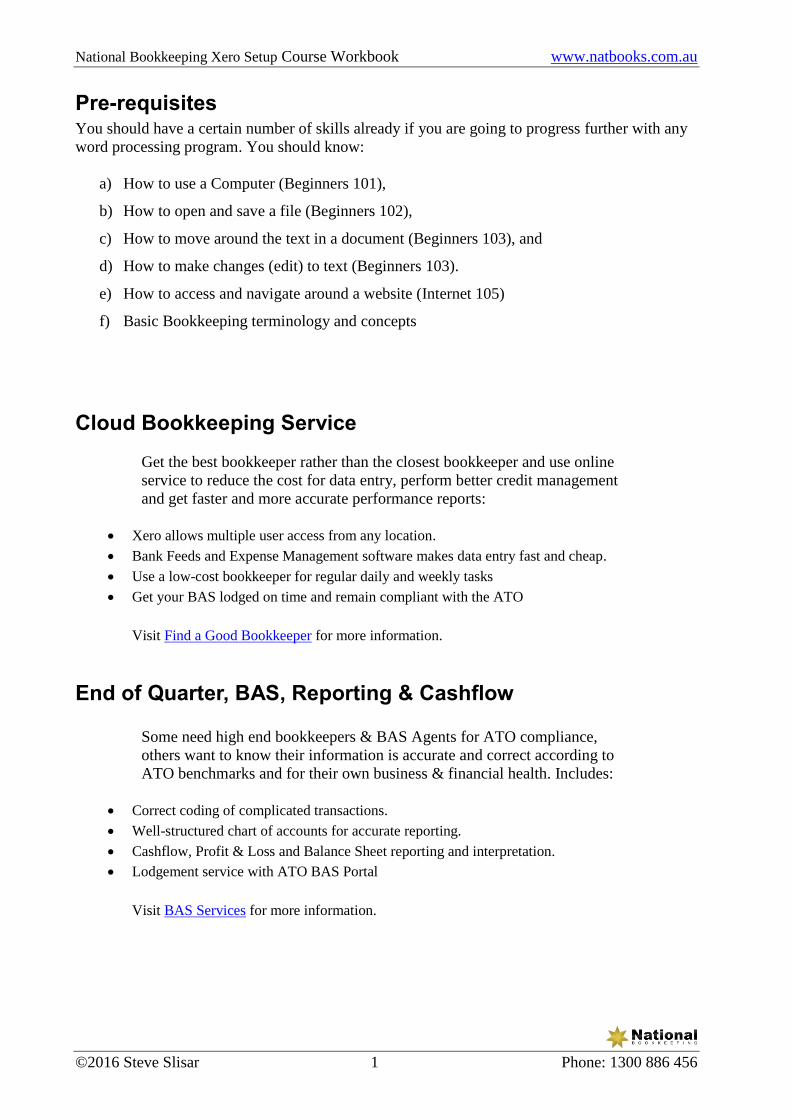
Video - DIY Accounting Introduction
Bookkeeping is something that every business has to do. It doesn’t matter how large or small
your business is and it doesn’t matter where you are based – whether in an office or factory, or
working from home as a remote contractor.
Getting your bookkeeping done promptly is not only important as part of your compliance
requirements for the Australian Taxation Office, but the information you get from this
bookkeeping data entry helps you understand how your business is performing and if there is
anything that you need to change.
The bookkeeping process begins the moment you start out in business and incur expenses and
most of the time spent in bookkeeping is involved in data entry and what accountants call
“coding” – ie. putting each expense, income, asset and liability in the correct “account”. A
simple example of demonstrating this is that costs for petrol need to go into the Motor Vehicle
expenses category in your accounting software.
National Bookkeeping Xero Setup Course Workbook www.natbooks.com.au
©2016 Steve Slisar 4 Phone: 1300 886 456

National Bookkeeping Xero Setup Course Workbook www.natbooks.com.au
©2016 Steve Slisar 5 Phone: 1300 886 456
If you get to a point where it is starting to get too complicated for you, you could get a
Bookkeeper that is a registered BAS agent or your Accountant to help.
Video - DIY Accounting - Charts of Accounts
What are the Chart Of Accounts?
They are a list of accounts created & used by a business which tells them about what their
money was spent on or who they received money from.

National Bookkeeping Xero Setup Course Workbook www.natbooks.com.au
©2016 Steve Slisar 6 Phone: 1300 886 456
The Chart Of Accounts also helps a business to arrange their finances by separating the
expenses, income, assets & liabilities in order to give the relevant people a better understanding
of the businesses finances.
Customising?
The Chart Of Accounts can be customised to suit any business.
The smaller the business, the smaller the list of accounts is needed. Where as the larger the
business the more accounts are needed for detailed reporting purposes.
What does the Chart Of Accounts have to do with the General Ledger?
The General Ledger contains all of the accounts for recording transaction relating to a
company's assets, liabilities, owners equity, income & expenses.
The General Ledger report shows the transaction applied to any or all of the accounts within the
Chart Of Accounts.
The General Ledger is the number 1 report in any accounting system, which holds financial &
non financial data for an entity.
National Bookkeeping Xero Setup Course Workbook www.natbooks.com.au
©2016 Steve Slisar 7 Phone: 1300 886 456
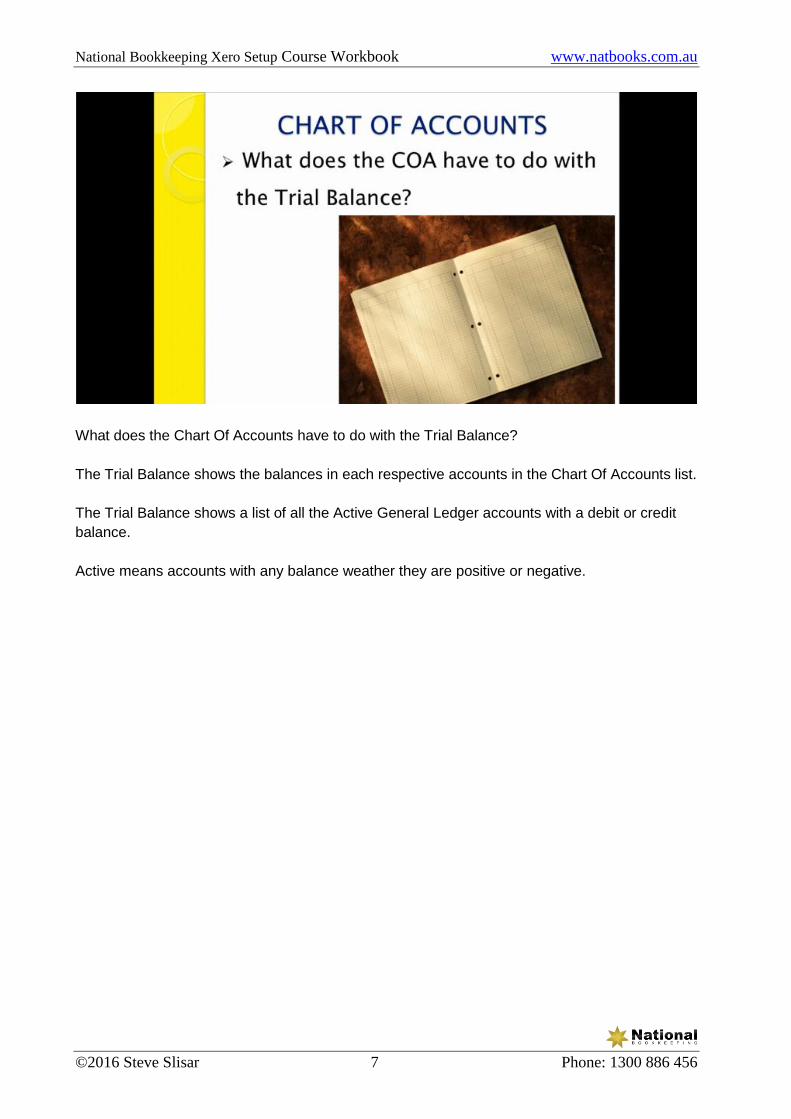
What does the Chart Of Accounts have to do with the Trial Balance?
The Trial Balance shows the balances in each respective accounts in the Chart Of Accounts list.
The Trial Balance shows a list of all the Active General Ledger accounts with a debit or credit
balance.
Active means accounts with any balance weather they are positive or negative.

National Bookkeeping Xero Setup Course Workbook www.natbooks.com.au
©2016 Steve Slisar 8 Phone: 1300 886 456
Video - DIY Accounting - Tax Codes
Tax Codes are codified system that designates and defines government levies on transactions,
also known as Taxes.
What are the main Tax Codes?
● GST - 10% = GST is applicable to a particular item and 10% of the amount should be
allocated to the GST Account.
● FRE - 0% = GST is NOT applicable to a purchase.
● N-T - 0% = GST is NOT reportable on a purchase.

National Bookkeeping Xero Setup Course Workbook www.natbooks.com.au
©2016 Steve Slisar 9 Phone: 1300 886 456
Examples of FRE & N-T:
Examples of GST & CAP:

National Bookkeeping Xero Setup Course Workbook www.natbooks.com.au
©2016 Steve Slisar 10 Phone: 1300 886 456
Tax On Invoices.
If you are registered for GST your invoices should include the following:

National Bookkeeping Xero Setup Course Workbook www.natbooks.com.au
©2016 Steve Slisar 11 Phone: 1300 886 456
Video - DIY Accounting - Cash Vs. Accrual Accounting Methods
What is Cash Accounting?
The Cash Accounting Method records income when it is actually received. It also records
outgoing payments and expenses when they have actually been paid.
Cash Accounting and the BAS.
If you are registered for GST you will have to lodge a BAS Statement usually quarterly but it can
also be lodged monthly if you have organised this with the Tax Office.
Let’s say as an example we invoice a customer on the 15th December but they don’t actually
pay until 5th January. We would need to put the payment transaction on the third quarter BAS
which is 1st January to 31st March as the payment was made on the 5th January.

National Bookkeeping Xero Setup Course Workbook www.natbooks.com.au
©2016 Steve Slisar 12 Phone: 1300 886 456
Accrual Accounting records income when it is actually earnt & records outgoing payments when
it is incurred regardless of any pay dates.
Let’s say as an example again, we invoice a customer on the 15th December but they don’t
actually pay until 5th January. With the Accrual Accounting Method we would need to put the
invoice transaction on the second BAS which is 1st October to 31st December as the invoice
was dated 15th December.
National Bookkeeping Xero Setup Course Workbook www.natbooks.com.au
©2016 Steve Slisar 13 Phone: 1300 886 456
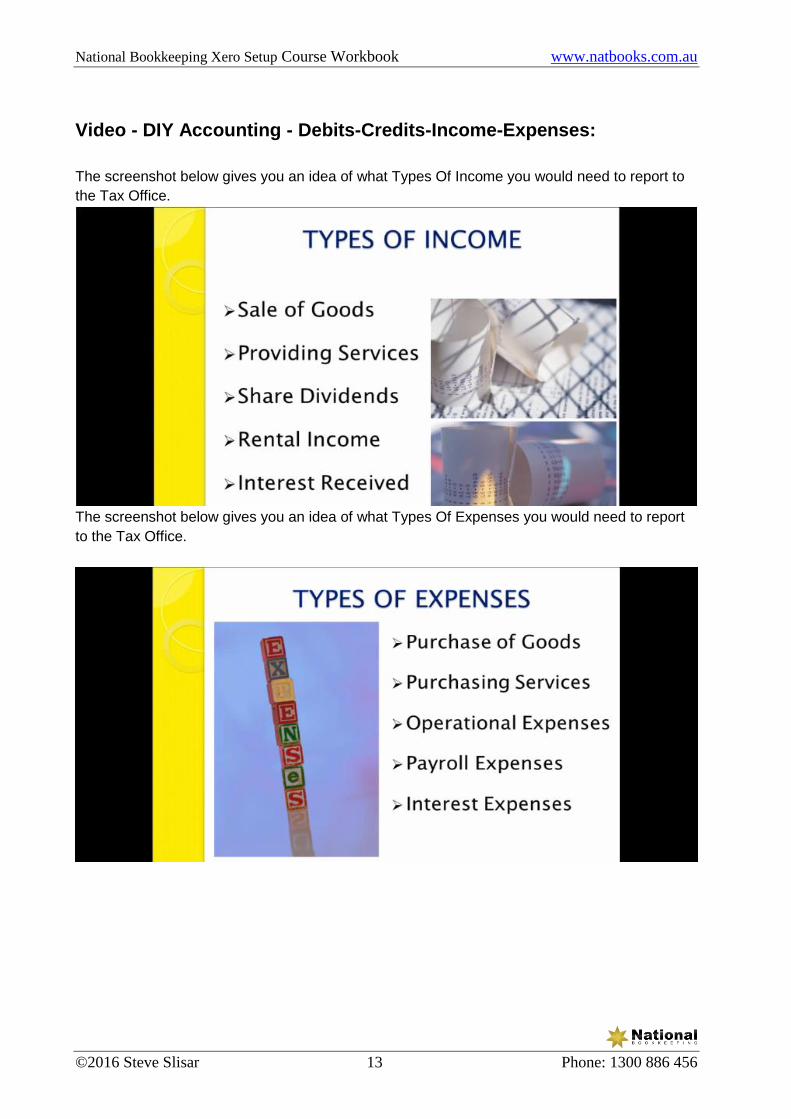
Video - DIY Accounting - Debits-Credits-Income-Expenses:
The screenshot below gives you an idea of what Types Of Income you would need to report to
the Tax Office.
The screenshot below gives you an idea of what Types Of Expenses you would need to report
to the Tax Office.

National Bookkeeping Xero Setup Course Workbook www.natbooks.com.au
©2016 Steve Slisar 14 Phone: 1300 886 456
When Do You Use A Sales Invoice?
You would use a Sales Invoice when goods are sold or a service is provided to a customer.
When Do You Use a Enter Purchase?
You would use a Enter Purchase when you receive a bill or invoice for a purchase i.e.
purchases for some stationary from officeworks, an invoice you have received for electricity.
These would then be entered in as a purchase.
When Do You Use a Journal Entry?
A Journal Entry is used for example: to record an Owner’s Capital into a business, for a BAS
transaction, for year ending adjustments.

National Bookkeeping Xero Setup Course Workbook www.natbooks.com.au
©2016 Steve Slisar 15 Phone: 1300 886 456
A sample of a Journal Entry (as shown above) using the Double Entry System, you would Debit
the Bank Account with the $50,000 and Credit the Owner A - Equity with the $50,000.
Double Entry bookkeeping uses a formula for debits & credits. When you debit a Bank account
you are increasing that bank account & therefore adding funds to it.
Debit & Credit are 2 critical terms used in business transactions. Every Debit transaction needs
a Credit transaction and vice versa.
Debits & Credits are frequent terms used in Bookkeeping and Accounting. It controls and
establishes how to record any financial transactions.
You will often see the Debit term shown as DR and the Credit term shown as CR in
Bookkeeping and Accounting.
National Bookkeeping Xero Setup Course Workbook www.natbooks.com.au
©2016 Steve Slisar 16 Phone: 1300 886 456
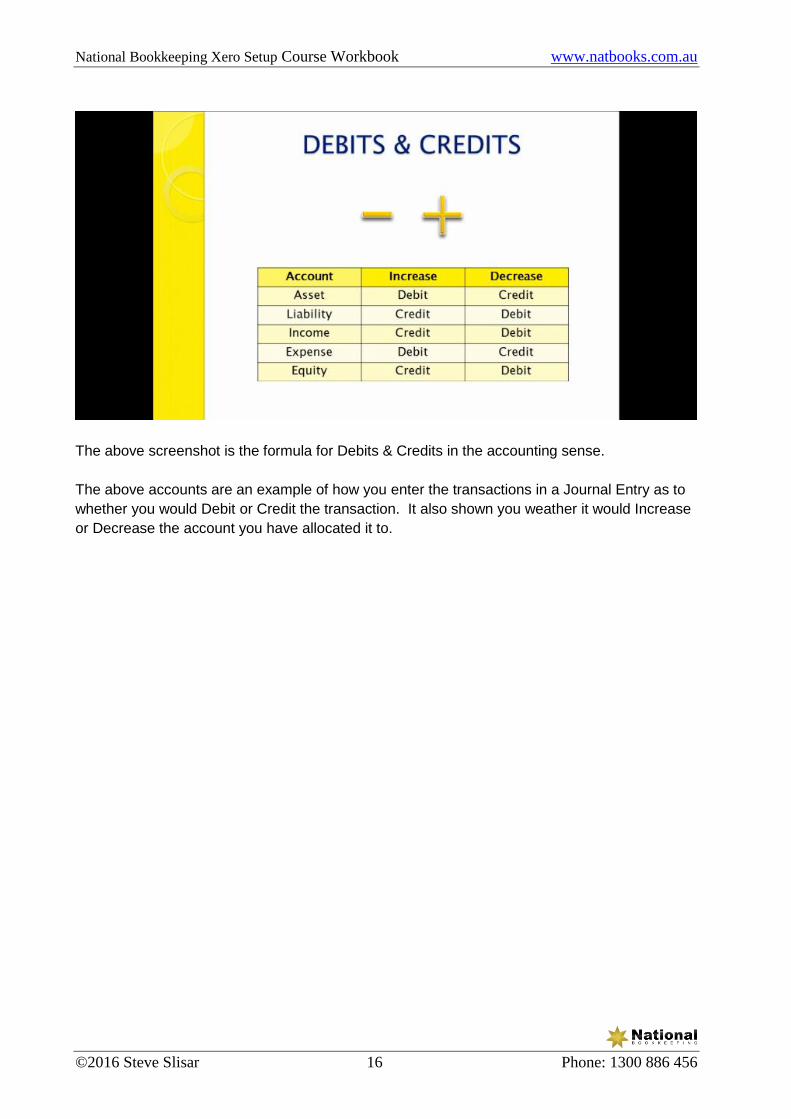
The above screenshot is the formula for Debits & Credits in the accounting sense.
The above accounts are an example of how you enter the transactions in a Journal Entry as to
whether you would Debit or Credit the transaction. It also shown you weather it would Increase
or Decrease the account you have allocated it to.
National Bookkeeping Xero Setup Course Workbook www.natbooks.com.au
©2016 Steve Slisar 17 Phone: 1300 886 456
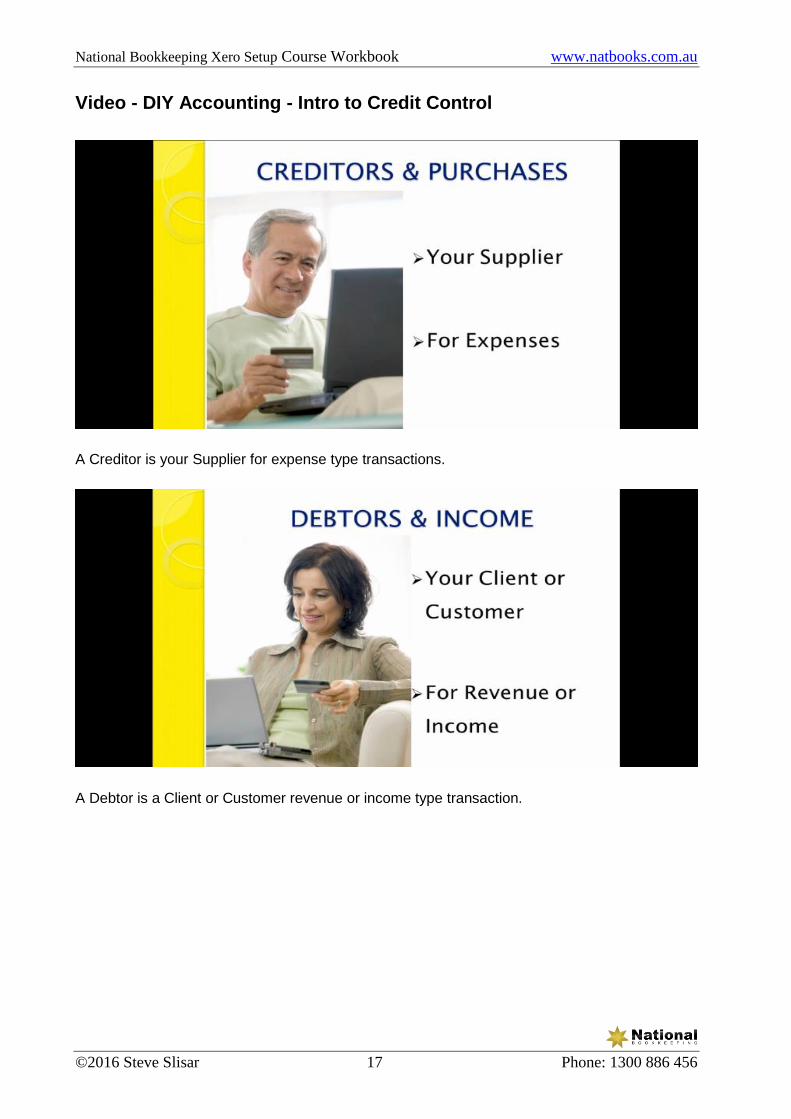
Video - DIY Accounting - Intro to Credit Control
A Creditor is your Supplier for expense type transactions.
A Debtor is a Client or Customer revenue or income type transaction.

National Bookkeeping Xero Setup Course Workbook www.natbooks.com.au
©2016 Steve Slisar 18 Phone: 1300 886 456
A Creditors Report is an Accounts Payable Report that tells you how much money you owe to
your Suppliers. It lets you know the number of days payment is outstanding, any overdue
balance and the total balance owed to each supplier. This is recorded as an expense
transaction type.
National Bookkeeping Xero Setup Course Workbook www.natbooks.com.au
©2016 Steve Slisar 19 Phone: 1300 886 456
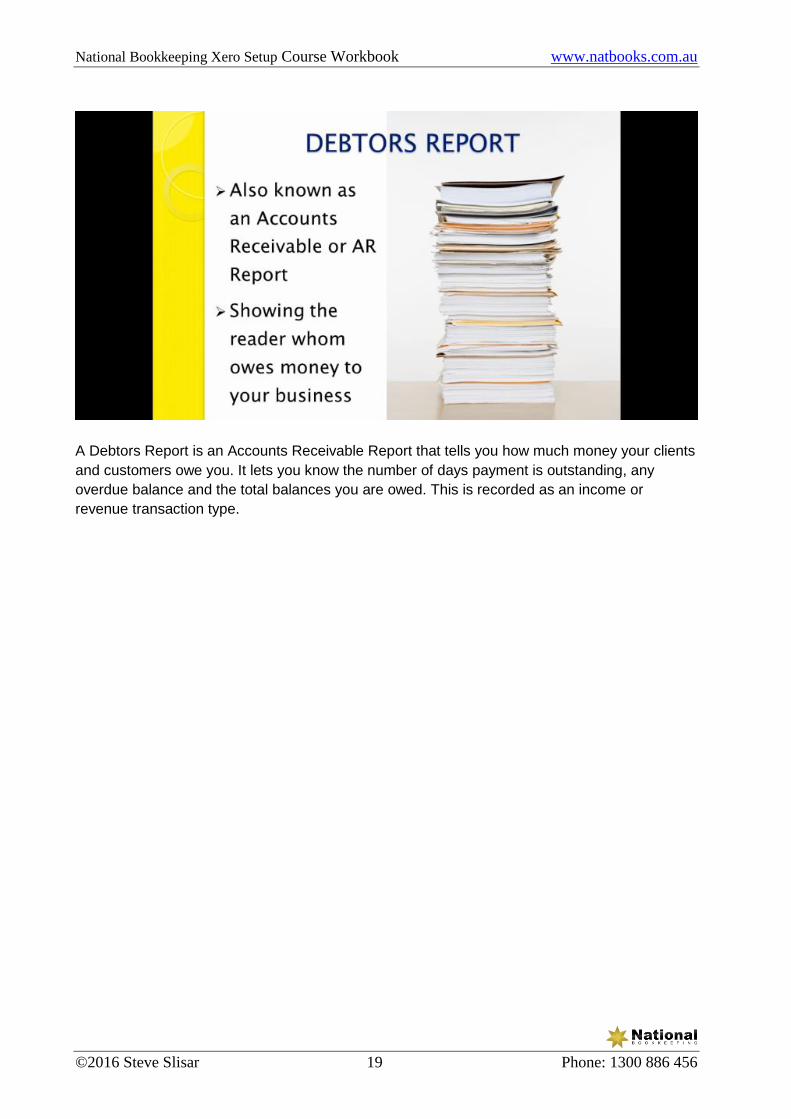
A Debtors Report is an Accounts Receivable Report that tells you how much money your clients
and customers owe you. It lets you know the number of days payment is outstanding, any
overdue balance and the total balances you are owed. This is recorded as an income or
revenue transaction type.
National Bookkeeping Xero Setup Course Workbook www.natbooks.com.au
©2016 Steve Slisar 20 Phone: 1300 886 456
Xero Setup Training Course - Section 2
Xero Setup - Intro & Setup a Company File
This section contains information to help you along the way of your Xero user experience. From
the trial edition to setting up your brand new company within Xero. This cloud Accounting
Information Software (AIS) stores all of your data securely in the cloud which ultimately saves
your room on your computer and gives you the ability to access your file from virtually
anywhere.
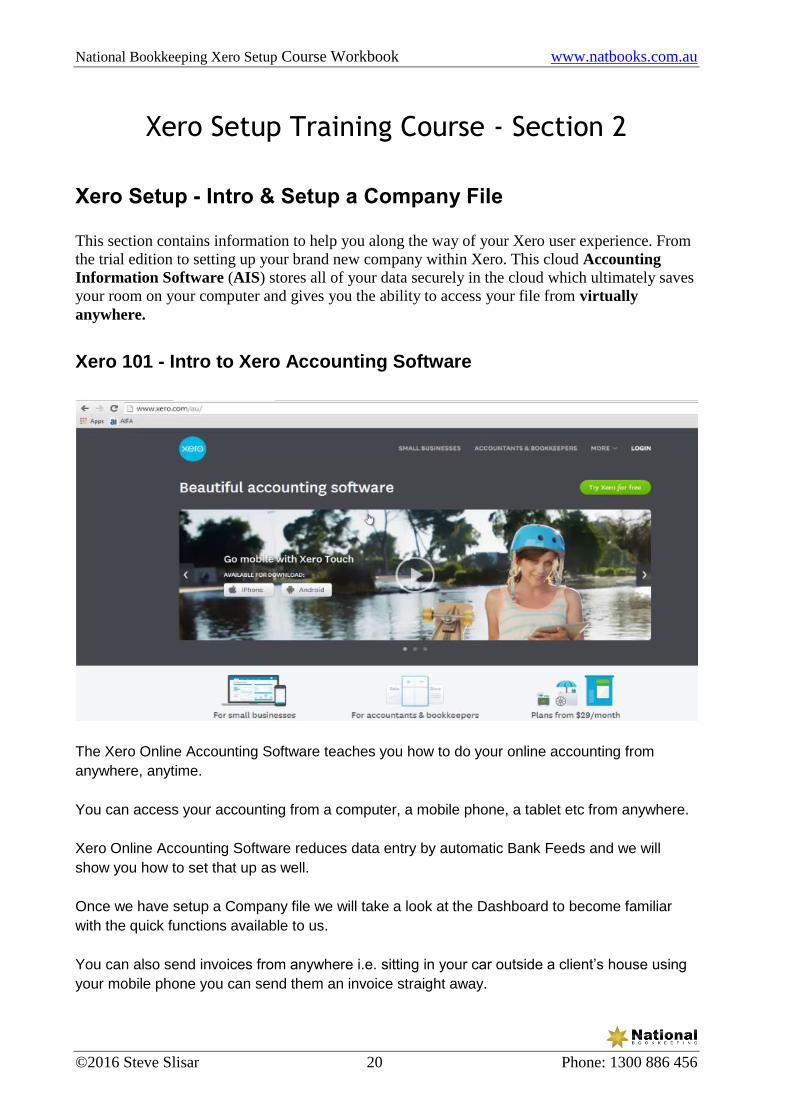
Xero 101 - Intro to Xero Accounting Software
The Xero Online Accounting Software teaches you how to do your online accounting from
anywhere, anytime.
You can access your accounting from a computer, a mobile phone, a tablet etc from anywhere.
Xero Online Accounting Software reduces data entry by automatic Bank Feeds and we will
show you how to set that up as well.
Once we have setup a Company file we will take a look at the Dashboard to become familiar
with the quick functions available to us.
You can also send invoices from anywhere i.e. sitting in your car outside a client’s house using
your mobile phone you can send them an invoice straight away.

National Bookkeeping Xero Setup Course Workbook www.natbooks.com.au
©2016 Steve Slisar 21 Phone: 1300 886 456
Xero 102 - Free Software Trial
Xero Accounting Software gives you the ability to trial the product free for 30 days and that
way, you can pay when you are ready to use it. Go to https://www.xero.com/au/signup/ and sign
up by following the on screen prompts. We also have some videos in this section to assist you
further.
Let’s download our Trial Version. You will need to fill in a small amount of details to get your
trial i.e. first name, last name, your email address, your phone number, business location &
current system (optional), so go ahead and do this now. Have a read of the Terms and once
finished, click on the box next to I have read and I agree to the Terms Of Use. Then click on the
Get Started tab.
Xero would now have sent you an email with a link to verify our account so check your inbox for
this email and click on the link. We will then be prompted to create a password so go ahead
and enter a password and then click on the Activate Your Account tab.

National Bookkeeping Xero Setup Course Workbook www.natbooks.com.au
©2016 Steve Slisar 22 Phone: 1300 886 456
You should now be at the Main Dashboard as shown below:

National Bookkeeping Xero Setup Course Workbook www.natbooks.com.au
©2016 Steve Slisar 23 Phone: 1300 886 456
Xero 103 - Setup - Organisational Settings
We will now setup an Organisation.
1. Click on the Add Your Business tab.
2. The next screen is where you will put your Organisation Name. Normally you would put
your own organisation name but we will use EzyLearn for this exercise, so go ahead and
type this name in the organisation field.
3. The default country is Australia, so for now we will leave that as is for this exercise.
4. As shown below your screen should now look like this, then click Start Trial button:
Now we are at the welcome screen and the Setup Guide which will help us create our
organisation.
1. Click on the “Next” tab.
We would normally enter our organisation information in this screen but for this exercise we will
leave it blank except for the Company Name which has already been pre-populated.
National Bookkeeping Xero Setup Course Workbook www.natbooks.com.au
©2016 Steve Slisar 24 Phone: 1300 886 456
Xero 104 - Setup - Financial Settings
Now we are going to enter our Financial Details.
Financial Year End
Enter the last month of the financial year (usually 30th June) so use this.
Activity Statement Settings
GST Accounting Method
Click on the arrow next to this tab and the drop down box will appear with choices of accounting
methods. Cash, Accrual or None.
CASH - This is when you enter your income or expenses at the time of receiving a payment or
making a purchase.
ACCRUAL - This is when you create an invoice once the job is done but don’t receive payment
straight away, also when you have a bill that you enter but it doesn’t get paid straight away.
NONE - This means you don’t choose either of the first 2 options.
It is always good to ask your accountant which way they would prefer you to record your GST
Accounting Method.
For this exercise we will use the CASH GST Accounting Method so click on this option.
Tax File Number
In your own organisation you would enter your own tax file number but in this exercise we will
leave it blank.
GST Calculation
Here you can choose how often you submit a BAS and pay tax. The options are None, Monthly,
Quarterly Option 1, Quarterly Option 2, Quarterly Option 3 or Annually. If you are not
registered for GST then you would choose NONE. We will look at these more in depth later but
for now we will choose Quarterly Option 1 for this exercise.
PAYG Withheld Period
This is if you have employees and you withhold their tax to send to the tax office with your next
BAS. We will leave it as the default setting of “NONE” for this exercise

National Bookkeeping Xero Setup Course Workbook www.natbooks.com.au
©2016 Steve Slisar 25 Phone: 1300 886 456
PAYG Income Tax Method
This is if you pay your tax in instalments or in full. We will leave it as the default setting of
“NONE” for this exercise and look at this more in depth later.
Additional Tax Areas
There are other tax areas your business may need to report to the tax office i.e.
● Fringe Benefits Tax
● Fuel Tax Credits
● Wine Equalisation Tax
As we don’t need these we will leave them blank for this exercise.
Tax Defaults
Set your organisation's tax default for sales (invoices, quotes, credit notes, receive money) or
purchases (bills, credit notes, purchase orders, or spend money). Your options are as shown
below:
● Amounts are tax exclusive
● Amounts are tax inclusive
● Amounts are based on last invoice (or bill)
● Amounts don't include tax
For this exercise we will use Tax Exclusive for sales & Tax Inclusive for purchases.
Time Zone
This is where you would change to your own time zone & country but for the purposes of this
exercise we will leave it with the default of Canberra, Melbourne, Sydney.

National Bookkeeping Xero Setup Course Workbook www.natbooks.com.au
©2016 Steve Slisar 26 Phone: 1300 886 456
After you have entered the above information your screen should look like the following:
Click the “NEXT” tab.

National Bookkeeping Xero Setup Course Workbook www.natbooks.com.au
©2016 Steve Slisar 27 Phone: 1300 886 456
Xero 105 - Setup - Invoice Settings and Users
You will be asked if your organisation sends invoices, we will choose “No Skip This Step” for
now but we will come back to it later.
Invite Users
A screen prompt now appears asking if you would like to Invite a User. We will click Yes but
just to have a look how it is done.
This is where you can authorise (invite) other people i.e. your accountant, your bookkeeper, staff
members etc to be able to view, add data, delete data or make any changes to your organisation
data as shown below.
We will leave this as is for now so click “NEXT” and when you see the screen prompted choose
“SKIP”. This can be changed at a later time.
Add Foreign Currencies Used By Your Organisation
If your organisation uses foreign currencies you could add those currencies here but we will
leave this as the default which is AUD Australian Dollars for this exercise. This can be changed
at a later time.
Click the “NEXT” tab.

National Bookkeeping Xero Setup Course Workbook www.natbooks.com.au
©2016 Steve Slisar 28 Phone: 1300 886 456
Xero 106 - Setup - Chart of Accounts
How Would You Like To Setup Your Chart Of Accounts
This is where you can add or delete any of the income & expense accounts that do or don’t suit
your organisation. You could import your own chart of accounts here as well but for this
exercise we will use the default accounts Xero has chosen for us. Click the “NEXT” tab.
Confirm Your Chart Of Accounts
This shows you the types of income & expense account Xero has choosen for you. All monies
coming in and out of your organisation need to be allocated one of these income & expense
accounts. You can add an item to your chart of accounts if you wish also you can delete items
with a box next to it, if it has a padlock this means you cannot delete that item. You can also add
a Bank/Credit Card/Paypal account by clicking on the drop down box next to the Add Bank
Account tab (see screenshot below, but for this exercise we will leave it blank. This can be
changed at a later time.
1. In the Your Bank field we will start typing in Commonwealth Bank and it will
automatically start showing certain bank that start with what you are typing. Choose
Commonwealth Bank then you will get a prompt to say that Bank Feeds are available for
this bank.
2. The Name field is where you would put the Bank Account name so for this exercise type
in EzyLearn Pty Ltd.
3. The Code field we will use the number 600 for this exercise so go ahead and type this in
and a prompt should let you know that this number is available.
4. The Currency field is set to the default of Australia so we will leave this as is.
5. The BSB & Account Number fields you would enter the business account details here.

National Bookkeeping Xero Setup Course Workbook www.natbooks.com.au
©2016 Steve Slisar 29 Phone: 1300 886 456
6. For now though we will cancel out of this screen. Click on the Cancel tab.
You can also add an account to the chart of accounts.
1. Click on the Revenue tab.
2. Click on the Add Account tab and the following screen will appear.
3. Next to the Account Type field click on the drop down box and then scroll down and click
on Revenue.
4. Type in the code 201.
5. Type in the Name field Bookkeeping Income.
6. The Tax Field is where we can set our Tax Codes we will leave it as GST on Income.
We will talk about other fields and How Account Types Affect Your Reports on the right hand
side of the screen in another video. Click the Cancel tab.
National Bookkeeping Xero Setup Course Workbook www.natbooks.com.au
©2016 Steve Slisar 30 Phone: 1300 886 456
Xero 107 - Setup - Account Balances
1. Click on the Next tab.
2. A screen will appear letting you know you that you haven’t added a bank account and
did you want to continue, click the Yes & Continue Anyway tab.
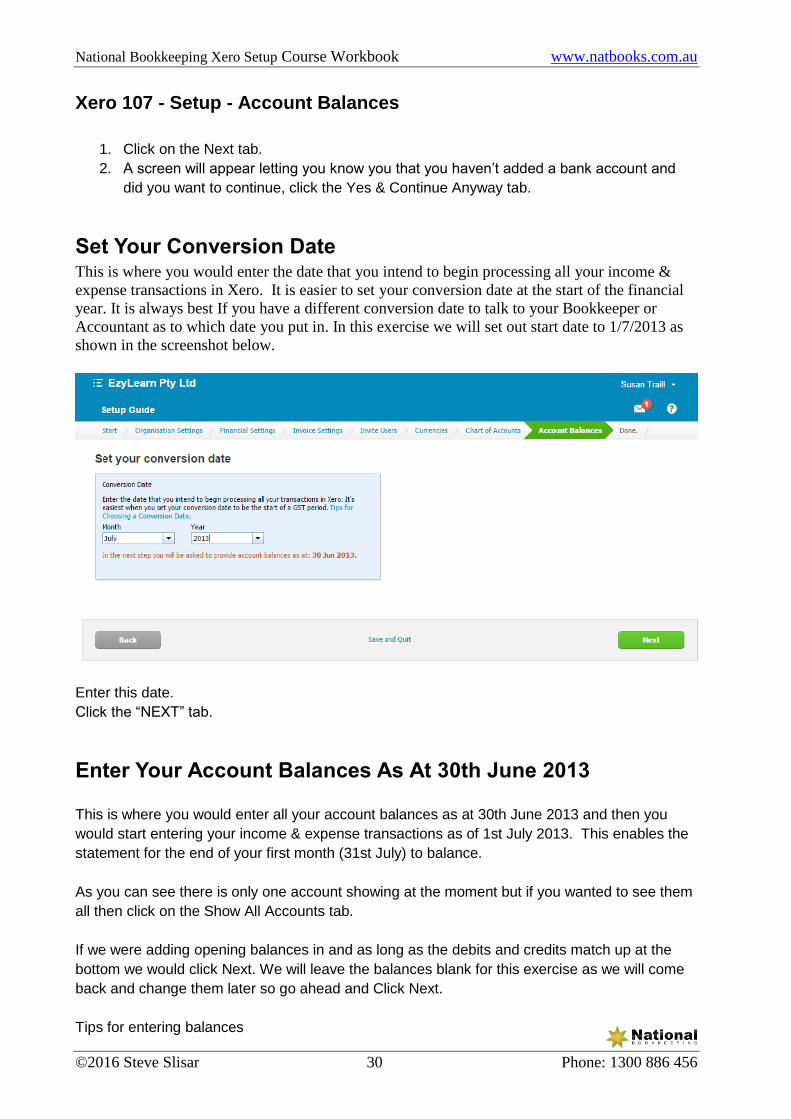
Set Your Conversion Date This is where you would enter the date that you intend to begin processing all your income &
expense transactions in Xero. It is easier to set your conversion date at the start of the financial
year. It is always best If you have a different conversion date to talk to your Bookkeeper or
Accountant as to which date you put in. In this exercise we will set out start date to 1/7/2013 as
shown in the screenshot below.
Enter this date.
Click the “NEXT” tab.
Enter Your Account Balances As At 30th June 2013
This is where you would enter all your account balances as at 30th June 2013 and then you
would start entering your income & expense transactions as of 1st July 2013. This enables the
statement for the end of your first month (31st July) to balance.
As you can see there is only one account showing at the moment but if you wanted to see them
all then click on the Show All Accounts tab.
If we were adding opening balances in and as long as the debits and credits match up at the
bottom we would click Next. We will leave the balances blank for this exercise as we will come
back and change them later so go ahead and Click Next.
Tips for entering balances

National Bookkeeping Xero Setup Course Workbook www.natbooks.com.au
©2016 Steve Slisar 31 Phone: 1300 886 456
● Use Xero's inbuilt calculator to help you work out your balances.
● Enter the account balances from your previous accounting system for the day before
your conversion date.
● Enter some, none or all your balances now - you can always come back to them later.
Often people enter just their bank account balances at this stage.
● It’s ok if they don’t balance, Xero will record the difference which you or your adviser can
adjust later.
● If you are a new business, your opening balances are likely to all be zero.
● Bank account balances should always be a positive number: overdrawn balances (or
outstanding credit card balances) go in the credit column, positive account balances go
in the debit column. Enter the actual bank balance from your bank statement.
Set-Up Complete
The set-up of your organisation information is now complete.
Click the “FINISH” tab. Now it will take you to the Main Dashboard that you will see every time
you login to Xero.

National Bookkeeping Xero Setup Course Workbook www.natbooks.com.au
©2016 Steve Slisar 32 Phone: 1300 886 456
Xero 108 - Setup - Invoice Settings - Default In this video we are going to take a look at the Default Settings for our Invoices.
1. Click on the Settings tab.
2. From the drop down list click on General Settings and the following screen will appear.
3. Click on Invoice Settings. This will bring up the default settings for our Invoices as shown
in the screenshot below:
National Bookkeeping Xero Setup Course Workbook www.natbooks.com.au
©2016 Steve Slisar 33 Phone: 1300 886 456
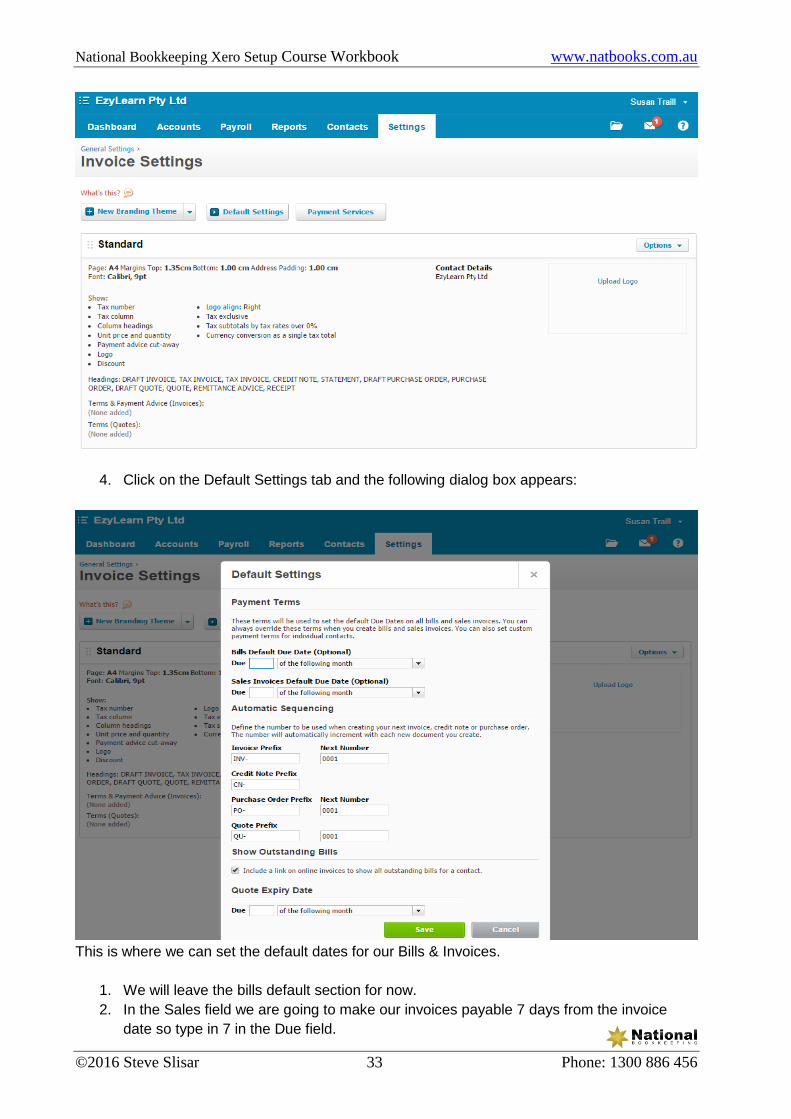
4. Click on the Default Settings tab and the following dialog box appears:
This is where we can set the default dates for our Bills & Invoices.
1. We will leave the bills default section for now.
2. In the Sales field we are going to make our invoices payable 7 days from the invoice
date so type in 7 in the Due field.

National Bookkeeping Xero Setup Course Workbook www.natbooks.com.au
©2016 Steve Slisar 34 Phone: 1300 886 456
3. Click on the arrow and when the drop down box appears click on Day(s) After The
Invoice Date.
Automatic Sequencing - If we are a new company we could set our starting invoice number
here. If we were an existing company transferring to the Xero software we would want to
continue on from the next invoice number following the last invoice number we processed in our
previous accounting software. You would add that number in the Next Number field.
1. Type in the Next Number field 0795.
2. Change the Credit Note Prefix from CN- to CR-.
3. The Show Outstanding Bill section leave ticked.
4. Click on the Save tab.
5. You will get a confirmation on the next screen that your preferences have been saved.

National Bookkeeping Xero Setup Course Workbook www.natbooks.com.au
©2016 Steve Slisar 35 Phone: 1300 886 456
Xero 109 - Setup - Invoice Settings - Email Settings
1. From the Main Dashboards click on Settings tab.
2. When the drop down box appears click on General Settings.
The Blue Star next to certain items in the General Settings Menu have been chosen as they will
appear in the Settings tab so if you want to see any of these items in the Settings tab you just
click on the blank star next to a particular item and then click on the Settings button and you will
now see it appear.
3. Click on the item Email Settings and you should see the screen below:
4. Email Address - You would normally have you business email address here but we will
leave it as is for now. If you wanted to change or add an email address you would just
click on the Edit button and then click on Add Email Address and the next screen is
where you would add the new email address as shown below.
National Bookkeeping Xero Setup Course Workbook www.natbooks.com.au
©2016 Steve Slisar 36 Phone: 1300 886 456
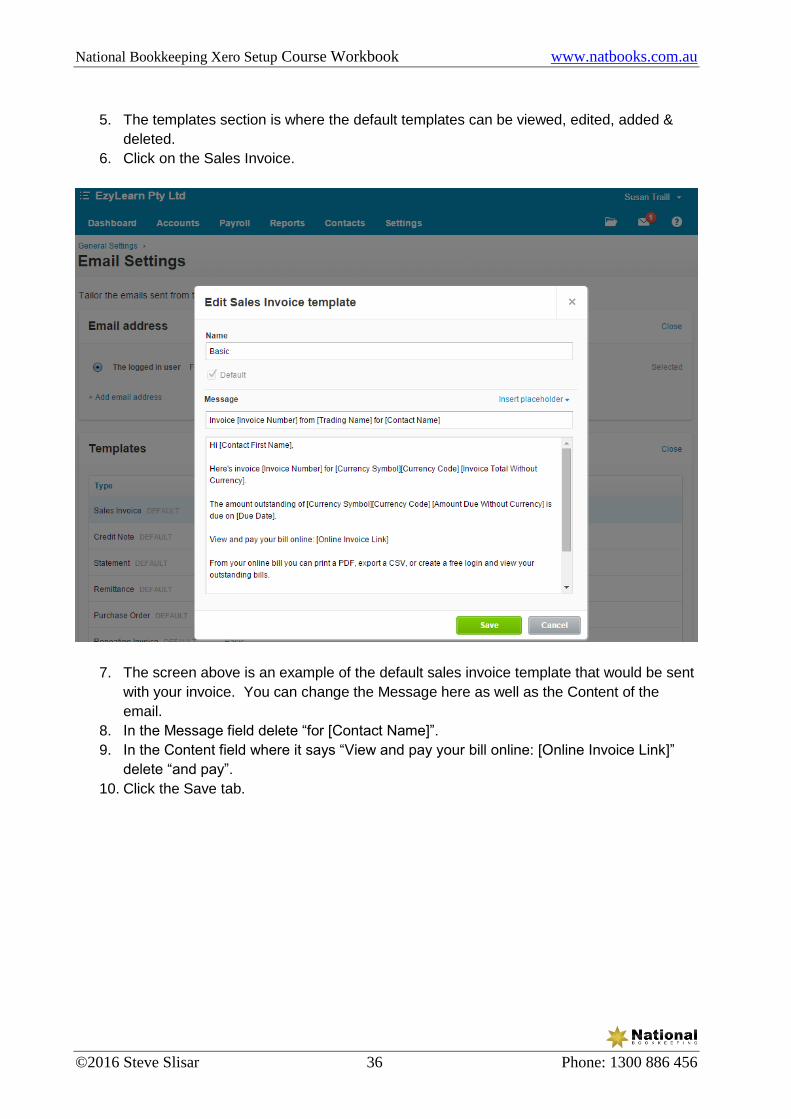
5. The templates section is where the default templates can be viewed, edited, added &
deleted.
6. Click on the Sales Invoice.
7. The screen above is an example of the default sales invoice template that would be sent
with your invoice. You can change the Message here as well as the Content of the
email.
8. In the Message field delete “for [Contact Name]”.
9. In the Content field where it says “View and pay your bill online: [Online Invoice Link]”
delete “and pay”.
10. Click the Save tab.

National Bookkeeping Xero Setup Course Workbook www.natbooks.com.au
©2016 Steve Slisar 37 Phone: 1300 886 456
Xero 110 - Setup - Dashboard - Watchlist
Manage your accounts within your dashboard.
We are going to show you how to display the types of accounts you would like to see on certain
Dashboards. You should be at your Main Dashboard as shown below:
You can display as many accounts as you want on the Main Dashboard.
1. Click on the Accounts tab.
2. From the drop down box click on the Sales tab. Now we are at the Sales Dashboard
which shows us money coming in and the customers that owe us the most. You can
display this in a Pie Graph or a List View.

National Bookkeeping Xero Setup Course Workbook www.natbooks.com.au
©2016 Steve Slisar 38 Phone: 1300 886 456
3. Click on the Accounts tab.
4. From the drop down box click on the Purchases tab. Now we are at the Purchases
Dashboard which shows us our Bills and whether they have been paid or when they are
due.

National Bookkeeping Xero Setup Course Workbook www.natbooks.com.au
©2016 Steve Slisar 39 Phone: 1300 886 456
5. Click on the Settings tab.
6. From the drop down box click on the Chart Of Accounts tab.
7. We can choose which accounts we wish to view. Click on the Sales Item and the edit
screen will appear.
8. Down the bottom of the screen tick the box next to Show On Dashboard Watchlist.
9. Click the Save tab.
10. Click on the Main Dashboard tab.
11. Now you can see that our Accounts Watchlist is now displayed on our Main Dashboard
(as shown below) and we can see how much money we are owed anytime.

National Bookkeeping Xero Setup Course Workbook www.natbooks.com.au
©2016 Steve Slisar 40 Phone: 1300 886 456
This is some information on how to modify & customise what is displayed on our Main
Dashboard to suit our business.
National Bookkeeping Xero Setup Course Workbook www.natbooks.com.au
©2016 Steve Slisar 41 Phone: 1300 886 456
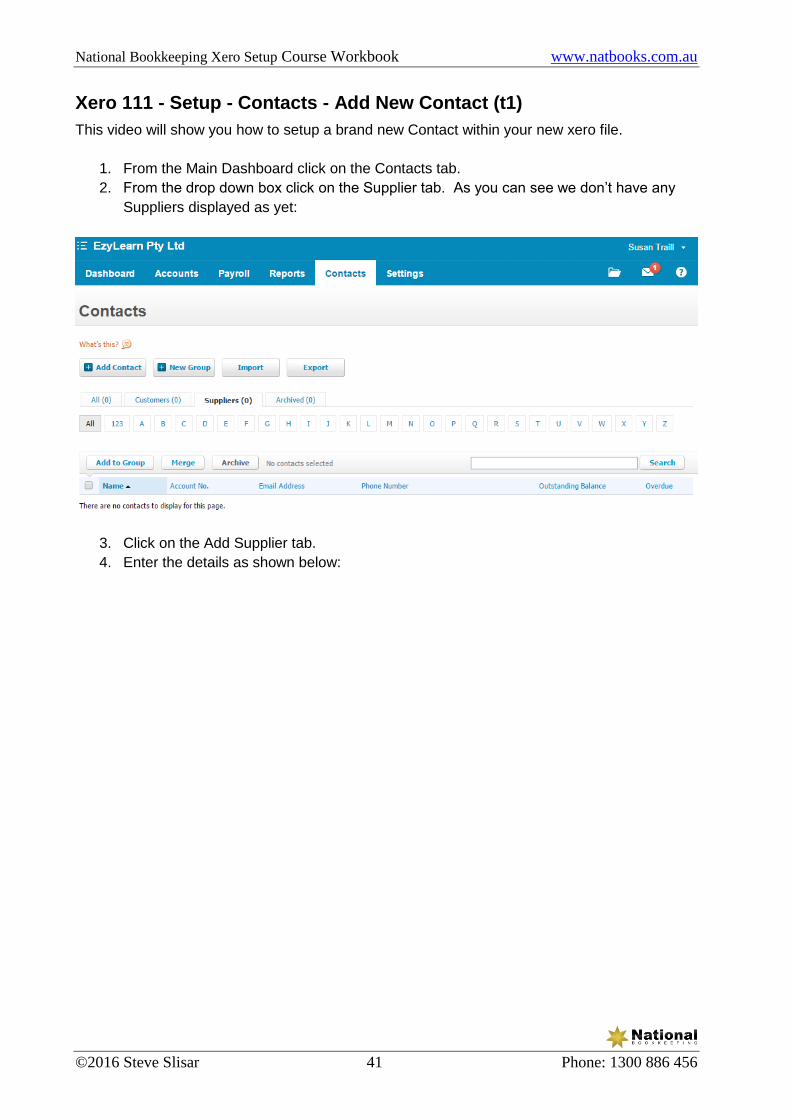
Xero 111 - Setup - Contacts - Add New Contact (t1)
This video will show you how to setup a brand new Contact within your new xero file.
1. From the Main Dashboard click on the Contacts tab.
2. From the drop down box click on the Supplier tab. As you can see we don’t have any
Suppliers displayed as yet:
3. Click on the Add Supplier tab.
4. Enter the details as shown below:

National Bookkeeping Xero Setup Course Workbook www.natbooks.com.au
©2016 Steve Slisar 42 Phone: 1300 886 456
5. Then add the details from the next screen.

National Bookkeeping Xero Setup Course Workbook www.natbooks.com.au
©2016 Steve Slisar 43 Phone: 1300 886 456
6. Click on the Save tab.
7. Now we can see that Harvey Norman has been saved and their contact details are
displayed as shown below.

National Bookkeeping Xero Setup Course Workbook www.natbooks.com.au
©2016 Steve Slisar 44 Phone: 1300 886 456

National Bookkeeping Xero Setup Course Workbook www.natbooks.com.au
©2016 Steve Slisar 45 Phone: 1300 886 456
Xero 201 - Setup - Add Bank Account
We will now create a Bank Account to our new xero file.
The black bar at the top of the screen tells us that we are using the Free Trial Version of xero
and when we are ready we can click on the Pay Now tab and follow the prompts to purchase
the full version of the Xero software
1. Click on the Add Bank Account tab.
2. From the drop down box click on Bank Account.
3. Enter the information you see on the screen below:
.
4. Click on the Save tab and now you should see your new bank account appear on your
Main Dashboard and now we can start our data entry.
National Bookkeeping Xero Setup Course Workbook www.natbooks.com.au
©2016 Steve Slisar 46 Phone: 1300 886 456
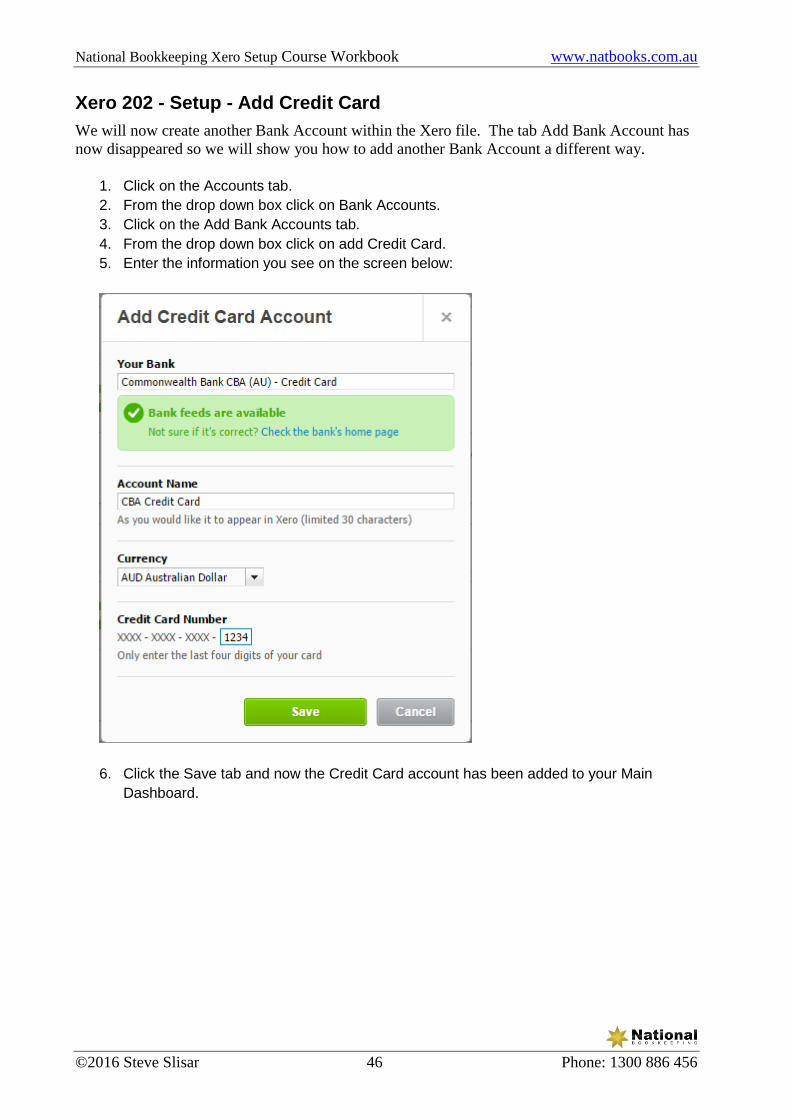
Xero 202 - Setup - Add Credit Card
We will now create another Bank Account within the Xero file. The tab Add Bank Account has
now disappeared so we will show you how to add another Bank Account a different way.
1. Click on the Accounts tab.
2. From the drop down box click on Bank Accounts.
3. Click on the Add Bank Accounts tab.
4. From the drop down box click on add Credit Card.
5. Enter the information you see on the screen below:
6. Click the Save tab and now the Credit Card account has been added to your Main
Dashboard.

National Bookkeeping Xero Setup Course Workbook www.natbooks.com.au
©2016 Steve Slisar 47 Phone: 1300 886 456
Xero 203 - Setup - Add PayPal Accounts
We will have a look at how to add online payment accounts to Xero. These days most business
have the ability to receive online payments for example in the form of a Paypal Account. In
Xero we have the ability to link up your Paypal account and receive your payments and your
data entry all via the add bank accounts screen. We will show you how to setup your Paypal
Account. As we don’t actually have a Paypal Account we won’t go through it all but we will
show you the basics.
1. Click on the Accounts tab.
2. From the drop down box click on Bank Accounts.
3. Click on the Add Bank Accounts tab.
4. From the drop down box click on add Paypal tab.
5. If we were to tick the box next to the Set Up Automatic Paypal Imports we would see the
screen below but we will only enter in the Account Name and the currency for now as we
don’t have a Paypal Account so un tick that box:
6. Click on the Save tab.

National Bookkeeping Xero Setup Course Workbook www.natbooks.com.au
©2016 Steve Slisar 48 Phone: 1300 886 456
Xero 204 - Setup - Manage Bank Accounts on Dashboard
Showing your Bank Accounts on the Main Dashboard. Every time you login to your Xero
account you will see the Main Dashboard. We can customise the Main Dashboard to suit your
needs. We can do this by showing or not showing certain things on the main dashboard which
ever you prefer.
Bank accounts are very important to see so they should be displayed on our Main Dashboard.
1. Click on the Accounts tab.
2. From the drop down box click on Bank Accounts.
3. You can see with all 3 accounts there is a box ticket that says Show Account On
Dashboard. This means that those 3 account are displayed on your dashboard. Click
on the Dashboard tab which will take you to your dashboard, you will see the 3 accounts
displayed as shown below:
You can also change the order in which the bank accounts are displayed on your dashboard.
We can add or take away any of the accounts from the dashboard. For example let’s take away
the credit card account (it doesn’t mean the account is deleted, it’s just not displayed on the
dashboard:
1. Click on the Accounts tab.

National Bookkeeping Xero Setup Course Workbook www.natbooks.com.au
©2016 Steve Slisar 49 Phone: 1300 886 456
2. From the drop down box click on Bank Accounts.
3. The box ticket that says Show Account On Dashboard, let’s un tick this box. Now you
will see it says Show Account On Dashboard so if we changed our minds and wanted
this account back on the dashboard then we would tick this box again.
4. If we wanted to change the order the accounts appear on the dashboard we would click
the arrow next to Order On Dashboard, so lets click on the arrow next to Paypal to move
it to the top. Now you can see the Paypal account and the NAB Chq account has
changed positions.
5. Now click on the Dashboard tab and we can see that Paypal account is displayed first as
shown below:
National Bookkeeping Xero Setup Course Workbook www.natbooks.com.au
©2016 Steve Slisar 50 Phone: 1300 886 456
What’s next
You should now feel quite comfortable using most parts of the Xero accounting software and
ready for some real world experience.
Are you looking for work?
Come and join the Career Academy and get the skills to present yourself professionally to get
that job or promotion you’re looking for.
Want to start your own bookkeeping business?
To be capable of running your own business is a dream aspired to by many smart Australians and
The Startup Academy and National Bookkeeping will help you get their faster and with the help
of mentors and achievement coaching.
Are you looking for a Bookkeeper or BAS Agent?
Our National Team of bookkeepers and BAS Agents are available to start working on your
bookkeeping now. We provide the full service from setup to BAS lodgment and offer the right
bookkeeper for the right task so you only pay for what you need. Plus, we’ll help systemize the
procedures for your accounting records and daily transactions.
Call us on 1300 886 456, email [email protected] or visit our website
www.natbooks.com.au for more information.
Disclaimer
The circumstances of each business are very different. Decision making on how to handle the
variety of compliance duties vary from company to company. This training workbook is meant
as a guide only and does not take you or your employer’s circumstances into account. Use this
guide as a means to understand how to move around and enter information into the software but
consult your advisers for information specific to you or your employer’s organization.

![MARKET RELEASE Xero Annual Results[4]media.nzherald.co.nz/webcontent/document/pdf/201321/xero.pdf · Xero CEO rod.drury@xero.com +64 27 6000 007 About Xero Xero provides beautiful,](https://static.fdocuments.us/doc/165x107/5f6033680f3f054d38639675/market-release-xero-annual-results4media-xero-ceo-roddruryxerocom-64-27-6000.jpg)