Wood Windmill DIY Tower - Outdoor Water Solutions Windmill DIY Tower Outdoor Water Solutions, Inc....
5
Wood Windmill DIY Tower Outdoor Water Solutions, Inc. 2300 South Old Missouri Road, Springdale, AR 72764 • 1-866-471-1614 (Toll Free) • 1-479-756-1614 www.outdoorwatersolutions.com
Transcript of Wood Windmill DIY Tower - Outdoor Water Solutions Windmill DIY Tower Outdoor Water Solutions, Inc....

Wood Windmill DIY Tower
Outdoor Water Solutions, Inc.2300 South Old Missouri Road, Springdale, AR 72764 • 1-866-471-1614 (Toll Free) • 1-479-756-1614
www.outdoorwatersolutions.com
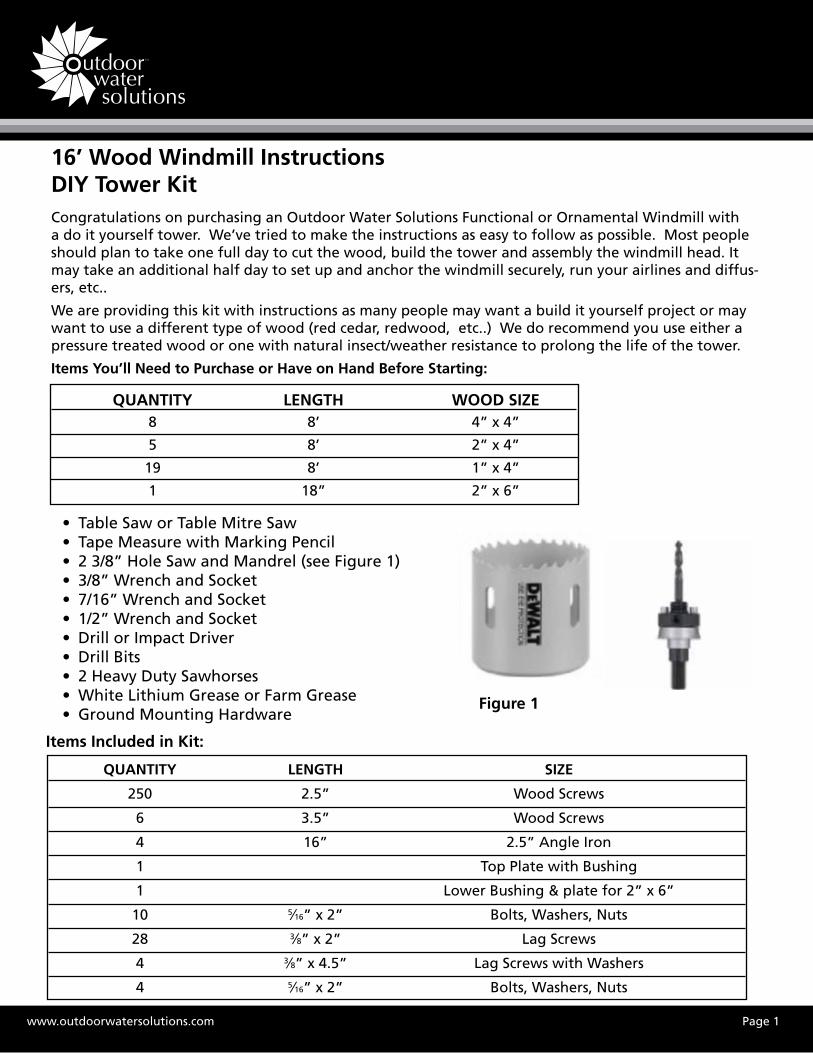
16’ Wood Windmill InstructionsDIY Tower KitCongratulations on purchasing an Outdoor Water Solutions Functional or Ornamental Windmill with a do it yourself tower. We’ve tried to make the instructions as easy to follow as possible. Most people should plan to take one full day to cut the wood, build the tower and assembly the windmill head. It may take an additional half day to set up and anchor the windmill securely, run your airlines and diffus-ers, etc..
We are providing this kit with instructions as many people may want a build it yourself project or may want to use a different type of wood (red cedar, redwood, etc..) We do recommend you use either a pressure treated wood or one with natural insect/weather resistance to prolong the life of the tower.
Items You’ll Need to Purchase or Have on Hand Before Starting:
www.outdoorwatersolutions.com Page 1
QUANTITY LENGTH WOOD SIZE 8 8’ 4” x 4”
5 8’ 2” x 4”
19 8’ 1” x 4”
1 18” 2” x 6”
• Table Saw or Table Mitre Saw• Tape Measure with Marking Pencil• 2 3/8” Hole Saw and Mandrel (see Figure 1)• 3/8” Wrench and Socket• 7/16” Wrench and Socket• 1/2” Wrench and Socket• Drill or Impact Driver• Drill Bits • 2 Heavy Duty Sawhorses• White Lithium Grease or Farm Grease• Ground Mounting Hardware
Figure 1
QUANTITY LENGTH SIZE
250 2.5” Wood Screws
6 3.5” Wood Screws
4 16” 2.5” Angle Iron
1 Top Plate with Bushing
1 Lower Bushing & plate for 2” x 6”
10 5⁄16” x 2” Bolts, Washers, Nuts
28 3⁄8” x 2” Lag Screws
4 3⁄8” x 4.5” Lag Screws with Washers
4 5⁄16” x 2” Bolts, Washers, Nuts
Items Included in Kit:
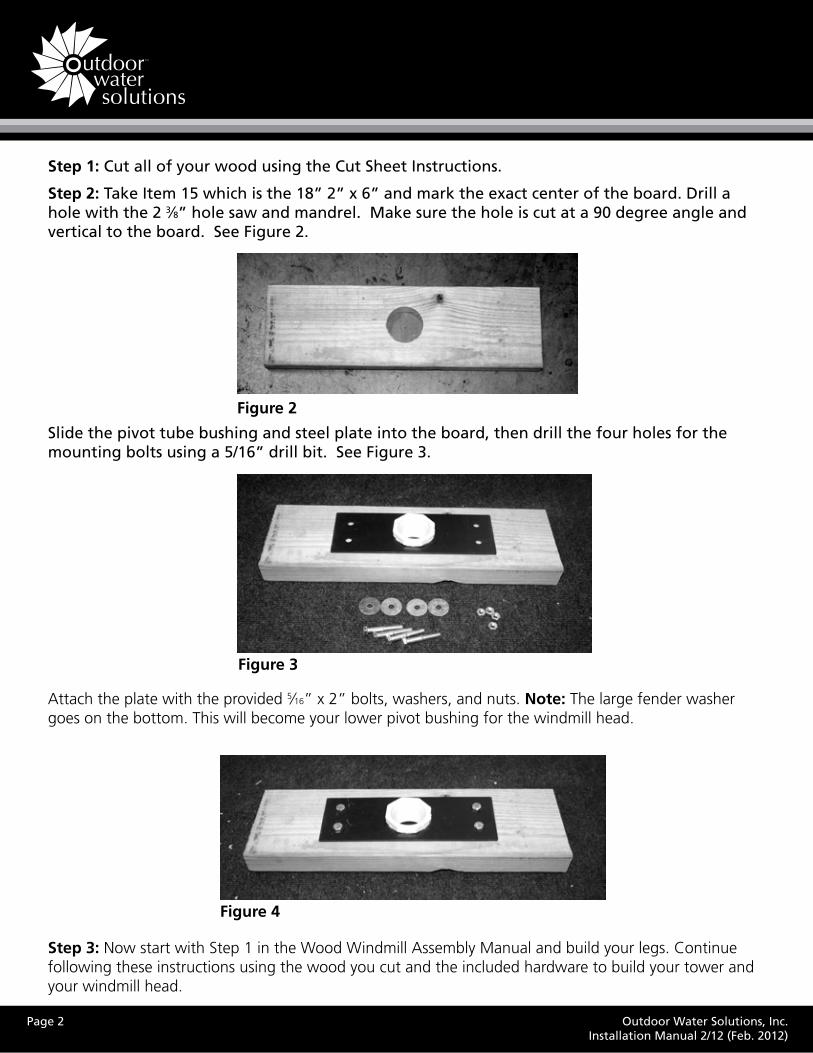
Attach the plate with the provided 5⁄16” x 2” bolts, washers, and nuts. Note: The large fender washer goes on the bottom. This will become your lower pivot bushing for the windmill head.
Step 3: Now start with Step 1 in the Wood Windmill Assembly Manual and build your legs. Continue following these instructions using the wood you cut and the included hardware to build your tower and your windmill head.
Figure 2
Figure 3
Figure 4
Page 2 Outdoor Water Solutions, Inc.Installation Manual 2/12 (Feb. 2012)
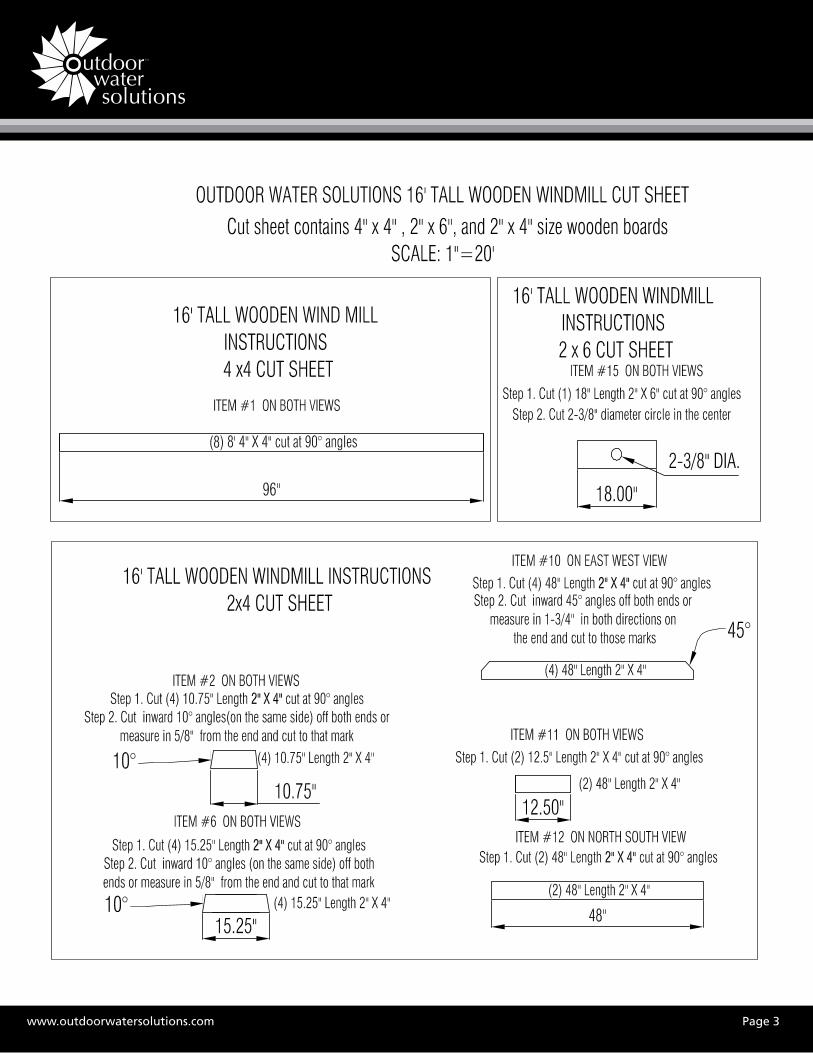
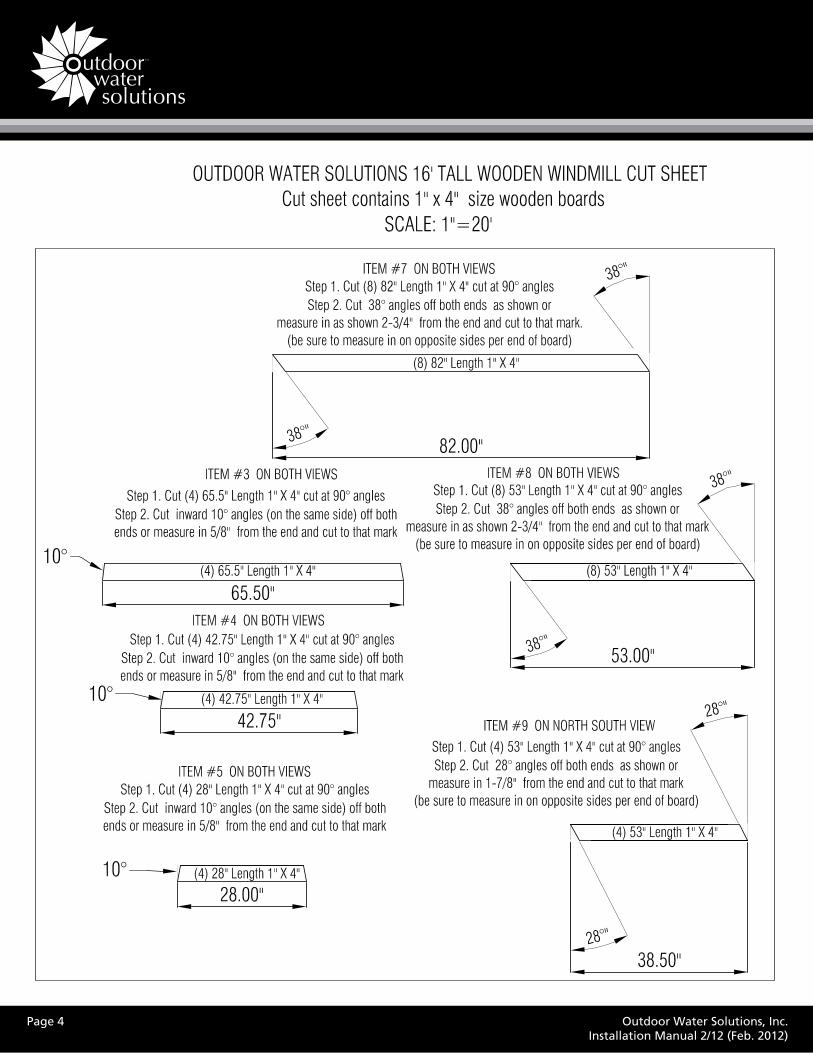
Step 1: Cut all of your wood using the Cut Sheet Instructions.
Step 2: Take Item 15 which is the 18” 2” x 6” and mark the exact center of the board. Drill a hole with the 2 3⁄8” hole saw and mandrel. Make sure the hole is cut at a 90 degree angle and vertical to the board. See Figure 2.
Slide the pivot tube bushing and steel plate into the board, then drill the four holes for the mounting bolts using a 5/16” drill bit. See Figure 3.
www.outdoorwatersolutions.com Page 3
Page 4 Outdoor Water Solutions, Inc.Installation Manual 2/12 (Feb. 2012)