Wireless VDSL Modem Router - TDS Telecom Introduction Thank you for choosing the Actiontec Wireless...
82
Wireless VDSL Modem Router Model #: V1000H User Manual Ver 1.0 Solutions for the Digital Life ™
Transcript of Wireless VDSL Modem Router - TDS Telecom Introduction Thank you for choosing the Actiontec Wireless...

Wireless VDSLModem RouterModel #: V1000H
User ManualVer 1.0
Solutions for the Digital Life™

i
Table of ContentsIntroduction 1
Minimum System Requirements 1Features 1Getting to Know the Modem Router 3
Getting Started With the Modem Router 7Accessing the Home Screen 7Host Screen 10
Configuring Wireless Settings 13Accessing Wireless Settings 13Basic Settings 16Wireless Security 18Radio Setup 20SSID Setup 22Wireless MAC Authentication 23WPS 24WMM 25802.1x 26
Configuring the Modem Router’s Utilities 27Accessing Utilities 27Rebooting the Modem Router 29Restoring Factory Default Settings 29Upgrade Firmware 31Ping Test 32Traceroute 33Web Activity Log 34Time Zone 34
ConfiguringAdvanced Setup 36Accessing Advanced Setup Options 36Services Blocking 39Website Blocking 40Scheduling Access 41Broadband Settings 43WAN IP Address 44LAN IP and DHCP Settings 46WAN VLAN 48HPNA Settings 49
i

ii
Table of Contents
ii
QoS Settings 50Remote GUI 52Remote Telnet 53Dynamic Routing 54Static Routing 55Admin Password 56Port Forwarding 57Applications 58DMZ Hosting 60Firewall 61NAT 62UPnP 62
Viewing the Modem Router’s Status 63Accessing Wireless Settings 63Connection Status 65WAN Status 66WAN Ethernet Status 67Routing Table 68Firewall Status 68NAT Table 69Wireless Status 69Modem Utilization 70LAN Status 71
Specifications 72General 72Wireless Operating Range 73LED Indicators 73Environmental 73
Notices 74Regulatory Compliance Notices 74Modifications 74GPL (General Public License) 75
Limited Warranty 76

1
Introduction
Thank you for choosing the Actiontec Wireless VDSL Modem Router. With its powerful wireless N radio, gigabit Ethernet switch, and WAN port, as well as its dual-core processor and support for HPNA, the Modem Router will propel you to new speeds as you traverse the Internet. We are sure the Modem Router will pro-vide you with years of hassle-free performance.
Minimum System Requirements• Active ADSL2+ service
• Computer with an 10 Mbps or 10/100/1000 Mbps Ethernet connection
• Microsoft Windows 2000, XP, Vista; Mac OS 7.1+, 8.0+, 9.0+, OS X+
• Internet Explorer (7.0 or higher), Firefox, Safari web browsers
• TCP/IP network protocol installed on each computer
Features• Gigabit Ethernet (WAN and LAN)
• VDSL 2 access technology (backward compatible to ASDL2+/ASDL2)
• HPNA coax support
• Optional Java Virtual Machine and Java Runtime software
• TR-069 support with remote management
• TR-064 local management
1

2
Wireless VDSL Modem Router
• 64-, 128-, and 256-bit WEP/WPA/WPA2 wireless LAN security
• IEEE 802.3 Ethernet standard compliance
• Four 10/100/1000 Base-T Ethernet ports (LAN)
• One 10/100/1000 Base-T Ethernet ports (WAN)
• DHCP server option
• MAC address cloning
• QoS support, including diffserv and random early detection
• PPPoE support
• External Radius support
• Web-based configuration support
• FTP firmware upgradeable
• Web download support
• 802.11b/g/n support
• WPS support
• Advanced firewall
• ALG

3
Chapter 1 Introduction
Getting to Know the Modem RouterThis section contains a quick description of the Modem Router’s lights, ports, etc. The Modem Router has several indicator lights (LEDs) and a button on its front panel, and a series of ports and switches on its rear panel.
Front Panel
The front panel of the Modem Router features 11 LEDs: Power, DSL, Internet, WAN Ethernet, Internet, Ethernet (4), HPNA, USB, Wireless and WPS Push Button.

4
Wireless VDSL Modem Router
Power
The Power LED displays the Modem Router’s current status. If the Power LED glows steadily green, the Modem Router is receiving power and fully operational. When the Power LED is rapidly flashing, the Modem Router is initializing. If the Power LED is glows red when the Power cord is plugged in, the Modem Router has suffered a critical error and technical support should be contacted. If the Power LED is flashing red, the Modem Router is performing a firmware update.
DSL
The DSL LED illuminates when the Modem Router is connected to an xDSL line. If the DSL LED is flashing, the Modem Router is in training for DSL service.
WAN Ethernet
When the WAN Ethernet LED glows steadily, the Modem Router is connected to an Ethernet WAN. When it flashes, it signifies that data traffic is traveling across the connection.
Internet
When the Internet LED glows steadily, the Modem Router is connected to the DSL provider. When it flashes, data traffic is passing across the Modem Router.
LAN Ethernet
The LAN Ethernet LEDs illuminate when the Modem Router is connected to another device via one of its LAN Ethernet ports. When one of the LAN Ethernet LEDs flashes, data traffic is passing across the corresponding connection.
HPNA
The HPNA LED illuminates when the Modem Router is connected to another device via its HPNA port. When it flashes, data traffic is passing across the connection.

5
Chapter 1 Introduction
USB
The USB LED illuminates when a USB device is connected via the Modem Router’s USB port. This port is not currently operational, but may be enabled in a future firmware update.
Wireless
The Wireless LED illuminates when the Modem Router is connected wirelessly, assuming the Modem Router’s Wireless feature is turned on.
WPS Button
The WPS button activates WPS (WiFi Protected Setup) on the Modem Router. To use WPS, press the WPS button on the Modem Router, then, within two minutes, press the WPS button on a device you wish to connect to the Modem Router’s wireless network. The device will automatically join the Modem Router’s wireless network. Repeat for other wireless devices.
Rear Panel
The rear panel of the Modem Router features 8 ports (Line, HPNA, LAN Ethernet, WAN Ethernet, USB, and Power), as well as a Reset switches.
43
21
LAN
WAN
Ethernet Cable(from LAN Ethernet Port
to Computer/Device)
Ethernet Cable(from WAN Port
to ISP Connection)
Power Adapter(from Power Port
to Wall Outlet)
Coaxial Cable(from Coax Portto Set Top Box)
USB1
USB Cable(from USB Port
to Device)
USB
HPNA
Line
Reset Power

6
Wireless VDSL Modem Router
Line Port
The Line port is used to connect the Modem Router to a telephone line connection.
HPNA Port
The HPNA port is used to connect the Modem Router to an HPNA connection via coaxial cable.
LAN Ethernet Ports (4)
The LAN Ethernet ports are used to connect computers to the Modem Router via Ethernet cable. The Ethernet ports are 10/100/1000 Mbps auto-sensing ports, and either a straight-through or crossover Ethernet cable can be used when con-necting to the ports.
WAN Ethernet Port
The WAN Ethernet port is used to connect the Modem Router to a WAN via an Ethernet cable.
USB Port
The USB port is used to connect the Modem Router to a USB device. This port is not yet active; it may be activated in a future firmware update.
Reset Switch
Depressing the Reset switch for one second will restore the Modem Router’s factory default settings. To reset the Modem Router, depress and hold the Reset switch for approximately ten seconds. The reset process will start after releasing the switch.
Power Port
The Power port is used to connect the Power cord to the Modem Router.
WARNING! Do not unplug the Power cord from the Modem Router during the reset process. Doing so may result in permanent damage to the Modem Router.
7
Getting Started With the Modem Router
This chapter gives an overview of how to get started with the Modem Router, including describing the Modem Router’s Home screen and setting up the Modem Router through the Quick Start screens.
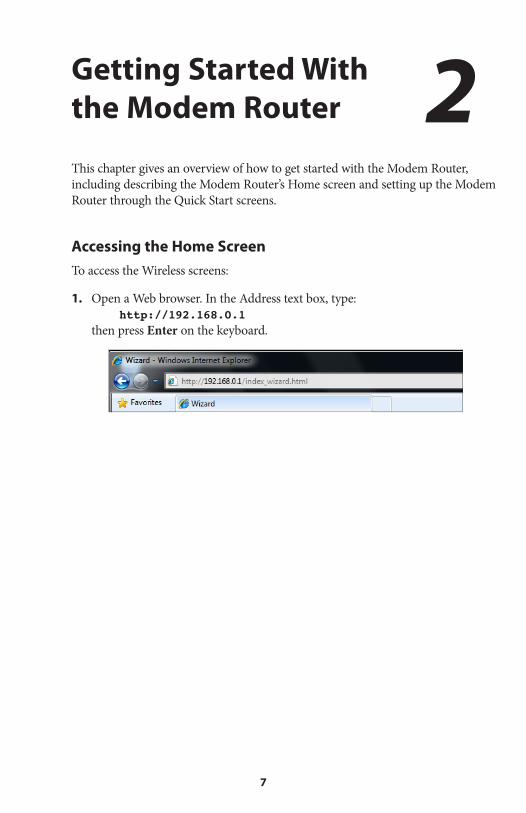
Accessing the Home ScreenTo access the Wireless screens:
Open a Web browser. In the Address text box, type: 1. http://192.168.0.1 then press Enter on the keyboard.
2

8
Wireless VDSL Modem Router
The Modem Router’s host screen appears. Click 2. Manual Setup.
The Quick Setup screen appears, with a row of large icons across the top of the 3. screen. Click Homepage.

9
Chapter 2 Getting Started
The Modem Router’s Home screen appears.4.
Icon Bar
At the top of the Home screen is the Icon Bar. Here, you can quickly access the other four main sections of the Modem Router’s firmware by clicking on the appro-priate icon: Status; Quick Setup, Wireless Setup; Utilities; and Advanced Setup. Clicking the Home icon in any other firmware screen generates the Home screen.
Internet Services
On the right side of the screen is the Internet Services menu, where there is a series of four Actiontec links (Actiontec, Actiontec Store, Actiontec How To Zone, and Actiontec Support) that can help you get the most out of the Modem Router.
Home Network Map
The Home Network map on the Home screen is a graphical representation of the Modem Router’s network, including how it is connected to the ISP, all devices con-nected to it through its networks, and the state of the firewall.

10
Wireless VDSL Modem Router
Host ScreenThe Modem Router’s Host screen is the first one you will see when connecting to the Modem Router. It contains four options: Auto Configure Your Modem, From Provider List Setup Option, Manual Setup, and Log into My Device.
Auto Configure Your Modem
Selecting this option generates a procedure wizard that guides you through auto-matically connecting the Modem Router with your ISP.
From Provider List Setup Option
Selecting this option generates a procedure wizard that guides you through con-necting the Modem Router with an ISP that appears on the list that appears. Only ADSL customers can access this option.

11
Chapter 2 Getting Started
Manual Setup
Selecting this option takes you to the Quick Setup screen. To perform a quick setup:
In the first Quick Setup screen, follow the onscreen instructions, then click 1. Next.
Another Quick Setup screen appears. Select the WAN interface you are using 2. from the WAN Interface drop-down list.
Select the protocol used by your ISP by clicking in the appropriate radio but-3. ton. If PPPoE or PPPoA was selected, enter the PPP username and password in the text boxes that appear.
Click 4. Apply to save your changes.
12
Wireless VDSL Modem Router
Log Into My Device
Selecting this option generates a screen asking for your username and password. After entering them correctly, the Home screen appears, where you can access the Modem Router’s graphical user interface.

13
Configuring Wireless Settings
This chapter explains the options provided in the Wireless section of the Modem Router’s firmware, including setting up wireless security and WPS.
Accessing Wireless SettingsTo access the Wireless screens:
Open a Web browser. In the Address text box, type: 1. http://192.168.0.1 then press Enter on the keyboard.
3

14
Wireless VDSL Modem Router
The Modem Router’s host screen appears. Click 2. Manual Setup.
The Quick Setup screen appears, with a row of large icons across the top of the 3. screen. Click Wireless Setup.

15
Chapter 3 Wireless Settings
The Wireless Setup screen appears, with list of options on the left side of 4. the screen.
The rest of this chapter explains the options found in the menu on the left side of every wireless settings screen.

16
Wireless VDSL Modem Router
Basic SettingsClick Basic Settings from any Wireless screen to generate the Basic Settings screen. This screen displays step-by-step instructions to set up a secure wireless network with the Modem Router.
To configure the basic wireless settings of the Modem Router:
Enable the wireless radio of the Modem Router by clicking in the Enable radio 1. button to activate it.
If needed, change the name of the Modem Router’s wireless network by enter-2. ing a new one in the Network Name text box. Otherwise, you can use the one that is already entered the the text box. You should write this name down, so that you can refer back to it later, when connecting other wireless devices (such as smartphones or laptop computers) to the Modem Router’s wireless network.

17
Chapter 3 Wireless Settings
If needed, change the channel on which the Modem Router’s wireless network 3. will operate once it is activated. In the U.S., wireless networks can operation on channels 1 through 11. If your network is not working properly because of out-side interference, you can change it to another channel here. Also, if you select the Auto Detect option, the Modem Router will automatically select a channel.
Activate wireless security by clicking in the radio button next to WPA/WPA2. 4. This type of wireless security is the recommended choice, and will secure the Modem Router’s wireless network against outside intruders who try to gain access to the wireless network without your knowledge.
Enter a pre-shared key (PSK) in the text box next to Pre-Shared Key (PSK) for 5. Home Network. A PSK is the password that other wireless devices will need to join the Modem Router’s wireless network. It must be at least 8 characters long, and is made up of numbers and letter. Once you create a PSK, write it down for future reference.
Click 6. Apply. The Modem Router’s wireless network is now on and other wire-less devices can join it.

18
Wireless VDSL Modem Router
Wireless SecurityClick Wireless Security from any Wireless screen to generate the Wireless Security screen. This screen lets you make other changes to the security of the Modem Router’s wireless network.
To change the security settings of the Modem Router’s wireless network:
If needed, change the name of the Modem Router’s wireless network by select-1. ing a new one from the Network Name drop-down list. Otherwise, use the one already selected. You should write this name down, so that you can refer back to it later, when connecting other wireless devices (such as smartphones or lap-top computers) to the Modem Router’s wireless network.
Select a security type from the Security Type drop-down list below step 2. For 2. all types of except WEP, continue with this procedure. If you select WEP, see the following section, WEP Wireless Security.
Select an encryption type from the Security Type drop-down list below step 3. 3. TKIP should be used for networks with older equipment, while AES is a more secure encryption for newer network equipment. If using 802.11n wireless net-working, your must select AES.

19
Chapter 3 Wireless Settings
Under step 4 in the Wireless Modem Router screen, select the radio button 4. next to Use Default Security Key/Passphrase. The Modem Router automatically generates a strong security key that is difficult to crack. Be sure to write down the secuirty key, which appears in green text. You will need it to connect other wireless devices to the Modem Router’s wireless network.
Click 5. Apply. The Modem Router’s wireless network is now functional and using the security type you selected.
WEP Wireless Security
If you selected WEP in step 2 of the previous procedure, the following screen appears:

20
Wireless VDSL Modem Router
To change the security settings of the Modem Router’s wireless network to WEP:
Select an encryption type from the Security Type drop-down list below 1. step 3.
Under step 4, select the radio button next to Use Default Security Key/2. Passphrase. The Modem Router automatically generates a strong security key that is difficult to crack. Be sure to write down the secuirty key, which appears in green text. You will need it to connect other wireless devices to the Modem Router’s wireless network.
Click 3. Apply. The Modem Router’s wireless network is now functional and using WEP security.
Radio SetupClick Radio Security from any Wireless screen to generate the Radio Secuirity screen. This screen lets you make changes to the radio signal of the Modem Router’s wireless network.
21
Chapter 3 Wireless Settings
To change the radio settings of the Modem Router’s wireless network (if needed; you do not need to make all the changes in this procedure, as they can be changed independently of each other):
Select the radio’s channel from the Channel drop-down list.1.
Select the level of the wireless radio’s power level.2.
Select the wireless network’s mode. Options include whatever mix of 802.11b, 3. g, and n modes you prefer (except b/n only).
Select the channel width by clicking in either the 20 Mhz or 40 Mhz 4. radio buttons.
If 40 Mhz was selected in step 5, select the channel’s width (5. Upper or Lower).
Set the MSDU (MAC-Layer Service Data Unit) aggregation state by clicking 6. in the Enable or Disable radio buttons below step 6. MDSU should only be enabled/disabled by an experienced network technician.
Set the MPDU (MAC-Layer Protocol Data Unit) aggregation state by clicking 7. in the Enable or Disable radio buttons below step 7. MPDU should only be enabled/disabled by an experienced network technician.
Click 8. Apply.

22
Wireless VDSL Modem Router
SSID SetupClick SSID Setup from any Wireless screen to generate the SSID Setup screen. This screen lets you make changes to the name of the Modem Router’s wireless network name, as well as letting you turn off the wireless network name broadcast option.
To change the network name settings of the Modem Router’s wireless network (if needed; you do not need to make all the changes in this procedure; they can be changed independently of each other):
If needed, change the name of the Modem Router’s wireless network by select-1. ing a new one from the SSID drop-down list. Otherwise, use the one already selected. You should write this name down, so that you can refer back to it later, when connecting other wireless devices (such as smartphones or laptop com-puters) to the Modem Router’s wireless network.
Click the Broadcast SSID radio button to activate SSID broadcasting, which 2. allows any computer searching for available wireless networks to detect this net-work (however, if this network is protected with some form of wireless security, they will not be able to join the network unless they know the security pass-word). Clicking “Hide SSID” turns off SSID broadcasting.
If you want to have a custom name for your wireless network, enter it in the 3. Network Name text box under step 3.
Click 4. Apply.

23
Chapter 3 Wireless Settings
Wireless MAC AuthenticationClick Wireless MAC Authentication from any Wireless screen to generate the Wireless MAC Authentication screen. This screen lets you allow or deny access to the Modem Router’s wireless network for any wireless devices (such as laptop com-puters) by the devices’ MAC address. A MAC address is a unique code that identi-fies every wireless-capable device (printers, computers, hard drives, etc.).
To set up authentication on the Modem Router’s wireless network using MAC addresses:
Select a wireless network name from the SSID drop-down list.1.
Turn on MAC authentication by clicking in the Enable radio button.2.
Select a filtering method. Activating the radio button next to Allow Device 3. List creates a list of wireless devices that will be allowed to join the wireless network–all other devices will not be able to join. Activating the radio button next to Deny Device List creates a list of wireless devices that cannot join the wireless network–all other devices will be able to join.

24
Wireless VDSL Modem Router
Begin creating your list by selecting a wireless device that appears on the Select 4. Device Name drop-down list. You can also enter a devices MAC address in the Manually Add MAC Address text box.
Click 5. Apply. The device will appear in the MAC Authentication Device List at the bottom of the screen.
Repeat steps 4 and 5 to add more wireless devices.6.
WPSClick WPS in any Wireless screen to generate the WPS (Wi-Fi Protected Setup) screen.WPS provides a simple method of setting up a wireless network by automati-cally sharing the network key between the Modem Router and other wireless devices.
There are three ways to set up WPS on the Modem Router: Push Button (PBC), AP PIN, and End Device PIN.
Push Button (PBC)
Select Push Button (PBC) from the drop-down list.1.
Click 2. Connect.
Press the PBC-compatible button on another wireless device within two minutes 3. to have that device join the wireless network.

25
Chapter 3 Wireless Settings
AP Pin
Select AP PIN from the drop-down list.1.
A PIN is created on the Modem Router. Write it down.2.
Enter the PIN on another wireless device’s WPS AP PIN configuration to have 3. that device join the wireless network.
End Device PIN
Select End Device PIN from the drop-down list.1.
Enter the end device’s PIN in the appropriate text box.2.
Click 3. Connect. The Modem Router joins the existing wireless network.
WMMClick WMM in any Wireless screen to generate the WMM (Wi-Fi Multimedia) screen. Wi-fi Multimedia provides a way to control the bandwidth of certain types of data, prioritizing one type over another to ease congestion.
To set up WMM:
Click in the radio button next to Enable under step 1.1.
If applicable, click in the radio button next to Enable under step 2.2.
Click 3. Apply.

26
Wireless VDSL Modem Router
802.1x802.1x is a robust security protocol that uses port control with dynamically changing encryption keys automatically updated over the network. 802.1x uses a RADIUS (Remote Authentication Dial-in Service) server for authentication pur-poses. This server must be physically connected to the Modem Router. Also, the user must enable the RADIUS client embedded in the Modem Router.
To set up 802.1x security:
Select the Modem Router’s wireless network name from the SSID drop-down list.1.
Click in the radio button next to Enable under step 2.2.
Enter the RADIUS server’s port number in the Radius Port text box.3.
Enter the RADIUS server’s shared secret in the Radius Key text box.4.
Enter the group key interval in the Group Key Interval text box.5.
Click 6. Apply to save your changes.

27
Configuring the Modem Router’s Utilities
This chapter will explain the options provided in the Utilities section of the Modem Router’s firmware, including services blocking, restoring the Modem Router to factory default settings, and performing a ping test.
Accessing UtilitiesTo access the Utilities screens:
Open a Web browser. In the Address text box, type: 1. http://192.168.0.1 then press Enter on the keyboard.
4

28
Wireless VDSL Modem Router
The Modem Router’s host screen appears. Click 2. Manual Setup.
The Quick Setup screen appears, with a row of large icons across the top of the 3. screen. Click Utilities.

29
Chapter 4 Utilities
Rebooting the Modem RouterTo reboot the Modem Router:
Click 1. Reboot from the menu on the left side of any Utilities screen. The Reboot Modem screen appears.
Click 2. Reboot to reboot the Modem Router. This may take up to one minute.
To reenter the Modem Router’s firmware after restarting the Modem Router, click the web browser’s Refresh button.
Restoring Factory Default SettingsIf the Modem Router’s factory default settings need to be restored (to build a new network from the beginning, for example), use the following procedure:
Click 1. Restore Defaults in any Utilities screen. The “Restore Defaults” screen appears.

30
Wireless VDSL Modem Router
If you want to restore only the Modem Router’s default wireless settings, 2. click the “Restore” button across from Restore Default Wireless Settings. The Modem Router’s current wireless settings will be deleted, and the factory default wireless settings restored.
If you want to restore only the Modem Router’s default firewall settings, click 3. the Restore button across from Restore Default Firewall Settings. The Modem Router’s current firewall settings will be deleted, and the factory default firewall settings restored.
If you want to restore all the Modem Router’s default settings, click the Restore 4. button across from Restore Modem to Factory Default Settings. All of the Modem Router’s current settings (including wireless and firwall settings) will be deleted, and the factory default settings restored.
Note: All of the Modem Router’s settings and parameters will be restored to their default values after performing the Restore Factory Default procedure. This includes the user name and password; the user-specified user name and password will no longer be valid.

31
Chapter 4 Utilities
Upgrade FirmwareSelecting Upgrade Firmware from any Utilities screen generates the Upgrade Firmware screen, which is used to upgrade the Modem Router’s firmware. Actiontec periodically updates the Modem Router’s firmware to enhance perfor-mance, add new capabilities, and eradicated software bugs. To upgrade the Modem Router’s firmware:
Go to the Actiontec support web site (http://www.actiontec.com/support/) 1. and select the product from the Product Categories section. Check to see if there is a newer firmware version available for the Modem Router by compar-ing the available firmware upgrade revision to the one currently running on the Modem Router. The Modem Router’s current firmware revision number appears in the Upgrade Firmware screen.
If there is new firmware available, download it to your computer. Note its loca-2. tion on the computer’s hard drive.
Click 3. Browse and in the window that appears, locate the downloaded firm-ware file, and select it.
Click 4. Upgrade. The new firmware is loaded on the Modem Router. When the process is complete, the Modem Router will be running with the new firmware.

32
Wireless VDSL Modem Router
Ping TestSelecting Ping Test from any Utilities screen generates the Ping Test screen, which is used to check whether the Modem Router is properly connected to the Internet. Follow the on-screen instructions to perform the test. The results will be displayed at the bottom of the screen.

33
Chapter 4 Utilities
TracerouteSelecting Traceroute from any Utilities screen generates the Traceroute screen, which is used to determine the route taken by packets across a network. Follow the on-screen instructions to perform the test. The results will be displayed at the bot-tom of the screen.

34
Wireless VDSL Modem Router
Web Activity LogTo check the web activity on the Modem Router’s network, click Web Activiy Log from any Utilities screen. The Web Activity Log appears:
To change the automatic refresh period of the Web Activity Log, select a new time period from the Auto Refresh Every drop-down list. To refresh the Log, click Refresh.
Time ZoneTo set the correct time zone on the Modem Router:
Click 1. Time Zone from the left side of any Advanced Setup screen. The Time Zone screen appears.

35
Chapter 4 Utilities
Click in the appropriate radio button for your time zone.2.
If da3. ylight saving is currently in effect, click in the “Day Light Saving” check box to activate
Click 4. Apply to save your settings.

36
Configuring Advanced Setup
This chapter will explain the options provided in the Advanced Setup section of the Modem Router’s firmware, including services blocking, firewall options, and setting up QoS (Quality of Service).
Accessing Advanced Setup OptionsTo access the Advanced Setup screens:
Open a Web browser. In the “Address” text box, type: 1. http://192.168.0.1 then press Enter on the keyboard.
5

37
Chapter 5 Advanced Setup
The Modem Router’s host screen appears. Click 2. Manual Setup.
The “Quick Setup” screen appears, with a row of large icons across the top of 3. the screen. Click Advanced Setup.

38
Wireless VDSL Modem Router
An “Advanced Setup” screen appears, with list of options on the left side of 4. the screen.
The rest of this chapter explains the options found in the menu on the left side of every advanced setup settings screen.
39
Chapter 5 Advanced Setup
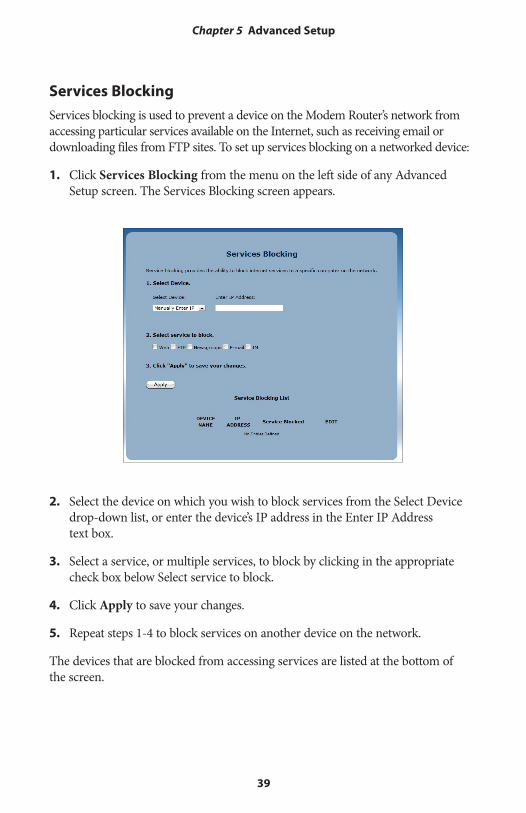
Services BlockingServices blocking is used to prevent a device on the Modem Router’s network from accessing particular services available on the Internet, such as receiving email or downloading files from FTP sites. To set up services blocking on a networked device:
Click 1. Services Blocking from the menu on the left side of any Advanced Setup screen. The Services Blocking screen appears.
Select the device on which you wish to block services from the Select Device 2. drop-down list, or enter the device’s IP address in the Enter IP Address text box.
Select a service, or multiple services, to block by clicking in the appropriate 3. check box below Select service to block.
Click 4. Apply to save your changes.
Repeat steps 1-4 to block services on another device on the network.5.
The devices that are blocked from accessing services are listed at the bottom of the screen.

40
Wireless VDSL Modem Router
Website BlockingWeb site blocking is used to prevent all devices on the Modem Router’s network from accessing particular web sites on the Internet. To set up web site blocking on the Modem Router’s network:
Click 1. Website Blocking from the menu on the left side of any Advanced Setup screen. The Website Blocking screen appears.
Enter the web site address of the web site to be blocked in the Website Address 2. text box.
Click 3. Apply to save your changes.
Repeat steps 1-3 to block other web sites from being acesssed on the 4. Modem Router’s network.
The web sites blocked from being accessed on the Modem Router’s network are listed at the bottom of the screen.

41
Chapter 5 Advanced Setup
Scheduling AccessScheduling access is used to allow a device on the Modem Router’s network to access the Internet at certain times of the day, or certain days of the week, only. During times not configured in the Scheduling Access screen, the device will not be able to access the Internet. To set up scheduling access on a networked device:
Click 1. Scheduling Access from the menu on the left side of any Advanced Setup screen. The Scheduling Access screen appears.
Select the device on which you want to scheduled Internet access from the 2. Select Device drop-down list, or enter the device’s MAC address in the Enter MAC Address text box.
42
Wireless VDSL Modem Router
Select the days of the week during which you want to allow Internet access by 3. clicking in the appropriate check box below “Select the days of the week…”
Set the time range during which you want to allow Internet access. This time 4. range will apply only to the days you activated in step 3.
Click 5. Add to create a schedule access.
Repeat steps 1-5 to create multiple access schedules for other devices on the 6. Modem Router’s network.
The devices that are configured with an access schedule are listed at the bottom of the screen.

43
Chapter 5 Advanced Setup
Broadband SettingsThe Broadband Settings screen allows the Modem Router to connect to differ-ent service providers, which may have different connection parameters than the Modem Router’s default settings. To change Broadband Settings:
Click 1. Broadband Settings from the menu on the left side of any Advanced Setup screen. The Broadband Settings screen appears.
Select the type of WAN interface the service providers uses. Options are WAN 2. Ethernet, WAN DSL PTM, and WAN DSL ATM.
Enable or disable Global VLAN on the Modem Router by clicking in the 3. appropriate radio button. Global VLANs are used on the WAN and LAN sides to create virtual networks. Do not enable or disable Global VLAN unless instructed to do so by your ISP.
Click 4. Apply to save your changes.

44
Wireless VDSL Modem Router
WAN IP AddressThe WAN IP Address screen allows you to manually set up the WAN IP address of the Modem Router. To do this:
Click 1. WAN IP Address from the menu on the left side of any Advanced Setup screen. The WAN IP Address screen appears.

45
Chapter 5 Advanced Setup
Select the type of connection the ISP uses.2.
Note: Some DSL providers use PPPoE to establish communica-tion with an end user. Other types of broadband Internet con-nections (such as fixed point wireless) may use either DHCP or static IP address. If unsure which connection is present, check with Verizon before continuing.
If using PPPoA or PPPoE was selected in step 1, enter the user name and pass-3. word in the appropriate text boxes. If the ISP requires no user name or pass-word, click in the “My ISP does not require a username and password” check box.
Select the 4. IP type. If Single Static IP Address was selected, enter the IP address in the “Single Static IP” text box. If “Block of Static IP Addresses (Unnumbered Mode)” was selected, enter the designated gateway IP address and subnet mask address in the “Modem Address” and “Subnet Mask” text boxes, respectively. Also, “VIP Mode” can be activated by clicking in the appropriate check box. VIP mode works in concert with unnumbered mode and allows computers not assigned a static IP to receive a DHCP LAN side private IP address.
Select the DNS type. If static DNS address was selected, enter the primary DNS 5. address and, optionally, the secondary DNS address in the appropriate text boxes.
If applicable, enter a different MTU value in the MTU text box.6.
Enable or disable IGMP proxy by clicking in the appropriate radio button.7.
When finished in this screen, click Apply to activate any changes made.

46
Wireless VDSL Modem Router
LAN IP and DHCP SettingsThe LAN IP and DHCP Settings screen allows you to change the Modem Router’s default LAN IP address, and adjust the DHCP settings. To change the LAN IP:
Click 1. LAN IP and DHCP Settings from the menu on the left side of any Advanced Setup screen. The LAN IP and DHCP Settings screen appears.
47
Chapter 5 Advanced Setup
Enter the new modem IP address and modem subnet mask in the appropriate 2. text boxes.
Click 3. Apply and Reboot. The Modem Router reboots with the new settings.
To change the Modem Router’s DHCP settings:
Click 4. Enable to activate the Modem Router’s DHCP server.
Enter the DHCP server’s beginning IP address, ending IP address, and subnet 5. mask address in the appropriate text boxes.
Enter the DHCP server’s lease time period by entering the days, hours, and 6. minutes in the appropriate text boxes.
Set the DNS values by selecting Dynamic or Static (clicking in the appropriate 7. radio button), then, if needed enter the IP addresses for DNS server 1 and 2.
Click 8. Apply to save your changes.

48
Wireless VDSL Modem Router
WAN VLANThe WAN VLAN screen allows the service operator to create additional network paths to accomodate new services. To use:
Click 1. Services/VLAN Settings from the menu on the left side of any Advanced Setup screen. The WAN VLANs screen appears.
Enter the name of the VLAN in the VLAN name text box.2.
Select a protocol from the drop-down list (options are PPPoE, RFC 1483 3. Transparent Bridging, and RFC 1483 via DHCP), then enter a user name and password in the appropriate text boxes.

49
Chapter 5 Advanced Setup
If applicable, enable VLAN tagging by clicking in the radio button next to 4. Enable under step; 4, then entering a VLAN ID (1 to 4094) and selecting a Priority (0-7).
Click 5. Add to add the VLAN to the VLAN list, which appears at the bottom of the screen.
You can also delete existing VLANs by clicking Delete, or modify a VLAN’s set-tings by clicking Modify.
HPNA SettingsThe HPNA Settings screen allows you to enable HPNA. Click in the Enable radio button to activate.
50
Wireless VDSL Modem Router
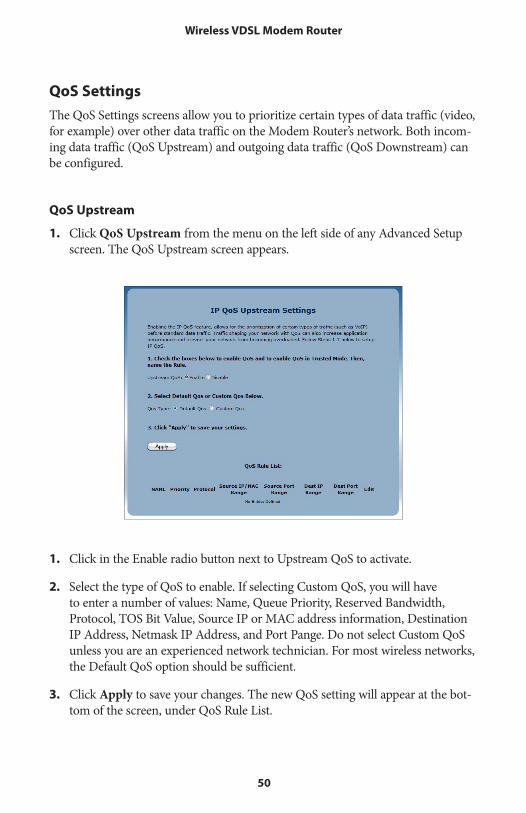
QoS SettingsThe QoS Settings screens allow you to prioritize certain types of data traffic (video, for example) over other data traffic on the Modem Router’s network. Both incom-ing data traffic (QoS Upstream) and outgoing data traffic (QoS Downstream) can be configured.
QoS Upstream
Click 1. QoS Upstream from the menu on the left side of any Advanced Setup screen. The QoS Upstream screen appears.
Click in the Enable radio button next to Upstream QoS to activate.1.
Select the type of QoS to enable. If selecting Custom QoS, you will have 2. to enter a number of values: Name, Queue Priority, Reserved Bandwidth, Protocol, TOS Bit Value, Source IP or MAC address information, Destination IP Address, Netmask IP Address, and Port Pange. Do not select Custom QoS unless you are an experienced network technician. For most wireless networks, the Default QoS option should be sufficient.
Click 3. Apply to save your changes. The new QoS setting will appear at the bot-tom of the screen, under QoS Rule List.

51
Chapter 5 Advanced Setup
QoS Downstream
Click 1. QoS Downstream from the menu on the left side of any Advanced Setup screen. The QoS Downstream screen appears.
Click in the Enable radio button next to Downstream QoS to activate.1.
Select the type of QoS to enable. If selecting Custom QoS, you will have 2. to enter a number of values: Name, Queue Priority, Reserved Bandwidth, Protocol, TOS Bit Value, Source IP or MAC address information, Destination IP Address, Netmask IP Address, and Port Pange. Do not select Custom QoS unless you are an experienced network technician. For most wireless networks, the Default QoS option should be sufficient.
Click 3. Apply to save your changes. The new QoS setting will appear at the bot-tom of the screen, under QoS Rule List.

52
Wireless VDSL Modem Router
Remote GUIThe Remote GUI screen allows you to setup the Modem Router so that it can be accessed from a remote location. To use:
Click 1. Remote GUI from the menu on the left side of any Advanced Setup screen. The Remote GUI screen appears.
Click in the2. Enable radio button next to Remote GUI to activate.
Enter a user name and password in the appropriate text boxes beneath step 2.3.
Set the remote management port. It is set to port 443 by default. If the remote 4. management port number has been changed, you will need to use the URL “https://” followed by the Modem Router’s IP address, a colon (:), then the port number to which the remote management port was changed. Example: https://192.170.1.1:234.
Select the remote management timeout. If you select one of the time periods 5. provided in the drop-down list, remote management of the Modem Router will stop after the selected time period, if no actions are detected.
Click 6. Apply to save your changes.

53
Chapter 5 Advanced Setup
Remote TelnetThe Remote Telnet screen allows you to set up the Modem Router so that it can be accessed from a remote (not local) telnet device. To use:
Click 1. Remote Telnet from the menu on the left side of any Advanced Setup screen. The Remote Telnet screen appears.
Click in the2. Enable radio button next to Remote Telnet to activate.
Enter a username and password in the appropriate text boxes beneath step 2.3.
Select the idle disconnect time. If you select one of the time periods provided 4. in the drop-down list, remote telnet management of the Modem Router will stop after the selected time period, if no actions are detected.
Click 5. Apply to save your changes.

54
Wireless VDSL Modem Router
Dynamic RoutingThe Dynamic Routing screen allows you to set up the Modem Router for dynamic routing, which is useful if the Modem Router is set up in a network behind a modem To use:
Click 1. Dynamic Routing from the menu on the left side of any Advanced Setup screen. The Dynamic Routing screen appears.
Select the version of dynamic routing you want to use (Version 1, Version 2) by 2. clicking in the appropriate radio button. Consult the documentation that came with the modem set up in front of the Modem Router on the network to find out which version to use.
Click 3. Apply to save your changes.

55
Chapter 5 Advanced Setup
Static RoutingThe Static Routing screen allows you to set up static routes on the Modem Router. To use:
Click 1. Static Routing from the menu on the left side of any Advanced Setup screen. The Static Routing screen appears.
Enter the destination IP address of the static route in the Destination IP 2. text box.
Enter the subnet mask IP address in the Subnetmask text box.3.
If applicable, enter the gateway IP address in the Gateway IP text box.4.
Select a WAN interface from the WAN Interface drop-down list.5.
Click 6. Apply to save your changes.

56
Wireless VDSL Modem Router
Admin PasswordTo change the password that allows access to the Modem Router’s firmware screens:
Click 1. Admin Password from the menu on the left side of any Advanced Setup screen. The Admin Password screen appears.
If needed, enter a new username in the text box next to Admin username.2.
En3. ter a new password in the text box next to Admin Password.
Click 4. Apply to save your changes.

57
Chapter 5 Advanced Setup
Port ForwardingPort forwarding is used for Internet applications that need access to devices con-nected to the Modem Router’s network:
Click 1. Port Forwarding from the menu on the left side of any Advanced Setup screen. The Port Forwarding screen appears.
Enter a starting and ending LAN port numbers in the appropriate text boxes 2. beneath step 1.
Select a protocol from the Protocol drop-down list (TCP, UDP, GRE).3.
Enter the LAN IP address of the port in the appropriate text box.4.

58
Wireless VDSL Modem Router
If applicable, enter the starting, ending, and remote IP address of the remote 5. port in the appropriate text boxes.
Click 6. Apply to save your changes.
The port forwarding rules you create are listed at the bottom of the screen, under Applied Port Forwarding Rules.
ApplicationsThe Modem Router comes preloaded with a list of popular applications that require port forwarding. Instead of entering all the port forwarding values in the port forwarding screen, you can simply select the application in this screen to con-figure all of its ports.
Click 1. Applications in any Advanced Setup screen. The Applications screen appears.
59
Chapter 5 Advanced Setup
Select the device on the Modem Router’s network that you want the application 2. to work with. Alternatively, you can enter the device’s IP address in the appro-priate text box.
Select the application from the Applications drop-down list. To make searching 3. easier, you can select an application category from the Application Category drop-down list first, which will limit the applications in the Application list to that category.
After selecting an application, you can click 4. View Rule. A new screen appears, displaying the rule’s details.
Click 5. Apply to save your changes.
The applications’ port forwarding details will be listed at the bottom of the screen, underneath Forwarded Applications List.
User Created Rules
If, in step 3 of the previous procedure, User Created Rules was chosen, click Create Rule to generate a screen in which you can create a custom rule. Enter the rule name, select a protocol, and enter a port start, port end, and port map in the appropriate text boxes, then click Apply. The new rule will be listed at the bottom of the Applications screen.

60
Wireless VDSL Modem Router
DMZ HostingSelecting DMZ Hosting from any Advanced Setup screen generates the DMZ Hosting screen. DMZ hosting allows a device on the Modem Router’s network to be set up outside the Modem Router’s firewall.
WARNING! The DMZ hosted device poses a security risk, since the device will be vulnerable to outside intrusion.
Click 1. DMZ Hosting in any Advanced Setup screen. The DMZ Hosting screen appears.
Click in the Enable radio button to activate DMZ hosting.2.
Select the device on the Modem Router’s network that you want use as the 3. DMZ host. Alternatively, you can enter the device’s IP address in the appropri-ate text box.
Click 4. Apply to save your changes.
Afterwards, the DMZ hosted device details will be listed at the bottom of the screen, underneath DMZ Hosted Device.

61
Chapter 5 Advanced Setup
FirewallSelecting Firewall from any Advanced Setup screen generates the Firewall screen. The Modem Router’s firewall allows you to set up comprehensive security around your network, although some network functionality will be lost. To use:
Click 1. Firewall in any Advanced Setup screen. The Firewall screen appears.
Select one or all device(s) on the Modem Router’s network from the Apply rule 2. to drop-down list on which you want to apply the firewall.
Select a firwall security level by clicking in the appropriate radio button below 3. step 2.
Click 4. Apply to save your changes.
If you selected Low, Medium, or High in step 3, you can do additional tweaking to the firewall by allowing or denying access to certain applications that appear in the Firewall screen.

62
Wireless VDSL Modem Router
NATSelecting NAT from any Advanced Setup screen generates the NAT screen, which is used to enable or disable NAT, at the request of your ISP. If your ISP requires you to disable NAT, click in the Disable radio button, then click Apply. This action should be undertaken by an experienced network technician only.
UPnPSelecting UPnP (Universal Plug and Play) from any Advanced Setup screen generates the UPNP screen, which is used to set up gaming consoles on the Modem Router’s network. To activate UPnP, click in the Enable radio button, then click Apply.

63
Viewing the Modem Router’s Status
This chapter gives an overview of the various status tables provided by the Modem Router, which allow you check on various parameters, including WAN connec-tions, WAN Etherent connection, and wireless status.
Accessing Wireless SettingsTo access the Wireless screens:
Open a Web browser. In the Address text box, type: 1. http://192.168.0.1 then press Enter on the keyboard.
6

64
Wireless VDSL Modem Router
The Modem Router’s host screen appears. Click 2. Manual Setup.
The Quick Setup screen appears, with a row of large icons across the top of the 3. screen. Click Status.
65
Chapter 6 Status
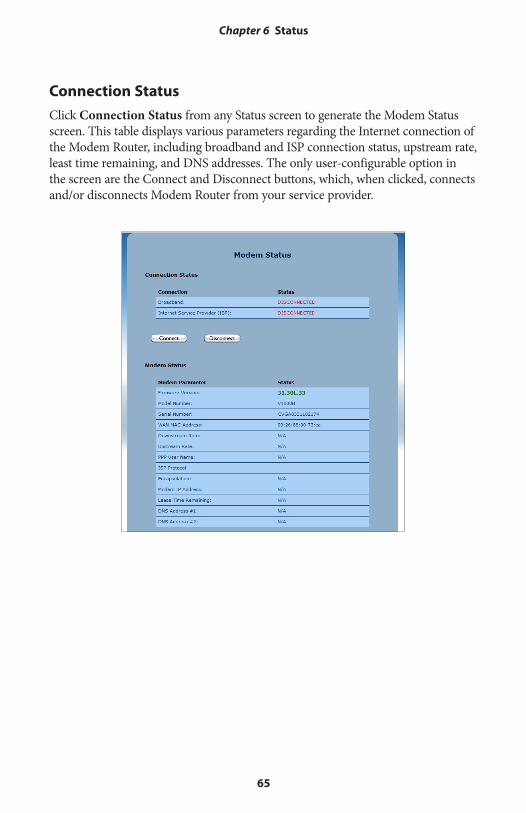
Connection StatusClick Connection Status from any Status screen to generate the Modem Status screen. This table displays various parameters regarding the Internet connection of the Modem Router, including broadband and ISP connection status, upstream rate, least time remaining, and DNS addresses. The only user-configurable option in the screen are the Connect and Disconnect buttons, which, when clicked, connects and/or disconnects Modem Router from your service provider.

66
Wireless VDSL Modem Router
WAN StatusClick WAN Status from any Status screen to generate the WAN Status screen. This table displays various parameters relating to the WAN connection of the Modem Router, including PPP and broadband status. There are no user-configurable options in this screen, but there is a Clear button at the bottom of the screen (not shown) that resets all of the statistics back to zero, at which time the statistics will begin accumulating again.

67
Chapter 6 Status
WAN Ethernet StatusClick WAN Ethernet Status from any Status screen to generate the WAN Ethernet Status screen. This table displays various parameters relating to the WAN Ethernet connection of the Modem Router, including subnet mask, default Modem Router, and sent packets. There are no user-configurable options in this screen.

68
Wireless VDSL Modem Router
Routing TableClick Routing Table from any Status screen to generate the Routing Table screen. This screen displays the Modem Router’s routing table. There are no user-configu-rable options in this screen.
Firewall StatusClick Firewall Status from any Status screen to generate the Firewall Status screen. This table displays the status of the Modem Router’s firewall. There are no user-configurable options in this screen. For more details, see the “Configuring the Firewall Settings” chapter of this manual.

69
Chapter 6 Status
NAT TableClick NAT Table from any Status screen to generate the “NAT Table” screen. This screen displays the Modem Router’s NAT table. There are no user-configurable options in this screen.
Wireless StatusClick Wireless Status from any Status screen to generate the “Wireless Status” screen. This table displays the Modem Router’s wireless network statistics, including wireless security type, wireless mode, and packets received.

70
Wireless VDSL Modem Router
Modem UtilizationClick Modem Utilizations from any Status screen to generate the Modem Utilization screen. This table displays the Modem Router’s modem statistics, including wireless memory used, LAN TCP settings, and, at the bottom of the screen, a LAN device ses-sion log. There are no user-configurable options in this screen.

71
Chapter 6 Status
LAN StatusClick LAN Status from any Status screen to generate the LAN Status screen. This table displays the Modem Router’s LAN (local network) statistics, including Ethernet connections, HPNA link status, and various networked device details. There are no user-configurable options in this screen.

72
Specifications
GeneralModel Number
V1000H (Wireless VDSL Modem Router)Standards
IEEE 802.3 (10BaseT) IEEE 802.3u (100BaseTX) IEEE 802.3ab (1000BaseTX) IEEE 802.11b/g/n (Wireless) G.dmt, G.lite t1.413 RFC 1483, 2364, 2516
Protocol
LAN - CSMA/CD WAN - PPP, DHCP, Static IP
WAN
VDSL2 interface
LAN
10/100/1000 RJ-45 switched ports
Speed
LAN Ethernet: 10/100/1000 Mbps auto-sensing Wireless: 802.11n 300 Mbps optimal (see “Wireless Operating Range” for details)
Cabling Type
Ethernet 10BaseT: UTP/STP Category 3 or 5 Ethernet 100BaseTX: UTP/STP Category 5 Ethernet 1000BaseTX: UTP/STP Category 5
A

73
Appendix A Specifications
Wireless Operating RangeIndoors
Up to 91M (300 ft.) @ 300 MbpsOutdoors
Up to 457M (1500 ft.) @ 300 MbpsTopology
Star (Ethernet)
LED IndicatorsPower, DSL, WAN Ethernet, Internet, LAN Ethernet (4), HPNA, USB, Wireless
EnvironmentalPower
External, 10V DC, 1.6A
Certifications
FCC Class B, FCC Class C (part 15, 68), CE Mark Commercial, UL
Operating Temperature
0º C to 40º C (32ºF to 104ºF)
Storage Temperature
-20ºC to 70ºC (-4ºF to 158ºF)
Operating Humidity
10% to 85% non-condensing
Storage Humidity
5% to 90% non-condensing

74
Notices
Regulatory Compliance Notices
Class B Equipment
This equipment has been tested and found to comply with the limits for a Class B digital device, pursuant to Part 15 of the FCC Rules. These limits are designed to provide reasonable protection against harmful interference in a residential installa-tion. This equipment generates, uses, and can radiate radio frequency energy and, if not installed and used in accordance with the instructions, may cause harmful interference to radio communications. However, there is no guarantee that inter-ference will not occur in a particular installation. If this equipment does cause harmful interference to radio or television reception, which can be determined by turning the equipment off and on, the user is encouraged to try to correct the interference by implementing one or more of the following measures:
s Reorient or relocate the receiving antenna;
s Increase the separation between the equipment and receiver;
s Connect the equipment to an outlet on a circuit different from that to which the receiver is connected;
s Consult the dealer or an experienced radio or television technician for help.
ModificationsThe FCC requires the user to be notified that any changes or modifications made to this device that are not expressly approved by Actiontec Electronics, Inc., may void the user’s authority to operate the equipment.
Declaration of conformity for products marked with the FCC logo – United States only.
This device complies with Part 15 of the FCC Rules. Operation is subject to the fol-lowing two conditions:
1. This device may not cause harmful interference;

75
Notices
2. This device must accept any interference received, including interference that may cause unwanted operation.
Note: To comply with FCC RF exposure compliance require-ments, the antenna used for this transmitter must be installed to provide a separation distance of at least 20 cm from all persons and must not be co-located or operating in conjunction with any other antenna or transmitter.
For questions regarding your product or the FCC declaration, contact:
Actiontec Electronics, Inc. 760 North Mary Ave. Sunnyvale, CA 94086
United States Tel: (408) 752-7700 Fax: (408) 541-9005
GPL (General Public License)This product includes software code developed by third parties, including software code subject to the enclosed GNU General Public License (GPL) or GNU Lesser General Public License (LGPL). The GPL Code and LGPL Code used in this prod-uct are distributed WITHOUT ANY WARRANTY and are subject to the copy-rights of the authors, and to the terms of the applicable licenses included in the download. For details, see the GPL Code and LGPL Code for this product and the terms of the GPL and the LGPL, which are available on the enclosed product disk and can be accessed by inserting the disk into your CD-ROM drive and opening the “GPL.exe” file.

76
Limited Warranty
Hardware: Actiontec Electronics, Inc., warrants to the end user (“Customer”) that this hardware product will be free from defects in workmanship and materials, under normal use and service, for twelve (12) months from the date of purchase from Actiontec Electronics or its authorized reseller.
Actiontec Electronics’ sole obligation under this express warranty shall be, at Actiontec’s option and expense, to repair the defective product or part, deliver to Customer an equivalent product or part to replace the defective item, or if neither of the two foregoing options is reasonably available, Actiontec Electronics may, in its sole discretion, refund to Customer the purchase price paid for the defec-tive product. All products that are replaced will become the property of Actiontec Electronics, Inc. Replacement products may be new or reconditioned. Actiontec Electronics warrants any replaced or repaired product or part for ninety (90) days from shipment, or the remainder of the initial warranty period, whichever is longer.
Software: Actiontec Electronics warrants to Customer that each software pro-gram licensed from it will perform in substantial conformance to its program spec-ifications, for a period of ninety (90) days from the date of purchase from Actiontec Electronics or its authorized reseller. Actiontec Electronics warrants the media con-taining software against failure during the warranty period. The only updates that will be provided are at the sole discretion of Actiontec Electronics and will only be available for download at the Actiontec Web site, www.actiontec.com. Actiontec Electronics’ sole obligation under this express warranty shall be, at Actiontec Electronics’ option and expense, to refund the purchase price paid by Customer for any defective software product, or to replace any defective media with software which substantially conforms to applicable Actiontec Electronics published specifi-cations. Customer assumes responsibility for the selection of the appropriate appli-cations program and associated reference materials. Actiontec Electronics makes no warranty or representation that its software products will meet Customer’s requirements or work in combination with any hardware or applications software products provided by third parties, that the operation of the software products will be uninterrupted or error free, or that all defects in the software products will be corrected. For any third-party products listed in the Actiontec Electronics software product documentation or specifications as being compatible, Actiontec Electronics will make reasonable efforts to provide compatibility, except where the non-compatibility is caused by a “bug” or defect in the third party’s product or from use of the software product not in accordance with Actiontec Electronics published specifications or user guide.

77
Limited Warranty
THIS ACTIONTEC ELECTRONICS PRODUCT MAY INCLUDE OR BE BUNDLED WITH THIRD-PARTY SOFTWARE, THE USE OF WHICH IS GOVERNED BY A SEPARATE END-USER LICENSE AGREEMENT.
THIS ACTIONTEC ELECTRONICS WARRANTY DOES NOT APPLY TO SUCH THIRD-PARTY SOFTWARE. FOR THE APPLICABLE WARRANTY, PLEASE REFER TO THE END-USER LICENSE AGREEMENT GOVERNING THE USE OF SUCH SOFTWARE.
Obtaining Warranty Service: Customer may contact Actiontec Electronics Technical Support Center within the applicable warranty period to obtain warranty service authorization. Dated proof of purchase from Actiontec Electronics or its authorized reseller may be required. Products returned to Actiontec Electronics must be pre-authorized by Actiontec Electronics with a Return Merchandise Authorization (RMA) number marked on the outside of the package, and sent prepaid and packaged appropriately for safe shipment, and it is recommended that they be insured or sent by a method that provides for tracking of the package. The repaired or replaced item will be shipped to Customer, at Actiontec Electronics’ expense, not later than thirty (30) days after Actiontec Electronics receives the defective product.
Return the product to:(In the United States)
Actiontec Electronics, Inc.760 North Mary Avenue
Sunnyvale, CA 94085
Actiontec Electronics shall not be responsible for any software, firmware, informa-tion, memory data, or Customer data contained in, stored on, or integrated with any products returned to Actiontec Electronics for repair, whether under warranty or not.

78
Wireless VDSLS/GigE Modem/Router
78
WARRANTIES EXCLUSIVE: IF AN ACTIONTEC ELECTRONICS’ PRODUCT DOES NOT OPERATE AS WARRANTED ABOVE, CUSTOMER’S SOLE REMEDY FOR BREACH OF THAT WARRANTY SHALL BE REPAIR, REPLACEMENT, OR REFUND OF THE PURCHASE PRICE PAID, AT ACTIONTEC ELECTRONICS’ OPTION. TO THE FULL EXTENT ALLOWED BY LAW, THE FOREGOING WARRANTIES AND REMEDIES ARE EXCLUSIVE AND IN LIEU OF ALL OTHER WARRANTIES, TERMS OR CONDITIONS, EXPRESS OR IMPLIED, EITHER IN FACT OR BY OPERATION OF LAW, STATUTORY OR OTHERWISE, INCLUDING WARRANTIES, TERMS OR CONDITIONS OF MERCHANTABILITY, FITNESS FOR A PARTICULAR PURPOSE, SATISFACTORY QUALITY, CORRESPONDENCE WITH DESCRIPTION, AND NON-INFRINGEMENT, ALL OF WHICH ARE EXPRESSLY DISCLAIMED. ACTIONTEC ELECTRONICS NEITHER ASSUMES NOR AUTHORIZES ANY OTHER PERSON TO ASSUME FOR IT ANY OTHER LIABILITY IN CONNECTION WITH THE SALE, INSTALLATION, MAINTENANCE OR USE OF ITS PRODUCTS.
ACTIONTEC ELECTRONICS SHALL NOT BE LIABLE UNDER THIS WARRANTY IF ITS TESTING AND EXAMINATION DISCLOSE THAT THE ALLEGED DEFECT OR MALFUNCTION IN THE PRODUCT DOES NOT EXIST OR WAS CAUSED BY CUSTOMER’S OR ANY THIRD PERSON’S MISUSE, NEGLECT, IMPROPER INSTALLATION OR TESTING, UNAUTHORIZED ATTEMPT TO OPEN, REPAIR OR MODIFY THE PRODUCT, OR ANY OTHER CAUSE BEYOND THE RANGE OF THE INTENDED USE, OR BY ACCIDENT, FIRE, LIGHTNING, OTHER HAZARDS, OR ACTS OF GOD.
LIMITATION OF LIABILITY: TO THE FULL EXTENT ALLOWED BY LAW, ACTIONTEC ELECTRONICS ALSO EXCLUDES FOR ITSELF AND ITS SUPPLIERS ANY LIABILITY, WHETHER BASED IN CONTRACT OR TORT (INCLUDING NEGLIGENCE), FOR INCIDENTAL, CONSEQUENTIAL, INDIRECT, SPECIAL, OR PUNITIVE DAMAGES OF ANY KIND, OR FOR LOSS OF REVENUE OR PROFITS, LOSS OF BUSINESS, LOSS OF INFORMATION OR DATA, OR OTHER FINANCIAL LOSS ARISING OUT OF OR IN CONNECTION WITH THE SALE, INSTALLATION, MAINTENANCE, USE, PERFORMANCE, FAILURE, OR INTERRUPTION OF ITS PRODUCT, EVEN IF ACTIONTEC ELECTRONICS OR ITS AUTHORIZED RESELLER HAS BEEN ADVISED OF THE POSSIBILITY OF SUCH DAMAGES, AND LIMITS ITS LIABILITY TO REPAIR, REPLACEMENT,OR REFUND OF THE PURCHASE PRICE PAID, AT ACTIONTEC ELECTRONICS’ OPTION. THIS DISCLAIMER OF LIABILITY FOR DAMAGES WILL NOT BE AFFECTED IF ANY REMEDY PROVIDED HEREIN SHALL FAIL OF ITS ESSENTIAL PURPOSE.

79
Limited Warranty
Disclaimer: Some countries, states or provinces do not allow the exclusion or limi-tation of implied warranties or the limitation of incidental or consequential damages for certain products supplied to consumers, or the limitation of liability for personal injury, so the above limitations and exclusions may be limited in their application to you. When the implied warranties are not allowed to be excluded in their entirety, they will be limited to the duration of the applicable written warranty. This warranty gives you specific legal rights which may vary depending on local law.
Dispute Resolution: The customer may contact the Director of Technical Support in the event the Customer is not satisfied with Actiontec Electronics’ response to the complaint. In the event that the Customer is still not satisfied with the response of the Director of Technical Support, the Customer is instructed to contact the Director of Marketing. In the event that the Customer is still not satis-fied with the response of the Director of Marketing, the Customer is instructed to contact the Chief Financial Officer and/or President.
Governing Law: This Limited Warranty shall be governed by the laws of the State of California, U.S.A., excluding its conflicts of laws and principles, and excluding the United Nations Convention on Contracts for the International Sale of Goods.