APARILLOdownloads.sugar-bytes.de/manuals/Aparillo.pdf · Modulation Windows 28 ... Host integration...
45
1 APARILLO User Manual
Transcript of APARILLOdownloads.sugar-bytes.de/manuals/Aparillo.pdf · Modulation Windows 28 ... Host integration...

1
APARILLO
User Manual

2
Content About 3
Quick Start 4
Tips & Tricks 8
Structure 9
Parameters 9
The Building Blocks 10
Presets 10
Sound Designers 11
Synth Page 12
Synthesizer 12
The Arpeggiator 18
LFO 1 & 2 20
FX Page 24
Envelope Page 27
Modulation Windows 28
Modulation Amount 28
Polarity Switch 28
Modulation Sources 28
Modulation Filters 29
The Orbit 33
About Screen 39
Native Kontrol Standard NKS 41
Installation 42
Windows 32bit 42
Windows 64bit 42
macOS 42
Uninstallation 43
Windows 43
macOS 43
Authorization 43
Host integration 44
Contact 45

3
About
Welcome to the world of Aparillo! You have obtained a very special breed of synthesizer
which will deliver powerful textural and organic sounds , extracted directly from the
microbiotics of synthesis.
Aparillo is based on two interacting FM Synthesizers, capable of forming the most
complex timbres. The signal generator has been enriched with fine DSP spices like Jitter,
Brightness and Formant/Waveshaping, followed by a free-signalflow Filter/Spacial Comb
device, flowing into a polyphonic Auto Pan, the obligatory Delay and our finest Reverb
algorithm yet.
The synthesizer is mostly 16-voice-unison, meaning you can play one note at a time,
consisting of 16 individual synth voices. Combined with the polyphonic double LFO
which also includes FM, this brings you the complex sounds, either of the atonal or of the
super harmonic kind, because there is a scale generator in there, capable of the most
dramatic orchestrations or just a perfect golden ratio unison.
The Arpeggiator adds another layer to the sound, extracting synth voices on its own and
playing them back by different rules, mostly based on what the LFO is doing.
And then there is the Orbit, being a one-touch macro-controller for the whole sound
engine, that finally gives you unlimited control over new grounds of sound manipulation.
Enjoy Aparillo, and let the fun grow the deeper you dive into it!
Back To Table of Content

4
Quick Start
Aparillo’s output has three distinctive layers of sound: the Synth, the Arp and the
Spacializer.
Leash the Arp via the Arp knob and Decay control right above the LFO display.
Calm down the Spacializer with the Mix Fader (FX Page).
The Synth Engine will mellow out, after initializing modulations by doubleclicking
Amount in the modulation options (below the faders).
Synth Page
The FM engine follows the classic setup: two operators, each with a modulator and a
carrier wave.
The operators’ Ratio and Amount control the (dis)-harmonics of the output (Ratio) and
the intensity of modulation between the modulator- and carrier-wave (Amount).
Tune sets the base pitch within a range of -4 octaves to +4 octaves.
All faders come with 16 vertical meters in the background: a visual feedback on the
respective parameter value (fader position +/- modulation) for each of the 16 voices.
OP-I and OP-II can have 3 different relationships (algorithms):
Algo 1: Independent operation of OPI and OPII
Algo 2: OP-I modulates OP-II’s carrier/ OPII’s Ratio is applied to OP-I’s carrier
Algo 3: OP-I modulates OP-II / Both Ratios are added and applied to OP-I’s modulator
The 3 different harmonic modes (next to Algo) determine the nature of the Ratio:
Off for the full spectrum of Ratio settings. Allows for exact tuning and
disharmonic setups.
Quantized applies a Farey Sequence (a table of 80 fractions: 1/1, 1/2 , 1/3,
1/4, ..., 1/20). See the Q mode as a huge scale of pre-defined ratios that are
rather mathematically correct.
Harmonic: crystal-clear, state-of-the-art FM synthesis. A value range of 40
harmonic ratios.
Back To Table of Content
5
Enter the Modulation Options by clicking the icons right under the faders. The basic
setup is the same across all screens: Pick any of 10 Sources, choose which Voices to
affect, define Amount and Bi-Polarity.
Shift is a melody generator with a scale engine to put your 16 voices to different
pitches. This might be a gigantic unison spread or a scale turning a single MIDI
note into a chord. Combined with modulation, Shift is a very powerful tool!
The LFO, as the main modulating source, gets its own Display. Each of the 16 vertical
tubes represents one of the voices. The balls jumping up and down show the value of
LFO 1 (bluish) and LFO 2 (yellowish). Grab the Crosshairs for quick access to the rates of
LFO 1 (y-axis) and LFO 2 (x-axis), full LFO parameters after click below the display.
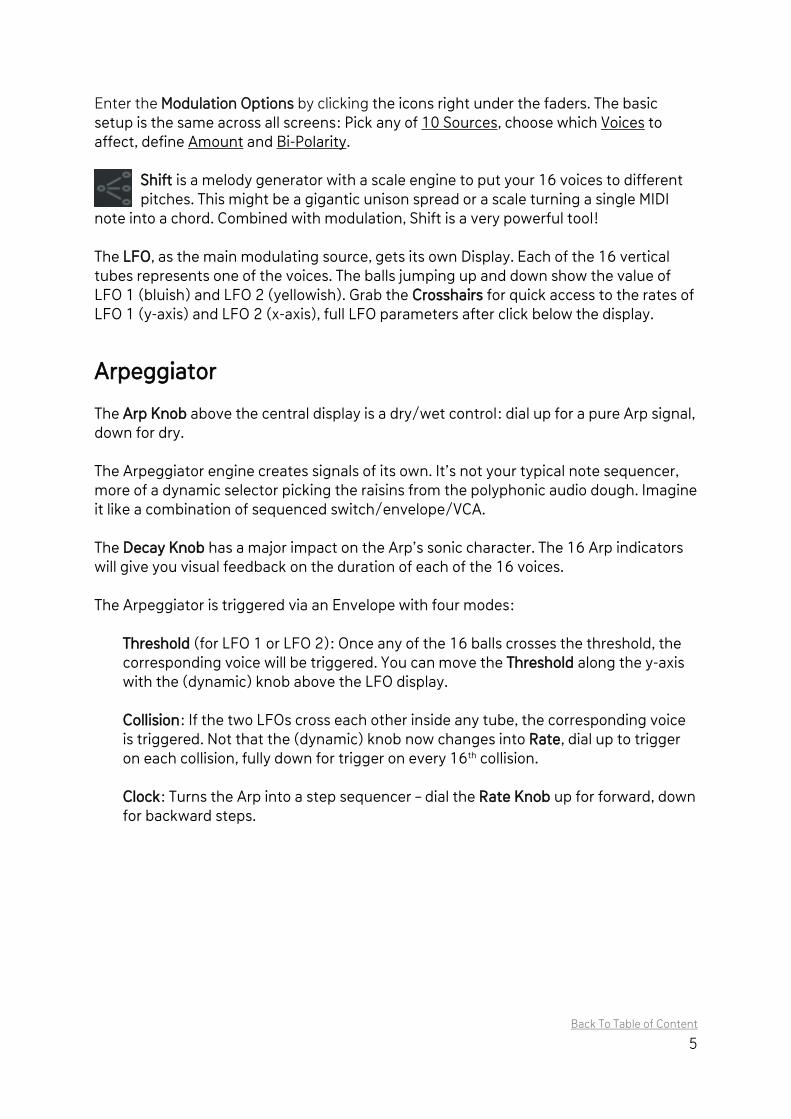
Arpeggiator
The Arp Knob above the central display is a dry/wet control: dial up for a pure Arp signal,
down for dry.
The Arpeggiator engine creates signals of its own. It’s not your typical note sequencer,
more of a dynamic selector picking the raisins from the polyphonic audio dough. Imagine
it like a combination of sequenced switch/envelope/VCA.
The Decay Knob has a major impact on the Arp’s sonic character. The 16 Arp indicators
will give you visual feedback on the duration of each of the 16 voices.
The Arpeggiator is triggered via an Envelope with four modes:
Threshold (for LFO 1 or LFO 2): Once any of the 16 balls crosses the threshold, the
corresponding voice will be triggered. You can move the Threshold along the y-axis
with the (dynamic) knob above the LFO display.
Collision: If the two LFOs cross each other inside any tube, the corresponding voice
is triggered. Not that the (dynamic) knob now changes into Rate, dial up to trigger
on each collision, fully down for trigger on every 16th collision.
Clock: Turns the Arp into a step sequencer – dial the Rate Knob up for forward, down
for backward steps.
Back To Table of Content

6
FX Page – Spacializer
The Spacializer can serve as a delay, reverb or a pitch-controlled resonator.
Its character depends on the Spacial Range and the dynamic Size/Pitch Fader for fine
tuning:
Small 1 ms < Range < 250 ms
Medium 1 ms < Range < 500 ms
Large 1 ms < Range < 1,000 ms
Pitch -24 semitones < Range < +24 semitones
Sync 1/16 bar < Range < 1/1 bar
The Feedback fader will build a wall of reverb but also is your entry to the weird realms of
modal synthesis.
As expected, the Mix fader is the envoy between the dry synth/Arp signal and the wet
Spacializer output.
Filter and Spacializer share a free signal flow: just click the little ←→ button.
Envelope Page
The Envelope Page holds ADSR controls affecting the Modulation System and its Output.
Each of the parameters comes with its individual modulation options (as usual after
clicking the icon below the faders), here with additional settings for Slope-Curve and
Loop Mode.
In the upper left-hand corner, Envelope Mode switches between Unison (for all 16 voices
in sync and a monophonic envelope) and Polyphon for a 16-voice polyphonic
synthesizer, where each voice has a different sound, most probably...
Orbit Page
A bi-polar amount control for 15 parameters across the instrument – distance based.
Activates Orbiter (see the SB logo playing ping pong?)
Move the Orbiter object around the cosmos for gravitational effects on the parameter
amounts. Once the Orbiter enters the perimeter of a parameter object, a link between
the two is established. Change the Radius in the Options Menu for each parameter object
(Right Click).
Back To Table of Content

7
The Orbiter’s gravitational impact is close to zero on the perimeter, close to max near the
centre. The parameter object will show its current level of affection with an increasingly
impassioned animation.
Max Value of each parameter object is defined by the bi-polar Amount knob in the
Options Menu.
Moving the Orbiter around the cosmos will affect several objects at once with ever-
changing intensity. The easiest method is just grabbing the Orbiter and move it around
by hand.
Learn the Orbiter The x- and the y-axis can be remoted via MIDI knobs on your hardware.
Recording Movements Open the Orbiter Options to define the Record Mode. The Keyboard icon is for
Orbiter positions per MIDI note, the Tour icon is for mouse movements, which can
run in Loop and Oneshot mode. All Orbiter memory is written with the Record Button to
the right.
MIDI Press a MIDI note, move the Orbiter to the position you like, press another MIDI note,
move it to another position, etc. Stop Recording and your keyboard will send the Orbiter
warp-jumping across the cosmos. Or just randomize the Key Recorder for random sounds
all over the keyboard.
Mouse Set the Record Mode to Tour. Set the Length to any value between 1 and 32 bars. Press
Record and move around. For a smooth transition, stop where you started (see the grey
indicator?) and stop Recording.
Random, Init & Cosmos
Initialize & Random options.
Grab anywhere in the cosmos to turn the world upside down! Move all objects at once
(mirrors on the four borders.) Revert via Undo.
Back To Table of Content
8
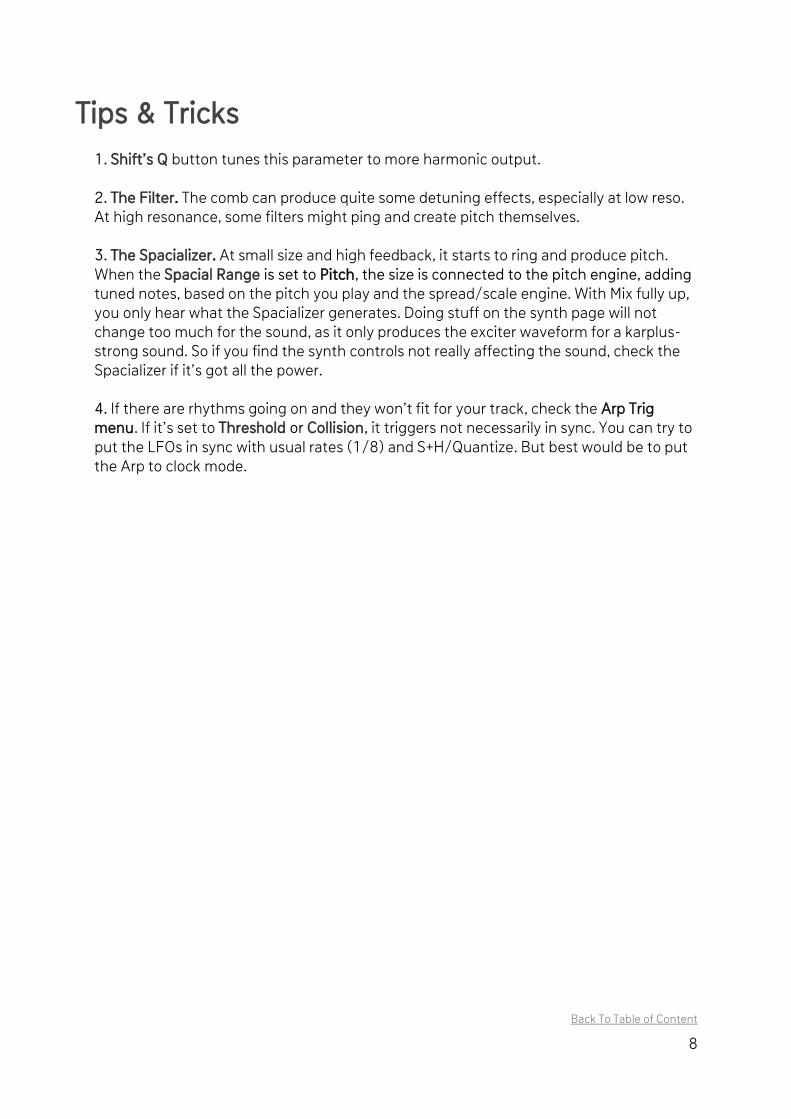
Tips & Tricks
1. Shift’s Q button tunes this parameter to more harmonic output.
2. The Filter. The comb can produce quite some detuning effects, especially at low reso.
At high resonance, some filters might ping and create pitch themselves.
3. The Spacializer. At small size and high feedback, it starts to ring and produce pitch.
When the Spacial Range is set to Pitch, the size is connected to the pitch engine, adding
tuned notes, based on the pitch you play and the spread/scale engine. With Mix fully up,
you only hear what the Spacializer generates. Doing stuff on the synth page will not
change too much for the sound, as it only produces the exciter waveform for a karplus-
strong sound. So if you find the synth controls not really affecting the sound, check the
Spacializer if it’s got all the power.
4. If there are rhythms going on and they won’t fit for your track, check the Arp Trig
menu. If it’s set to Threshold or Collision, it triggers not necessarily in sync. You can try to
put the LFOs in sync with usual rates (1/8) and S+H/Quantize. But best would be to put
the Arp to clock mode.
Back To Table of Content

9
Structure
The GUI pretty much follows the structure of the sound.
On the Synth Page, we have two FM operators, represented mainly by their Ratio and FM
Amount controls (left side). In the middle, there is the LFO and Arpeggiator.
To the right, we take up the sound path with Form, Jitter, Brightness, Operator Balance
and Level Control.
On the FX Page, you’ll find Aparillo’s effects engine: Filter/Spacializer, Pan, Delay and
Reverb.
The Envelope Page offers Envelopes and their ADSR controls for Modulation & Output.
The Orbit Page will give you The Orbit with all its magic.
Parameters
The parameters are displayed as 16 vertical meters, representing the parameter value
(fader position +/- modulation) for each of the 16 voices. Most of these parameters are
connected to the modulation system which consists of a modulation amount control,
polarity switch, modulation source and modulation filter.
Modulation is accessible through the buttons below the parameters.
Nearly all sound parameters are controlled by the Orbit as well. The Orbit will add values
to the parameters, based on their distance to the “Orbiter” object.
Back To Table of Content
10
The Building Blocks
Presets
Sound Designers
Undo/Redo
Synth Page
FX Page
Envelope Page
Modulation Windows
The Orbit
About Screen
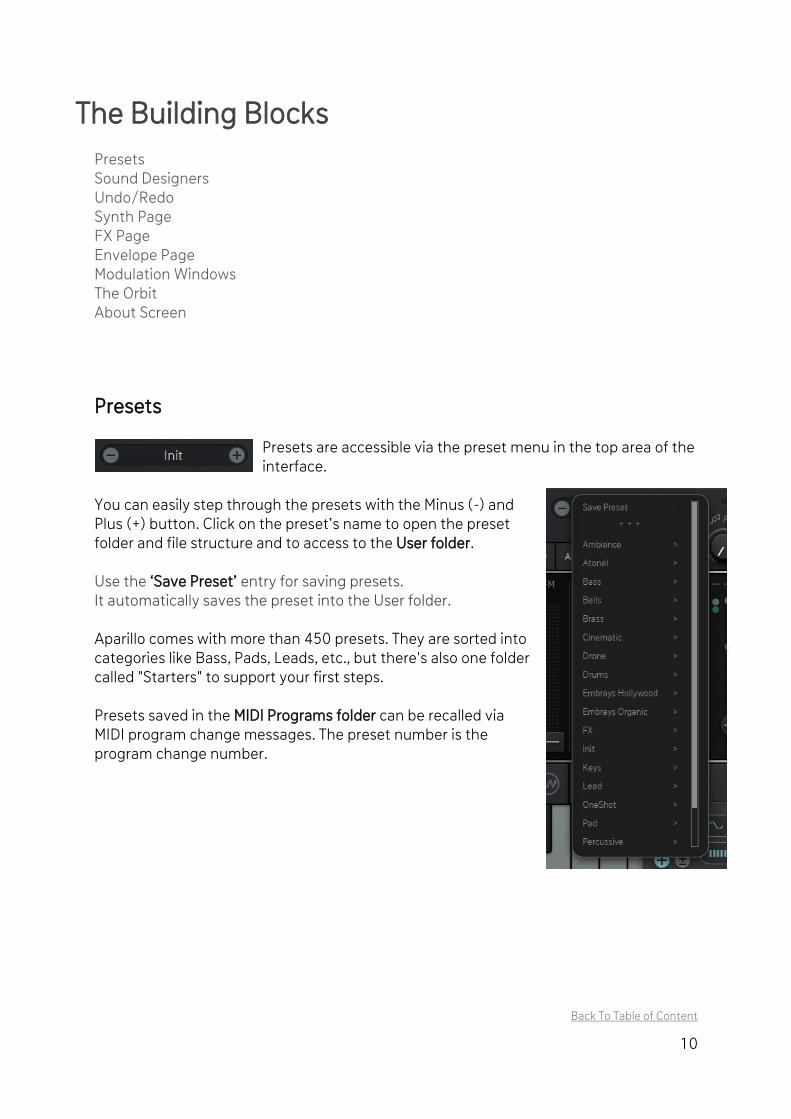
Presets
Presets are accessible via the preset menu in the top area of the
interface.
You can easily step through the presets with the Minus (-) and
Plus (+) button. Click on the preset’s name to open the preset
folder and file structure and to access to the User folder.
Use the ‘Save Preset’ entry for saving presets.
It automatically saves the preset into the User folder.
Aparillo comes with more than 450 presets. They are sorted into
categories like Bass, Pads, Leads, etc., but there's also one folder
called "Starters" to support your first steps.
Presets saved in the MIDI Programs folder can be recalled via
MIDI program change messages. The preset number is the
program change number.
Back To Table of Content

11
Sound Designers Aparillo was developed together with the sound designers. Their love for Aparillo showed
in a record-breaking number of presets being sent in, which gave us the opportunity to
cherry-pick only the awesome ones. Still, Aparillo ships with nearly 500 unique sounds,
varying from blasting synths to most complex environments.
The letters in the end of each preset name represent the name of the sound designer:
SB Sugar Bytes
DF DavidF
VN VANE
KPR Klaus P. Rausch
MA Mikael Adle
RM Ryn Manning
VB Vincenzo Bellanova
CCT Christian C. Thompson
PLGRND Plaeground
EV Empty Vessel
ML Mads Lindgren
ET Ed Ten Eyck
RAY Embrays
DS Daniel Stawczyk
Undo / Redo function
These buttons (in the header) reset or redo your last operating step.
Back To Table of Content

12
Synth Page
Synthesizer
Ratio OP-I
FM Amount OP-I
Ratio OP-II & FM Amount OP-II
Shift
Tune/FM Mode/Arp Trigger settings
Form
Jitter
Brightness
Operator Mix
Level
The Synthesizer is placed on the first page and the controls are marked with light blue
faders and it basically consists of a 2-operator FM units - Operator I (OP-I) and Operator II
(OP-II) - with granular jitter, waveshaping, feedback, operator crossfade and three grades
of complexity.
Back To Table of Content

13
Ratio OP-I
Determines the pitch of the Phase Modulating oscillator, in relation to the incoming pitch.
At a ratio of 2:1, the modulating oscillator is running at double speed, compared to the
slave/carrier oscillator (the one you hear).
The higher you raise the fader, the faster the Phase Modulation will be. The numbers
above the fader give you hints for harmonic ratio settings.
In this model, we use sine waves as usual, but the Formant can distort these sines
exponentially or logarithmically, in the modulation path as well as in the audio path.
If the meter is moving on its own, the fader is modulated either by the modulation
system or by a moving Orbiter. The Orbiter handles Ratio I & II in one control.
Click the button below the Ratio OP-I fader to open the Modulation Window, choose from
different modulators and curves, fit them with Amount and Polarity and filter the voices.
FM Amount OP-I
The second fader on the synth page controls the FM Amount of Operator I.
The FM Amount is the intensity of Phase Modulation provided from the modulator to the
carrier osc (the one you hear). FM Amount OP-I/II share the same Orbit object.
Back To Table of Content

14
Ratio OP-II & FM OP-II
Work exactly as the controls for OP-I, but they have different impact depending on the
selected FM Mode.
Pitch Generator: Shift
Let’s stay on the synth page and move to the center. There we have the Shift control.
This is one of the most powerful controls, as it puts your 16 voices to pitch. Think of the
Shift control as 16 detune-faders for your unison (or polyphonic, but that comes a little
later) synth voice.
The Shift modulation system differs from the others. While you have the usual
modulators with mod-amount and polarity, there are different filters, differing from
unison, about scales, to a user definable table.
Shift works bipolar, and so it utilizes the scale in a bipolar way.
If Shift ist above 50%, the scale will be used as you see it.
If the Shift is below 50%, the scale will be used in a negative way, subtracting the given
intervals from the given pitch.
(For unison effects, it is important to pitch the voices up and down, so that you have no
audible change in the recognized pitch.)
Back To Table of Content
Mirror

15
Tune/FM Mode/ Arp Trigger settings
Tune
Octave
The octave control sets the base pitch of the oscillators in octave steps.
The range of this control is from -4 octaves to +4 octaves.
Fine tune
Both oscillators will be fine-tuned to each other, so the one up and the other
down.
FM Mode
The different FM Modes represent a twist in the FM signal flow.
The audio outputs of OP-I and OP-II can be mixed using the OP Bal control.
The Arp has an individual OP balance control, so you can have a completely different
sound coming from the Arp.
Algo 1
Here we use OP-I and OP-II as individual pairs, not affecting each other.
Algo 2
Gives a glance at the complexity of FM Synthesis, as we now use OP-I as
modulator for OP-II, bypassing the internal modulator of OP-II.
The Ratio of OP-II is now applied to the carrier of OP-I.
Algo 3
Here we also use OP-I instead of OP-II´s modulator, but we apply Ratio2 to
OP-I modulator, resulting in much more harmonic variety, but also some chaos.
Back To Table of Content

16
Take your time when setting and modulating these controls, as lots of interesting timbres
are covered here.
Algo 1 Algo 2 Algo 3
Harmonic modes
When turned to off, we handle the ratio as an un-quantized parameter. This
makes it possible to be really unharmonic and enjoying the fun of dialing in an
exact ratio or whatever pleases your ears.
Quantize the parameter by applying a Farey Sequence to the ratio, which basically
is a big table of 80 fractions ( 1/1, 1/2 , 1/3, 1/4....1/20).
See the Q mode as a huge scale of pre-defined ratios that are rather
mathematically correct.
Here we use a table of 40 harmonic ratios, and additionally we apply the ratio to
modulator and carrier as further fractions, resulting the crystal clear sound of
state of the art FM synthesis.
Back To Table of Content

17
Now we jump over to the right section where we can take up the sound path with Form,
Jitter, Brightness, Operator Balance and Level Control.
Form
To make the FM Engine a little bit more
interesting, the sine oscillators are treated with
the form parameter. It actually houses two
waveshaping effects, which can be applied to the
operators independently. So these effects do not
only provide sound design qualities on their own,
they also have influence on the fm itself, leading
to very new and unheards sounds.
Formant
This makes the form parameter shift the
formants of the operators waveforms
in complex mode, that means you can use
formant shifted sounds as fm modulator.
Shaper
This will put the form control to shaper mode,
where it will narrow the waveform in the upper
half, while broadening the waveform in the
lower half.
In Algo 2 and Algo 3 mode, the shaper of OP-I also applies to the modulator signal.
Fold
The waveform is boosted and sent through a sine function which will then fold the
signal around, generating lot of harmonic overtones.
Jitter
We took some jittering from the granular shelf, as it turned out to be a bit more
interesting than usual noise. The jitter will add a little random number to each oscillator’s
phase, so that eventually each waveform has its very own frequency. This results in a
rather granular noise, which is not replacing the original sound as much as usual noise.
Brightness
This is the feedback path of the FM circuit. Turning up the brightness reshapes the final
waveform to sawtooth, providing more harmonics and a rather “conventional”
synthesizer sound which the filter is naturally starving for.
Operator Mix (OP Bal)
As we have 2 operators working, we need a mixer to put them together, and here we are:
The OP Balance crossfades between OP-I (bottom) and OP-II (top).
Level
This is the Master Level control, but it can also be put to modulation mayhem.
Back To Table of Content
From its modulation system you can decide
whether you want to apply Formant, Shaper or
both for each OP separately.

18
The Arpeggiator
Like a crown on the LFO sits the Arpeggiator, which is a neat little engine that works
together with the LFO to pick and play a selection from the available 16 voices.
Technically, it picks the 16 oscillator voices and plays them with an individual decay
envelope. Therefore, the 2 operators can be mixed individually and the arpeggiated audio
can be mixed with the polyphonic audio.
So the Arpeggiator is not what you are used to,
like a note sequencer, it´s rather a sequenced
switch/envelope/VCA combination that creates
an individual monophonic audio signal from the
already existing polyphonic audio signal.
Arp knob
This very first control in the Arpeggiator
crossfades the original audio signal (dial down)
with the arpeggiated audio signal (dial up).
Arp Trigger menu (Arp Trg)
The Arpeggiator has 16 voices to choose from.
This is done with an envelope which pulls up the
level of certain voices. The envelope must be
triggered on a voice to make that voice be heard.
The Arp Trig menu offers 4 modes to trigger the envelope.
In each of these modes, the third parameter (rate or threshold)
changes its dedication.
These are the 4 modes available in the Arp Trig menu:
Threshold LFO 1 (blue)
Here we set the threshold for triggering the Arp by the
voices of LFO 1. If a voice of LFO 1 crosses the line,
this voice will trigger the Arp envelope and the voice
will be heard.
Threshold LFO 2
Here we set the threshold for triggering the Arp by the
voices of LFO 2.
Back To Table of Content
LFO 1 is
measured
LFO 2 is
measured

19
Collision
If LFO 1 and LFO 2 voices are crossing each other, a
trigger will be generated. Here the 3rd control is named
RATE, as it will skip triggers when the parameter is not at
100%, playing each 16th trigger at 0%.
Clock Mode
Here the 3rd control is named Rate, as it sets the Arp
clock speed (always in sync with host bpm). The Rate
control works bipolar, so that the Arp can run
forward(cw) or backward (ccw) or not at all (center).
The Global Settings of Aparillo provide two different Collision Methods to cover all
possible aspects for measuring an LFO-voice with either the threshold or another LFO-
voice.
What we have learned is that the Arpeggiator can trigger more than one voices at once, if
not in clock mode, and that it produces sound that can be mixed with the polyphonic
synthesizer signal.
OP Bal
Here we create a mix of the OP-I and OP-II audio signals, especially for the Arp.
That means: your polyphonic OP Balance (Operator Mix) on the main synth page can
have a different sound than the OP Balance setting of the Arpeggiator.
Rate/Threshold
The Rate/Threshold control depends on the Arp Trigger mode.
Decay control
The Arp selects voices from the polyphonic audio stream, using its own envelope.
Set the decay time of that envelope here. The envelope is triggered by different events,
selected by the Arp Mode Switch.
The Arp displays blink up when a trigger is received and they fade out according to the
decay time. That makes it easy to see what is going on in your voice trigger setup.
In the Orbit, these four Arpeggiator controls can be
selected in the Arp Object window as a modulation
target.
Back To Table of Content
trigger
density
Arp clock
speed

20
LFO 1 & 2
There are two complex LFO circuits running in
Aparillo, these were the initial backbone of the
product idea. While 16-voice unison FM
provides a lot of possibilities already, the LFOs
will put these 16 voices at work and make them
dance, at least with your intentions being paid
attention to.
The LFOs are interconnected with phase
modulation from LFO 1 to LFO 2, but there are
more differences, as we will find out, following
their slightly different parameter sets.
Hit one of the LFO buttons below the LFO window to open the LFO controls:
Waveform (Direction)
There are 3 waveforms available. Linear Up, Linear Down and Sine.
Oneshot/Loop
The LFO can repeat its waveform forever in Loop mode (grey straight arrow), or it will do
the waveform just once, just like an envelope (lighting straight arrow).
Retrigger
There are 3 retrigger-options available to define the LFO restart behaviour:
MIDI
The LFO will restart with a MIDI Gate
Free
The LFO will not be restarted
Collision
An LFO-voice restarts on Collision with the respective voice of the other LFO
Back To Table of Content

21
Rate
The Rate determines the speed of the LFO and is connected to the Crosshairs in the
LFO Window (LFO 1 vertical, LFO 2 horizontal).
The Rate of LFO 1 is always in sync with your BPM and goes from 1/64 up to 4/1 bars.
The Rate of LFO 2 is also in sync with your BPM but goes from zero (to be fully
controlled by PhM) to 16/1 bars.
Rate Jitter
The Rate Jitter will create 16 individual LFO frequencies.
The control works like a crossfader for two jitter modes.
Zero Center Right
No Jitter Full random Even spread from 0 to 100%,
results in LFO frequencies
from min to max.
Phase Jitter
Works exactly like the Rate Jitter.
Zero Center Right
No Jitter Full random Even spread throughout the
full value range, results in
display of currently selected
waveform. Back To Table of Content

22
Phase (LFO1)
Use the Phase control to determine the starting
point of your LFO. Easiest way is to retrigger the
LFO repeatedly while turning the Phase control
to find the Phase that fits your needs. Or just
wiggle the Phase control until the LFO sounds
right for you.
PhM (LFO 2)
Use this control to determine how much LFO 1
is affecting the Phase of LFO 2.
As you raise the control, more potion of LFO 1
will be added to LFO 2, making it quicker and
providing complex waveforms.
Quantize (LFO 1)
Use the quantize control to turn LFO 1 into a stepped modulator. The higher you raise
the knob, the bigger the steps will be, resulting in less variety of output values, but with
a rhythmical aspect, due to the jumping values.
S+H (LFO 2)
A Sample and Hold circuit is used to turn LFO 2 into a stepped modulator.
The S+H control sets the sampling rate. At this rate, LFO 2 will produce output values
that have been sampled from its original output. The sampling rate is always in sync
with your bpm and ranges from 1/32 to 1/1 bar.
Gravitation
Gravitation will reduce the LFO amplitude over time, while increasing
the frequency, until it reaches zero/phase.
Depending on the LFO loop mode, the Gravitation will start again in
Loop mode and go to rest in oneshot mode.
The time of the Gravitational effect can be set with the bipolar
Gravitation control.
Below the center mark, the Gravitation will be negative, resulting in an LFO wave that
rises from zero to its maximum value, depending on the Phase setting.
Above the center mark, the gravitation is positive resulting in an LFO that starts at its
max value and is bouncing down to phase.
The little button besides the Gravitation control toggles the feature on or off.
Back To Table of Content

23
LFO window
The window is sliceds into 16 tubes, in which the LFO-dots
and the Arp-indicators are positioned.
The 16 balls represent your 16 voices, and their graphics
work as follows:
Arp indicator
Here you can watch your Arp triggering the voices. Arp decay will do a longer fade out
time on those lamps, providing visual feedback of uprising polyphony by overlapping
voices.
LFO-dots
These dots represent the position (i.e. value) of an LFO-voice.
LFO 1 is blueish, LFO 2 is yellow-ish.
The Dots light up when their LFO voice is triggered.
Crosshairs
The Crosshairs is used to control LFO 1 and LFO 2 Rate simultaneously and also
displays the current rate setting and automations.
Keep in mind !
LFO 1 differs from LFO 2, which is an FM-slave to LFO 1.
LFOs can be stepped and that they can retrigger in funny ways using the Collision
trigger.
The gravitation is something very special and will be your friend on a travel through
sound.
Back To Table of Content

24
FX Page
Here we do the post processing, final shaping of the sound.
Filter The multi-mode filter provides a broad variety of filter types, including unusual ones like
the dirt filters or the vowel filter. The filter is also connected to the modulation system in
the usual fashion (refer to FM amount modulation) and also to the Orbiter, with
individual Orbit objects for cutoff, cutoff mod amount and resonance. The dirt filters can
be used to provide the sound with more fatness, less clarity and buzzing overtones.
Lowpass
Cuts off high frequencies according to the cutoff frequency.
LP 4 Silk
Four pole lowpass filter based on the oberheim paradigm.
LP 2 Sat
Two pole state variable filter with saturation.
LP Dirt
Two pole lowpass filter based on the oberheim paradigm but with a very hot internal
distortion and some other magic.
BP Bandpass
Cuts off low and high frequencies and passes thru the cutoff frequency.
BP Silk
Two pole bandbassfilter based on the oberheim paradigm.
BP Sat
Two pole state variable filter with saturation. Back To Table of Content

25
BP Dirt
Two pole bandpass filter based on the oberheim paradigm but with a very hot internal
distortion and some other magic.
Highpass
Cuts off low frequencies according to the cutoff frequency.
HP Silk
Two pole highpass filter based on the oberheim paradigm
HP Sat
Two pole highpass state variable filter with saturation
HP Dirt
Two pole highpass filter based on the oberheim paradigm but with a very hot internal
distortion and some other magic.
Special
Peak
Creates a peak at the cutoff frequency without losing original audio.
Comb
A feedback delayline with delaytimes according to the cutoff frequency.
Should be used with high resonance.
Vowel
Sugar Bytes’ famous Vowel Mode delivers a powerful 'talkbox' sound, making the
output signal sound like it's being spoken.
Spacializer This is a very special breed of delay based effect, which can
work as a delay, reverb or tuned comb filter. Here you can add
room, plucked strings or even pinged percussion to your sound.
Modulation works in the usual Fashion (refer to FM amount
modulation), Feedback and Dry/Wet Mix are represented by
individual Orbit symbols.
Filter and Spacializer share a free signal flow, so you can run
the filter first (recommended), sending damped material to the
Spacializer, or run the Spacializer first to play with filtered
artefacts created by spacial size modulation. Just click the
little ←→ button to switch the signal flow.
Spacial Range
This menu provides different timebases for the delay that the spacializer is based on.
There are 3 free time bases from 1sec via 500msec to 250msec, plus a pitch based and a
host bpm based time table. Back To Table of Content

26
Use the large size for delays, the med size for reverbs and the small size for
resonators/percussions with 16 modal frequencies.
Use the pitch mode to have polyphonic bongos tuned to the instrument pitch, or use
sync mode to have a mighty synced 16 taps delay. In either mode, the spacializer effect
provides a wall of sound.
Large
1sec
Medium
550 msec
Small
250 msec
Pitch
Based on the current pitch (-24/+24 semitones)
Sync
Based on the host bpm
Panner Here we move from “mono polyphonic” to “stereo monophonic”.
We spread the voices in the stereo field, then combining them to a stereo audio stream.
The Panner offers 4 function generators (panner waveforms) , Rate and drywet mix.
Sine
The 16 voices are facing a sinusoid level modulation forming a nice and
smoothing wave.
Sine S+H
The sine wave is sampled at certain intervals.
Random
Random values arrive at the given rate.
Continuous random
Random waveform LFO
Delay A small delay circuit with saturated feedback path and always in sync with your bpm.
Reverb A new reverb that delivers a rich and warm cloud, but also nice and defined rooms.
We shrunk it down to 2 controls though. The Panner, Delay and Reverb controls are not
connected to the Modulation System, while still being represented in the Orbit.
Back To Table of Content

27
Envelope Page
While we find the modulation and level envelopes here as well as Arp and LFO for
convenience, this page contains a very important setting:
The Envelope Mode
Unison
The envelopes work monophonic, providing the standard Aparillo case:
One note plays 16 voices at once.
Polyphon
The envelopes represent a 16 voice polyphonic synthesizer, where, due to the special
nature of Aparillo, each voice most probably has a different sound.
The Modulation System for the modulation and amplifier envelope comes with the
standard modulation sources and filters as well as a slope parameter and AD loop feature
(for sustain).
The output volume level is usually modulated by the amplifier envelope (Vel disabled).
The maximum modulation envelope as well as the maximum amplifier envelope can be
determined by velocity (Vel enabled).
Back To Table of Content

28
Modulation Windows
Choose from different modulators and fixed curves, fit them with amount and polarity
and filter the voices. The modulation options are accessible through the buttons below
the individual parameters.
The upper menu selects from different Modulation Sources.
The lower menu offers filters for the 16 modulation voices.
Modulation Amount
Works as an Attenuverter. Being a bipolar control, it can add or subtract the
modulation from your fader value.
Polarity Switch
Decide if your modulation is unipolar or bipolar.
Use the fader position as its minimum or maximum (uni) or
if it works above and below the fader position (bi).
Modulation Sources:
LFO 1
Modulation comes from LFO 1
LFO 2
Modulation comes from LFO 2
LFO RM
Both LFOs ring-modulated (multiplied)
Mod Env
Modulation Envelope (the left one on “ENV” Page)
Arp Env
The Decay envelope of the Arpeggiator
Up
Linear upward Curve (Play with amount and polarity with these curves!)
Back To Table of Content

29
Down
Linear Downward Curve
Exp
Exponential Upward curve
Log
Logarithmic Downward curve
Flat
Just a Flat Offset (good use with the mod filters)
Lin
Linear Curve (for spread)
M-Wheel
Assigns the MIDI modulation wheel to define the modulation depth.
P-Wheel
Assign the Pitch bend wheel to define the modulation depth.
Velocity
The modulation level will be determined by velocity.
Modulation Filters:
ALL
No filtering
Even
Only even numbered events get through (2,4,6,8…)
Odd
Only odd numbered events get through (1,3,5,7…)
Third
Each third event gets through(1,4,7,10,13…)
Lower
More lower than upper events get through (1,2,4,6,9…)
Upper
More upper events get through (4,7,9,11,12,13…)
5-7-12
Events are Quantized in 5th, 7th and octaves
Octave
Events are quantized in octaves
Back To Table of Content

30
On the Envelope tab the modulation system of attack, decay and release additionally
offers a slope parameter.
Slope-Curve
With Slope you can define the fading curve. A higher Slope value results in a larger
controlling range for the parameter while a lower value does the opposite.
To alter the curve value click the curve from the slope window and drag the mouse up or
down.
The modulation system of the sustain parameter comes with an attack-decay loop mode.
Loop Mode
When AD-Loop is disabled (grey circle arrow) it acts like an ordinary ADSR envelope.
When AD-Loop is enabled (lighting circle arrow) the envelope acts like an LFO.
It repeats the phase between attack and sustain as long as a note is hold and as the
attack phase was once run through. The envelope releases only after the note is
released. The phase ends at the sustain level and starts from zero.
Back To Table of Content
31
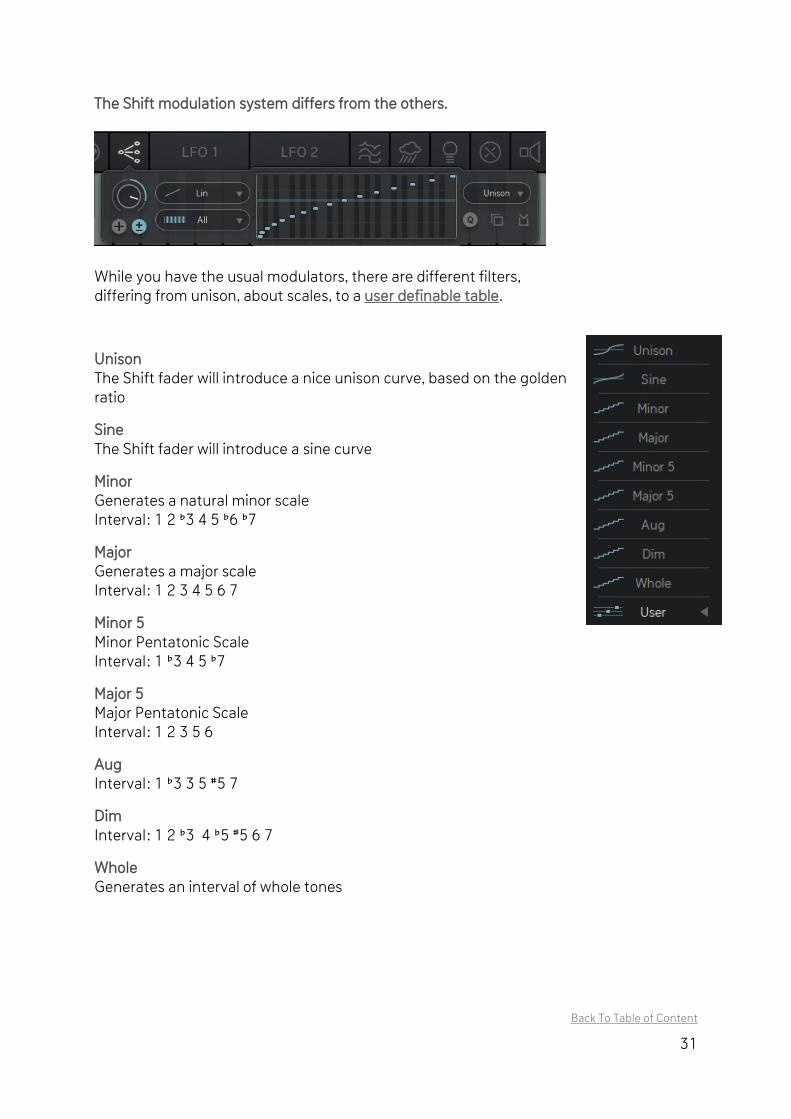
The Shift modulation system differs from the others.
While you have the usual modulators, there are different filters,
differing from unison, about scales, to a user definable table.
Unison
The Shift fader will introduce a nice unison curve, based on the golden
ratio
Sine
The Shift fader will introduce a sine curve
Minor
Generates a natural minor scale
Interval: 1 2 ♭3 4 5 ♭6 ♭7
Major
Generates a major scale
Interval: 1 2 3 4 5 6 7
Minor 5
Minor Pentatonic Scale
Interval: 1 ♭3 4 5 ♭7
Major 5
Major Pentatonic Scale
Interval: 1 2 3 5 6
Aug
Interval: 1 ♭3 3 5 ♯5 7
Dim
Interval: 1 2 ♭3 4 ♭5 ♯5 6 7
Whole
Generates an interval of whole tones
Back To Table of Content

32
The USER Scale The User Scale offers 16 horizontal sliders and a 36-note range to transpose the 16
individual voices. Use the editor to define your own scales, from your personal drone-
unison-seed, to the tricky scale that puts out that one special melody.
The Scale-Editor can always be modified, so you can make your own edit of a factory
scale and it will be saved and recall normally. Bringing up another scale however, will
destroy your work.
If you copy your Scale to the User Table, you can leave it there while trying out other
factory scales, and you can copy and paste it from/to another preset.
Q Button puts the faders to quantized mode for easy pitch assignments.
Copy button is used to copy the currently shown scale.
Paste button is used to paste into the user scale editor.
Right click to initialize.
Shift Mode: Shift+Click for horizontal linear spread and vertical shift.
Back To Table of Content

33
The Orbit
Hit the Orbit Tab in the top right corner below the SB icon to open the Orbit Page.
Aparillo has become a pretty complex sound engine and we had to take it back to where
it started! An easy to use unicorn of a synth which produces lots of sounds with few
controls! That’s when we came up with the Orbit.
The red Orbiter object measures its distance to 15 parameter objects.
OP-I & OP-II Ratio OP-I & OP-II FM Amount Shift Arp Mix
Operator Balance Formant Brightness Jitter
Reverb Mix Spacializer Feedback Spacializer Mix Delay Mix
Filter Cutoff Cutoff Mod Amount Filter Resonance
So, the Orbiter oject is one control giving you access to 15 parameters at once, based on
distance. Move it around and you will see how it connects and disconnects to the
parameter objects.
Back To Table of Content

34
The circle shows the current radius of your object.
The dotted line indicates that the Orbiter oject is within
your radius and shows the connection to the Orbiter.
The object will draw an animation if the Orbiter is in radius,
and the animation will become faster as closer as the
Orbiter comes to the object.
Orbit Headline
The Orbit headline gives you choices on how you would like to use the Orbit.
Click the button to access the synth engine.
If the SB icon in the top right corner is moving, the Orbit engine is powered on.
So when faders do stuff on their own, they are either modulated, or affected by the
Orbiter object.
Orbiter options
The Orbiter features its own settings screen, so you can manage its
options, also while the Orbit is moving around.
It handles parameters related to the Orbiter-automation features.
The Orbit works as a touch controller, but it can also record your
mouse movements or save an Orbiter position for each of your 128
possible MIDI keys.
Mouse-Recorder Button
Click this Tour icon to put the Orbiter mouse-recorder to playback.
Back To Table of Content

35
MIDI Position Button
Activates the MIDI-position feature, where each MIDI note can be assigned to an
individual Orbiter position. The MIDI notes can then be used to let the Orbiter
travel from stage to stage, with an additional slew processor which is to be found
in the Orbiter window.
This is how it works:
Activate the record button and the MIDI button.
Hit a MIDI key and put the Orbiter to the desired position.
Hit another MIDI Key and set another Orbiter-position and so on.
Deactivate recording when you are finished.
Now, call the Orbiter positions using the MIDI keys that you used for recording.
Use the Speed control in the Orbiter window to smooth out the travel curve.
Speed
Will slow down (left) or speed up (right) the Orbiter movement.
Rec Lenght
Sets the maximum time for mouse recording.
The maximum length is 32 bars.
Loop button
When activated the Orbiter will move in loop mode.
When deactivated the Orbiter will do it’s movement just once after triggered by
MIDI.
Record Buffer
Shows your current position within the recording buffer.
Orbiter MIDI learn
The movement of the x-axis and the y-axis of the Orbiter can be remoted via MIDI
controllers.
Assigns incoming MIDI CC’s Deletes the assignment
Back To Table of Content

36
Initialize and Randomize
Hit this button to call up the Initialize and Random options.
Initialize the entire Orbit (All), set the Objects to their default position
(Objects) or initialize Amount, Radius, Level and Pan of your Objects as
well as your Mouse- and your Key-recordings individually.
Randomize
Click Objects to randomize the Object positions.
Amounts sets random amounts for your Objects.
Radius randomizes the radius of the objects.
MouseRecorder creates a random Orbiter animation.
KeyRecorder creates a keyboard full of 128 different Orbiter positions.
Record Button
Activate recording for the Orbiter.
In mouse-recording mode the recording will start as soon as you touch the screen and it
will end as soon as the mouse is released. During the recording the record button will
start blinking and you will see a red lit ring appearing around it which shows your current
position within the recording buffer.
The “Home” indicator will show where you started the recording,
so you can end the recording there for a smooth loop.
Orbit On/Off Button
This button will activate the Orbit.
Clicking into the inactive Orbit will also activate it.
Back To Table of Content

37
Objects window
The funny objects have their little controls window that pops
up when you right-click an object.
Here you find 4 parameters which help you to shape your
dramatic conditions:
Amount
This control will set the amount of impact that the Orbit has on the regarded parameter.
This is a bipolar control, so you can create positive and negative amounts. You can see
the Orbit’s impact everywhere across the instrument: If a fader is moving on its own, it is
most probably modulated by the Orbit.
Radius
Sets the radius for the object. Radius is useful to control the amount of impact from the
Orbiter-distance metering, but also to exclude the object from the Orbiter in certain
areas.
Level
This object can influence the overall output level.
Use the level control to have influence to the overall volume, as the Orbiter comes closer
to this object. Since all objects have the same parameter set, their level and pan
influences are automatically mixing together to a bigger, more complex picture.
Pan
Define the width of the stereo effect for each oject.
In the Arp Object you can select the four Arpeggiator controls
as a modulation target.
In the Ratio and the FM Object you can toggle between OP-I,
OP-II or both as a modulation target.
Turning the world Touch the empty space to turn the world!
Here you can move all objects at once, mirroring at the corners, forming new shapes.
After releasing the Mouse, this can easily be reverted using undo.
Back To Table of Content

38
Orbit parameter value display
Hover any Object with your mouse to see its name and coordinates in the bottom left
corner right above the keyboard.
Back To Table of Content

39
About Screen
Clicking the Aparillo logo opens the About Screen where you find some global settings
and functions:
Restart Oscillators
If the Restart Oscillators option is active, all oscillators will restart with the first note (after
all notes were off) and after the amp envelope has reached zero. If you retrigger a note
before the release of the amp envelope has reached zero there will be no restart.
If the option is off, all oscillators will recall their phase spread.
Global Tuning
With the Global Tune parameter you can change the overall tuning of Aparillo in order to
adapt it to other sound sources.
Pitch Bend Range
Intensity of the pitch bend wheel.
Glide Time
The pitch will slide from one voice to another with increasing glide time.
Glide is only active on Legato notes (when more than one note is held)
Collsion Method
Whenever we measure the collision of an LFO-voice with either the threshold or another
LFO-voice, we came to the conclusion that two modes are needed to cover all possible
aspects of the issue. Back To Table of Content

40
Method equal
We measure a collision with "is equal" method. This makes sure that an LFO-voice will not
collide when it wraps around (ramp waveforms need to wrap from 1 to 0 or vice versa),
as the wrap around is not actually seen as a movement here.
However, when using very fast rates or sample&hold/quantize, the voices might never
fulfill the "is equal" rule, resulting in very few triggers.
Therefore we apply the ‚Method not equal’.
Method not equal
We measure the collision by status change. If an LFO-voice has been smaller than the
threshold/other LFO-voice, but is now higher, it must have collided somewhere, so we
send a trigger. Toll to pay here is that wrapping around is also a status change, so the
trigger will occur when the ramp wraps from 1 to 0, as well as when it regularly crosses
the threshold/other voice. This will keep the LFO from fulfilling its whole wave cycle.
These modes are pretty deep down the rabbit hole, but usually you are fine with the "not
equal" mode. You might observe LFO-voices just run above the threshold, if thats a
problem for you, just switch to the other method.
Ignore Program change
Only presets from the folder “MIDI Programs” will be used for program changes.
Incoming program-change messages will be ignored.
CC Preset Isolate
MIDI Learn settings won't change when loading presets.
CC Map
Load or save your current MIDI CC assignment.
Extras
Here you can find your Aparillos version number. Please make sure, that you are always
running the latest version. By clicking „?“, you are directed to Aparillos User Manual.
Click the www.sugar-bytes.de to open the Sugar Bytes Website.
41
Native Kontrol Standard NKS Aparillo supports Native’s NKS standard, giving you the same deep integration with NI
controllers like Komplete Instruments. The main features are a plug-and-play support of
Aparillo‘s preset browser and trouble-free tagging/organisation for inclusion in the
powerful Komplete Kontrol / Maschine browser. This lets you search by sound type (e.g.
synth lead), character (e.g. dark), or any combination thereof. We have strived for highly
profound control of Aparillo‘s sound engine. Knobs and faders can be mapped to match
those on the Kontrol and Maschine hardware in logical ways, with similar controls
grouped by pages. For example: Skip to the Synth tab and you will find the set of controls
related to the synth characteristics. All presets have been wrapped into .nksf files which
contain preset and tagging information as well as mapped out controls. Different genre
and mood categories will speed up the producers’ workflow when browsing through
libraries, and help you keep your eyes off the computer screen.
Controller Mapping
All mappings are consistent throughout the different presets.
There are four pages available:
Page 1: Synth
Features the level, cutoff and resonance controls and also provides the amount controls
for FMI and FMII as well as the shift amount, bright and jitter parameter.
Page 2: Spacializer/Pan/Delay/Reverb
Here you will find the controls of Aparillo‘s FX section.
Page 3: Arp/LFO/Pitch/Orbiter
This page features the most relevant controls for Aparillo‘s Arpeggiator and LFO.
Alongside global pitch controls we've also included knobs for the movement of
the x-axis and the y-axis of the Orbiter.
Page 4: Mod Env/Amp Env
In this section you can set the level of attack, decay, sustain and release for the
modulation and the amplifier envelope.
Back To Table of Content

42
Installation
Download (requires login) the latest version here.
Double-click on the installer and follow exactly the instructions provided by the
installation process.
The standalone version and manual will be installed to:
Windows: C:\Program Files\Sugar Bytes\Aparillo
macOS: /Applications/Sugar Bytes/Aparillo
Presets will be installed into
\Users\YOURLOGINNAME (your home folder)Documents\Sugar Bytes\Aparillo
Important: Do not relocate Aparillo presets after installation!
Windows 32bit Default installation paths:
VST C:\Program Files\Steinberg\Vstplugins
AAX C:\Program Files \Common Files\Avid\Audio\Plug-Ins
Windows 64bit Note that all 64-bit plugins are in C:\Program Files and your 32-bit plugins are located in
C:\Program Files (x86). Make sure you have installed the correct version (32- or 64-bit).
You can check wether your DAW is running in 64-bit or 32-bit mode by opening the Task
Manager while it is running.
Default installation paths for the 32-bit version:
VST C:\Program Files (x86)\Steinberg\Vstplugins
AAX C:\Program Files (x86)\Common Files\Avid\Audio\Plug-Ins
Default installation paths for the 64-bit version:
VST C:\Program Files\Common Files\Steinberg\VST2
AAX C:\Program Files\Common Files\Avid\Audio\Plug-Ins
macOS All versions of Aparillo will be installed by default. Our plugins are Universal Binaries that
are both 32-bit and 64-bit compatible. Depending on your host, the proper one will be
loaded and used. AAX is supported by Pro Tools 10.3.5 and higher.
Default installation paths:
VST /Library/Audio/Plug-Ins/VST/
AU /Library/Audio/Plug-Ins/Components/
AAX /Library/Application Support/Avid/Audio/Plug-Ins
Back To Table of Content

43
Uninstallation To uninstall Aparillo, please follow the instructions:
Windows Uninstall Aparillo under Control Panel>Add/Remove Software.
macOS Delete all the following files and folders:
/Applications/Sugar Bytes/Aparillo
/Library/Audio/Plug-Ins/VST/Aparillo.vst
/Library/Audio/Plug-Ins/Components/Aparillo.component
/Library/Application Support/Avid/Audio/Plug-Ins/Aparillo.aaxplugin
~/Documents/Sugar Bytes/Aparillo
~/Library/Preferences/com.sugar-bytes.Aparillo.plist
/Library/Application Support/Sugar Bytes/Aparillo
/Library/Preferences/com.native-instruments.Aparillo.plist
NKS:
/Library/Application Support/Native Instruments/Service Center/Aparillo.xml
/Library/Application Support/Sugar Bytes/Aparillo /
/Library/Preferences/com.native-instruments. Aparillo.plist
‚~‘ means: /Users/YOURLOGINNAME (your home folder)
(Please note that in macOS 10.7 and later, the user Library folder is hidden. In case you
cannot locate your Library folder in the Finder: Select „Go to Folder“ from the Finder‘s Go
menu and enter ‚~/Library‘.)
Authorization The serial number is requested during installation. If the serial number is missing or
incorrect, the product will not produce any sound. Check the the top area of the Aparillo
interface to verify whether your serial number is VALID. Manually entering the correct
serial number there or performing a quick reinstall, should fix any issues.
License License covers both the macOS and Windows version and can be activated for two
computers at the same time. For use on more than two computers, please buy an
additional license.
Back To Table of Content

44
Host integration
Aparillo works as a VST / AU / AAX plugin in the most commen DAW hosts.
When installing, please make sure to install the right plugin-type and – if using Windows –
the right version (32 or 64 bit).
Make sure that Aparillo is installed in the Plugins folder used by your DAW.
Some hosts need to perform a plugin rescan when a newly installed plugin is launched
for the first time. Please find all detailed instructions for your DAW below.
Cubase Perform a full rescan in the Cubase plugin manager. Make sure that the Aparillo.dll (Win)
or Aparillo.vst (macOS) file is contained in Cubase‘s assigned VST Plugins folder. Load
Aparillo as Instrument into an Instrument track.
Ableton Live When using macOS, we recommend using the VST version of Aparillo in Live.
Please note: With Ableton Live, plugins sometimes will be marked as unloadable and not
rescanned automatically. If this happens to be the case, force a rescan by unchecking
and checking the ‚Use custom VST Folder‘ checkbox in Preferences/File Folder/Plug-In
Sources. Set up a MIDI track and insert Aparillo as instrument.
Pro Tools When installing Aparillo, select AAX plug-in format. (AAX is supported by Pro Tools 10.3.5
and higher.) Use Aparillo as an instrument.
Studio One Go to the Studio One menu and choose Options. Click Locations, then VST Plug-Ins.
Click the Add... button and select your VST Plugins folder. Press OK.
Create an instrument track and pick Aparillo up from the Instrument list.
Sonar Make sure that Aparillo is installed in the VST Plugins folder used by Sonar, and on
Windows that you have installed the correct version (32- or 64-bit). Insert Aparillo as a
„soft synth“.
Logic Select Aparillo as an AU-Instrument from the I/O dialogue of a Software Instrument
track.
FL Studio Go to Channels>Add one>More...There you should find Aparillo and perform a refresh.
You can now open Aparillo in the Mixer Inserts.
Back To Table of Content

45
Contact
Sugar Bytes GmbH | Made of passion
Greifswalder Str. 29 | 10405 Berlin, Germany
phone:+493060920395
www.sugar-bytes.com
Back To Table of Content