Wellcome on the STED Tutorial - EPFL BIOPbiop.epfl.ch/pdf/Leica Sp5 sted.pdf · 1 Wellcome on the...
22
1 Wellcome on the STED Tutorial Before using the Sp5 WLL STED microscope , Version 1 27.08.2013 You will need to put down your name on the reservation system = https://sv-bbs.epfl.ch/ptbiop/ STED, on the SP5WLL.
Transcript of Wellcome on the STED Tutorial - EPFL BIOPbiop.epfl.ch/pdf/Leica Sp5 sted.pdf · 1 Wellcome on the...

1
Wellcome on the STED Tutorial
Before using the Sp5 WLL STED microscope ,
Version 1 27.08.2013
You will need to put down your name on the reservation system = https://sv-bbs.epfl.ch/ptbiop/
STED, on the SP5WLL.

2
Welcome to the Leica Sp5 WLL
Confocal Invert tutorial.
System start Up. (Page 3-8) Laser switch and calibration (page 11-13) Sted configuration(page 14-17) System shut down. (page 18-22)
3
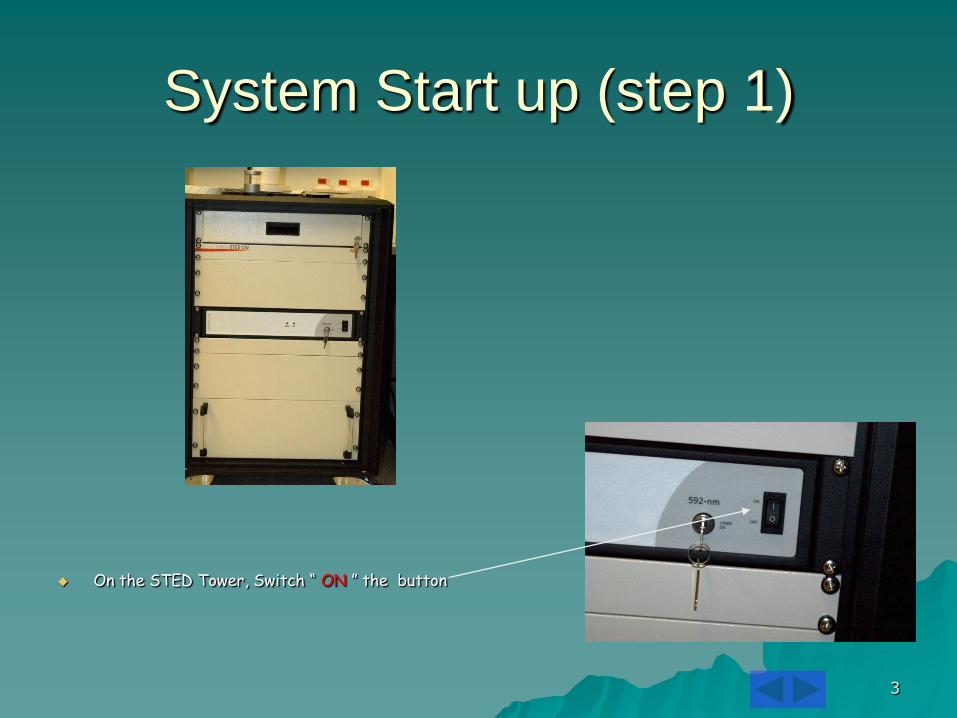
System Start up (step 1)
On the STED Tower, Switch “ ON ” the button

4
System Start up (step 2)
The SHG led turn green for 3sec,
then it’s turn orange for 3 minutes,
then it’s turn green again after 1 minutes.

5
System Start up (step 3)
Turn the key from the depletion laser 592-nm in vertical position.
The SHG led keep green.
6
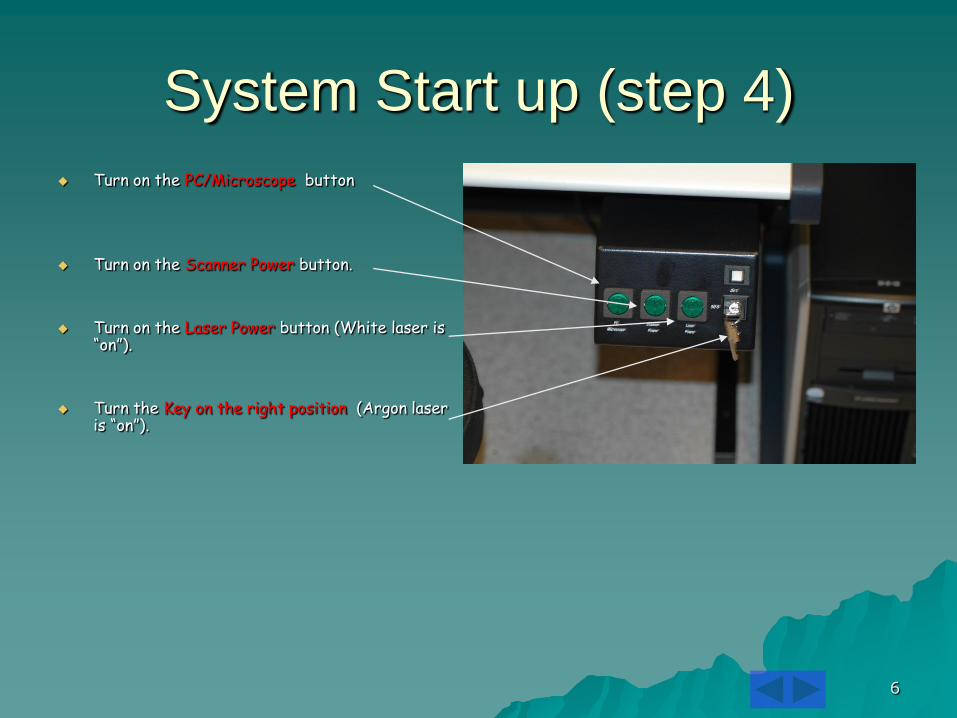
System Start up (step 4)
Turn on the PC/Microscope button
Turn on the Scanner Power button.
Turn on the Laser Power button (White laser is “on”).
Turn the Key on the right position (Argon laser is “on”).

7
Turn “on” the XCite Light.
System Start up (step 5)

8
System Start up (step 6)
When the computer is on
Introduce your Username
Introduce your Password
Introduce your login
Start the LASAF software.
Under “Configuration” select Machine STED.
Do OK
9
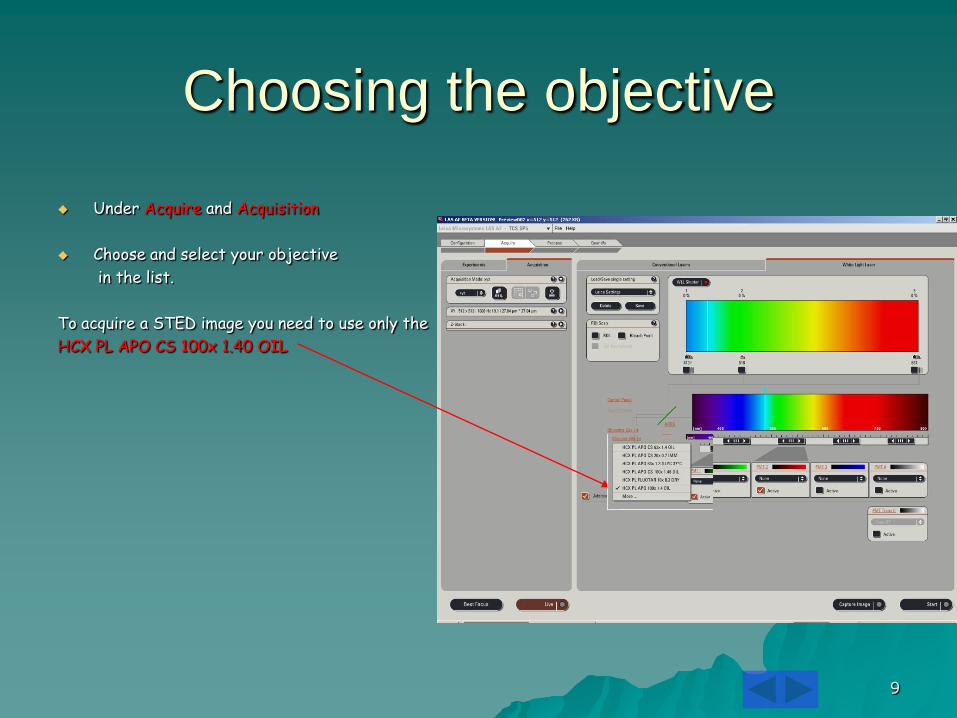
Choosing the objective
Under Acquire and Acquisition
Choose and select your objective
in the list.
To acquire a STED image you need to use only the
HCX PL APO CS 100x 1.40 OIL

10
Choosing the Filter
You need to introduice a Notch filter to stop the laser 592nm
Select “Analyzer Filter”
Deselect “ Auto Select”
Select “NF STED ” filter
11
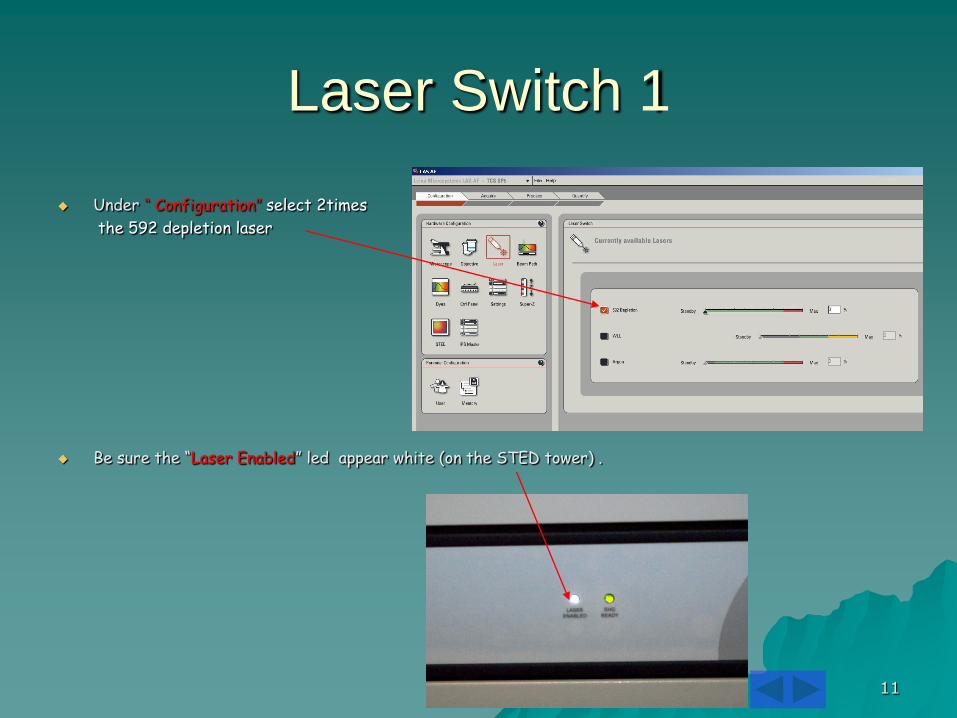
Under “ Configuration” select 2times
the 592 depletion laser
Be sure the “Laser Enabled” led appear white (on the STED tower) .
Laser Switch 1

12
Under “Hardware Configuration ” and “Laser” select the WLL and Argon Laser.
Increase the power of the 592 Depletion at 80% ( minimum) 100% possible.
Increase the wll laser at 70% ( good value = the laser is very stable).
Increase the Argon laser at 30%.
Laser Switch 2
13
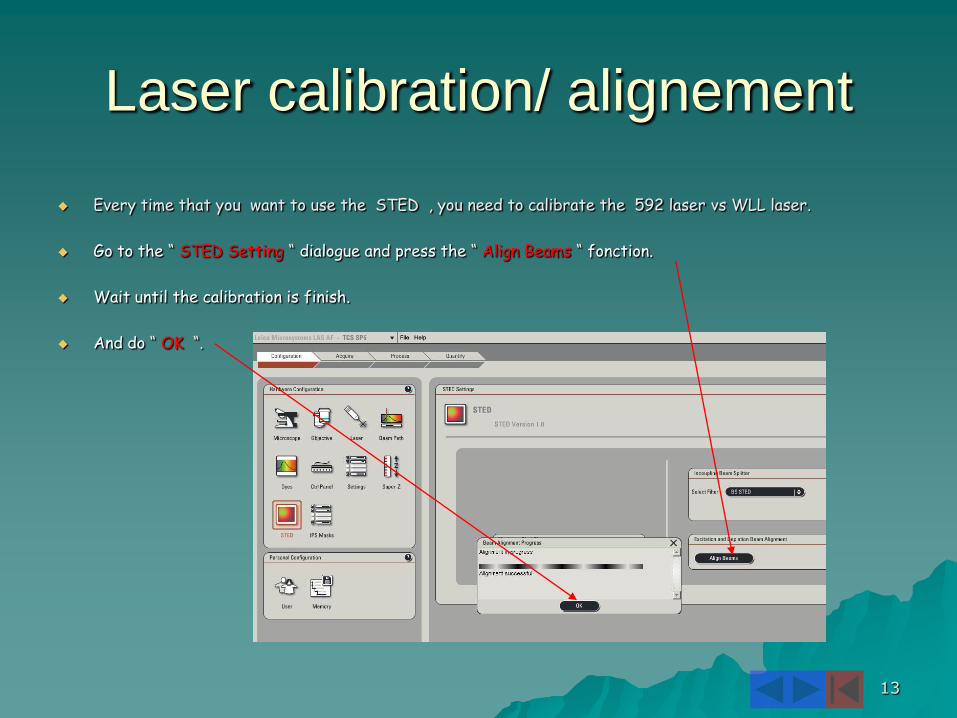
Every time that you want to use the STED , you need to calibrate the 592 laser vs WLL laser.
Go to the “ STED Setting “ dialogue and press the “ Align Beams “ fonction.
Wait until the calibration is finish.
And do “ OK “.
Laser calibration/ alignement

14
By using the depletion laser 592nm, the samples can be bleach very quickly, so first scan the sample in standard Confocal mode to find the focus and prepare the STED configuration close to work.
Set the WLL laser line that you need to use (10 to 30 %).
Select the Hyd 2 detector and set it at 100%.
Introduce to the Hyd a bandwidth that is 10nm fahter
to the WLL line that you set, and maximum 10nm lower
than the wavelength of the laser depletion ( +/-582nm).
Use a format like 512x512 or 1024x1024.
Use a scan speed like 400HRZ .
Use a zoom factor from 4 to 6 .
STED configuration ( step1)

15
Select the STED mode.
Set the WLL laser line that you need to use ( for ex. 488nm at 30 % to 50% transmission ).
Select the Hyd 2 detector and set it at 100%. Introduce
to the Hyd a bandwidth that is 10nm fahter to the WLL
line that you set, and maximum 10nm lower than the
wavelength of the laser depletion ( +/-582nm).
Open the Gate Setting; set the Wll value which is equal to
the value you use to excite the fluorochrome (for ex 488nm)
Set the Gate Start from 0,5 to 2,5 1,5 is compromise
Set the Gate End to 6,5
STED configuration ( step2)

16
Use a format like 1024x1024 to 2048x2048.
Use a scan speed like 200 to 400HRZ .
Use a zoom factor from 4 to 6.
Very important ,control that the pixel size is 20nm or less.
Use 3-4 Accu in frame mode.
Use 0-4 average in line mode.
Ex. if you use 200 HRZ, use 2 – 3 accu without average.
If you use 400 HRZ use 2 - 3 accu with 2-4 average.
STED configuration (step3)

17
Select” Switch Conventionel Laser”.
Select the ” STED ” .
Set the Depletion 592nm laser line at ” 100% ”
You can use less than 100%, but you may lost
some resolution, and win some intesity.
Use ” Start” and not live to acquire the image.
STED configuration (step4)
18
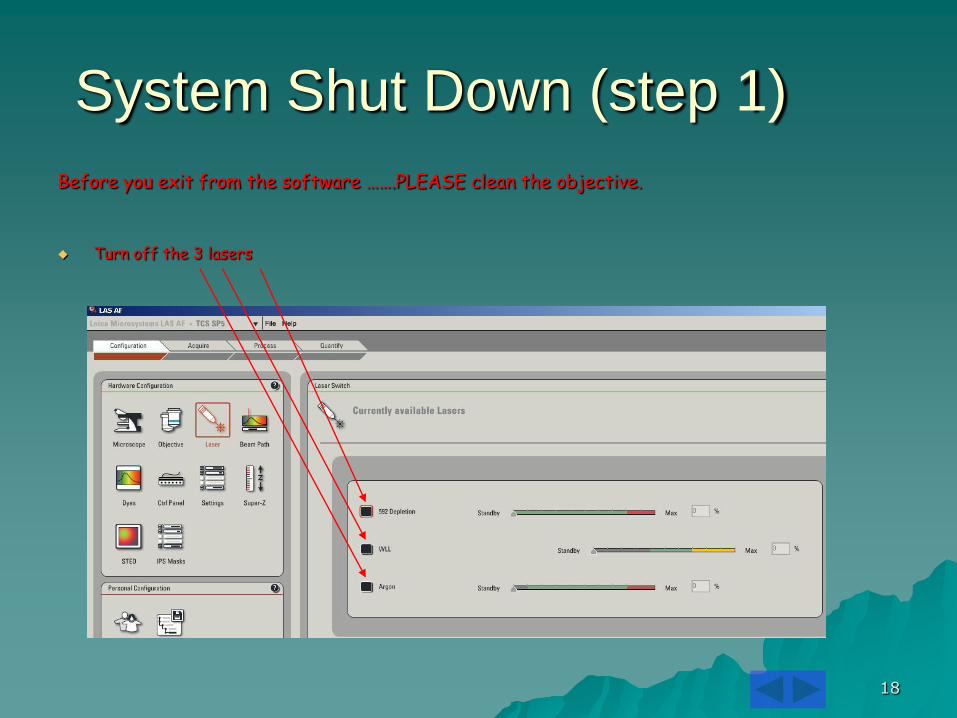
System Shut Down (step 1)
Before you exit from the software …….PLEASE clean the objective. Turn off the 3 lasers

19
System Shut Down (step 2)
Exit from the LASAF software.
Go to Start and shut down the computer.
20
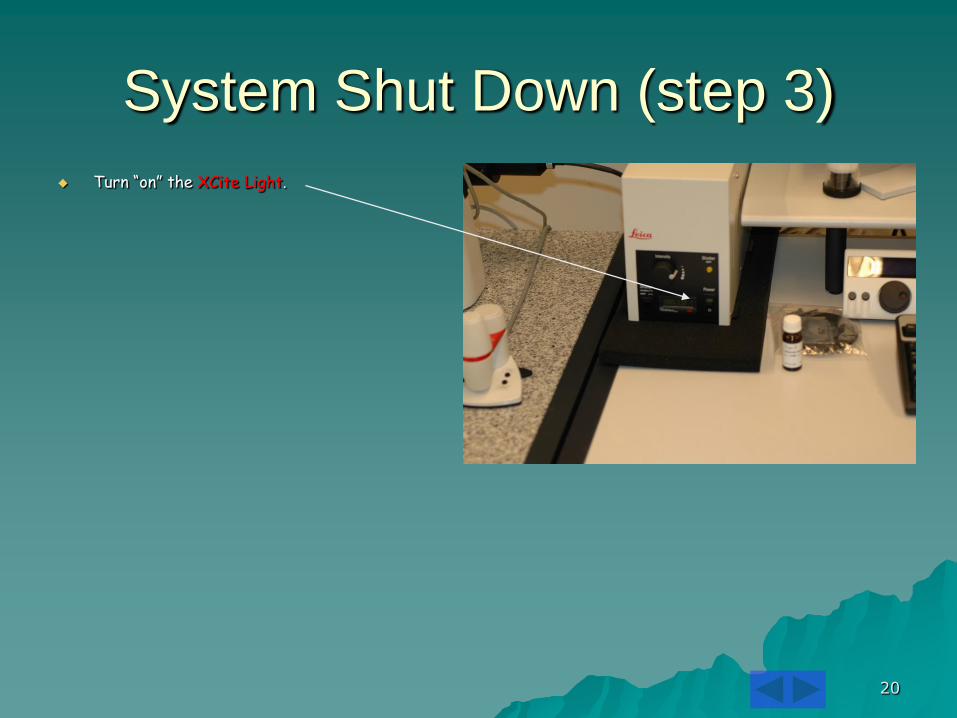
Turn “on” the XCite Light.
System Shut Down (step 3)
21
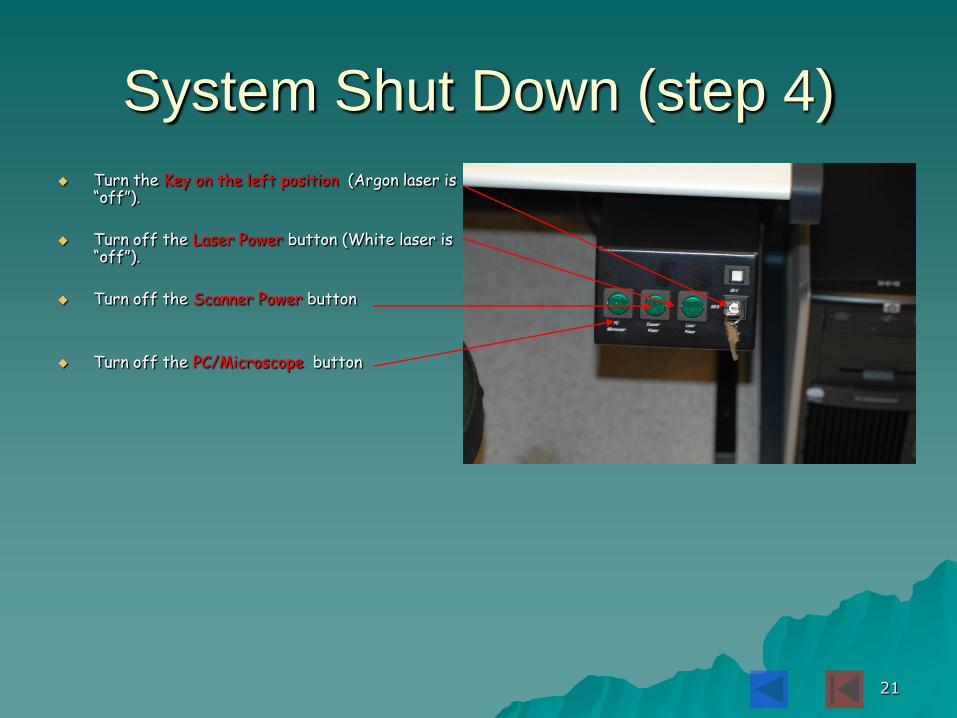
System Shut Down (step 4)
Turn the Key on the left position (Argon laser is “off”).
Turn off the Laser Power button (White laser is “off”).
Turn off the Scanner Power button
Turn off the PC/Microscope button
22
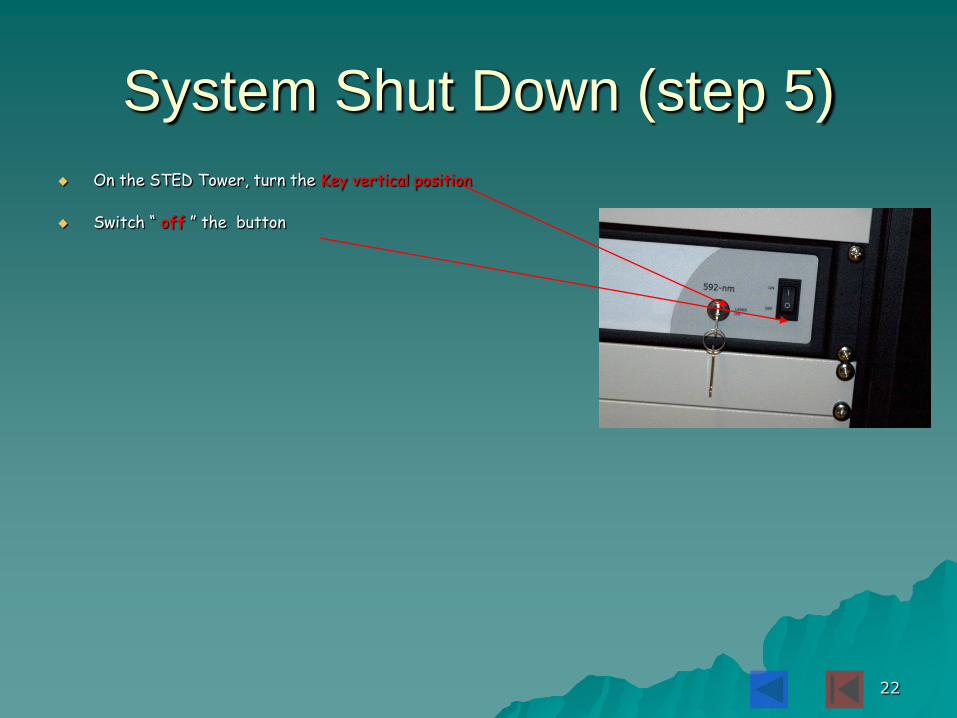
System Shut Down (step 5)
On the STED Tower, turn the Key vertical position
Switch “ off ” the button