WebDesigning'15.pdf
144
1 2 ND FLOOR, RONAK PLAZA, TULSIDHAM CHAR RASTA, MANJALPUR PH: 3290290 9328994901 B 108, MANUBHAI TOWER, OPP. M.S. UNIVERSITY, SAYAJIGUNJ PH: 3290291 / 9016667242 INDEX Part 1 HTML Part 2 DHTML Part 3 Java Script 1. Introduction to JavaScript 2. Variables and operators in JavaScript 3. Conditional Statements 4. JavaScript Loops 5. Built-in Functions 6. Array 7. User-define Function 8. Events Part 4 DreamWeaver
-
Upload
minalpatel -
Category
Documents
-
view
212 -
download
0
Transcript of WebDesigning'15.pdf

1
2ND
FLOOR, RONAK PLAZA, TULSIDHAM CHAR RASTA, MANJALPUR PH: 3290290 9328994901
B 108, MANUBHAI TOWER, OPP. M.S. UNIVERSITY, SAYAJIGUNJ PH: 3290291 / 9016667242
INDEX
Part 1 HTML
Part 2 DHTML
Part 3 Java Script
1. Introduction to JavaScript
2. Variables and operators in JavaScript
3. Conditional Statements
4. JavaScript Loops
5. Built-in Functions
6. Array
7. User-define Function
8. Events
Part 4 DreamWeaver

2
2ND
FLOOR, RONAK PLAZA, TULSIDHAM CHAR RASTA, MANJALPUR PH: 3290290 9328994901
B 108, MANUBHAI TOWER, OPP. M.S. UNIVERSITY, SAYAJIGUNJ PH: 3290291 / 9016667242
PART 1 HTML
In this chapter we shall study about HTML in general and various facilities available in HTML in the form of Tags
to write a source file for creating Web pages. Use of tags available for creation of lists and Table on Web pages
is explained in later sections of the chapter. The descriptions on tags in the chapter are in conformance with
Internet Explorer (IE) and we recommend that their use on Netscape navigator should be verified. The chapter
also mentions how to include graphics and pictures on web page by providing reference to the files containing
graphics.
After studying the chapter and performing suggested exercises you can expect to be able to write source files
for creating simple web pages.
1. What is HTML?
We have seen in the previous chapter that WWW represents a complicated network of information s
tored on very large number of computers spread around the world and connected by internet. Since the
information stored on each computer on the WEB is a mixture of text, Graphics, Pictures, sound etc. stored in
a variety of formats, an interface language, which allows easy and uniform presentation of this information in
very essential. Hypertext Markup Language is providing the facility to present the information stored on
various Web sites hosted on different Web Servers, to the prospective users in an attractive and easy to use
manner.
The term hypertext refers to the ability of handling text and graphics together by the language. The idea
behind hypertext is to be able to read text/ access information in a nonlinear fashion and jump directly to any
topic of interest regardless of its position in storage. Hypermedia is an extension of hypertext so as to support
linking of graphics, sound and images or video elements in addition to text.
The HTML mainly consists of various tags / marks to identify different elements which are to be processed by
the language processor a program that you are familiar with the name of a browser – to generate the desired
web pages layout.
Hyperlink is an element in an electronic document that either links to another place in the same document or
to and altogether different document.
A hyperlinked phrase or icons are associated with URL of the document containing the information referred to
by the link. Whenever we click the mouse on a link, the browser picks up the URL address associated with the
link and sends it on the internet for locating the documents which when found are to be transferred using
HTTP – Hyper Text transfer protocol for display.
W3C has recommended standards for HTML which, almost every browser has supported however each
browser also has their own additions to HTML and becomes proprietary coding aspects for those browsers.
The recent version of HTML is 4.0. earlier versions were level 0 –HTML, Level 1 HTML, HTML+ and the advent
or graphics HTML 2.0,HMTL 3.02, HTML 3.2.
To do programming in HTML and create web pages you need the following to start with:
1. Text Editor:- Any text processor which can save files in ASCII format can be used for writing HTML
programs Ms–word, Notepad, MS frontpages. Netscape composer, Hotdog pro etc., can be used to write
HTML source.
2. Web Browser:- Any one of the popular browser form netscape navigator, mosaic, internet explorer, web
explore, net cruiser, lynx, chimera etc., can be used.
3. Graphic Tools:- Software that enables us to create picture and save in Graphic interchange format GIF or
BMP e.g. photoshop, paintbrush etc.
4. Web Server:- Web server is essentially required when we want to store the webpages on a web site and
make them available for public access on internet. Web pages can be viewed using browser in a local
mode also in case web server is not available.
HTML is a programming language of sort, however unlike a programming language the instruction written in
HTML are not compiled by a traditional compiler but rather interpreted by a web browser.

3
2ND
FLOOR, RONAK PLAZA, TULSIDHAM CHAR RASTA, MANJALPUR PH: 3290290 9328994901
B 108, MANUBHAI TOWER, OPP. M.S. UNIVERSITY, SAYAJIGUNJ PH: 3290291 / 9016667242
An HTML file is what the web browser uses to generate a web pages. At it heart thus, the WWW is nothing but
a vast collection on HTML files residing on the hard drives of hundreds of thousands of computers spread
throughout the world, and a set of transport protocol for transferring these files from computer to computer.
HTML files are simply text files but they are different from other text files because they include special codes
called HTML tags or elements doing the work or programming instructions. The HTML tags are mostly used in
pairs as <tag> and </tag> marking the beginning and the end of an instruction respectively. The tags may also
have attributes specifying characteristic properties for display of information. You can identify the HTML tags
by searching for expressions surrounded by two angled brackets <and>. This is a characteristic of HTML tags in
general.
Structuring your HTML
HTML defines mainly three tags that are used to describe the pages overall structure of minimal HTML
Document and provide some simple “header” information. These three tags identify your page to browsers or
HTML tools. The page structure tags don’t affect what the page looks like when it’s displayed there are only
there to help tools like browser programs that interpret to filter HTML files.
Basic Document Structure:-
< Html >
< Head >
< Title > Title for the Web document < /Title>
< /Head>
< Body >
………….
…………
Content of the web page document
…………..
……………
< /Body >
< / Html >
< HTML >
The first and also the last page structure tag in every HTML document is the <HTML> tag. It indicates that the
content of this file is in the HTML language. All the text and HTML commands in your HTML page should go
within the beginning and ending HTML tags, like this:
< Html >
…………. The html source for your web pages….
< /Html >
< Head >
The < Head > tag specifies that the lines within the beginning and ending pair of the head tags are the prologue
to the rest of the file. Generally, only a few tags like < BASE >, <ISINDEX>, <LINK>, < META >, <SCRIPT >, < STYLE
>, and <TITLE> go into the head section. You should never put any of the text of your page into the header.
Here’s a typical example:
< Html >
< Head >
< Title > This is where you provide the title of your page < / Title >
< /Head >
………..
</ Html >
< Body >
The remainder of your HTML page, including all the text and other content such as links, pictures, and so on, is
enclosed within a pair of <body> and </body> tags. In combination with the < Html > and < Head > tags, your
code looks like the following:

4
2ND
FLOOR, RONAK PLAZA, TULSIDHAM CHAR RASTA, MANJALPUR PH: 3290290 9328994901
B 108, MANUBHAI TOWER, OPP. M.S. UNIVERSITY, SAYAJIGUNJ PH: 3290291 / 9016667242
< Html >
< Head >
< Title > Title of Web page < /Title>
< /Head >
………..
</ Body >
………..
Body of the web page
……….
< /Body >
< /Html >
Head Elements:-
• The < Head > Element :- The < Head > element denotes the head section of the document. The head
section contains information similar to that, which would normally be found at the top of a letter. The <
Title > element is the only essential required field. Every document must have a title. The following
elements can be used within the < Head > and < / Head >
Tags: < Base >, < Is index >, < Link >, < Meta >, <Style >, <Title > and < Script >.
• The <Title> Element:- The <Title> element gives the title of the document. Only one <Title> element can
be placed in a document. The title bar of the browser will contain what is given between the < Title > and
< /Title > tag. The title should be limited to less than 80 characters. The title of the document should not
contain any other elements such as hyperlink anchors, bold, italics, etc.
• The < Base > Element:- The < Base > element is usually the URL for the document itself. It tells the
browser where this document is located and uses the base as a starting point for resolving relative
hyperlinks and paths. The <Base> element is used to resolve other reference when the page is taken out
of context.
A relative hyperlink or path is a path that does not start with http:// or with a/. an example would be
“pages/page2.html”. if the base URL was set to http://www.indiatimes.com/book/toc.html, then the
relative path would be resolved to http://www.indiatimes.com/book/pages/page2.html”.
• Attributes:-
Href:- The Href attribute is used to specify the Hyperlink Reference. The Href needs to be the full URL
address pointing to the current document.
Example:
<Head >
<Base Href = http://www.indiatimes.com/ samples.html >
< /Head >
• The <Link> Element:- The <Link> element causes the browser to include another object into the current
document. the rel attribute is used with the link element tot specify the relationship between the current
document and the other document. An HTML document may have included zero or more < Link> element
in it. The <Link> command is cached separately form the rest of the document. This means that other
documents that use the same < link > statement won’t have to download the information again and again,
saving lots of precious computer time.
• Attributes:-
Rel : The Rel attribute shows the relationship of the < Link > to the document. It describes what the <Link> is
including. To include a banner, the attribute rel = Banner is used. This allows the banner to be shared among
several documents. The <Link > element can also be used to include style sheets by using the attribute Rel =
Stylesheet.
Href: The Href attribute specifies the URL address to the item the < Link > if referring to. It can be any valid
URL address.
Example:
< Head >
< Title > simple Title </Title >
< Link Rel = Banner Href = “banner.html”>

5
2ND
FLOOR, RONAK PLAZA, TULSIDHAM CHAR RASTA, MANJALPUR PH: 3290290 9328994901
B 108, MANUBHAI TOWER, OPP. M.S. UNIVERSITY, SAYAJIGUNJ PH: 3290291 / 9016667242
< Link Rel = Stylesheet Href = “mystyle.css” >
< /Head >
• The < Style > Element :- The < Style > element is used to include style information to the browser.
Style sheets can be used to pass information to the browser on how to display the document. The browser
uses a built–in stylesheet to display the document when not stylesheet is referenced. The <Style> element
allows the author to override the default style information by that of a stylesheet that has been included.
Style instructions usually match an HTML element name and specify how to display data tagged with that
element.
Example:
< Head >
< Style >
……. Some style instructions …….
< /Style >
< /Head >
• The < Script > Element:-The < Script > element is for including browser interpreted script code directly
into your pages.
• Attribuites:
Language: The Language attribute identifies the scripting language of the included script code.
Src : specifies the URL address of the file containing script code.
Example:
<Head >
< Script Language = “Java Script” >
…… Some javascript instructions …….
< /Script >
< /Head >
� Body Elements:-
The body section encloses all of the HTML elements except the Head elements. Some of the elements
described here are used to divide the document into section while some of them are used for
controlling the character display.
• The < Body > Element :- the < Body > element is not displayed when the document is rendered. The <
Body > element is a tag that is used to identify the body section of the HTML document. The BODY section
follows the HEAD section in an HTML document.
Attributes:
Background : The background attribute can be used to specify the URL address of an image file to be tiled as
the document background. Backgrounds can add a visual effect that can be stunning. i.e. < Body Background =
“Scence 1 jpg” >
Bgcolor :- the Bgcolor attribute may be used to specify a background colour of the document. it is different
form the background attribute in the sense that it is not gif or jpg picture that needs to be downloaded. The
colour can be specified by its name or using the hexadecimal code for the colour.
i.e. < Body Bgcolor = “Pink” > or < Body Bgcolor = “#00ff00” >
Text: The text attribute is used to set a colour for all the text that is displayed in the document. The default
color is black.
Text : The Text attribute is used to set a color for all the text that is displayed
In the document. The default color is black.
i.e < Body text = “00FF00” >
link : The Link attribute can be used to specify the colour to be used when displaying hyperlinks that have
not already been selected. The default colour is blue.
Vlink : The Vlink attribute can be used to specify the colour to be used when displaying hyperlinks that have
already been selected. The default colour is maroon.
Alink : The Alink attribute can be used to specify the color to be used when displaying hyperlinks as they are
selected. The default color is Red.
Example:
<Body Background=“flower.gpg”>

6
2ND
FLOOR, RONAK PLAZA, TULSIDHAM CHAR RASTA, MANJALPUR PH: 3290290 9328994901
B 108, MANUBHAI TOWER, OPP. M.S. UNIVERSITY, SAYAJIGUNJ PH: 3290291 / 9016667242
< Body Bgcolor=“pink” Text =“Blue” link=“Yellow”>
The < H1 > Through <H6 > Elements
The headline elements <H1>….. are used for identifying the headlines in the document. There are six levels of
headlines supported in HTML document, the first being < H1> and the last being <H6>, i.e. the size of displayed
text varies as we go from H1 to H6. The browser has different information regarding font size, and bold
defaults for each headline.
• Attributes:-
Align : The Align attribute is used to specify where on the page the headline is to be displayed.
With Align = Left (the default) the headline is displayed starting against the left margin. Other values
possible are ‘Right’ and ‘Center’.
Example:
<Body >
< H1 Align =Center > Chapter 1 </H1>
< H3 Align = Center > Introduction to HTML </H3>
< H5 Align = Left > Basic features of HTML < /H5>
</Body >
• The <Br> Element
The < Br > element is for specifying line breaks in your HTML document. The effect of < Br > tag is to
simply add a carriage return at the location of the tag. In order to add multiple blank lines in your
document you must use the < Br > element.
• The < NoBr > Element
The <Nobr >……. < /Nobr > element is the opposite of the < Br > tag. The text inside the <Nobr> tags
always remains on one line, even if it would have wrapped around to two or more lines without the
Nobr. Nobr is used for words or phrases that must be kept together on one line
Example:
<Html >
<Head >
<Title > Demo of Br and NoBr < /Title >
</Head>
<Body>
HTML document contains two things : <Br> 1) Head Elements <Br>2) Body Elements
<Br><Br>
HTML document contains two things: <NoBr>
1) Head Element <NoBr>
2) Body Element <NoBr>
</Body>
</Html>
• The < Hr > Element
The <Hr> element is used to draw lines of specified sort across the page viz horizontal ruling. Lines come
in handy to visually divide the document into sections of text.
Attributes:-
Size : The Size attribute denotes the thickness of the horizontal rule to display. It is specified in
terms of number of pexels.
Width : The width attribute is used to specify the length of the line. It can be specified in terms of
number of pixels or as percentage of the screen.

7
2ND
FLOOR, RONAK PLAZA, TULSIDHAM CHAR RASTA, MANJALPUR PH: 3290290 9328994901
B 108, MANUBHAI TOWER, OPP. M.S. UNIVERSITY, SAYAJIGUNJ PH: 3290291 / 9016667242
Align : The Align attribute is used to align the line within the page. The permissible values are : Left
/ Right / Center. The default is Center.
Color : The Colour attribute is used to specify the colour for the line.
Noshade : the noshade attribute denotes that no shading is desired when the horizontal line is
displayed.
Example illustrating use of Heading, Hr, Br Tags
<Html>
<head>
<title> Demo of heading , Hr, Br </titile>
</head>
<body bgcolor = ‘aqua’>
<H1 align = center > introduction </H1>
<Hr width = 50% align = center >
<H3 align = center> Different Headingh </H3>
<Hr color = red>
<H1> Biggest Heading </H1>
<H2> this is next bigger, heading </H2>
<H3> this is a big heading </H3>
<H4> this is a small heading </H4>
<H5> this is a smaller heading </H5>
<H6> this is the smallest heading </H6>
<Hr>
</Body>
</Html>
� The < P > (Paragraph) Element
The < P > element is used to denote paragraphs. Since the browser ignores all carriage returns and spaces (
including tabs )., the <P > element can be used to identify where new paragraphs begin. The browser usually
adds a blank line at the location of the < P > elements.
• Attributes:-
Align : Align = Left (the default) is used to specify that all lines in the paragraph are flush left when
displayed. Align = Right is used to specify that all lines in the paragraph are flush right when displayed. Align =
Center is used to center all lines when displayed. Align = Justify is used to make all lines flush right and left
when displayed. “Justify” may or may not be supported by all browsers.
Example:
<Html>
<Head>
<Title > Paragraphs </Title>
< /Head>
<Body>
< H1> paragraphs </H1>
<H2> first Paragraph </H2>
<P>
paragraph tags provide a way of separating the content of your page.
A paragraph tag first ends any previous section. Then it puts some space after the last section. finally the text
inside the tag is printed as a new section.
</P>
<P>
Notice the separation between this section and the plain text that follows.
</P>
<P>

8
2ND
FLOOR, RONAK PLAZA, TULSIDHAM CHAR RASTA, MANJALPUR PH: 3290290 9328994901
B 108, MANUBHAI TOWER, OPP. M.S. UNIVERSITY, SAYAJIGUNJ PH: 3290291 / 9016667242
This is the plain text.
</Body>
</Html>
If we execute the above source file in a web browser, then following output will be obtained.
� The <Pre > (preformatted text ) Element
The <Pre > element is used to designate a section of text that is already formatted for display. The browser
usually displays all text enclosed between <PRE> and </PRE> tags in a fixed width font like courier. The text is
displayed exactly as it appears in the HTML document.
Example:
< Body >
< P >
A simple C program:
< Pre >
#include < stdio.h >
Void main ( )
{
Int num;
Printf (“Enter the number of lines to be displayed : “);
Scanf (“%d” , & num);
}
< /Pre >
</Body >
When the above code is interpreted by the browser, it displays all text within the <Pre > and </Pre > text as it
occurs in the html file.
� The < Div > (Division) Element
The <Div > element is used to divide up the document into related sections. <Div > stands for division and
includes the Align attribute just as the headings and paragraphs do. Unlike using alignments in individual
elements, however, <Div > is used to surround a block of HTML tags of any kind, and it affects all the tags and
text inside the opening and closing tags. Two advantages of Div are as follow:
--Div needs to be used only once for everything contained between the pair rather than including Align
repeatedly in several different tags
-- Div can be used to align anything (heading,paragraphs, quotes, images, tables and so on); whereas the Align
attribute is available only on a limited number of tags.
All the HTML between the two < Div > tags will be aligned according to the value of the Align attribute. If
individual Align attributes appear in heading or paragraphs inside the DIV, those will override the global Div
setting.
� The < Font > Element
The < Font > tag is used to control the characteristics of a given set of characters not covered by the character
styles. Originally, < Font > was used only to control the font size of the characters it surrounds, but it has since
been extended to allow you to change the font itself and the colour of those characters.
• Attributes: -
Size : The size attribute indicates the size to which the font is to be changed. The range of values of size
are 1 to 7, withf the default being 3. You can also specify the size as a relative value using the + or – character
in the value for size, because the default size is 3, you can change relative font size in the range from -3 to +4.
E.g. < Font size = +2>, this will change the font size to two levels larger then the default font size. Relative font
size are actually based on a value that you can define using the < Basefont > tag.

9
2ND
FLOOR, RONAK PLAZA, TULSIDHAM CHAR RASTA, MANJALPUR PH: 3290290 9328994901
B 108, MANUBHAI TOWER, OPP. M.S. UNIVERSITY, SAYAJIGUNJ PH: 3290291 / 9016667242
Face : Face attribute is used to set the type-face of text to be displayed on screen, face takes as its value a
set of font names, surrounded by quotation marks and separated by commas. When a browser that supports
face interprets a page, it will search the system for the given font names one at a time. If it can’t find the first
one, it will try the next one and so on.
E.g < Font Face = “Futura, Helvetica, Arial” >
Color : The colour attribute is used to specify the colour to be used for that particular text.
E.g. < Font color = “Iemonyellow” >ABC </Font>
� The Look Element
The look elements deal with how the text is to be displayed, not its meaning. They are useful when you want
to italicize or bold a word or pharse.
� The < B > ( Bold ) Element
The < B > element is used to denote boldface. Bold characters make them stand out in the text.
Example:
< Body >
< B > this text appears in Bold format </B>
This text appears in a normal format.
</Body >
� The < I > (Italic ) Element
The < I > element is used to denote display of text in italics.
Example:
< Body >
< I > I appear in italics < /I >
I appear in normal style
</Body >
� The < U > ( Underline ) Element
The < U > is used for displaying text in underline mode.
Example:
< Body >
< U > HTML notes </U >
</Body >
� The < Strike > Element
The < Strike > element is used for showing strikethrough text. This is handy when you want to show that a
phrase is no longer nedded, while still allowing the text to be seen.
� The < Big > Element
The < Big > element is used to specify display of the character, word, or phrase in a larger font compared to
the rest of the text.
� The < Small > Element
The < Small > element is used to indicate display of the character, word or phrase in a smaller, font size
compared to the rest of the text.
� The < Sub > ( Subscript ) Element
The < Sub > element is for showing subscripts (i.e. those below the line ) and practically in smaller fonts.
E.g. The code to display ‘H2O’ would be:
< Body >
H < Sub > 2 </Sub > O
</Body >
� The < Sup > (Superscipt ) Element
The < Sup > element is for showing superscripts (ie. Those above the line) and practically in smaller fonts. E.g.
The code to display “IInd
“ would be:

10
2ND
FLOOR, RONAK PLAZA, TULSIDHAM CHAR RASTA, MANJALPUR PH: 3290290 9328994901
B 108, MANUBHAI TOWER, OPP. M.S. UNIVERSITY, SAYAJIGUNJ PH: 3290291 / 9016667242
< Body >
II < Sup > nd </Sup >
</body >
� Comments in HTML
Like any other programming languages you can also specify comments in your HTML document. For specifying
any commented code in your HTML document you use the “ <!—“ tag to start a comment and the “-->” tag to
mark the end of the comment.
Example:
< Body >
< H1 > Chapter -3 Advanced HTML </H1 >
<!—The rest of the code is used to format the text of this chapter -->
< B > Advanced HTML consists of the following topics : </B >
……….
……..
</Body >
In the above example the line “The rest ……” is a comment line and won’t be displayed on the web page.
� HyperLinks
Well designed and well formatted pages look nice and good, but are rather boring to read. What makes a web
site or the WWW interesting and fun is the concept of hypertext. Hypertext and hyperlinks make the flow of
the text non- linear and hence comfortable to navigate and interesting to refer to.
� The < A > ( Anchor of Hyperlink ) Element
The Anchor element is a central element of HTML. We can achieve the concept of hypertext in HTML using the
< A > ….. </A> tag. It tells what phrase is to be made into a hyperlink and the location or action that is to be
performed when the link is selected. This tag is to be used with HREF attribute specifying location where
hyperlink points to.
• Attributes:-
HREF : The HREF stands for Hypertext Reference. The location specified as the value of ‘HREF’ is the
destination of the hyperlink. The value of HREF can be any valid URL.
E.g. < A HREF = http://www.rediff.com > go to Rediff </A>
Here, when the user clicks on the phrase “ Go to Rediff “ in the web page he will be taken to the Rediff.com
web-site.
Name : The Name attribute is used to specify the location of an internal reference in a document.
E.g. < A Name = “TOC” > Table of Contents < /A > would be used to mark the location of the “Table of
Content”. A link to that place form some other location in the document would be
< A HREF = “document.html #TOC” > see the table of contents </A>
The phrase “See the table of contents” would become a hyperlink to the location designated by the name –
“TOC”. So when the user clicks on this phrase somewhere in the page then the line “ Table of contents “ will
become the first line of the page.
Example showing use of look Elements and hyperlinks:
< Html >
< Head >
< Title > Example of look elements and links < /Title >
</Head >
<Body >
<H2 > LINKS MAIN PAGE </H>
<Br >
<B > an example of links </B >
<P >
<I> <U> Links </U> </I> are what make the internet interesting. How often have you started looking for one
piece of information and ended up looking at some different home page?
< A Href = “linkref.html “ > Click here to go to some III <Sup> page. </A>
</P>
</Body >
</Html >

11
2ND
FLOOR, RONAK PLAZA, TULSIDHAM CHAR RASTA, MANJALPUR PH: 3290290 9328994901
B 108, MANUBHAI TOWER, OPP. M.S. UNIVERSITY, SAYAJIGUNJ PH: 3290291 / 9016667242
� Animated Marquees
A marquee is a line of scrolling text that moves from one side of the web page to the other. Although you can
create a marquee with just about any form fo inline animation, the < Marquee > tag allows you to create a
marquee quickly and esily.
� The < Marquee > Element
To create a marquee, use the < Marquee > tag. This is nonstandard HTML tag supported by micorsoft. The text
between the opening and closing <Marquee > tags is the text that will scroll:
< Marquee > I’m scrolling < /Marquee >
By default, a marquee appears on its own line, it the font and size of the enclosing element. So, for example,
by enclosing the marquee inside a heading, you can get a heading sized marquee.
Attributes:-
Behavior: The Behavior attribute has three values: Scroll, or Alternate. The default is scroll. Slide causes the
marquee to slide in from the right side of the screen and stop when the text hits the left margin. Alternate
starts the text on the left side of the page and bounces it back and forth between the left and right margins.
Direction: The direction attribute. Which can have the values left or Right affects only marquee of type scroll
and determines which direction the marquee initially moves in. the default is left is left (ie it moves from the
right side of the screen to the left); Direction = right reverses the direction.
Loop: The value of the loop attribute determines how many times the marquee will scroll by. For example,
Loop = 5 will scroll the marquee five times and stop.
Loop = -1 or Loop = infinite will causes the marquee to scroll forever.
ScrollAmount: It determines the speed of the marquee. It is the number of pixels between each step of the
text in the marquee. That is, the number of pixels the text moves to the right or left each time. Higher number
means the marquee moves faster.
ScrollDelay: Scroll Delay is the number of milliseconds between each step in the animation; delay higher
numbers make the animation work more slowly and less smoothly.
Bgcolor: The Bgcolor attribute determines the background colour of the marquee’s bounding box and can take
a hexadecimal RGB number or a colour name.
Height: It determines the height of the bounding box surrounding the marquee. It can take a pixel number or a
percentage of screen size.
Width: It determines the width of the bounding box surrounding the marquee. It can take a pixel number or a
percentage of screen size.
Hspace: The Hspace determines the space between the edges of the marquee’s bounding box and the
surrounding text. Hspace determines the space on either side of the marquee.
Vspace: The Vspace determines the space between the edges of the marquee’s bounding box and the
surrounding text. Vspace determines the space above and below it.
Align: The Align attribute can have values: Top / middle / bottom. It determines how the text surrounding the
marquee will align with the marquee’s bounding box.
� Images
The <IMG > element is used to include graphics in the document. these can be icons, pictures or just anything.
Graphics picture can be stored in a number of formats, of which the following two formats are the most widely
used.
--GIF (Graphics Interchange Format)
-- JPEG (Joint photographic Experts Groups)
• GIF : GIF format stores pixels row by row. So this type of format is good for pictures that use basic
colours. Cartoon type pictures work best when stroed as GIF.
• JPEG : JPEG format uses mathematical formulas to determine how to store piexels. This type of
compression- works best with photographs and other pictures where the pictures next to each other change
colours frequently.
• Attributes:-
SRC: The SRC attribute tells the location of the image to include. It canbe any valid URL that points to an
image, or the name of a file that contains an image.
i.e. <IMG SRC = http://www.yahoo.com/images/image.jpg>
Width: The Width attribute allows you to specify the width in which to display the image. It is optional. If
width does not match the width of actual document. then the image is scaled to given width. To increase

12
2ND
FLOOR, RONAK PLAZA, TULSIDHAM CHAR RASTA, MANJALPUR PH: 3290290 9328994901
B 108, MANUBHAI TOWER, OPP. M.S. UNIVERSITY, SAYAJIGUNJ PH: 3290291 / 9016667242
performance it is recommended that width be specified. It can be specified in pixels or in terms of percentage
of the container.
Height: The height attribute allows you to specify the height in which to display the image. It is optional. To
increase performance it is recommended that height be specified. It can be specified in pixels or in terms of
percentage of the container.
Align: The align attribute is slightly different here and supports more values. Align = Top, aligns the top of the
graphic with the current line of text. Align = Middle, aligns the middle of the graphic with the current line of
text align = bottom, aligns the bottom of the graphic with current text. Align= left, menas that the image will
be against the left margin and the text will flow around the image to the right. Align = right menas the image
will against the right margin and the text will flow around the image to the left.
Alt: The Alt attribute is used to display some alternate text on the page when the graphics feature is turned
off in the browser or the browser is a text based browser simply incapable of displaying graphics.
Border: The Border attribute is used to specify the width of the border around the image when the image is
within an anchor < A > element.
Hspace: The Hspace attribute is used to specify the Horizontal space around the image to reserve.
Vspace: the Vspace attribute is used to specify the vertical space around the image to reserve.
� Example of a page with an Image
< Html >
< Head >
<Title > Demo of Images </Title >
</Head >
<Body >
<Img SRC = “ford.bmp” height = 50> This image is not aligned
< P >
< Img SRC = “ ford.bmp” height =50 Align= “right” > This image is right aligned
<P >
< Img SRC = “ford.bmp” height =50 Align = “ top “ > This image is top aligned
<Img SRC = “ford.bmp” height =50 Align= “middle” > this image is middle aligned
<img SRC= “ford.bmp” height =50 Align =”bottom” > this image is bottom aligned
< P >
< Img SRC = “ford.bmp” height = 50 Align “left” > this image is left aligned
</Body >
</Html >
� Tables
Tables are advanced HTML constructs that allow you to arrange text, images, and other HTML contents into
rows and columns with or without borders. Tables have an enormous influence on how pages are designed
and constructed. Tables are used for more then just displaying a table of data. Tables can be used as
formatting tool. The data in a table can be text or images.
There are several elements or tags that need to be combined to build a table in HTML. The following four
elements are used to construct a table:
< Table > -- the table element
< Tr > -- the Table Row element
< Th > -- the table header element
< Td > -- the table Data element
� The < TABLE> Tag:- The <TABLE> element let the browser know that table follows. To create a table in
HTML, you use the <TABLE> ……. </TABLE> tags, which contain the code for the contents of the table itself.
• Attributes:-
Border: It is the most common attribute of the <TABLE> tag. It causes the table to be drawn with a border
around it. It specifies the thickness of the border in terms of pixels. Setting Border=0 means the border has no
thickness and is not displayed Borderless table are useful when you want to use the table structure for layout
purposes, but you don’t necessarily want the outline of an actual table on the page.
Width: The width attribute is used to specify the width of the table. It can be specified in number of pixels or in
terms of percentage of the page to occupy.

13
2ND
FLOOR, RONAK PLAZA, TULSIDHAM CHAR RASTA, MANJALPUR PH: 3290290 9328994901
B 108, MANUBHAI TOWER, OPP. M.S. UNIVERSITY, SAYAJIGUNJ PH: 3290291 / 9016667242
Align : The align attribute specifies the left/right alignment of the table. Align=Left means to align the table
with the left text margin. Align=Center centers the table on the page between both margins. Align=Fight
displays the table with the right text margin.
Bgcolor: This attribute is used to specify the specify the background color of the table Eg., Bgcolor=”pink” or
Bgcolor=”#A1B6C8”
Cellspacing :It specifies the spacing between two adjoining cells of the table. It is given in terms of Pixels.
Eg. Cellspacing = 2
Cellspadding : It is use to specify the padding within the cells. i.e. the area between the cell content and the
cell border. It is specified in pixels.
Eg., Cellpadding=3
� The <TR> (Table Row) Element
The <TR> element is for defining table rows.. Each table row is indicated by the <TR> tag and ends with the
appropriate closing </TR>. Each table row, in turn, has a number of table cells, which are indicated using the
<TH>…………..</TH> (for header cells ) and <TD> (for data cells). The attributes of the <TR> tag apply to the
contents of the current row only.
Attributes :
Align : The Align attribute is used to define the left/right alignment for the date displayed in each column.
Align = Left, displays text flush left.
Align = Center, displays the text in the center of the column.
Align = Fight, displays the text flush right.
Valign: The Valign attribute is used to define the top/Bottom alignment for data displayed in each column.
Valign = Top, displays the data at the top of the column.
Valign = Middle, displays the data centered from top to bottom.
Valign = Bottom, displays the data at the bottom of the column.
Bgcolor: This attribute is used to specify the background color of the ce3lls of the row Eg., Bgcolor=”light pink”
Or Bgcolor = “A1B6C8”
� <TH> (Table Header) and <TD> (Table Data) Elements
The <TH> and <TD> elements are the table cell elements. They identify the data to be displayed in the table.
Each occurrence of <TH> or <TD> within a table row defines a new column. The attributes of either of these
tags apply to that particular cell only.
Attributes :
Colspan :The cols pan attribute is used to specify how many columns the cell is to span. The default is
1.
Rowspan :The row span attribute is used to specify how many rows the cell is to span The default is 1.
Align :The Align attribute is use to define the left/right alignment for data displayed in the column.
Align = Left, displays text flush left. Flush left is the default when displaying <TD> data.
Align = Center, displays the text in the center of the column. Center is the default for <TH>
dta. Aligh = Fight, displays text flush right
Valign : The Valign attribute is used to define the top/bottom alignment for data displayed in each
Column.
Valign = Top, displays the data at the top of the column.
Valign = Middle, displays the data centered from top to bottom.
Valign = Bottom, displays the data at the bottom of the column

14
2ND
FLOOR, RONAK PLAZA, TULSIDHAM CHAR RASTA, MANJALPUR PH: 3290290 9328994901
B 108, MANUBHAI TOWER, OPP. M.S. UNIVERSITY, SAYAJIGUNJ PH: 3290291 / 9016667242
Bgcolor : This attribute is used to specify the background colour of the particular cell Eg., Bg color =
“light ping” or Bgcolor = “#A1B6C8”
Width : The width attribute is used to specify the width of the cell
Height :The height attribute is used to specify the height of the cell
Example of a Table:-
Suppose we want to display the following table :-
Then its code would be as follows:
<Html>
<Head>
<Title> Demo of Table </Title>
</Head>
<Body>
<Table Border = 2 Align=center width = 50%>
<Caption> <B> Car Details </B> </caption>
<TR>
<TH cols pan=2> Car </TH>
<TH cols pan=2> Specifications </TH>
</TR>
<TR>
<TH cols pan=2> Ford </TH>
<TH> Type: </TH>
<TD> Luxury </TD>
</TR>
<TR>
<TD row span=2 cols pan=2> <IMG SRC=”ford.bmp”></TD>
<TH> Tyres : </TD>
</TR>
<TR>
<TH> Glasses : </TH>
<TD> Dark </TD>
</TR>
</TABLE>
</BODY>
</Html>
� LISTS IN HTML
List is probably one of the most common element that you will be using HTML defines five kinds of Lists:
• Numbered of Ordered Lists – typically labeled with numbers.
• Bulleted of Unordered Lists – typically labeled with bullets of other symbols
Car Details
Car Specification
Type : Luxury
Tyres : Radial
Glasses : Dark
15
2ND
FLOOR, RONAK PLAZA, TULSIDHAM CHAR RASTA, MANJALPUR PH: 3290290 9328994901
B 108, MANUBHAI TOWER, OPP. M.S. UNIVERSITY, SAYAJIGUNJ PH: 3290291 / 9016667242
• Definition Lists – Here each item has a term and a definition for the term, arranged so that the term is
somehow highlighted.
• Menu Lists
• Directory Lists
� Ordered Lists ( <OL>___________ </OL>):
Ordered List is used where you have some specific order like steps.
It makes use of two more elements (lags ) ie.
<LH>__________</LH> ---List Header
<LI>___________</LI> ---List Item
Attribute :
TYPE : The TYPE attribute specifies the type of numbering to use. The
Acceptable values are :
‘1’ : for Arabic numerals like (1, 2, 3,…)
‘a’ : for Lowercase alphabets (a, b, c, …)
‘A’: for Uppercase alphabets (A, B, C, …)
‘i’ : for Lowercase Roman numerals (i, ii, iii,…)
‘I’ : for Uppercase Roman Numerals (I, II, III, …)
START : The START attribute specifies the starting number for the list.
<LH> : List Header
<LH> is used to identify the list header. It must appear right after the
<ol> tag.
<LI> : List Item
<LI> is used to identify a list element.
Unordered List (<UL> _ _ _ _ _ </UL>)
An unordered list is used to list items that do not have a specific order. The items are bulleted or marked with
some other symbols.
Attribute: -
TYPE : The TYPE attribute is used to specify the bullet style to use. It can take three possible values :
- - “ disc” which is
- - “ square” which is �
- - “ circle” which is
Definition Lists (<DL> _ _ _ _ </DL> ) :
The <DL> element is used for definition lists. It marks use of two more elements

16
2ND
FLOOR, RONAK PLAZA, TULSIDHAM CHAR RASTA, MANJALPUR PH: 3290290 9328994901
B 108, MANUBHAI TOWER, OPP. M.S. UNIVERSITY, SAYAJIGUNJ PH: 3290291 / 9016667242
<DL> : Definition Term and
<DD> : Definition Data
Example of an Ordered and Unordered List :
<Html>
<Head>
<Title> Demo of Lists </Title>
</Head>
<Body bgcolor= “light pink”>
<H2> Lists </H2>
<H3> An Example of Lists </H3>
<P> Lists are another way of organizing the content of your page. <Br>
An ordered list of items looks like this : </p>
<OL TYPE = “1”>
<LH> Lists in HTML : </LH>
<Li> Ordered Lists
<Li> Unordered Lists
<Li> Menus
<Li> Directories
<Li> Definition / Glossary Lists
</Ol>
<p> An unordered list of same items looks like this : </p>
<UL TYPE = “disc”>
<LH> Lists in HTML: </LH>
<Li> Ordered Lists
<Li> Unordered Lists
<Li> Menus
<Li> Directories
<Li> Definition / Glossary Lists
</UL>
</Body>
</Html>
� FRAMES :-
Using frames you can display multiple HTML documents on the screen at the same time. Using frames, you
divide a browser window into multiple parts and display a distinct HTML file in each part.
For example, using frames, you could divide your browser window into two halves and display the Netscape
home page in the left half and the Microsoft home page in the right half. Pages from the two web sites could
coexist peacefully in the same browser window at the same time by occupying two distinct frames.
Normally, however, frames are used when you want a part of the window to remain the same as user
navigates a web site. The content of one frame remains fixed, while the content of the second frame changes.
Suppose you want to provide the full text of a book on your web site. In that case, you could display the table
of contents of the book in one frame and display the text of a particular chapter in another. If users want to
jump to a particular chapter, they can simply click the name of the chapter in the table of contents frame.
Frames also can be useful for displaying advertisements. If you want to display the same advertisement on the
bottom of every page, you can create an advertisement frame. The contents of the advertisement frame can
remain fixed as users navigate in another frame to different web pages on your web sites.
Finally, a frame can be used to display a standard corporate logo at the top of each page. By using a standard
header frame, you can provide a Web site with a consistent appearance.
Frames are often unnecessary. Often, tables can be used instead. Tables have none of the disadvantages of
frames. Tables can simulate many of the effects of frames. Frames do, in fact, have some unique properties. In
general, you should use frames instead of tables in three special situations.

17
2ND
FLOOR, RONAK PLAZA, TULSIDHAM CHAR RASTA, MANJALPUR PH: 3290290 9328994901
B 108, MANUBHAI TOWER, OPP. M.S. UNIVERSITY, SAYAJIGUNJ PH: 3290291 / 9016667242
First, when you need a scrollbar, you must use frames. You can’t scroll through the contents of a table without
scrolling the whole web page, but you can scroll through the contents of a frame.
Consider the example of a web site that contains the text of a book. By using frames, you can display both the
table of contents and the text of a particular chapter at the same time. Because you can scroll through the
contents of a frame, the table of contents can remain onscreen even as you read through a lengthy chapter. By
using frames in this situation, you can display more content in the same amount of screen space than is
normally possible.
Second, if you want one part of a window to remain fixed while another part changes, then you need to use
frames. To create a portion of the browser window that’s always visible, you need to use frames.
Finally, when you want to display a complete web page from another web site, you need to use a frame.
Sometimes you want to trespass on other web sites. Getting more people to a web site is a full time obsession
of want webmasters. Once you get someone to visit your web site, you don’t want that person to leave. You
may want to display hypertext links to other sites. So how can you let people visit other web sites without
leaving your own? Display the web pages from other web sites in a frame.
So, there are some situations where frames are good or even necessary.
• Frame elements (tags):-
There are several elements used to create a document that contains frames. These are <Frameset>, <Frame>
and <No Frame>. These are describes below:
The <Frameset> Element
The <Frameset> Element is used to describe the layout of the frame in the window. Frameset may be nested.
Each frameset describes the dimensions of the frame and whether the frames are to be laid out in columns or
rows. Then the <frame> element is used to designate which URL is loaded into a particular frame.
• Attributes :-
ROWS: The rows attribute is used to divide the window into rows. The frames are created
by specifying their size in a comma separated list. The number of frames depends on the number of entries in
the list. Sizes are designated by specifying the percentage of the window to use for that frame, by specifying
the pixel width to use for the frame, or by using an * to designate the remainder of the window. For example,
ROWS = “30%, 50%, 20%” would create three frames, the first one with size 30% of the window height, the
next 50% of the window height, and the last with 20% of the window height. Using wild card sizes is similar to
percentage sizes.
ROWS = “50%, *” would make two frames, one 50 pixels wide and the other size would be whatever is left
over.
COLS: The COLS attributes is the same as ROWS except that it creates columns, not ROWS.
The <Frame> Element
The <Frame> element is used to designate the URL to load into the frame.
• Attributes :-
Src : The ‘src’ attribute specifies the URL to the page to be loaded into the frame. This can be any valid
URL, including CGI program. Leaving the URL blank will result in a blank frame.
Name : The ‘Name’ attribute is used to assign a name to the frame. This is useful because now a “Target”
attribute can be added to the anchor <A > tag to specify the destination of a URL. For example, if the frame
was named ‘Main’ by using the <Frame Name =”Main” > element and then a hyperlink us created in the TOC
frame as <A Href = “chapter.html” target = “Main”>, the HTML page
18
2ND
FLOOR, RONAK PLAZA, TULSIDHAM CHAR RASTA, MANJALPUR PH: 3290290 9328994901
B 108, MANUBHAI TOWER, OPP. M.S. UNIVERSITY, SAYAJIGUNJ PH: 3290291 / 9016667242
Scrolling: The ‘Scrolling’ attribute is used to specify whether or not scroll bars are to be displayed. The values
are Yes, No, and Auto. If Scrolling=Yes, then scroll bars are always displayed. If scrolling=No, then scroll bars
are never displayed. If Scrolling =Auto (the default), then the browser decides when scroll bars are needed.
Marginwidth: The ‘Margin width’ attribute is used to specify in pixels the width of the left and right margins
for a frame.
MarginHeight: The ‘Margin height’ attribute is used to specify in pixels the width of the top and bottom
margins for a frame.
Noresize: The ‘No resize’ attribute is used to indicate that the frame cannot be resized by the user. This usually
affects most frames in the window since any adjoining frame cannot be resized where they will affect the no
resize frame.
The < No frames >Element
The < No frames >Element is used to specify text for browsers that cannot display frames. The ending tag is
required, With a frames capable browser, the browser ignores the <No frames> element and does not display
the text is contains, For a browser that does not support frames, the <Frames> element is ignored and the text
within the <No frames> element is displayed.
Dividing a Window into Frames
You should think of frames as the different panes in the window of glass. A frame is a particular portion of the
browser window. A browser window can be divided into as many separate frames as you feel necessary. An
individual frame can even be divided into other frames, resulting in nested frames.
To create distinct frames in a browser window, you need to create a special HTML file called a frameset file. A
frameset file doesn’t appear in a Web browser itself. The frameset file specifies how other Web pages should
appear in a browser. Following is an example of a simple frameset file.
<Html>
<Head>
<Title> simple Frames </Title>
</Head>
<Frameset Rows = “100%” Cols = “50%, 50%”)
<Frame Src = “mypage1.html”>
<Frame Src = “mypage2.html”>
</Frameset>
</Html>
When this frameset file is loaded into a browser, the browser displays the HTML files mypage1.html and
mypage2.html. These two files are normal HTML files. The frameset file tells the browser that these files
should appear in two separate frames. Unlike a normal HTML file, in frameset file there’s no <BODY> tag. In
frameset file, the <Frameset> Tag replaces the <Body> tag In fact you should never use a <Body> tag in the
main portion of a frameset file. If you do; the browser will attempt to interpret the frameset file as a normal
HTML file
The <Frameset > tag specifies the manner in which the frames should appear in a browser window. The tag
decides the browser window into rows and columns In this example, the browser window is divided into one
row and two columns. The attribute Rows = “100%” creates one row that covers the complete height of the
browser window the attribute Cols = “50%,50%” creates two columns. Each of which covers 50% of the width
of the window.
You can divide a window into as many separate Cols and Rows as you need. Every new division result in a new
frame Remember however, that too many frames can make a mess of a browser window.
For the attributes rows and Cols you can also specify absolute pixel widths. Here’s an example of a frameset
file that creates a frame that’s 200 pixels wide:
<Html>
<Head>

19
2ND
FLOOR, RONAK PLAZA, TULSIDHAM CHAR RASTA, MANJALPUR PH: 3290290 9328994901
B 108, MANUBHAI TOWER, OPP. M.S. UNIVERSITY, SAYAJIGUNJ PH: 3290291 / 9016667242
<Title>Simple frames </Title>
</Head>
<Frameset Rows = “100%” Cols = “200,*”>
<Frame Src = “my page.html”>
<Frame Src = “my page2.html”>
</Frameset>
</Html>
The attribute Cols = “200,*” specifies that the browser window should be divided into two columns. The first
value of the attribute specifies that the first frame should be 200pixels wide. The second value, the asterisk,
specifies that the second frame should occupy the remainder of the screen. You can use more than one
asterisk in the list of caules for the remainder of the screen. You can use more than one asterisk in the list of
values for the Row of Col attribute. Each additional asterisk divides the screen into another equal amount.
The <Frame> tag specifies which HTML pages to load into the separate frames. The SRC attribute points to an
HTML file residing on the same Web site of any where else on the World Wide Web. Particular HTML files are
associated with individual frames according to the order in which they appear So, in this example, the file my
page 1. Html appears in the first column, and the file mypage2.html appears in the second column
• Frames and Older browsers:-
The frameset file creates a compatibility problem with older problem with older browsers because the
frameset file is no a normal HTML files. If you attempt to add normal HTML tag to this file, you get
unpredictable results.
This creates a dilemma. You want the frameset file to be compatible with browsers that understand frames
and browsers that don’t. If you use only the frame tags in a frameset file. This will be incompatible with older
browsers. On the other tags the file will no longer function as a proper frameset file fortunately a hand if you
use additional non frame HTML tags, the file will no linger function as a proper frameset file fortunately. A
special tag was introduced to solve this dilemma. By using the <No frames> tag you can create frameset file
that are compatible with both frame-compliant and non frame-compliant browser.
Here’s an example of how this tag works:
<Html>
<Html>
<Title> Simple Frames </Title>
</Head>
<Frameset rows = “100%” Cols=”5%”,”50%”>
<frameset src=”my page 1.html”>
<frame src=”mypage2.html”>
</frameset>
<No frames>
<body bg color=”pink”>
1 can only be seen in older browsers!
</Body>
</no frames>
</Html>
When this frameset file is interpreted by a frame- compliant browser, the browser ignores everything
contained in the <No frames> tags. However, if the file somehow gets to an older browser that can’t
understand frames, the browser ignores everything except what’s contained in the <No frames> tgs. You can
place any HTML tag you want within the <No frames> tags.
Frames and Links:-
Suppose you want to create a Web sit e containing the complete text of a book. You create two frames in the
left frame, you create a list of hypertext links to chapters in the book. In the fight frame you display the actual
text of a chapter. You can use the two book. In the right frame you display the actual text of chapter. You can
use the two HTML files shown in listings to create the frameset file and the table of contents file.
The frameset file:

20
2ND
FLOOR, RONAK PLAZA, TULSIDHAM CHAR RASTA, MANJALPUR PH: 3290290 9328994901
B 108, MANUBHAI TOWER, OPP. M.S. UNIVERSITY, SAYAJIGUNJ PH: 3290291 / 9016667242
<Html>
<Head>
<Title> A Great Book on Html </Title>
</Head>
<Frameset rows = “100%” Cols=”5%”,”50%”>
<frameset src=”toc.htmll” Name=”Toc”>
<frame src=”chapter1.html” Name=”chapter” >
</frameset>
Contents of toc.html file
<Html>
<Html>
<Title> Table of Contents </Title>
</Head>
<Body>
<UL>
<Li> < A Href=”chapter1.thml” Target=”chapter”> Chapter 1 </A>
<Li> <A Href = “chapter2.html” Target=”chapter”> Chapter2 </A>
<UL>
</Body>
</Html>
The contents of chapter 1.html file
<Html>
<Html>
<Title> Contents of Chapter 1</Title>
</Head>
<Body bg color=”pink”>
<B> This is the chapter frame</B>
<UL>
<Lh> < B>Overview of Html :</B></Lh>
<Li> Basic Html </Li>
<Li>Table</Li>
<Li>Forms</Li>
<Li>Frames</Li>
<Li>Style sheets</Li>
</Body>
</Html>
When the frameset file is displayed in a browser you see the two pages as you should By default when you
click a hypertext link in a frame the new page loads into the same frame Sometimes this is what you want to
happen. Often, however, you want the page to load into another frame. In the current example you want the
chapter text to load into the right hand frame rather than the left hand frame you can make this happen by
targeting particular frames by name.
You specify the name of frame by using the NAME attribute of the <Frame> tag. Once you have named a frame
you can target it by using the TARGET attribute of the <A> tag; The NAME and TARGET attribute force the
hypertext link and pages to behave correctly. When someone clicks a link in the frame named TOC, the chapter
text loads into the frame named CHAPTER. The TARGET attribute of the <A> tags causes the hypertext links to
target the correct frame.
� Image Maps:-
The home pages of many web sites include an image that you can click to navigate to different section of the
web site. For example, the image might include icons representing a new section, a chat section and a file
downloaded section. If a visitor to the web site wants to move immediately to the news section from the home
page, he or she can simply click the news icon. The image that contains these icons is called an image map.

21
2ND
FLOOR, RONAK PLAZA, TULSIDHAM CHAR RASTA, MANJALPUR PH: 3290290 9328994901
B 108, MANUBHAI TOWER, OPP. M.S. UNIVERSITY, SAYAJIGUNJ PH: 3290291 / 9016667242
The related use of image maps is for creating navigation bar on the top of every page on a web site. The
navigation bar contains a menu of the site’s main section. User can use a navigation bar to quickly and easily
navigate to an area of interest.
There are two types of image maps: server side and client site. When you use a server side image map, the
server determines what action to take when a user clicks a region of the image. In a client side image map, the
browser determines what action to take. Server side image map are compatible with more browsers, but client
side image maps are much faster. Both types of image maps are easy to create.
• Server side image maps
Server side image maps are compatible with even the older browser. The only disadvantage of Server side
image map is that they are significantly slower than Client side image maps.
Three steps are involved in creating a Server side image map.
1. Create /get the image.
2. Include the correct HTML tag in the html file.
3. Create a map file.
You can use any type of image in an image map. Typically GIF files are used, but you can use JPEG image as
well. You can create the image using any paint programs that support the standard web image format.
The second step in creating Server side image map is to include the necessary image tag in html file. You
specify that an image should be treated as Server side image map by using the ISMAP attribute of the <IMG>
tag.
<Html>
<Head>
<Title> Server side image map</title>
</head>
<Body>
<A href=“map1.map”><IMG SRC=”image1.jpg” ISMAP > </A>
</body>
</html>
The image “image1.jpg” is the image that will be displayed as the image map. The attribute ISMAP warns the
browser to interpret the image as an image map rather than as a normal image.
The final step in creating a Server side image map is to create a map file. A map file is a normal text file with
the extension .map. You can create map files by using any normal text editor.
In a map file the different areas can be specified in the shape of rectangle, circle, polygon or even individual
points.
The code rect is used to associate a rectangular area.
The code circle is used to associate a circular area.
The code poly is used to associate a polygon area.
• Client –Side Image Maps
A client –side image map can be used for exactly the same purpose as a server –side Image map .However, a
client –side image map is much faster.
In a client –side image map ,the map file is specified with HTML tags. You create the map file by using the <
MAP > and < AREA > tags., as in this example;
< Html >
< Head >
< Title >Client –Side Image Map < /Title >
</Head >
<Body >
< Map Name =’’ Map’>
< Area Shape =’’rect’’ Coords =’’0,0, 100’’ Href = ‘’/ news.html’’>

22
2ND
FLOOR, RONAK PLAZA, TULSIDHAM CHAR RASTA, MANJALPUR PH: 3290290 9328994901
B 108, MANUBHAI TOWER, OPP. M.S. UNIVERSITY, SAYAJIGUNJ PH: 3290291 / 9016667242
< Area Shape =’’circle’’ Coords =’’50, 50, 20’’ Href =’’/ chat. Html ‘’>
<Area Shape =’’ poly’’ Coords =’’ 200, 0 400, 0 400, 100 200, 100 200, 0’’
Href =’’/help. help’’>
<Area Shape= “rect” Coords =’0.0. 10. 10’ NOHREF>
</ Map >
</ Body >
</ Html >
The < Map > tag is used to contain the <Area > tags and provide a name for the map. Each< Area > tag defines
an area on the image and associates the area with a particular address (URL). In the < Map > tag, the ‘’ Name’’
attribute is used to provide a name for the map. In the above example ‘’ Map1’’ is the name of the map. The
region or the area to be mapped can be specified using the ‘’ SHAPE’’ attribute. The shape attribute can have
the following valued:
- “rect” for a rectangular region
-“circle” for a circular region
- “poly” for a area of a polygon
In this example, the first rectangular area begins at the upper- left edge of the image and extends 100 pixels
across and 100 pixels down. If someone clicks in this area, then the News.html file is loaded.
The area of circle is specified by providing the x, y coordinates values of the center of the circle, followed by
the radius of the circle. The area of the polygon is given by a string of x, y coordinates that defines the vertices
of the polygon.
Notice the NOHREF attribute used in the last <Area> tag. This attribute is used to Specify a dead zone in the
image map. If someone clicks this area, no file is loaded.
In this example, the last<Area> tag is used to cut a hole in the rectangle specified in the first <Area> tag. (This
attribute is useful when you’ re attempting to define complex shapes within an image map. )
� FORMS :-
Forms allow you to gather and collect data from the user and return that data to a CGI program. Once, the
data is collected by the CGI program, the possibilities are almost endless as to what processing can take place.
The <FORM> Element
The <Form> element is used to start a form. There are several elements the are used within the < Form >
element. The <Form> element specifies what program to run when the form is submitted and how the data is
to be transferred.
• Attributes:-
Action : The action attribute specifies what program or HTML file is to be called when the submit button is
pressed. The action is specified as a URL.
Method : The method attribute specifies the protocol to be uses when the client sends the data to the
server. There are two choices, Method – (the default ) or Method = get. The basic difference is how the CGI
program gests the fields. Method =Get stores all the data in the environment variable called Query- String.
With Method =Post, The CGI Program reads the data from STDIN.
The < INPUT> Element
The <Input > element is used to specify almost all the input type on the form. The different boxed (radio
buttons, text boxes, check boxes, etc.) are defined using the <Input> element.
• Attributes :-

23
2ND
FLOOR, RONAK PLAZA, TULSIDHAM CHAR RASTA, MANJALPUR PH: 3290290 9328994901
B 108, MANUBHAI TOWER, OPP. M.S. UNIVERSITY, SAYAJIGUNJ PH: 3290291 / 9016667242
Name: the name attribute is used to specify the name of the field.
Value : the value attribute is used to specify a default value for the field.
Type : the type attribute is used to specify what type of input mechanism is to be drawn on the screen. The
permissible values are as follows :
Text : the text value is for a one-line text field. The user may enter up to one line of text, with no return. The
Maxlength attribute us used to limit the number of characters allowed in the box.
Password : the password value is used for entering a password. The text types in the box is not displayed.
Instead you see asterisks all over.
Checkbox : the checkbox value provides the user with two choices, selected or not selected. The value
attribute is required when using a type checkbox. If the box is selected, the value is returned to the server.
Radio: the radio value is used to select one of many from a set of choices. The value attribute is required when
using a type of radio. For radio buttons the name of the different buttons must be the same.
Submit : The submit value is used to draw a button on the screen that the user can select once the form is
completed. The value attribute is used to specify the text displayed on the button.
Reset : The reset value is used to draw a button on the screen that the user can select to reset the form to its
original default values. The values attribute is used to specify the text displayed on the button.
Image :- Forms also give you an alternate way of implementing image maps using the type = Image attribute.
Use type = Image with the SRC attribute which indicates the pathname or URL to an image. Images in forms
behave just like image maps; when you click somewhere on the image, the form is submitted back to the
server. The coordinated of the point where you clicked are submitted as part of that Form data, with the value
of the name attribute included twice with .x and .y appended for each coordinate.
Checked : the checked attribute is used with radio buttons or check boxes to set the initial value to be
selected.
Size : the size attribute is used to set the visible width of the text and password boxes that are drawn on the
screen.
MAXLENGTH : the maxlength attribute is used to specify the maximum number of characters allowed in the
text or password fields.
SRC : the src attribute specifies a URL to an image to be used as the background of the submit or reset buttons.
ALIGN : the Align attribute describes where on the screen data is displayed. There are three possible values for
align. Align = left is used to display the data flush left. Left is the default. Align = right is used to display the data
flush right. Align = Center is used to display the data centered.
The <textarea> element:-
The <text area> element is used to add multiple lines input boxes to your form. All the text between the
<textarea>starting tag and the </textarea> ending tag is used as default text. User can make use of return key
anywhere in the text.
• Attributes :-
Name : the name attribute specifies the name of the field.
Rows: the rows attribute specifies the number of rows to display on the screen.
Cols : the cols attribute specifies the number of columns to display on the screen.
The <select> element:-

24
2ND
FLOOR, RONAK PLAZA, TULSIDHAM CHAR RASTA, MANJALPUR PH: 3290290 9328994901
B 108, MANUBHAI TOWER, OPP. M.S. UNIVERSITY, SAYAJIGUNJ PH: 3290291 / 9016667242
The <select> element is used to add pull down or scroll label. List to your form. The <option> element is used
to add options to the list.
Attributes :-
Name : the name Attribute is used to name the field.
Multiple : the multiple Attribute is used to specify whether or not multiple items from the list may be
selected. Without the attribute multiple, only one item from the list may be selected.
Size : the size attribute specifies the number of lines option to display. The default is one, and a pop-up list is
created. To or more produces a scrolling box
The <Option > Element
The <Option > element is used to place items on the <select >list.
• Attributes : -
Value : The value attribute specifies the value to return when that item in the list is selected.
Selected : The selected attribute is used to select a default item from the list.

25
2ND
FLOOR, RONAK PLAZA, TULSIDHAM CHAR RASTA, MANJALPUR PH: 3290290 9328994901
B 108, MANUBHAI TOWER, OPP. M.S. UNIVERSITY, SAYAJIGUNJ PH: 3290291 / 9016667242
PART 2 DHTML
This chapter explains some advance features available in HTML for efficient source code. Writing and
formatting features using style sheets to be included in webpage development.
Cascading Style Sheets
Cascading Style Sheets (CSS) have the potential of dramatically altering the appearance of the World Wide
Web. Using cascading style sheets, You can gain precise control over the style of each of the element of your
Web page. Style sheets alter the fundamental character of HTML by enabling you to treat HTML more like a
traditional page-formatting language.
With style sheets, you can control such elements of traditional page design as precise margins, paragraph
indentation, and fonts. Style sheets not only allow you to specify the appearance of an individual Web page,
but can also be used to provide a whole Web site with a consistent overall look.
You can safely use style sheets without worrying about their effect on older browsers. Style sheets have the
important property of graceful degradation. Browsers that don’t understand them will simply ignore them. To
use style sheets effectively, you must invest a considerable amount of time in experimenting. In many cases,
the implementation of CSS in both browsers remains extremely quirky.
Style Sheet Types
Basically there are three ways we can set styles for the html tags.
a) Inline
b) Internal
c) External CSS
Inline Styles
This kind of style takes values inline with the html tag.
e.g:
<font style="color: red; background-color: orange;"> Hello BIT </font>
Internal Stylesheet
A style sheet is a list of rules that determine the appearance of the elements of a Web page. For example,
suppose you want to really emphasize all the bold text in a Web page You want all bold text to appear in the
color red. Using a style sheet, you can supply a browser with the rule that all bold text should appear in red, as
in following example:
<Html>
<Head>
<Title> Simple Style</Title>
<Style>
B { color: red }

26
2ND
FLOOR, RONAK PLAZA, TULSIDHAM CHAR RASTA, MANJALPUR PH: 3290290 9328994901
B 108, MANUBHAI TOWER, OPP. M.S. UNIVERSITY, SAYAJIGUNJ PH: 3290291 / 9016667242
</Style>
</Head>
<Body>
<B> I am bold and red </B>
</Boy>
</Html>
When this HTML file is interpreted in a browser that can understand style sheets, the tex within the <B> tag
appears in red. The <STYLE> tag contains the list of rules for the style of the Web page. In this example, there’s
a single rule:
B { color: red }
This rule has two parts.
The first part of the rule,B,is called the selector. A selector is used to select the elements in a Web page that
the rule affects. In this example, the B selects all < B > tags that appear in the HTML file. This rule determines
the behavior of every < B > tag.
The second part of the rule is called the declaration. A declaration contains a property and a value. In this case
the property is color and the value is red. According to this rule, the color property of every < B> tag should be
set to the color red.
All rules have this general format one of more selectors is used to pick our elements in the Web page. The
selector is followed by a single space. Next, a property and value are separated by a colon and wrapped in
braces ( { } ).
As mentioned earlier, you can use style sheets without worrying about their effect on older browsers. Older
browsers simply ignore the < Style > tag itself. However, an older browser might display the list of rules
contained within the <Style > tag. To prevent this form happening, you should always place HTML comments
around the list of rules like this:
<Html>
<Head>
<Title> Simple Style</Title>
<Style>
<!--
B {color: red}
-- >
</Style>
</Head>
<Body>
<B> I am bold and red </B>
</Boy>
</Html>
Browsers that can understand style sheets are smart enough to look inside the comment tags to get the style
rules. Older browsers completely ignore what’s between the comment tags and don’t display the text of the
rules onscreen.
Adding Style to an HTML Tags
You can apply a style rule to almost any HTML tag. For example, suppose you want all the text in a list to
appear in red. You can do this by using the following rule:
<Html>
<Head>

27
2ND
FLOOR, RONAK PLAZA, TULSIDHAM CHAR RASTA, MANJALPUR PH: 3290290 9328994901
B 108, MANUBHAI TOWER, OPP. M.S. UNIVERSITY, SAYAJIGUNJ PH: 3290291 / 9016667242
<Title> Simple Style</Title>
<Style>
<!--
B { color: red }
OL { color : red }
-- >
</Style>
</Head>
<Body>
<B> I am bold and red </B>
< OL >
< Li > I am red.
< Li > So am I
< /OL>
</Body>
</Html>
In this example, the single rule OL { color: red } affects the color of every item listed.
If you have more than one list, the items in those lists appear in red as well.
Both of the rules in this style sheet have the same effect on the elements they select. The first rule makes
everything contained in every < B > tag red; the second rule makes everything contained in every ordered list
red. To save typing, you can combine the two rules into one ,
B OL { color; red }
Rules can determine the behavior of many properties other than color For example, you can create a rule that
says that all top headings should appear in a 24-point Arial typeface with a yellow background.
<Html>
<Head>
<Title> Simple Style</Title>
<Style>
<!--
H1 {font-style: Italic; font-size: 24pt;
-- >
</Style>
</Head>
<Body>
<H1> important information</H1>
This document contains very important information.
</Body>
</Html>
The single rule in this example creates all the formatting effects on the text contained in the heading. The
declaration of this rule contains a number of property and value pairs separated by semicolons. In this way,
you can combine as many property and value pairs in a single declaration as you need.
You also can apply style rules to both the < P > and < Body > tags. When you apply a rule to the <Body>tag, the
rule affects everything contained in the body of the document.

28
2ND
FLOOR, RONAK PLAZA, TULSIDHAM CHAR RASTA, MANJALPUR PH: 3290290 9328994901
B 108, MANUBHAI TOWER, OPP. M.S. UNIVERSITY, SAYAJIGUNJ PH: 3290291 / 9016667242
When a rule is appli9ed to the <P> tag, it affects only what’s contained in the tag. Here’s an example:
<Html>
<Head>
<Title> Simple Style </Title>
<Style>
<!—
Body {font-size:24pt}
P {font style: italic}
-->
</Style>
</Head>
</Body>
This text is above the paragraph.
<P> This text is inside the paragraph. <P>
</Body>
</Html>
When this HTML file is displayed in a browser, all the text appears in 24 point font. Even the text within the
<P> tag appears in a 24 point font, because the <P> tag contained within the <body> tags. However only the
text that appears in the <P> tag is in italic.
HTML <div> tag
Function:
The HTML <div> tag is used for defining a section of your document. With the div tag, you can group large
sections of HTML elements together and format them with CSS.
The difference between the div tag and the span tag is that the div tag is used with block-level elements whilst
the span tag is used with inline elements.
Example:
<div style="background-color:orange;text-align:center">
<p>Navigation section</p>
</div>
<div style="border:1px solid black;text-align:right ">
<p>Content section</p>
</div>
This will produce following result:
Navigation section
Content section
HTML <span> tag Function:
The HTML <span> tag is used for grouping and applying styles to inline elements.
There is a difference between the span tag and the div tag. The span tag is used with inline elements whilst the
div tag is used with block-level content.
Example:
<p>This is a paragraph <span style="color:#FF0000;">
BIT Manjalpur, Vadodara.</span>
This is a paragraph</p>
<p><span style="color:#6600ff;">
This is another paragraph</span></p>

29
2ND
FLOOR, RONAK PLAZA, TULSIDHAM CHAR RASTA, MANJALPUR PH: 3290290 9328994901
B 108, MANUBHAI TOWER, OPP. M.S. UNIVERSITY, SAYAJIGUNJ PH: 3290291 / 9016667242
This will produce following result:
This is a paragraph BIT Manjalpur, Vadodara This is a paragraph
This is another paragraph
The primary difference between the SPAN and DIV elements is that SPAN doesn’t do any formatting of it’s
own. The DIV element includes a paragraph break. The SPAN element simply tells the browser to apply the
style rules to whatever is within the SPAN.
Adding Style to a Class of HTML Tag
Suppose you need to apply a rule to certain paragraphs in a web browsers, but not to all of them. For example
you may want the first paragraphs to appear in 24 point and the second paragraph to appear in 14 point type.
To do this with style sheets, you need a way to distinguish between different instance of the <P> tag.
A special attribute was introduced for this purpose. Every HTML tag has a CLASS attribute. The Class attribute
is used to divide tags into different classes.
Example :
<html>
<head> <title> simple style </title>
<style>
p.firstclass {font-size: 24 pt}
p.secondclass {font-size: 24 pt}
</style>
</head>
<body>
<p class = “first class”>
I am the first paragraph and I formatted with 24 point.
</p>
<p class = “second class”>
I am the second paragraph and I formatted with 14 point.
</p>
</body>
</html>
Adding Style to Classes
You can also associate a rule with a class that isn’t associate with any particular tag.
Example:
<Html>
<Head> <title> simple style </title>
<Style>
.free class {font-size: 24 pt}
</style>
</head>
<Body>
<B class = “free class”>
I am bold and I formatted with 24 point.
</p>
<p class = “free class”>
I am the second paragraph and I formatted with 14 point.
</p>
</body>
</html>

30
2ND
FLOOR, RONAK PLAZA, TULSIDHAM CHAR RASTA, MANJALPUR PH: 3290290 9328994901
B 108, MANUBHAI TOWER, OPP. M.S. UNIVERSITY, SAYAJIGUNJ PH: 3290291 / 9016667242
In this example both the <B> tag and <P> tag are associate with the same class. Don’t forget to add the initial
period when specifying the class selector in the rule.
Adding Style to HTML tags depending on Context
Suppose you want bold text in a list to appear in the courier typeface. However you don’t want text to appears
in courier outside the list or when the text in not bold. You can specify that a rule should be applied only in
certain context. For example you can define a rule that affects text only when the text appears in bold and a
list, but not in other context.
Example:
<html>
<head> <title> simple style </title>
<style>
UL B {font-family: courier}
</style>
</head>
<Body>
<B >
I am bold but not in courier typeface.
</B>
<UL>
<LI> I am plain but I am <B> bold and use courier </B>
<LI> Yes, but I am <B> bold and use courier </B> as well.
<UL>
</body>
</html>
Addding Style with SPAN and DIV
Suppose you want the first half of the paragraph to appear with the courier typeface and the second half of
the paragraph to appear with the Arial typeface. Here the problem is that you don’t want to associate a style
with the whole paragraph, you want to associate styles with different logical divisions of the paragraphs.
A special tag exists that you can use to associate style rules with particular portion of an HTML document.
Using the <span> tag, you can associate a style with different divisions within a block of text.
Example:
<Html>
<Head> <title> simple style </title>
<Style>
.courier part {font-family: courier}
.aria part {font-family: areal}
</style>
</head>
<Body>
<p >
<span class = courier part>
I am first part of this paragraph.
<span class = aria part>
I am second part of this paragraph.

31
2ND
FLOOR, RONAK PLAZA, TULSIDHAM CHAR RASTA, MANJALPUR PH: 3290290 9328994901
B 108, MANUBHAI TOWER, OPP. M.S. UNIVERSITY, SAYAJIGUNJ PH: 3290291 / 9016667242
</p>
</body>
</html>
The sole purpose of the <span> tag is to surround other elements of your HTML code so you can apply styles to
them.
The <div> tag also functions to create logical divisions in HTML document. Unlike the <span> tag, however the
<div> tag introduces a line break both before and after the HTML elements it contains.
Identifier
When we use universal styles it will set style for all the tags of that type.
But many times we will want to set different styles at different positions for the same type of tag.
That when we use identifiers.
If we use internal styles with identifiers, we have to set the id for the style to take effect.
Example:
<head>
<style>
a#test1
{
color: red;
background-color: orange;
}
a#test2
{
color: green;
background-color: yellow;
}
</style>
</head>
<a href="index.php" id=test1> Index </a><br><br>
<a href="index.php" id=test2> Index </a>
External Stylesheet
You can place your style rules in a separate file and apply the same rules to multiple documents. This is a
powerful feature of style sheets. By using the same style rules for the multiple pages you can provide your web
site with a consistent overall look.
You can create a style sheet file by creating a file that contains nothing but style sheet rules. You shouldn’t
include the <style> tag or any other html tags in this file. For ex: consider a style sheet-
H1 {color: green; font-family: Arial}
P {font-family: impact}
.Title {background: grey; color: red; font: bold 14pt “Comic Sans MS”}

32
2ND
FLOOR, RONAK PLAZA, TULSIDHAM CHAR RASTA, MANJALPUR PH: 3290290 9328994901
B 108, MANUBHAI TOWER, OPP. M.S. UNIVERSITY, SAYAJIGUNJ PH: 3290291 / 9016667242
Create a new file that contains nothing but these three rules. You can save the file with any name. You should
give it the extension (.css). Save above file as mystyle.css.
Example:
<Html><head><title>HTML FILE</title>
<link type=”text/css” href=”my style.css” rel=style sheet title=”my style”>
</head>
<Body>
<div class=title>I am title of this document</div>
<H1>First section</H1>
<P>I have the impact type face</P>
</body>
</html>
CSS Comment
CSS Commenting is very simple as any other language.
Add your comments in between /* and */.
Here is an example of how to have comments
/*This is how to add the comment in css style sheet*/<br>
/* This is the header row style */
Background Properties
Color
Usage:
color: red;
color: rgb(125,234,124);
color: #343434;
Definition:
Colors for html font/text can be set using the css tag "color".
It accepts values in three formats
a) Color name
b) rgb(x,y,z) where x,y,z is red,green,blue
c) #xxyyz where xx,yy,zz points to hexadecimal(hex) values of red,green,blue
Examples
The following examples will show on how to set color for a font or text in html using css.
<div style="color: green;"> color name </div>
<div style="color: rgb(125,125,125);"> color using rgb(x,y,z) </div>
<div style="color: #343434;"> color using hex values</div>

33
2ND
FLOOR, RONAK PLAZA, TULSIDHAM CHAR RASTA, MANJALPUR PH: 3290290 9328994901
B 108, MANUBHAI TOWER, OPP. M.S. UNIVERSITY, SAYAJIGUNJ PH: 3290291 / 9016667242
BackGround Color
Usage:
background-color: red;
background-color: #343434;
background-color: transparent;
Definition:
Background Color in html can be set using the css property background-color.
It accepts values in two formats
a) Color name
b) #xxyyz where xx,yy,zz points to hexadecimal values of red,green,blue
c) Transparent background can also be set in css.
Examples
Example 1:
<font style="background-color: green;"> color name </font>
Example 2:
<font style="background-color: #888888;"> html text background using css</font>
Example 3:
<font style="background-color: transparent; color:green;"> transparent backgrounds can also be
given using css</font>
BackGround Image
Usage:
background-image: url('image.jpg');
background-image: none;
Definition:

34
2ND
FLOOR, RONAK PLAZA, TULSIDHAM CHAR RASTA, MANJALPUR PH: 3290290 9328994901
B 108, MANUBHAI TOWER, OPP. M.S. UNIVERSITY, SAYAJIGUNJ PH: 3290291 / 9016667242
Background Image can be set using the tag background-image.
It takes the image in url as said in the example.
a) Url("image directory"). We have to set the image path inside the tag url. It accepts either of the
given values.
b) None, if no background image is required.
Examples
Example 1:
<div style="background-image: url('test.jpeg');"> color name <br><br><br></div>
Example 2:
<font style="background-image: none; background-color: green; "> color using hex values
<br><br><br><br></font>
Background Repeat
How to set the background image with out repeating in html?
Repeat background image in vertical direction only.
Repeat background image in horizontal direction only.
Explanation
This tag sets the property of how the background image should look.
Depending on this tag the image might repeat in horizontal or vertical or both directions
It takes any of the following values.
a) repeat : This value tells the image to be repeated in both directions
b) repeat-x : This value tells the image to be repeated in vertical direction only
c) repeat-y : This value tells the image to be repeated in horizontal directions
d) no-repeat : This value tells that the background image should not be repeated
Example 1:
<div style="background-image: url('test3.jpg'); background-repeat: repeat; background-color:
green;"> color name <br><br><br></div>

35
2ND
FLOOR, RONAK PLAZA, TULSIDHAM CHAR RASTA, MANJALPUR PH: 3290290 9328994901
B 108, MANUBHAI TOWER, OPP. M.S.
Example 2:
<div style="background-image: url('test3.jpg'); background
green;"> color name <br><br><br></div>
Example 3:
<div style="background-image: url('test3.jpg'); background
green;"> color name <br><br><br></div>
Example 4:
<div style="background-image: url('test3.jpg'); background
green;"> color name <br><br><br></div>
Background Position
Usage
background-position: center | top | bottom | top left | top center | top right | bottom left | bottom
center | bottom right ;
background-position: 50% 50%;
background-position: 200 200;
Definition
This tag sets the position of the backgr
been set as "no-repeat".
It takes the following values.
a) center | top center | ... : These values define in words where the image should be. It can be given
as "top center" or "top left" or "to
b) 50% 50% : The values can be given in percentage as 50% 60%. This means the image should be
placed at the position of 50% from left and 60% from top
c) 200 200 : The values can be given in pixels.
FLOOR, RONAK PLAZA, TULSIDHAM CHAR RASTA, MANJALPUR PH: 3290290 9328994901
MANUBHAI TOWER, OPP. M.S. UNIVERSITY, SAYAJIGUNJ PH: 3290291 /
image: url('test3.jpg'); background-repeat: repeat-x; background
green;"> color name <br><br><br></div>
image: url('test3.jpg'); background-repeat: repeat-y; background
olor name <br><br><br></div>
image: url('test3.jpg'); background-repeat: no-repeat; background
green;"> color name <br><br><br></div>
position: center | top | bottom | top left | top center | top right | bottom left | bottom
position: 50% 50%;
This tag sets the position of the background image. This will be more effective, if repeat type has
a) center | top center | ... : These values define in words where the image should be. It can be given
as "top center" or "top left" or "top right" or like these
b) 50% 50% : The values can be given in percentage as 50% 60%. This means the image should be
placed at the position of 50% from left and 60% from top
c) 200 200 : The values can be given in pixels.
FLOOR, RONAK PLAZA, TULSIDHAM CHAR RASTA, MANJALPUR PH: 3290290 9328994901
/ 9016667242
x; background-color:
y; background-color:
repeat; background-color:
position: center | top | bottom | top left | top center | top right | bottom left | bottom
ound image. This will be more effective, if repeat type has
a) center | top center | ... : These values define in words where the image should be. It can be given
b) 50% 50% : The values can be given in percentage as 50% 60%. This means the image should be
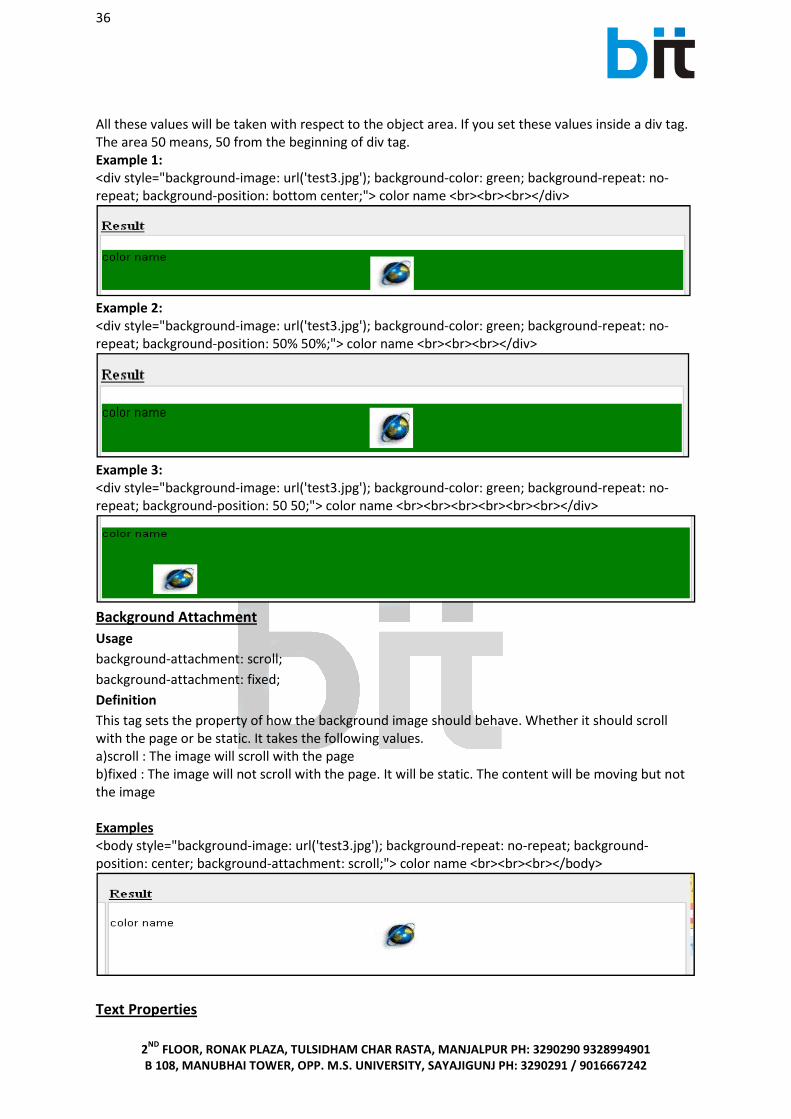
36
2ND
FLOOR, RONAK PLAZA, TULSIDHAM CHAR RASTA, MANJALPUR PH: 3290290 9328994901
B 108, MANUBHAI TOWER, OPP. M.S. UNIVERSITY, SAYAJIGUNJ PH: 3290291 / 9016667242
All these values will be taken with respect to the object area. If you set these values inside a div tag.
The area 50 means, 50 from the beginning of div tag.
Example 1:
<div style="background-image: url('test3.jpg'); background-color: green; background-repeat: no-
repeat; background-position: bottom center;"> color name <br><br><br></div>
Example 2:
<div style="background-image: url('test3.jpg'); background-color: green; background-repeat: no-
repeat; background-position: 50% 50%;"> color name <br><br><br></div>
Example 3:
<div style="background-image: url('test3.jpg'); background-color: green; background-repeat: no-
repeat; background-position: 50 50;"> color name <br><br><br><br><br><br></div>
Background Attachment
Usage
background-attachment: scroll;
background-attachment: fixed;
Definition
This tag sets the property of how the background image should behave. Whether it should scroll
with the page or be static. It takes the following values.
a)scroll : The image will scroll with the page
b)fixed : The image will not scroll with the page. It will be static. The content will be moving but not
the image
Examples
<body style="background-image: url('test3.jpg'); background-repeat: no-repeat; background-
position: center; background-attachment: scroll;"> color name <br><br><br></body>
Text Properties

37
2ND
FLOOR, RONAK PLAZA, TULSIDHAM CHAR RASTA, MANJALPUR PH: 3290290 9328994901
B 108, MANUBHAI TOWER, OPP. M.S. UNIVERSITY, SAYAJIGUNJ PH: 3290291 / 9016667242
Word Spacing
Usage
word-spacing: 1cm;
word-spacing: 10pt;
word-spacing: 10px;
word-spacing: none;
Definition
Using this attribute we can define or set the space between each words.
It takes the following values.
a)cm : You can set the value in centimeters as 1cm etc...
b)px : You can set the value in pixels as 1px or 10px etc...
c)pt : you can set the value in points as 1pt or 2pt etc
d)norm : on setting norm, normal / default word spacing will be taken.
Example 1:
<font style="word-spacing: 1cm;"> Test for word spacing </font>
Example 2:
<div style="word-spacing: 10px;"> Test for word spacing </div>
Example 3:
<h5 style="word-spacing: 10pt;"> Test for word spacing </h5>
Example 4:
<font style="word-spacing: none;"> Test for word spacing </font>
Letter Spacing Usage
letter-spacing: 1cm;
letter-spacing: 10pt;
letter-spacing: 10px;
letter-spacing: none;
Definition
Using this attribute we can define or set the space between each letters.
It takes the following values.
a) cm : You can set the value in centimeters as 1cm etc...
b) px : You can set the value in pixels as 1px or 10px etc...

38
2ND
FLOOR, RONAK PLAZA, TULSIDHAM CHAR RASTA, MANJALPUR PH: 3290290 9328994901
B 108, MANUBHAI TOWER, OPP. M.S. UNIVERSITY, SAYAJIGUNJ PH: 3290291 / 9016667242
c) pt : You can set the value in points as 1pt or 2pt etc
d) norm : on setting norm, normal / default word spacing will be taken.
Example 1:
<font style="letter-spacing: 1cm;"> Testing Letter </font>
Example 2:
<div style="letter-spacing: 10px;"> Testing Letter </div>
Example 3:
<h5 style="letter-spacing: 10pt;"> Testing Letter </h5>
Example 4:
<font style="letter-spacing: none;"> Testing space between letters </font>
Text Decoration
Usage
text-decoration: underline;
text-decoration: overline;
text-decoration: line-through;
text-decoration: blink;
Definition
Using this attribute we can decorate out text. The words can be made to blink, striked words, etc...
It takes the following values.
a)underline : You can under line the text or word by using this value.
b)overline : You can over line the text or word by using this value
c)line-through : You can strike through the text or word by using this value
d)blink : You can make the text to blink by using this value.
Example 1:
<font style="text-decoration: underline;"> Testing Text Decoration </font>
Example 2:
<div style="text-decoration: overline;"> Testing Text Decoration </div>
Example 3:

39
2ND
FLOOR, RONAK PLAZA, TULSIDHAM CHAR RASTA, MANJALPUR PH: 3290290 9328994901
B 108, MANUBHAI TOWER, OPP. M.S. UNIVERSITY, SAYAJIGUNJ PH: 3290291 / 9016667242
<h5 style="text-decoration:line-through;"> Testing Text Decoration </h5>
Example 4: [IE and some older version of browsers might not support this value]
<font style="text-decoration: blink;"> Testing Text Decoration</font>
To get a text which is both under lined, over lined and also blinks, we have to use the values as said
in the below example. This is how we can get blinking underlined text.
Example 5:
<font style="text-decoration: underline overline blink;"> Testing Text Decoration</font>
Vertical Alignment
Usage
vertical-align: baseline;
vertical-align: sub;
vertical-align: super;
vertical-align: 50%;
vertical-align: pt | px | cm;
Definition
Using this attribute we can decorate out text. To create base and power text. It takes the following
values.
a)baseline : This text will be shown normal.
b)sub : This text will be shown as a sub text. It will lie beneath / below normal text.
c)super : This text will be shown as a super text. It will lie above normal text level.
d)% : The value can be set in percentage as 50%, etc...
e)pt | px | cm : The value can be set in points or pixels or cm
Example 1:
The following is a <font style="vertical-align: baseline;"> Inline Text </font> Example.
Example 2:
The following is a <font style="vertical-align: sub;"> Sub line Text </font> Example.
Example 3:
The following is a <font style="vertical-align: super;"> Supper Line Text </font> Example.
Example 4:
The following is a <font style="vertical-align: -10px;"> Pixel </font> Example.

40
2ND
FLOOR, RONAK PLAZA, TULSIDHAM CHAR RASTA, MANJALPUR PH: 3290290 9328994901
B 108, MANUBHAI TOWER, OPP. M.S. UNIVERSITY, SAYAJIGUNJ PH: 3290291 / 9016667242
Text Transform
Usage
text-transform: capitalize;
text-transform: lowercase;
text-transform: uppercase;
text-transform: none;
Definition
Using this attribute/tag we can transform text with out really editing the text. It takes the following
values.
a)capitalize : This will make the first letter of the every word as a capital letter.
b)uppercase : It will show all the letters as uppercase letters.
c)lowercase : It will show all the letters as lowercase letters.
d)none : This will remove any text transforms
Example 1:
<font style="text-transform: capitalize;">testing text transform </font>
Example 2:
<font style="text-transform: uppercase;">testing text transform </font>
Example 3:
<font style="text-transform: lowercase;">TesTing TEXT TRANSform </font>
Example 4:
<font style="text-transform: none;"> TesTing TEXT TRANSform </font>
Text Alignment Usage
text-align: center;
text-align: left;
text-align: right;
text-align: justify;
Definition
This will align the text within the object area. It takes the following values.
a)center : This value aligns the text to center.
b)left : This value aligns the text to left.
c)right : This value aligns the text to right.
d)justify : This justifies the text with default value.

41
2ND
FLOOR, RONAK PLAZA, TULSIDHAM CHAR RASTA, MANJALPUR PH: 3290290 9328994901
B 108, MANUBHAI TOWER, OPP. M.S. UNIVERSITY, SAYAJIGUNJ PH: 3290291 / 9016667242
Example 1:
<div style="text-align: center;">testing text align</div>
Example 2:
<div style="text-align: left;">testing text align</div>
Example 3:
<div style="text-align: right;">testing text align</div>
Text Indent Usage
text-indent: 1cm;
text-indent: 10px;
text-indent: 10pt;
text-indent: 10%;
Definition
This attribute can be used to indent the text. In simple word to move the text by some distance away
from the border. It can also be termed as a big marginal space.
It takes the following values.
a)cm : The indent can be set in centimeter as 1cm or 2cm etc ...
b)px : The indent can be set in pixels as 1px or 10px etc ...
c)pt : The indent can be set in points as 1pt or 10pt etc ...
d)% : The indent can be set in percent as 10% or 5% etc ...
Example 1:
<div style="text-indent: 1cm;">testing text indent</div>
Example 2:
<div style="text-indent: 20px;">
testing text indent line 1<br>
testing text indent line 2
</div>
Example 3:
<div style="text-indent: 40pt;">testing text indent</div>

42
2ND
FLOOR, RONAK PLAZA, TULSIDHAM CHAR RASTA, MANJALPUR PH: 3290290 9328994901
B 108, MANUBHAI TOWER, OPP. M.S. UNIVERSITY, SAYAJIGUNJ PH: 3290291 / 9016667242
Line Height Usage
line-height: 1cm;
line-height: 40px;
line-height: 40pt;
line-height: 200%;
Definition
This will set the spacing between the lines. It is the broadness / thickness of the line. So each line will
be set to the corresponding height. It takes the following values.
a) cm : The line height can be set in centimeter as 1cm or 2cm etc ...
b) px : The line height can be set in pixels as 1px or 10px etc ...
c) pt : The line height can be set in points as 1pt or 10pt etc ...
d) % : The line height can be set in percent as 200% or 500% etc .... If 100% means original size.
Example 1:
<div style="background-color: lime; line-height: 1cm;">
testing line height - line 1 <br>
testing line height - line 2 <br>
</div>
Example 2:
<div style="background-color: lime; line-height: 80px;">testing line height<br>
testing line height - line 2 <br>
</div>
Example 3:
<div style="background-color: lime; line-height: 20pt;">testing line height<br>
testing line height - line 2 <br>
</div>
Example 4:

43
2ND
FLOOR, RONAK PLAZA, TULSIDHAM CHAR RASTA, MANJALPUR PH: 3290290 9328994901
B 108, MANUBHAI TOWER, OPP. M.S. UNIVERSITY, SAYAJIGUNJ PH: 3290291 / 9016667242
<div style="background-color: lime; line-height: 200%;">testing line height<br>
testing line height - line 2 <br>
</div>
Font Properties
Font Style
Usage
font-style: italic;
font-style: oblique;
font-style: normal;
Definition
This will set style to the fonts. It takes the following values.
a)italic : It sets the fonts as italic fonts.
b)oblique: It sets the fonts as normal fonts.
c)normal : It sets the fonts as normal fonts. Its the default value.
Example 1:
<div style="font-style: italic;">testing font style</div>
Example 2:
<div style="font-style: oblique;">testing font style</div>
Example 3:
<div style="font-style: normal;">testing font style</div>
Font Weight
Usage
font-weight: bold;
font-weight: bolder;
font-weight: light;
font-weight: lighter;
font-weight: 100;
font-weight: normal;
Definition
This parameter controls the weight or boldness of the font. We can make the font look lighter or
bolder using style sheet. It takes the following values.
a) bold : It makes the font to look bold.
b) bolder : It makes the font to look bolder.

44
2ND
FLOOR, RONAK PLAZA, TULSIDHAM CHAR RASTA, MANJALPUR PH: 3290290 9328994901
B 108, MANUBHAI TOWER, OPP. M.S. UNIVERSITY, SAYAJIGUNJ PH: 3290291 / 9016667242
c) light : It makes the font to look light.
d) lighter : It makes the font to look lighter.
e) 100 to 900 : The fonts boldness can be set using values as 100 or 200 or 300 or 400 or 500 or 600
or 700 or 800 or 900.
f) normal : It sets the fonts as normal fonts.
Example 1:
<div style="font-weight: bold;">testing font weight </div>
Example 2:
<div style="font-weight: bolder;">testing font weight </div>
Example 3:
<div style="font-weight: light;">testing font weight </div>
Example 4:
<div style="font-weight: lighter;">testing font weight </div>
Example 5:
<div style="font-weight: 800;">testing font weight </div>
Example 6:
<div style="font-weight: normal;">testing font boldness </div>
Font Size Usage
font-size: xx-small;
font-size: x-large;
font-size: larger;
font-size: smaller;
font-size: 10px;
font-size: 80%;
Definition
The size of the font can be controlled using this parameter in style sheet. The values can be set in
three modes.
a) Absolute Size.
b) Relative Size.

45
2ND
FLOOR, RONAK PLAZA, TULSIDHAM CHAR RASTA, MANJALPUR PH: 3290290 9328994901
B 108, MANUBHAI TOWER, OPP. M.S. UNIVERSITY, SAYAJIGUNJ PH: 3290291 / 9016667242
c) Length - in percentage / pixels / points.
It takes the following values.
a)Absolute : The following absolute values can be used to set the size of the text. xx-small or x-small
or small or large or x-large or xx-large or medium.
b)Relative : The following relative values can be used. larger or smaller
c)Length : In percentage (e.g 34%) or pixels (e.g: 20px) or points (e.g: 20).
Example 1:
<div style="font-size: xx-small;">testing font size </div>
Example 2:
<div style="font-size: larger;">testing font size </div>
Example 3:
<div style="font-size: smaller;">testing font size </div>
Example 4:
<div style="font-size: 20px;">testing font size </div>
Example 5:
<div style="font-size: 200%;">testing font size </div>
Font Family Usage
font-family: [ [family-name | generic-family], ]*;
Definition
The font family can be set using this tag in style sheet.There are numerous font families like serif,
cursive, monospace etc....
Many font families can be set in order. This is usually done because when the first family is not
supported by the browser or not present the second is used and so on..
It takes the following values.
a)font-family | generic-family : e.g: serif , cursive , monospace
Example 1:
<div style="font-family: serif;">testing font family</div>

46
2ND
FLOOR, RONAK PLAZA, TULSIDHAM CHAR RASTA, MANJALPUR PH: 3290290 9328994901
B 108, MANUBHAI TOWER, OPP. M.S. UNIVERSITY, SAYAJIGUNJ PH: 3290291 / 9016667242
Example 2:
<div style="font-family: courier;">testing font family </div>
Example 3:
<div style="font-family: fantasy;">testing font family </div>
Example 4:
<div style="font-family: tims, cursive, serif;">testing font family </div>
Note: In this example we have set three font-families. As the first family(tims - a junk value) will not
be available, the second one "cursive" is taken.
Most commonly used font types that are available in most platforms are Verdana, Arial, helvetica,
san-serif.
Some other example Values you can use: serif, san-serif, cursive, monospace, fantasy, "times new
roman", "new century schoolbook", helvetica, times, courier, western.
Box Properties: We collectively call Margin Properties, Padding Properties and Border Properties as BOX Properties.
Margin
Border
Padding
This is the content
Margin:
It is the space that we create from the nearest object.
For example purpose we can think our content as our house. We build our house with a margin
from the nearest house/building.
Border:
It is the boundary we create around our object in Html.
For example purpose we can think our content as our house. The border here is the compound wall
we build.
Padding:
It is the space that we create inside the object for the content to be displayed.
For example purpose we can think our content as our house. Here our dinning table is placed
leaving a space from the wall of the house (padding).

47
2ND
FLOOR, RONAK PLAZA, TULSIDHAM CHAR RASTA, MANJALPUR PH: 3290290 9328994901
B 108, MANUBHAI TOWER, OPP. M.S. UNIVERSITY, SAYAJIGUNJ PH: 3290291 / 9016667242
Border Properties
Border color Usage
border-color: red;
border-color: #454545;
border-color: rgb(123,123,123);
Definition
The border of any object can be set with any color using the tag/argument border-color. border-
color will not take effect without border style. Border style can be set using "border-style"
It takes the following values.
a)red : The border color can be set using text names of colors.
b)#454545 : The border color can be set using hexadecimal color code.
c)rgb(x,y,z) : The border color can be set rgb code.
Example 1:
<div style="border-width: 4px; border-style: solid; border-color: red; ">testing border color</div>
Example 2:
<font style="border-width: 4px; border-style: solid; border-color: #454545;">testing border
color</font> .
Example 3:
<div style="border-width: 4px; border-style: solid; border-color: rgb(125,125,125);">testing border
color</div>
Border Width
Usage
border-width: 5px;
border-width: 5pt;

48
2ND
FLOOR, RONAK PLAZA, TULSIDHAM CHAR RASTA, MANJALPUR PH: 3290290 9328994901
B 108, MANUBHAI TOWER, OPP. M.S. UNIVERSITY, SAYAJIGUNJ PH: 3290291 / 9016667242
border-width: 2%;
Definition:
The border width of any object can be set with any width using the tag/argument border-width.
border-width will not take effect with out border style. Border style can be set using "border-style"
Border Width takes the following values.
a)5px : The border width can be set in pixels.
b)5pt : The border width can be set in points.
c)1% : The border width can be set in percentage.
Example 1:
<div style="border-width: 4px; border-style: solid; border-color: red; ">testing border width</div>
Example 2:
<font style="border-width: 5pt; border-style: solid; border-color: #454545;">testing border
width</font>
Example 3:
<div style="border-width: 2%; border-style: solid; border-color: rgb(125,125,125);">testing border
width</div>
Border Style Usage
border-style: dotted;
border-style: dashed;
border-style: solid;
border-style: double;
border-style: groove;
border-style: ridge;
border-style: inset;
border-style: outset;
Definition
The style of the border can be set using the tag border-style. Border Style takes the following values.
a)dotted- This will create a border with dotted lines.
b)dashed- This will create a border with dashed lines.
c)solid- This will create a border with solid lines.
d)double- This will create a border containing double lines.
e)groove- This will create a border that will look like groove.
f)ridge- This will create a border that will look like ridge.
g)inset- This will create a border with the line looking inset.
h)outset- This will create a border with the line looking outset.
Example 1:
<div style="border-width: 2px; border-style: dotted; border-color: red; "> testing border style</div>

49
2ND
FLOOR, RONAK PLAZA, TULSIDHAM CHAR RASTA, MANJALPUR PH: 3290290 9328994901
B 108, MANUBHAI TOWER, OPP. M.S. UNIVERSITY, SAYAJIGUNJ PH: 3290291 / 9016667242
Example 2:
<div style="border-width: 2px; border-style: dashed; border-color: red; "> testing border style</div>
Example 3:
<div style="border-width: 2px; border-style: solid; border-color: red; "> testing border style</div>
Example 4:
<div style="border-width: 4px; border-style: double; border-color: red; "> testing border style</div>
Example 5:
<div style="border-width: 4px; border-style: groove; border-color: red; "> testing border style</div>
Example 6:
<div style="border-width: 4px; border-style: ridge; border-color: red; "> testing border style</div>
Example 7:
<div style="border-width: 4px; border-style: inset; border-color: red; "> testing border style</div>
Example 8:
<div style="border-width: 4px; border-style: outset; border-color: red; "> testing border style</div>
Side Borders
Each side of the border can be handled separately using the these tags. Usage:

50
2ND
FLOOR, RONAK PLAZA, TULSIDHAM CHAR RASTA, MANJALPUR PH: 3290290 9328994901
B 108, MANUBHAI TOWER, OPP. M.S. UNIVERSITY, SAYAJIGUNJ PH: 3290291 / 9016667242
border-top: <border-top-width> || <border-style> || <border-color> ;
border-left: <border-left-width> || <border-style> || <border-color> ;
border-bottom: <border-bottom-width>|| <border-style> || <border-color> ;
border-right: <border-right-width> || <border-style> || <border-color> ;
Definition:
Each side of the border can be handled separately using this tags. Border sides takes the following
values.
a)border-top : 5px dotted red - The top border is set using the tag border-top. The values or in the
order width, style and color of top border.
b)border-left : 5pt dashed green - The left border is set using the tag border-left. The values or in
the order width, style and color of top border.
c)border-bottom : 2% groove grey - The bottom border is set using the tag border-bottom. The
values or in the order width, style and color of top border.
d)border-right: 5px solid blue - The right border is set using the tag border-right. The values or in the
order width, style and color of top border.
Example 1:
<div style=" border-top : 2px dotted red ;"> testing border properties </div>
Example 2:
<div style=" border-left : 2pt dashed green; "> testing border properties </div>
Example 3:
<div style=" border-bottom: 5px ridge brown;"> testing border properties </div>
Example 4:
<div style=" border-right: 5px groove #733366;"> testing border properties </div>
Combing All:
Example 5:
<div style="
border-top : 2px dotted red ;
border-left : 2pt dashed rgb(100,100,100);
border-bottom: 5px ridge brown;
border-right: 5px groove #733366;">
testing border properties </div>

51
2ND
FLOOR, RONAK PLAZA, TULSIDHAM CHAR RASTA, MANJALPUR PH: 3290290 9328994901
B 108, MANUBHAI TOWER, OPP. M.S. UNIVERSITY, SAYAJIGUNJ PH: 3290291 / 9016667242
NOTE: In the example we have used div tag. But you can use any standard html tags to set the style.
Borders
Instead of setting each side of borders separately, the whole thing can be done using the single tag
Usage:
border: <border-width> || <border-style> || <border-color> ;
Definition:
This will set the border to any object.
a)border : 5px dotted green - The border is set using the tag border. The values or in the order
width, style and color of border.
This set the border on all the four sides.
Example 1:
<div style=" border : 2px dotted red ;"> testing border properties </div>
NOTE: In the example we have used div tag.
But you can use any standard html tags to set the style.
Common Border on Three Sides and Different border in one side:
In some cases we will have common border for two are three sides and different border in only one
side. This can be easily handled as follows
Example 2:
<div style="border : 2px dotted red ;border-top: 3px dashed green; ">
testing border properties </div>
Definition:
Initially we set the common border for all sides using border attribute and then we set/change the
top border using "border-top".
Margin Properties
Top Margin
Usage
margin-top: 10px;
margin-top: 10pt;
margin-top: 10%;
margin-top: auto;
Definition
Many times we would need to set margin for our objects. This will set the top margin of the object.
It takes the following values.
a)pt : You can set values in points. (e.g: 10pt or 100pt).
b)px : You can set values in pixels. (e.g: 10px or 100px).

52
2ND
FLOOR, RONAK PLAZA, TULSIDHAM CHAR RASTA, MANJALPUR PH: 3290290 9328994901
B 108, MANUBHAI TOWER, OPP. M.S. UNIVERSITY, SAYAJIGUNJ PH: 3290291 / 9016667242
c)% : You can set values in percentage. (e.g: 10% or 100%).
d)auto : This will set a automatic margin.
Example 1:
<div style="margin-top: 20px;">testing top margin</div>
Note: You can see that the text has moved 20 pixels down from "Result" string.
Example 2:
<div style="margin-top: 30pt;">testing top margin</div>
Note: You can see that the text has moved 30 points down from "Result" string.
Example 3:
<div style="margin-top: 10%;">testing top margin</div>
Note: You can see that the text has moved 10 percentage down from "Result" string.
Example 4:
<div style="margin-top: auto;">testing top margin</div>
Left Margin
Usage
margin-left: 10px;
margin-left: 10pt;
margin-left: 10%;
margin-left: auto;
Definition
Many times we would need to set margin for our objects. This will set the left margin of the object.
It takes the following values.
a)pt : You can set values in points. (e.g: 10pt or 100pt).
b)px : You can set values in pixels. (e.g: 10px or 100px).
c)% : You can set values in percentage. (e.g: 10% or 100%).
d)auto : This will set a automatic / default margin.
Example 1:
<div style="margin-left: 20px;">testing left margin</div>

53
2ND
FLOOR, RONAK PLAZA, TULSIDHAM CHAR RASTA, MANJALPUR PH: 3290290 9328994901
B 108, MANUBHAI TOWER, OPP. M.S. UNIVERSITY, SAYAJIGUNJ PH: 3290291 / 9016667242
Note: You can see that the text has moved 20 pixels from left side.
Example 2:
<div style="margin-left: 30pt;">testing left margin</div>
Note: You can see that the text has moved 30 points from left side.
Example 3:
<div style="margin-left: 10%;">testing left margin</div>
Note: You can see that the text has moved 10 percentage from left side.
Example 4:
<div style="margin-left: auto;">testing left margin</div>
Bottom Margin Usage
margin-bottom: 10px;
margin-bottom: 10pt;
margin-bottom: 10%;
margin-bottom: auto;
Definition
Many times we would need to set margin for our objects. This will set the bottom margin of the
object.
It takes the following values.
a) pt : You can set values in points. (e.g: 10pt or 100pt).
b) px : You can set values in pixels. (e.g: 10px or 100px).
c) % : You can set values in percentage. (e.g: 10% or 100%).
d) auto : This will set a automatic / default margin.
Example 1:
<div style="margin-bottom: 20px;">testing bottom margin</div>
Note: You can see that the text has moved 20 pixels from bottom line.
Example 2:
<div style="margin-bottom: 30pt;">testing bottom margin</div>
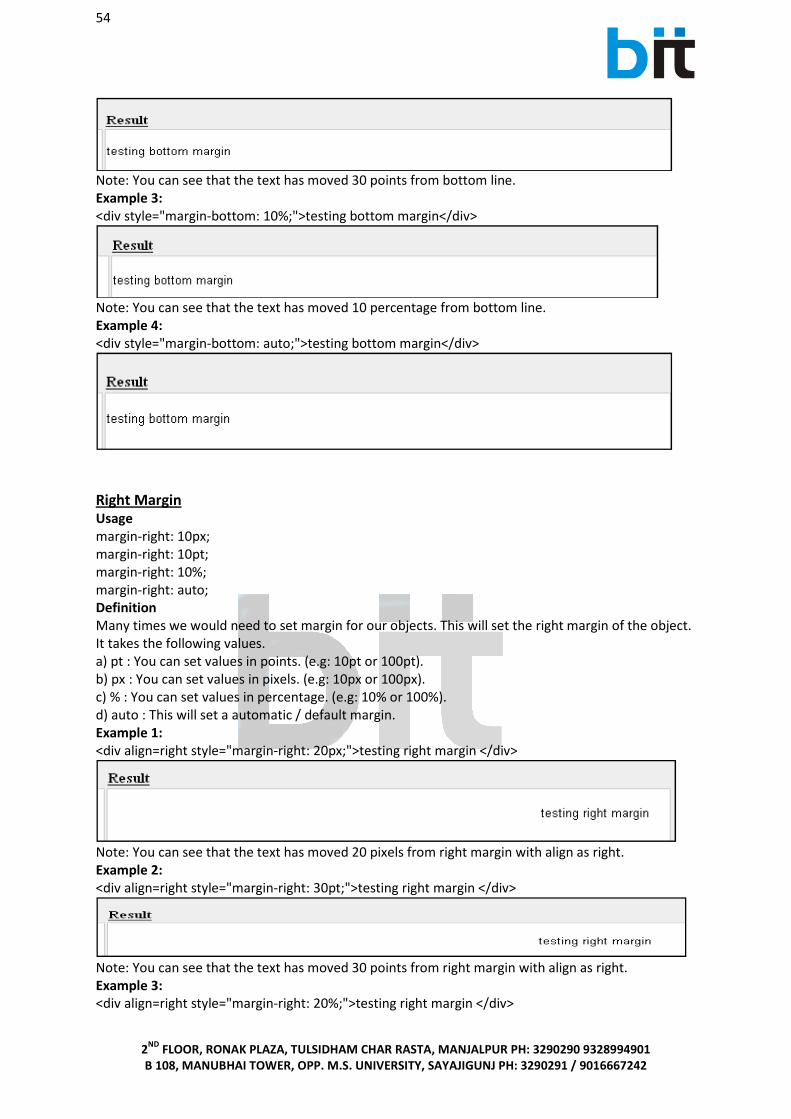
54
2ND
FLOOR, RONAK PLAZA, TULSIDHAM CHAR RASTA, MANJALPUR PH: 3290290 9328994901
B 108, MANUBHAI TOWER, OPP. M.S. UNIVERSITY, SAYAJIGUNJ PH: 3290291 / 9016667242
Note: You can see that the text has moved 30 points from bottom line.
Example 3:
<div style="margin-bottom: 10%;">testing bottom margin</div>
Note: You can see that the text has moved 10 percentage from bottom line.
Example 4:
<div style="margin-bottom: auto;">testing bottom margin</div>
Right Margin Usage
margin-right: 10px;
margin-right: 10pt;
margin-right: 10%;
margin-right: auto;
Definition
Many times we would need to set margin for our objects. This will set the right margin of the object.
It takes the following values.
a) pt : You can set values in points. (e.g: 10pt or 100pt).
b) px : You can set values in pixels. (e.g: 10px or 100px).
c) % : You can set values in percentage. (e.g: 10% or 100%).
d) auto : This will set a automatic / default margin.
Example 1:
<div align=right style="margin-right: 20px;">testing right margin </div>
Note: You can see that the text has moved 20 pixels from right margin with align as right.
Example 2:
<div align=right style="margin-right: 30pt;">testing right margin </div>
Note: You can see that the text has moved 30 points from right margin with align as right.
Example 3:
<div align=right style="margin-right: 20%;">testing right margin </div>

55
2ND
FLOOR, RONAK PLAZA, TULSIDHAM CHAR RASTA, MANJALPUR PH: 3290290 9328994901
B 108, MANUBHAI TOWER, OPP. M.S. UNIVERSITY, SAYAJIGUNJ PH: 3290291 / 9016667242
Note: You can see that the text has moved 20 percentage from right margin with align as right.
Example 4:
<div align=right style="margin-right: auto;">testing right margin </div>
Margin
All the margins (top, right, bottom, left) can be combined using this single tag.
Usage
margin: 20px;
margin: 10px 20px 30px 10px;
margin: 10px 20px;
margin: 20px 10px 30px;
Definition
The margin can be set using the tag "margin". It takes the following values.
a) 20px : This will set a margin of 20px on the four sides (top, right, bottom, left).
b) 10px 20px 30px 10px: This format will set the margin in the order of top,right,bottom,left.
c) 10px 20px : This format will set the margin for top and right. Bottom will take the top margin value
(10px) and left will take right margins value(20px).
d) 20px 10px 30px: This format will set the margin for top and right and bottom. left will take the
right margins value.
The values can be in percent or points or pixels.
Examples For setting Margins in Percent or Points or Pixels
Example 1:
<div align=right style="margin: 20px;">
Here we have set a margin of 20 pixels.
You can see that this paragraph has margins on all the four sides. </div>
.
Example 2:
<div style="margin: 10px 50px 30px 5px;">
Here we have set a margin with four values. You can see that this paragraph has margin of 10px on
top, 50px on right, 30px on bottom and 5px on left. </div>
Example 3:
<div style="margin: 20px 40px;">
Here we have set a margin with two values.
You can see that this paragraph has margins on 20px on top and bottom and 40px on left and right.
</div>

56
2ND
FLOOR, RONAK PLAZA, TULSIDHAM CHAR RASTA, MANJALPUR PH: 3290290 9328994901
B 108, MANUBHAI TOWER, OPP. M.S. UNIVERSITY, SAYAJIGUNJ PH: 3290291 / 9016667242
Example 4:
<div style="margin: 10px 50px 40px;">
Here we have set a margin with three values.
You can see that this paragraph has margins of 10px on top, 50px on right , 40px on bottom. left
margin took values from its right counter part as 50px. </div>
Top Padding
Usage
padding-top: 10px;
padding-top: 10pt;
padding-top: 10%;
padding-top: auto;
Definition
This will set the top padding of the object. It takes the following values.
a) pt : You can set values in points. (e.g: 10pt or 100pt).
b) px : You can set values in pixels. (e.g: 10px or 100px).
c) % : You can set values in percentage. (e.g: 10% or 100%).
d) auto : This will set a automatic margin.
Example 1:
<div style="padding-top: 20px;">testing top padding</div>
Note: The difference between padding and margin is that padding set values inside the objects
scope, while margin moves the whole object away from the nearby object.
Example 2:
<div style="padding-top: 30pt;">testing top padding</div>
Example 3:
<div style="padding-top: 10%;">testing top padding</div>
Example 4:
<div style="padding-top: auto;">testing top padding</div>

57
2ND
FLOOR, RONAK PLAZA, TULSIDHAM CHAR RASTA, MANJALPUR PH: 3290290 9328994901
B 108, MANUBHAI TOWER, OPP. M.S. UNIVERSITY, SAYAJIGUNJ PH: 3290291 / 9016667242
Left Padding
Usage
padding-left: 10px;
padding-left: 10pt;
padding-left: 10%;
padding-left: auto;
Definition
This will set the left padding of the object.
It takes the following values.
a) pt : You can set values in points. (e.g: 10pt or 100pt).
b) px : You can set values in pixels. (e.g: 10px or 100px).
c) % : You can set values in percentage. (e.g: 10% or 100%).
d) auto : This will set a automatic margin.
Example 1:
<div style="padding-left: 20px;">testing left padding</div>
Note: The difference between padding and margin is that padding set values inside the objects
scope, while margin moves the whole object away from the nearby object.
Example 2:
<div style="padding-left: 30pt;">testing left padding</div>
Example 3:
<div style="padding-left: 10%;">testing left padding</div>
We don't recommend this as it might cause issues in few browsers like IE
Example 4:
<div style="padding-left: auto;">testing left padding</div>
Bottom Padding Usage
padding-bottom: 10px;
padding-bottom: 10pt;
padding-bottom: 10%;
padding-bottom: auto;
Definition

58
2ND
FLOOR, RONAK PLAZA, TULSIDHAM CHAR RASTA, MANJALPUR PH: 3290290 9328994901
B 108, MANUBHAI TOWER, OPP. M.S. UNIVERSITY, SAYAJIGUNJ PH: 3290291 / 9016667242
This will set the bottom padding of the object.
It takes the following values.
a) pt : You can set values in points. (e.g: 10pt or 100pt).
b) px : You can set values in pixels. (e.g: 10px or 100px).
c) % : You can set values in percentage. (e.g: 10% or 100%).
d) auto : This will set a automatic margin.
Example 1:
<div style="padding-bottom: 20px;">testing bottom padding</div>
Note: The difference between padding and margin is that padding set values inside the objects
scope, while margin moves the whole object away from the nearby object.
Example 2:
<div style="padding-bottom: 30pt;">testing bottom padding</div>
Example 3:
<div style="padding-bottom: 10%;">testing bottom padding</div>
Example 4:
<div style="padding-bottom: auto;">testing bottom padding</div>
Right Padding
Usage
padding-right: 10px;
padding-right: 10pt;
padding-right: 10%;
padding-right: auto;
Definition
This will set the right padding of the object.
It takes the following values.
a) pt : You can set values in points. (e.g: 10pt or 100pt).
b) px : You can set values in pixels. (e.g: 10px or 100px).
c) % : You can set values in percentage. (e.g: 10% or 100%).
d) auto : This will set a automatic margin.
Example 1:
<div style="padding-right: 20px;">testing right padding</div>

59
2ND
FLOOR, RONAK PLAZA, TULSIDHAM CHAR RASTA, MANJALPUR PH: 3290290 9328994901
B 108, MANUBHAI TOWER, OPP. M.S. UNIVERSITY, SAYAJIGUNJ PH: 3290291 / 9016667242
Note: The difference between padding and margin is that padding set values inside the objects
scope, while margin moves the whole object away from the nearby object.
Example 2:
<div style="padding-right: 30pt;">testing right padding</div>
Example 3:
<div style="padding-right: 10%;">testing right padding</div>
We don't recommend this as it might cause issues in few browsers like IE
Example 4:
<div style="padding-right: auto;">testing right padding</div>
Padding
All the padding (top, right, bottom, left) can be combined using this single tag.
Usage
padding: 20px;
padding: 10px 20px 30px 10px;
padding: 10px 20px;
padding: 20px 10px 30px;
Definition
The padding can be set using the tag "padding". It takes the following values.
a) 20px : This will set a padding of 20px on the four sides (top, right, bottom, left).
b) 10px 20px 30px 10px: This format will set the padding in the order of top,right,bottom,left.
c) 10px 20px : This format will set the padding for top and right. Bottom will take the top padding
value (10px) and left will take right paddings value(20px).
d) 20px 10px 30px: This format will set the padding for top and right and bottom. left will take the
right paddings value.
The values can be in percentage or points or pixels.
Example 1:
<div align=right style="padding: 20px;">
Here we have set a padding of 20 pixels.
You can see that this paragraph has paddings on all the four sides.
</div>
Example 2:

60
2ND
FLOOR, RONAK PLAZA, TULSIDHAM CHAR RASTA, MANJALPUR PH: 3290290 9328994901
B 108, MANUBHAI TOWER, OPP. M.S. UNIVERSITY, SAYAJIGUNJ PH: 3290291 / 9016667242
<div style="padding: 10px 50px 30px 5px;">
Here we have set a padding with four values.
You can see that this paragraph has padding of 10px on top, 50px on right, 30px on bottom and 5px
on left.
</div>
Example 3:
<div style="padding: 20px 40px;">
Here we have set a padding with two values.
You can see that this paragraph has paddings on 20px on top and bottom and 40px on left and right.
</div>
Example 4:
<div style="padding: 10px 50px 40px;">
Here we have set a padding with three values.
You can see that this paragraph has paddings of 10px on top, 50px on right , 40px on bottom. left
padding took values from its right counter part as 50px.
</div>
Special Topics
Visited Link Colors
a:visited
Many times we want our links to show different colors.
We might want our visited links to be shown in red color and font size as 10px.
We might want our non-visited links to be shown in green color and font size as 15px.
This can be achieved by using internal style sheet coding
For this, in the header portion add the style as
<style>
a{color: green; font-size: 15px}
a:visited{color: red; font-size: 10px;}

61
2ND
FLOOR, RONAK PLAZA, TULSIDHAM CHAR RASTA, MANJALPUR PH: 3290290 9328994901
B 108, MANUBHAI TOWER, OPP. M.S. UNIVERSITY, SAYAJIGUNJ PH: 3290291 / 9016667242
</style>
Definition
We can set the link property for visited links using the tag "a:visited".
We can set any property (text, box, font, background properties).
Example:
The below links will give you the result:
The first link is some dummy value so it will be treated as a non-visited link.
The second link is for the same page("link-styles.php") which is the visited link.
No underline Link:
Here we will show how to create links with out any underline
We use the attribute "text-decoration: none;" to handle it.
Example:
<a href="http://www.hscripts.com" style="color: orange; font-size: 15px; text-decoration: none;">
Creating Link without a underline
</a>
onMouseOver Effects
Text Effects:
e.g:hioxindia.com
Its very simple to do this. Just follow the steps and you can do it.
Step 1:
In head portion add style that you want the text to change, as follows
<head>
<style>
/*This is how the text will look before mouse over*/
.colc{
font-family: san-serif;
color: #9EFF36;
}
/*This is how the text will look on mouse over. Note "hover" is the most important change here*/
.colc:hover
{
font-family: san-serif;
color: #456745;

62
2ND
FLOOR, RONAK PLAZA, TULSIDHAM CHAR RASTA, MANJALPUR PH: 3290290 9328994901
B 108, MANUBHAI TOWER, OPP. M.S. UNIVERSITY, SAYAJIGUNJ PH: 3290291 / 9016667242
}
</style>
</head>
Step 2:
Set the style to the text for which you want the mouse over effect to happen
e.g:
Note: Here we set the style with the tag "class". The style name is "colc" that was created in header
portion.
To make the background color to change, just add "background-color" property in style tags as
explained above.
E.g: Form the style as
.colc2{
font-family: san-serif;
color: #9EFF36;
}
/*This is how the text will look on mouse over. Note "hover" is the most important change here*/
.colc2:hover
{
background-color: #245250;
}
set this style to the html tag
Scrollable Table (Html)
In most occasions when we face such a requirement, it will be to fit some large viewable content
inside a small area.
Follow the simple instructions.
Examples:
It's simple to do it. All that is needed is a small part of dhtml code.
<div STYLE=" height: 100px; width: 150px; font-size: 12px; overflow: auto;">
The portion "overflow: auto;" does everything.
Below is the HTML code.
<div STYLE=" height: 100px; width: 100px; font-size: 12px; overflow: auto;">
<table bgcolor="green">
<tr><td bgcolor="blue">testing </td></tr>
<tr><td>free php scripts;/td></tr>

63
2ND
FLOOR, RONAK PLAZA, TULSIDHAM CHAR RASTA, MANJALPUR PH: 3290290 9328994901
B 108, MANUBHAI TOWER, OPP. M.S. UNIVERSITY, SAYAJIGUNJ PH: 3290291 / 9016667242
<tr><td bgcolor="blue">free php scripts</td></tr>
<tr><td>free php scripts</td></tr>
<tr><td bgcolor="blue">free php scripts</td></tr>
</table>
</div>
The output will be like this
cursor
The cursor for any element can be set by using the css property "cursor".
Example Tag:
<div style=" background-color: green; color: white; cursor: crosshair;"> this is a pointer type cursor
</div>
The css property can take many values as described in the below table
Value Result
pointer a hand symbol
crosshair + symbol
move move symbol
wait loading symbol
help question symbol
text text symbol
e-resize move east cursor
ne-resize move north-east cursor
nw-resize move north-west cursor
n-resize move north cursor
se-resize move south-east cursor
sw-resize move south-west cursor
s-resize move south cursor
w-resize move west cursor
default default cursor
url user defined image as cursor
A user defined image can be set as a cursor using css.
The code for it is "cursor: url('./images/cursor.gif');".
But this custom user defined cursor may not work in some versions of the browsers.
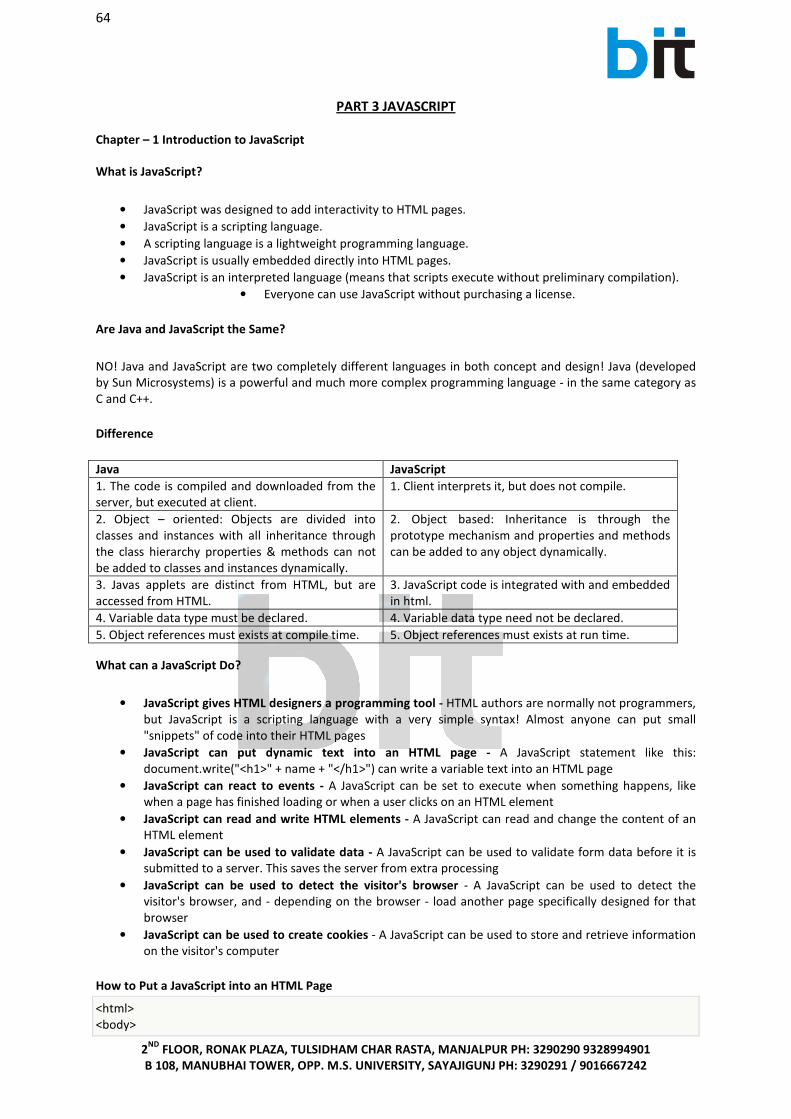
64
2ND
FLOOR, RONAK PLAZA, TULSIDHAM CHAR RASTA, MANJALPUR PH: 3290290 9328994901
B 108, MANUBHAI TOWER, OPP. M.S. UNIVERSITY, SAYAJIGUNJ PH: 3290291 / 9016667242
PART 3 JAVASCRIPT
Chapter – 1 Introduction to JavaScript
What is JavaScript?
• JavaScript was designed to add interactivity to HTML pages.
• JavaScript is a scripting language.
• A scripting language is a lightweight programming language.
• JavaScript is usually embedded directly into HTML pages.
• JavaScript is an interpreted language (means that scripts execute without preliminary compilation).
• Everyone can use JavaScript without purchasing a license.
Are Java and JavaScript the Same?
NO! Java and JavaScript are two completely different languages in both concept and design! Java (developed
by Sun Microsystems) is a powerful and much more complex programming language - in the same category as
C and C++.
Difference
Java JavaScript
1. The code is compiled and downloaded from the
server, but executed at client.
1. Client interprets it, but does not compile.
2. Object – oriented: Objects are divided into
classes and instances with all inheritance through
the class hierarchy properties & methods can not
be added to classes and instances dynamically.
2. Object based: Inheritance is through the
prototype mechanism and properties and methods
can be added to any object dynamically.
3. Javas applets are distinct from HTML, but are
accessed from HTML.
3. JavaScript code is integrated with and embedded
in html.
4. Variable data type must be declared. 4. Variable data type need not be declared.
5. Object references must exists at compile time. 5. Object references must exists at run time.
What can a JavaScript Do?
• JavaScript gives HTML designers a programming tool - HTML authors are normally not programmers,
but JavaScript is a scripting language with a very simple syntax! Almost anyone can put small
"snippets" of code into their HTML pages
• JavaScript can put dynamic text into an HTML page - A JavaScript statement like this:
document.write("<h1>" + name + "</h1>") can write a variable text into an HTML page
• JavaScript can react to events - A JavaScript can be set to execute when something happens, like
when a page has finished loading or when a user clicks on an HTML element
• JavaScript can read and write HTML elements - A JavaScript can read and change the content of an
HTML element
• JavaScript can be used to validate data - A JavaScript can be used to validate form data before it is
submitted to a server. This saves the server from extra processing
• JavaScript can be used to detect the visitor's browser - A JavaScript can be used to detect the
visitor's browser, and - depending on the browser - load another page specifically designed for that
browser
• JavaScript can be used to create cookies - A JavaScript can be used to store and retrieve information
on the visitor's computer
How to Put a JavaScript into an HTML Page
<html>
<body>

65
2ND
FLOOR, RONAK PLAZA, TULSIDHAM CHAR RASTA, MANJALPUR PH: 3290290 9328994901
B 108, MANUBHAI TOWER, OPP. M.S. UNIVERSITY, SAYAJIGUNJ PH: 3290291 / 9016667242
<script type="text/javascript">
document.write("Hello World!");
</script>
</body>
</html>
The code above will produce this output on an HTML page:
Hello World!
Example Explained
To insert a JavaScript into an HTML page, we use the <script> tag. Inside the <script> tag we use the type
attribute to define the scripting language. So, the <script type="text/javascript"> and </script> tells where the
JavaScript starts and ends:
<html>
<body>
<script type="text/javascript">
...
</script>
</body>
</html>
The word document.write is a standard JavaScript command for writing output to a page. By entering the
document.write command between the <script> and </script> tags, the browser will recognize it as a
JavaScript command and execute the code line. In this case the browser will write Hello World! to the page.
HTML Comments to Handle Simple Browsers
Browsers that do not support JavaScript will display JavaScript as page content. To prevent them from doing
this, and as a part of the JavaScript standard, the HTML comment tag can be used to "hide" the JavaScript. Just
add an HTML comment tag <!-- before the first JavaScript statement, and a --> (end of comment) after the last
JavaScript statement.
<html>
<body>
<script type="text/javascript">
<!--
document.write("Hello World!");
//-->
</script>
</body>
</html>
The two forward slashes at the end of comment line (//) is the JavaScript comment symbol. This prevents
JavaScript from executing the --> tag.
Where to Put the JavaScript

66
2ND
FLOOR, RONAK PLAZA, TULSIDHAM CHAR RASTA, MANJALPUR PH: 3290290 9328994901
B 108, MANUBHAI TOWER, OPP. M.S. UNIVERSITY, SAYAJIGUNJ PH: 3290291 / 9016667242
JavaScript in a page will be executed immediately while the page loads into the browser. This is not always
what we want. Sometimes we want to execute a script when a page loads, other times when a user triggers an
event.
1) Scripts in the head section: Scripts to be executed when they are called, or when an event is triggered, go in
the head section. When you place a script in the head section, you will ensure that the script is loaded before
anyone uses it.
<html>
<head>
<script type="text/javascript">
....
</script>
</head>
2) Scripts in the body section: Scripts to be executed when the page loads go in the body section. When you
place a script in the body section it generates the content of the page.
<html>
<head>
</head>
<body>
<script type="text/javascript">
....
</script>
</body>
3) Scripts in both the body and the head section: You can place an unlimited number of scripts in your
document, so you can have scripts in both the body and the head section.
<html>
<head>
<script type="text/javascript">
....
</script>
</head>
<body>
<script type="text/javascript">
....
</script>
</body>
Using an External JavaScript
Sometimes you might want to run the same JavaScript on several pages, without having to write the same
script on every page. To simplify this, you can write a JavaScript in an external file. Save the external JavaScript
file with a .js file extension.
Note: The external script cannot contain the <script> tag!
To use the external script, point to the .js file in the "src" attribute of the <script> tag:
<html>
<head>
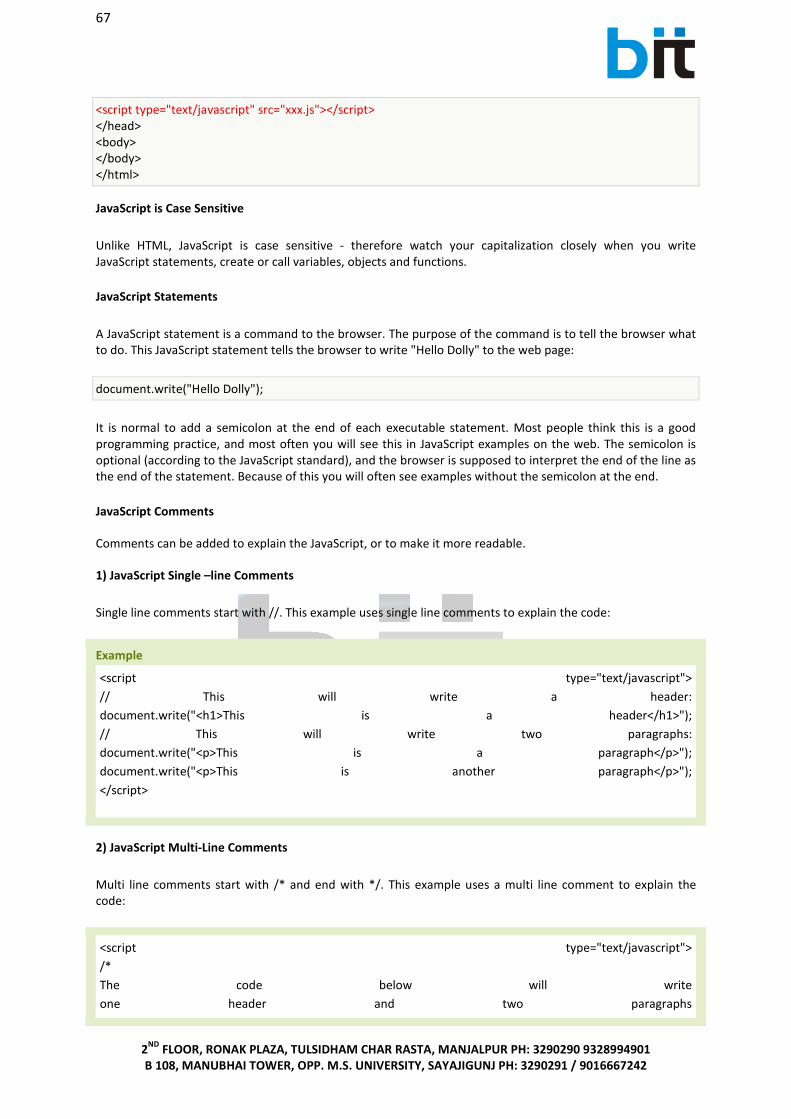
67
2ND
FLOOR, RONAK PLAZA, TULSIDHAM CHAR RASTA, MANJALPUR PH: 3290290 9328994901
B 108, MANUBHAI TOWER, OPP. M.S. UNIVERSITY, SAYAJIGUNJ PH: 3290291 / 9016667242
<script type="text/javascript" src="xxx.js"></script>
</head>
<body>
</body>
</html>
JavaScript is Case Sensitive
Unlike HTML, JavaScript is case sensitive - therefore watch your capitalization closely when you write
JavaScript statements, create or call variables, objects and functions.
JavaScript Statements
A JavaScript statement is a command to the browser. The purpose of the command is to tell the browser what
to do. This JavaScript statement tells the browser to write "Hello Dolly" to the web page:
document.write("Hello Dolly");
It is normal to add a semicolon at the end of each executable statement. Most people think this is a good
programming practice, and most often you will see this in JavaScript examples on the web. The semicolon is
optional (according to the JavaScript standard), and the browser is supposed to interpret the end of the line as
the end of the statement. Because of this you will often see examples without the semicolon at the end.
JavaScript Comments
Comments can be added to explain the JavaScript, or to make it more readable.
1) JavaScript Single –line Comments
Single line comments start with //. This example uses single line comments to explain the code:
Example
<script type="text/javascript">
// This will write a header:
document.write("<h1>This is a header</h1>");
// This will write two paragraphs:
document.write("<p>This is a paragraph</p>");
document.write("<p>This is another paragraph</p>");
</script>
2) JavaScript Multi-Line Comments
Multi line comments start with /* and end with */. This example uses a multi line comment to explain the
code:
<script type="text/javascript">
/*
The code below will write
one header and two paragraphs
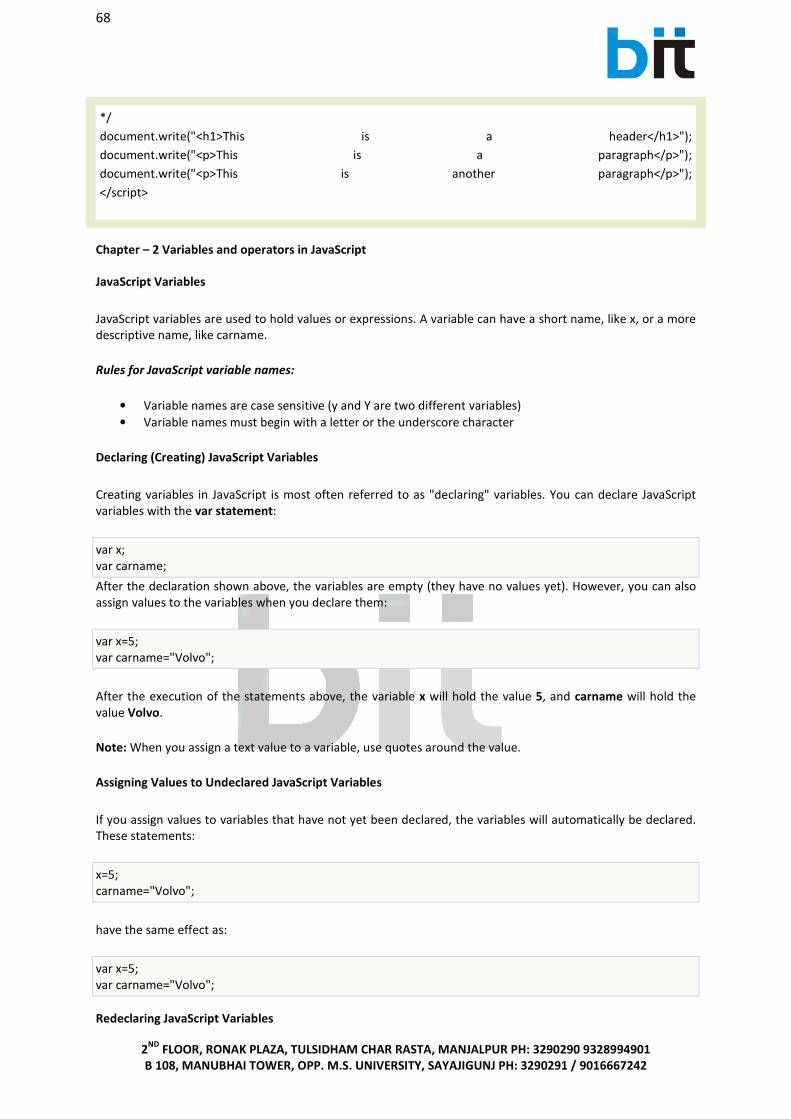
68
2ND
FLOOR, RONAK PLAZA, TULSIDHAM CHAR RASTA, MANJALPUR PH: 3290290 9328994901
B 108, MANUBHAI TOWER, OPP. M.S. UNIVERSITY, SAYAJIGUNJ PH: 3290291 / 9016667242
*/
document.write("<h1>This is a header</h1>");
document.write("<p>This is a paragraph</p>");
document.write("<p>This is another paragraph</p>");
</script>
Chapter – 2 Variables and operators in JavaScript
JavaScript Variables
JavaScript variables are used to hold values or expressions. A variable can have a short name, like x, or a more
descriptive name, like carname.
Rules for JavaScript variable names:
• Variable names are case sensitive (y and Y are two different variables)
• Variable names must begin with a letter or the underscore character
Declaring (Creating) JavaScript Variables
Creating variables in JavaScript is most often referred to as "declaring" variables. You can declare JavaScript
variables with the var statement:
After the declaration shown above, the variables are empty (they have no values yet). However, you can also
assign values to the variables when you declare them:
var x=5;
var carname="Volvo";
After the execution of the statements above, the variable x will hold the value 5, and carname will hold the
value Volvo.
Note: When you assign a text value to a variable, use quotes around the value.
Assigning Values to Undeclared JavaScript Variables
If you assign values to variables that have not yet been declared, the variables will automatically be declared.
These statements:
x=5;
carname="Volvo";
have the same effect as:
var x=5;
var carname="Volvo";
Redeclaring JavaScript Variables
var x;
var carname;

69
2ND
FLOOR, RONAK PLAZA, TULSIDHAM CHAR RASTA, MANJALPUR PH: 3290290 9328994901
B 108, MANUBHAI TOWER, OPP. M.S. UNIVERSITY, SAYAJIGUNJ PH: 3290291 / 9016667242
If you redeclare a JavaScript variable, it will not lose its original value.
var x=5;
var x;
After the execution of the statements above, the variable x will still have the value of 5. The value of x is not
reset (or cleared) when you redeclare it.
JavaScript Operators
1) JavaScript Arithmetic Operators
You can do arithmetic operations with JavaScript variables:
y=x-5;
z=y+5;
Arithmetic operators are used to perform arithmetic between variables and/or values. Given that y=5, the
table below explains the arithmetic operators:
Operator Description Example Result
+ Addition x=y+2 x=7
- Subtraction x=y-2 x=3
* Multiplication x=y*2 x=10
/ Division x=y/2 x=2.5
% Modulus (division remainder) x=y%2 x=1
++ Increment x=++y x=6
-- Decrement x=--y x=4
2) JavaScript Assignment Operators
Assignment operators are used to assign values to JavaScript variables. Given that x=10 and y=5, the table
below explains the assignment operators:
Operator Example Same As Result
= x=y x=5

70
2ND
FLOOR, RONAK PLAZA, TULSIDHAM CHAR RASTA, MANJALPUR PH: 3290290 9328994901
B 108, MANUBHAI TOWER, OPP. M.S. UNIVERSITY, SAYAJIGUNJ PH: 3290291 / 9016667242
+= x+=y X=x+y x=15
-= x-=y X=x-y x=5
*= x*=y X=x*y x=50
/= x/=y X=x/y x=2
%= x%=y X=x%y x=0
3) Comparison (Relational) Operators
Comparison operators are used in logical statements to determine equality or difference between variables or
values. Given that x=5, the table below explains the comparison operators:
Operator Description Example
== is equal to x==8 is false
=== is exactly equal to (value and type) x===5 is true
x==="5" is false
!= is not equal x!=8 is true
> is greater than x>8 is false
< is less than x<8 is true
>= is greater than or equal to x>=8 is false
<= is less than or equal to x<=8 is true
4) Logical Operators
Logical operators are used to determine the logic between variables or values. Given that x=6 and y=3, the
table below explains the logical operators:
Operator Description Example
&& and (x < 10 && y > 1) is true

71
2ND
FLOOR, RONAK PLAZA, TULSIDHAM CHAR RASTA, MANJALPUR PH: 3290290 9328994901
B 108, MANUBHAI TOWER, OPP. M.S. UNIVERSITY, SAYAJIGUNJ PH: 3290291 / 9016667242
5) Conditional Operator
JavaScript also contains a conditional operator that assigns a value to a variable based on some condition.
Syntax
variablename=(condition)?value1:value2
Example
greeting=(visitor=="PRES")?"Dear President ":"Dear ";
If the variable visitor has the value of "PRES", then the variable greeting will be assigned the value "Dear
President " else it will be assigned "Dear".
6) Special Operator
� typeof : The “typeof” operator returns a string indicating the type of the operand.
Ex. var x = 5;
document.write(typeof(x));
output will be : Number
� Comma : The comma operator evaluates both its operands and returns the value of the second operand.
Ex. var a= 2;b=3;c=4;d=5;
x=(a++,c) * (b++,d);
document.write(x);
output will be : 20
� new : The new operator is used to create a new instance of an object type. The object type may be user
define or built-in, the array object.
ex. a=new Array;
7) The + Operator Used on Strings
The + operator can also be used to add string variables or text values together. To add two or more string
variables together, use the + operator.
txt1="What a very";
txt2="nice day";
txt3=txt1+txt2;
|| or (x==5 || y==5) is false
! not !(x==y) is true

72
2ND
FLOOR, RONAK PLAZA, TULSIDHAM CHAR RASTA, MANJALPUR PH: 3290290 9328994901
B 108, MANUBHAI TOWER, OPP. M.S. UNIVERSITY, SAYAJIGUNJ PH: 3290291 / 9016667242
After the execution of the statements above, the variable txt3 contains "What a verynice day". To add a space
between the two strings, insert a space into one of the strings:
txt1="What a very ";
txt2="nice day";
txt3=txt1+txt2;
or insert a space into the expression:
txt1="What a very";
txt2="nice day";
txt3=txt1+" "+txt2;
After the execution of the statements above, the variable txt3 contains:
"What a very nice day"

73
2ND
FLOOR, RONAK PLAZA, TULSIDHAM CHAR RASTA, MANJALPUR PH: 3290290 9328994901
B 108, MANUBHAI TOWER, OPP. M.S. UNIVERSITY, SAYAJIGUNJ PH: 3290291 / 9016667242
Chapter – 3 Conditional Statements
Very often when you write code, you want to perform different actions for different decisions. You can use
conditional statements in your code to do this.
In JavaScript we have the following conditional statements:
• if statement - use this statement if you want to execute some code only if a specified condition is true
• if...else statement - use this statement if you want to execute some code if the condition is true and
another code if the condition is false
• if...else if....else statement - use this statement if you want to select one of many blocks of code to be
executed
• switch statement - use this statement if you want to select one of many blocks of code to be
executed
If Statement
You should use the if statement if you want to execute some code only if a specified condition is true.
Syntax
if (condition)
{
code to be executed if condition is true
}
Note that if is written in lowercase letters. Using uppercase letters (IF) will generate a JavaScript error!
Example 1
<script type="text/javascript">
//Write a "Good morning" greeting if
//the time is less than 10
var d=new Date();
var time=d.getHours();
if (time<10)
{
document.write("<b>Good morning</b>");
}
</script>
Example 2
<script type="text/javascript">
//Write "Lunch-time!" if the time is 11
var d=new Date();
var time=d.getHours();
if (time==11)
{
document.write("<b>Lunch-time!</b>");
}
</script>
Note: When comparing variables you must always use two equals signs next to each other (==)!
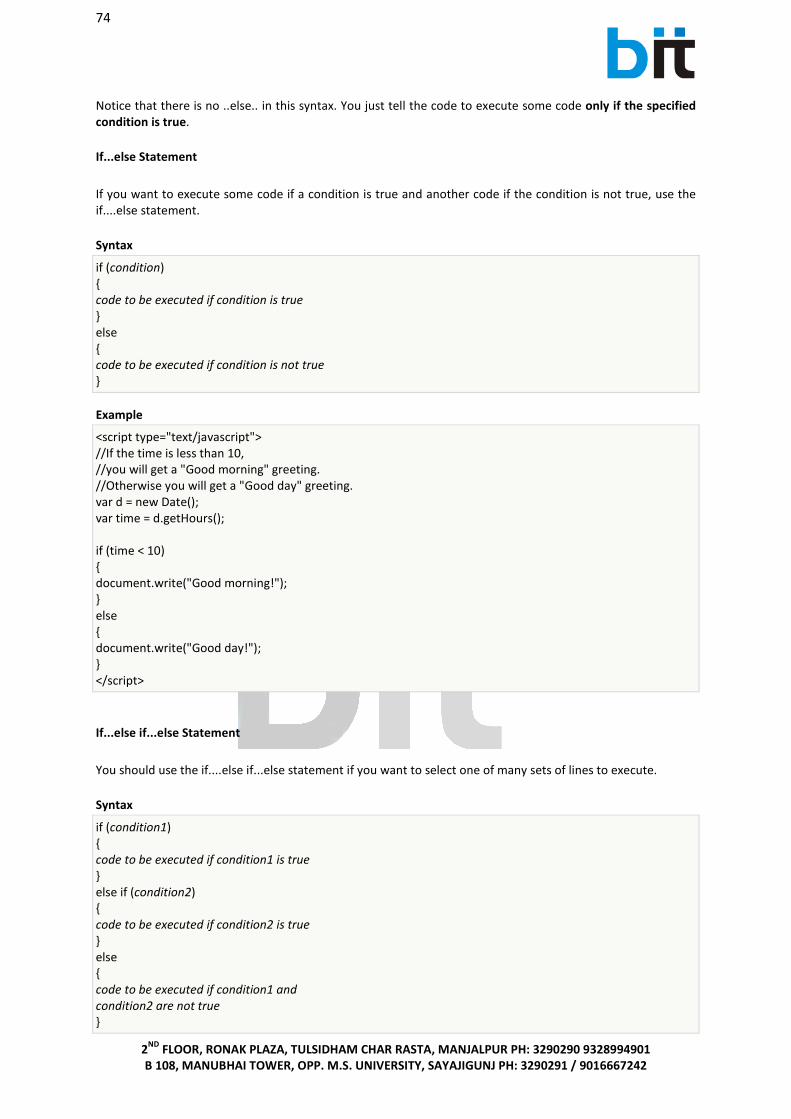
74
2ND
FLOOR, RONAK PLAZA, TULSIDHAM CHAR RASTA, MANJALPUR PH: 3290290 9328994901
B 108, MANUBHAI TOWER, OPP. M.S. UNIVERSITY, SAYAJIGUNJ PH: 3290291 / 9016667242
Notice that there is no ..else.. in this syntax. You just tell the code to execute some code only if the specified
condition is true.
If...else Statement
If you want to execute some code if a condition is true and another code if the condition is not true, use the
if....else statement.
Syntax
if (condition)
{
code to be executed if condition is true
}
else
{
code to be executed if condition is not true
}
Example
<script type="text/javascript">
//If the time is less than 10,
//you will get a "Good morning" greeting.
//Otherwise you will get a "Good day" greeting.
var d = new Date();
var time = d.getHours();
if (time < 10)
{
document.write("Good morning!");
}
else
{
document.write("Good day!");
}
</script>
If...else if...else Statement
You should use the if....else if...else statement if you want to select one of many sets of lines to execute.
Syntax
if (condition1)
{
code to be executed if condition1 is true
}
else if (condition2)
{
code to be executed if condition2 is true
}
else
{
code to be executed if condition1 and
condition2 are not true
}

75
2ND
FLOOR, RONAK PLAZA, TULSIDHAM CHAR RASTA, MANJALPUR PH: 3290290 9328994901
B 108, MANUBHAI TOWER, OPP. M.S. UNIVERSITY, SAYAJIGUNJ PH: 3290291 / 9016667242
Example
<script type="text/javascript">
var d = new Date()
var time = d.getHours()
if (time<10)
{
document.write("<b>Good morning</b>");
}
else if (time>10 && time<16)
{
document.write("<b>Good day</b>");
}
else
{
document.write("<b>Hello World!</b>");
}
</script>
The JavaScript Switch Statement
You should use the switch statement if you want to select one of many blocks of code to be executed.
Syntax
switch(n)
{
case 1:
execute code block 1
break;
case 2:
execute code block 2
break;
default:
code to be executed if n is
different from case 1 and 2
}
This is how it works: First we have a single expression n (most often a variable), that is evaluated once. The
value of the expression is then compared with the values for each case in the structure. If there is a match, the
block of code associated with that case is executed. Use break to prevent the code from running into the next
case automatically.
Example
<script type="text/javascript">
//You will receive a different greeting based
//on what day it is. Note that Sunday=0,
//Monday=1, Tuesday=2, etc.
var d=new Date();
theDay=d.getDay();
switch (theDay)
{
case 5:
document.write("Finally Friday");
break;
case 6:
document.write("Super Saturday");

76
2ND
FLOOR, RONAK PLAZA, TULSIDHAM CHAR RASTA, MANJALPUR PH: 3290290 9328994901
B 108, MANUBHAI TOWER, OPP. M.S. UNIVERSITY, SAYAJIGUNJ PH: 3290291 / 9016667242
break;
case 0:
document.write("Sleepy Sunday");
break;
default:
document.write("I'm looking forward to this weekend!");
}
</script>
Alert Box
An alert box is often used if you want to make sure information comes through to the user.
When an alert box pops up, the user will have to click "OK" to proceed.
Syntax:
alert("sometext");
Confirm Box
A confirm box is often used if you want the user to verify or accept something.
When a confirm box pops up, the user will have to click either "OK" or "Cancel" to proceed.
If the user clicks "OK", the box returns true. If the user clicks "Cancel", the box returns false.
Syntax:
confirm("sometext");
Prompt Box
A prompt box is often used if you want the user to input a value before entering a page.
When a prompt box pops up, the user will have to click either "OK" or "Cancel" to proceed after entering an
input value.
If the user clicks "OK" the box returns the input value. If the user clicks "Cancel" the box returns null.
Syntax:
prompt("sometext","defaultvalue");
chapter – 4 JavaScript Loops
Very often when you write code, you want the same block of code to run over and over again in a row. Instead
of adding several almost equal lines in a script we can use loops to perform a task like this.
In JavaScript there are two different kinds of loops:
• for - loops through a block of code a specified number of times
• while - loops through a block of code while a specified condition is true

77
2ND
FLOOR, RONAK PLAZA, TULSIDHAM CHAR RASTA, MANJALPUR PH: 3290290 9328994901
B 108, MANUBHAI TOWER, OPP. M.S. UNIVERSITY, SAYAJIGUNJ PH: 3290291 / 9016667242
• do-while - loops through a block of code while a specified condition is true
The for Loop
The for loop is used when you know in advance how many times the script should run.
Syntax
for (var=startvalue;var<=endvalue;var=var+increment)
{
code to be executed
}
Example
Explanation: The example below defines a loop that starts with i=0. The loop will continue to run as long as i is
less than, or equal to 10. i will increase by 1 each time the loop runs.
Note: The increment parameter could also be negative, and the <= could be any comparing statement.
<html>
<body>
<script type="text/javascript">
var i=0;
for (i=0;i<=10;i++)
{
document.write("The number is " + i);
document.write("<br />");
}
</script>
</body>
</html>
Result
The number is 0
The number is 1
The number is 2
The number is 3
The number is 4
The number is 5
The number is 6
The number is 7
The number is 8
The number is 9
The number is 10
The while loop
The while loop is used when you want the loop to execute and continue executing while the specified
condition is true.

78
2ND
FLOOR, RONAK PLAZA, TULSIDHAM CHAR RASTA, MANJALPUR PH: 3290290 9328994901
B 108, MANUBHAI TOWER, OPP. M.S. UNIVERSITY, SAYAJIGUNJ PH: 3290291 / 9016667242
while (var<=endvalue)
{
code to be executed
}
Note: The <= could be any comparing statement.
Example
Explanation: The example below defines a loop that starts with i=0. The loop will continue to run as long as i is
less than, or equal to 10. i will increase by 1 each time the loop runs.
<html>
<body>
<script type="text/javascript">
var i=0;
while (i<=10)
{
document.write("The number is " + i);
document.write("<br />");
i=i+1;
}
</script>
</body>
</html>
Result
The number is 0
The number is 1
The number is 2
The number is 3
The number is 4
The number is 5
The number is 6
The number is 7
The number is 8
The number is 9
The number is 10
The do...while Loop
The do...while loop is a variant of the while loop. This loop will always execute a block of code ONCE, and then
it will repeat the loop as long as the specified condition is true. This loop will always be executed at least once,
even if the condition is false, because the code is executed before the condition is tested.
Do
{
code to be executed
}
while (var<=endvalue);
Example

79
2ND
FLOOR, RONAK PLAZA, TULSIDHAM CHAR RASTA, MANJALPUR PH: 3290290 9328994901
B 108, MANUBHAI TOWER, OPP. M.S. UNIVERSITY, SAYAJIGUNJ PH: 3290291 / 9016667242
<html>
<body>
<script type="text/javascript">
var i=0;
do
{
document.write("The number is " + i);
document.write("<br />");
i=i+1;
}
while (i<0);
</script>
</body>
</html>
Result
The number is 0
break and continue Statements
There are two special statements that can be used inside loops: break and continue.
Break
The break command will break the loop and continue executing the code that follows after the loop (if any).
Example
<html>
<body>
<script type="text/javascript">
var i=0;
for (i=0;i<=10;i++)
{
if (i==3)
{
break;
}
document.write("The number is " + i);
document.write("<br />");
}
</script>
</body>
</html>
Result
The number is 0
The number is 1
The number is 2
Continue
The continue command will break the current loop and continue with the next value.

80
2ND
FLOOR, RONAK PLAZA, TULSIDHAM CHAR RASTA, MANJALPUR PH: 3290290 9328994901
B 108, MANUBHAI TOWER, OPP. M.S. UNIVERSITY, SAYAJIGUNJ PH: 3290291 / 9016667242
Example
<html>
<body>
<script type="text/javascript">
var i=0
for (i=0;i<=10;i++)
{
if (i==3)
{
continue;
}
document.write("The number is " + i);
document.write("<br />");
}
</script>
</body>
</html>
Result
The number is 0
The number is 1
The number is 2
The number is 4
The number is 5
The number is 6
The number is 7
The number is 8
The number is 9
The number is 10
JavaScript For...In Statement
The for...in statement is used to loop (iterate) through the elements of an array or through the properties of
an object.
The code in the body of the for ... in loop is executed once for each element/property.
Syntax
for (variable in object)
{
code to be executed
}
The variable argument can be a named variable, an array element, or a property of an object.
Example
Using for...in to loop through an array:

81
2ND
FLOOR, RONAK PLAZA, TULSIDHAM CHAR RASTA, MANJALPUR PH: 3290290 9328994901
B 108, MANUBHAI TOWER, OPP. M.S. UNIVERSITY, SAYAJIGUNJ PH: 3290291 / 9016667242
<html>
<body>
<script type="text/javascript">
var x;
var mycars = new Array();
mycars[0] = "Saab";
mycars[1] = "Volvo";
mycars[2] = "BMW";
for (x in mycars)
{
document.write(mycars[x] + "<br />");
}
</script>
</body>
</html>
Chapter – 5 Built-in Functions
���� String object
The String object is used to manipulate a stored piece of text.
Examples :
The following example uses the length property of the String object to find the length of a string:
var txt="Hello world!";
document.write(txt.length);
The code above will result in the following output:
12
The following example uses the toUpperCase() method of the String object to convert a string to uppercase
letters:
var txt="Hello world!";
document.write(txt.toUpperCase());
The code above will result in the following output:
HELLO WORLD!
String Object Methods
Method Description
big() Displays a string in a big font
blink() Displays a blinking string
bold() Displays a string in bold
charAt() Returns the character at a specified position

82
2ND
FLOOR, RONAK PLAZA, TULSIDHAM CHAR RASTA, MANJALPUR PH: 3290290 9328994901
B 108, MANUBHAI TOWER, OPP. M.S. UNIVERSITY, SAYAJIGUNJ PH: 3290291 / 9016667242
concat() Joins two or more strings
fontcolor() Displays a string in a specified color
fontsize() Displays a string in a specified size
indexOf() Returns the position of the first occurrence of a specified string value in
a string
italics() Displays a string in italic
lastIndexOf() Returns the position of the last occurrence of a specified string value,
searching backwards from the specified position in a string
match() Searches for a specified value in a string
replace() Replaces some characters with some other characters in a string
small() Displays a string in a small font
split() Splits a string into an array of strings
strike() Displays a string with a strikethrough
sub() Displays a string as subscript
substr() Extracts a specified number of characters in a string, from a start index
substring() Extracts the characters in a string between two specified indices
sup() Displays a string as superscript
toLowerCase() Displays a string in lowercase letters
toUpperCase() Displays a string in uppercase letters
valueOf() Returns the primitive value of a String object
���� Date Object
The Date object is used to work with dates and times. The following code create a Date object called myDate:
var myDate=new Date()
Note: The Date object will automatically hold the current date and time as its initial value!
Set Dates

83
2ND
FLOOR, RONAK PLAZA, TULSIDHAM CHAR RASTA, MANJALPUR PH: 3290290 9328994901
B 108, MANUBHAI TOWER, OPP. M.S. UNIVERSITY, SAYAJIGUNJ PH: 3290291 / 9016667242
We can easily manipulate the date by using the methods available for the Date object. In the example below
we set a Date object to a specific date (14th January 2010):
var myDate=new Date();
myDate.setFullYear(2010,0,14);
And in the following example we set a Date object to be 5 days into the future:
var myDate=new Date();
myDate.setDate(myDate.getDate()+5);
Note: If adding five days to a date shifts the month or year, the changes are handled automatically by the Date
object itself!
Compare Two Dates
The Date object is also used to compare two dates. The following example compares today's date with the
14th January 2010:
var myDate=new Date();
myDate.setFullYear(2010,0,14);
var today = new Date();
if (myDate>today)
{
alert("Today is before 14th January 2010");
}
else
{
alert("Today is after 14th January 2010");
}
Date Object Methods
Method Description
Date() Returns today's date and time
getDate() Returns the day of the month from a Date object (from 1-31)
getDay() Returns the day of the week from a Date object (from 0-6)
getFullYear() Returns the year, as a four-digit number, from a Date object
getHours() Returns the hour of a Date object (from 0-23)
getMilliseconds() Returns the milliseconds of a Date object (from 0-999)
getMinutes() Returns the minutes of a Date object (from 0-59)
getMonth() Returns the month from a Date object (from 0-11)
84
2ND
FLOOR, RONAK PLAZA, TULSIDHAM CHAR RASTA, MANJALPUR PH: 3290290 9328994901
B 108, MANUBHAI TOWER, OPP. M.S. UNIVERSITY, SAYAJIGUNJ PH: 3290291 / 9016667242
getSeconds() Returns the seconds of a Date object (from 0-59)
getTime() Returns the number of milliseconds since midnight Jan 1, 1970
toString() Converts a Date object to a string
valueOf() Returns the primitive value of a Date object
���� Math Object
The Math object allows you to perform mathematical tasks. The Math object includes several mathematical
constants and methods.
Syntax for using properties/methods of Math:
var pi_value=Math.PI;
var sqrt_value=Math.sqrt(16);
Note: Math is not a constructor. All properties and methods of Math can be called by using Math as an object
without creating it.
Mathematical Constants
JavaScript provides eight mathematical constants that can be accessed from the Math object. These are: E, PI,
square root of 2, square root of 1/2, natural log of 2, natural log of 10, base-2 log of E, and base-10 log of E.
You may reference these constants from your JavaScript like this:
Math.E
Math.PI
Math.SQRT2
Math.SQRT1_2
Math.LN2
Math.LN10
Math.LOG2E
Math.LOG10E
Mathematical Methods
In addition to the mathematical constants that can be accessed from the Math object there are also several
methods available. The following example uses the round() method of the Math object to round a number to
the nearest integer:
document.write(Math.round(4.7));
The code above will result in the following output:
5

85
2ND
FLOOR, RONAK PLAZA, TULSIDHAM CHAR RASTA, MANJALPUR PH: 3290290 9328994901
B 108, MANUBHAI TOWER, OPP. M.S. UNIVERSITY, SAYAJIGUNJ PH: 3290291 / 9016667242
The following example uses the random() method of the Math object to return a random number between 0
and 1:
document.write(Math.random());
The code above can result in the following output:
0.1398174871170434
The following example uses the floor() and random() methods of the Math object to return a random number
between 0 and 10:
document.write(Math.floor(Math.random()*11));
The code above can result in the following output:
Math Object Methods
Method Description
abs(x) Returns the absolute value of a number
acos(x) Returns the arccosine of a number
asin(x) Returns the arcsine of a number
atan(x) Returns the arctangent of x as a numeric value between -PI/2 and PI/2
radians
ceil(x) Returns the value of a number rounded upwards to the nearest integer
cos(x) Returns the cosine of a number
exp(x) Returns the value of Ex
floor(x) Returns the value of a number rounded downwards to the nearest integer
log(x) Returns the natural logarithm (base E) of a number
max(x,y) Returns the number with the highest value of x and y
min(x,y) Returns the number with the lowest value of x and y
pow(x,y) Returns the value of x to the power of y
random() Returns a random number between 0 and 1
round(x) Rounds a number to the nearest integer

86
2ND
FLOOR, RONAK PLAZA, TULSIDHAM CHAR RASTA, MANJALPUR PH: 3290290 9328994901
B 108, MANUBHAI TOWER, OPP. M.S. UNIVERSITY, SAYAJIGUNJ PH: 3290291 / 9016667242
sin(x) Returns the sine of a number
sqrt(x) Returns the square root of a number
tan(x) Returns the tangent of an angle
Top-level Functions
Function Description
eval() Evaluates a string and executes it as if it was script code
isNaN() Checks if a value is not a number
Number() Converts an object's value to a number
parseFloat() Parses a string and returns a floating point number
parseInt() Parses a string and returns an integer
String() Converts an object's value to a string
chapter – 6 Array
Create an Array
The following code creates an Array object called myCars:
var myCars=new Array();
There are two ways of adding values to an array (you can add as many values as you need to define as many
variables you require).
1:
var myCars=new Array();
myCars[0]="Saab";
myCars[1]="Volvo";
myCars[2]="BMW";
You could also pass an integer argument to control the array's size:
var myCars=new Array(3);
myCars[0]="Saab";
myCars[1]="Volvo";
myCars[2]="BMW";
2:var myCars=new Array("Saab","Volvo","BMW");

87
2ND
FLOOR, RONAK PLAZA, TULSIDHAM CHAR RASTA, MANJALPUR PH: 3290290 9328994901
B 108, MANUBHAI TOWER, OPP. M.S. UNIVERSITY, SAYAJIGUNJ PH: 3290291 / 9016667242
Note: If you specify numbers or true/false values inside the array then the type of variables will be numeric or
Boolean instead of string.
Access an Array
You can refer to a particular element in an array by referring to the name of the array and the index number.
The index number starts at 0. The following code line:
document.write(myCars[0]);
will result in the following output:
Saab
Modify Values in an Array
To modify a value in an existing array, just add a new value to the array with a specified index number:
myCars[0]="Opel";
Now, the following code line:
document.write(myCars[0]);
will result in the following output:
Opel
Example 1. Script to accept 5 numbers in array and display sum of all elements.
<script language="JavaScript">
var i, no,sum=0;
no=new Array();
for(i=0;i<5;i++)
{
no[i]=prompt("Enter " + i +" element");
sum=sum+parseInt(no[i]);
}
document.write("Sum of " +(no.length)+"array element " + sum);
</script>
Array Object Methods
Method Description Example
concat() Joins two or more arrays and returns the
result
a=new Array("red","orange");
b=new Array("green","blue");
c=new Array;
c=a.concat(b);

88
2ND
FLOOR, RONAK PLAZA, TULSIDHAM CHAR RASTA, MANJALPUR PH: 3290290 9328994901
B 108, MANUBHAI TOWER, OPP. M.S. UNIVERSITY, SAYAJIGUNJ PH: 3290291 / 9016667242
document.write(c);
join() Puts all the elements of an array into a string.
The elements are separated by a specified
delimiter
a=new Array("red","orange");
str=a.join();
document.write(str);
pop() Removes and returns the last element of an
array
a=new Array("red","blue");
p=a.pop();
document.write(p);
push() Adds one or more elements to the end of an
array and returns the new length
a=new Array("basic ","dtp ");
a.push("C ","C++ ");
document.write(a);
reverse() Reverses the order of the elements in an array a=new Array("Java","dtp","C","C++");
a.reverse();
document.write(a);
shift() Removes and returns the first element of an
array
a=new Array("basic ","dtp ","C","C++");
a.shift();
document.write(a);
slice() Returns selected elements from an existing
array
sort() Sorts the elements of an array a=new Array("dhiren","Amir","saurabh",
"kush","parth","anshu","saumya");
a.sort();
document.write(a);
chapter – 7 User-define Function
JavaScript Functions
To keep the browser from executing a script when the page loads, you can put your script into a function. A
function contains code that will be executed by an event or by a call to that function. You may call a function
from anywhere within the page (or even from other pages if the function is embedded in an external .js file).
Functions can be defined both in the <head> and in the <body> section of a document. However, to assure
that the function is read/loaded by the browser before it is called, it could be wise to put it in the <head>
section.

89
2ND
FLOOR, RONAK PLAZA, TULSIDHAM CHAR RASTA, MANJALPUR PH: 3290290 9328994901
B 108, MANUBHAI TOWER, OPP. M.S. UNIVERSITY, SAYAJIGUNJ PH: 3290291 / 9016667242
Example
<html>
<head>
<script type="text/javascript">
function displaymessage()
{
alert("Hello World!");
}
</script>
</head>
<body>
<form>
<input type="button" value="Click me!"
onclick="displaymessage()" >
</form>
</body>
</html>
If the line: alert("Hello world!!") in the example above had not been put within a function, it would have been
executed as soon as the line was loaded. Now, the script is not executed before the user hits the button. We
have added an onClick event to the button that will execute the function displaymessage() when the button is
clicked.
How to Define a Function
The syntax for creating a function is:
function functionname(var1,var2,...,varX)
{
some code
}
var1, var2, etc are variables or values passed into the function. The { and the } defines the start and end of the
function.
Note: A function with no parameters must include the parentheses () after the function name:
function functionname()
{
some code
}
The return Statement
The return statement is used to specify the value that is returned from the function. So, functions that are
going to return a value must use the return statement.
Example
The function below should return the product of two numbers (a and b):
function prod(a,b)
{

90
2ND
FLOOR, RONAK PLAZA, TULSIDHAM CHAR RASTA, MANJALPUR PH: 3290290 9328994901
B 108, MANUBHAI TOWER, OPP. M.S. UNIVERSITY, SAYAJIGUNJ PH: 3290291 / 9016667242
x=a*b;
return x;
}
When you call the function above, you must pass along two parameters:
product=prod(2,3);
The returned value from the prod() function is 6, and it will be stored in the variable called product.
Example :
<html>
<head><title> script in the head section</title>
<script>
function draw(ch,n)
{
for (i=0; i<n; i++)
document.writeln(ch);
document.writeln("<br>");
}
</script>
</head>
<body>
<h3> script in the head section </h3>
<p align=center>
<script type=text/javascript language=javascript>
draw('*',7);
draw('=',9);
draw('@',7);
draw('!',15);
</script>
</body>
</html>
chapter – 8 Events
By using JavaScript, we have the ability to create dynamic web pages. Events are actions that can be detected
by JavaScript. Every element on a web page has certain events which can trigger JavaScript functions. For
example, we can use the onClick event of a button element to indicate that a function will run when a user
clicks on the button. We define the events in the HTML tags.
Examples of events:
• A mouse click
• A web page or an image loading
• Mousing over a hot spot on the web page
• Selecting an input box in an HTML form
• Submitting an HTML form
• A keystroke
Note: Events are normally used in combination with functions, and the function will not be executed before
the event occurs!
onload and onUnload

91
2ND
FLOOR, RONAK PLAZA, TULSIDHAM CHAR RASTA, MANJALPUR PH: 3290290 9328994901
B 108, MANUBHAI TOWER, OPP. M.S. UNIVERSITY, SAYAJIGUNJ PH: 3290291 / 9016667242
The onload and onUnload events are triggered when the user enters or leaves the page. The onload event is
often used to check the visitor's browser type and browser version, and load the proper version of the web
page based on the information. Both the onload and onUnload events are also often used to deal with cookies
that should be set when a user enters or leaves a page. For example, you could have a popup asking for the
user's name upon his first arrival to your page. The name is then stored in a cookie. Next time the visitor
arrives at your page, you could have another popup saying something like: "Welcome John Doe!".
onFocus, onBlur and onChange
The onFocus, onBlur and onChange events are often used in combination with validation of form fields. Below
is an example of how to use the onChange event. The checkEmail() function will be called whenever the user
changes the content of the field:
<input type="text" size="30"
id="email" onchange="checkEmail()">
onSubmit
The onSubmit event is used to validate ALL form fields before submitting it. Below is an example of how to use
the onSubmit event. The checkForm() function will be called when the user clicks the submit button in the
form. If the field values are not accepted, the submit should be cancelled. The function checkForm() returns
either true or false. If it returns true the form will be submitted, otherwise the submit will be cancelled:
<form method="post" action="xxx.htm"
onsubmit="return checkForm()">
onMouseOver and onMouseOut
onMouseOver and onMouseOut are often used to create "animated" buttons. Below is an example of an
onMouseOver event. An alert box appears when an onMouseOver event is detected:
<a href="http://www.w3schools.com"
onmouseover="alert('An onMouseOver event');return false">
<img src="w3schools.gif" width="100" height="30">
</a>
Example 1 :
<html>
<Head>
<SCRIPT>
function b_w( )
{
document.bgColor="white"; //background color
document.fgColor="black"; //foreground color
}
</SCRIPT>
</Head>
<Body>
<H2> Move the mouse Over and Out of the color names
given below and play with the background and text
color of the document.

92
2ND
FLOOR, RONAK PLAZA, TULSIDHAM CHAR RASTA, MANJALPUR PH: 3290290 9328994901
B 108, MANUBHAI TOWER, OPP. M.S. UNIVERSITY, SAYAJIGUNJ PH: 3290291 / 9016667242
<UL>
<LI on MouseOver=document.bgColor="green"; document.fgColor="orange"
onMouseOut=b_w( );>Green-Orange </LI>
<LI onMouseover=document.bgColor="orange"; document.fgColor="navy"
onMouseOut=b_w( );>Orange-Navy Blue<LI>
<LI onMouseover=document.bgColor="cyan"; document.fgColor="black"
onMouseOut=b_w( );>cyan-black<LI>
</UL> </H2>
</Body>
</html>
Example 2 :
<html>
<head><title>form</title></head>
<body>
<script language="JavaScript">
function fn()
{
abc.txtsum.value=parseInt(abc.no1.value)+parseInt(abc.no2.value);
}
</script>
<form name = "abc">
<input type="text" name="no1" value=" ">
<input type="text" name="no2" value=" "><br><br>
<input type = "button" name = "btn" value="click" onClick=fn();> <br><br>
Addition = <input type="text" name="txtsum" value=" "> <br>
</form>
</body>
</html>
Example 3:
<html>
<head><title>count</title></head>
<body bgcolor=skyblue>
<script>
function display()
{
document.write("<img src=Sunset.jpg height=50% width=50%>");
document.bgColor="lightyellow";
}
</script>
<input type =button name=btn value="CLICK " ondblClick=display();>
</body>
</html>

93
2ND
FLOOR, RONAK PLAZA, TULSIDHAM CHAR RASTA, MANJALPUR PH: 3290290 9328994901
B 108, MANUBHAI TOWER, OPP. M.S. UNIVERSITY, SAYAJIGUNJ PH: 3290291 / 9016667242
PART 4 DREAMWEAVER
CH – 1 INTRODUCTION
Introduction to Dreamweaver:
Dreamweaver 8 is easy to use software that allows you to create professional web Pages. The design
edition features of Dreamweaver 8 allow you to quickly add objects and functionality to your pages,
without having to program the HTML code manually. It's possible to create tables, edit frames, work
with layers, and insert JavaScript behaviours, etc., in a very simple and visual way.
In addition, it includes complete FTP client software, allowing among other things to work with visual
maps of the Web sites, and updating the Web site in the server without leaving the program.
Features of Dreamweaver:
1) RSS Integration: with Dreamweaver 8 you can integrate RSS feeds from other pages just
setting the source and drag-and-dropping the fields you want to appear. This way you would
insert XML data easily.
2) CSS improvement: in this latest version the compatibility and handling of CSS styles have
improved considerably. The CSS styles has been remade for a faster access to the page's
style, and includes a new grid from which you will be able to modify the properties of every
aspect of the style. Moreover, Dreamweaver 8 adds a new toolbar that helps you to set
different styles depending on the kind of media the pages is being visualizing (screen, printer
WebTV, PDAs...).
3) Accessibility: Dreamweaver 8 incorporates an evaluation tool that supports the new
WCAG/W3C Priority 2 checkpoints.
4) File Transfer: Now with Dreamweaver 8 you could keep on working with your files while the
program uploads you recent modified files to your server. Its synchronization has been
improved in a way that will allow you to manage the file changes and block/unblock files to
avoid overwriting.
5) Improved Interface: The users with visual problems could access to a new Zoom option of
the Design View in order to work comfortably and help them to work easily with nested
tables. Also the inclusion of rules will help to the measuring of the elements pixel to pixel.
6) New toolbar: A new toolbar has been added in Dreamweaver 8, you will find it in the left
side of the Code View, and it will help you to make the code more accessible since it allows
us to browse the code by tags or even to collapse them. You can even add comments with
just one click!
7) Compatibility: We have to mention also the new added compatibility with PHP%, ColdFusion
8 7 and Video Flash.
Introduction to Menus and Panels:
When we start Dreamweaver an initial screen appears like this one, we're going to look at its
fundamental components.
We will list the names of the different elements so it will be easier to understand the rest of the
course. The screen that is next (and in general all those of this course) does possibly not coincide
exactly with what you see in your computer, since each user can decide what elements they want to
see at every moment, as we'll see ahead.

94
2ND
FLOOR, RONAK PLAZA, TULSIDHAM CHAR RASTA, MANJALPUR PH: 3290290 9328994901
B 108, MANUBHAI TOWER, OPP. M.S. UNIVERSITY, SAYAJIGUNJ PH: 3290291 / 9016667242
Tool bars:
1. Title bar:
The title bar contains the name of the program (Macromedia Dreamweaver 8) and the name of the
document we are working with, between parenthesis you can see the name of the file format this
file is codified. At the end on the right are the buttons to minimize, maximize/restore and close the
program.
2. Menu bar:
The menu bar contains Dreamweaver operations, grouped in drop down menus. When we click on
Insert, for example, we'll see the operations related to the different elements that can be inserted in
Dreamweaver.
Many of the operations can be done from these menus, but sometimes it's preferable (or
compulsory) to do them from the panels.

95
2ND
FLOOR, RONAK PLAZA, TULSIDHAM CHAR RASTA, MANJALPUR PH: 3290290 9328994901
B 108, MANUBHAI TOWER, OPP. M.S. UNIVERSITY, SAYAJIGUNJ PH: 3290291 / 9016667242
3. The Standard Toolbar:
The standard toolbar contains icons to execute some of the most habitual operations immediately,
like Open , Save , etc.
4. The document Toolbar:
The document toolbar contains icons to execute some other habitual operations that the standard
toolbar doesn't include. These operations are for example changing the view of the document,
preview, etc.
5. The status bar:
The status bar shows us in every moment the HTML tag we are in (in the image, as we are in a blank
document, we are directly on the <body> tag). We also can swich between the selection, drag and
zoom modes using the three buttons on the right. You can select the zoom which you want to view
the Design View selecting a percentage or just tipying it on the percentage textbox (the default is
100%).
Panels and Inspectors:
Dreamweaver uses floating windows similar to the toolbar ones, these are known as panels or
inspectors. The difference between panel and inspector is that, in general, the appearance and
options of an inspector changes depending on the selected object. Through the Window option on
the menu bar, it's possible to show or to hide each one of the panels or inspectors. We're going to
look at the most important ones.
The Properties inspector:
The Properties inspector shows and allows us to modify the more frequent properties that are used
in the selected elements. For example, when we select element a text it will show the type of font,
the alignment, whether it's in italic or bold, etc. Clicking on the button you can unfold more options.

96
2ND
FLOOR, RONAK PLAZA, TULSIDHAM CHAR RASTA, MANJALPUR PH: 3290290 9328994901
B 108, MANUBHAI TOWER, OPP. M.S. UNIVERSITY, SAYAJIGUNJ PH: 3290291 / 9016667242
This button is in the bottom-right corner. It will surely be the tool that you are going to use most in
Dreamweaver.
The insert toolbar or panel of objects:
The insert toolbar or panel of objects allows you to insert elements in a document without having to
use the menu. The elements are classified according to their category: tables, text, forms, etc. It's
possible to configure this panel so that the icons of the objects are shown as buttons (in the previous
image), as names, or both simultaneously.

97
2ND
FLOOR, RONAK PLAZA, TULSIDHAM CHAR RASTA, MANJALPUR PH: 3290290 9328994901
B 108, MANUBHAI TOWER, OPP. M.S. UNIVERSITY, SAYAJIGUNJ PH: 3290291 / 9016667242
CH – 2 WORKING WITH WEBPAGE
Creating a Webpage:
So now that you have an idea of how Dreamweaver works, we're going to create a simple web Page,
with several text styles, an image, and a link to another Page. To create this single Page will take you
a few minutes, and you will know how to work with the basic elements with which most Web Pages
are made. If you have never made a Web Page, this is the moment to discover how easy it is.
Setting page title:
My First Web Page:
The first thing you need to do is to open Dreamweaver. You have already seen how to do this in the
previous Page. Then open a new document and select the Category Basic Page, HTML.
Next, type the text that appears in the following image in the blank document.
Once you type the text, we're going to modify the title and the background colour of the document.
For this you must click on the Modify menu and select the Page Properties option. Then a window
will be opened like the one appearing below.

98
2ND
FLOOR, RONAK PLAZA, TULSIDHAM CHAR RASTA, MANJALPUR PH: 3290290 9328994901
B 108, MANUBHAI TOWER, OPP. M.S. UNIVERSITY, SAYAJIGUNJ PH: 3290291 / 9016667242
Change the title for My first page. In Background colour type #CCCCFF, this way the background
colour of the document will be blue. Next, click on the OK button. Now you are going to insert an
image. For this, it has to be accessible in your hard drive, on a CD-ROM, or a floppy disk, but
preferably in the hard drive. Many of the images that we see in the Internet can be copied to your
hard drive. By right-clicking on the image a window opens with the option to Save image as... (it
depends on the browser that you use, but it will be similar). That allows you to save this image in a
file on your hard drive.
In the most modern browsers when placing the cursor over an image these icons
appear in a corner of the image, if you click in the icon of the floppy the same menu Save image as...
will appear, which we previously have made reference to.
Working With Text:
In this topic we'll learn how to change the text properties
Text Format:
The Selected text format can be defined through the Text menu, and through the Properties
inspector. We'll see the alternatives offered by the Properties inspector, although they are less than
the ones the Text menu offers.
Format:
Here we'll select a paragraph format previously designed for HTML, it can be header, paragraph or
pre-formatted. The headings are used to establish titles inside a document. The preformatted format
works to make the text appear such as it has been written. For example, if between two words you
introduce many spaces they will be considered as only one but when you establish the preformatted
format, the spaces will not be changed.
Font:
Lets you select a set of fonts. There are font’s sets instead of only one, because it's possible that if
you set just one font, the user could not have that font in their PC. So, if you select a set of fonts, if
the user doesn't have one of them, another is would be applied from the set. For example, if we
choose Arial, Helvetia, Sans-serif, we'll see the text with Arial font, but if it doesn't exist in our
computer, we'll see the text in Helvetia, and so on.
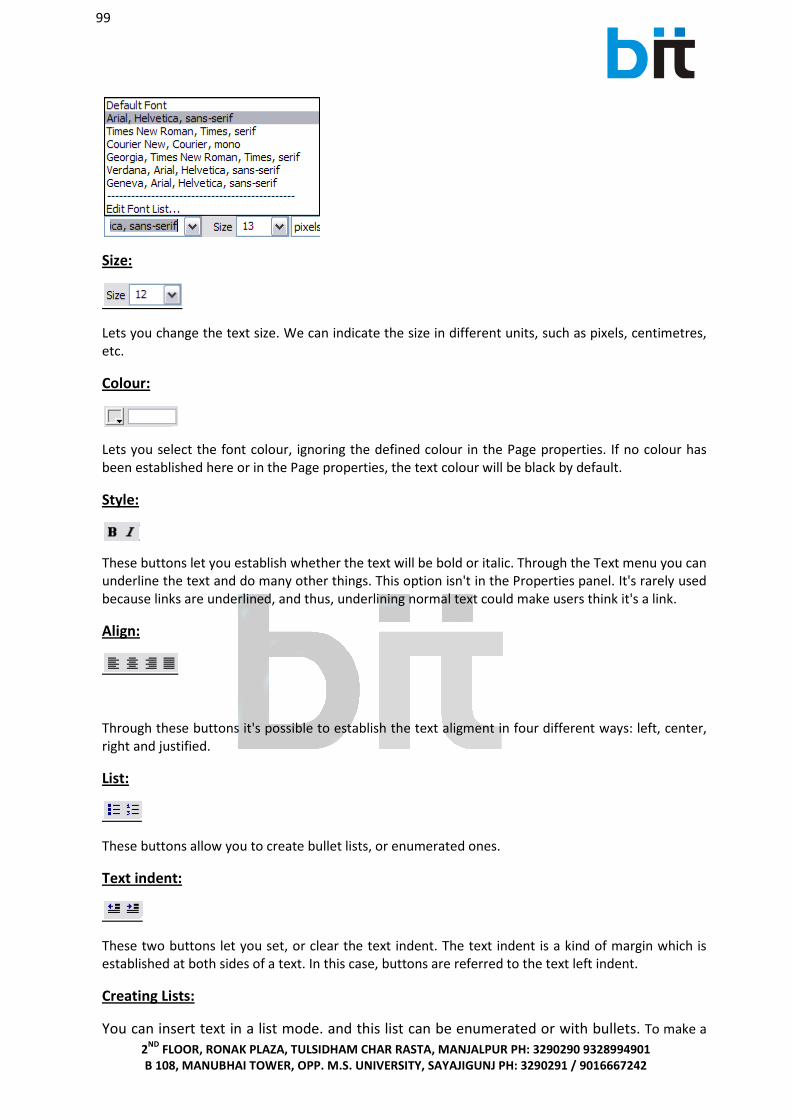
99
2ND
FLOOR, RONAK PLAZA, TULSIDHAM CHAR RASTA, MANJALPUR PH: 3290290 9328994901
B 108, MANUBHAI TOWER, OPP. M.S. UNIVERSITY, SAYAJIGUNJ PH: 3290291 / 9016667242
Size:
Lets you change the text size. We can indicate the size in different units, such as pixels, centimetres,
etc.
Colour:
Lets you select the font colour, ignoring the defined colour in the Page properties. If no colour has
been established here or in the Page properties, the text colour will be black by default.
Style:
These buttons let you establish whether the text will be bold or italic. Through the Text menu you can
underline the text and do many other things. This option isn't in the Properties panel. It's rarely used
because links are underlined, and thus, underlining normal text could make users think it's a link.
Align:
Through these buttons it's possible to establish the text aligment in four different ways: left, center,
right and justified.
List:
These buttons allow you to create bullet lists, or enumerated ones.
Text indent:
These two buttons let you set, or clear the text indent. The text indent is a kind of margin which is
established at both sides of a text. In this case, buttons are referred to the text left indent.
Creating Lists:
You can insert text in a list mode. and this list can be enumerated or with bullets. To make a

100
2ND
FLOOR, RONAK PLAZA, TULSIDHAM CHAR RASTA, MANJALPUR PH: 3290290 9328994901
B 108, MANUBHAI TOWER, OPP. M.S. UNIVERSITY, SAYAJIGUNJ PH: 3290291 / 9016667242
list from a previously introduced text in the document, you just have to select it and click on the right
list option, through the Properties inspector, or through the Text menu. The bullet list (unordered) is
selected through the button, while the enumerated list (ordered) is selected through the
button.
Example of a enumerated list (ordered):
1. Pack the bag
1. Pull out the books of that day
2. Introduce the books of the next day
2. Put on my pijamas
3. Brush my teeth
4. Turn on the alarm
Example of a list with bullets (unordered):
• Dog
• Cat
• Birds
o Canary
o Parrot
• Hamster
To establish lists nested inside others, such as the previous examples, you need to add a text
indent to the elements of the list you want to be part of the nested list.
Through the Text menu, and then the List option, it's possible to access the properties of the
selected list. You need to previously select the text list or have the cursor in any part of the
list to activate this submenu.
In the List properties window you can specify the list types (with numbers or bullets), the
type of the numbers or bullets you will use (in the Style field), and in case of ordered lists, the
number where the count starts.

101
2ND
FLOOR, RONAK PLAZA, TULSIDHAM CHAR RASTA, MANJALPUR PH: 3290290 9328994901
B 108, MANUBHAI TOWER, OPP. M.S. UNIVERSITY, SAYAJIGUNJ PH: 3290291 / 9016667242
CH – 3 WORKING WITH TABLES
In this unit we're going to see how to work with tables. We'll learn how to insert tables,
combine cells, insert rows or columns, and how to change the border size.
Working with Table:
All objects are aligned on the left side of the web site by default. But thanks to the tables
it's possible to distribute the text in columns, place the images next to a text block, and
many more things we could not do without the tables. At the moment most web sites are
based in tables, and this is because they are very useful to improve the design options. Tables are
composed of a set of cells and are distributed in rows and columns. Below we have an example of a
table:
Insert a table:
To insert a table go to the Insert menu, and then select the Table option. In the new window you
will need to set the number of Rows and Columns, and the width of the table. The Width can be
defined in Pixels or as a Percent. The difference between these is that the width in Pixels is always
the same, independent of the size of the browser window in which you are viewing the page, whilst
the width in Percent shows the percentage of the browser window that will be occupied by the
table and therefore it will be adjusted relative to the size of the browser window. This allows users
with a large screen to take advantage of the width of it. Border thickness indicates the border
thickness of the table in pixels. It is assigned a one (1) by default. Cell Padding indicates the space
between the cells content and their borders. Cell Spacing indicates the space between the table's
cells.
A heading for the table can also be established, and it is recommendable to use headings in the case
of users that use screen readers. Screen readers read headings and help the users to follow the
table information.
If you want to include a title, set it in the Caption option - the title will show up outside the table.In
align caption we indicate where we want to align the title in respect to the table. In Summary: we
indicate a description for the table which screen readers will read, remember that this text will not
be visible in the user's browser.

102
2ND
FLOOR, RONAK PLAZA, TULSIDHAM CHAR RASTA, MANJALPUR PH: 3290290 9328994901
B 108, MANUBHAI TOWER, OPP. M.S. UNIVERSITY, SAYAJIGUNJ PH: 3290291 / 9016667242
Cell Padding:
Cells are the squares that compose a table and are the intersection of the rows and the columns.

103
2ND
FLOOR, RONAK PLAZA, TULSIDHAM CHAR RASTA, MANJALPUR PH: 3290290 9328994901
B 108, MANUBHAI TOWER, OPP. M.S. UNIVERSITY, SAYAJIGUNJ PH: 3290291 / 9016667242
To insert any element into a cell such as text or images, you just have to place the cursor in there.
Table format:
The table properties are specified through its properties inspector.
Through the properties inspector you can modify the specified values when you insert the table. At
the same time, you can indicate others as the Align value (which allows one to align the table to the
left, middle or right), the background colour, or the background image.
If you select a cell or a set of cells, the properties inspector changes in order to specify other colours.
The top of the properties inspector in this case is used to specify the text properties which will be
inserted in the selected cell (or cells).
The inferior part is used to specify the value of the each cell such as the colour or the background
image (other than that specified in a global table), the cell border colour, etc.
Two options that you may possibly need to use frequently will be the Horz and Vert, which define
the content of the cell in horizontal or vertical way.
To practice you can perform the Step by step exercise in creating a table.
Changing table and cell sizes:
As you know, the Width of a table can be defined in Pixels or as a Percentage. The table size through
properties inspector will be set by the values of W (Width) and H (Height). Normally only width is
specified, not height.
The W and H values of a cell are always in Pixels. It isn't necessary to set any of these values for cells
unless you wish to maintain that size and don't want them to be adjusted to the window size.

104
2ND
FLOOR, RONAK PLAZA, TULSIDHAM CHAR RASTA, MANJALPUR PH: 3290290 9328994901
B 108, MANUBHAI TOWER, OPP. M.S. UNIVERSITY, SAYAJIGUNJ PH: 3290291 / 9016667242
The table and cells size can be specified not only through the properties inspector. You can also do it
by maintaining the mouse pressed on any border, and dragging it to the position that you want.
Adding and clearing rows and columns:
There are many ways of adding and clearing the rows and columns of a table. The first thing to do is
to place the mouse in a cell or to select several of them, then unfold the table contextual menu by
right clicking on it, or you can also open the Modify menu. In both cases you will see the Table
option. Depending on the selected cells, some of the Table options will be able to be used and others won't.
To insert a row or a column, just click on the Insert row or Insert column option. The row is inserted
above the cell or the set of selected cells, and columns are inserted to its left.
We can also count with a full advanced option, the Insert rows or columns option. When you select
this option you will see a new window where you can define whether you are going to insert rows or
columns, their number, and their position.
To delete a row or a column, just place the mouse in the row or column you want to delete, and
select Delete row or Delete column from the table menu.

105
2ND
FLOOR, RONAK PLAZA, TULSIDHAM CHAR RASTA, MANJALPUR PH: 3290290 9328994901
B 108, MANUBHAI TOWER, OPP. M.S. UNIVERSITY, SAYAJIGUNJ PH: 3290291 / 9016667242
You can also select the row or the column you want to delete and press the DEL key.
Combining and dividing cells:
It is possible to insert tables into other tables. This is called to Nest tables. Next you have an example
of a nesting. As you can see, in the first cell, another table has been inserted.
To nest tables, you just have to place the mouse in the cell where you want to insert the new table,
and then insert it the way we have just seen.
Combine cells consists of converting 2 or more cells into just one. This will clear the separating
border between the cells and they will become one. This can be useful, for example, to use the first
row to write the table's title. In this case you would have to combine all the cells of the first row into
just one. Dividing cells consists of splitting them.
One of the ways of dividing or combining cells is through the properties inspector.

106
2ND
FLOOR, RONAK PLAZA, TULSIDHAM CHAR RASTA, MANJALPUR PH: 3290290 9328994901
B 108, MANUBHAI TOWER, OPP. M.S. UNIVERSITY, SAYAJIGUNJ PH: 3290291 / 9016667242
If many cells are chosen they can be combined by clicking on the button of the properties inspector
(found at the bottom left of the properties panel, or by selecting the Merge cells option in the Table
option. As you have seen, you can get there via the contextual menu of the table or via the Modify
menu.
You should remember that it is only possible to combine adjacent cells, or a combination which
would lead to another new cell, in the example the result is a square.
In the next table cells 1 and 4 cannot be combined, neither the cells 1, 2 and 3, because those
combinations do not lead to a new squared cell.
To split a cell you have to click on the button of the properties inspector, or on the Split cell option of
the Table submenu. In both cases, you will see a window like this, in which you need to specify
whether the cell is going to be divided by rows or by columns, and the number of these.
Table modes:
At the time of working with tables, Dreamweaver offers us many different view modes. We have
worked all along in this unit with the standar mode, and we will continue working this way, but you
can go to different modes through the View menu, and then selecting the Table mode option.
Inside this option we can choose the Standard mode, the Expanded Tables mode, or the Layout
mode.
Layout mode is used to draw pages with a defined design based in tables. Using this view, the tables
don't have to be obligatorily inserted into text lines as we have been doing up to this moment. They

107
2ND
FLOOR, RONAK PLAZA, TULSIDHAM CHAR RASTA, MANJALPUR PH: 3290290 9328994901
B 108, MANUBHAI TOWER, OPP. M.S. UNIVERSITY, SAYAJIGUNJ PH: 3290291 / 9016667242
can be inserted into any part of the page, and Dreamweaver will fill the blank space to make it
possible for the table to be shown in that position.
Expanded Tables mode adds temporary filling and cell space to a table. It also increases the table
borders to make its edition easier. This mode can be used to select tables elements or to have the
insertion point in the required way, but in this mode we don't see how the page will be shown.
Marquees:
Marquees are text, images, or a combination of them. They can be moved inside the window in a
linear way. Below we have an example of a marquee.
Marquees cannot be inserted with the Dreamweaver graphics editor; you need to do it through
code. To create a marquee you need to insert the <MARQUEE> and </MARQUEE> labels. Between
these labels you need to introduce the elements that you want inside the marquee. You can also
specify some of the characteristics of the marquee. The marquee is moved from right to left
indefinitely by default, but you can make this properties vary if you want. For example, if you write
<marquee behaviour="slide">, the marquee will only move once and then will stop.
If you write <marquee behaviour="alternate">, instead of moving continuously, the marquee will
move from side to side in the window, like bouncing in the extremes, just as it happened in the
previous example whose code you can see next:
<marquee behavior="alternate">
Welcome to Dogs and Cats
<img src="images/logo_animales.gif">
</marquee>
Setting Date:
Dreamweaver allows you to easily insert the last date of update of the pages. With Dreamweaver,
when you modify a page in which this type of date has been inserted, it is automatically updated
with the system date.
It is convenient to insert the update date when the page contains constantly updated data, this way
the users know the last data of modification. In the cases when the update time is great it is worth
not to include this feature. To insert this date you need to go to Insert menu, and then the Date
option. In the new window it's possible to establish the date format, and the option of automatically
updating when the file is modified and saved.

108
2ND
FLOOR, RONAK PLAZA, TULSIDHAM CHAR RASTA, MANJALPUR PH: 3290290 9328994901
B 108, MANUBHAI TOWER, OPP. M.S. UNIVERSITY, SAYAJIGUNJ PH: 3290291 / 9016667242
CH – 4 WORKING WITH IMAGES
All web sites have a certain number of pages that allow you to improve their look, or just to add
more visual information.
Insert Images:
To insert an image go to the Insert menu and then select the Image option. After this it's possible to
select an image in the next window:
If for any reason you need to insert a BMP, it will not appear unless you select All the files in the
Type field. In the Relative to option you can specify whether the image will be relative to the
document or to the site root folder. It's better if it's relative to the Document because if you move
the site to a different location you may not see the image.
The path where the image is will be in the URL field of the window, and later in the SRC field of the
properties inspector. The way this path will be inserted will depend on whether it has been inserted
as relative to the root folder, or to the document.
For example, imagine that the images folder and the document in which we want to insert the image
is inside the root folder. An image, called teacherclick.jpg is inside the images folder. In case of
inserting the image as relative to the Document, the path would be:
Images/teacherclick.jpg
So, in case of it being inserted relative to the Site Root the path would be:
/images/teacherclick.jpg

109
2ND
FLOOR, RONAK PLAZA, TULSIDHAM CHAR RASTA, MANJALPUR PH: 3290290 9328994901
B 108, MANUBHAI TOWER, OPP. M.S. UNIVERSITY, SAYAJIGUNJ PH: 3290291 / 9016667242
It's just like when you create a hyperlink to a file related to the document or to the site root folder. If
you insert a BMP into a document, this will not be correctly shown in Dreamweaver, although it does
in the browser. In Dreamweaver it will be shown like this:
This is the same image that appears in Dreamweaver when an inserted image isn't found. This will
happen if you have modified the name of the image, or if you have moved it to another directory. In
this case, the image you will see in the browser will be like this:
It's a blank square with a red X, next to the image name or the contents of the Alt field in the
properties inspector.
Changing the image size:
Inside Dreamweaver the size of the images can be modified. This size change isn't directly applied to
the image file, but the view changes inside the page. It's very probable for the quality of the resulting
image to be lower than if we modify it in an external editor, such as Fireworks.
For example, we'll see what happens if we insert an image that represents the Dreamweaver icon
and we modify its size in many ways:
Original Image: Modified size image:
You can see the quality of the result. But occasionally it can be useful modifying the size of some
images although this implicates losing quality. There are two ways to modify the size. The first of
these is to select the image and drag one of the black squares that surround the image. The other
way is through the properties inspector, by changing the fields W (wide) or H (height). These fields
will be shown in the inspector when an image is selected.
Remember that when you change the alignment of an image you need to do this through the field
Align option of the properties inspector. The image alignment offers more possibilities than the text:
top, middle, absolute middle, baseline, etc...
Insert Rollover Images:
A rollover is an image replace by another when the mouse is over it. This kind of image is used on
menus and buttons. Here, there is an example of a rollover. Point at it to see what happens.

110
2ND
FLOOR, RONAK PLAZA, TULSIDHAM CHAR RASTA, MANJALPUR PH: 3290290 9328994901
B 108, MANUBHAI TOWER, OPP. M.S. UNIVERSITY, SAYAJIGUNJ PH: 3290291 / 9016667242
If you want to insert a rollover, you need to go to Insert menu, Image objects, and then Rollover
Image. In the new window specify the original image and the one that will substitute the former.
It's preferable to activate the Preload rollover image option. If it's active, the rollover image loads
when the page loads, so we avoid a download delay when we're over the image. The Alternate Text
is the text you will see when you place the mouse over the image, or the text that will show up when
of the image cannot be shown in the browser. Alternate text can be assigned to all images, not only
to rollovers. You can do this through the Alt field in the Properties inspector of the selected image.

111
2ND
FLOOR, RONAK PLAZA, TULSIDHAM CHAR RASTA, MANJALPUR PH: 3290290 9328994901
B 108, MANUBHAI TOWER, OPP. M.S. UNIVERSITY, SAYAJIGUNJ PH: 3290291 / 9016667242
CH – 5 LINKS
A hyperlink or link is just a connection that redirects you to another Page or file when you
click on it. You can assign a link to a text, to an image, or to part of an image.
Types of links:
There are different types of access paths when you are defining a link.
Absolute reference:
Drives you to an external location from the site where the file is. The location must be in the
internet, for example: "http://www.teacherclick.com".
Relative reference to the site:
Drives you to a file located inside the site of the actual file location.
Relative reference to the file:
It drives you to a file located inside the same site of the actual document, but starting in the
directory in which the actual file is.
Anchors:
It drives you to an anchor inside a file, which can be the current one or any other. To do this, the link
might be "name of_file.extension#name_of_anchor". The anchor is defined inside a file through
Insert menu, and then selecting the Named Anchor option.
Creating links:
The easiest way to create a link is through the properties inspector. To do this you have to select the
text or the object which is going to be used as a link, and then you must establish the Link in the
inspector.
For example, here there is a link to www.teacherclick.com, which will be an absolute reference, so, it
must contain HTTP://
Another way to create a link is through the Insert menu, and then selecting the Hyperlink option.
It's possible to create empty links; they can be useful when you use behaviours, etc. You just need to
write in Link only the # symbol. Other way to create a hyperlink is through the menu Insert, Hyperlink
option.

112
2ND
FLOOR, RONAK PLAZA, TULSIDHAM CHAR RASTA, MANJALPUR PH: 3290290 9328994901
B 108, MANUBHAI TOWER, OPP. M.S. UNIVERSITY, SAYAJIGUNJ PH: 3290291 / 9016667242
Creating links in this way is very easy, you only have to fill the fields we will now explain and the link
will be placed where the cursor is.
Text: stands for the text that the link will show.
Link: is the page you are making the hyperlink to.
Target: the page where you want the link to be opened.
Title: its use is almost the same than the Alt attribute of the images. It is the contextual help of the
link.
Access key: you can set here a key to increase the accessibility of your site. This link will be
accessible pressing the Alt key and then the key you type in this field.
Tab index: as long as you can jump from a link to another using the Tab key, you can set here the
order of priority this link will have.
Link Target:
The link target determines in which window the linked Page it's going to be opened, it can change
depending on the frames of the actual file. It can be specified in properties inspector through Target,
or through the Insert menu, and then clicking on the Hyperlink option.
_blank: It opens the linked file in a new browser's window.
_parent: It opens the linked file in the frame window that contains the link or the set of parent
frames.
_self: It's the default option. It opens the linked file in the same frame or window as the link.
_top: It opens the linked document in the whole browser's window.
Don't worry if you don't completely understand the functions of each of those destiny options, we'll
check them again in the Frames theme.

113
2ND
FLOOR, RONAK PLAZA, TULSIDHAM CHAR RASTA, MANJALPUR PH: 3290290 9328994901
B 108, MANUBHAI TOWER, OPP. M.S. UNIVERSITY, SAYAJIGUNJ PH: 3290291 / 9016667242
CH – 6 FLASH
Flash Buttons:
There is another set of special images similar to rollovers that are used to create menus, these are
the Flash buttons.
Below we see an example of a flash button. Place the mouse over it to see what happens.
To insert a flash button you need to go to the Insert menu, Media, and Flash Button option, and you
will see this dialogue box:
Through Style you can select one of the button formats offered. In this window you have to set the
text that will be shown in the button (Button text :), the name of the object in order to be saved
(Save as:) and the associated link (Link: and Target:).
It's better to save Flash buttons in the same directory of the HTML files, instead of the assigned
folder for images. If you don't do this it is possible that the button doesn't work propperly if the url is
not an absolute one (because if it is relative and the button is saved in the images folder the URL
must be relative to that path). Remember that buttons will be saved with a SWF extension. Through
the Properties inspector of the flash button, you can edit its attributes again:

114
2ND
FLOOR, RONAK PLAZA, TULSIDHAM CHAR RASTA, MANJALPUR PH: 3290290 9328994901
B 108, MANUBHAI TOWER, OPP. M.S. UNIVERSITY, SAYAJIGUNJ PH: 3290291 / 9016667242
The dialog window can be opened by clicking on the Edit button, and through the Play button you
can check the button status from Dreamweaver without it being necessary to open a browser's
page.
After testing the flash button status, you need to click again on the Play button (which will have
changed to a Stop button).
Flash text:
Flash text is like the rollover, but instead of interchanging images, it interchanges the colour of the
text. To insert a flash text you need to go to the Insert menu, Media, and Flash Text.
In the new window, set to the text, the link, and the name for the text and specify the original colour
as well as the rollover colour. Here, there is an example of the flash text. Place the mouse over it to
see what happens.

115
2ND
FLOOR, RONAK PLAZA, TULSIDHAM CHAR RASTA, MANJALPUR PH: 3290290 9328994901
B 108, MANUBHAI TOWER, OPP. M.S. UNIVERSITY, SAYAJIGUNJ PH: 3290291 / 9016667242
The properties inspector for the flash text is the same that the one for the flash button.
The Navigation bar:
A navigation bar is a set of images that are used like menu options to browse within the WebSite. A
single web page can contain only one navigation bar. To insert a browser bar go to the Insert menu,
Image Objects, and the Navigation Bar option. In the next window you can specify four different
images for each state of each button as well as its link.
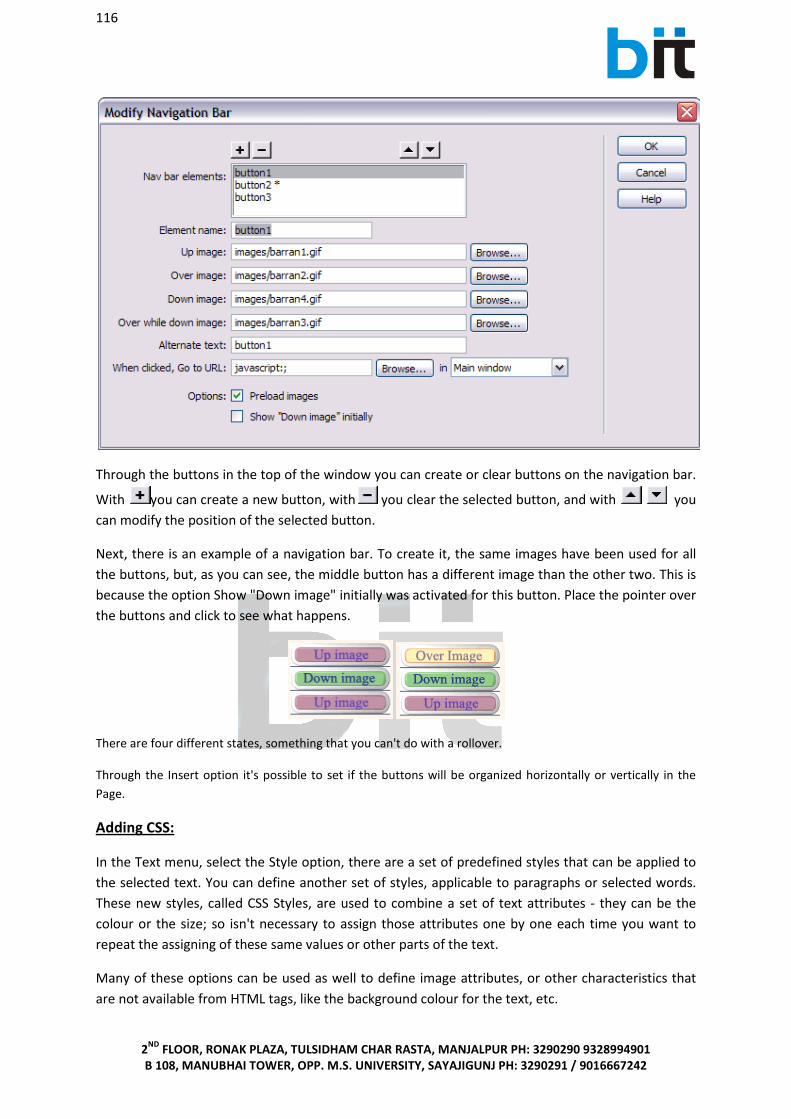
116
2ND
FLOOR, RONAK PLAZA, TULSIDHAM CHAR RASTA, MANJALPUR PH: 3290290 9328994901
B 108, MANUBHAI TOWER, OPP. M.S. UNIVERSITY, SAYAJIGUNJ PH: 3290291 / 9016667242
Through the buttons in the top of the window you can create or clear buttons on the navigation bar.
With you can create a new button, with you clear the selected button, and with you
can modify the position of the selected button.
Next, there is an example of a navigation bar. To create it, the same images have been used for all
the buttons, but, as you can see, the middle button has a different image than the other two. This is
because the option Show "Down image" initially was activated for this button. Place the pointer over
the buttons and click to see what happens.
There are four different states, something that you can't do with a rollover.
Through the Insert option it's possible to set if the buttons will be organized horizontally or vertically in the
Page.
Adding CSS:
In the Text menu, select the Style option, there are a set of predefined styles that can be applied to
the selected text. You can define another set of styles, applicable to paragraphs or selected words.
These new styles, called CSS Styles, are used to combine a set of text attributes - they can be the
colour or the size; so isn't necessary to assign those attributes one by one each time you want to
repeat the assigning of these same values or other parts of the text.
Many of these options can be used as well to define image attributes, or other characteristics that
are not available from HTML tags, like the background colour for the text, etc.

117
2ND
FLOOR, RONAK PLAZA, TULSIDHAM CHAR RASTA, MANJALPUR PH: 3290290 9328994901
B 108, MANUBHAI TOWER, OPP. M.S. UNIVERSITY, SAYAJIGUNJ PH: 3290291 / 9016667242
They even allow you to apply a style in all of the HTML labels of the same type, for example the A
HREF label, which corresponds to hyperlinks. This way, all hyperlinks would acquire a defined
appearance in this style.
A CSS style is no more than a set of format rules that controls the aspect of a web site's content. CSS
styles give flexibility and control to the view you are looking for in a Page, from the exact position of
the elements to the font designs and specified styles. One of the big advantages of CSS styles is that
they have a simply updating capacity; when you update a CSS style, the format of all the documents
with that style are automatically updated.
The disadvantage of working with style sheets is that some browsers cannot support them, although
these browsers are usually older versions, and so this will rarely happen. The characteristics we
apply to a text automatically creates CSS styles, which are inlayed in the actual document's heading.
Let's see that:
To create a personalized CSS Style:
1. In the document, select the text you want to apply the specific characteristics to.
2. In the Properties inspector, modify the text format properties, and establish the font attributes,
and the paragraph you want.
Dreamweaver will automatically create a new style with the name Style1 or Style2 or Style3,...
depending on the previous created names and styles.
It will appear as the name: Style1 in the Style window of properties panel.
You can also change the name of the style, it's preferable to the style to have a name referring to the
type of text to which it will be applied. To do this, unfold the style list and select the Change name...
option. A dialog window will appear to introduce the new name as the image below.
Then write the new name without blank spaces. In this case: redstyle.
Click on OK, and you will see a panel with the name Results. Close this window.
This way you can create a style and add it to a document.

118
2ND
FLOOR, RONAK PLAZA, TULSIDHAM CHAR RASTA, MANJALPUR PH: 3290290 9328994901
B 108, MANUBHAI TOWER, OPP. M.S. UNIVERSITY, SAYAJIGUNJ PH: 3290291 / 9016667242
Each new style that is created is added to the style list, and you can access them quickly through the
Text menu, and then selecting the CSS Styles option.
In the CSS panel you can verify that the new style has been automatically added.
Now, you have a paragraph in which the previous CSS style has been applied.
In the Page's HTML code, the text is like this:
<head>
<style type="text/css">
<!--
.redstyle {
font-family: Arial, Helvetica, sans-serif;
font-size: 18px;
font-weight: bold;
color: #FF0000;
}
-->
</style>
</head>
<body>
<p class="redstyle">CSS Style Text</p>
To apply a personalized CSS Style:
In the document, select the text to which you want to apply the CSS style, or place the mouse in a
paragraph to apply the style to the whole paragraph. If you select a text rank inside a paragraph, the
CSS Style will only affect the selected rank. In the Properties Inspector select the style created by us
from the list that appears when you unfold the Style field.
Interactive Form:

119
2ND
FLOOR, RONAK PLAZA, TULSIDHAM CHAR RASTA, MANJALPUR PH: 3290290 9328994901
B 108, MANUBHAI TOWER, OPP. M.S. UNIVERSITY, SAYAJIGUNJ PH: 3290291 / 9016667242
You can create forms through the Insert menu and then the Form option. Once you have created the
form, it will be represented in the Dreamweaver window as a box with dashed red lines, similar to
this image.
You can insert the form elements inside the form through the Insert menu and then the Form
option. It's recommendable to use tables to organize the elements of the forms. You will find a
better distribution of the form elements using them, and this will make its comprehension easier
while improving its appearance.
Validating Interactive forms:
The forms validation is used to make the form valid before sending it, and also to make the user fill
in the obligatory fields before sending it. To validate a form, you need to open the Behaviours panel.
This panel can be opened through the Window menu and then the Behaviours option, or by pressing
Shift+F3.
In this panel you need to unfold the button by clicking on it, and in Show events for, select an
actual version from the browser's list. You can choose for example IE 6.0. browser.
After doing this, you have to unfold the button again, and select the Valid form option.
For all this you will have to previously select the form.
A window like this will be shown, here you will find all the form elements.
You can select each one of the form element, and specify the required requests. You can establish an
obligatory filling field, whether it's content to be numeric, an e-mail address, etc.

120
2ND
FLOOR, RONAK PLAZA, TULSIDHAM CHAR RASTA, MANJALPUR PH: 3290290 9328994901
B 108, MANUBHAI TOWER, OPP. M.S. UNIVERSITY, SAYAJIGUNJ PH: 3290291 / 9016667242
CH – 7 FRAMES
We are going to see what Frames are and when they must be used. We will also see how to
insert a simple frame into a website and how to work with it.
Introduction:
Frames are used to distribute the data in a web site. They help to keep some parts straight such as
they are, as the logotype and the browser bar, while the others can change. In addition they usually
improve the appearance. Each page's frame has its own HTML file. For example, in the image on the
right you can see a page with two frames. The left frame has the menu.htm file, and the right frame
has the dogs.htm file. To see the page this way, we have opened the browser's file frames.htm,
which is the page that has grouped the frames.
It is possible to edit the frame's files from the page that contains the set of frames. This simplifies
the work as it is easier to figure what the final page is going to look like. This is something that you
cannot do if you edit each framed file individually. Working with frames can be a bit complicated,
and even more so in the beginning. We are not going to go too much into the theme, and we will
only look at some of the basic concepts with a few easy examples.
Creating frames:
There are many ways of creating a frame. We will only learn one. To create a frame, you first need to
open a file. It can be new or an existing one. After this, you need to go to the Insert menu, HTML,

121
2ND
FLOOR, RONAK PLAZA, TULSIDHAM CHAR RASTA, MANJALPUR PH: 3290290 9328994901
B 108, MANUBHAI TOWER, OPP. M.S. UNIVERSITY, SAYAJIGUNJ PH: 3290291 / 9016667242
and Frames. Through this option you can select the type of frame you want to create. We are going
to look at the Left frame option.
If we click on Left, a new frame will be created in the left side of the current file.
As you can see in the image, there is a line splitting the document. In this case we will have three
files: the left one, the right one, and the one which has the set of frames. The right one is the file we
had at the start. It is in the frame known as Main Frame.
To select the file that has the set of frames you have to click on the line that splits the frames. This is
only possible in case of not having been previously saved. In case of inserting a right frame instead of
a left frame, the empty frame will be shown to the right of the original file. In this image you can see
an example of a right frame. A right frame has been inserted over an existing file, menu.htm.
As in the previous case, we have three files: the left, the right, and the one which has the set of
frames. In this case the file we had at the begining is the left one, while the previous was the right
one. For this reason Main frame will be at the left. Main frame is the frame that is always in the
initial file, into which the rest of the frames have been inserted.

122
2ND
FLOOR, RONAK PLAZA, TULSIDHAM CHAR RASTA, MANJALPUR PH: 3290290 9328994901
B 108, MANUBHAI TOWER, OPP. M.S. UNIVERSITY, SAYAJIGUNJ PH: 3290291 / 9016667242
Selecting frames:
If you want to select the frames of a document you have to go to the Frames panel which can be
opened through the Window menu. If the Frame option isn't in this menu, it may be in Others
option. You can also open the Frames panel by pressing the combination of Shift+F2 keys.
The frames that are in the frame document are found in the Frames panel, and we can go through
them by clicking on them in the panel. You can also select the frame Page by clicking on the border
that sorrounds the frames.
Select the frames to edit the document they may contain. Select the frames to specify the specific
properties of each one of them.
Saving Frames:
All documents that have frames must have a Page inside each one of them. This is why when you
create a frame; new pages are loaded by default in each one of them (apart from the frame that has
the original page).

123
2ND
FLOOR, RONAK PLAZA, TULSIDHAM CHAR RASTA, MANJALPUR PH: 3290290 9328994901
B 108, MANUBHAI TOWER, OPP. M.S. UNIVERSITY, SAYAJIGUNJ PH: 3290291 / 9016667242
These new pages can be replaced later by other existing pages as we'll soon see. If you save the page
that has the set of frames, each one of the pages included in their frames we'll be saved too. It is not
recommendable to save the frames for the first time using the Save all option, because we can
make mistakes when naming the new files. It's preferable saving each file (one by one) unless all the
frames had an already existing page, because in this case the unique file that will have to be named
will be the one that has the set of frames.
To save a file that has a set of frames, you have to previously select it. To save each one of the
documents, you just have to place the cursor on one of them and click on the Save button.
Setting up Frames:
After selecting a frame through the Frames panel, its properties can be established through the
properties inspector.
Each frame has a name assigned that can be changed through the Frame name option. The name
cannot have blank spaces. Src is the HTML file name that is displayed in the frame. In Borders you
can select a line that splits the frame from the rest of the frames. In case of showing the border, a
color for this can be specified through Border color. You can also establish a width for the border
through the Width option.
Scroll will indicate whether scrolling bars will be shown or not when the frame file cannot be
completely seen. If the No resize option is activated, it indicates that users won't be able to change
the frame size in the browser. The Margin width and Margin height set the separation between the
content of the frame and its right-left and top-bottom borders. If all the sets of frames are selected,
then the Properties inspector will display the following options:
In Borders you can add a line to split the frame from the rest of the frames. In case of showing the
border, a color for this can be specified through Border color. You can also establish a width for the
border through the Width option.
The Column field (or Row) is used to set the frame size, and it can be introduced as Pixels, in Percent
(of the window) or Relative (proportional to the rest of the frames).

124
2ND
FLOOR, RONAK PLAZA, TULSIDHAM CHAR RASTA, MANJALPUR PH: 3290290 9328994901
B 108, MANUBHAI TOWER, OPP. M.S. UNIVERSITY, SAYAJIGUNJ PH: 3290291 / 9016667242
You will usually use two frames, one of them with size in Pixels, which will contain the browser bar,
and the other frame with a Relative size, to adjust it to the rest of the browser window.
Frame content:
As you have seen, the frame content can be established through the Src field of the properties
inspector.
When we work with frames, our aim is to load different files in at least one of them.
Through the Src field of the properties inspector, it's only possible to specify the file that will be
loaded in the frame in first time, but we can change this later using links.
As you remember, in the hyperlinks unit we learnt the possible links destinies. Those destinies could
be _blank, _parent, _self, and _top. Let's see again what are they used for. You now know how to
work with frames and they will be easier to understand.
_blank: Opens the file linked in a new browser window.
_parent: Opens the linked file in the frame window that has the link or the set of main frames. As
you know, the main frame is the frame where the initial file is and where the rest of the frames have
been inserted.
_self: Is the predetermined option. It opens the linked file in the same frame or window as the link.
Adding multimedia Elements:
Flash Movies:
Flash movies are animations that have an SWF extention, just like buttons and flash text. They are
usually used in web sites as a presentation, although they can be used for any kind of animation.
These movies can be created through Flash Macromedia, and the user needs to have a plug-in
installed on his/her computer to view the movies.
Flash movies can be inserted in a Page through the Insert menu, Media, Flash option, or by pressing
Ctrl+Alt+F. Also, they can be inserted by clicking the Flash option that is in the Common tab of the
Insert panel, Media button.

125
2ND
FLOOR, RONAK PLAZA, TULSIDHAM CHAR RASTA, MANJALPUR PH: 3290290 9328994901
B 108, MANUBHAI TOWER, OPP. M.S. UNIVERSITY, SAYAJIGUNJ PH: 3290291 / 9016667242
The Flash movies Properties inspector is similar to the buttons and flash text's, but there are two
new options that makes reference to the movie view.
The Loop option sets a restart of the movie at the end of it. The other option Auto play, indicates
that the movie flash will be started when the page loads. If this option is unmarked, it would be
shown only the first frame of the movie. You must disable this option when you want the
reproduction to be activated by any behaviour.
Template Designing:
Templates can be created from zero, or starting from an existing page. One way of creating
templates from zero is through the Assets panel. The Assets panel can be opened through the
Window menu and then the Assets option. Also by pressing F11. Once you have opened the panel
you need to select the button. This way you can work with templates. The Templates Assets panel's
bottom buttons are similar to the ones in the CSS Styles panel.
The only different button is the first, used in this case to update the list, the rest of them allow you
to create a new template, edit a selected template of the list, or clear it. To create a new template
you need to click on the button (if it isn't activated, right-click and select New Template).

126
2ND
FLOOR, RONAK PLAZA, TULSIDHAM CHAR RASTA, MANJALPUR PH: 3290290 9328994901
B 108, MANUBHAI TOWER, OPP. M.S. UNIVERSITY, SAYAJIGUNJ PH: 3290291 / 9016667242
When you press the button you create a new file in the templates list. You can also change its Name.
To modify a template select it from the list an click on the button. To delete a template select it from
the list and click on the button. Templates are saved in the actual web site inside the Templates
folder which is automatically created. To create a template from an existing file, you need to open
the file, and then save it as a template through the File menu, and Save as template. When you
select the former option, you see a window like the one on the right. It's necessary to specify the
name which you want to save the template as through the Save as field and then select the Site in
which it's going to be saved from the sites list.

127
2ND
FLOOR, RONAK PLAZA, TULSIDHAM CHAR RASTA, MANJALPUR PH: 3290290 9328994901
B 108, MANUBHAI TOWER, OPP. M.S. UNIVERSITY, SAYAJIGUNJ PH: 3290291 / 9016667242
CH – 8 LAYERS
Layers are squares that can be placed wherever you want in the Page, we can insert HTML content in
them. Those layers can be hidden and overlapped between them. This gives you a great variety to
design.
Layers can be moved from their positions by just clicking on the white square in its left top corner,
and whilst keeping the mouse pressed, dragging it to the new position.
They can also can be resized by clicking on the black squares and dragging them until the size you
want is reached. You can insert text, tables, images, and flash animations inside the layer's square,
and also all the elements that an HTML file can contain.
This icon is used to select the layer when you click on it, and when you clear it, you are also
clearing the layer.
Inserting a layer:
Layers can be inserted in a Page through the Insert menu, and then selecting the Design object
option, and Layer. Once the layer is inserted, you can edit its attributes by selecting it.
You can select layers through many different ways. One of them is clicking on the icon. This is not
useful when there are many layers in the same file because all layers have an image like this one
associated, and it's very easy to select the wrong one.
When there are many layers in the same file, it's recommendable to select them through the Layers
tab in the Design panel, which can be opened through the Window menu, and then the Layers
option. If the Layers option isn't in the menu, it may possibly be in the Others option. Also, it can be
opened just by pressing F2.
In the panel are the names of all existing layers in the actual file, and you only need to click on the
layer name to select it.
Layer format:
Layer's properties are shown through its properties inspector

128
2ND
FLOOR, RONAK PLAZA, TULSIDHAM CHAR RASTA, MANJALPUR PH: 3290290 9328994901
B 108, MANUBHAI TOWER, OPP. M.S. UNIVERSITY, SAYAJIGUNJ PH: 3290291 / 9016667242
Layer ID is the layer's name. You can change it through the Layers panel, and double-clicking it. L and
T indicate the pixels distance between left and top limits of the document and the layer. W and H
indicate the layer's width and the height. Z-Index is the depth order of the layer. This value can be
changed through the Layers panel. A layer will be overlapped by others which greater Z-index. Vis
indicates the inital view of the layer. Visibility can accept four types.
Default (Browser view),
Inherit (the layer of the Page that is being displayed is shown)
Visible (It shows the layer although the Page isn't being seen)
Hidden (the layer is hidden).
You can also change the view through the Layers panel by clicking on the eye image. The open eye
indicates Visible, and the closed eye indicates Hidden. Through Bg Image and Color you can indicate
an image or a background color for the layer. Overflow controls how the layers appear in a browser
when the content exceeds the specified size of the layer. Visible indicates that the layer would be
amplified to make its content fit. Hidden specifies the additional content will not be shown in the
browser. Scroll specifies that the browser should add scrolling bars to the layer although they are or
not needed. Auto makes the browser show the scrolling bar when they are needed (when the layer
content is bigger than its limit).
Using Behaviors:
Behaviors are actions that happen when the userdoes something over an object, for example
moving the mouse over an image, clicking on a text, double-clicking on an image map, etc.
behaviors don't exist as HTML code, they are programmed with JavaScript. Dreamweaver allows you
to insert them through the Behaviors panel, so it is not necessary to write a JavaScript code line to
program them.
The image below has a behavior associated. Place the mouse over it to see what happen.

129
2ND
FLOOR, RONAK PLAZA, TULSIDHAM CHAR RASTA, MANJALPUR PH: 3290290 9328994901
B 108, MANUBHAI TOWER, OPP. M.S. UNIVERSITY, SAYAJIGUNJ PH: 3290291 / 9016667242
The image has two behaviors associated to show and hide the layer. We'll look at this kind of
behavior later. Other behaviors you have seen are the ones applied to substitution bars and browser
bars, they are predefined, and for this reason it isn't necessary to introduce the set of behaviors
through Behavior panel. To validate forms you saw some of the characteristics of Behavior panel.
Let's remember which we need to insert behaviors later.
The Behavior panel can be opened through the Window menu, and then the Behaviors option, also
by pressing Shift+F3. In this panel you need to click on the button, and in Show events for
selecting a version from the browser list. Some behaviors don't work with some browsers.
Depending on the selected browser, you will see or not some of the possible behaviors.
There are many behaviors for Internet Explorer but they don't work with Netscape. As most users
use Internet Explorer, let's select this browser. You can select from one of its latest versions: IE 5.5 o
IE 6.0. Once the browser is selected it's not necessary to re-select it the following time you want to
insert any behavior.
Inserting a behavior:
When there is an established browser, you can insert behaviors. The first thing to do is to select the
object on which the behavior is going to be applied, it can be an image, a text fragment, etc.
When you click on the button of the Behavior panel you will see the Show Events for option.
Also, you will see a list of all possible actions in the browser previously selected, so you can select
one.

130
2ND
FLOOR, RONAK PLAZA, TULSIDHAM CHAR RASTA, MANJALPUR PH: 3290290 9328994901
B 108, MANUBHAI TOWER, OPP. M.S. UNIVERSITY, SAYAJIGUNJ PH: 3290291 / 9016667242
Depending on the element on which you want to apply the behaviuor, you can select some actions,
and others not. In this case the Validate form action cannot be selected because there isn't any form
in the Page.
After choosing any action, the corresponding behavior appears in the Behaviors panel. In this case,
two behaviors have been inserted. As you can see, each behavior has an action and an event
associated to it.
Actions are the ones which have been selected in the previous list, and the event indicates the
action by itself (when it is done).
To clear any behavior, you need to select it in the Behaviors panel and click on the button. You
can also change the order of the behaviors applied to an object, by selecting them and arranging
their order through the buttons.
Using JavaScript Code:
Another behavior that can be applied on any object is Call JavaScript. This behavior allows us to
insert JavaScript code inside the file.
For example, it's possible to make the browser window close when you click on an object. To do this
you need to insert a "window. Close ();" JavaScript line. The same as the layers example, the first
thing to do is to select the object on which the behavior is going to be applied. After this you need to
select the Call JavaScript action through the button. Then a new window shows up and you now
need to introduce the JavaScript line.
Once the behavior is inserted in the Behavior panel, you need to establish an on click event to
produce the call to JavaScript when clicking on the object.

131
2ND
FLOOR, RONAK PLAZA, TULSIDHAM CHAR RASTA, MANJALPUR PH: 3290290 9328994901
B 108, MANUBHAI TOWER, OPP. M.S. UNIVERSITY, SAYAJIGUNJ PH: 3290291 / 9016667242
By clicking twice on the action the previous window is opened again and it's possible to modify the
line code.
Webpage Resolutions:
When creating a web site you have to remember that it will be visited by many users with different
size and resolution monitors. It is impossible to make a web site with the same view in all the
different monitors, but you need to try to make them alike. The most common resolution is
800x600, so you will need to design the site to this resolution. This means that you will need to
create the web site in a monitor with this resolution to clearly view how is it going to appear in the
browser, and to be able to distribute the content in the best possible way.
Tables are normally used because they are very useful to distribute the page content. As you know,
the table size can be set in pixels or as a percent. When you set it in pixels, the table will be seen the
same size independently of the window browser's. However, when the table size is defined in
percent, the table will be automatically adjusted to the browser window size, which implies that the
content will be out of place.
Imagine that the page has been designed to be seen in a small monitor with a lower resolution,
whose size is equivalent to the opened browser's window. If you modify the window size, you'll see
tables always with same size. The inconvenience is that when you maximize the browser window
(equivalent to viewing the site in a big monitor with higher resolution), the right of the tables will be
an empty space.
If you change the window size, the tables will be adjusted. Using tables with changing size may be
problematic at the time of maximizing the window as the tables will be out of place. In the beginning
you may feel that it's better using tables with static size even though this implies an empty space on
the right in the case of high resolution monitors. But by practicing this, at the time of working with
tables you can fix the problem and define the sites with percent size, and take advantage of the
width when monitors have higher resolution. Not only can the table size be defined but also the
cell's size. The same as in the table’s case, a cell's size can be defined in pixels or as a percent.

132
2ND
FLOOR, RONAK PLAZA, TULSIDHAM CHAR RASTA, MANJALPUR PH: 3290290 9328994901
B 108, MANUBHAI TOWER, OPP. M.S. UNIVERSITY, SAYAJIGUNJ PH: 3290291 / 9016667242
The cell's size will be specified by W (width) and H (height) values through the properties inspector.
Normally only the width is specified. Cells W and H values are in Pixels. The cell in the previous image
has a width of 208 pixels. To make the width 25% of the table you would have to write 25% in W.
Changing cell's sizes, and knowing their contents (images, text right aligned, text left aligned, big font
text, etc) you can make the appearance be alike or barely affected by the change of the browser
window when viewing the site in different sized monitors and resolutions.

1
Example -1
Html Tutorial
This html tutorial with examples is suitable for absolute beginners and advanced users
alike, more regular coders should find the taq of interest.
The first part of the html tutorial is written with the absolute beginner in mind and looks
at how to code a first document.
The second part of the html tutorial is packed with example html codes, reference
material includes a complete guide to html tags a frames tutorial and unusual html
effects. The third part of the html tutorial looks at formatting a document with tables.
HEADINGS ARE IMPORTANT
Use HTML headings for headings only. Don't use headings to make
text BIG or bold.
Search engines use your headings to index the structure and content of your web
pages.
Since users may skim your pages by its headings, it is important to use headings to
show the document structure.
H1 headings should be used as main headings, followed by H2 headings, then the
less important H3 headings, and so on.
Mathematical Formula :
Hydrogen peroxide (H2O2) is the simplest peroxide (a compound with an oxygen-
oxygensingle bond). It is also a strong oxidizer. Hydrogen peroxide is a clear liquid,
slightly moreviscous than water. In dilute solution, it appears colorless. Due to its
oxidizing properties, hydrogen peroxide is often used as a bleach or cleaning agent.
The oxidizing capacity of hydrogen peroxide is so strong that it is considered a
highly reactive oxygen species.

2
EXAMPLE - 2
WHAT IS HTML?
HTML is a language for describing web pages.
o HTML stands for Hyper Text Markup Language
o HTML is not a programming language, it is a markup language
o A markup language is a set of markup tags
o HTML uses markup tags to describe web pages
HTML TAGS
HTML markup tags are usually called HTML tags
1. HTML tags are keywords surrounded by angle brackets like <html>
2. HTML tags normally come in pairs like <b> and </b>
3. The first tag in a pair is the start tag, the second tag is the end tag
4. Start and end tags are also called opening tags and closing tags
HTML DOCUMENTS = WEB PAGES
c. HTML documents describe web pages
d. HTML documents contain HTML tags and plain text
e. HTML documents are also called web pages

3
EXAMPLE – 3
Images make up a large part of the web - most websites contain images. HTML makes it very easy for you to embed images into your web page.
To embed an image into a web page, the image first needs to exist in either .jpg, .gif, or
.png format. You can create images in an image editor (such as Adobe Photoshop) and save them in the correct format.
Once you've created an image, you need to embed it into your web page. To embed the
image into your web page, use the <img> tag, specifying the actual location of the image.
Example :
Sunset or sundown is the daily disappearance of
the Sun below the horizon in the west as a result
of Earth's rotation.
The time of sunset is defined in astronomy as the moment
when the trailing edge of the Sun's disk disappears below
the horizon in the west. The ray path of light from the
setting Sun is highly distorted near the horizon because
of atmospheric refraction, making the sunset appear to
occur when the Sun’s disk is already about one
diameter below the horizon. Sunset is distinct from dusk, which is the moment at which
darkness falls, which occurs when the Sun is approximately eighteen degrees below the
horizon. The period between sunset and dusk is called twilight.
_________________________________________________________

4
EXAMPLE – 4
Table Example
The img tag contains a number of attributes. These attributes tell the browser all about
the image and how to display it. Here's an explanation of these attributes:
src Required attribute. This is the path to the image. It can be either
an absolute path, or a relative path
width Optional attribute (but recommended). This specifies the width to display the image. If the actual image is wider, it will shrink to the dimensions you
specify here. Likewise, if the actual image is smaller it will expand to your dimensions.
height Optional attribute (but recommended). This specifies the height to display
the image. This attribute works similar to the width.
alt Alternate text. This specifies text to be used in case the browser/user agent can't render the image.
Table 1. Customer Account Balances - January 1, 2000
Account Name Balance 800001 Rameshbhai Patel 1000.00 800002 John Christian 2000.00 800003 Ronak Sing 3000.00 Table 2. colspan Example
Production
Raha Mutisya 1493
Shalom Buraka 3829
Brandy Davis 0283
Sales
Claire Horne 4827

5
Table 3. Rowspan example Table with Hyperlink
Production
Raha Mutisya 1493
Shalom Buraka 3829
Brandy Davis 0283
Sales
Claire Horne 4827
Bruce Eckel 7246
Danny Zeman 5689
Table 4. Images in table
Create a table like the one below.
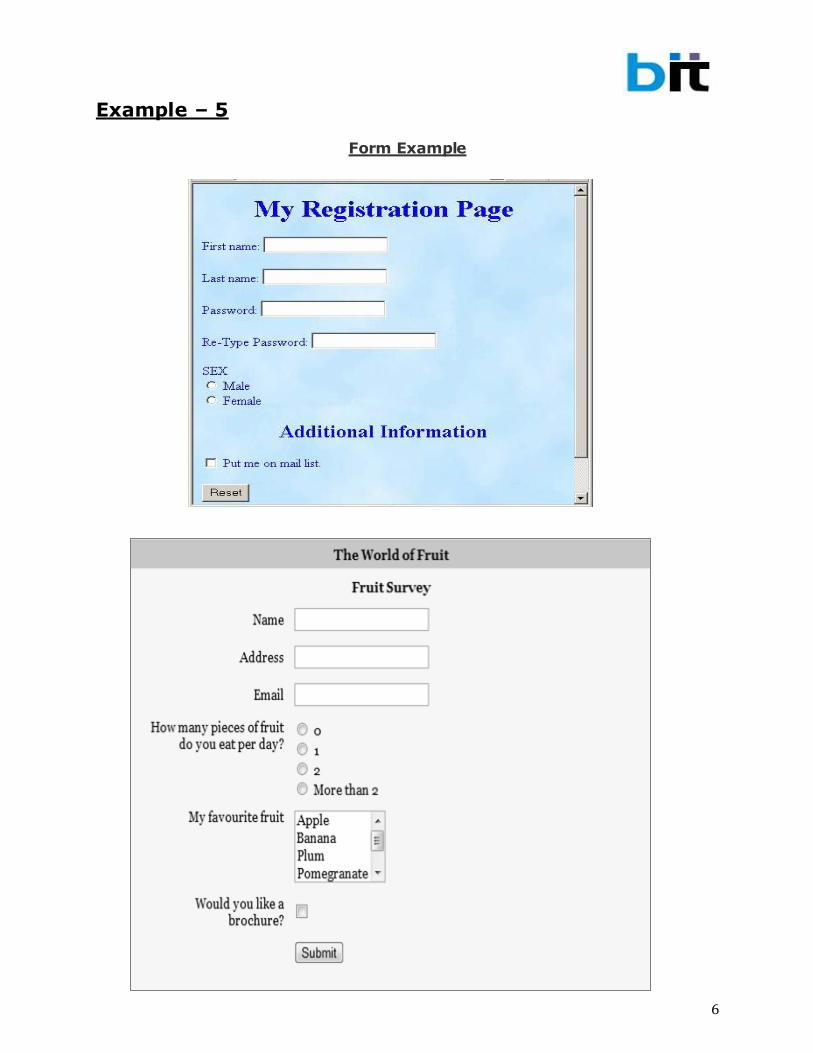
6
Example – 5
Form Example

7
EXAMPLE – 6
Frame Example

8
CSS EXERCISE
Write Html Program using CSS style. Use Internal and Inline CSS style. 1. Body, h1 & h2
2. P, text-align, color & other text properties.
3. font-family, font-style, font-size
4. border- style & border-width
5. background color, background image
6. background image repeat, repeat horizontally, repeat vertically
7. Creation of use defined class
8. Different link color i.e. Normal, Active, Visited, Hover links.
JAVASCRIPT EXERCISE
Write JAVASCRIPT Program. 1. Program to display message “Today’s date is ---------“ using date function.
2. Program to calculate Area of Circle.
3. Program to add three numbers using Prompt method.
4. Program to calculate simple interest using Prompt & Alert method.
5. Program to accept a number from user and display whether it is odd or even.
6. Program to display total marks, percentage and grade(‘A’, ‘B’, ‘C’, ‘D’, ‘F’)
7. Program to display maximum number between three using logical operator.
8. Program to display sum of numbers until user enters 0.
9. Program to display multiplication table of a number entered by user.
10. Program to enter 5 elements of Array and display Sum of Array.
11. Program to compute Area of Rectangle using Function.
12. Program to calculate length of entered String.
13. Program to check whether entered string is uppercase or lowercase.
14. Program to enter first name & Last name using prompt and display Full name using String function.
15. Program to display calculator using form, function & Event.
Calculator
Enter First Number
Enter Second Number
ANSWER
ADDITION SUBTRACTION DIVISION
MULTIPLICATION CLEAR

9
Create following Website using suitable Coding. For design create External CSS File
and then connect it with your HTML code.
Layout -1
Layout-2

10
Layout – 3
Layout- 4
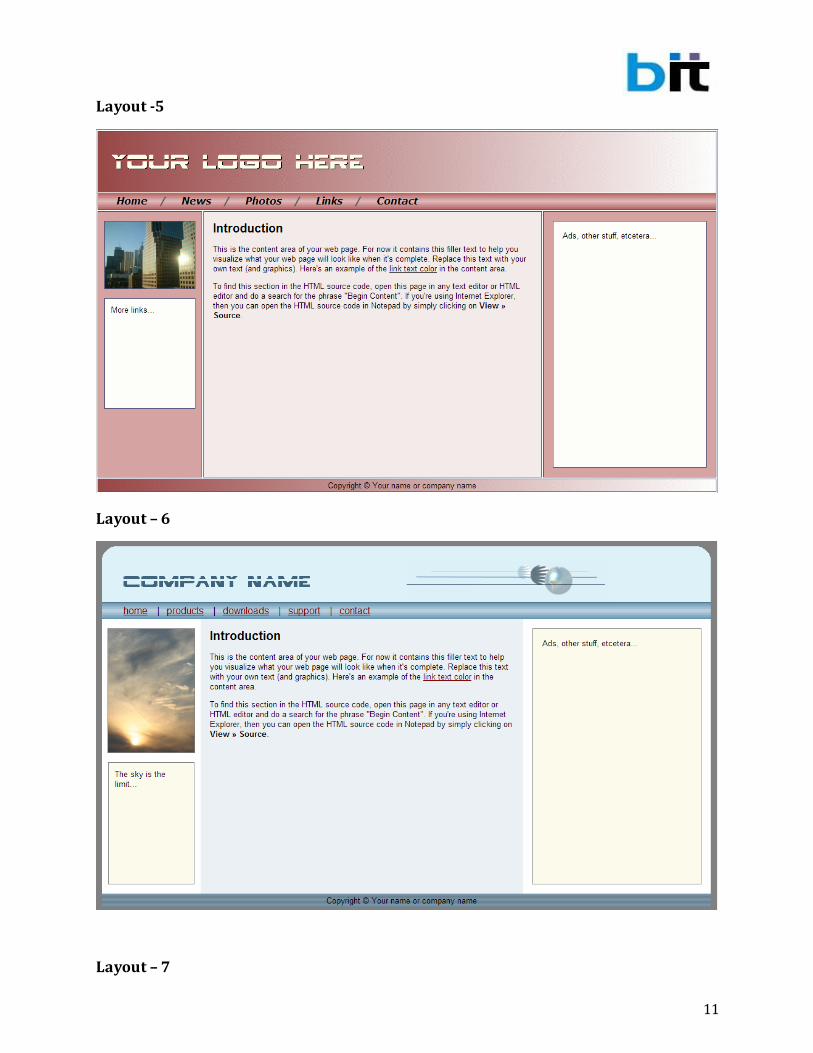
11
Layout -5
Layout – 6
Layout – 7
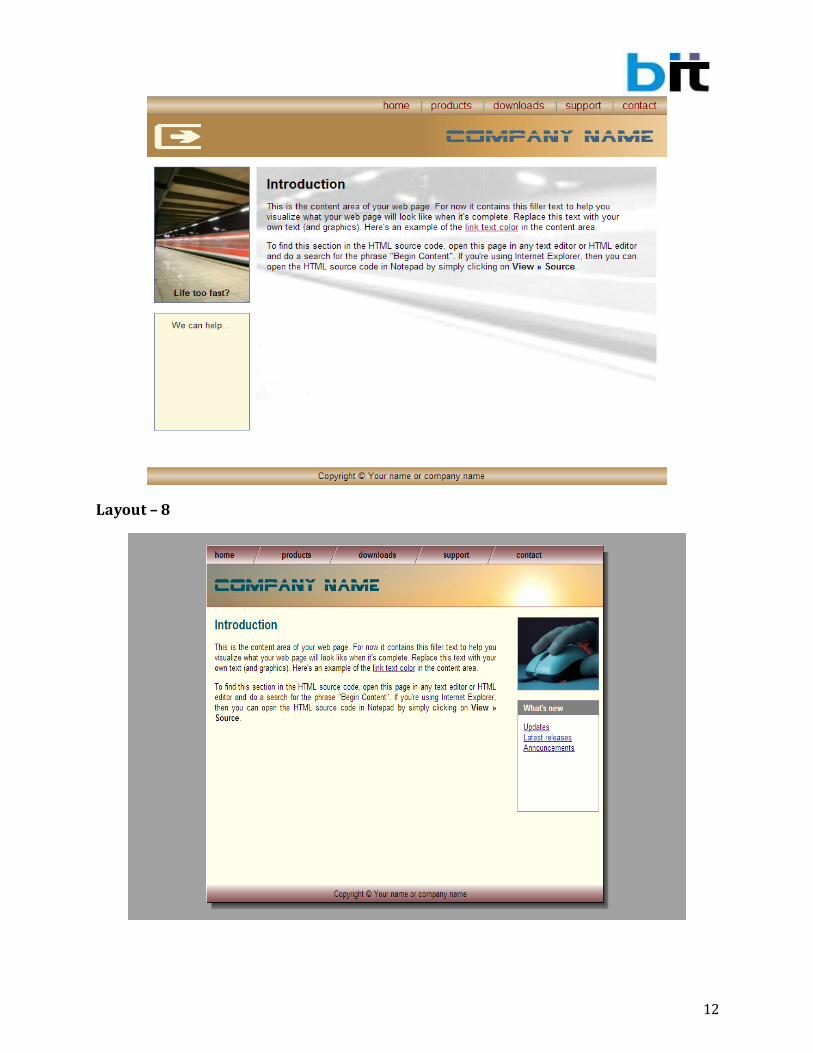
12
Layout – 8