Volume 53 Issue 1 September 2013 This Month's Program · Volume 53 Issue 1 September 2013 This...
6
Volume 53 Issue 1 September 2013 This Month's Program ... Division 3 Website: www.modelraildayton.com The September program will be a talk on Cincinnati Union Termi- nal. Mike Laurence will give a talk on the Cincinnati Union Ter- minal covering background, the building of the terminal and Union Terminal today. Mike is a Regular Cincinnati Historical Presenter and lives in Beaver- creek. We will be meeting at the Green Co Historical Society. Division 3, MCR, NMRA meets the third Sun- day of each month except August. Meetings are open to all members of the NMRA and any one interested in railroads or railroad model- ing.
-
Upload
nguyendien -
Category
Documents
-
view
215 -
download
2
Transcript of Volume 53 Issue 1 September 2013 This Month's Program · Volume 53 Issue 1 September 2013 This...

Volume 53 Issue 1 September 2013
This Month's Program ...
Division 3 Website: www.modelraildayton.com
The September program will be a talk on Cincinnati Union Termi-nal. Mike Laurence will give a talk on the Cincinnati Union Ter-minal covering background, the building of the terminal and Union Terminal today. Mike is a Regular Cincinnati Historical Presenter and lives in Beaver-creek. We will be meeting at the Green Co Historical Society.
Division 3, MCR, NMRA meets the third Sun-day of each month except August. Meetings are open to all members of the NMRA and any one interested in railroads or railroad model-ing.

=========== 2 ===========
Super’s Notes for September 2013 Wil Davis
It’s hard to believe that summer is almost over. Most schools are back in session or will be next week, and “official” start of fall is less than a month away, so I guess it’s really over. As usual I didn’t get everything I planned to do this summer done, and I have a whole new list of things to do this fall and winter. For many peo-ple fall and winter is prime modeling time. So let’s head to the basement, train room, or wherever you do your modeling, and finish up some of those long delayed projects. When you do, bring the results to a meeting to share. You can enter your project in the contest, if appropriate, or if not just bring it to share during “show and tell.” August Bus Trip We took our annual bus trip last week and returned to Indianapolis. Mike set us up for a train ride on the “Fairtrain.” The “Fairtrain” is operated by the Indiana Transportation Museum and shuttles people from Fish-ers, IN over former NKP tracks to the Indiana State Fair. They also operate a variety of excursions throughout the year. Our train was pulled by an F7 which had been painted in MONON livery, but has been recently re-painted in basic black. (I saw it last summer at the museum and it badly needed a paint job. On the rear of the train, as it headed south west to the fairgrounds, was a GP9 painted as NKP 426. Between the streamlined coaches and the 426, was Nickel Plate Road Business Car #1. The business car was built by Pullman in 1929 and served as the private business car by the Van Sweringen brothers from 1929 until the death of Oris in 1936. It was then used by the presidents of the NKP, C&O and N&W until 1967. It is now privately owned and on loan to the museum. On our way back to Fishers, I was approached by one of the car hosts who introduced himself as David Wil-cox. He said he had just found out that we were a NMRA group and that he was a life member of the NMRA. (I later found out that he had also been a director of the ITM and one of the car’s owners.) He said he would like to invite our group to tour the NKP #1 so he escorted us back to the car for the rest of the trip. It was pretty cool and it would have been great to have been to travel in it in the day. Heck I would travel in it tomor-row if I were afforded the opportunity. We detrained from the open platform at the end of the car, which made for a great ending to a pleasant train ride. After detraining we collected our box lunches and headed off to the first of four layouts we visited during the afternoon. Mike had put together a varied selection of layouts, including an ‘O’ scale layout, an On3 layout, a HOn30 layout and, last but not least, an HO layout. All of these showcased a variety of scenery and techniques that made them all unique. All in all another great trip, but I am already excited about next year’s trip. Stay tuned for more information about that in the coming year! Hands-On Decoder Clinic I have received a request from a division member to do a “hands on” decoder installation, so he could practice with guidance and supervision. I realized there may be others who would also like to have this opportunity. As a result, I have decided to offer a clinic for a limited number of people where you can sit down and use your own tools to install a motor decoder in an engine of your choosing. I have recruited a helper, but six seems to be a practical limit for the two of us to assist. The clinic will be limited to the first six people who sign up (if there is that much interest). In the unlikely case there are more than six people interested, I may be convinced to do it again. As currently envisioned, the clinic would take a Saturday morning, from 9 am to noon, at a place where we would have room to set up everything. I think I can find a place with ample tables to accommodate a group of six. The dates I am currently considering are October 19 or 26. Let me know if you are interested and once we have a list I will provide information on what you will need for the clinic.
=========== 3 ===========
Contests We have three categories each month. You can enter Scratch Built, Kit Bashed, or just plain Kit built. This allows anyone to enter anything they are proud of and at any skill level. Judging is by popular vote but if you wish to have your model judged by NMRA rules for the Achievement Program, we will make arrangements for you “on the spot”.
The coming contest schedule ...
September - Make it cheap (1-3-5 Dollar) October - Caboose November - Weathering December - Structure January - Open Loads February - No Contest March - Freight Cars April - Passenger Cars May - Diesel Locomotives June - Steam Locomotives July - Non-Revenue Cars August - No Contest
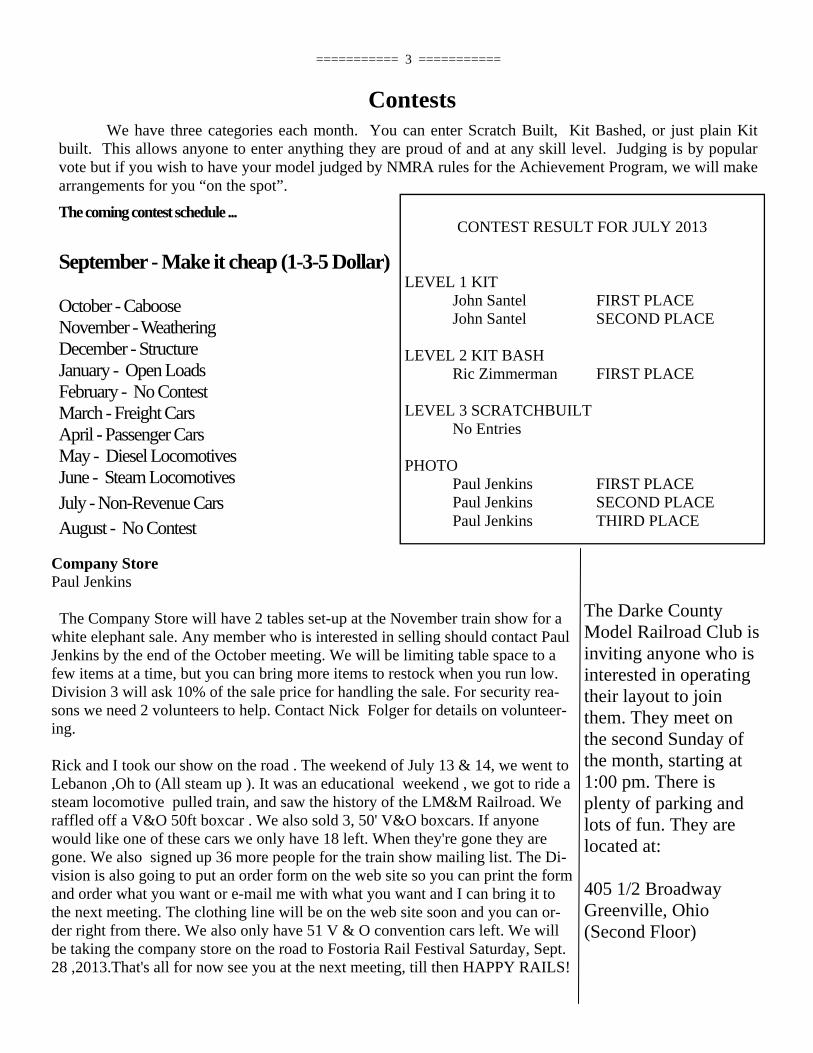
CONTEST RESULT FOR JULY 2013
LEVEL 1 KIT
John Santel FIRST PLACE John Santel SECOND PLACE
LEVEL 2 KIT BASH Ric Zimmerman FIRST PLACE LEVEL 3 SCRATCHBUILT No Entries PHOTO Paul Jenkins FIRST PLACE
Paul Jenkins SECOND PLACE Paul Jenkins THIRD PLACE
Company Store Paul Jenkins The Company Store will have 2 tables set-up at the November train show for a white elephant sale. Any member who is interested in selling should contact Paul Jenkins by the end of the October meeting. We will be limiting table space to a few items at a time, but you can bring more items to restock when you run low. Division 3 will ask 10% of the sale price for handling the sale. For security rea-sons we need 2 volunteers to help. Contact Nick Folger for details on volunteer-ing. Rick and I took our show on the road . The weekend of July 13 & 14, we went to Lebanon ,Oh to (All steam up ). It was an educational weekend , we got to ride a steam locomotive pulled train, and saw the history of the LM&M Railroad. We raffled off a V&O 50ft boxcar . We also sold 3, 50' V&O boxcars. If anyone would like one of these cars we only have 18 left. When they're gone they are gone. We also signed up 36 more people for the train show mailing list. The Di-vision is also going to put an order form on the web site so you can print the form and order what you want or e-mail me with what you want and I can bring it to the next meeting. The clothing line will be on the web site soon and you can or-der right from there. We also only have 51 V & O convention cars left. We will be taking the company store on the road to Fostoria Rail Festival Saturday, Sept. 28 ,2013.That's all for now see you at the next meeting, till then HAPPY RAILS!
The Darke County Model Railroad Club is inviting anyone who is interested in operating their layout to join them. They meet on the second Sunday of the month, starting at 1:00 pm. There is plenty of parking and lots of fun. They are located at: 405 1/2 Broadway Greenville, Ohio (Second Floor)
=========== 4 ===========
Improving A Decoder Tester Wil Davis
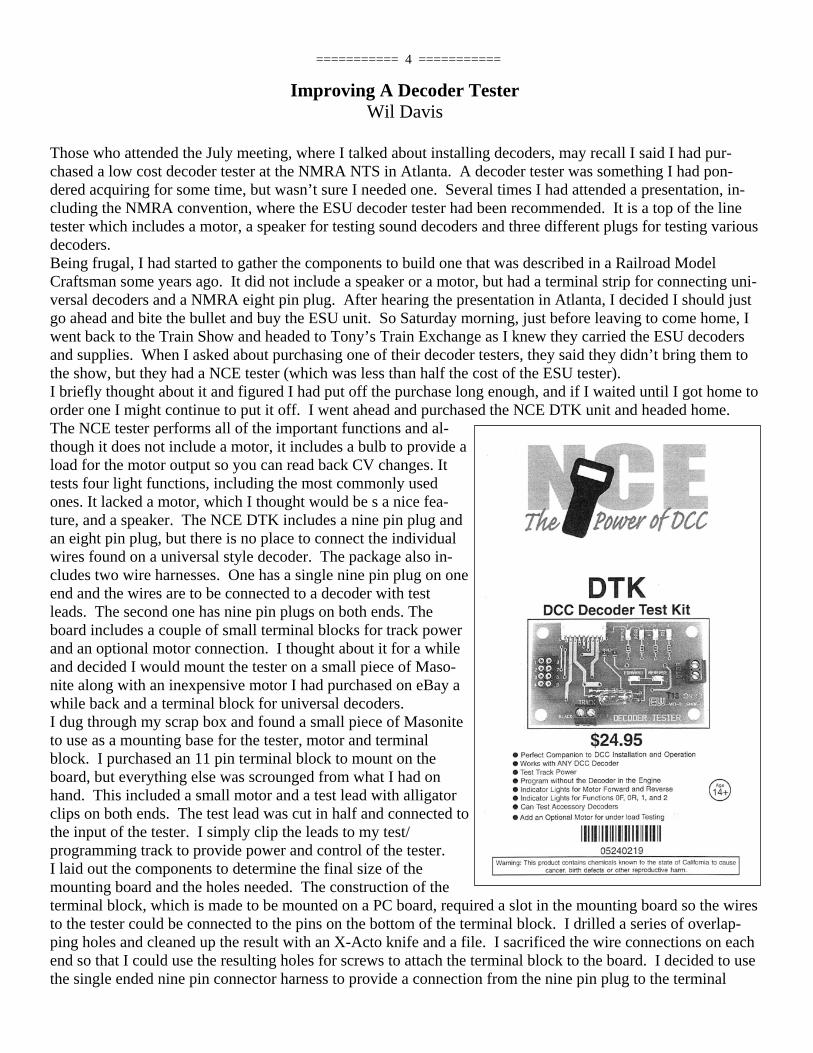
Those who attended the July meeting, where I talked about installing decoders, may recall I said I had pur-chased a low cost decoder tester at the NMRA NTS in Atlanta. A decoder tester was something I had pon-dered acquiring for some time, but wasn’t sure I needed one. Several times I had attended a presentation, in-cluding the NMRA convention, where the ESU decoder tester had been recommended. It is a top of the line tester which includes a motor, a speaker for testing sound decoders and three different plugs for testing various decoders. Being frugal, I had started to gather the components to build one that was described in a Railroad Model Craftsman some years ago. It did not include a speaker or a motor, but had a terminal strip for connecting uni-versal decoders and a NMRA eight pin plug. After hearing the presentation in Atlanta, I decided I should just go ahead and bite the bullet and buy the ESU unit. So Saturday morning, just before leaving to come home, I went back to the Train Show and headed to Tony’s Train Exchange as I knew they carried the ESU decoders and supplies. When I asked about purchasing one of their decoder testers, they said they didn’t bring them to the show, but they had a NCE tester (which was less than half the cost of the ESU tester). I briefly thought about it and figured I had put off the purchase long enough, and if I waited until I got home to order one I might continue to put it off. I went ahead and purchased the NCE DTK unit and headed home. The NCE tester performs all of the important functions and al-though it does not include a motor, it includes a bulb to provide a load for the motor output so you can read back CV changes. It tests four light functions, including the most commonly used ones. It lacked a motor, which I thought would be s a nice fea-ture, and a speaker. The NCE DTK includes a nine pin plug and an eight pin plug, but there is no place to connect the individual wires found on a universal style decoder. The package also in-cludes two wire harnesses. One has a single nine pin plug on one end and the wires are to be connected to a decoder with test leads. The second one has nine pin plugs on both ends. The board includes a couple of small terminal blocks for track power and an optional motor connection. I thought about it for a while and decided I would mount the tester on a small piece of Maso-nite along with an inexpensive motor I had purchased on eBay a while back and a terminal block for universal decoders. I dug through my scrap box and found a small piece of Masonite to use as a mounting base for the tester, motor and terminal block. I purchased an 11 pin terminal block to mount on the board, but everything else was scrounged from what I had on hand. This included a small motor and a test lead with alligator clips on both ends. The test lead was cut in half and connected to the input of the tester. I simply clip the leads to my test/programming track to provide power and control of the tester. I laid out the components to determine the final size of the mounting board and the holes needed. The construction of the terminal block, which is made to be mounted on a PC board, required a slot in the mounting board so the wires to the tester could be connected to the pins on the bottom of the terminal block. I drilled a series of overlap-ping holes and cleaned up the result with an X-Acto knife and a file. I sacrificed the wire connections on each end so that I could use the resulting holes for screws to attach the terminal block to the board. I decided to use the single ended nine pin connector harness to provide a connection from the nine pin plug to the terminal

=========== 5 ===========
block. I made four short spacers to use to attach the tester to the board, as there are leads protruding from the back of the board. You could use washers to achieve the same result. I drilled another hole to feed the wires from the connector to the bottom of the board where they attach to the terminal block. I sol-dered the wires to the terminal block and used hot glue to secure them to the board. I also installed four silicone pads to the bottom to provide clearance for the wires. The motor was fastened to the top of the board with some of the double sided foam tape that I use to in-stall decoders. Sometime during this process I real-ized that it might be difficult to tell if the motor was turning by just looking at the shaft. I dug through my motor parts box and found a dead Atlas motor with flywheels and the shaft diameter was an exact fit for my motor. This makes it easy to see when the motor starts to turn. I made copies of the wire color and identification template that was included with the RMC article and attached them to the front and back of the mounting board, to simplify wire connection. You could also color code the top of the terminal block to match the wire colors. The result is a nice compact decoder tester for about half of what I was prepared to spend. Mine does not include a speaker, but I figure it will be easy to attach a speaker when testing a sound decoder and it does include a terminal block for connecting universal de-coders and a motor. My total expenditure was about $23.00 not counting the bits and pieces I had on hand. All in all, I am pleased with the result!
Fostoria Rail Festival Saturday, September 28, 2013
Fostoria Middle School 1202 HL Ford Drive
Fostoria, Ohio 10am - 4pm
Train Show Admission - Adults $3.00 Children Under 12 Free
Fostoria Iron Triangle Train Show
The Dalmatian Switching District is looking for help at the Fostoria Iron Triangle Train Show. We will be setting up the layout at 4pm on Friday, September 27 and operat-ing on Saturday, September 28.The Division 3 Company Store will also be attending. For more infor-mation or to volunteer please con-tact Jack Honeycutt or J. Hedge. This is a good excuse to visit Fos-toria on Friday, help the Division and the Fostoria Railpark.
www.fostoriairontriangle.com

=========== 6 ===========
June program recap Richard Todd
It was a pleasure to share my experiences with new materials for construction and scenery at the June meeting. For future reference, I thought I would repeat the recipes for both Lou Sassi’s “ground goop”, and the Portland cement mixture I use for rock faces. In addition, I have listed sources and costs for some of the items. Ground Goop: 1 cup Celluclay 1 cup earth colored latex paint 1 cup vermiculite ½ cup white glue Portland cement for rock faces: ¼ cup cement 1 squirt of white glue wet water-(water with a few drops of dishwashing detergent added) craft paint add until you like the color Precut cardboard scenery strips: Micromark.com; -$11.95 / 90 strips frequently on sale! Vermiculite: Lowes-Garden time 8 quart vermiculite/$4.11 Red rosin paper: Lowes-$9.59/3foot by 40 foot roll Celluclay: Hobby Lobby-$23.95/5lb bag. I bought 2 and I am still using the first bag! Poly iso foam board: Modern Building Supply/$16.00 per sheet/ must be ordered Ask for iso board Also available at ABC roofing supplies. Hot glue sticks: Catan Crafts Springfield/ item 1015-40 / 5 lbs / about $15.00 Craft paint: WalMart-$.99 up