Volleyball Officiating 101 - North Texas Region USA...
34
Volleyball Officiating 101 © 2008-2012 Officials Division, USAV North Texas Region. All rights reserved.
Transcript of Volleyball Officiating 101 - North Texas Region USA...
Volleyball Officiating 101
© 2008-2012 Officials Division, USAV North Texas Region. All rights reserved.
Volleyball Officiating 101
Packing Your Bags ........................................................................ 1 Whistles and Lanyards ..................................................................... 1 Pressure Gauge and Air Pump ......................................................... 1 Net Chain .......................................................................................... 2 Sanction Cards ................................................................................. 2 Rule Book (aka Domestic Competition Regulations or DCR) .......... 2 Writing Utensils ................................................................................ 2 Watch ............................................................................................... 3 Line Judge Flags ............................................................................... 3 Referee Bag ...................................................................................... 3 Dressing the Part .......................................................................... 4 Shirts, Sweaters, and Jackets (The Top Half) .................................. 4 Pants ................................................................................................. 4 Socks and Shoes ............................................................................... 5 Certification Patch ........................................................................... 5 Uniform Care .................................................................................... 5 Your First Big Assignment ............................................................ 6 What to Expect – Before Play Begins .............................................. 6
The Big Pre-Game Talk, Part I: Captain’s Meeting ...................... 6 Timed Warm-Ups ......................................................................... 6 The Big Pre-Game Talk, Part II: Instructing the Work Team ....... 7
What to Expect – During Your Match .............................................. 8 What to Expect – After the Match ................................................... 9 What to Expect – When You’re Not Working a Match ................. 10 What to Expect – Tournament Format and Administration ........ 11 The Things They Didn’t Teach You At Your Clinic .................... 13 Handling an Injury ......................................................................... 13 Handling a Protest ........................................................................ 14 Handling Misconduct By Participants ........................................... 15
Minor Misconduct ..................................................................... 15 Rude Conduct ............................................................................ 16
Ball Handling ................................................................................. 17 Catch ......................................................................................... 17 Double Contact ......................................................................... 18
Rule Review ................................................................................ 20 Jewelry .......................................................................................... 20 Interruptions.................................................................................. 20 The Libero ..................................................................................... 20 Back-Row Players .......................................................................... 21 External Interference .................................................................... 22 Facility Ground Rules .................................................................... 22
Divider Nets .............................................................................. 22
Adjacent Courts ......................................................................... 22 Initiating the Serve on the Playable Surface ............................. 23 Overhead Obstructions ............................................................. 23 Benches ...................................................................................... 24
Replays ........................................................................................... 24 Line Judge Footwear...................................................................... 25 Tournament Lingo ..................................................................... 26 Movin’ On Up .............................................................................. 27 Online Resources ....................................................................... 29
Note: Rulebook references in this document refer to the 2011-2013 Indoor Domestic Competition Regulations (DCR)
as presented by USA Volleyball.
1
Packing Your Bags Let’s set the stage: Saturday morning, 6:45am. You’re still groggy and grumpy because you haven’t had your coffee yet. Your spouse is still under the covers and sleeping soundly. You: Goodbye honey, I’m off to my referee assignment. Spouse: <mumble mumble> You: Huh? Spouse: I asked if you remembered your referee bag.
Remember how silly you felt when you forgot it a few weekends ago?
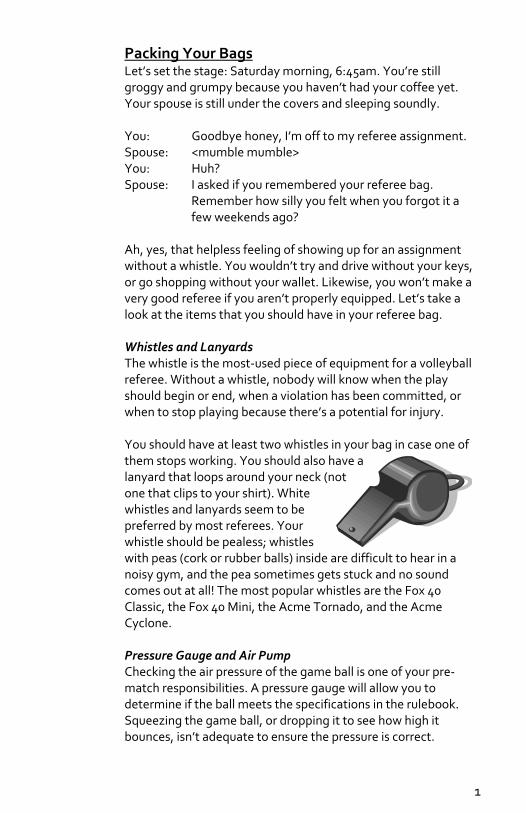
Ah, yes, that helpless feeling of showing up for an assignment without a whistle. You wouldn’t try and drive without your keys, or go shopping without your wallet. Likewise, you won’t make a very good referee if you aren’t properly equipped. Let’s take a look at the items that you should have in your referee bag. Whistles and Lanyards The whistle is the most-used piece of equipment for a volleyball referee. Without a whistle, nobody will know when the play should begin or end, when a violation has been committed, or when to stop playing because there’s a potential for injury. You should have at least two whistles in your bag in case one of them stops working. You should also have a lanyard that loops around your neck (not one that clips to your shirt). White whistles and lanyards seem to be preferred by most referees. Your whistle should be pealess; whistles with peas (cork or rubber balls) inside are difficult to hear in a noisy gym, and the pea sometimes gets stuck and no sound comes out at all! The most popular whistles are the Fox 40 Classic, the Fox 40 Mini, the Acme Tornado, and the Acme Cyclone. Pressure Gauge and Air Pump Checking the air pressure of the game ball is one of your pre-match responsibilities. A pressure gauge will allow you to determine if the ball meets the specifications in the rulebook. Squeezing the game ball, or dropping it to see how high it bounces, isn’t adequate to ensure the pressure is correct.
2
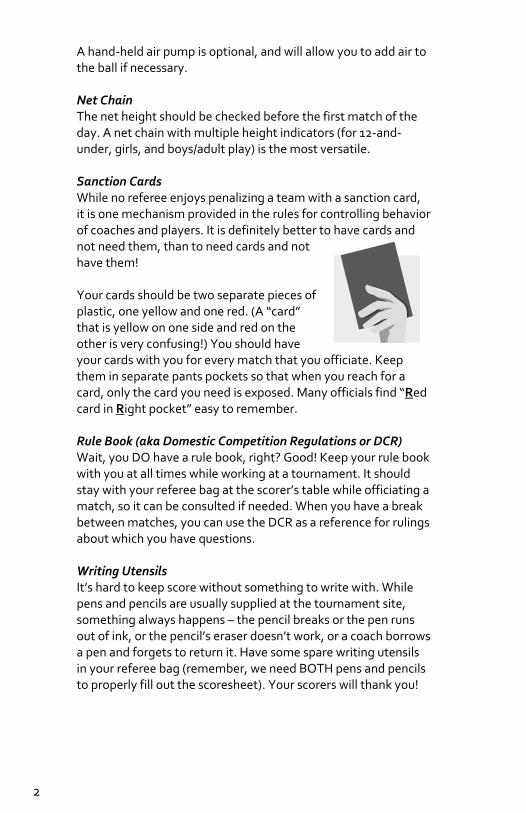
A hand-held air pump is optional, and will allow you to add air to the ball if necessary. Net Chain The net height should be checked before the first match of the day. A net chain with multiple height indicators (for 12-and-under, girls, and boys/adult play) is the most versatile. Sanction Cards While no referee enjoys penalizing a team with a sanction card, it is one mechanism provided in the rules for controlling behavior of coaches and players. It is definitely better to have cards and not need them, than to need cards and not have them! Your cards should be two separate pieces of plastic, one yellow and one red. (A “card” that is yellow on one side and red on the other is very confusing!) You should have your cards with you for every match that you officiate. Keep them in separate pants pockets so that when you reach for a card, only the card you need is exposed. Many officials find “Red card in Right pocket” easy to remember. Rule Book (aka Domestic Competition Regulations or DCR) Wait, you DO have a rule book, right? Good! Keep your rule book with you at all times while working at a tournament. It should stay with your referee bag at the scorer’s table while officiating a match, so it can be consulted if needed. When you have a break between matches, you can use the DCR as a reference for rulings about which you have questions. Writing Utensils It’s hard to keep score without something to write with. While pens and pencils are usually supplied at the tournament site, something always happens – the pencil breaks or the pen runs out of ink, or the pencil’s eraser doesn’t work, or a coach borrows a pen and forgets to return it. Have some spare writing utensils in your referee bag (remember, we need BOTH pens and pencils to properly fill out the scoresheet). Your scorers will thank you!
3
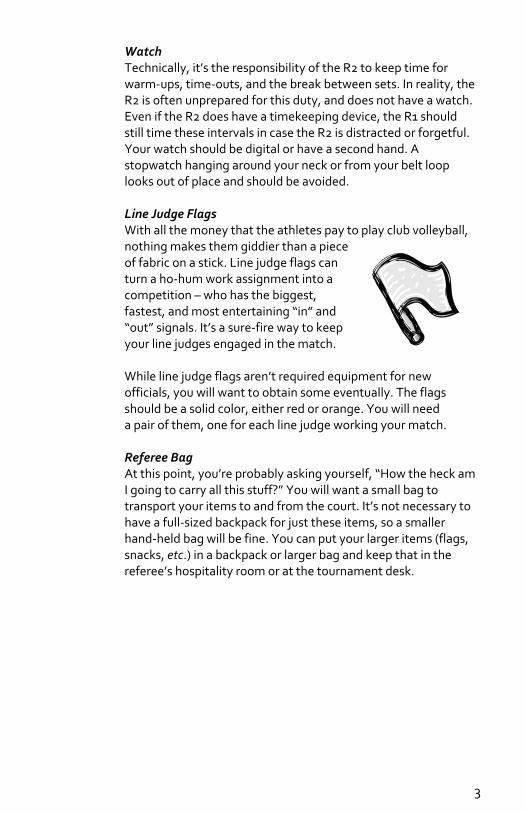
Watch Technically, it’s the responsibility of the R2 to keep time for warm-ups, time-outs, and the break between sets. In reality, the R2 is often unprepared for this duty, and does not have a watch. Even if the R2 does have a timekeeping device, the R1 should still time these intervals in case the R2 is distracted or forgetful. Your watch should be digital or have a second hand. A stopwatch hanging around your neck or from your belt loop looks out of place and should be avoided. Line Judge Flags With all the money that the athletes pay to play club volleyball, nothing makes them giddier than a piece of fabric on a stick. Line judge flags can turn a ho-hum work assignment into a competition – who has the biggest, fastest, and most entertaining “in” and “out” signals. It’s a sure-fire way to keep your line judges engaged in the match. While line judge flags aren’t required equipment for new officials, you will want to obtain some eventually. The flags should be a solid color, either red or orange. You will need a pair of them, one for each line judge working your match. Referee Bag At this point, you’re probably asking yourself, “How the heck am I going to carry all this stuff?” You will want a small bag to transport your items to and from the court. It’s not necessary to have a full-sized backpack for just these items, so a smaller hand-held bag will be fine. You can put your larger items (flags, snacks, etc.) in a backpack or larger bag and keep that in the referee’s hospitality room or at the tournament desk.
4
Dressing the Part OK, so you’ve got your referee bag packed, and you’re headed out the door. Your son is already awake, playing video games in the living room. You: See you tonight, son. Son: Where are you going? You: I’m refereeing a volleyball tournament today. Son: Dressed like THAT?!?! As an official, you are judged heavily on other people’s first impression of you. Everybody understands how difficult it is to look bright-eyed and well-dressed early on a weekend morning, but as a referee, you will be expected to look your best no matter when or where you are working. Let’s discuss your appearance and the components of your uniform. Shirts, Sweaters, and Jackets (The Top Half) For most matches, you’ll wear a short-sleeved polo shirt with the “Certified Volleyball Official” logo. There are also long-sleeved knit shirts and sweaters with the logo that can be worn if the facility is cold. All of these items are white with a blue logo. These are the only uniform tops that should be worn while you’re working. No other jackets or sweaters can be worn over these items. If you work at a tournament in a convention center, long sleeves are a must to stay warm. Some referees like to wear a jacket while resting between matches. In addition to keeping you warm, it will keep food and drink accidents from ruining your shirt! Most officials prefer something blue as it matches their uniform pants. Pants Dark blue slacks are the required uniform bottom. No jeans, shorts, warm-ups, or sweatpants allowed! Cotton pants are fine, but they tend to fade over time. You’ll want to invest in polyester or wool pants, since they won’t fade, and they’ll hold a crease and look sharp for longer. A few nice pairs of pants, while expensive, will last for many seasons, and they may be tax-deductible as a part of your uniform. (Ask your accountant for details.) If your pants have belt loops, a navy or black belt should be worn.
5
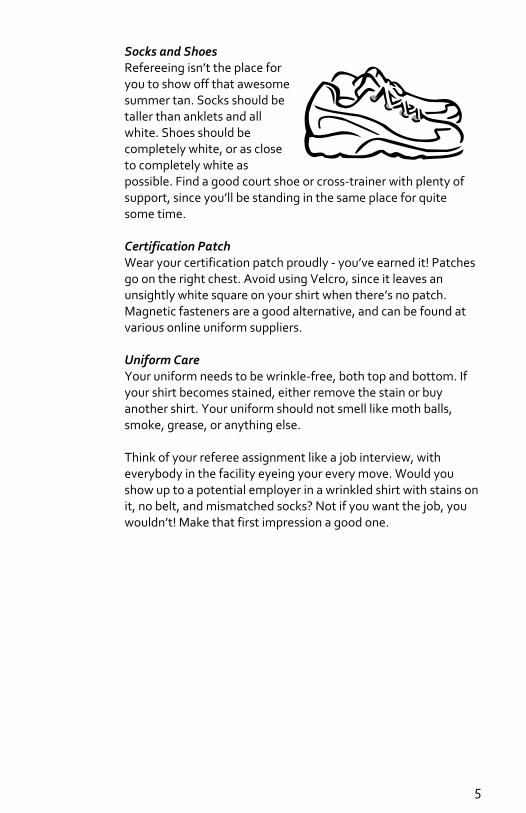
Socks and Shoes Refereeing isn’t the place for you to show off that awesome summer tan. Socks should be taller than anklets and all white. Shoes should be completely white, or as close to completely white as possible. Find a good court shoe or cross-trainer with plenty of support, since you’ll be standing in the same place for quite some time. Certification Patch Wear your certification patch proudly - you’ve earned it! Patches go on the right chest. Avoid using Velcro, since it leaves an unsightly white square on your shirt when there’s no patch. Magnetic fasteners are a good alternative, and can be found at various online uniform suppliers. Uniform Care Your uniform needs to be wrinkle-free, both top and bottom. If your shirt becomes stained, either remove the stain or buy another shirt. Your uniform should not smell like moth balls, smoke, grease, or anything else. Think of your referee assignment like a job interview, with everybody in the facility eyeing your every move. Would you show up to a potential employer in a wrinkled shirt with stains on it, no belt, and mismatched socks? Not if you want the job, you wouldn’t! Make that first impression a good one.
6
Your First Big Assignment You arrive at the playing site, ready for your big day. Much like the first few weeks at a new job, you’re unsure what to expect. Will I get along with my boss and co-workers? What is acceptable behavior and what is not? Will I be closely supervised, or left to fend for myself? And most importantly, when do I get to take my lunch break? What to Expect – Before Play Begins Most days start with a short meeting conducted by the head referee. These meetings will start half an hour before the first scheduled match, so don’t be late! The head referee will cover the format for warm-ups, the number of sets per match, specific rules that need extra attention, and the assignments for the first match. If you are working the first match, you will need to take a game ball and be at your court 15 minutes prior to the start time. It is extremely important to get started on time, since a late start impacts all matches on that court for the rest of the day.
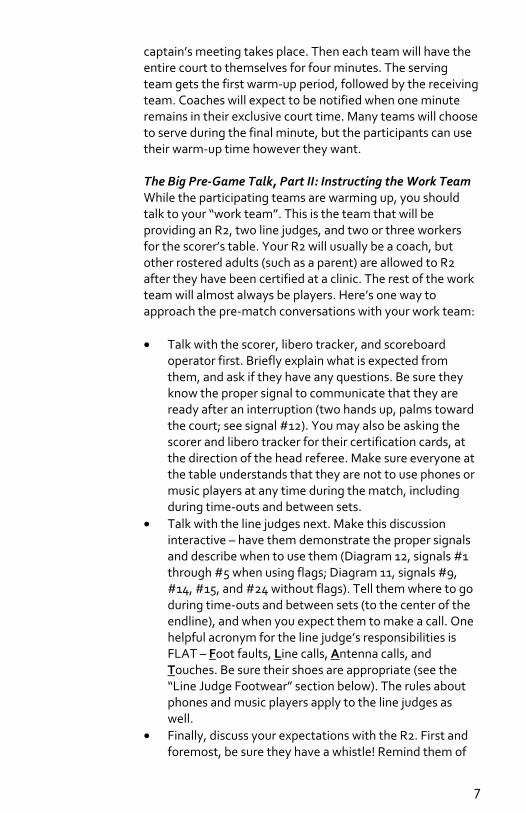
The Big Pre-Game Talk, Part I: Captain’s Meeting Once you arrive at your court, you’ll conduct a short meeting with the captains of the playing teams. This meeting should start as soon as both of the teams are present. Go over the ground rules for your court, including pointing out any overhead obstructions, and describe the rules regarding adjacent courts. Ask the captains if they have any questions, then conduct the coin toss. Assign heads to one team, and tails to the other. Toss the coin (which should be at least as big as a quarter) and catch it (do NOT flip it over after you catch it). The winner of the toss may choose to: 1) serve first; 2) receive first; or 3) start the set on a specific side of the court. If the winner picks either serve or receive, the other captain gets to choose the side they start on. If the winner picks their side, the other captain can choose either to serve or receive.
Timed Warm-Ups You should then administer the timed pre-match warm-ups for both teams. Most tournaments will have two minutes of shared court time, where the teams can warm up on their side of the court only. It is during this shared time that the
7
captain’s meeting takes place. Then each team will have the entire court to themselves for four minutes. The serving team gets the first warm-up period, followed by the receiving team. Coaches will expect to be notified when one minute remains in their exclusive court time. Many teams will choose to serve during the final minute, but the participants can use their warm-up time however they want.
The Big Pre-Game Talk, Part II: Instructing the Work Team While the participating teams are warming up, you should talk to your “work team”. This is the team that will be providing an R2, two line judges, and two or three workers for the scorer’s table. Your R2 will usually be a coach, but other rostered adults (such as a parent) are allowed to R2 after they have been certified at a clinic. The rest of the work team will almost always be players. Here’s one way to approach the pre-match conversations with your work team: • Talk with the scorer, libero tracker, and scoreboard
operator first. Briefly explain what is expected from them, and ask if they have any questions. Be sure they know the proper signal to communicate that they are ready after an interruption (two hands up, palms toward the court; see signal #12). You may also be asking the scorer and libero tracker for their certification cards, at the direction of the head referee. Make sure everyone at the table understands that they are not to use phones or music players at any time during the match, including during time-outs and between sets.
• Talk with the line judges next. Make this discussion interactive – have them demonstrate the proper signals and describe when to use them (Diagram 12, signals #1 through #5 when using flags; Diagram 11, signals #9, #14, #15, and #24 without flags). Tell them where to go during time-outs and between sets (to the center of the endline), and when you expect them to make a call. One helpful acronym for the line judge’s responsibilities is FLAT – Foot faults, Line calls, Antenna calls, and Touches. Be sure their shoes are appropriate (see the “Line Judge Footwear” section below). The rules about phones and music players apply to the line judges as well.
• Finally, discuss your expectations with the R2. First and foremost, be sure they have a whistle! Remind them of
8
their primary responsibility during the play: to watch for and whistle violations of the net and centerline rules. Also be sure they understand that they should whistle and signal all interruptions (substitutions, time-outs, lineup checks, etc.). Tell them that you expect all of the coaches’ requests to go through the R2 – a coach should never approach the scorer’s table directly to ask for information.
What to Expect – During Your Match You’ve briefed your work crew, and the teams are warmed up and ready to play. All your work up until now has prepared you for this moment – climbing up on the stand and refereeing a match. The big question now: do you have any idea what you’re supposed to do? Before the teams take the court, they’ll line up on their end line. Blow your whistle and direct them to the net so they can shake hands and wish each other good luck. After the pre-match handshake, the teams will line up in rotational order so the R2 can verify that their positions match the submitted line-up. If liberos enter the court, this will take place once the line-ups have been checked. The R2 should give you the “ready” signal (signal #12), and now you’re ready to go! Prior to every rally, you will scan the court to ensure everyone is ready to play. Start your scan with the receiving team’s side of the court, checking the team’s bench and court for anything that needs to be addressed. Also check that the line judge on the receiving team’s side is ready. Be sure your R2 is in position and not distracted, and do the same with your scorer’s table. Then check the serving team’s bench, court, and line judge. The entire scan should only take a second or two if everything is in order. (Note that your scan might be slightly different, depending on the location of the scorer’s table in the facility. However, it should always start on the receiving team’s side, and end with the serving team.) If there is a request for a substitution or time-out, your R2 will usually blow their whistle and signal. You should repeat the signal (signal #5) but not the whistle, and be sure that the proper protocol is followed. If the R2 does not blow their whistle, you should signal AND whistle – there should never be a sub or time-out without someone blowing a whistle! During time-outs, be
9
sure to keep time, in case the R2 becomes distracted at the scorer’s table. Once your scan is complete and everyone is ready, blow your whistle and authorize the serve with a “beckon” (signal #1). During the rally, you should concentrate your focus on the ball and the part of the player’s body that is about to contact the ball. You are responsible for determining when a ball is out of play, and (with the help of the line judges) whether a ball lands in bounds or out of bounds. Once you see that a fault has been committed, blow your whistle immediately to end the play. Signal which team has won the rally and the right to serve next (signal #2), and then signal what fault led you to blow your whistle. If a ball lands on the floor, blow your whistle immediately, even if you still need input from the line judges to decide if the ball landed in or out. If there is a problem on the court (e.g., a shoe needs to be tied, or a foreign object is on the court), allow the players a short time to fix the issue. If you haven’t yet blown your whistle for serve, try to make eye contact with the server so they are aware of the delay. (If the server does serve before your beckon, whistle and signal a replay.) If you have already blown your whistle for serve, and then recognize the problem, you must blow your whistle again to stop play and signal a replay (signal #23). Once the problem is fixed, do another quick scan, and start the play again with another whistle and beckon. Lather, rinse, and repeat. Before each rally, you will scan the court, beckon for serve, then end the play and award the ball to the team that won the rally. When the last point of the set is scored, end the rally like normal. Visually confirm the end of the set with your R2 and the scoreboard. Blow your whistle and signal “end of set” (signal #9), then blow your whistle again. For non-deciding sets, signal “change of courts” (signal #3), start your watch, and take a well-deserved mental break while supervising the teams between sets. If a deciding set is needed, call for captains, start your watch, and have your R2 administer the coin toss. What to Expect – After the Match When the last point of the match is scored, the teams should line up on the end lines as they did before the match started. Once
10
the players are lined up, blow your whistle again and direct them to the net so they can shake hands. Supervise the handshake to discourage unsportsmanlike conduct. As soon as the handshake is completed, head to the scorer’s table. If you are working the next match on the court, conduct the captain’s meeting as soon as the previous match is finished and captains from both teams are present. Then turn your attention to the scoresheet from the previous match. You will need to keep the scorer at the table until you have finished reviewing the scoresheet. Make certain that the sheet is filled out both completely and correctly. Have the scorer fix any incorrect or omitted portions. It is the R1’s responsibility to make certain that the correct winning and losing teams are listed for each set. Obtain the signatures of the head coaches from both playing teams. Once the scoresheet is completed to your satisfaction, sign the sheet in the designated box and deliver it to the tournament desk. While you turn in the scoresheet, have your R2 for the upcoming match time the warm-ups. What to Expect – When You’re Not Working a Match At most tournaments, there will be periods during the day where you don’t have an assignment. This is your opportunity to relax, grab a snack, and get off your feet for a bit. For food, you will typically be on your own. Some of the facilities have snack bars, but others don’t have any food available on-site. You won’t have much time to run out and grab fast food, so it’s a good idea to pack some nutritious snacks. Either way, be aware of the facility’s rules – if there is a “no outside food or drink” sign, don’t walk right past the snack bar with your homemade sandwich! Sometimes, a work team won’t be able to provide enough people to officiate a match. In this case, a referee on their break may be asked to help out. If nobody volunteers, the head referee will assign officials to cover the match. Please don’t gripe about the extra work – the head referee is very aware that you’d rather be eating or relaxing during your match off, but they’ve been put in an unpleasant position and need your help. You may or may not be paid for your work, depending on the circumstances.
11
What to Expect – Tournament Format and Administration Most of the tournaments in the North Texas Region are run in a similar manner. All of the tournaments that have paid R1’s are known as “A” tournaments. (“C” tournaments do not have paid referees; coaches of the participating teams are responsible for refereeing the matches.) “A” tournaments can be either one-day or two-day events. One-day tournaments typically have pool play in the morning, followed by single-elimination bracket play after pool play is finished. Pool play will normally have four teams playing a round-robin format (six matches per pool), and matches will usually be two sets to 25, with no deciding set if the teams split the first two sets. Sometimes pools will have three teams, and matches in those pools will usually be three sets to 25, regardless of the outcome of the first two sets. Bracket play will be normal best-of-3 matches, first two sets to 25, third set (if necessary) to 15, switch sides at 8. Two-day tournaments will have two “waves” on the first day, one in the morning and one in the afternoon. Each wave has different teams playing, often from different age groups. The first day will be all pool play, generally the same format as pool play for one-day tournaments. The second day will be mostly bracket play, although occasionally there may be pools as well. At a fully-staffed tournament, you will work two or three matches in a row on the same court, then have some time off before working again. Your break might not be very long if the
court you leave is running behind and the court you’re going to is ahead of schedule. This is one reason why it’s very important to keep your court running efficiently, so you don’t inconvenience the referees who are
following you later in the day. After you leave your court, before taking your break, see if the court you’re assigned to next is running ahead of schedule. BE SURE you are not late to your next assignment – it is your responsibility to be at the court, with your equipment and scoresheets, ready to conduct the captain’s meeting as soon as the previous match is finished. Your schedule might change during the course of the day, so be flexible. Once you arrive at the facility, you should stay there for

12
the entire day, until you check out with the head referee after your last match. Be sure that the head referee has your contact information, so you can be paid for the matches you’ve worked. If you know you will need to leave a tournament site early, those arrangements should be made with the assigner and head referee before you arrive at the site. Requests for early departure will be granted at the head referee’s discretion, and only if there are enough officials to cover the remaining matches. Do NOT arrive at a site and ask the head referee if you can leave early that day.
13
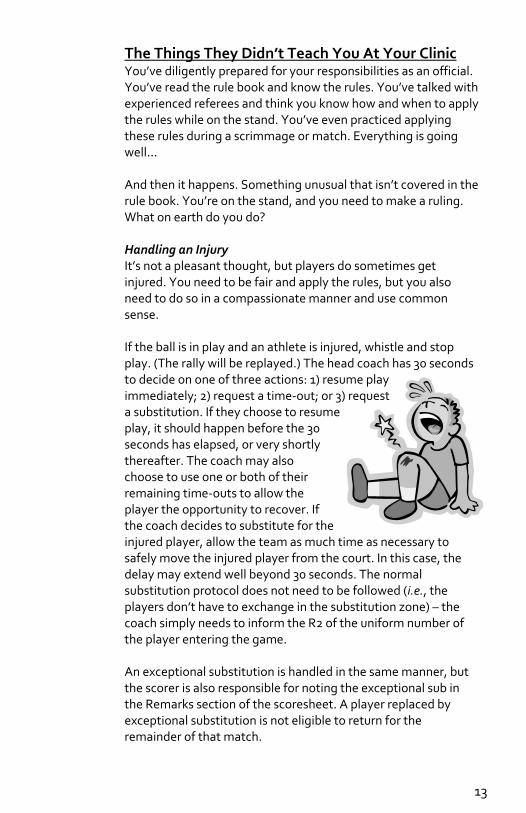
The Things They Didn’t Teach You At Your Clinic You’ve diligently prepared for your responsibilities as an official. You’ve read the rule book and know the rules. You’ve talked with experienced referees and think you know how and when to apply the rules while on the stand. You’ve even practiced applying these rules during a scrimmage or match. Everything is going well… And then it happens. Something unusual that isn’t covered in the rule book. You’re on the stand, and you need to make a ruling. What on earth do you do? Handling an Injury It’s not a pleasant thought, but players do sometimes get injured. You need to be fair and apply the rules, but you also need to do so in a compassionate manner and use common sense. If the ball is in play and an athlete is injured, whistle and stop play. (The rally will be replayed.) The head coach has 30 seconds to decide on one of three actions: 1) resume play immediately; 2) request a time-out; or 3) request a substitution. If they choose to resume play, it should happen before the 30 seconds has elapsed, or very shortly thereafter. The coach may also choose to use one or both of their remaining time-outs to allow the player the opportunity to recover. If the coach decides to substitute for the injured player, allow the team as much time as necessary to safely move the injured player from the court. In this case, the delay may extend well beyond 30 seconds. The normal substitution protocol does not need to be followed (i.e., the players don’t have to exchange in the substitution zone) – the coach simply needs to inform the R2 of the uniform number of the player entering the game. An exceptional substitution is handled in the same manner, but the scorer is also responsible for noting the exceptional sub in the Remarks section of the scoresheet. A player replaced by exceptional substitution is not eligible to return for the remainder of that match.
14
If a team does not have any available players on their bench, and an injury occurs on the court, you can allow the player up to three minutes to recover. If they are ready to play before the three minutes expires, play resumes immediately. You can ONLY grant this recovery period if the team has no players on their bench that could enter as regular or exceptional subs. In most cases, you should administer the injury situation without getting off the stand. Instruct your R2 what to communicate to the coach. If the injury is severe, or it involves blood, it is acceptable to come down from the stand during the prolonged interruption. If blood is present, it must be cleaned using universal precautions; all NTR-sanctioned facilities have the proper equipment. See page 214 in the DCR for more guidance. Handling a Protest Here’s a news flash: coaches don’t always agree with the referees’ decisions. Judgment calls in volleyball tend to draw the most disagreement, primarily because the play looks very different depending on your vantage point. Referees are expected to be impartial and fair, while coaches have an emotional investment in the match that can alter their perception of a play. A coach isn’t allowed to challenge your judgment calls, other than occasionally expressing their disagreement in a sportsmanlike manner. However, a coach does have an avenue to formally challenge non-judgment calls, known as a protest. A coach, through their captain, can protest a referee’s ruling in the following three situations: • The coach believes you have misinterpreted a playing rule
(e.g., you whistle a violation for a double hit on the team’s first contact);
• The coach believes you have failed to apply the correct rule to a given situation (e.g., applying the low-hanging obstruction rule to an object that is part of the ceiling); or
• The coach believes you have failed to charge the correct penalty or sanction for a fault (e.g., charging a team with a time-out for delaying the match).
If a coach wishes to protest a ruling, their captain must do so before the next serve. If the dispute involves the last point of a set, they must protest within one minute of the end of the set.
15
If a captain attempts to protest an obvious judgment call (“That was a double by their setter – I want to protest!”), politely reject the protest, explain to them that judgment calls cannot be protested, and resume the match. Issues with the scoresheet (such as the wrong score showing on the scoreboard) are not protestable either. If the captain protests any other ruling, you should accept the protest, even if you know you made the correct call. Send your R2 to find the head referee and bring them to the court. Do not discuss the situation with anybody – coaches, players, scorers, or the R2 – until the head referee arrives at the court. The head referee will talk to you and to the coach of the protesting team, and issue a ruling, either upholding or denying the coach’s protest. If the protest is upheld, the outcome of the rally may be adjusted. If the protest is denied, play will resume immediately, and no penalty will be charged to the protesting team. Handling Misconduct By Participants Youth volleyball players typically display good sportsmanship. In the heat of competition, however, players and coaches can get emotional and exhibit unsportsmanlike behavior. Here’s how to cool things down when tempers flare.
Minor Misconduct Most unsportsmanlike conduct by participants is very minor. For example, a player may be frustrated that her team lost the rally, and might let off some steam by kicking the ball under the net towards the other team. You can express your displeasure with a player’s action by simply whistling a few times, establishing eye contact with the offending player, and using the “finger wag” (shaking your index finger back and forth as if to tell a child “no”). This can be combined with a verbal warning, such as “Please don’t kick the ball, roll it under the net”, or simply “This is your verbal warning”. Most players already know they did something wrong, and won’t repeat the behavior. You will also encounter minor unsportsmanlike conduct in the form of disagreement with your calls or no-calls. The most frequently disputed calls are judgment calls, such as ball handling and “in”/”out”/”touch” decisions. If this conduct occurs more often than occasionally during a match, or it happens once but is demonstrative, call the captain to the
16
stand. Remind them that only the game captain may address the referees, and that they can do so only to request explanations of your rulings, not to dispute them. These verbal warnings and informal hand-signals are called “warnings” for a reason. Their intent is not to penalize a team, but to caution them that their behavior is considered unacceptable.
Rude Conduct Continued disagreement after a verbal warning, or individual acts that express contempt for the referees’ decisions, are classified as rude conduct. Examples might include a player or coach shouting “You suck” or “You are horrible”, or throwing a clipboard in disgust. Such conduct is penalized with a yellow card. You can whistle a few times to ensure you have the offender’s attention. If the offending player is on the court, call them to the stand; if the sanction is assessed to a coach or a player on the bench, call the captain to the stand instead. Inform the captain who is receiving the card and why. Keep it short – for example, “The head coach has received a yellow card for their unsporting conduct”. Remove your yellow card from your pocket. Hold it high on the offender’s side of the court (signal #6), and display it for a few seconds. At this point, the offending participant is required to raise their hand to acknowledge that they have been sanctioned. After putting away your card, use the “team to serve” signal (signal #2) to indicate that the opposing team should receive a point and the right to serve. Make sure the scorer sees and understands this! Try to issue a penalty card the same way you make any other call – without showing emotion. After issuing a card, you will want desperately to resume the match as soon as possible, to shift everyone’s focus away from you and back to the match. However, before you start play, be sure that the R2 is aware of the sanction, that they have helped the scorer record the sanction, and that the penalty point has been awarded to the opposing team. Remember: when you issue a yellow card, either for misconduct or for a team delay penalty, it always results in a point for the opposing team.
17
Ball Handling The most difficult skill to master for volleyball officials is correctly and consistently applying the rules related to ball handling. There are two types of ball handling violations identified in the DCR – a “catch” and a “double contact”.
Catch Volleyball is unique amongst sports in that the ball must rebound off of the participants while remaining aloft. With the exception of the service action, players may not hold or unduly control the ball, as this would provide them with a distinct advantage. Therefore, catching or throwing the ball is not permitted. A catch is commonly referred to as a “lift” by participants and spectators. Potential violations of this rule can happen in many circumstances: • An open hand beneath the ball catches or throws it • A setter “deep dishes” a set • A player throws the ball from behind or the side • The ball comes to rest between the player and the net When determining if a contact violates the “catch” rule, asking yourself the following question can help: did the player overcontrol the ball? If the answer is yes, the likelihood of a ball handling violation is much higher. Note that the words “roll”, “stick”, “ugly”, and “sound” do not appear in the rule, and therefore do not factor into our decision to call this fault. Here are some examples of common plays: • A ball hits a passer in the shoulder or chest, or on the
inside of the elbows. The ball will often seem to “stick” on the player for a moment, and may not rebound as far as a normal contact would. Your tendency might be to call a violation due to the unusual nature of the contact, but ask yourself the question as it is presented in the rules – was the ball caught or thrown? Is the player exerting extra control over the ball? The answer to both questions is clearly “no”. In fact, the player is exhibiting a complete lack of control over the ball in these examples. A catch should not be called on these contacts.
18
• A team member attempts to play a served or attacked ball with an overhand setting action, but mis-hits it and the ball goes through their hands and flies backwards. The ball might have been contacted multiple times, but it was definitely not caught or thrown. This play may be ugly, but it is not a violation as defined in the rules.
• A player squats low to the floor to save a ball near the net. If the player uses an open hand to lift the ball, it is possible that a violation has occurred. Otherwise, do not assume from the player’s awkward positioning that all contacts like this will be illegal – judge only the part of the body making contact with the ball.
A one-handed play, whether it is a dig, set, or tip, should be judged using the same guidelines as all other contacts. The mere act of playing a ball with only one hand or with an open hand does not automatically make the contact illegal.
Double Contact On the second and third team contacts, a player may not contact the ball more than once while making a play on the ball. Double contact violations are most commonly seen during the act of setting, but can occur in other situations. We do not use spin, sound, body position, or any other factor to influence our decision – only whether or not we actually see the player contact the ball multiple times. Let’s examine some contacts that should not be whistled as violations of the double contact rule: • A team member attempts to play a served or attacked
ball with an overhand setting action, but misplays it and the ball contacts her hands multiple times, then spins wildly as it comes out. On all first team contacts (the first time a team touches the ball after it crosses the net, not including the block), a player may contact the ball multiple times, so long as the ball is not caught or thrown. These plays will be very ugly – and you will be tempted to blow your whistle because something just doesn’t seem right – but rest assured these contacts are allowed by the rules.
• A team member attempts to play a served or attacked ball, and it contacts her forearms, then her shoulder. While this is clearly two contacts, we must allow play to
19
continue, since the double contact occurred on the first team hit. These types of contacts are allowable as long as they are during a single attempt to play the ball. If a ball were to contact the player’s forearms, then travel up in the air and hit the player’s shoulder on the way down, the contacts would be considered successive attempts, and would be whistled as a double contact.
Becoming a good judge of ball handling can only occur with experience. Watch other officials whom you trust as they work a match, and see if you would have made the same calls as them. As you begin to have questions about how to interpret these rules, ask your mentor, an evaluator, or your head referee for clarification.
20
Rule Review Many volleyball officials work under multiple rulesets. The basic rules of the game are the same, but the intricacies of the rules can differ depending on the organization. Here are some rules that you’ll need to remember when working a USAV juniors match in the North Texas Region. Jewelry Hair adornments of any kind are allowed. This includes plastic or metal barrettes and bobby pins. Headbands of all materials, including hard plastic and metal, are also legal. Hats are not allowed. All other jewelry is prohibited for junior volleyball matches. No necklaces, rings, earrings, piercings, or bracelets or anklets (even those made of string) may be worn. You cannot require a player to remove their jewelry, but if they will not or cannot remove it, they may not warm up or play. Plastic or nylon spacers (often worn in the ear or nose to keep a piercing hole from closing) are allowed. Interruptions A team is allowed a maximum of 12 substitutions per set. Libero replacements are not counted as substitutions, and neither are exceptional subs. Time-outs are 30 seconds in length. No warning whistle should be blown. At the end of 30 seconds, the R2 should whistle, and then actively encourage the teams to return to the court. The interval between sets is a maximum of three minutes, but play can resume before three minutes expires if the players, coaches, referees, and support officials are ready sooner. A warning whistle should be blown when two and a half minutes have passed. The Libero Despite their funny name, the libero position has gained an increasingly important role since its introduction. (Libero is Italian for “free”, since they can freely replace any back-row player, and can be pronounced either LEE-buh-row or luh-BEAR-oh.) The libero is restricted to playing in the three back-row positions. When their position rotates to the front row, they must be replaced by the regular team member in that position.
21
Because the libero is intended to be a serve-receive and defensive specialist, and because they may enter the game freely, there are a number of restrictions on their playing actions. First, the libero may not be designated as the captain, since they are frequently leaving and re-entering the court. They may not block or attempt to block, and they may not attack a ball from anywhere on the court if it is entirely above the height of the net. Additionally, if a libero is touching the court on or in front of the 3-meter line, and they play the ball using an overhand setting motion, the next contact by their teammate may not be an attack while the ball is completely above the height of the net. Back-Row Players A player who starts a rally in one of the three back-row positions has some restrictions. They may not block a ball, and cannot be blocking next to a player who does successfully block a ball (known as a “collective block”). If they attack the ball while it is entirely above the height of the net, they must have last contacted the floor completely behind the 3-meter line. One of the rules that coaches expect all referees to apply consistently is the back-row rule, particularly as it relates to the setter. You must be aware when a setter starts the rally in the back row, because a violation has been committed if any of the following things happen: • The setter contacts a ball while it is completely above the
height of the net and: a) the next contact is a legal contact by an opposing player; or b) the ball completely crosses the vertical plane of the net
• The setter has a part of her body above the height of the net and an opponent causes the ball to touch her
These rules apply to all back-row players, but the situation occurs most frequently when the setter is involved. You MUST blow your whistle and make a ruling – play cannot continue if a back-row player touches a ball that is completely above the height of the net immediately before or after it contacts an opponent. The signal is ”attack fault” (signal #21, in the case of the first bullet above), ”blocking fault” (signal #12, in the case of the second bullet), or “reaching beyond the net” (signal #20) if the opponent reaches over the net and interferes with the playing action.
22
External Interference The most frequent type of external interference is a ball rolling onto the court. If the ball presents a distraction to the players, interferes with play, or poses a safety hazard, the rally should be stopped and replayed. However, not all balls that enter the court will necessitate a replay. If the play is occurring near the net, and an errant ball rolls across the back of the court away from the play, it is not necessary to stop the rally. Other types of interference can also require a replay. If a player is chasing a ball and the line judge or R2 prevents that player from making a play, the rally should be replayed. In your judgment, the player must have a legitimate play on the ball in order for a replay to be awarded. Facility Ground Rules Each facility will have some unique ground rules that need to be applied during your match. If you have any questions about the specific circumstances that apply to your court, ask your head referee. Even with the wide variety of facilities, there are some ground rules that will be common across all venues.
Divider Nets The ball is out of play if it contacts a divider net around a court. If a player is preparing to play a ball falling near a divider net, only that player can move the net before the ball is played. If one player moves a divider net so a different player can contact the ball, the ball is ruled out of play (signal #15).
Adjacent Courts A player may not step on or over the boundary lines of another court at any time. If they do so, the ball is ruled out of play (signal #15). This is true even if the player has already contacted the ball and their momentum carries them into the adjacent court. The area around an adjacent court, such as the free zone and service zone, is considered playable area. The only exception to the adjacent court rule is if play for the day has already finished on an adjacent court, and no other matches are scheduled on that court. As long as both captains are informed during the captains’ meeting, the court may be considered playable area. The adjacent court ruling may not change during a match – if the match starts with the
23
adjacent court being considered out of play, it must remain that way for the entire match.
Initiating the Serve on the Playable Surface The server may not step off the playable surface at any time during their serving action. Before beckoning for serve, you should confirm that the server does not have any part of their body touching the non-playable surface. This most commonly applies to sport court laid on top of a concrete floor; the server may not have any part of their foot touching the concrete. If the player is not completely on the playable surface, motion for them to move forward, or inform the captain and have them relay the message to the server. This reminder can be given whenever necessary during a match, without penalty.
Overhead Obstructions After a team’s first or second contact, if the ball touches the ceiling on that team’s side of the court, it remains in play, as long as the portion of the ceiling that the ball touched is over the playable area. The next player to touch the ball must also be a member of that team – in other words, if the ball contacts the ceiling and then crosses the net, it is out of play once: a) a player from the other team touches it; or b) it completely crosses the vertical plane of the net. If the ball crosses the net and then contacts the ceiling, it is out of play as soon as the ceiling is contacted. If the ball touches the ceiling on either side of the court after a team’s third contact, it is ruled out of play immediately. You should not take into account the trajectory of the ball when determining if contact with the ceiling is legal. If a ball is traveling towards a non-playable area (such as a wall or spectator seating), but after it contacts the ceiling it changes direction and comes back towards the court, the ball is still in play, as long as the portion of the ceiling that the ball touched is over a playable area. This interpretation is commonly misunderstood – the opposing coach will want you to call the ball “out” because it would not have been playable if the overhead obstruction had not been present. Where the trajectory of the ball is important is dealing with obstructions below 15 feet high. The most common example of this situation is a vertical basketball backboard. (Note that
24
if the backboard is above 15 feet, it is considered to be part of the ceiling.) If a ball contacts an obstruction below 15 feet, whistle to stop play. If the ball would not have remained in play if the obstruction was not there, call the ball out (signal #15). If the ball would have remained in play, and a player had a legitimate play on the ball, the rally should result in a replay. If the ball comes to rest on an overhead obstruction, the rally is replayed. Send your R2 to the tournament desk to get another game ball.
Benches If a facility has benches, they should be no closer to the centerline than the 3-meter line. Players may stand at the end of the benches, but cannot be any closer to the court than the front edge of their bench. If a player attempts to play a ball that is over the bench, they can legally do so as long as part of their body is touching the playing surface when they contact the ball. Some facilities do not have room for benches. In this case, the players and coaches will typically stand next to or behind the court. Their position may not interfere with the duties of the R2, line judges, or scorekeepers. While the ball is in play, the coaches must be closer to their bench area than they are to the court.
Replays In addition to the sections above regarding injuries, interference, and overhead obstructions, there is another situation where a replay may be awarded. If a ball lands near a line, but none of the officials can determine whether the ball landed “in” or “out”, the rally can be replayed. This should be a very rare occurrence, and happens most often when the R1 cannot see the ball land because players are in the way, and the line judges are also unable to determine where the ball contacted the floor. The line judges are positioned to assist the R1 in making line and antenna calls, but in the absence of a call from the line judges, you should be prepared to make a ruling. Note that disputed touch calls CANNOT be replayed. If it cannot be determined with 100% certainty whether or not a ball was

25
touched prior to traveling out of bounds, then no touch is called and the ball is ruled “out”. Line Judge Footwear To ensure the safety of our players and work teams, the North Texas Region has instituted a rule regarding appropriate footwear for line judges. This rule applies to all competition sanctioned by the region. A line judge may not wear any type of shoe that the referee determines could cause a hazardous condition. Examples of prohibited shoes include flip-flops, slip-on sandals or “slides”, shoes with no backs (such as Crocs), and fuzzy slippers. If a line judge needs to scramble to move out of the way of the play, and their shoes might come off or cause them to trip, those shoes may not be worn. A line judge can wear their normal court shoes, or work in socks or bare feet.
26
Tournament Lingo Junior volleyball vocabulary can be confusing to the uninitiated! Here are some explanations to keep you from feeling like an outsider. Qualifier – One of ten nation-wide tournaments where teams can qualify for the Junior National Championships. Qualifiers are held from late February through the end of April. Teams must typically finish in the top three or four places at a qualifier to secure a spot in the national tournament. Qualifiers can have as many as 200 teams in an age group competing for just a few bids to Nationals. The nearest qualifier is the Lone Star Classic, which is typically held in Dallas. Ranking Tournaments or Power League Tournaments – The most important regular-season tournaments in the region. Teams play in power league tournaments to increase their chance of receiving a high seed at the Regional Bid Tournament. Regional Bid Tournament – Once all the national qualifying tournaments are finished, the teams that still wish to play at the Junior National Championships have one last opportunity to qualify by placing high at the regional bid tournament. This tournament is usually held the first or second weekend of May. Typically only the top two or three finishers in each age group will receive a bid to Nationals. Junior National Championships (formerly the Junior Olympic Volleyball Championships or JO’s) – The national championship tournament for USAV junior volleyball teams. The tournament is held in late June and early July each year, and in order to play, teams must earn a bid from a qualifier tournament or receive a bid from their region. For some teams, the major measure of a season’s success is whether or not they earn a bid to Nationals.
27
Movin’ On Up After you’ve officiated juniors volleyball for a few seasons, you may be interested in upgrading your certification. Some of the benefits of achieving a higher certification level include: • The chance to work higher-level matches in an age group • The opportunity to work with older age groups • A new patch indicating your certification level • Better pay per match Your first season, you will be considered In-Process until you complete all the requirements of the Provisional rating. After spending some time as a Provisional referee, you can advance to the Regional level. The certifications beyond Regional are Junior National and National. These two national-level ratings are granted by USA Volleyball after an official is evaluated at one or more national tournaments. The North Texas Region has posted the requirements and expectations for each of these ratings on their website (see the “Online Resources” section on page 29). To advance to the next level, first confirm you meet all the requirements. For example, you must hold a certification for a minimum period of time before you can be considered for advancement. Additionally, ensure that you are able to perform all the duties expected of you should you achieve the higher rating. Submit your name to the chair of the Officials Division’s Advancement Committee per the instructions on the website. The Advancement Committee will work with the Education and Training Committee to determine which candidates should be considered for an upgrade to their rating. This will include verifying that you meet all requirements for the next certification level. The Education and Training Committee, along with their evaluators and the head referees at tournament sites, will evaluate you as you work a number of matches throughout the season in both the R1 and R2 positions. These evaluations may be informal observations, or they may include a post-match conversation with the evaluator. In this de-briefing session, your evaluator will talk about ways to improve your officiating by referencing specific occurrences during that match. It’s not always easy to take this kind of criticism – after all, you’re already hearing plenty of negativity from the coaches and spectators! Just keep in mind that the comments of the
28
evaluator are intended to be constructive, and if you implement their suggestions, you will become a better referee. You may not aspire to become a national or international-level official, but that doesn’t mean that you won’t be expected to continue improving your officiating skills. Evaluations will be done throughout the season on all officials as one of the criteria of maintaining your existing rating.
29
Online Resources www.ntrvolleyball.org The North Texas Region of USA Volleyball. The site contains information for junior players and parents, adult players, coaches, and referees. All of the Officials Division’s documentation can be found here, including policies, expectations, and compensation information. Click on the “Officials” tab to view information specific to referees. www.volleyballreftraining.com The official site for USA Volleyball referee training and education. Contains presentations about various aspects of volleyball officiating, links to documents and resources, and a blog where officials can ask questions about rules and officiating techniques. www.usavolleyball.org The website of USA Volleyball, the national governing body for the sport of volleyball in the United States. www.fivb.org Federation Internationale de Volleyball, the world governing body for the sport of volleyball. www.roofsportswear.com Online vendor of uniform shirts and equipment, catering specifically to volleyball referees.
www.pavo.org Professional Association of Volleyball Officials, a joint organization for volleyball referees working under either USAV or collegiate rules. Publishes rule comparison documents outlining the differences between NCAA, USAV, and NFHS rules. www.zebraweb.org The online assignment system for NTR referees.

30
Notes