Vitality - ORGANIC HEALTH...
94
Transcript of Vitality - ORGANIC HEALTH...
2
THE VITALITY PROTOCOL EAT, MOVE, AND BE
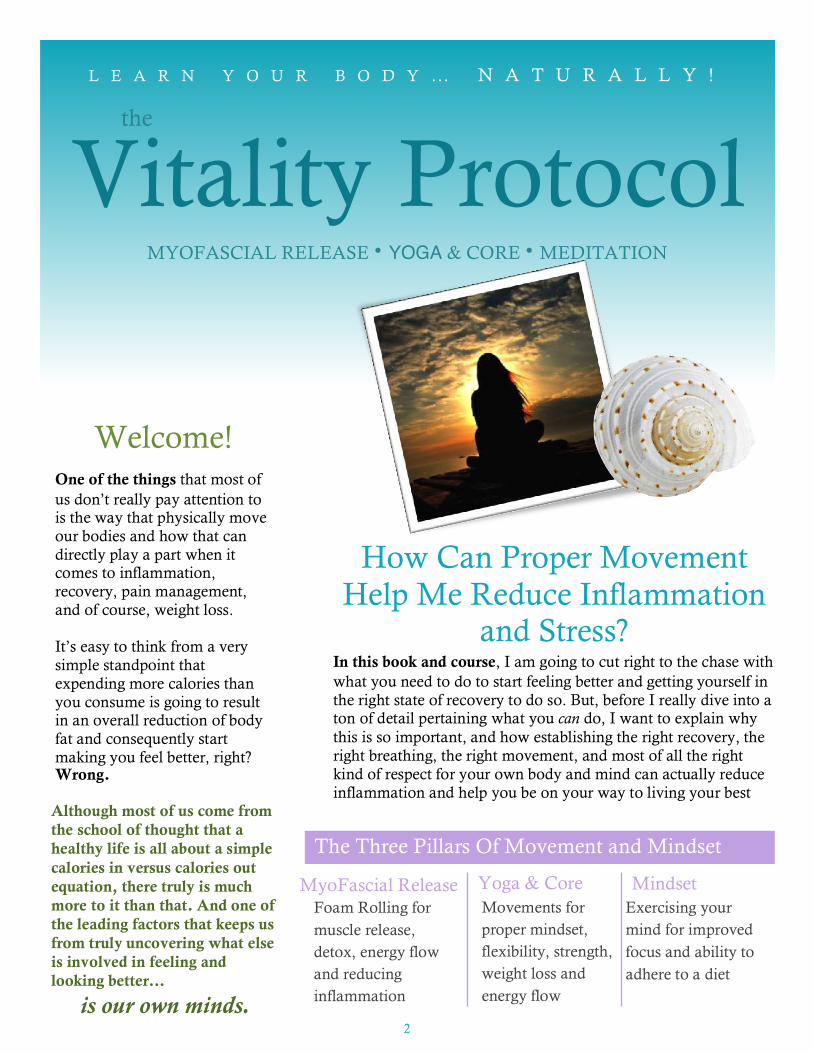
The Three Pillars Of Movement and Mindset
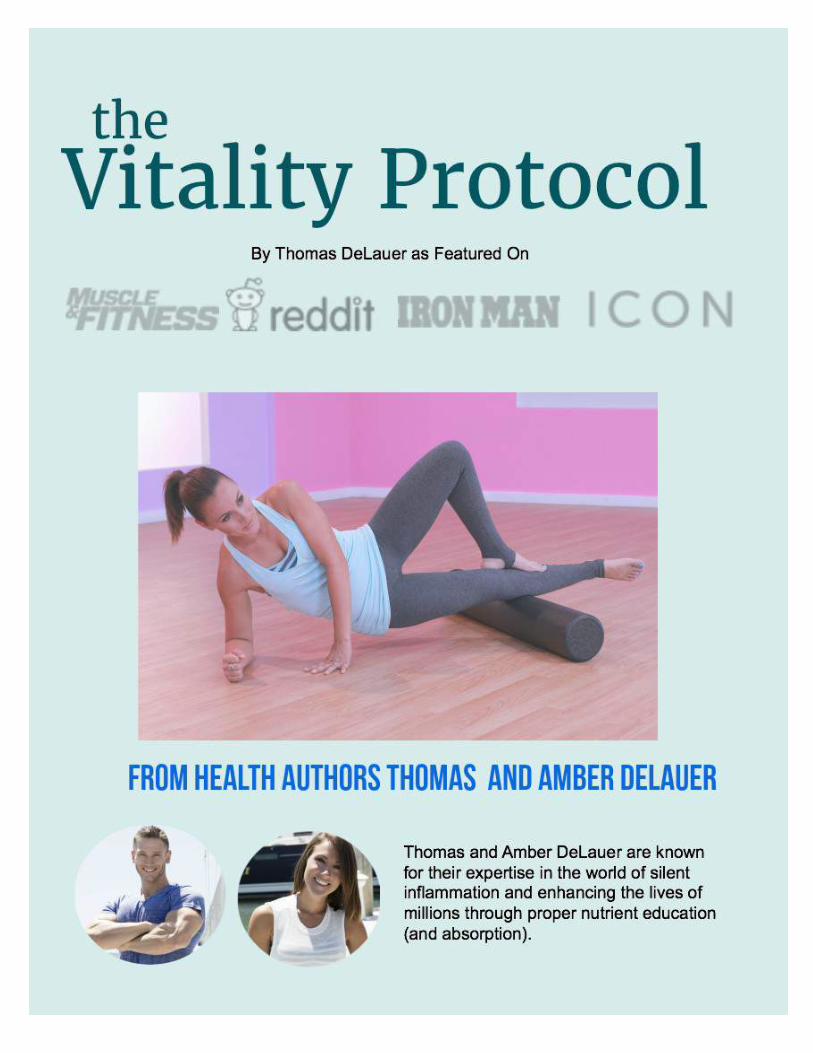
the
Vitality Protocol MYOFASCIAL RELEASE • YOGA & CORE • MEDITATION
How Can Proper Movement Help Me Reduce Inflammation
and Stress? In this book and course, I am going to cut right to the chase with what you need to do to start feeling better and getting yourself in the right state of recovery to do so. But, before I really dive into a ton of detail pertaining what you can do, I want to explain why this is so important, and how establishing the right recovery, the right breathing, the right movement, and most of all the right kind of respect for your own body and mind can actually reduce inflammation and help you be on your way to living your best
MyoFascial Release Yoga & Core Movements for proper mindset, flexibility, strength, weight loss and energy flow
Mindset Exercising your mind for improved focus and ability to adhere to a diet
L E A R N Y O U R B O D Y … N A T U R A L L Y !
Welcome! One of the things that most of us don’t really pay attention to is the way that physically move our bodies and how that can directly play a part when it comes to inflammation, recovery, pain management, and of course, weight loss. It’s easy to think from a very simple standpoint that expending more calories than you consume is going to result in an overall reduction of body fat and consequently start making you feel better, right? Wrong.
Although most of us come from the school of thought that a healthy life is all about a simple calories in versus calories out equation, there truly is much more to it than that. And one of the leading factors that keeps us from truly uncovering what else is involved in feeling and looking better…
is our own minds.
Foam Rolling for muscle release, detox, energy flow and reducing inflammation

3
THE VITALITY PROTOCOL EAT, MOVE, AND BE
Table of Contents This is a BIG Program, So use this table of
Contents to Jump to the Desired Areas
Education Learn About Recovery………………………Pg. 8 Cortisol and Stress Hormones………………Pg. 9 What will you Learn in this Program………Pg. 12 The Structure of the Program Overview……Pg. 14 What Kind of Materials Do You Need…….Pg. 19 The Programming The Fasted Cardio Technique………………Pg. 20 Foam Rolling Introduction to Foam Rolling………………Pg. 25 Foods that Assist Foam Rolling……………Pg. 34 How to Pick a Foam Roller………………...Pg. 35 Myofascial Release for Lymphatic Drainage (inflammation)………………………………Pg. 39 Foam Rolling for Energy and Mobility……Pg. 55

4
THE VITALITY PROTOCOL EAT, MOVE, AND BE
Table of Contents Cont. Yoga Introduction to Yoga Program……...………Pg. 65 Mobility Flow Yoga Routine……………….Pg. 67 Morning Power Yoga Routine……………..Pg. 68 Relaxation Yoga Routine…………………...Pg. 69 Mindset and Meditation Overview of Mindset and Meditation………Pg. 70 3 Videos you MUST WATCH……………...Pg. 71 Mindset and the DIET……………………….Pg. 72 Breathing and Your LOW BACK…………..Pg. 73 Finding Time to Meditate……………………Pg. 74 Visualization………………………………….Pg. 75 The FOUR Meditation Techniques…………Pg. 76 Using All of the Above Tying it All Together (Full Routine)…..……Pg. 83 Core Work How the Core Helps This Process………….Pg. 85 The AB ROUTINE!!..................................Pg. 86

5
THE VITALITY PROTOCOL EAT, MOVE, AND BE
This is Also a Video Course!!
Throughout this Program are over 50 videos to help you learn every single component of the program, so
be sure to keep an eye out for anything with THIS icon:
This Icon means that there is a video to watch along with it, so we want to make sure that you know what
to look for. Simply click and you’re set!
In addition to these videos throughout the program, There is a VIDEO TABLE OF CONTENTS to show you each and every video in order as well (although I definitely recommend reading the
program as well)

6
THE VITALITY PROTOCOL EAT, MOVE, AND BE
Video Table of Contents
There are over 50 Videos in the Program! They’re spread throughout the program appropriately, but if you want
to view specific videos, they are also all linked here!
Introduction to Program How the Program Works Program Materials Needed Cardio Explanation
Foam Roll Lymphatic Drainage
Massage Ball Chest Massage Ball Traps Massage Ball Abs Massage Ball Chin Massage Ball Pecs and Biceps Massage Ball Arm Massage Ball Hip Flexors Massage Ball Calves
Foam Rolling For Energy Massage Ball Neck/Traps Foam Rolling Upper Back Foam Rolling Armpit Foam Rolling Low Back/Glutes Foam Rolling Glutes Foam Rolling Hamstrings Foam Rolling Adductors Foam Rolling Calves Foam Roller Shins Foam Rolling IT Band Foam Rolling Quads Foam Rolling Adductors (2) Foam Rolling for Mobility Massage Ball Feet Foam Roller Calves Foam Roller Hamstrings Foam Roller Glutes Foam Roller Quads Foam Roller Biceps Foam Roller Back Foam Roller Low Back Foam Roller Side/Back

7
THE VITALITY PROTOCOL EAT, MOVE, AND BE
Video Table of Contents Cont. Yoga Mobility Flow Yoga Morning Power Yoga Relaxation Yoga
Mindset/Meditation Introduction to Meditation Meditation Techniques Coming Out of Meditation
Abs and Core Introduction to the Ab Program Exercise: Bird Dogs Exercise: Dead Bugs Exercise: Suitcase Crunches Exercise: Planks Exercise: Pallof Presses Exercise: Suitcase Carries Exercise: Heel Touches Exercise: Overhead Lunges
End of Program Thank You and What’s Next

8
THE VITALITY PROTOCOL EAT, MOVE, AND BE
Why We Overlook Recovery
Rest to Recover Most of our healing and our senses of well-being come from the recovery process, and if our recovery process isn’t operating at it’s full potential, then we are always swimming in a pool of our own toxins and byproducts of daily life.
Detoxing
How Does Movement Help? • Our bodies cleanse through our own kidneys,
livers, and lymph systems • There is so much more than just diet that plays a
part here • Moving the Body in the Right way can help
these organs and systems work better, much like a healthy diet can do the same
• Stresses on the body, from things as simple as
This program is going to take you on a journey of discovering how you can use the right methods of foam rolling, yoga, meditation, and core exercises to truly make your body efficient at staying detoxified.
Imagine if you could have a body that is efficient at detoxing… Even if you’re not eating detox-like foods!
We hear about cleanses. Heck, you’ve probably heard of or are utilizing my own 7-Day Reboot Anti-Inflammatory Cleanse. But when we think of cleanses, we tend to only think of food. We think of juice-fasts and lots of fruit, but we forget that movement is one of the key components of life. It is what makes us human, what really makes us living organisms.
We are all conditioned to think that we need to be constantly working our tails off to get the bodies that we want. Society wants us to believe that the more that we exert and the harder we are on our bodies, the more results we will get… Well, that’s not entirely the truth.

9
THE VITALITY PROTOCOL EAT, MOVE, AND BE
Let’s Talk A Little Bit About Stress Hormones… Cortisol
Cortisol is something that I talk about frequently… Heck, it seems like most of my videos that have to do with diet somehow end up roping cortisol into the equation at some point or another. Why? Because it is such a critical hormone when it comes to how your body reacts to certain foods. Up until now, we’ve broken down so much in the way of how diet can affect your cortisol levels and how specific foods might help reduce those levels, but we haven’t talked about how cortisol is directly affecting your levels of inflammation in the body, and how that could be impacting your ability to get in the best possible shape of your life.
We’ve established that cortisol is the stress hormone, that it is released when the body is in a state of panic, stress, or just flat out hungry. Well, it is quite a bit more than that. You see, before we start drastically trying to defeat cortisol, we need to understand that it is not this evil little hormone that everyone makes it out to be. It has a legitimate purpose and it is absolutely needed not just for daily function, but for peak performance as well. If we can understand the importance of cortisol, then we can truly understand how we can manage it and how we can actually capitalize on higher and lower levels of cortisol throughout the day. Let’s start with when cortisol is released throughout the day…

10
THE VITALITY PROTOCOL EAT, MOVE, AND BE
Imagine This… You’re living out in the wild back in the Paleolithic times and you just woke up… You’re climbing out of your slumber and you stand up, only to find that your body doesn’t produce cortisol like it should, and you suddenly get light headed and dizzy. You start to stumble. You trip as you walk out of the cave… Then boom! A tiger comes up and attacks you when you are at your highest
You see how cortisol is a very important factor here? The elevation of cortisol and blood pressure in the morning is one of the most important simple functions of the human body. And this is just one of the reasons that cortisol is so critical to human function. Here is a short list
Here’s A Short List of Some of the Important Reasons That We Need Cortisol
• Proper Glucose Metabolism – This means regulating your blood sugar
• Insulin Response – Helps us absorb food at the right time • Immune Function – Helps our white blood cells do their job and
helps move them throughout the body • Inflammatory Response – Although we are trying to combat
inflammation, cortisol can help trigger the proper response at the correct time
• Lowers your sensitivity to pain – Cortisol does this by helping regulate the hormones and neurotransmitters that help the body overcome stressful and painful times
And these are truly just a FEW Functions of cortisol…

11
THE VITALITY PROTOCOL EAT, MOVE, AND BE
We are all conditioned to think that we need to be constantly working our tails off to get the bodies that we want. Society wants us to believe that the more that we exert and the harder we are on our bodies, the more results we will get… Well, that’s not entirely the truth.
For example, if you get stressed out about something and your cortisol levels elevate, they are elevating because they’re trying to adapt to the situation at hand. It’s not the end all, be all effect that immediately causes damage, but it’s the reaction of your body trying to rectify what may have gone wrong. What does this ultimately mean to you at a very tangible level?
SO HERE IS WHAT I TRULY WANT YOU TO UNDERSTAND BY GOING THROUGH THIS
PROCESS…
Cortisol is released as a PRODUCT of stress. It is not the CAUSE of stress. Cortisol is actually your friend, you can allow it to become your signaler for a lot of positive things that happen in your body. The trick is thinking one step ahead and truly knowing the chain reaction that occurs after a cortisol release.
You’re likely reading this because you’re taking part in a few changes in your diet to address inflammation at its root, so you’re already taking the steps to eliminate or at least reduce some of the autonomic stressors that are eliciting a cortisol response in the first place… Which is eating the problem foods or at least identifying them. Well, you’ve now come to the right place, because the purpose of this book and these videos is to teach you a way that you can legitimately begin to reduce stress and cortisol elevation from DIFFERENT angles other than just the diet, and frankly, they are ways that are somewhat simple, we just don’t always have the guidance or the structure to put them into a solid plan.
It means that we need to control the stressors that elevate cortisol in the first place.

What Will You Learn in This Program?
This program is going to not only teach you the physical techniques to manually flush inflammation and toxins out of your body, but I’m going to explain exactly how you can use this program for the rest of your life to continually feel the way that you feel after completing just one day. There are three components to this program, and they are three pillars of an anti-inflammatory lifestyle. Granted, there are really four pillars, the fourth being the diet portion which, if you are adopting this whole heartedly, you have already embarked on. But the three pillars that make up the rest of the foundation of a truly anti-inflammatory lifestyle that allows for longevity, reduced pain, and increased results are the following:
The Three Pillars of Movement and Mindset
Foam Rolling Yoga & Exercise Mindset/Meditation Using Simple Foam Rollers, you can help expedite the removal of toxins and stimulate the lymphatic system to do its job more effectively
The right kind of movement in conjunction with proper foam rolling can dramatically help you get in better shape in much less time, without spending hours and hours at the gym
Although it all starts in the mind, we are going to focus on this portion last. It’s important to learn the fundamental techniques first, and then apply mindset and meditation to what you’ve learned to increase adherence for a lifetime.
Watch the Video Here!
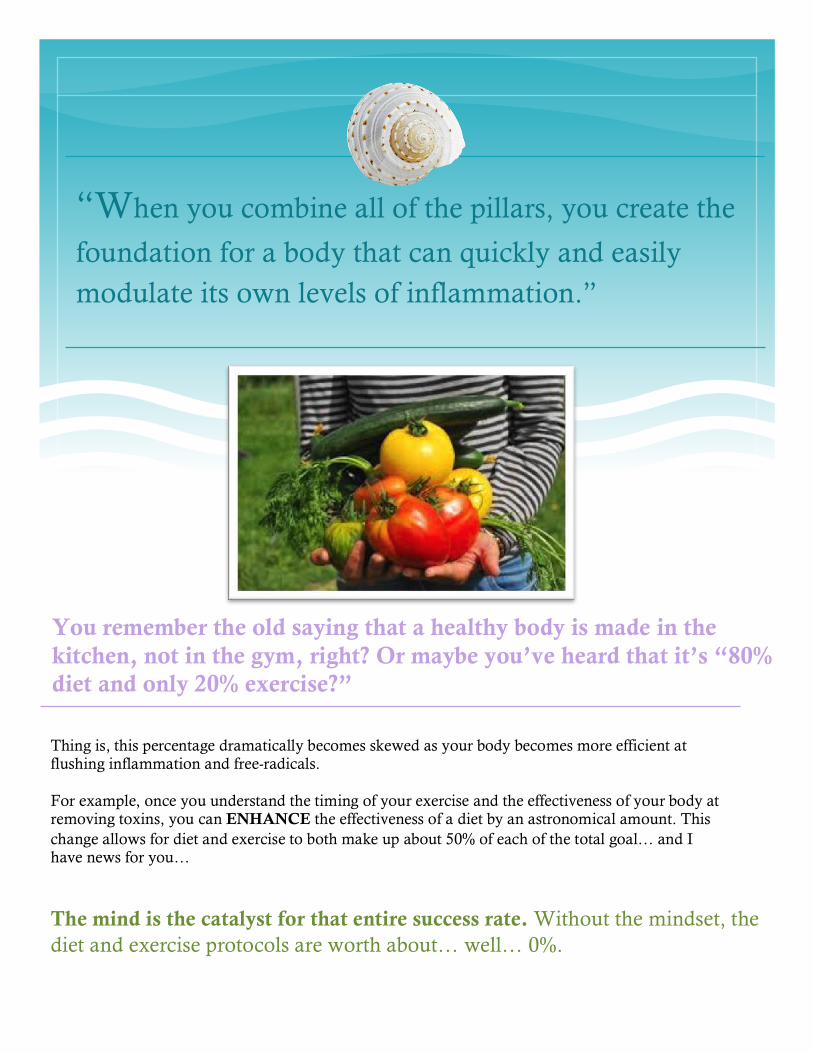
“When you combine all of the pillars, you create the
foundation for a body that can quickly and easily modulate its own levels of inflammation.”
You remember the old saying that a healthy body is made in the kitchen, not in the gym, right? Or maybe you’ve heard that it’s “80% diet and only 20% exercise?”
Thing is, this percentage dramatically becomes skewed as your body becomes more efficient at flushing inflammation and free-radicals. For example, once you understand the timing of your exercise and the effectiveness of your body at removing toxins, you can ENHANCE the effectiveness of a diet by an astronomical amount. This change allows for diet and exercise to both make up about 50% of each of the total goal… and I have news for you…
The mind is the catalyst for that entire success rate. Without the mindset, the diet and exercise protocols are worth about… well… 0%.

What is the Structure of This Program?
In this program, you’re going to learn how you can exercise, recover, and even think to help your diet have a stronger effect on your body. Remember how I talk about inflammation and how it affects your ability to absorb nutrients? If you’re not absorbing nutrients, then your metabolism isn’t able to do its job and you’re not absorbing the healthy foods that you are in fact eating. The reason that this program is set up in the structure that it is, is so that you can learn the proper steps in the easiest to remember fashion.
Watch the Video Here!

First, we are going to go over the myofascial release and foam rolling aspect of the program. The reason that we cover this section first is because at the end of all of this, if there is one tangible technique that I want you to take way, it is how to effectively foam roll for recovery.
I will explain how foam rolling literally squeezes energy out of your muscles and soft tissue and that how by doing it with the right sequence can help your lymphatic system do a better job at keeping your immune system up to snuff. In the first part of the foam rolling segment, I’ll break down how foam rolling works, why its important, and then of course, the actual techniques for both lymphatic drainage and energy/mobility. These techniques will literally show you how to perform the movements themselves. After you’ve learned the movements themselves, I’ll give you a four week breakdown that you can use to establish a great routine for yourself. You’ll know exactly what to do, and when J
The thing is…. It doesn’t have to be this excruciating exercise all the time. Heck, you wouldn’t know it by looking at me, but truthfully, I am not leaving my blood and guts on the gym floor every day. Heck no. I don’t have time or energy to do that every day. I am more about using movement in a smart way, to get the most out of my diet, and it all comes down to timing, efficiency, and most of all mindset and recovery.
But Why Foam Rolling?
Foam Rolling First
But Why Yoga
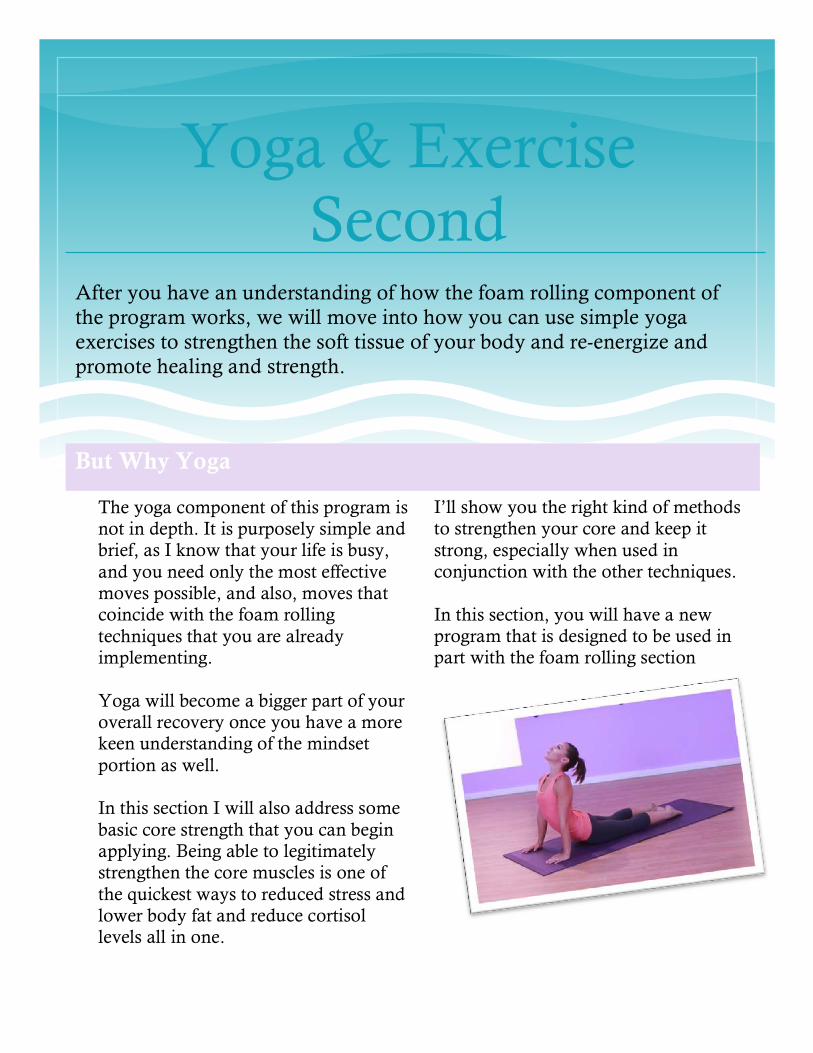
Yoga & Exercise Second
After you have an understanding of how the foam rolling component of the program works, we will move into how you can use simple yoga exercises to strengthen the soft tissue of your body and re-energize and promote healing and strength.
The yoga component of this program is not in depth. It is purposely simple and brief, as I know that your life is busy, and you need only the most effective moves possible, and also, moves that coincide with the foam rolling techniques that you are already implementing. Yoga will become a bigger part of your overall recovery once you have a more keen understanding of the mindset portion as well. In this section I will also address some basic core strength that you can begin applying. Being able to legitimately strengthen the core muscles is one of the quickest ways to reduced stress and lower body fat and reduce cortisol levels all in one.
I’ll show you the right kind of methods to strengthen your core and keep it strong, especially when used in conjunction with the other techniques. In this section, you will have a new program that is designed to be used in part with the foam rolling section

Mindset & Meditation Third
(And Most Importantly!)
This section of the program is geared all around the proper meditation techniques and also proper breathing for reducing inflammation.
But Why Meditation?
So much of how we feel physically is dictated by our mind’s ability to focus and shy away from distress. In this section I will teach you tried and true, simple meditation techniques that can allow you to get much more out of your diet, training, and life in general. This isn’t about using pseudo science to convince you to become a zen warrior, but rather to teach you meditative techniques that you can apply throughout the day to reduce inflammation and literally absorb more nutrients.
By the end of this section, you will be able to apply components of the mindset portion into your foam rolling and exercise techniques. You’ll be able to use the meditation techniques by themselves or apply them to different areas of the program and even the diet

So What Do We Start With?
In this program, I’m going to teach
you all about how you can use foam rolling, meditation, affirmations, and even touch on exercise to get the most out of your diet and your life, but I feel like it makes the most sense to start with myofascial relief and recovery in general. Then we will dive into how you can structure your workouts in such a way that you’re going to get the most out of them without having to break your back doing so.
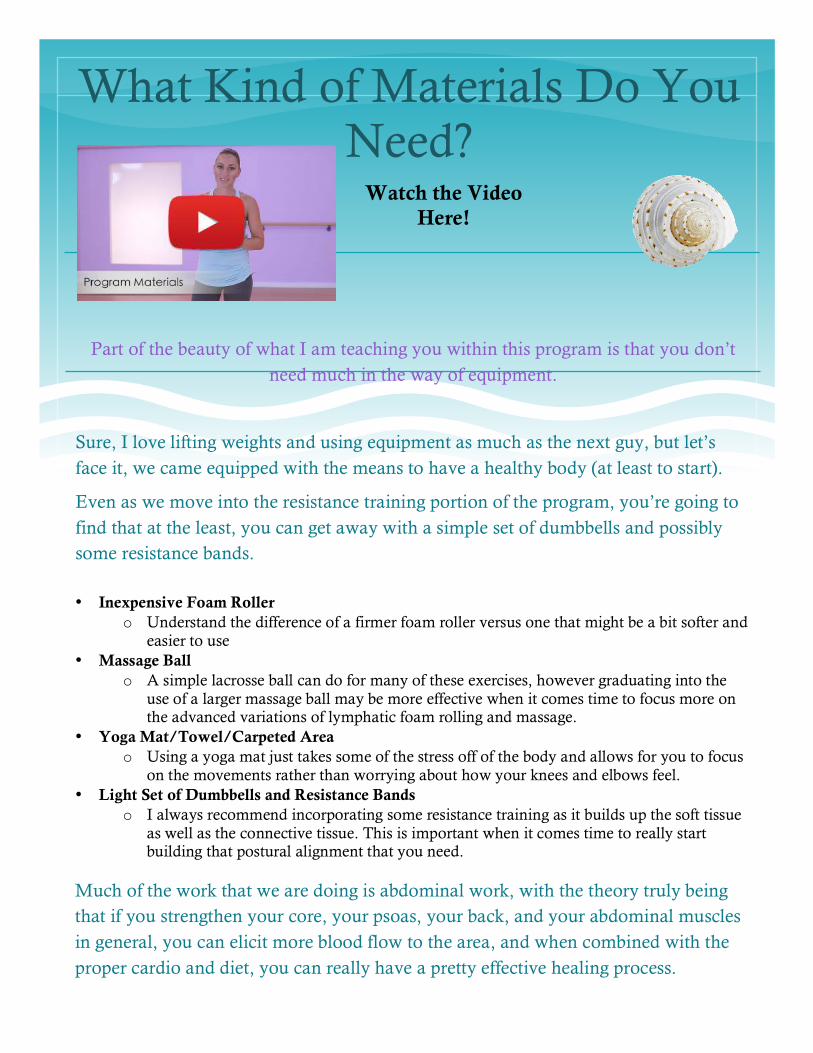
What Kind of Materials Do You Need?
Part of the beauty of what I am teaching you within this program is that you don’t need much in the way of equipment.
Sure, I love lifting weights and using equipment as much as the next guy, but let’s face it, we came equipped with the means to have a healthy body (at least to start).
Even as we move into the resistance training portion of the program, you’re going to find that at the least, you can get away with a simple set of dumbbells and possibly some resistance bands.
• Inexpensive Foam Roller
o Understand the difference of a firmer foam roller versus one that might be a bit softer and easier to use
• Massage Ball o A simple lacrosse ball can do for many of these exercises, however graduating into the
use of a larger massage ball may be more effective when it comes time to focus more on the advanced variations of lymphatic foam rolling and massage.
• Yoga Mat/Towel/Carpeted Area o Using a yoga mat just takes some of the stress off of the body and allows for you to focus
on the movements rather than worrying about how your knees and elbows feel. • Light Set of Dumbbells and Resistance Bands
o I always recommend incorporating some resistance training as it builds up the soft tissue as well as the connective tissue. This is important when it comes time to really start building that postural alignment that you need.
Much of the work that we are doing is abdominal work, with the theory truly being that if you strengthen your core, your psoas, your back, and your abdominal muscles in general, you can elicit more blood flow to the area, and when combined with the proper cardio and diet, you can really have a pretty effective healing process.
Watch the Video Here!

Step 1
One Sample Week Of How Structuring Fasted Cardio Can Change Your Life
This is not designed to be a hardcore fat-loss cardio regime, this is a realistic, PROVEN structure that helps condition your body to feel better
and heal faster. As you’ve probably seen in some of my work, I am a huge advocate for fasted cardio. I feel that by getting up out of bed and immediately beginning movement patterns, you convince your body that it needs to run on those stored forms of fuel (fat mainly). This can prime your body to begin running on those fat stores throughout the day more than anything else. So here is my strategy for implementing fasted cardio during the first week of your inflammation reduction process. **If you for any reason cannot perform this in the morning fasted, try to perform it as close to being fasted as possible (i.e. as far away from your last meal as possible)
Watch the Video Here!
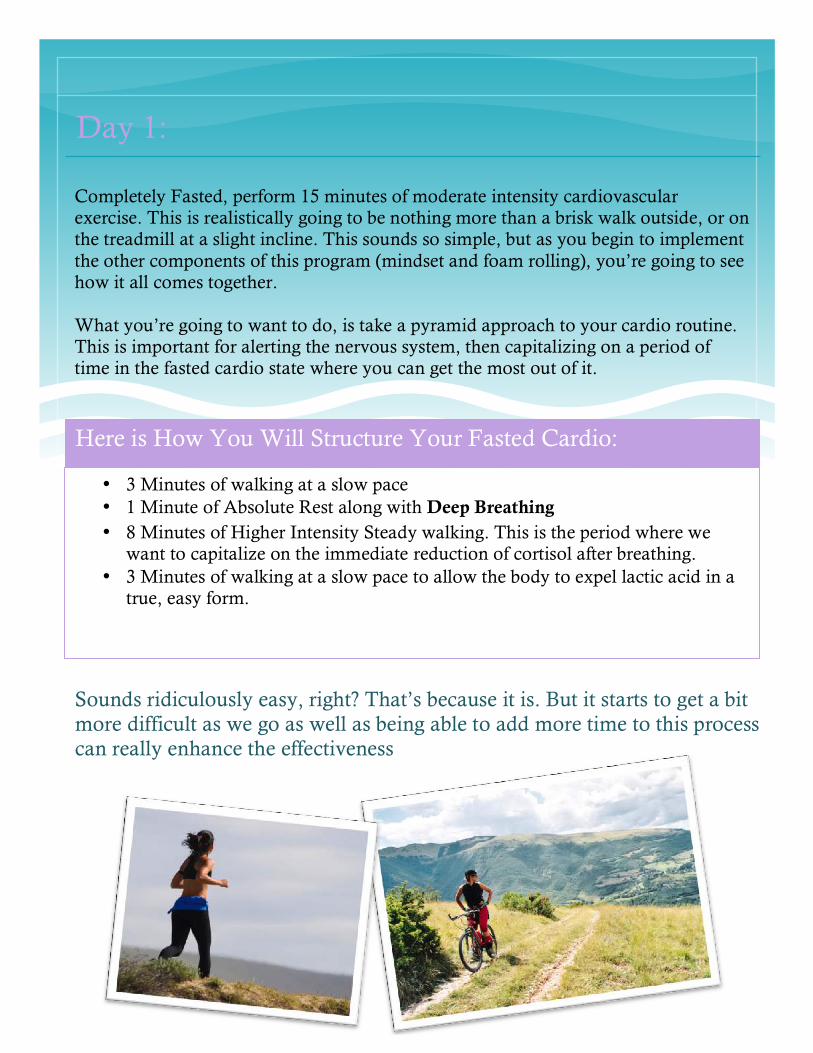
Day 1:
Completely Fasted, perform 15 minutes of moderate intensity cardiovascular exercise. This is realistically going to be nothing more than a brisk walk outside, or on the treadmill at a slight incline. This sounds so simple, but as you begin to implement the other components of this program (mindset and foam rolling), you’re going to see how it all comes together. What you’re going to want to do, is take a pyramid approach to your cardio routine. This is important for alerting the nervous system, then capitalizing on a period of time in the fasted cardio state where you can get the most out of it.
• 3 Minutes of walking at a slow pace • 1 Minute of Absolute Rest along with Deep Breathing • 8 Minutes of Higher Intensity Steady walking. This is the period where we
want to capitalize on the immediate reduction of cortisol after breathing. • 3 Minutes of walking at a slow pace to allow the body to expel lactic acid in a
true, easy form.
Sounds ridiculously easy, right? That’s because it is. But it starts to get a bit more difficult as we go as well as being able to add more time to this process can really enhance the effectiveness
Here is How You Will Structure Your Fasted Cardio:

Curabitur in dolor
Day 2:
Here is How You Will Structure Your Fasted Cardio:
• 3 Minutes of Easy paced cardio • 1 Minute of Easy Stretching along with Deep Breathing • 4 Minutes of Higher intensity, about 70% of your max (this could be a light jog) • 8 Minutes of Moderate Intensity (about 55% of max) • 4 minutes of cool down at a slower pace
Day 3:
• 3 Minutes of easy paced warm-up • 1 Minute of Stretching and Breathing • 3 Minutes of 55% max cardio, nice and easy • 2 Minutes of 60-70% max cardio, just enough to break a good sweat • 1 Minute Stretching and Breathing recovery • Repeat this 5 times total • 3 minutes of easy cool down.
Here is How You Will Structure Your Fasted Cardio:
We increase the time a bit more, and also re-structure our breathing to be a bit more in the way of intervals. This is NOT high intensity interval training, but rather a more structured form of introductory intervals.
• Repeat the same cycle as Day 3
Day 4:
Here is How You Will Structure Your Fasted Cardio:
Day 5: On Day 5, we begin decreasing the rest periods to build up the endurance in the shortest amount of time possible.
Here is How You Will Structure Your Fasted Cardio:
• 3 minutes of easy paced warm up • 1 Minute of stretching and breathing • 2 Minutes of Moderate Intensity Cardio • 1 Minute of Higher Intensity Cardio • 30 Seconds of Breathing and recovery • 2 Minutes of Moderate Intensity • 20 Seconds of Recovery • 1 Minute Higher Intensity • 30 Seconds Recovery. • You’re basically repeating 1 minute on, 30 seconds off, 2 minutes on, 30
seconds off for a total of 4 times. • 3 Minute light recovery
Day 6:
Here is How You Will Structure Your Fasted Cardio:
• Repeat the same cycle as Day 3

Day 7:
Here is How You Will Structure Your Fasted Cardio:
• 2 Minute warm up • 1 minute of breathing and stretching • 5 minutes at moderate intensity • 5 minutes at higher intensity • 5 minutes at lower intensity/recover
Finally, on Day 7, you’ll do be able to maintain a higher level of focus and moderate intensity throughout the duration of your cardio. You’ll simply do the following
Ongoing
You’ll be able to repeat day 7 consistently for 3-4 days per week. If you cannot perform the cardio first thing in the morning, remember, you can implement throughout the day. This structure of cardio is known as surge training and is extremely effective at helping the body remove toxins and expelling lactic acid from the blood. You can revisit the 7-Day Fasted Cardio plan after 4-5 weeks of performing the ongoing cardio plan as a reintroduction or an extra kick.

Introduction to Foam Rolling (Video)
The Next Few Pages Explain the Details of Why we have foam rolling in the program. But if you would rather just watch the video, You can click
on the video button below!
If you would like to skip straight ahead to the technique portion of the foam rolling, you can skip ahead to page 37. The next few pages explain the
science behind foam rolling, which may or may not be up your alley.

Step 2 Now That You’ve Gotten Moving, Let’s Get
Look at How You Can Get That Inflammation OUT!
One of the things that is so overlooked, is the world of myofascial relief and foam rolling in
general.
Foam rolling seems like one of those things that only athletes do… right? Well the truth is that everyday people like you and I can get even more benefit out of spending some gentle time with a foam roller than even athletes sometimes. In this section of the program, I’m going to show you not only how foam rolling helps you recover from workouts, but how it might be the missing link between your diet and exercise.

What are You Going to Learn When It Comes to Foam Rolling?
• Lymphatic Drainage Technique
o Did you know that you can actually stimulate the immune system to work more effectively by stimulating the lymph system to do it’s job better? These techniques will show you ways that you can actually improve your immune system in a method that…well… feels kind of good!
• Foam Rolling for Energy and Mobility Technique o So much of our energy is trapped in our muscles. It’s trapped in
the bound up tissue and it’s trapping us when we feel still and immobile. Simply making some changes to how you help your body recover and regain mobility can dramatically change how your body feels and most of all, how much energy you have!
• Day by Day Plan o You’ll learn a day by day plan that you can incorporate and
even use with other sections of this plan. This way you can begin incorporating foam rolling and lymphatic drainage techniques without the mystery and on your schedule.
Here’s a Brief Breakdown of What You’ll Learn in This Section!

What To Expect
and mobility routines that will help carry on your success with the Organic Total Body Reboot (if purchased) and the other steps on this program into a lifestyle that helps you feel more energized, but also allows you to get the results and relief you need. This is not just a simple stretching routine, this is an intensely planned out and research-backed sequence of specific movements using instruments that have been proven effective by countless clients to improve pain, mobility, energy, health and weight loss!
Why It’s So Simple Instead of overcomplicating with an intimidating routine, I have done my best to make this the most simple and effective program that you can do right at home, and it is that way because I have broken it down into two pillars for your success:
• Detoxification and Energy • Pain and Mobility
These techniques will show you what to implement to take control of your own body and take the guess work and intimidation out of
the practice of physical healing.
Learn How to Detox, Learn How to Manage Pain and Mobility, and Learn How to Reenergize your Life! This section of the program will take you through easy steps to implement recovery

Pain Probably one of the main reasons you’re here, I address how this routine can relieve your pain and discomfort and reduce inflammation within your body, just by incorporating key movements into your daily routine, and understanding that it doesn’t have to be painful to reduce your pain!
Guides and Videos How to properly utilize the correct equipment, how to find the proper mindset to achieve your goals, and how to find the energy that you’ve been missing out on!
Equipment You don’t need a gym to achieve these movements. They can be done from the comforts of your home using basic, compact equipment that can easily be stored away for later use! Do not let the intimidation of the gym keep you from being the best version of you possible!

Suspendisse potenti!
Why is This Important?
To make the most out of any exercise program, it is important to recognize and implement a proper amount of rest and recovery into your routine. There are so many people out there who break their minds and bodies down with intense workouts and stress, but ignore the healing aspect of muscle recovery, keeping them from reaching their full potential. With the constant overload of information available on exercise, it often overshadows the necessary practices that help you get in shape, relieve pain and detox your body! We almost think of recovery as a chore or a negative action. The beauty of this program is that it encompasses all aspects of movement and healing in a more in depth and easy to understand way. Therapeutic foam rolling and myofascial release is an enormous part of the healing process within the body and the mind. It improves blood flow and helps digestion while decreasing toxins and inflammation! If we can put a few of these simple movements into action every day, your body will become so receptive to healing and you will have so much more energy, it will be like you are running on jet-fuel!
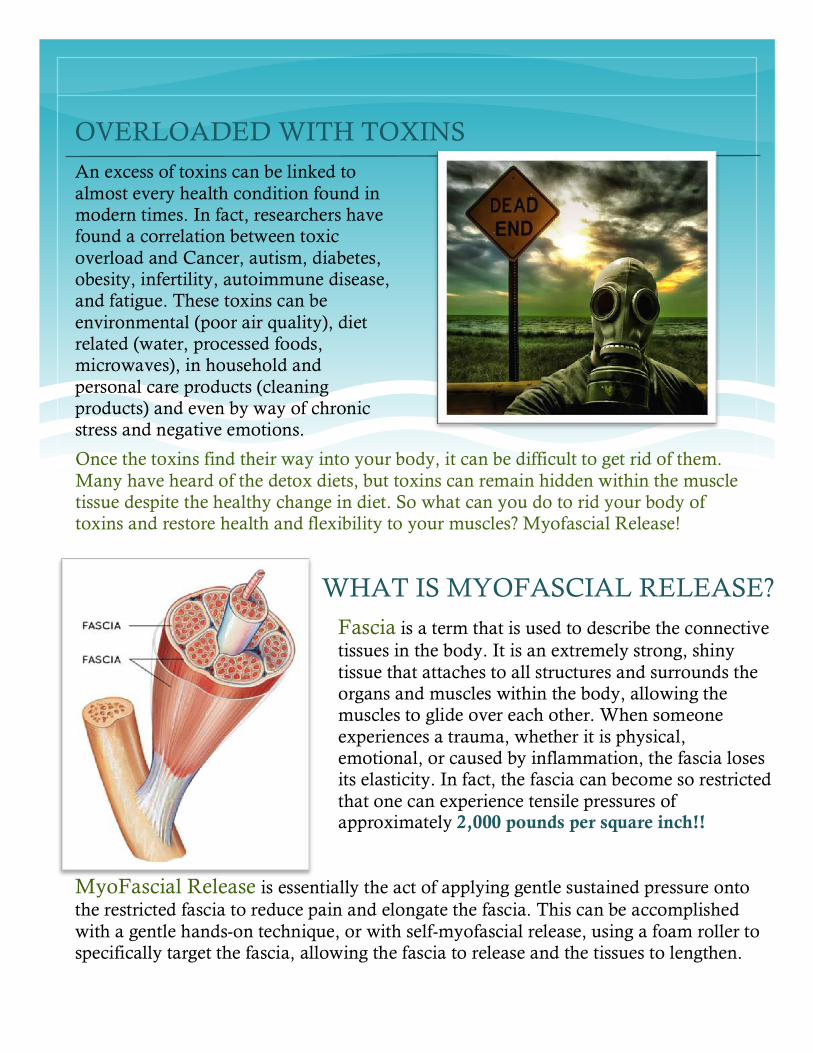
OVERLOADED WITH TOXINS An excess of toxins can be linked to almost every health condition found in modern times. In fact, researchers have found a correlation between toxic overload and Cancer, autism, diabetes, obesity, infertility, autoimmune disease, and fatigue. These toxins can be environmental (poor air quality), diet related (water, processed foods, microwaves), in household and personal care products (cleaning products) and even by way of chronic stress and negative emotions. Once the toxins find their way into your body, it can be difficult to get rid of them. Many have heard of the detox diets, but toxins can remain hidden within the muscle tissue despite the healthy change in diet. So what can you do to rid your body of toxins and restore health and flexibility to your muscles? Myofascial Release!
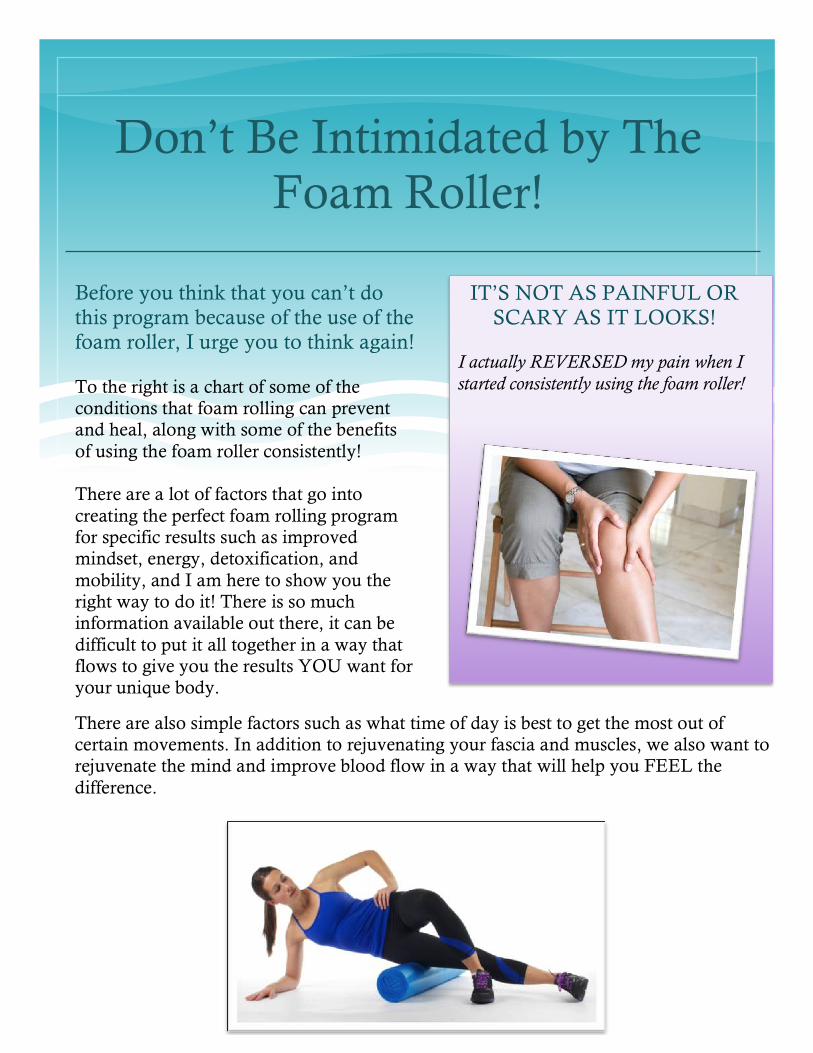
MyoFascial Release is essentially the act of applying gentle sustained pressure onto the restricted fascia to reduce pain and elongate the fascia. This can be accomplished with a gentle hands-on technique, or with self-myofascial release, using a foam roller to specifically target the fascia, allowing the fascia to release and the tissues to lengthen.
Fascia is a term that is used to describe the connective tissues in the body. It is an extremely strong, shiny tissue that attaches to all structures and surrounds the organs and muscles within the body, allowing the muscles to glide over each other. When someone experiences a trauma, whether it is physical, emotional, or caused by inflammation, the fascia loses its elasticity. In fact, the fascia can become so restricted that one can experience tensile pressures of approximately 2,000 pounds per square inch!!
WHAT IS MYOFASCIAL RELEASE?
Don’t Be Intimidated by The Foam Roller!
IT’S NOT AS PAINFUL OR SCARY AS IT LOOKS!
I actually REVERSED my pain when I started consistently using the foam roller!
Before you think that you can’t do this program because of the use of the foam roller, I urge you to think again! To the right is a chart of some of the conditions that foam rolling can prevent and heal, along with some of the benefits of using the foam roller consistently! There are a lot of factors that go into creating the perfect foam rolling program for specific results such as improved mindset, energy, detoxification, and mobility, and I am here to show you the right way to do it! There is so much information available out there, it can be difficult to put it all together in a way that flows to give you the results YOU want for your unique body. There are also simple factors such as what time of day is best to get the most out of certain movements. In addition to rejuvenating your fascia and muscles, we also want to rejuvenate the mind and improve blood flow in a way that will help you FEEL the difference.

Ø Toxic Overload Ø Injury Ø Muscle Imbalance Ø Muscle Soreness Ø Pain Ø Chronic Tension (Hypertonic Muscles) Ø Poor Balance Ø High Blood Pressure Ø Heart Arrhythmias Ø Less Risk of Heart Attack Ø Stress Ø Elevated Cortisol Ø Abnormal Feedback to The Central
Nervous System Ø Colds and Flus Ø …and more!
Ø Mood and Mindset Ø Immune System Ø Stress and Cortisol reduction Ø Movement Ø Range of Motion Ø Power and Performance Ø Recovery Time Ø Blood Pressure Ø Blood Flow Ø Heart Health Ø Lymph Circulation Ø Nutrient Supply Ø Oxygen Supply Ø Elimination of Lactic Acid Ø Flexibility and Tissue Elasticity Ø Pain Ø Energy Ø Reduces inflammation Ø Breaks up Scar Tissue Ø Reduces Cellulite Ø Cell Nutrition Ø Removal of Waste Products Ø Your Bank Account- SAVES YOU
MONEY!
What Can It Improve?
What Can It Prevent?
Reasons to Roll
When it all comes down to it, it’s just a simple necessity to perform self-myofascial release, regardless of your activity level. Our bodies have been under pressure from years and years of strenuous activity, stress, and poor posture caused by anything from sitting behind a desk to improper workout form, and even if you don’t feel the negative affects yet, it will likely catch up to you one day! Prevention is the best medicine! So pay close attention to this list, as it may help you Identify with some of the immense benefits of myofascial release and therapeutic foam rolling and help you realize that these movements may not be as intimidating as you originally thought!

Berries Berries are a great source of blood cleansing antioxidants. These antioxidants work alongside fiber to rid the body, and specifically digestive system, of harmful toxins, relieving inflammation and supporting cellular cleansing and immune health.
Greens To help ensure that you are ridding your body of toxins and inflammation and helping to improve your energy, get your greens in! The fiber found within the leafy greens feeds good bacteria while supporting immune and blood health and cleansing the body of mucus
Pure Spring Water I recommend that you consume as much water as entirely possible. As a general rule, you should be consuming as close to 0.75oz of water for every 1lb of body weight. For those of you that use the metric system about 50 ml per KG of bodyweight. This is MOST important after a session of myofascial release therapy, as the toxins are being flushed out of the muscle, and ultimately should be excreted from the body.
What Foods Can You Expect to Assist You… And Why?
CLICK THE PICTURE OF THOMAS for a complete guide to anti-inflammatory eating, starting with the 7 Day Organic Total Body Reboot!
WANT A STEP-BY-STEP PLAN?

Selecting Your Foam Roller and Massage Ball
What Foam Roller Do I Need? The first thing to take into consideration when selecting your foam roller is finding the proper density. Typically, foam rollers come in a variety of colors, white being the softest foam roller, and the darker colors are more firm. We recommend the dark grey Spri brand, or the TriggerPoint Grid foam roller, but any roller that is the right density will do..
What Massage Ball Do I Need? When it comes to choosing the right massage ball, you have a little bit more flexibility. You can either pick up a standard massage ball at your local sporting goods store (we like the Supernova brand), or you can use a soft softball, tee ball, or lacrosse ball. Really, any small ball will do, as long as it doesn’t give too much under pressure and isn’t unbearably firm.
Essentially, you will want to pick the roller that gives you the most benefit. A roller that is too soft may not produce adequate results, but a foam roller that is too hard may cause too much pain. The idea is to find the happy medium between pleasure and pain, as in the saying “It hurts so good!”. For this program, you are likely to have the best results with a medium to firm foam roller (again, normally gray to black in color), but use your best judgement in what is right for your body.

Basic Guidelines for Rolling
Our goal is to help you fight inflammation, lose weight, gain energy and feel better, right? That said, I want to ensure that you are performing these movements to the best of your ability the RIGHT way, to get the most out of this program.
• Expect mild discomfort during some movements • Use your body weight to apply and remove pressure as you
roll • Position the roller in an area that will allow you to roll 3 to
4 inches in either direction • Rest the body on the roller where pain or tension is found
for 30 seconds. • If there is too much pain, remove pressure, use a softer
roller, or cease rolling that muscle. Work your way up to being able to roll that muscle, don’t damage the tissue.
• Always roll slowly, focusing on the small movements, relaxing the muscles, and allowing the roller to work it’s way into the muscles.
• Breathe. Don’t forget to breathe deeply and slowly throughout each movement.
Follow These Guidelines for
the BEST results!

Essentially, research has proven that the psoas can affect your mindset, and your mindset can affect your psoas, which in turn can affect every aspect of your body. Seems pretty important, right? The other muscles that make up the hip flexors are the Iliacus, connecting the inside of the femur to the iliac crest, and the Rectus Femoris, which connects the front of the iliac crest to the front of the femur. We will dive into how to open the pelvis and release the constant tension on your psoas and hip flexors. Be sure to check into the Movement section of this program for more ways to help your psoas.
To understand the importance of the psoas, it is the only muscle that bridges from the spine to the legs, allowing us to walk, and stand upright. It is attached to our diaphragm and affects our ability to breathe. Beyond that, it affects and is affected by our fight or flight reflex, as it is attached to the most interior part of the spinal cord and brain stem, which causes the psoas to contract when the stimulus response is triggered. Revisiting what we learned about chronic stress and muscle tension, as the psoas is under constant tension, it begins to shorten and puts pressure on the spine, nerves and organs. It can also affect your breathing and cause a multitude of ailments, from low back pain, to hip degeneration, knee pain, infertility, and digestive upset. Researchers even believe when your psoas is under chronic tension, it is constantly telling your body that you are in danger. Over time, this can cause your adrenal glands to shut down and greatly affect your immune system.
Psoas (so-as): The psoas is a muscle found within the pelvic region of our bodies. It is part of the group of muscles collectively known as Hip Flexors. In fact, the psoas has been named the deepest muscle of our body and affects our entire structure, flexibility, strength, range of motion, mobility, and organs. Essentially, this innermost muscle connects from the inside of our femurs, along the iliac crest (inside of the hip bone) and spans all the way up each lumbar vertebra, landing at the number 12 Thoracic vertebrae.
There may be some muscles mentioned that you might not be familiar with. And that’s okay! Here, we want you to become aware of your muscles, what they are, what they do, and how to treat them properly! These are just a few muscles that you may not be familiar with.
Get to Know Your Muscles

For the Athlete: Do your muscles get sore after a workout? Do you know why? Every day that you are training, you are putting enough strain on your muscles to literally tear your muscle fibers apart, leaving you sore and aching for the days that follow. That soreness carries over into your every day life, as you sit at your desk, in traffic, and at the dinner table, but you may not be consciously aware of it at all times, as you prioritize and conquer the stress of daily life. As you are eating dinner, your body is working overtime to try to repair those muscle fibers and rebuild a muscle that is even stronger, built to withstand even more than before. This process of tearing and rebuilding can put a lot of stress on your body!
For Weight Loss: From improving your mood and mindset to reducing the pain and the stress hormone cortisol, researchers have proven that myofascial release can greatly assist in weight loss goals! When you feel better, you make better decisions, and you are more apt to take better control of your health. Don’t let pain or discomfort keep you from reaching your weight loss goals! Implementing practices of inflammation fighting myofascial release along with an anti-inflammatory diet will kick your weight loss goals into overdrive!
For Everyone: Whether you are currently working out or not, this program will help you find the energy to make the right conscious decisions when it comes to your health and overall being. Myofascial release is a great way to kick your body into gear. This isn’t a program based on age, gender, weight or skill level, it is for anyone and everyone who simply wants to improve their current state of being. I have done my absolute best to make this the easiest to follow program out there, allowing you to perform the movements at home, in a gym, at the office, or even while you’re traveling!
Latissimus Dorsi: The Latissimus Dorsi, also referred to as “Lat” translates to mean “broadest muscle of the back”. It originates along the spine of the lower back and runs upward and outward along the ribs, beneath and into the armpits, finally landing on the inside of the humerus (upper arm). The Lat is responsible for doing movements such as a pull up, a row or rotating the arms. For example, lifting something heavy from above the head, pulling something towards you, folding the arms or touching your hand to the opposite elbow are all made possible by the lat muscles.
We will be focused most on the armpit area of the Lats, specifically, during the Detox and Lymphatic Drainage portion of the program.
Lastly, why is This Right for ME?

Myofascial Release For Detox and Lymphatic Drainage
Myofascial Release
D E T O X D I F F E R E N T L Y
For this portion of the program, we will be paying close attention to toxins within the body. It is extremely important to remember to drink plenty of
water when doing a detox myofascial release. As mentioned above, toxins are trapped in many of the muscles found within the body. Instead of simply reaching for the green detox drinks, we are focusing this part of the program in a specific order on the muscles surrounding the lymph nodes in an effort to first displace the toxins and then flush them out of the body, so follow along step by step.
As you complete these movements, focus on deeply breathing and making soft, calculated motions as opposed to any jerking or jarring motions. Staying calm and relaxed state of mind is extremely beneficial to this sequence.

Movement 1 Equipment: Massage Ball Muscle Focus: Pectorals § Stand facing a wall and place the massage ball between the right pectoral muscle and the wall. § Bring your right arm up to shoulder height and extend away from the body, palm on the wall. § Place your left hand on the wall and lean in to allow your weight to determine the pressure on
the ball. Slowly roll the ball from the center of your chest to your shoulder. § Stop at the first tender area and use your toes to move up and down along the foam roller. § Continue rolling towards the next tender area and repeat. § When you get to the middle of the ribcage, along the side of the sternum, follow the breathing
exercises listed below. BREATHING: It is important to remember to breathe into this movement. On the second inhalation, resist the expansion of the rib cage with moderate pressure on the roller. This will cause the diaphragm muscles to work harder and contract. The more the muscle contracts, the more intrapleural pressure. As we create a larger amount of intrapleural pressure, the volume of lymph that drains into the circulatory system is also increased.
Ready to Get Started?? You’ll be using the massage ball for the first portion of this
sequence, then transitioning to the roller, so have both handy!

Movement 2 Equipment: Massage Ball Muscle Focus: Trapezius, Sternocleidomastoid (Front of Neck) § Continuing to stand, turn the head to the right side and place the massage ball in the triangular
area outlined by the front of the front of the neck (sternocleidomastoid), the clavicle, and the front of the trapezius on the left side.
§ While being careful not to apply too much pressure, use the opposite hand to begin to move the roll the ball slightly up and down, massaging the muscles.
§ You may also, while keeping the ball still, nod the head up and down. § As an alternative, you may perform this movement against a wall for added pressure.
BREATHING: It is important to remember to breathe deeply during this movement. With each deep exhalation, apply small pumps of light pressure onto the ball, using the weight of your body. Repeat 4-5 times on each side.
Movement 3 Equipment: Massage Ball Muscle Focus: Rectus Abdominus (Abdomen) § Lying on stomach, knees on the ground, position massage ball in the navel area and place the
palms beneath the shoulders to stabilize, hips pushed toward the ceiling only enough to find light to moderate pressure on navel area of the abdomen.
§ Using your hands and knees to drive you, move your body slowly up and down over the massage ball, and then side to side before coming back to rest in the center.
BREATHING: Breathe deeply and slowly, focusing on relaxing the abdominal muscles as much as possible. With each exhale, apply small pumps of pressure by allowing the hips to sink and rise slightly towards the ground and ceiling. Being that the biggest lymphatic vessels are found here, this pumping action is extremely important to move the lymphatic fluid into the thoracic duct. Repeat this movement 4-5 times

Movement 4 Equipment: Massage Ball Muscle Focus: Anterior Digastric/Mylohyoid/Upper Sternocleidomastoid (Beneath the chin/side of neck) § Back in an upright position, hold the massage ball in the palm and lift the nose towards the
ceiling, tilting the head to the side. § Position the massage ball beneath the raised side of the chin close to the neck and applying
moderate pressure, roll the ball in small circles. § Then, position the massage ball beneath the chin, directly behind the foremost portion of the jaw
bone. Lift the nose slightly toward the ceiling and apply light to moderate pressure. Roll the ball in small circles.
§ Lastly, bring the ball to rest at the crest between the side of the neck and the chin, just beneath the jaw bone, moving the ball in circles and applying light to moderate pressure.
§ Repeat this movement on both sides.
BREATHING: Breathe deeply in through the nose and out through the mouth as you relax the muscles as much as possible.
Watch the Technique Video!

Movement 5 Equipment: Massage Ball Muscle Focus: Pectorals and Biceps § Lying on the stomach once more, bring one hand up to rest beneath the shoulder on the same
side and position the massage ball on the front of the chest on the opposite side, beneath the armpit, bringing that hand out to rest comfortably at your side.
§ Gently move your body to roll the ball in small circles, applying light to moderate pressure. Roll the ball inward and outward from the pectorals along the armpit and to the inside of the bicep, and then rest back on the ball at the starting position.
§ Now, gently move the arm back and forth towards the head and the pelvis, again, applying only a light to moderate amount of pressure on the ball.
BREATHING: Breathe deeply in through the nose and out through the mouth as you relax the muscles as much as possible.
Movement 6 Equipment: Massage Ball Muscle Focus: Biceps and Flexors (Inside of elbow) § Continuing to lie on the stomach, raise the arm so the bicep is level with the shoulder. § Bend the elbow to a 90 degree angle and lay the palm flat near your ear. § Position the ball just beside the elbow on the inside of the bicep. § Begin to move the arm up and down so as to move the ball in small circles, applying moderate
pressure. Now, bend the elbow and bring the fingers to the top of your shoulder. § Move the ball back and forth from the muscles on the inside of the forearm to the muscles on the
inside of the bicep.
BREATHING: Focus on breathing deeply in through the nose and out through the mouth as you relax the muscles as much as possible.

Movement 7 Equipment: Massage Ball Muscle Focus: Hip Flexors, Quads and Adductors § Continuing to lie on the stomach, bring the elbows to rest underneath your core, and rest your
weight onto your toes or knees. § Position the massage ball beneath the hip toward the upper inside of the thigh, near the groin. § Under light to moderate pressure, massage the nodes in a circular motion. Then, remaining to
stand on the toes, move the heel of the foot side to side, gently.
BREATHING: Focus on breathing deeply in through the nose and out through the mouth as you relax the muscles as much as possible.
Movement 8 Equipment: Massage Ball Muscle Focus: Gastrocnemius, Biceps Femoris (Back of Knee) § Transitioning to sitting upright, lay the palms flat on the ground beside you, and outstretch the
legs in front of you. § Place the massage ball behind and just below the right knee, and bend the knee of the left leg,
bringing the foot to rest beside the right calf. Lift the hips into the air, applying light to moderate pressure on the massage ball.
§ Using the foot that is planted on the ground, begin to move the hips into a circular motion, thus moving the massage ball in small circles below the back of the knee.
§ Then, move the massage ball up and down along the back of the knee while moving foot gently side to side. Come back to center and lightly pump the pressure on and off the back of the knee.
§ Repeat on both sides. BREATHING: Focus on breathing deeply in through the nose and out through the mouth as you relax the muscles as much as possible.

Movement 9 Equipment: Massage Ball Muscle Focus: Soleus, Achilles Tendon § Continuing to sit in the same position as in Movement 8, move the massage ball down to rest
beneath the Achilles tendon. Now, rotate the toe to the inside so the ball rests just between the ankle joint and the Achilles tendon.
§ Bend at the knee, and roll the ball in small circles. § Repeat on the outside of the ankle, resting the ball between the achilles tendon and the outside
ankle joint. § Apply small pumps of light pressure on and off the ball. § Repeat on both sides.
BREATHING: Focus on breathing deeply in through the nose and out through the mouth as you relax the muscles as much as possible.

Movement 10 Equipment: Foam Roller Muscle Focus: Soleus, Gastrocnemius § Transitioning to the foam roller, remain sitting upright in the same position as Movement 9. § Position the foam roller beneath both calves, and use your arms to the lift the hips, transitioning
the weight onto the calves. Here, you can cross one leg over the other, if it is not too much pressure on the calf muscles. If the pressure is too great with the legs crossed, complete this movement with both calves on the roller.
§ Begin to move the roller up and down first along the bottom portion of the calves, nearest the ankles. Then, focus the rolling movement along the upper portion of the calves, applying more pressure as your roll toward the knee, less as you roll away.
§ Ensure that you roll both the inside and the outside of each calf muscle. § As you roll up and down along the calves, roll the ankle joint.
BREATHING: Focus on breathing deeply in through the nose and out through the mouth as you relax the muscles as much as possible.
Now, grab your foam roller, as we roll from the bottom up to the top, getting that lymph to move into the thoracic region and ready to ultimately be excreted
from the body!

Movement 11 Equipment: Foam Roller Muscle Focus: Hamstring § In the same position as Movement 10, place the roller beneath the middle of the hamstring, and
lift the trunk to sit upright, putting your weight onto the palms. § You can perform this movement with the legs crossed at the ankles, or uncrossed. § Lift the hips off of the ground, and slowly move the hips so that the foam roller moves toward
the back of the knees with moderate pressure, and then roll back toward the hips with light pressure.
§ As you roll toward the knees, flex and extend the toes.
BREATHING: Focus on breathing deeply in through the nose and out through the mouth as you relax the muscles as much as possible.

Movement 12 Equipment: Foam Roller Muscle Focus: Glutes § Now, position the foam roller just beneath the glutes, where the hamstring and glutes meet. § When you have the foam roller in place, you are going to turn your hips, lifting the opposite hip
towards the ceiling. This will apply the pressure directly onto one glute muscle at a time. § Here, bring your opposite leg up and over the leg resting on the foam roller, bringing the foot to
rest just on the outside of the knee. The planted foot will ‘drive’ you over the foam roller. § Rest the hand on the ground beneath you, helping to stabilize you. § Now that you are in the proper position, begin to push against the planted foot, moving the
roller up and down over the glutes, applying moderate pressure. § On the last roll, slightly move the ankle back and forth as you roll toward the hamstrings. § Repeat on each side.
BREATHING: Focus on breathing deeply in through the nose and out through the mouth as you relax the muscles as much as possible.

Movement 13 Equipment: Foam Roller Muscle Focus: Quads, Hip Flexors § Rolling onto the stomach, elbows beneath the core, position the foam roller just above one knee,
bending the knee of the opposite leg and bringing the foot to rest at your side, using it to stabilize and move you along the roller.
§ Begin to push against the grounded foot, slowly moving the roller up the quad, towards the hip with moderate pressure, then applying light pressure when you roll back down to the knee.
§ Repeat on both sides. BREATHING: Focus on breathing deeply in through the nose and out through the mouth as you relax the muscles as much as possible.
Remember to breathe. The more you focus on your breath, the more your muscles will relax,
helping you get the most benefit J
§ Continuing to lay on the stomach, elbows bent and palms near the shoulders, position the foam roller beneath the inside of one forearm, near the wrist, palm flat.
§ Begin to roll away from the body, toward the elbow with moderate pressure. § As you roll, alternate between making a light fist and moving your palm flat, to provide a
pumping motion onto the roller. § Then, bend at the elbow to about 90 degrees, bringing the hand up near the head, palm down.
Reposition the roller just above the elbow on the inside of the bicep and use the planted hand to roll the bicep over the roller, toward the shoulder, pivoting the wrist so the palm alternates between facing your head and facing down.
§ Repeat on both sides.
Movement 14 Equipment: Foam Roller Muscle Focus: Biceps and Flexors (Inside of Elbow)
BREATHING: Focus on breathing deeply in through the nose and out through the mouth as you relax the muscles as much as possible.

Movement 15 Equipment: Foam Roller Muscle Focus: Latissiumus Dorsi, Psoas § Rolling onto your back, position the roller beneath your spine, parallel to your body instead of
across. Bend at the knees, and cross the arms, bringing the hands to rest on the opposite shoulders, or you may use the hands to support the head and neck.
§ Lift one shoulder and hip at a time to move the roller from the spine outward on each side, pushing the lymph away from the spine with light to moderate pressure.
BREATHING: Focus on breathing deeply in through the nose and out through the mouth as you relax the muscles as much as possible.

Movement 16 Equipment: Foam Roller Muscle Focus: Psoas § Lying on your back, position the roller beneath the lumbar area of the spine. Bend the knees,
resting both feet on the ground comfortably. § Here, lift the trunk of the body onto one elbow. Lift the knee on the same side off of the ground,
and hold beneath the knee with the opposite arm. § Use the planted foot to move the roller up towards the ribcage, stopping just below the ribcage,
applying moderate pressure. § Roll back down towards the glutes applying light pressure. § Repeat this on each side.
BREATHING: Focus on breathing deeply in through the nose and out through the mouth as you relax the muscles as much as possible.
Movement 16 Equipment: Foam Roller Muscle Focus: Latissiimus Dorsi § Drop the feet back to the ground, and reposition the roller just below the shoulder blades. § Here, cradle the head and neck region in the hands, bringing the elbows as close together as
possible, separating the shoulder blades. § Slowly begin to roll up and down with light to moderate pressure. § As you roll over the shoulder blade area, twist the shoulders back and forth toward the ceiling,
applying a pumping pressure to the muscles in the back. § Come back to rest beneath the shoulder blades. § Lift the arms into the air palms facing each other and thumbs out. § Keeping your arms as straight as possible, begin to move from the shoulder joint, dropping the
hands overhead to tap the thumbs on the ground, if you can, to get a good stretch through the back, then come back up to center.
BREATHING: Focus on breathing deeply in through the nose and out through the mouth as you relax the muscles as much as possible.

Now That You’re Detoxed, Let’s Get Energized! Pain from muscle tension and muscle imbalance can be exhausting on your body. Due to injuries, misuse, overuse and underuse of muscles, inflammatory diet, lack of stretching, or even just simply aging, we can begin to lose elasticity in our joints and connective tissue. Research has shown that a massage can relieve stiff muscles and muscle soreness by over 40%, and much like a massage, foam rollers are able to help relieve pain, but at a much more cost effective rate.
When your muscles are sore, tight or full of knots, energy becomes stagnant within the muscles. According to UC San Diego, Traditional Chinese Medicine is based upon an ancient philosophy known as Yin and Yang, which are two opposing forces known as universe and body. When the Yin and Yang are in balance, the body is healthy and in harmony with the universe. Energy, known as “qi” (pronounced “chee”) flows along pathways throughout the body. The constant flow of energy keeps the yin and yang forces in balance. That said, if the energy flow is blocked by muscle tension or knots, it acts as water being dammed, and the energy is blocked within the muscle. This can cause pain, poor muscle function and illness. Myofascial release can assist in releasing the blocked qi, essentially evoking the body’s natural healing response. Research has proven that foam rolling can not only improve mobility, muscle function and energy, but also effect the nervous system, cardiovascular system, immune system, endocrine system, and organ function, improving digestion and nutrient absorption.
In this section of the program, we are going to be working to remove muscle tension and qi blockers within the body to improve energy function and
mobility and decrease pain. Throughout these movements, it is important to remember to breathe and focus on relaxing the muscle throughout the
movement.

Ready to Get Started??
Movement 1 Equipment: Massage Ball Muscle Focus: Neck, Trapezius, Deltoid § Stand with your upper back against a wall and place the ball to the side of the base of your neck,
and press the ball into the wall. § Using your body, move the ball side to side and up and down from the base of the skull towards
the shoulder blade. § Next, and remaining in the standing position against the wall, place the massage ball to the left
side at the base of your neck. § Now, bring your left hand up to rest on your right shoulder. § Using your body, roll the ball outward toward your shoulder and then back toward your spine. § When you find an area of tension, rest the ball. If you’d like, you can raise and lower the elbow
while keeping the hand on the shoulder to get a deeper movement. § Repeat on both sides.
MyoFascial Release for Energy and Mobility
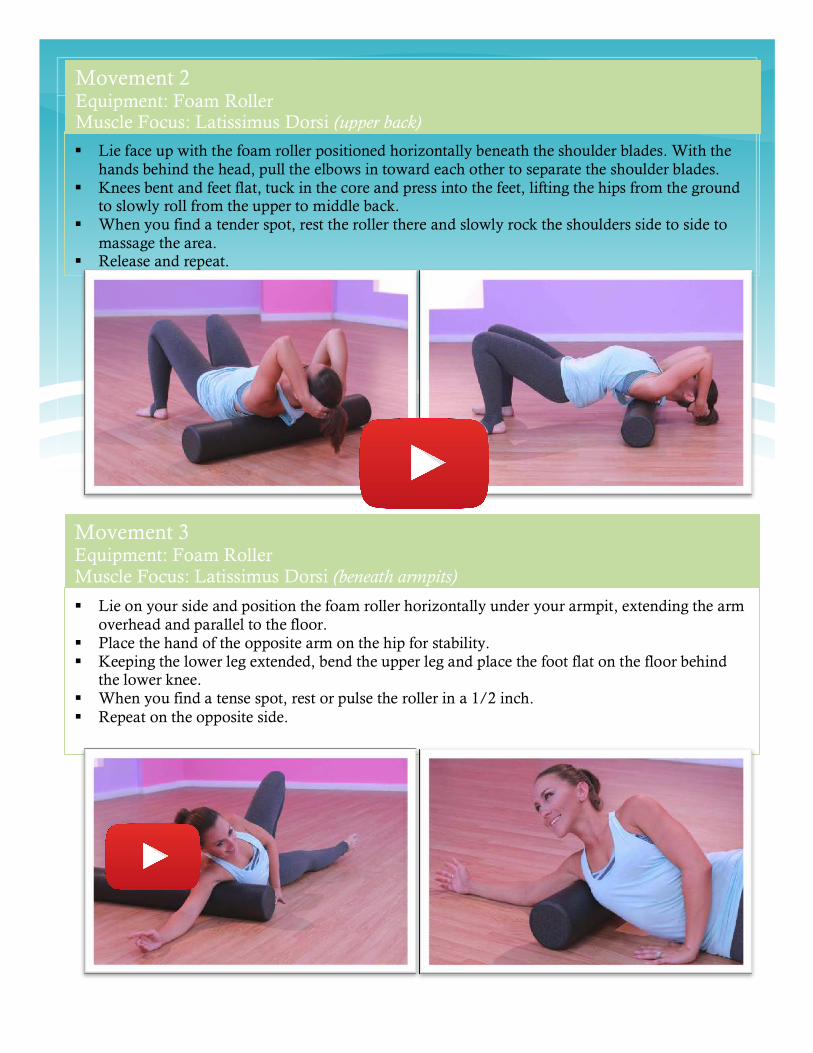
Movement 2 Equipment: Foam Roller Muscle Focus: Latissimus Dorsi (upper back) § Lie face up with the foam roller positioned horizontally beneath the shoulder blades. With the
hands behind the head, pull the elbows in toward each other to separate the shoulder blades. § Knees bent and feet flat, tuck in the core and press into the feet, lifting the hips from the ground
to slowly roll from the upper to middle back. § When you find a tender spot, rest the roller there and slowly rock the shoulders side to side to
massage the area. § Release and repeat.
Movement 3 Equipment: Foam Roller Muscle Focus: Latissimus Dorsi (beneath armpits) § Lie on your side and position the foam roller horizontally under your armpit, extending the arm
overhead and parallel to the floor. § Place the hand of the opposite arm on the hip for stability. § Keeping the lower leg extended, bend the upper leg and place the foot flat on the floor behind
the lower knee. § When you find a tense spot, rest or pulse the roller in a 1/2 inch. § Repeat on the opposite side.

Movement 4 Equipment: Foam Roller Muscle Focus: Lower Back § Lying on your back again, position the roller beneath the lumbar area of the spine. Bend the
knees, resting both feet on the ground comfortably. § Here, lift the trunk of the body onto one elbow. § Lift the knee on the same side off of the ground, and hold beneath the knee with the opposite
arm. § Use the planted foot to move the roller up towards the ribcage, stopping just below the ribcage,
applying moderate pressure. § Roll back down towards the glutes applying light pressure. § Repeat this on each side.

Movement 5 Equipment: Foam Roller Muscle Focus: Glutes § Move from lying on the back to a seated position, legs bent and feet flat on the ground in front of
you. § Position the foam roller across on your right glute at a slanted angle, with one side ending at the
outside of your right knee and the other side ending on just above the outside of your left hip. § When you have the foam roller in place, you are going to slightly turn your hips, lifting the left
hip towards the ceiling. § This will apply the pressure directly onto the right glute muscle. § The planted foot, in this case, your left foot, will ‘drive’ you over the foam roller. § Rest the hands on the ground behind you, helping to stabilize you. § Now that you are in the proper position, begin to push against the planted foot, moving the
roller back and forth over the glutes, applying moderate pressure. § Repeat on each side.
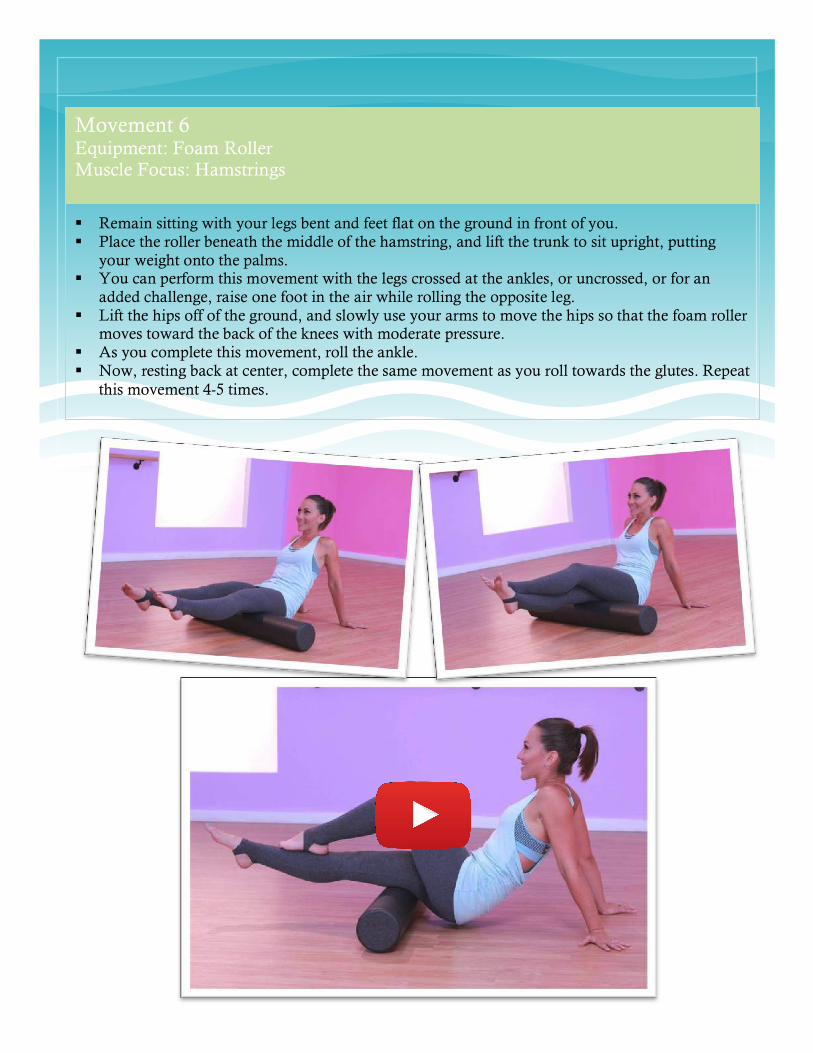
Movement 6 Equipment: Foam Roller Muscle Focus: Hamstrings § Remain sitting with your legs bent and feet flat on the ground in front of you. § Place the roller beneath the middle of the hamstring, and lift the trunk to sit upright, putting
your weight onto the palms. § You can perform this movement with the legs crossed at the ankles, or uncrossed, or for an
added challenge, raise one foot in the air while rolling the opposite leg. § Lift the hips off of the ground, and slowly use your arms to move the hips so that the foam roller
moves toward the back of the knees with moderate pressure. § As you complete this movement, roll the ankle. § Now, resting back at center, complete the same movement as you roll towards the glutes. Repeat
this movement 4-5 times.

Movement 7 Equipment: Foam Roller Muscle Focus: Adductors § Remain sitting with your legs bent and feet flat on the ground in front of you. Place the roller
beneath the middle of the hamstring, and lift the trunk to sit upright, putting your weight onto the palms.
§ Here, bring your left foot up to rest on or beside your right knee, then turn your right foot to the left, moving roller onto the inside of the thigh.
§ Lift the hips off of the ground, and slowly use your arms to move the hips so that the foam roller moves toward the back of the knees with moderate pressure.
§ Rest back at center, and then complete this movement towards the glutes.
Movement 8 Equipment: Foam Roller Muscle Focus: Calves § Remain sitting upright and outstretch the legs in front of you. Position the foam roller beneath
both calves, and use your arms to the lift the hips, transitioning the weight onto the calves. § Here, you can cross one leg over the other, if it is not too much pressure on the calf muscles. If
the pressure is too great with the legs crossed, complete this movement with both calves on the roller.
§ Begin to move the roller up and down first along the middle of the calf, keeping the toes pointed toward the ceiling. As you roll up and down along the calves, draw a circle with your toes.
§ Next, turn your toes to the inside and roll the inside of the calf. Draw a circle with your toes as you roll. Lastly, turn your toes toward the outside and and roll the outside of the calf. Once more, draw a circle with your toes as you roll.
§ Repeat this movement on both sides.

Movement 9 Equipment: Massage Ball Muscle Focus: Feet § Rising into a standing position, place the massage ball beneath the heel of your foot, the other
foot planted comfortably beneath the shoulder. You may stand facing a wall and place your hands against the wall for balance, if needed.
§ Applying moderate pressure onto the ball, slowly pull the foot away from the wall, moving the ball towards the toes, paying special attention to relax the muscles in the foot.
§ As you roll, you may slowly rock the foot side to side as you find areas of tension.
Movement 10 Equipment: Foam Roller Muscle Focus: Shins § On your hands and knees, place the foam roller beneath your chest. Draw one knee up toward
your face and place in on the foam roller, leaving the other leg extended to control the pressure and roll up and down your shin. As you roll, flex and extend the foot.
§ For an added challenge, bring both knees onto the roller, using your hands to stabilize you, help you roll and control pressure.
§ Repeat this on both shins.

Movement 11 Equipment: Foam Roller Muscle Focus: IT Band/Shins § Rolling to the side, prop yourself up on your right elbow and position the roller just beneath the
knee, on the outside of the calf/shin. § Bend the left leg and place the foot behind the right knee. This will dictate the amount of
pressure applied to the right leg. This is a tender area, so use caution with applying too much pressure.
§ Begin to roll in a 3-5 inch area. § If you want to add more pressure, place the left foot on top of the right calf as you roll. § Next, position the roller just above the outside of the knee, moving the left foot to the other side
of the roller, or again, on top of the right leg for added pressure. § Here, sway the leg back and forth to get a better massage on the muscle. § Repeat on both sides

Movement 11 Equipment: Foam Roller Muscle Focus: Quadriceps (thighs) § Before we begin this movement, imagine sectioning your thigh muscle into three parts: Upper,
middle and lower. We are going to focus on each part individually. § Begin on your hands and knees and lower yourself onto the foam roller, placed at top of the left
thigh, near the hip. § Resting on your elbows, bring the right leg out to the side and rotate it so your inner thigh is
resting on the ground and your toes are resting on the ground to roll you up and down along the roller.
§ Begin to roll up and down along the top section of your thigh, being sure to relax the left leg completely. When you find a point of tension, slowly wing the foot side to side, and bring the foot up to the glute, performing two “butt-kicks”.
§ Repeat the same movements for your mid-thigh and your lower thigh. § Repeat on both legs.

Movement 11 Equipment: Foam Roller Muscle Focus: Adductors § Much like in the previous movement, lie face down, propped up on the elbows and position the
foam roller beneath the middle of the thigh. § Before you lay on the roller, bring the right leg out to the side and rotate it so the inner thigh is
resting on the floor. § Begin to roll the foam roller up and down along the inner thigh, using your arms and the
outstretched leg to guide you.

M O V I N G T H R O U G H S P A C E
Yoga
Myofascial release and removing tension is imperative to gaining flexibility and mobility.
That said, your body will try to find a way to snap you right back to the grid that it’s already used to, meaning that there is a good chance that your muscles will tighten back up in much the same fashion as before starting a myofascial release routine. So with muscle release comes the very important aspect of muscle strengthening and dynamic stretching to help your body get used to a new grid of movement that doesn’t involve pain, tension and “qi” blocking knots.
Working with body weight and your own natural movements, the goal of this section of the program is to help you sustain the positive energy flow that gives you a boost when you need it and helps calm your mind when it’s time to unwind. There is also the very important aspect of gaining both mental and physical strength as you learn how to focus on your breath while completing both relaxing and challenging movements.
Because I hear this all too often, REMEMBER, this isn’t just a program for women, and yoga isn’t something that only women should focus on. It is healthy and dare I say necessary for men to incorporate in their daily routine just as much as it is for women. That said, while completing these yoga routines, you will get a fantastic low impact workout as your body is realigning and adjusting to the released muscle tension you’ve found after a good self-myofascial release session.
For our yoga section, we have created a total of three routines for various purposes, all surrounding ideas of weight loss, strength training, flexibility, stress reduction, increased energy and mindfulness with the ultimate goal in mind being relieved pain, reduced inflammation and a happier mind.

What to Expect
To fully understand what to expect within each routine, let’s dive right into talking about what each routine is all about!
RELAXATION YOGA Whether you are feeling a bit overwhelmed mid-day, or want to incorporate this routine before you head to sleep, try out this sequence for relaxation and reestablishing healthy sleeping patterns. Not only can this series of movements can restore that nice deep sleep you may be missing out on, it can also help you find closure from your day, or simply reduce anxiety and calm the nerves. Remember, you don’t need to go to sleep for 8 hours to start fresh!
TIP* Focus your attention on deep, slow breathing. If you find a position that feels good and calming, feel free to hit pause and rest there as long as you’d like.
Establish range of motion, gain flexibility and mobility, improve energy and re-establish a healthy circadian rhythm
MOBILITY FLOW YOGA This sequence focuses primarily on becoming observant of your breath while moving through space at a fast tempo from pose to pose. This sequence is an especially great workout that can help improve strength, flexibility and range of motion.
TIP* Be sure to listen to your breath. If you feel as though you need to take a moment to catch your breath before resuming, hit the pause button until you recover and feel recovered. One step at a time!
MORNING POWER YOGA Start your day off on the right foot with this morning power yoga sequence. This short, swift moving sequence is made up of a specific series of movements that can help bring you energy, mental clarity and stability before you go about your busy day.
TIP* Focus on deep breathing while you feel the stretching in the body. Awaken your nerves and get your circulatory system pumping! Again, this is a quick moving sequence, so if you feel like you need to catch your breath, hit the pause button and come back to it when you’re feeling recovered.

Mobility Flow Yoga 7 Minute Follow-Along Video Workout
IMPROVE YOUR STRENGTH AND FLEXIBILITY IN LESS THAN 7 MINUTES!
Flow from movement to movement in this guided sequence. Follow along with the breathing patterns and feel free to hit pause any time you need a rest or to regroup.

Morning Power Yoga
KICKSTART YOUR MORNING AND FIND LASTING ENERGY IN LESS THAN 5 MINUTES!
Break away from the energy blocking knots in your body and find flexibility, stability and mental clarity so you can start your day the right way!

Relaxation Yoga
UNWIND, RELAX AND SLEEP DEEPLY AFTER THIS EASY TO FOLLOW 10 MINUTE SEQUENCE.
Release the stress and anxiety caused by the day and restore your body’s natural sleep pattern. Start fresh and find your center with this slow paced routine.
Mindset A C C E P T I N G A N E W W A Y O F
T H I N K I N G
One of the most difficult components of meditation and a proper mindset is that we have to overcome initial insecurities and uncertainties surrounding
meditation and how it works. I think it is most important to note that meditation is not just for those that are living 100% care free lives with no responsibility. This here, is the product of the mainstream media making meditation out to be some form of cult-like activity that is only performed by those that are devout yogis.
This couldn’t be further from the truth. Meditation isn’t about being completely turned off to the world. It is isn’t about stopping everything you’re doing and doing absolutely nothing… In fact, it is quite the opposite of doing nothing…. It is a process of becoming aware!
Just like becoming aware of the foods that you are eating can lead you to a healthier, happier body; being aware of your emotions can lead you to a healthier, happier mind. But it also allows you to establish a level of control that you may not have had before.
The First Steps Towards Accepting Mindset and Meditation
You Can Watch the Meditation Introduction Video and Then Skip Ahead to Page 75 For the
Meditation Technique Videos;

Watch These 3 Videos Before Beginning This Mindset/Meditation
Portion
Introduction to Mindset and Meditation
Meditation Techniques
How to Successfully End a
Meditation Session

The Tie in Between the Diet and the Mind
Many of us don’t want to admit it, but there are no “super-secret”
shortcuts to achieving a healthy diet. A lot of it comes down to plain old mental fortitude and the ability to abstain from foods that can cause you
harm.
Sure, there are definitely some knowledge points that we all should be aware of, especially when it comes down to identifying our specific problem foods, but that doesn’t discount the fact that we still need to be able to adhere to a plan, and let’s face it, a strong mind will prevail in a situation like this.
If you had 100% self-control, and awareness and mindfulness of what you were eating ALONG with being educated about proper food intake as it pertains to your body, you would be able to accomplish a lot more of your goals day in and day out.

So How Does Mindfulness Help the Diet?
How many times have you come home from work, only to find yourself mindlessly raiding the pantry for something to munch on? It’s more
common than you may think, and candidly, you may do it more often than you think.
This is impulsive eating, and it happens in many other aspects of our life than just eating. Impulsive behavior can ultimately happen at the cellular level when it comes to having a wandering mind. I’m not trying to sit here and tell you that you can willfully fix all of your issues, but I am telling you that you can strongly encourage your body to go the proper direction along with your motivation to make changes.
Have you ever felt like on the surface you had the motivation to make changes? Maybe you bought a diet program or a workout program and felt like you were ready to take the plunge? But then, when the time came to actually execute, it was like you couldn’t get your head out of the clouds and gain the ability to actually make the change?
That is because your conscious mind was aware of the need for change. Your body and your mind were telling you with ailments, by-signs, fatigue, and sometimes even physical queues that it was time to do something different and heal yourself… But your subconscious wasn’t ready… It wasn’t ready because you didn’t have the ability to compartmentalize in a positive way, and get your body raring to go.

What am I Going to Teach You in This Section?
The main purpose of this section of the program is to give you four tangible ways that you can begin to take advantage of meditation to help you
become a better version of yourself.
I’m going to teach you the basic methods that you can follow, but more importantly, I am going to explain how meditation can actually help you combat inflammation and how making this an integral part of your daily routine can not only help your mind, but it can actually help your body do a more efficient job and expediting the removal of inflammation, getting you on the track to being the best version of yourself.

Breathing and the Psoas Muscle Earlier in this program I discuss the importance of relaxing the psoas
muscle, also known as the “muscle of the soul.” When our psoas muscle is out of alignment or tight, it can affect how we feel, how we breathe, and
truly even how we treat others. There has been countless research proving that the psoas truly does have an impact over our emotional state. What many of us don’t think about, however, is how the psoas is deeply tied to our breathing and our diaphragm.
SO THERE ARE TWO WAYS TO TACKLE THIS PROBLEM:
1) Improve the psoas flexibility through yoga, foam rolling and proper exercise
2) Improve the range of motion and regularity of proper breathing utilizing the diaphragm to help move the psoas
The problem here is that it takes time to practice proper breathing, and at the end of the day, that is what a lot of this mindfulness is all about… proper breathing!
Let’s not forget that proper breathing allows for proper c02 elimination which in and of itself can help you reduce levels of chronic inflammation within the body.
You see, when you take a deep breath in, your diaphragm sinks down in order to allow you to fill your lungs with air. Now, I want you to envision your diaphragm and your psoas muscles like a soup ladle. Your diaphragm being the dome-shaped ladle spoon and the psoas being the handle of the ladle. When you take a deep breath in, it allows your psoas muscle to relax, and just like any muscle, when it doesn’t get to exercise its full range of motion, it loses mobility.

Finding the Time to Meditate
Okay, this is all fine and dandy, but what about being realistic here? I mean, I am a realist in many senses of the word, and I really want you to be able to view everything in this program from a realistic angle, because that is how you will adhere to it and how you will be able to sustain a healthy lifestyle.
SO LET’S TALK ABOUT HOW YOU CAN FIND THE TIME TO MEDITATE…
What if I told you that I only meditate for 5 minutes per day?
Much of this comes down to prioritizing it for yourself. If you consider it as critical of a component to your day as eating breakfast, then you will easily indoctrinate it into your daily routine.
“You need to sit around for hours on end… right?”
WRONG!
What About Finding a Quiet Place to Meditate?
“It is super noisy with kids at my house, how can I meditate?” This comes down to YOU. Are YOU the one meditating, or are your kids? Are you letting external
factors dictate what you do with your BREATHING? That is the ultimate sign of self-sacrifice in a
truly detrimental way.
You need to allow this to be your time to embrace yourself and truly heal from the inside out.

Using Visualization
One of the easiest methods that I have found to help others learn to meditate or at least practice proper breathing is to actually visualize
themselves breathing deeper.
You can do this while you’re meditating or not, but when you start seeing yourself practicing the techniques that I will show you, it makes it all the easier to be able to implement them in an actual way.
YOU HAVE TO PRIORITIZE YOURSELF!
Don’t lie to yourself. I don’t want you to use affirmations or visualizations to become something that you are not… I just want you to make a practice of seeing what it would be like to begin this whole process.

Basic Meditation Techniques In this section, I am going to show you four, very basic techniques that you
can use right out the gate to practice some mindfulness. But before I give you the exact techniques, it is important to understand what we are trying to
accomplish through this:
The purpose of this entire section is to teach you how to recognize your thoughts. You’re not here to conquer your thoughts or to achieve anything other than recognizing the thoughts that are floating into your head and out. We don’t realize throughout the day how often we actually let our thoughts and emotions get the best of us…. Because we react to them. We actually let them consume us, when all we really need to do is recognize them, and let them move on, even if it is just delaying the inevitable.
Let me give you an example…
I’m sitting and meditating, focusing on my breathing. Then, all of a sudden, I think about work emails. One in particular. It floods my mind and I begin wanting to find a solution for it (this is normal). However rather than sitting there and allowing that thought to consume me and hijack MY TIME, I recognize that thought and give it a simple label. In this case, I am going to label it “an anxious thought.” This labeling process tones down the severity of the thought and makes me realize that it is literally just an emotion, not an actual, tangible thing that is affecting my happiness. This is a great illustration of how you can take a thought that would ordinarily be negative, and turn
it into something unbelievably positive and something that you can grow from. The difficult part of meditation comes when you have multiple, dozens, hundreds of those same kinds of thoughts that flood your head. But eventually, you learn to defragment them and place them in the right folders within your brain. Imagine not having to waste energy on organizing your thoughts in your head. Meditating and proper breathing is like hiring a full-time bookkeeper for your brain, and all you have to do is train that bookkeeper for 5 minutes per day.

Technique #1 - Breathing The simplest technique that I can possibly teach you is to focus on your breath. There is no denying that the quickest way to get your mind off of something that is bothering you is to focus on something else that gets your attention diverted. Well, this works when it comes to breathing.
Breathing comes so natural to us, if we stop for a few minutes and recognize our breath and deeply focus on the in and the out of breathing, you can realize how close to the earth you are, but also how simply many of our problems really are. The moment that you begin to feel your mind wander into an area that is not breathing, you simply give that thought a label and go back to thinking about your breathing.
The Physical Benefits?
you would be when you’re meditating. And this takes us right back to the positive effects on the psoas and on inflammation. You’re going to be spending all this time foam rolling and focusing on how to loosen up and feel better, don’t throw it all away with shallow breathing and negative thoughts.
Quick Tips: • Focus on Deep Breathing 10 times. As soon as
you find yourself losing count, recognize the thought that is distracting you, and start back at the number 1 again.
• Focus on breathing into specific bodyparts so that you can feel your breath enter your body.
• Focus on energy coming and flowing out when you breathe in and out
This is the simplest form of meditation because it allows you to focus on JUST ONE THING and it is always easy to come back to that place, no matter what distracts you.
This technique actually trains your diaphragm to expand and contract more fully as well, so that when you’re not consciously thinking about your breathing, you are breathing much like

Technique #2 – Audible Meditation This next technique is very similar to the breathing technique in that we are somewhat looking for an initial distraction out of noise. You’ll want to find some form of white noise. This can be found in the simplest of things. Maybe it is a fan, maybe it is an air conditioner, maybe it is the motor of the refrigerator humming. The point is, you’re shifting your focus to a simple noise that you can always revert back to when you begin to feel your mind wander. The ears are closely related to our emotions. Ever think about how a certain song makes you sad, or sometimes makes you happy?
Have you ever noticed that simple music can dictate how focused you are, or even how relaxed you are? It is powerful, powerful stuff. So if you can tap into your body’s ability to decipher sound as a trigger for relaxation, you can condition your body to lower cortisol levels just by identifying noises. The same rules apply with this form of meditation. When you feel thoughts enter your mind, you recognize them, exhale
and let them go and realize that they’ll be there to tackle later. This is YOUR time. It can be easy to get frustrated when you are meditating as well. Sometimes the emotions that flood through your mind can be brutal and cause you to get upset that you’re unable to bounce back to focusing on your breathing as quickly as you’d like to… But I encourage you to recognize this as an emotion too, because it is…
The Power of Sound

Technique #3 – BodyScan Meditation The body scan meditation is one of my all-time favorites as I believe that it really teaches you a lot about how your physical body responds to stress and inflammation.
The body scan technique is one of the best for people that have a hard time sitting still and focusing. Start in a simple relaxing position. It can either be crossed-legged or you can simply be sitting down in a relaxed pose. Focusing on your scalp first, take a deep breath and feel your body respond when you think about your scalp. You’re going to want to close your eyes and imagine what every single hair follicle feels like. Recognize the difference in how it feels when you breathe, versus when you don’t.
Just like the name of the meditation technique implies, you’re going to scan your entire body this way, going as fast or as slow as you need to in order to fully, comprehensively scan your entire body and recognize aches and pains.
It is through this method, that I was able to identify where my muscular imbalances were as well as my weaknesses in strength. Simply sitting in one position while focusing on your body allows you to recognize things you wouldn’t ordinarily recognize.
The Physical Benefits?

The Physical Benefits?
Technique #4 – Walking Meditation The walking meditation is a bit more of an advanced technique, as it requires you to accomplish two things at once. It also requires you to be fully conscious while you’re meditating, which can be a bit tough for a beginner.
The purpose of the walking meditation is to help you identify with your psoas contracting and expanding through the movement of walking. Walking directly involves the diaphragm and the psoas and teaches you to feel the connection between your breath and your step. When you focus on how every single step that you take actually elicits a given response from your lungs, you can begin to be in more touch with your step. One of the things that I focus on the most when it comes to walking meditation is feeling the earth beneath your step. As earthy as it sounds, being able to recognize that there is an entire, stable earth
underneath your feat teaches you that in the grand scheme of things, our problems are small, and have zero place in our day. They shouldn’t dictate our levels of inflammatory markers in the body, and they certainly shouldn’t dictate how we handle our health.
An extra benefit of a walking meditation is that you can accomplish your fasted cardio this way as well.
In fact, when the body is able to focus energy on the mind and walking, and not on the act of digesting food, you can often get more out of meditation.

How to Incorporate Meditation into your Day with Foam
Rolling and Yoga The important thing here is that you know how to structure your
day. I mean, we have broken down the different components of this program, but how should your day look when it comes down to
utilizing what you are learning in this program? WEEK 1
• 5 Minutes of ALONE TIME every morning only focusing on breathing. Don’t worry about meditating, only use this time to sit and breathe.
• Introduction to foam rolling and myofascial release for about 10 minutes • Fasted Cardio according to plan
WEEK 2
• 5 Minutes of Breathing Meditation. Begin to utilize the first technique of meditation and focus on defragmenting your thoughts.
• AFTER meditation (at any point) perform your workout (whether cardio or weight training) • Focus on week 2 of foam rolling • Being 1 of the yoga sequences
WEEK 3
• 5 Minutes of Audible Meditation in the morning • 5 Minutes of Breathing Meditation in the PM • Fasted cardio according to plan • Foam Rolling According to plan • Perform 1 of the yoga sequences at least 2x this week

WEEK 4
• 5 minutes of body scan meditation in the AM • 5 Minutes of Breathing meditation in the PM • Fasted Cardio according to plan • Foam rolling according to plan • Perform 1 of the yoga sequences at least 2x
WEEK 5
• 5 Minutes of Walking Meditation (coupled as your fasted cardio) in the AM • 5 Minutes of breathing meditation in the PM • Foam Rolling to Plan • Perform 2 of the yoga sequences, 1 each for 2x this week
BONUS TIP #1
BONUS TIP #2
I recommend that you try listening to something called BINAURAL BEATS. They are specific noises and waves that the brain is receptive to and they dramatically help you achieve that meditative state that can allow you to focus better. You can download them for free on Amazon and listen to them while you meditate
Download the App called “Buddhify.” It is a very cool app that allows you to utilize guided meditations that help you to get through the initial struggles of learning to meditate. Sometimes, being guided is all you need to establish the basics J
You can continue to repeat weeks 2-5 as you please, opting for your favorite
meditation technique.

How it All Gets Tied Together with Core Work
This entire program we’ve been talking about how to work you core in an indirect fashion. We’ve addressed the psoas (the muscle of the soul) by way of foam rolling, yoga, and even meditation. We’ve talked about how you can indirectly strengthen your core to help you find relief from pain but to also give you the confidence that you need to stand up taller, feel better about yourself, and ultimately make better decisions. You see, it comes down to being rooted at our core. This is where we hold our stress and it’s where we tend to crumble when we are weak. So now that we have targeted the core indirectly, it is time to face it dead on.
This section of the program gives you a rundown of eight different exercises that you will do in sequence for 60 seconds at a time. Although the workout may not seem excruciatingly difficult at first, once you are able to engage your core properly, you’ll be able effectively feel those muscles working all the better. There are a series of videos demonstrating the techniques so that you can make sure that you perform the abdominal exercises properly. Just note, although these are abdominal exercises, they also target a different area of the abdominals known as the “transverse abdominus.” This muscle, also known as the TA, is responsible for literally holding your abdomen tight and compact. In fact, if you relax your stomach and let your abdomen protrude out, that is effectively what you would look like if you didn’t have a transverse abdominus.
What You Will Learn
So now, you can see the importance of that muscle (even though it does a lot more than just that).
With all of the work that you are putting into your body between the diet, the workouts, the yoga, the foam rolling, and even the meditation, I wasn’t about to throw a brutally difficult ab routine at you… Rather, I wanted to give you a routine that you could use 3x per week and more if you desire, but gain a complimentary effect from this routine and the rest of this program.

How Do You Structure the Ab Routine?
It’s simple, you can either tack this ab routine to the end of your workout, or you can do it entirely separate and apart from the rest of your workout. Personally, I found that most people like to do it about an hour before bed as it helps them unwind and feel a bit more accomplished for the day.
Here’s How The Routine Breaks Down..
EXERCISE 1- BIRD DOGS TIME - 60 SECONDS (WATCH VIDEO FOR FULL DEMONSTRATION)
• To help you align your psoas, but also strengthen your lower back and core in a unified fashion. Developing synergy between the upper and lower body is critical to finding balance and reducing inflammation within your body
TECHNIQUE TIP: o Start slowly and build up your balance!
What’s The Purpose?
• Now that your psoas and transverse abdominus are somewhat fatigued, we can target the rectus abdominus (which is the actual six pack portion of your abs). You’re going to find that it is much tougher to target your abs after focusing on other parts of the TA. Stay strong and really focus on a contraction here.
EXERCISE 2- DEADBUGS TIME - 60 SECONDS (WATCH VIDEO FOR FULL DEMONSTRATION)
• To also assist in upper and lower body synergy and to help develop balance between the upper and lower portions.
TECHNIQUE TIP: o The goal is to try and move your arms and legs at the exact same rate of speed. It is a
bit of a mental exercise too as likely, one of the components of your body is going to want to move faster than the other… This is what signifies a neural issue that is somewhat of a “disconnect” between your upper and lower body.
o Focus on the hands raising above the head at the same time the knees are fully bent, and vice versa.
EXERCISE 3- SUITCASE CRUNCHES
TIME - 60 SECONDS (WATCH VIDEO FOR FULL DEMONSTRATION)
TECHNIQUE TIP: o Go Slow until you get the rhythm down. Bring the ball or weight directly over your
shin.
What’s The Purpose?
What’s The Purpose?

EXERCISE 4 – PLANKS/ MODIFIED PLANKS TIME - 60 SECONDS (WATCH VIDEO FOR FULL DEMONSTRATION)
What’s The Purpose? • The purpose of planks in this sequence is to activate both the transverse
abdominus and the rectus adbmonius when they’re mildly fatigued. Since your lower back is likely fatigued too, this is going to be exceptionally difficult. You can do it modified if you wish.
TECHNIQUE TIP: o You can always perform the easier version of a plank by performing it from your knees
as well.
EXERCISE 5 – PALLOF PRESSES TIME - 60 SECONDS (WATCH VIDEO FOR FULL DEMONSTRATION)
What’s The Purpose? • The purpose of the pallof press is to engage in the internal obliques which
help to stabilize the spine laterally. A strong set of these muscles can help your posture, and ultimately even your mood (and waistline).
TECHNIQUE TIP: o I illustrate this exercise with a dumbbell. However you can perform this by doing the
same technique, but with a cable machine with the cable set at about chest height. Notice how I press the dumbbell straight out in front of me, but return to about the armpit of the side that I am targeting.

TECHNIQUE TIP: o Go slow at first and really focus on the contraction of the side of the abs, not so much
the main portion. The movement is geared to target the sides of the body more than anything.
EXERCISE 6 – SUITCASE WALKS/LUNGES TIME - 60 SECONDS (WATCH VIDEO FOR FULL DEMONSTRATION)
What’s The Purpose? • Have you ever carried a suitcase that was heavy and felt the workout on the opposite side of the body because of counter balancing? Yep? Well, we are creating that scenario here! I demonstrate it with a light weight but you can go as heavy as you comfortably feel to be honest. I also demonstrate it with a lunge, but you can just do a straight walk if your dumbbell is heavy enough. Basically, we are targeting the muscles that support the spine as well as the internal and external obliques.
EXERCISE 7 – HEEL TOUCHES TIME - 60 SECONDS (WATCH VIDEO FOR FULL DEMONSTRATION)
What’s The Purpose? • Now that the abs and the TA are fatigued, let’s get a bit more focus on the
rectus abdominus again as well as the obliques in a NON weighted variation. Basically, this is a bit of a rest move for you.

EXERCISE 8 – OVERHEAD LUNGES TIME - 60 SECONDS (WATCH VIDEO FOR FULL DEMONSTRATION)
What’s The Purpose? • Well, it doesn’t even look like an ab exercise… but it is. You see, when you
hold your hands over your head, especially when weighted and sink into a squat or a lunge, you incorporate a lot of your core, and by doing this at the end of our sequence, you’re very fatigued (hence why I suggest going light with the weight). You’ll feel your hip flexors open up and stretch, and honestly, the more you do this along with the yoga and foam rolling, the stronger you’ll become!
TECHNIQUE TIP: o Focus on keeping the chest as high as possible and don’t let the arms fall forward. You
can use dumbbells or a barbell, whichever is easier from a balance standpoint at first… then move on to what is more difficult! Don’t let the knee come over the toe when you lunge down, keep your body as upright as possible and force yourself to become aligned!

So There You Have it!
By now, you can feel the overall encompassment of working the entire body in unison and helping yourself to become aligned. Remember, all of these programs work TOGETHER, although, they can be adopted into individual workouts if you are pressed for time.
The magic happens when it all comes together… along with the diet J
You can increase this workout to a frequency of up to 5x per week, but do not exceed that.
If after 5x per week it becomes too easy, you can add it one more rotation of the workout, meaning rather than going through the circuit one time, you can immediately go into the circuit a 2nd time! Enjoy the burn with that one J
A 3x per week routine that is extremely unconventional when it comes to targeting your abs… But we don’t want conventional! We want a
technique that works, and allows us to get results!

Thank You! Amber and I have put forth our heart and soul into making our programs the best that they can be. We know that there is so much information out there, and we are so appreciative that you trust us to accompany you on your journey with your health, fitness and mindset goals. What can we say?? We are selfish and want you to be the best version of you possible so that we (and the rest of the world) can enjoy you all the more!
When you follow our MyoFascial Release, Yoga, Mindset and bonus Core routines, you will be well on your way towards diminishing pain, reducing inflammation, increasing energy and improving your overall well-being. Diet is always a big factor in reducing inflammation as well, so for best results, we recommend diving into the 7 Day Organic Total Body Reboot program. More than anything, we appreciate your support, comments, and feedback!
We understand the struggles that accompany inflammation. From Amber’s struggles with autoimmune disease and pain to Thomas’s struggles with weight gain and brain fog, it can be so difficult to find a good place to start, and to take those first steps in doing so. We are so grateful you found us and we hope that you love our program as much as we do.

AMBER DELAUER @AMBERDELAUER
CLICK THE TILE TO ADD ME
THOMAS DELAUER @THOMASDELAUER
CLICK THE TILE TO ADD ME
Tell Us What You Think!
Love the program? Let us know! Tell us what you loved, and what you want to see more of! Have a concern? PLEASE, let us know! We are always looking for ways to improve how we help others.
We want to hear from you!!
Have a question? Send us an email! Our customer support team is happy to help you find an answer.
Get Involved! If you want more motivation and to be involved in the conversation even more, join in on our Facebook community. Email [email protected] to find out how!
For anything else? You guessed it, contact us! We want to help you find health and vitality with as little stress as possible.
Find Us On Social Media!
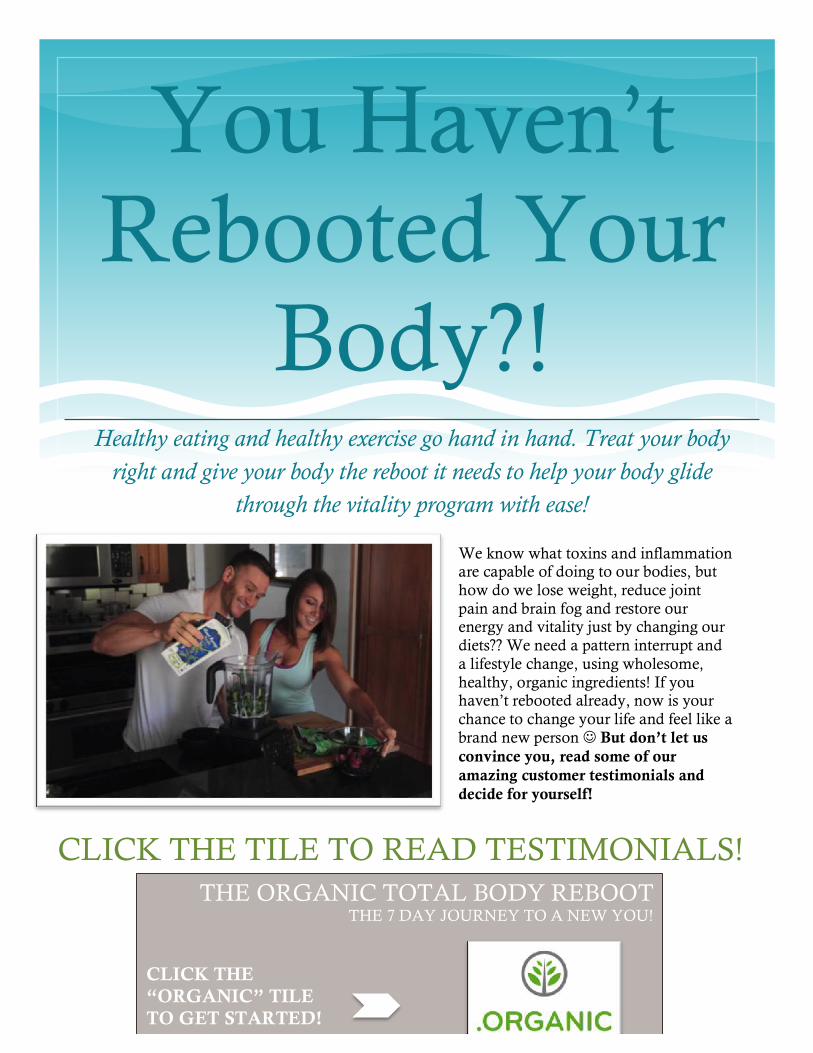
CLICK THE TILE TO READ TESTIMONIALS!
You Haven’t Rebooted Your
Body?! Healthy eating and healthy exercise go hand in hand. Treat your body
right and give your body the reboot it needs to help your body glide through the vitality program with ease!
We know what toxins and inflammation are capable of doing to our bodies, but how do we lose weight, reduce joint pain and brain fog and restore our energy and vitality just by changing our diets?? We need a pattern interrupt and a lifestyle change, using wholesome, healthy, organic ingredients! If you haven’t rebooted already, now is your chance to change your life and feel like a brand new person J But don’t let us convince you, read some of our amazing customer testimonials and decide for yourself!
THE ORGANIC TOTAL BODY REBOOT THE 7 DAY JOURNEY TO A NEW YOU!
CLICK THE “ORGANIC” TILE TO GET STARTED!