VITAEasyshade Advance · 5 VITAEasyshade ®Advance 1 Gettingstarted 6 1.1 Packagecontents 6 1.2...
36
VITA Easyshade ® Advance Model Number: DEASYAS Date of issue: 05.11 VITA shade control VITA shade reproduction VITA shade communication VITA shade taking Operating Instructions
Transcript of VITAEasyshade Advance · 5 VITAEasyshade ®Advance 1 Gettingstarted 6 1.1 Packagecontents 6 1.2...

VITA Easyshade® Advance
Model Number: DEASYAS
Date of issue: 05.11
VITA shade controlVITA shade reproductionVITA shade communicationVITA shade taking
Operating Instructions


3
VITA Easyshade®Advance
VITA Easyshade Advance Medical equipment, With respect to electric shock, fire andmechanical hazards only in accordance with UL 60601-1,IEC/EN 60601-1, CAN/CSA C22.2 No. 601.1
Attention, consult accompanying documents
Type B applied part
Single patient use only
Class II equipment
Definition of symbols
Warning1. Attention! Use only with enclosed power supply
(GlobTek GTM41076-0605).2. Never look directly into the VITA Easyshade Advance
probe tip when the lamp is on.3. Do not immerse the VITA Easyshade Advance hand piece
or base unit in water or any other liquid.4. Follow the instructions in Section 1.4 to properly apply
an infection control shield.5. Follow the instructions in Section 9 to properly clean
and disinfect VITA Easyshade Advance.6. Do not expose the unit to temperatures above 60° C.7. The general recommendations for the use of the
VITA Easyshade Advance instrument in dentist practicesand dental laboratories must be followed.
8. Infection control shields are for single patientuse only.
9. Protect the instrument against direct sunlight.
10. The temperature to perform measurements must bebetween 15°C and 40°C.
11. Do not drop the instrument to avoid the risk of breakageor electric shocks.
Important information on electromagnetic compatibilityPortable and mobile radio frequency (RF) communicationsequipment can affect medical electrical equipment. This productis intended for use in the electromagnetic environmentsspecified. The user of this product should assure it is usedin such an environment.
1. Portable and mobile RF Communications equipment(cell phones) should not be used at close distances.
2. Power frequency magnetic fields should be at levelscharacteristic of a typical location in a commercialor hospital environment.
Safety information

4
VITA Easyshade®Advance
This instrument and any accessory components are subjectto regulation 2002/96/EC (WEEE) and applicable national lawsand must not be disposed of with unsorted household wastewithin the European Union (EU).
The VITA Easyshade Advance instrument complies withthe applicable regulations of the European Union (EU).The declaration of conformity can be requested fromVITA Quality Management atwww.vita-zahnfabrik.com
Disposal of equipment
Important copyright information© Copyright 2011, VITA Zahnfabrik. All Rights Reserved.
This document and/or the software, data and informationreferenced or contained herein contain confidential andproprietary information of VITA Zahnfabrik. This documentdoes not convey or represent any right or license to use anysoftware, data or information, any right or license to use any
intellectual property rights, or any obligation on the part ofVITA Zahnfabrik to provide support or other services inconnection therewith. Any right or license to use anysoftware data, information or other intellectual propertyrights of VITA Zahnfabrik or any obligation to provide support,must be conveyed by separate written agreement withVITA Zahnfabrik.
Safety information

5
VITA Easyshade®Advance
1 Getting started 61.1 Package contents 61.2 Product information 61.3 System setup / Features 71.4 Applying an infection control shield 81.5 Power-on 91.6 Calibrating 9
1.6.1 Automatic calibration 91.6.2 Manual calibration 111.6.3 Monitoring the calibration 11
2 Menu navigation 122.1 Tables of icons 12
3 Measuring a tooth 13
4 Modes of operation 154.1 Measuring on the natural tooth 15
4.1.1 VITABLOCS mode 164.2 Multiple-point measurement
on the natural tooth 174.3 Measuring on ceramic restorations 18
4.3.1 Comparison of the shadewith the VITA standard 18
4.3.2 Comparison of the shadewith the user standard 19
4.3.3 Determining the shadeof a ceramic restoration 19
5 Training mode 21
6 Recording the measurements 22
7 Extended color information 237.1 VITA classical A1–D4 shades 237.2 VITA SYSTEM 3D-MASTER shades 237.3 Interpolated VITA SYSTEM 3-MASTER
shades 24
8 Battery level 25
9 Cleaning and disinfecting 26
10 Power off / Automatic power off 27
11 Appendix 2811.1 Replacement parts and accessories
for users 2811.2 Error messages 2911.3 Troubleshooting 3011.4 Technical data 3111.5 Storage and transport conditions 3111.6 Glossary 3211.7 Patents and trademarks 3311.8 Limitation of liability for
subsequent errors 3311.9 Warranty 33
Table of contents

6
B
D
F
G
C
H
E
VITA Easyshade®Advance
1 Getting startedThank you for your purchase of the VITA Easyshade Advance instrumentwhich provides accurate shade determination for natural dentition anda variety of restorations. The instrument can measure a broad range of shades,including VITA Linearguide 3D-MASTER, VITA Toothguide 3D-MASTER includingthe BLEACHED SHADE GUIDE shades and VITA classical A1–D4 shades.For accurate shade matching results, please read these instructionscompletely before using your instrument.
1.1 Package contentsA Operating instructions and Quick User Guide (not shown)B CD with VITA ShadeAssistC Package of infection control shieldsD Easyshade Advance hand pieceE Easyshade Advance base unitF Calibration block holderG Power supply with universal adapter kitH Mini USB cable
Note: If any items are missing,contact VITA Zahnfabrik or Vident (North America only) immediately.
1.2 Product informationPlease record the following information in the table below.
Date of purchase:
Serial number of the Easyshade Advancehand piece / calibration block holder:
Serial number of the Easyshade Advancebase unit:
Getting started
Software to transfer and document the natural tooth shade measured
Note: Operating system: Windows XP SP2 or later versions

7
1
VITA Easyshade®Advance
2
USB port
Charging LEDindicator light
Measurementswitch
Serial numberof base unit
IR LED forautomaticcalibration
Charging pins
Power LED -flashes green
Serial numberof calibrationblock holder
Serial numberof hand piece
Input forpower unit
so that the battery charging port fits over the charging pins.The green LED on the hand piece (charging indicator for thebattery) flashes after the instrument has been connected tothe power supply. Let the battery of the hand piece chargefor a minimum of five hours before initial use.
Important:The hand piece and the calibration holder will havethe same serial number (fig. 1); if not, contact VITA (Videntfor North America only) immediately. The base unit hasa different serial number.
1.3 System setupOpen the packaging of VITA Easyshade Advance and removethe Quick Guide, the CD-ROM containing the OperatingInstructions and VITA ShadeAssist, the Easyshade Advancehand piece, base unit, the calibration block holder and powersupply. Attach the calibration block holder as shown in fig. 2.The green power LED flashes on the base unit once thepower supply is connected to the wall electrical outlet witha suitable adapter. Place the base unit on a flat surface.Insert the Easyshade Advance hand piece into the base unit
Getting started

8
3
4
VITA Easyshade®Advance
1.4 Applying an infection control shield.It is important to properly clean and disinfect the instrument between patientuses and to use a new Easyshade infection control shield for each patientto prevent patient cross-contamination.
The infection control shield also protects the fiber optics in the instrumentfrom damage.
1. Insert the tip of the hand piece into the shield2. Remove paper backing from the shield3. Pull shield carefully over the hook4. Secure shield on the hook
Verify that the infection control shield is stretched uniformlyand flat over the face of the probe tip, and is not tornduring application (fig. 3+4).
Then calibrate the instrument as described in section 1.6.The infection control shield should remain in place for allmeasurements with the same patient.
These non-sterile covers are for single patient use only and shouldbe properly disposed of.
Note: An infection control shield that has come into contactwith a patient must not contact the calibration block assembly.If contact occurs, follow the instructions for cleaning anddisinfection of the calibration block assembly in section 9.
Getting started

9
6
7
5
VITA Easyshade®Advance
Grüne LED
1.5 Power-onTurn on the VITA Easyshade Advance by pressing and holding any buttonon the handpiece for at least two seconds.
1.6 CalibrationThe unit may only be calibrated with a new anti-infection cover in orderto prevent patient to patient cross-contamination.
1.6.1 Automatic calibrationIf the base unit is connected to a power source, the calibration procedureis carried out automatically.
Place the instrument in the calibration block holder so that the probe tipis flush with and perpendicular to the calibration block and depressesthe calibration block (fig. 6). Make sure that the hand piece is fully seatedin the calibration holder. Do not press the measurement switch when the unitis calibrated automatically.
A green LED in the center of the base unit is lit and shortly afterwardsthe hand piece probe will illuminate the calibration block (fig. 7).Initial calibration may take a few seconds after the unit is switched on.
Two short beeps indicate completion of calibration.
Note: Before carrying out any measurement, the unit mustbe calibrated. If power is not available to the base unit,the unit must be calibrated manually (section 1.6.2).
Getting started

10
9
10
8
VITA Easyshade®Advance
After successful calibration, the measurement menu is displayed (fig. 8)and the unit is ready for use. The measurement mode used last is high-lighted and activated after pressing the Select key.
If a single “beep” sounds and an error message is displayedon the screen as shown (fig. 9) calibration has failed and mustbe repeated (see section 11.2).
Note: Make sure not to block the IR ports above the labelslocated on the hand piece and the base unit (see IR ports, fig.10).
Avoid placing the base unit in the vicinity of a powerful infraredlight source (such as sunlight or an incandescent light),which may interfere with the signal transmission betweenthe base unit and the hand piece.
Getting started
IR Port

11
1312
11
VITA Easyshade®Advance
1.6.2 Manual calibrationThe instrument can also be calibrated when a power source is not available forthe base unit (the green Power LED is not flashing). For this purpose select theCalibration icon in the Settings menu which is accessed from the Toolbar iconin the Main menu (see section 12.3 Menus).
Place the hand piece in the calibration block holder and press the measurementswitch to activate the calibration procedure. The beeps indicate that the unithas been calibrated successfully.
Note: VITA Easyshade Advance is pre-calibrated at the factory for thecalibration block that is shipped with the instrument and may only be usedwith this calibration block. If you own more than one VITA Easyshade Advance,care must be taken not to switch calibration blocks between VITA EasyshadeAdvance units, which may adversely affect the accuracy of measurements.
Make sure that the serial number on the hand piece matches the serialnumber on the calibration block holder (see section 1.2).
1.6.3 Monitoring the calibrationDue to environmental changes or after repeated use, it may be necessaryto re-calibrate the instrument when performing repeated measurements.The animated Calibration icon, as shown in figure 12, indicates thatthe instrument must be re-calibrated.
Note: An anti-infection cover that has come into contactwith a patient must not contact the calibration block assembly.If this occurs, follow the instructions for cleaning and disinfectionof the calibration block assembly in section 9.
If error No. 106 is displayed, the instrument must be re-calibrated.
Getting started

12
13
VITA Easyshade®Advance
Enterbutton
Arrowbuttons
Display
2 Menu navigationThe two arrow buttons located below the displaymove the cursor left or right respectively to navigatethe instrument’s menus.
Pressing the Enter button will select the highlighted icon.
Menu navigation
VerifyrestorationAdjust
Verifyrestoration
Fair
Verifyrestoration
Good
Recordingmemory
Measurecervical
tooth area
Measurecentral
tooth area
Measureincisal
tooth area
Battery fullycharged
Batteryempty
Recycle binHomeToolbar
Tooth single Tooth areas Verifyrestoration
Shade tab Off Measurementfailed
Calibrationfailed
Shade matchfailed
Calibration
2.1 Tables of icons

13
15
14
16
VITA Easyshade®Advance
3 Measuring a toothThe instrument may be used to measure a single area on a tooth("Tooth single") or to measure the cervical, middle and incisal areas("Tooth areas") as described in section 4.
Procedure to perform accurate measurements with VITA EasyshadeAdvance (for purposes of illustration, the probe tip is shown withoutan anti-infection cover):
Have the patient sit on a chair and lean back his head.The probe tip must be placed on an area of the enamel surfacethat has underlying dentine (middle to cervical area).
The probe tip must be placed perpendicular and flushto the tooth surface as shown in the adjacent figure (fig. 15).
While holding the probe tip steady against the dentine centerof the tooth, press the Measurement button and hold the probe tipagainst the tooth until two rapid "beeps" can be heard to indicatecompletion of the measurement.
VITA Easyshade Advance will display the results of the measurement.
Incorrect placement (fig. 16):Probe tip not flush on the tooth surface.
Measuring a tooth

14
18
17
VITA Easyshade®Advance
Incorrect placement – incisal (fig. 17):Probe tip must be a minimum of 2 mmfrom the incisal edge.
Incorrect placement – cervical (fig. 18):Probe tip too close to gingival tissue.Maintain a minimum distance of 2 mm to the tissue margin.
If the probe tip is moved off of the tooth priorto the instrument sounding a "beep", an error messageor an erroneous measurement will be displayedand the measurement will need to be repeated.
Note: Prior to measuring a tooth, an infection control shieldmust be applied to the VITA Easyshade Advance probe tipand the instrument must be calibrated. It is recommendedto remove any stains from the surface of a tooth priorto measurement. It may be required to wipe the toothwith gauze to prevent the tip from sliding. The probe tipmust be placed entirely on the natural tooth. Any contactwith existing restorations must be avoided. Underlyingrestorations may adversely affect the measurement result.
Measuring a tooth

15
VITA Easyshade®Advance
19
20
21
22
23
Modes of operation
4 Modes of operation
4.1 Measurement on a natural toothTo measure the base shade of a tooth, highlight the Single Tooth iconon the measurement menu and confirm by pressing the “enter” button.Place the probe tip on the upper middle third of the tooth with the probetip flush in the dentine center of the tooth and press the measurement switch.The patient's head should be leaned backwards during the measurement.Ideally, measuring is performed while the patient is sitting in the dentist'schair.
The measurement results will be displayed in the 16 VITA classical A1–D4and the 29 3D-MASTER shades (basic level) on the screen of VITA EasyshadeAdvance.
To receive extended color information, highlight and selectone of the displayed shade results to access the detail screen.
In the detail screen, the shade codes behind the arrow icon provideinformation about the nearest tooth shades. A detailed descriptionof the screen can be found in section 7.
To receive detailed information about the 3D-MASTER shade measured,use the arrow buttons to highlight the displayed shade and pressthe Enter key to go to the detail screen.

16
26
24
25
VITA Easyshade®Advance
4.1.1 VITABLOCS modeThe VITABLOCS mode informs you which VITA block should be usedfor accurate reproduction of the measured tooth.Highlight the Tooth/BLOCS icon and press the Enter button to confirm.
The suitable VITABLOCS in the VITA classical A1–D4 or VITA SYSTEM3D-MASTER shade systems are displayed. If a suitable block is notavailable in the VITA classical A1–D4 shade system (--- is displayed),use the block indicated in the VITA 3D-MASTER SYSTEM.
Note:To determine the correct block shade, a distinction is made between4 initial situations. Generally, measurements should not be carried outon prepared teeth (stumps) since they are too small and normallyalso darker than natural teeth.
1. Vital, non-discoloredEasyshade is used to determine the base shade on the tooth and therestoration can be prepared without any additional characterization.
2. Vital, discoloredEasyshade is used to determine the base shade on the tooth;the shade of the prepared restoration, however, needs to becharacterized before the restoration is seated (Akzent, Shading Paste).
3. Devitalized, non-discoloredEasyshade is used to determine the base shade on the tooth and therestoration can be prepared without any additional characterization.
4. Devitalized, discoloredThe tooth should not be measured with Easyshade; an adjacent toothwith the same shade should be selected to determine the block shade.A devitalized tooth should be bleached internally prior to treatment(attempt to reproduce the shade of a non-discolored, devitalized tooth).The prepared tooth should be characterized as described under 2.
Modes of operation
In the detail screen, the shade codes behind the arrow icon provideinformation about the nearest tooth shades. A detailed descriptionof the screen can be found in section 7.
Note: Compare the shade measured with a shade tab if possiblein daylight, under standardized daylight lamps or at 5500 - 6500 Kand not under normal indoor lighting!

17
27
28
VITA Easyshade®Advance
30
29
31
4.2 Multiple-point measurement on the natural toothTo measure the cervical, middle and incisal shades of a tooth,highlight and select the Tooth area icon on the Measurement menu.
Measurement sequence: cervical, middle and incisal.
To begin, place the probe on the cervical area of the tooth and pressthe measurement switch. Two rapid "beeps" will indicate a successfulmeasurement and "OK" will be displayed.
Proceed with the measurements of the middle and incisal areas.
After successful measurement of all areas, the VITA classical A1–D4and VITA SYSTEM 3D-MASTER shade results will be displayed.
If an error occurs during measurement, a long "beep" will soundand "X" will be displayed in the measured tooth area (not shown).Repeat the measurement of the area until a successful measurementresult is obtained.
To receive extended color information, highlight and select one ofthe displayed shade results.
Modes of operation

18
34
33
VITA Easyshade®Advance
32
Modes of operation
4.3 Measuring on ceramic restorationsVITA Easyshade Advance enables dental professionals to verifythat a ceramic restoration's shade is an acceptable match tothe prescribed shade. The 29 shades and the 52 interpolated shadesof VITA SYSTEM 3D-MASTER and the 16 VITA classical A1–D4 shadescan be verified.Moreover, it is possible to determine the extent of deviationof a ceramic restoration from a standard defined by the user.Additionally, the instrument enables the determinationof the shade of a ceramic restoration.
4.3.1 Comparison of the shade with the VITA standardTo verify a restoration, highlight and select the Restoration iconon the Measurement menu and press the Enter button.The target shade is selected before measuring the restoration.After selecting the target shade, measure the middle thirdof the restoration. 1 to 3 asterisks, as shown in the following figures,indicate the degree to which the restoration matches the target shade.
To select a target shade, select the first digit or letter usingthe navigation buttons and the Enter button. Then only the digitsand letters can be selected, which may produce a correspondingVITA SYSTEM 3D-MASTER or VITA classical A1–D4 shade.
B selected first, then only 1, 2, 3 and 4 can be selected (fig. 33).
To select interpolated shades, go to the Extended Color mode (fig. 34).Navigation in the menu remains unchanged.
19
36
VITA Easyshade®Advance
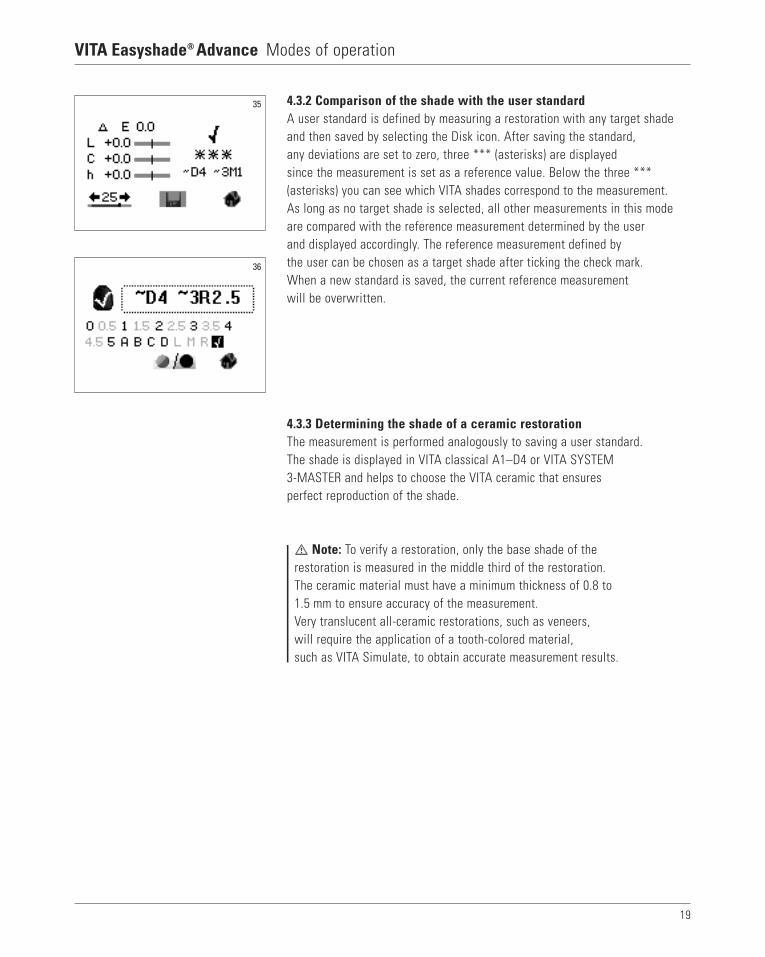
35 4.3.2 Comparison of the shade with the user standardA user standard is defined by measuring a restoration with any target shadeand then saved by selecting the Disk icon. After saving the standard,any deviations are set to zero, three *** (asterisks) are displayedsince the measurement is set as a reference value. Below the three ***(asterisks) you can see which VITA shades correspond to the measurement.As long as no target shade is selected, all other measurements in this modeare compared with the reference measurement determined by the userand displayed accordingly. The reference measurement defined bythe user can be chosen as a target shade after ticking the check mark.When a new standard is saved, the current reference measurementwill be overwritten.
4.3.3 Determining the shade of a ceramic restorationThe measurement is performed analogously to saving a user standard.The shade is displayed in VITA classical A1–D4 or VITA SYSTEM3-MASTER and helps to choose the VITA ceramic that ensuresperfect reproduction of the shade.
Note: To verify a restoration, only the base shade of therestoration is measured in the middle third of the restoration.The ceramic material must have a minimum thickness of 0.8 to1.5 mm to ensure accuracy of the measurement.Very translucent all-ceramic restorations, such as veneers,will require the application of a tooth-colored material,such as VITA Simulate, to obtain accurate measurement results.
Modes of operation

20
VITA Easyshade®Advance
38
39
37
Modes of operation
*** "Good" means that the base color of the restorationhas little or no color difference from the target shadeto which it has been verified.
** "Fair" means that the base color of the restorationmay have a noticeable but acceptable differencefrom the target shade to which it has been verified.However, this may not be acceptable for an anterior restoration.
* "Adjust" means that the base color of the restorationhas a noticeable difference from the target shadeto which it has been verified, and that the restorationshould be adjusted to be an acceptable shade match.
Press the Enter button to return to the "Verify restoration" screen.
L +/- The lightness of the restoration is above / below the lightnessof the target shade.
C +/- The chroma of the restoration is above (more intensive) / below (paler)than the chroma of the target shade.
h +/- The hue of the restoration is yellower/redder than thehue of the target shade.
For additional information on color theory,visit VITA's website at www.vita-zahnfabrik.com.
Note: The values measured by VITA Easyshade Advance are measurementmode specific and only accurate for natural teeth. Measurements of shade tabscan only be made in the Training mode. Measurements on dental restorationsshould always be performed in the Restoration mode.

21
41
42
43
40
VITA Easyshade®Advance
5 Training modeTo learn how to use VITA Easyshade Advance, it is useful to practiceusing the instrument by measuring VITA Linearguide 3D-MASTER,VITA Toothguide 3D-MASTER or VITA classical A1–D4 shade tabs.
To measure a shade tab, highlight the Shade tab iconon the Settings menu.
Hold the probe tip steady on the middle of the shade taband exert slight pressure.Then press the Measurement switch.
The measurement result with the closest shade matchas determined by the instrument is displayed on the screen.
Use the Classical and 3D-MASTER icons to switchbetween the different shade systems.
If the probe tip is not held steady or is partially off the shade tab,faulty measurements will result. The instrument detects anddisplays major measurement errors (fig. 43).
For purposes of training, repeat the measurement untila correct result is displayed.
Note: The 29 VITA Linearguide or Toothguide 3D-MASTER shadesand the 16 VITA classical A1–D4 shades are displayed in the Training mode.Measuring other shade guides or interpolated VITA shade tabs willproduce different (possibly inaccurate) results. Due to the small differencein the color and the natural color variations of the shade tabs, even slightchanges in the measurement process may lead to the fact that a nearest"neighbor shade" is displayed for some shades.
Training mode

22
VITA Easyshade®Advance
45
44
46
47
48
System functions
6 Recording the measurementsThe instrument has a memory capacity to store 30 successfulmeasurements in the order in which they were made.Each set of tooth area measurements is stored as one result.
The Measurement memory icon is located on the lower left of theMeasurement menu screen. The bar indicates the total memory capacity.
If the Measurement memory already contains measurements,a bar will be displayed; the length of the bar indicates the numberof measurements stored. Directional arrows allow navigationwithin the recorded data. A dot above the bar indicates the positionin the memory in addition to the measurement number.
Once the maximum number of measurements is stored,the number 30 will flash. If additional measurements are added,the last measurement will be replaced.The 29 measurement values saved first will not be changed.
By selecting the Recycle bin icon on the settings screen,all saved measurement values will be permanently deleted.

23
49
50
VITA Easyshade®Advance
7 Extended color information
7.1 VITA classical A1–D4 shadesThis screen indicates the distances in color space betweenthe measured area of the tooth and the closest matchingVITA classical A1–D4 shade.
The bars graphically indicate the color distances.
L +/- The tooth's lightness is higher / lower thanthe VITA classical A1–D4 shade.
C +/- The tooth's chroma is higher / lower thanthe VITA classical A1–D4 shade.
h +/- The tooth's hue is yellower / redder thanthe VITA classical A1–D4 shade.
7.2 VITA SYSTEM 3D-MASTER® shadesThis screen displays the L*C*h* a*b* coordinates in theCIEL*a*b* color space for the measured area of the tooth.
System functions

24
VITA Easyshade®Advance System functions
0M10M1.50M20M2.50M3
0.5M10.5M1.50.5M20.5M2.5
1M11M1.51M2
1.5M11.5M1.51.5M21.5M2.5
2M12M1.52M22M2.52M3
2.5M12.5M1.52.5M22.5M2.52.5M3
3M13M1.53M23M2.53M3
3.5M13.5M1.53.5M23.5M2.53.5M3
4M14M1.54M24M2.54M3
4.5M14.5M1.54.5M24.5M2.54.5M3
5M15M1.55M25M2.55M3
2L1.52L22L2.5
2.5L1.52.5L22.5L2.5
3L1.53L23L2.5
3.5L1.53.5L23.5L2.5
4L1.54L24L2.5
2R1.52R22R2.5
2.5R1.52.5R22.5R2.5
3R1.53R23R2.5
3.5R1.53.5R23.5R2.5
4R1.54R24R2.5
VITA Easyshade Advance measures teeth and restorationsto the nearest VITA SYSTEM 3D-MASTER interpolatedshade.
The 29 VITA Linearguide or Toothguide 3D-MASTERshades are shown in bold in the tables above.The tables also include the 52 interpolated shadesthat are achieved by equally mixing the appropriateVITA 3D-MASTER porcelains.
R shades
L shades
M shades
7.3 VITA SYSTEM 3D-MASTER® interpolated shades

25
52
51
VITA Easyshade®Advance
8 Battery levelThe Battery icon indicates the battery charge level.When the battery is almost empty, the Battery icon will flash.
Highlight and select the Battery level iconon the Settings screen.
The exact amount of charge on the battery csn be viewedon the Battery screen.
System functions

26
53
VITA Easyshade®Advance
9 Cleaning and disinfectingThe surface of VITA Easyshade Advance can be disinfected.We recommend using mild disinfectant sprays or disinfectant wipes,which can be purchased from most dental dealers.Please follow the manufacturers' instructions for use.
If iodine, phenyl phenol-based products or isopropyl alcohol are usedto clean or disinfect VITA Easyshade Advance, permanent discolorationand/or cracks may result which are not covered by the Product Warranty.Disinfectants that contain phenol or phenyl phenol compounds or methylethyl ketone damage the surface of the instrument.
Note: The dentist or health care provider should followthe CDC's recommendations for universal precautions duringthe use of VITA Easyshade Advance.
VITA Easyshade Advance may only be calibrated with a new infection controlshield. In the event that the calibration block becomes contaminated, thecalibration block must be removed from the base unit and sterilized usinga steam autoclave in accordance with the instructions of the manufacturerof the sterilizing agent. Do not use a "heat only" autoclave.
While holding the base unit with one hand, turn the calibration block holder1/4 turn counter-clockwise to remove it from the base unit (fig. 53).
Cleaning and disinfecting
27
54
VITA Easyshade®Advance
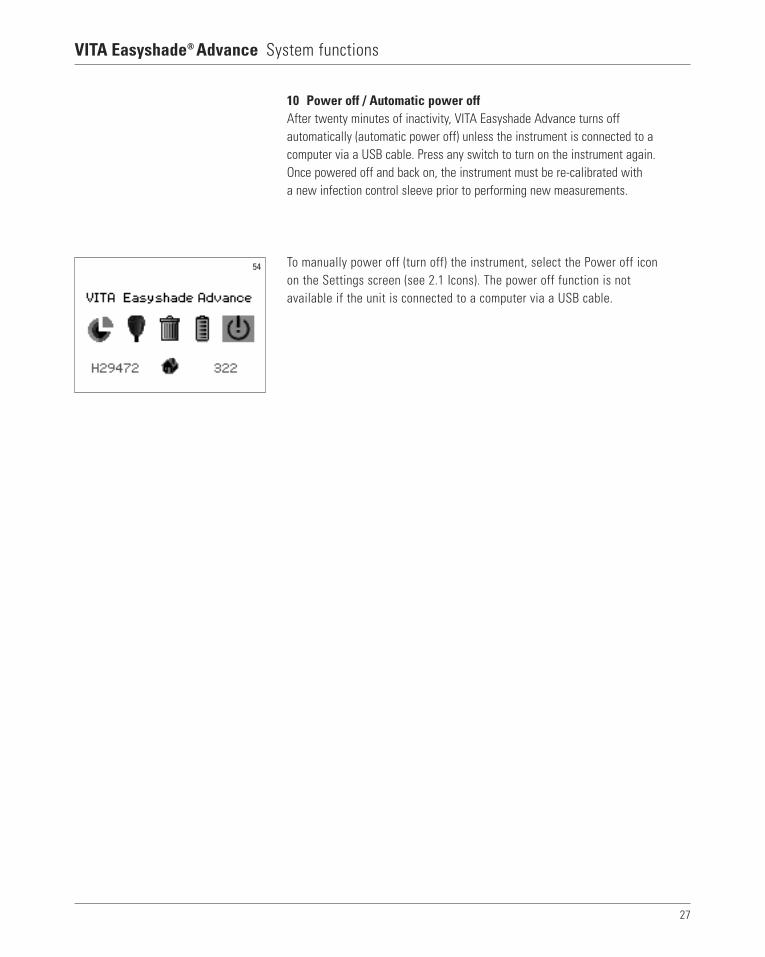
10 Power off / Automatic power offAfter twenty minutes of inactivity, VITA Easyshade Advance turns offautomatically (automatic power off) unless the instrument is connected to acomputer via a USB cable. Press any switch to turn on the instrument again.Once powered off and back on, the instrument must be re-calibrated witha new infection control sleeve prior to performing new measurements.
To manually power off (turn off) the instrument, select the Power off iconon the Settings screen (see 2.1 Icons). The power off function is notavailable if the unit is connected to a computer via a USB cable.
System functions

28
VITA Easyshade®Advance
ShadeAssist CD-ROM: D39000
Operating instructions: 1506/1
Quick Start Guide: 1559/1
Mini USB cable: D46007
External power supply: D46002
11 Appendix
11.1 Replacement parts and accessories for usersThe following replacement parts and accessoriesfor users are available from VITA:
Case with insert: DEASYASK
Anti-infection cover: D39003
Shipping container: DEASYAVP
Base unit: D46006
Appendix

29
112
108
101, 102
103
104, 105
116, 117
109, 110
101, 111
106
107
113
114, 115
118
VITA Easyshade®Advance
Calibrate the instrument.
Power unit off. Insert the probe tip into the calibration block holder.Switch the instrument on and calibrate it.
Hold steady when measuring.
Internal message, contact VITA's Technical Service if problem persists.
Re-calibrate
Re-calibrate
Re-calibrate
Shade out of measurement range
Unplug the USB cable; then re-install USB cable.
Contact VITA's Technical Service.
Charge the battery.
Error no. Then ...Symbol
11.2 Error messages
Appendix

30
VITA Easyshade®Advance Appendix
VITA Easyshade Advance cannotbe turned on.
VITA Easyshade Advance cannotbe calibrated or repeatedlyprompts to calibrate again.
Measurements can not be madeafter switching on VITA EasyshadeAdvance since the instrumentneeds to be calibrated first.
A measurement is made andVITA Easyshade Advancedisplays "---" in place of aVITA classical A1–D4 shade orVITA SYSTEM 3D-MASTER shade.
Inaccurate shades are alwaysdisplayed when testing on shade tabs.
A letter (S or W) is displayedto the right of the Toolbar icon.
Charge the battery as described in section 1.3.
Make sure that the probe tip is correctly placed into the calibration blockholder and held at an angle of 90° and is not lifted before hearing the "beep",which indicates completion of calibration. Reposition the probe tip as needed.Make sure that the IR ports of the base unit and the hand piece are not blocked(see section 1.6.1).
Make sure that the correct Measurement mode icon (see section 4)is highlighted on the Measurement screen. Make sure that the instrumentis calibrated in accordance with section 1.6.1.
Either the color is outside the known range of dental shades,the probe tip was not correctly positioned or was lifted or movedduring the measurement. Measure again; be careful to use properplacement technique.
Make sure that Easyshade is in Shade Tab mode. Make sure that thecalibration block and the probe tip are clean; then re-calibrate the unit.Use only approved VITA Easyshade Advance anti-infection covers.Repeat the measurement, assuring that the probe tip is touchingthe surface at 90° in the middle of the shade tab and that the probe tipis not moving during the measurement. Compare the serial numberto make sure that the correct calibration block for VITA Easyshade Advanceis installed. Make sure that only VITA Linearguide or Toothguide3D-MASTER and VITA classical A1–D4 shade tabs are used.
This indicates a temporary change to the instrument, due to environmentalfactors, such as static discharge or disconnecting the battery.Turn the unit off and on again; the letter will not be displayed.
Problem Then ...
11.3 Troubleshooting

31
VITA Easyshade®Advance
Temperature range:
Humidity range:
Pressure range:
- 40 °C to + 60 °C
10% to 90%, non condensing
500 to 1060 hPa
11.4 Technical data
Height /Width/Depth:
Weight:
Battery:
Lamp type:
Connection:
Classifications:
Temperature range:
15.9 cm / 17.2 cm / 10.8 cm
511g
Rechargeable Li-Ion battery
White High Power LED
Use only approved power supply (GlobTeK GTM41076-0605)VITA Prod. No. D46002
UL 60601-1 Class II equipment
Type B applied part
IPXO
Equipment is not suitable for use in presence of flammableanesthetic mixture with air or nitrous oxide.
15°C to 40°C
11.5 Storage and transport conditions
Appendix

32
VITA Easyshade®Advance Appendix
Spectrophotometer
VITA SYSTEM 3D-MASTER shades
VITA classical A1–D4 shades
Value
Chroma
Hue
Interpolated
CIEL*a*b*
An instrument for color measurement that measures the spectral distributionof light and converts it into color values (tristimulus value) or an internationallyaccepted numerical form.
Refers to the 29 shade sample teeth including 3 Bleached Shade Guideand the 52 VITA SYSTEM 3D-MASTER interpolated shades.
Refers to the 16 original VITA classical A1–D4 shades found on the VITA classicalA1–D4 shade guide, which was originally called the Lumin Vacuum shade guide.
The luminance of the color. It is the lightness or darkness of a color relativeto a series of grays ranging from white (L = 100) to black (L = 0).
The saturation (intensity) of a color. It is the difference between the colorand a gray having the same brightness, measured as the distance from theneutral axis. It is sometimes referred to as the purity of the color.
What we commonly call color (red, yellow, green, blue or some other color).It corresponds to the physical wavelength of light. In the L*C*h* system it isrepresented as an angle ranging from 0° to 360°. Angles that range from 0° to 90°are reds, oranges and yellows; 90° to 180° are yellows, yellow-greens and greens;180° to 270° are greens, cyans (blue-greens) and blues; 270° to 360° are blues,purples and magentas, returning again to red at 360° (the same as 0°).
The mixture of two or more shades of porcelain to achieve an intermediate shade.For example, 2M2 can be mixed with 2M3 to achieve the shade 2M2.5.
A three-coordinate representation of color (tristimulus) in color space, definedby the International Commission on Illumination (Commission Internationaled'Eclairage). For additional information on color theory visit VITA's website atwww.vita-zahnfabrik.com
11.6 Glossary

33
VITA Easyshade®Advance
11.7 Patents and trademarksVITA Easyshade Advance is covered by one or more of thefollowing US patents (6,040,902; 6,233,047; 6,239,868;6,249,348; 6,264,470; 6,307,629; 6,381,017; 6,417,917;6,449,041; 6,490,038; 6,519,037; 6,538,726; 6,570,654;6,888,634; 6,903,813; 6,950,189; 7,069,186; 7,110,096;7,113,283; 7,116,408; 7,139,068; 7,298,483; 7,301,636;7,528,956; 7,477,364; 7,477,391) and other U.S. andforeign patents pending.
VITA Easyshade®, VITA classical A1–A4 andVITA SYSTEM 3D-MASTER® are registered trademarksof VITA Zahnfabrik.
Windows® is a registered trademark of MicrosoftCorporation.
Other trademarks shown herein are the propertyof their respective owners.
11.9 WarrantyThe warranty claims of the original purchaser of theEasyshade Advance spectrophotometer are basedon the General Terms of Business of VITA and thestatutory provisions.
Visit www.vita-zahnfabrik.com to read the General Termsof Business of VITA and on the CD-ROM included in thescope of delivery.
Technical support or service for Easyshade Advanceare available from VITA at + 49/77 61- 5620.
If necessary for service, a Returned Goods Authorizationnumber will be provided with further instructions.We recommend to retain the original packagingfor service/warranty and to return it includingall accessories if necessary.
Appendix
11.8 Limitation of liability for subsequent errorsVITA will not assume any liability for loss of dataresulting from the use of the ShadeAssist CD-ROM.

34
VITA Easyshade®Advance Notes


VITA Zahnfabrik H. Rauter GmbH & Co.KGPostfach 1338 · D-79704 Bad Säckingen · GermanyTel. +49 (0)7761/ 562-0 · Fax +49 (0)7761/562-299Hotline: Tel. +49 (0)7761/ 562-222 · Fax +49 (0)7761/ 562-446www.vita-zahnfabrik.com · [email protected]
Please note: Our products should be used according to the working instructions. Wecannot be held liable for damages resulting from incorrect handling or usage. The useris furthermore obliged to check the product before use with regard to its suitability forthe intended area of applications. We cannot accept any liability if the product is usedin conjunction with porcelains and equipment from other manufacturers which are notcompatible or not authorized for use with our product. Furthermore, our liability for thecorrectness of this information is independent of the legal ground and, in as far aslegally permissible, is limited to the invoiced value of the goods supplied excludingturnover tax. In particular, as far as legally permissible, we do not assume any liabili-ty for profit loss, for indirect damages, for consequential damages or for claims ofthird parties against the purchaser. Claims for damages based on fault liability (culpain contrahendo, breach of contract, unlawful acts, etc.) can only be made in the caseof intent or gross negligence. Date of issue of these operating instructions: 05.11
After the publication of these operating instructions any previous versions becomeobsolete. The current version can be found at www.vita-zahnfabrik.com
VITA Zahnfabrik is certified according to the Medical Device Directiveand the following product bears the CE mark :VITA Easyshade® Advance
With the unique VITA SYSTEM 3D-MASTER all naturaltooth shades are systematically determined and complete-ly reproduced.
1506
_1E–05
11(.7
)S

![Home [] · 2021. 2. 24. · samsung samsung samsung samsung samsung advance advance advance advance advance advance advance advance advance advance 223sw 2233sw 2233sw 2233sw 933sn](https://static.fdocuments.us/doc/165x107/613cd1974c23507cb6359ff0/home-2021-2-24-samsung-samsung-samsung-samsung-samsung-advance-advance.jpg)