Visual Studio 2010 Console Application - Computer Sciencezelikovi/csc126/startingVC++2010.pdf ·...
7
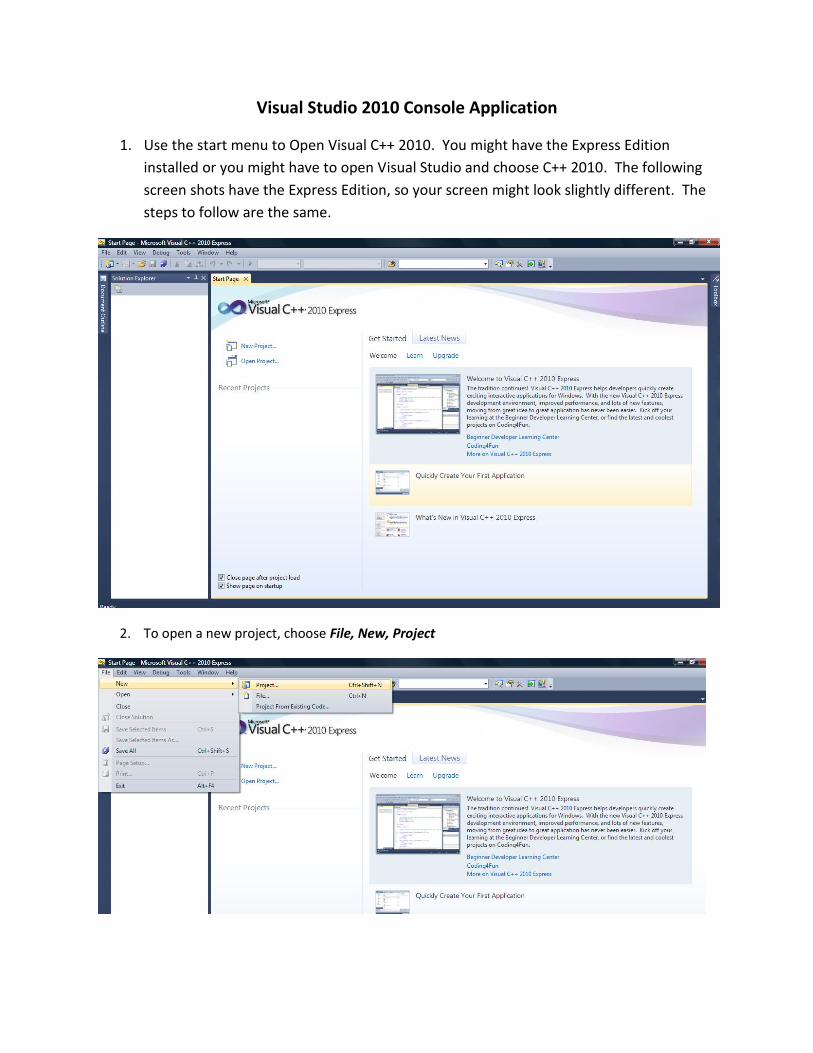
Visual Studio 2010 Console Application 1. Use the start menu to Open Visual C++ 2010. You might have the Express Edition installed or you might have to open Visual Studio and choose C++ 2010. The following screen shots have the Express Edition, so your screen might look slightly different. The steps to follow are the same. 2. To open a new project, choose File, New, Project
Transcript of Visual Studio 2010 Console Application - Computer Sciencezelikovi/csc126/startingVC++2010.pdf ·...
Visual Studio 2010 Console Application
1. Use the start menu to Open Visual C++ 2010. You might have the Express Edition
installed or you might have to open Visual Studio and choose C++ 2010. The following
screen shots have the Express Edition, so your screen might look slightly different. The
steps to follow are the same.
2. To open a new project, choose File, New, Project
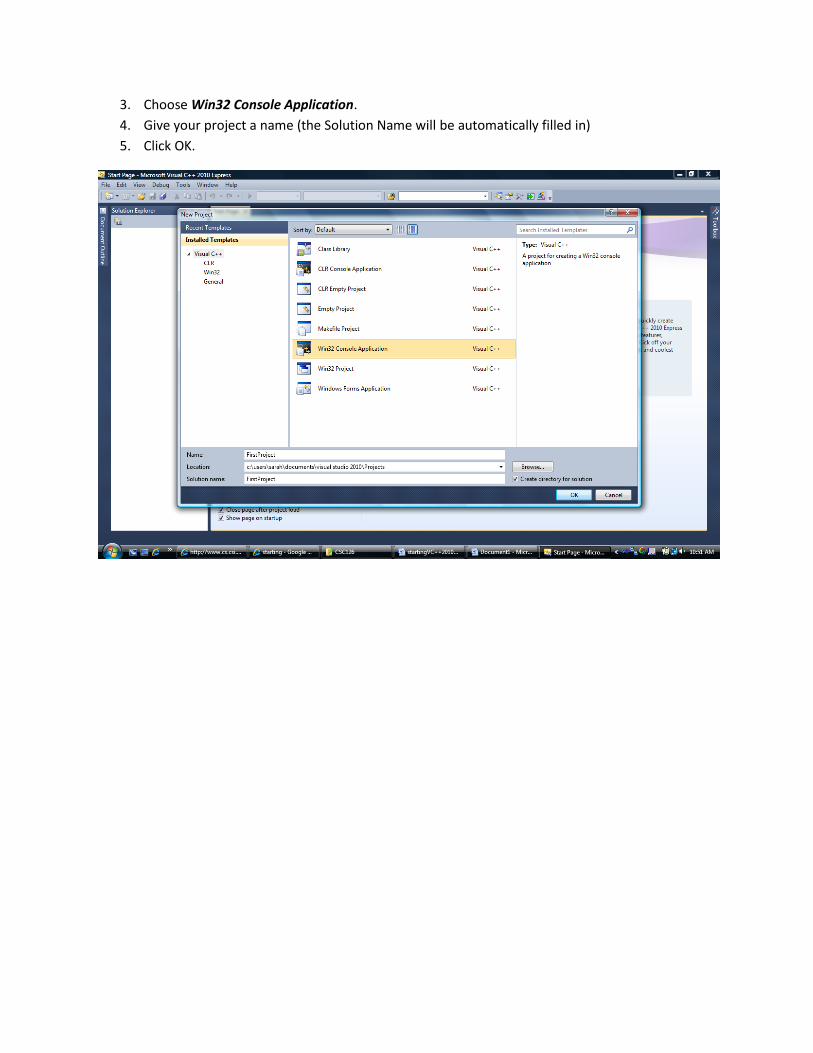
3. Choose Win32 Console Application.
4. Give your project a name (the Solution Name will be automatically filled in)
5. Click OK.
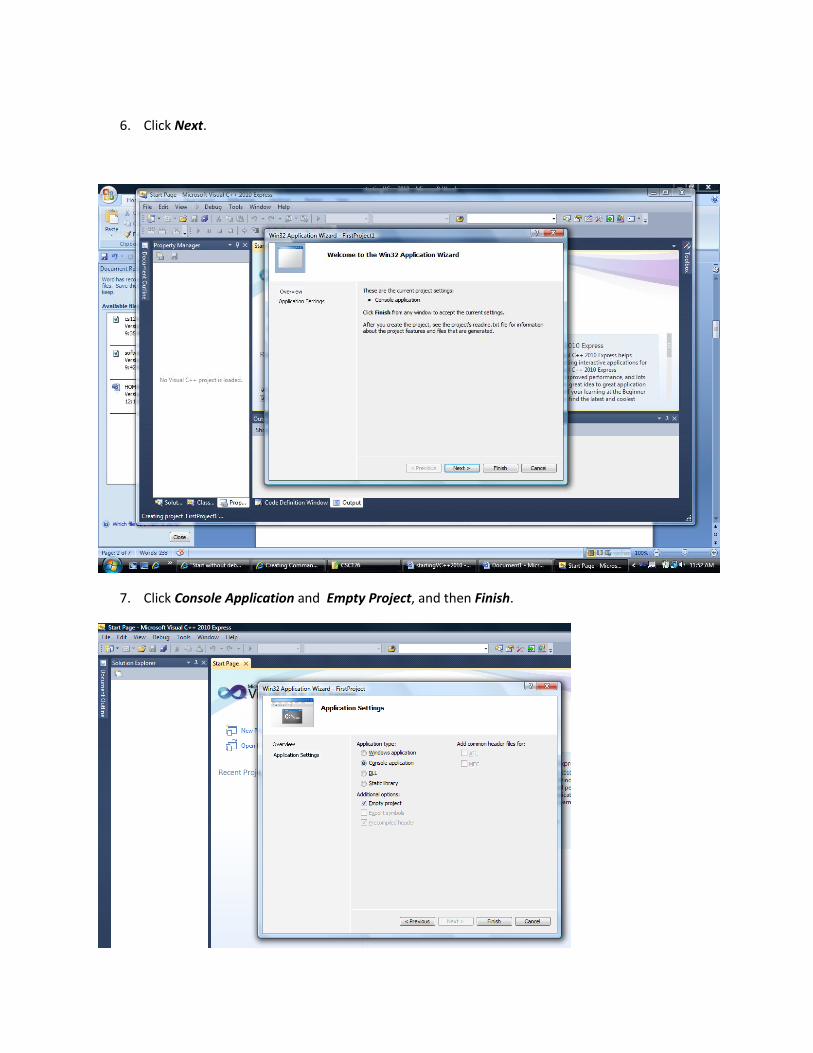
6. Click Next.
7. Click Console Application and Empty Project, and then Finish.
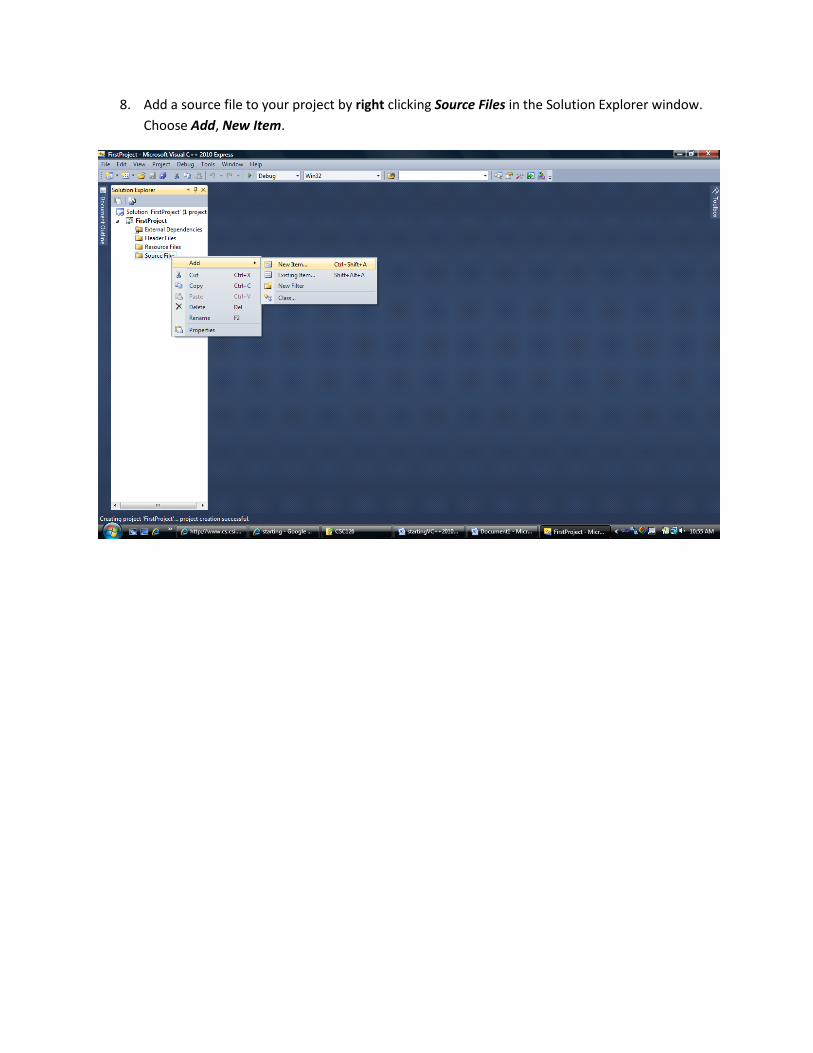
8. Add a source file to your project by right clicking Source Files in the Solution Explorer window.
Choose Add, New Item.
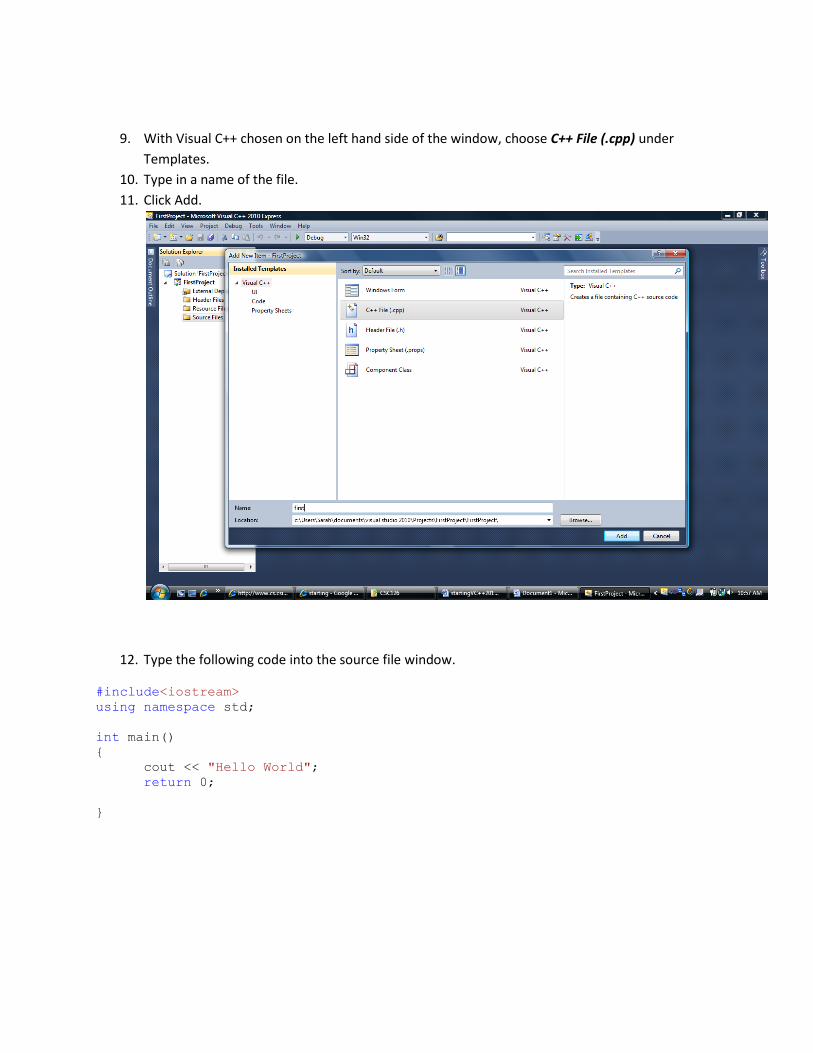
9. With Visual C++ chosen on the left hand side of the window, choose C++ File (.cpp) under
Templates.
10. Type in a name of the file.
11. Click Add.
12. Type the following code into the source file window.
#include<iostream>
using namespace std;
int main()
{
cout << "Hello World";
return 0;
}

13. Build your project using the Debug menu and choosing Build Solution
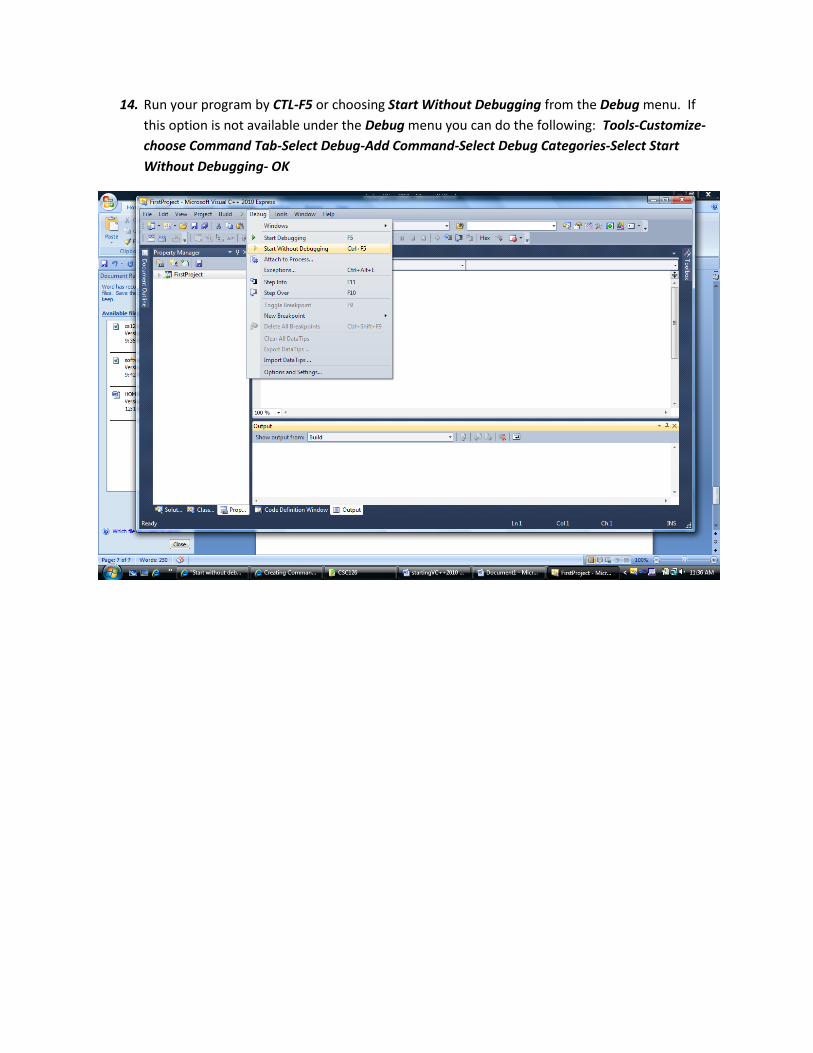
14. Run your program by CTL-F5 or choosing Start Without Debugging from the Debug menu. If
this option is not available under the Debug menu you can do the following: Tools-Customize-
choose Command Tab-Select Debug-Add Command-Select Debug Categories-Select Start
Without Debugging- OK