VISUAL GUIDE Winter Wheat...leaf sheath leaf blade 4th leaf 5th leaf 3rd leaf 2nd leaf nodal roots...
72
VISUAL GUIDE Winter Wheat DEVELOPMENT AND GROWTH STAGING
Transcript of VISUAL GUIDE Winter Wheat...leaf sheath leaf blade 4th leaf 5th leaf 3rd leaf 2nd leaf nodal roots...
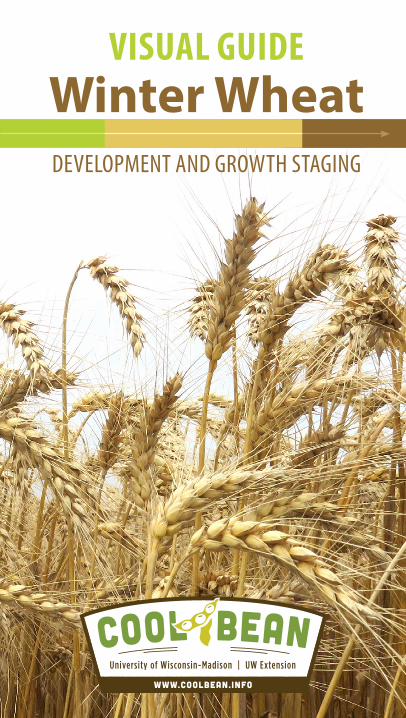
VISUAL GUIDEWinter WheatDEVELOPMENT AND GROWTH STAGING

ContentsIntroductionBasic wheat anatomyFeekes scale for cereal growth stagesZadoks scale for cereal growth stages
................................. Germination ............................................Feekes 1 ............................................ Feekes 2 ............................................ Feekes 3 ............................................ Feekes 4 ............................................ Feekes 5 ............................................ Feekes 6 ............................................ Feekes 7 ............................................ Feekes 8 ............................................ Feekes 9 .........................................Feekes 10 ................................... Feekes 10.1 ................................... Feekes 10.2 ................................... Feekes 10.3 ................................... Feekes 10.4 ................................... Feekes 10.5 ...............................Feekes 10.5.1 ...............................Feekes 10.5.2 ...............................Feekes 10.5.3 ...............................Feekes 10.5.4 ................................... Feekes 11.1 ................................... Feekes 11.2 ................................... Feekes 11.3 ................................... Feekes 11.4
Other cereals .................................................. Barley ...................................................... Oats .........................................................Rye ..............................................Triticale
jointing
booting
floweringILLU
STRA
TED
GRO
WTH
STA
GES

References:
Large, E. C. (1954). Growth Stages in Cereals Illustration of the Feekes Scale. Plant Pathology, 3: 128–129. doi:10.1111/j.1365-3059.1954.tb00716.x
Feekes, Willem (1941). De Tarwe en Haar Milieu [Wheat and Its Environment]. Verslagen van de Technische Tarwe Commissie. (in Dutch (English summary)). 17: 523–888.
J.C. Zadoks, T.T. Chang, C.F. Konza. A Decimal Code for the Growth Stages of Cereals. Weed Research 1974 14:415-421.
IntroductionUnderstanding the growth stages of cereals crops and how to identify them is key to successful cropping and pest management decisions.
Although there are several growth staging methods, this guide is based on the Feekes scale, which is a popular tool used in the field. It has eleven development stages with some stages having more detailed subdivisions.
The Zadoks scale is the standard scale used in research and has ten development stages, each stage having ten subdivisions. Both scales are useful to know, so this guide cross-references the Zadoks equivalents to the Feekes.
This guide uses winter wheat as an example. However, the methods generally apply to other cereals as well and at the back of the guide are sections that showcase barley, oats, rye and triticale.
A few notes on growth staging plants:• Select plants that represent at least 50% of the field• Dig plants (if possible), so you can assess the entire plant• Start at the base of plant and work your way upward• Use a knife to split the stems and sheaths• Look and feel for nodes

Basic wheat anatomy
auricles
leaf sheath
leaf blade
4th leaf
5th leaf
3rd leaf
2nd leaf
nodal rootsseed
seminal roots
crown
1st leafcoleoptile tiller
first tiller
main shoot
second tiller
This illustration shows the basic anatomy of a Feekes 2 plant; the intention of the drawing is to illustrate and annotate an ideal plantPlants in the field are rarely ideal and are often missing leaves, tillers, etc.
During the vegetative stages,the auricles are often a good way to distinguish between different cereal crops
Wheat | Auricles blunt and hairy; leaf sheath and blade always hairy; ligule medium length; leaf blades twist clockwise

seed
lin
g g
row
th
1 One shoot, first leaf through coleoptile
till
erin
g
2 Tillering begins; main shoot and one tiller
3 Tillers formed; leaves often twisted In some varieties, plant may be prostrate in appearance
4 Leaf sheaths lengthen; beginning pseudostem erection
5 Leaf sheaths fully elongated to form strongly erect pseudostem
stem
exte
nsi
on 6 First node of stem visible at base of shoot; jointing
7 Second node of stem formed; next-to-last leaf just visible
8 Flag leaf visible but still rolled up
9 Ligule of flag leaf just visible
10 Flag leaf sheath completely grown out; booting
hea
din
g
10.1 First awns of head just visible
10.2 1/4 of heading process complete
10.3 1/2 of heading process complete
10.4 3/4 of heading process complete
10.5 All heads out of sheath
flo
wer
ing 10.5.1 Beginning of flowering
10.5.2 Flowering complete to top of head
10.5.3 Flowering complete at base of head
10.5.4 Flowering complete; kernel watery ripe
ripe
nin
g
11.1 Kernel milky ripe; milk stage
11.2 Kernel mealy ripe; soft but dry consistency; soft dough stage
11.3 Kernel hard; difficult to divide with thumbnail; hard dough stage
11.4 Kernel harvest ready; straw dead
Feekes scale for cereal growth stages

Zadoks scale for cereal growth stagesGe
rmina
tion
00 Dry seed01 Start of imbibition03 Imbibition complete05 Radicle emerged from seed Feekes
scale equivalent
07 Coleoptile emerged from seed09 Leaf just at coleoptile tip
Seed
ling g
rowt
h
10 First leaf through coleoptile 111 First leaf unfolded
till
erin
g
12 2 leaves unfolded13 3 leaves unfolded14 4 leaves unfolded15 5 leaves unfolded16 6 leaves unfolded17 7 leaves unfolded18 8 leaves unfolded19 9 or more leaves unfolded
Tiller
ing
20 Main shoot only21 Main shoot and 1 tiller 222 Main shoot and 2 tillers23 Main shoot and 3 tillers24 Main shoot and 4 tillers25 Main shoot and 5 tillers26 Main shoot and 6 tillers 327 Main shoot and 7 tillers28 Main shoot and 8 tillers29 Main shoot and 9 or more tillers
Stem
elon
gatio
n
30 Pseudostem erection 4-531 1st node detectable
stem
exte
nsi
on
632 2nd node detectable 733 3rd node detectable34 4th node detectable35 5th node detectable36 6th node detectable37 Flag leaf just visible 839 Flag leaf ligule/collar just visible 9
A leaf is unfolded when its ligule is visible, or the tip of the next leaf is visible

Boot
ing40 ---------
stem
exte
nsi
on
41 Flag leaf sheath extending45 Boot just visibly swollen 1047 Flag leaf sheath opening49 First awns visible
Inflo
resce
nce
emer
genc
e
50 First spikelet of inflorescence visible
hea
din
g
10.153 1/4 of inflorescence emerged 10.255 1/2 of inflorescence emerged 10.357 3/4 of inflorescence emerged 10.459 Emergence of inflorescence completed 10.5
Anth
esis 60 Beginning of anthesis
flo
wer
ing
10.5.165 Anthesis half-way 10.5.269 Anthesis completed 10.5.3
Milk
de
velop
men
t 70 ---------71 Kernel watery ripe 10.5.473 Early milk75 Medium milk
ripe
nin
g
11.177 Late milk
Doug
h de
velop
men
t 80 ---------83 Early dough85 Soft dough 11.287 Hard dough
Ripe
ning
90 ---------91 Kernel hard (difficult to divide with thumbnail) 11.392 Kernel hard (no longer dented with thumbnail) 11.493 Kernel loosening in daytime94 Overripe, straw dead and collapsing95 Seed dormant96 Viable seed giving 50% germination97 Seed not dormant98 Secondary dormancy induced99 Secondary dormancy lost

GerminationGermination begins when the dry seed imbibes water and begins to expand
Planting depth and soil temperature influence the duration of the germination stages
Zadoks 00Dry seed
Zadoks 01Start of imbibition
Zadoks 05Radicle emerged from seed
Zadoks 07Coleoptile emerged from seed
radicleThe first root
coleoptileThe round sheath that protects the first leaf
Zadoks 00-09
Ger
min
atio
n

Zadoks 09Leaf just at coleoptile tip
seed
The first true leaf emerges through the coleoptile’s tip
The coleoptile stops growth when it encounters light above the soil surface
The seminal roots begin developingSeminal roots are fibrous and are produced by the seed
Germ
ination

Feekes 1
EMERGENCE | Feekes 1 | One shoot formed; first leaf through coleoptileZadoks 10
Feekes
1

This is an important time to check plants for uniform emergence; planting depth and soil temperature influence the length of this stage
main shoot
Feekes
1

Feekes 2
TILLERING | Feekes 2 | Tiller development beginsZadoks 21
Feekes
2

Tillers produced in the fall will contribute more to grain yield than those produced in the spring
tillers
main shoot
The crown forms between the seed and soil surface
Feekes
2

The secondary root system starts
developing
tillers
tiller
tiller
prophyllThe independent sheath at the base of each tiller
main shoot
Feekes
2

A tiller is capable of forming a single head (spike)The head is made up of spikelets
Each spikelet contains individual floretsIndividual florets can produce a single kernel
are also called axillary or side shoots; not all tillers will complete development and produce grain
The total numbers of tillers a plant produces is determined by both
environmental conditions and genetic potential
Tillers are absolutely necessary for high yields
1 4-5planted seed
tillers
Are tillers important?
In Wisconsin, the recommended planting date range for optimal tiller development in winter wheat is September 20 to October 10
KEY YIELD COMPONENT
can produce
Feekes
2

Feekes 3
TILLERING | Feekes 3 | Tillering completedZadoks 22-29
Feekes
3

The secondary root system undergoes extensive development
main shoot
Tillers with 3 or more leaves will be nutritionally independent from the main shoot
tillers
Feekes
3

KEY YIELD COMPONENT
What happens during winter dormancy?
Vernalization! When temperatures fall below 50 degrees Fahrenheit
for typically 3-6 weeks, the plant initiates
differentiation
The growing point is at the double ridge stage and is still protected in the crown below the soil surface
The number of florets initiated during this stage will determine the potential number of kernels per head
the growing point changes from vegetative or leaf producing to
reproductive or spikelet producing
Tillering completes in fall, winter dormancy occurs
Tillering begins in the fall, winter dormancy occurs, tillering completes in the spring
FEEKES 3 SPRING
FEEKES 3 FALL
FEEKES 3 CAN OCCUR IN FALL OR SPRING because winter wheat development is dependent on both temperature and planting date
Feekes
3

regrowth
Dig plants as soon as the soil thaws, bring inside and place in a warm (preferably moist) area for a few days, then check for root regrowth
FACTORS AFFECTING WINTER SURVIVAL
Good snow cover acts as insulator; keeps soil temperature from going below critical levels
Cyclic freezing and thawing increases injury from ice crystal growth in tissue
Mid-winter thaw and rain cause flooding at the base of the plants; crowns can die at warmer temperatures
Ice encasement traps carbon dioxide and suffocates plant by inhibiting respiration
Frost heaving can push root system out of ground, leaving plants vulnerable and weak
Feekes
3Root regrowth will develop from the crown and appear a vibrant white compared to the older roots

4 STEPS TO ASSESS STANDS IN EARLY SPRING
1 Venture out and get a general overview of the fields — vibrant green patches may be interspersed with drab brown areas, but brown does not always indicate winter-killed plants
2 Check for winter survival — identify several representative plants and 1) dig plants and bring inside to check for root regrowth or 2) wait a week and revisit to check for regrowth in the field
3 Do a plant count below 12 live plants per square foot is an automatic replant; 12-15 live plants per square foot requires more consideration for a replant decision; 15-22 live plants per square foot may recover and reach maximum yield potential; over 22 live plants per square foot means you’re good to go!
4 Consider a nitrogen application — the optimal time to apply nitrogen to winter wheat in Wisconsin is during green up; for recommendations and rates, consult UW-Extension publication A2809 Nutrient Application Guidelines for Field, Vegetable and Fruit Crops in Wisconsin
4
GREEN UP

In Wisconsin, the growth stage at green up can be Feekes 3 or Feekes 4 depending on planting date and environmental conditions
How to do a plant countCount the number of plants in a 3-foot length
Do this for at least 3 areas
Take the average of the counts
Multiply that number by 4
Then divide by the row width (inches)
EXAMPLEThe 3 counted areas have 40, 35 and 45 plantsAdd 40, 35 and 45 and then divide by 3, the average = 40Multiply 40 x 4 = 160Divide 160 by 7.5 inches = 21 plants/square foot
GREEN UP

Feekes 4
TILLERING | Feekes 4 | Leaf sheaths lengthen, pseudostem erection beginsZadoks 30
Feekes
4

Wheat plants have a pseudostem, which is a false stem composed of concentric rolled leaf sheaths that surround the growing point (the developing head)
During this stage, these leaf sheaths lengthen, making the plants stand more upright
This is an important time for weed control and/or nitrogen applications
Feekes
4

Feekes 5
TILLERING | Feekes 5 | Leaf sheaths fully elongated, pseudostem strongly erect
This is the last stage that some herbicides can be used without risk of injury!
Always check and follow herbicide labels
Zadoks 30
Feekes
5

The growing point is at the terminal spikelet stage and about 1/4 inch above the crown
The number of spikelets per head has been determined by this stage
KEY YIELD COMPONENT
plants cut at soil surface
As the developing head is pushed up into the pseudostem, it becomes more vulnerable to damage
less t
han 1
/8 in
ch
Feekes
5

Feekes 6
1st node
1st node
STEM EXTENSION | Feekes 6 | First node of the stem visible at the base of the shoot; jointing
As the head moves up the stem, it is vulnerable to freeze injury during low temperatures!
Zadoks 31
Feekes
6

leaves removed to show nodes
A node is an area of active cell division from which leaves, tillers and adventitious roots develop
1st node
1st node
Feekes
6

The jointing stage is when the internodal tissue begins to elongate and pushes the four
nodes that are stacked in the crown upward, similar to how
a telescope works
A leaf arises from each of these nodes, with the 4th node giving rise to the flag leaf — the last
leaf the plant produces
The developing
head is located
above the nodes
1st node
2nd node
3rd node
4th node
The stem is hollow behind
the node
The space between the
nodes elongates and moves the
head upward
Feekes
6

The number of tillers that form heads has been determined by this stage
KEY YIELD COMPONENT
WATER USE INCR
EASE
S
Feekes 6 plant shown with all
leaves intact
From this growth stage forward, broken stems due to wheel traffic will result in yield loss!
The developing head is moving up the stem and needs to be protected
Feekes
6

Feekes 7
2nd node
1st node
scout now! this will give you the information you need to make good management decisions about protecting the flag leaf at the next stage
STEM EXTENSION | Feekes 7 | Two nodes visible above the soil lineZadoks 32
Feekes
7

location of developing
head
1st node
sheaths removed and stem slit to show head
(about 1-1/2 inches) and nodes
NUTRIENT USE
INCR
EASE
S
WATER USE INCR
EASE
S
3rd node
2nd node
4th node
This leaf arises from the 1st node
To demonstrate this, pull the leaf sheath back and downward; it will break off at the node
This leaf arises from the 2nd node
Feekes
7

Feekes 8
flag leaf
flag leaf
NUTRIENT USE
INCR
EASE
S
WATER USE INCR
EASE
S
FLAG LEAF FACTS
The flag leaf accounts for over 50% of the photosynthates used for grain development, a.k.a YIELD
It must be protected from disease or insect damage to ensure the plant’s full yield potential
Fungicide application decisions to protect the flag leaf should be made based on presence and severity of disease on the two leaves immediately below it
STEM EXTENSION | Feekes 8 | Flag leaf visible, still rolled up
This is a critical time to make foliar fungicide application decisions!
Zadoks 37
Feekes
8

HOW DO YOU KNOW IF IT’S THE FLAG LEAF?
Identify the leaf arising from the 1st node
Call this leaf #1 and count upward
The flag leaf will be leaf #4
The flag leaf arises from the 4th node
sheaths removed to show head and nodes
KEY YIELD COMPONENT
Kernel size is determined by crop health and water/nutrient availability beginning now and continuing through grain fill
3rd node
4th node
2nd node
This leaf arises from the 2nd node
This leaf arises from the 3rd node
This leaf arises from the 1st node (see tip on Feekes 7)
location of developing head
Feekes
8#2
#1
#3
#4

Feekes 9
STEM EXTENSION | Feekes 9 | Flag leaf fully emerged from the whorl; ligule just visibleZadoks 39
Feekes
9

leaf collarThe area on the outer side of the leaf where the blade and the sheath join
ligule
flag leaf
continue to scout for insect pests and diseases !
The ligule is a narrow membranous scale on the inner side of the leaf sheath at its junction with the blade
Feekes
9

Feekes 10
At this stage, the Feekes scale subdivides:10.1 Head emerging10.2 Heading 1/4 complete10.3 Heading 1/2 complete10.4 Heading 3/4 complete10.5 Heading complete
location of developing head
continue to scout for insect pests and diseases !
and then subdivides again 10.5.1 Beginning flowering10.5.2 Flowering complete to top of spike10.5.3 Flowering complete at base of spike10.5.4 Kernels watery ripe
STEM EXTENSION | Feekes 10 | Flag leaf sheath completely grown out; head visible in the
leaf sheath; bootingZadoks 45
Feekes
10

The developing head is pushed through the flag leaf sheath as the peduncle and sheath elongate
sheath removed to show detail of developing head
peduncle
spikelets
awnsThe stem that supports the head
approximately 3 inches long
Feekes
10

Feekes 10.1
During head emergence, the tiller’s development synchronizes with the main stem
The result is that flowering occurs simultaneously throughout the plant, even though the tillers may have emerged at different times
As the leaf sheath splits, the awns become visible
Awns are the slender bristles that extend from the floret; some wheat varieties are awnless (also called beardless)
HEADING | Feekes 10.1 | First awns of the head just visibleZadoks 50
Feekes
10.1

Feekes 10.1
Feekes 10.2
When determining the growth stage of a field, 50% of the plants must be at that stage or above
Feekes
10.1

Feekes 10.2
HEADING | Feekes 10.2 | 1/4 of the head emerged from the leaf sheathZadoks 53
Feekes
10.2

Feekes 10.1
Feekes 10.2
sheaths removed to show
developing heads
Feekes
10.2

Feekes 10.3
HEADING | Feekes 10.3 | 1/2 of the head emerged from the leaf sheathZadoks 55
Feekes
10.3

The 5th or apical floret is sterile
spikeletSubdivision of the head that contains the florets
glumesThe pair of husks that contain the spikelet
pedicelConnects the spikelet to the rachis (the stem of the head)
palea
lemmaThe outer, lower bract that encloses the flower in a floret: also where the awn extends from
2
1
3
45
anther
stigma
ovary
The inner, upper bract that encloses the flower in a floret
1st or primary floret opened to show the stigma and ovary (female flower parts) and the three anthers (male flower parts)
spikelet opened to show detail
Feekes
10.3

Feekes 10.4
HEADING | Feekes 10.4 | 3/4 of the head emerged from the leaf sheathZadoks 57
Feekes
10.4

Feekes
10.4
peduncle
head lifted out of sheath to show elongating peduncle

Feekes 10.5
HEADING | Feekes 10.5 | Head completely emerged from the leaf sheathZadoks 59
Feekes
10.5

This stage completes the heading process
Feekes
10.5

Feekes 10.5.1
Flowering begins slightly above the middle portion of the head and continues towards the top
Starting now and continuing 5-7 days after this stage is the optimum time for fungicide application to suppress Fusarium head blight (FHB), also called head scab
FLOWERING | Feekes 10.5.1 | Beginning of floweringZadoks 60
Feekes
10.5.1

The number of flowers pollinated determines the number of kernels that will develop
KEY YIELD COMPONENT
Anthers dangle outside the florets during flowering
awn
The male flower part that produces and releases pollen
The powder-like grains that enable fertilization
pollen
anther
This stage begins shortly after the head has completely emerged from the leaf sheath
Feekes
10.5.1

Feekes 10.5.2
The developing head is still vulnerable to freeze injury during low temperatures
Flowering continues toward the base
FLOWERING | Feekes 10.5.2 | Flowering complete to the top of the headZadoks 65
Feekes
10.5.2

floret opened shortly after pollination to show developing kernel
Anthers fade to white as flowering
completes at the top of the head,
while those toward the base are still brightly
colored
Feekes
10.5.2

Feekes 10.5.3
FLOWERING | Feekes 10.5.3 | Flowering complete at the base of the headZadoks 69
Feekes
10.5.3

floret outer structure removed to show developing kernel
This stage signals the end of pollination
Feekes
10.5.3

Feekes 10.5.4
FLOWERING | Feekes 10.5.4 | Flowering complete; kernel watery ripe
This is the beginning of the grain filling stages; kernel length is established during this stage
Zadoks 71
Feekes
10.5.4

Kernel size increases but not dry matter
accumulation
When squeezed, clear fluid is released from the kernel
developing kernel with desiccated anthers still attached
Feekes
10.5.4

Feekes 11.1
RIPENING | Feekes 11.1 | Kernel milky ripe; milk stageZadoks 75
Feekes
11.1

Dry matter accumulates in the kernel
Feekes
11.1
When squeezed, milk-like fluid is released from the kernel

Feekes 11.2
RIPENING | Feekes 11.2 | Kernel mealy ripe; soft but dry consistency; soft dough stageZadoks 85
Feekes
11.2

Starch, nutrients and dry matter accumulate rapidly in the kernel
The kernel’s content is a soft-doughy material
Green color of the kernel, glume and peduncle begins to fade
Feekes
11.2

Feekes 11.3
RIPENING | Feekes 11.3 | Kernel hard; difficult to divide with a thumbnail; hard dough stageZadoks 91
Feekes
11.3

Kernels reach their maximum dry weight and are physiologically mature
Kernel moisture
decreases from 40% to 30%
Feekes
11.3

Feekes 11.4
Kernel moisture
decreases from 30% to 15%
RIPENING | Feekes 11.4 | Kernel harvest ready; straw deadZadoks 92
Feekes
11.4

Green plant tissue fades to straw
Feekes
11.4

Other cereals
BarleyOther cereals
To distinguish barley from wheat during the vegetative stages, check the auricles — barley auricles are long, slender and hairless, while wheat auricles are blunt and hairy
Barley | Auricles long, slender and hairless; leaf sheath and blade usually hairless (scattered hairs on some varieties); ligule medium length; leaf blades twist clockwise

Other cereals

Oats
Other cereals
To distinguish oats from wheat during the vegetative stages, check the auricles — oats lack auricles, while wheat auricles are blunt and hairy
Oats | Auricles absent; leaf sheath and blade hairless (scattered hair on some varieties); ligule medium length; leaf blades twist counter-clockwise

Other cereals
A simple method to distinguish oats from all other cereals during the vegetative stages is to observe the twist of the leaves; when viewing from above, oat leaves will have a counter-clockwise curl, all other cereals’ leaves curl clockwise
Oats
All other cereals

Rye
Other cereals
To distinguish rye from wheat during the vegetative stages, check the auricles — rye auricles are short and hairless, while wheat auricles are blunt and hairy
Rye | Auricles very short and hairless; leaf sheath and blade have an inconsistent degree of hairiness; ligule short; leaf blades twist clockwise

Other cereals

Triticale
Other cereals
The auricles of both triticale and wheat are blunt and hairy, so they are difficult to distinguish from each other during the vegetative stageAn alternative method is to remove a seedling from the soil and check the grain shell; triticale shells are oblong in shape and dark in color, while wheat grain shells are oval and lighter
Triticale | Auricles blunt and hairy, leaf sheath and blade hairy; ligule of medium length; leaf blades twist clockwise

Other cereals
Authors Mimi Broeske, Nutrient and Pest Management Program; Shawn Conley, John Gaska and Adam Roth, Department of Agronomy; University of Wisconsin-Madison, College of Agricultural and Life Sciences and Division of Extension
Acknowledgements The authors would like to thank our external reviewers: Mike Cerny, Walworth County farmer Dr. Chad Lee, University of Kentucky Dr. David Marburger, Oklahoma State University
This publication is available from the Nutrient and Pest Management Program: web (ipcm.wisc.edu); phone (608) 265-2660; email ([email protected])
NPM02-2020-2M
An EEO/AA employer, University of Wisconsin-Madison Division of Extension provides equal opportunities in employment and programming, including Title VI, Title IX, the Americans with Disabilities Act (ADA) and Section 504 of the Rehabilitation Act requirements.