Video Surveillance over BGAN - Global Satellite Internet & Phone
21
1/21 Video Surveillance over BGAN BGAN solutions guide Video Surveillance over BGAN Version 01 10.10.06 www.inmarsat.com/bgan Whilst the information has been prepared by Inmarsat in good faith, and all reasonable efforts have been made to ensure its accuracy, Inmarsat makes no warranty or representation as to the accuracy, completeness or fitness for purpose or use of the information. Inmarsat shall not be liable for any loss or damage of any kind, including indirect or consequential loss, arising from use of the information and all warranties and conditions, whether express or implied by statute, common law or otherwise, are hereby excluded to the extent permitted by English law. INMARSAT is a trademark of the International Mobile Satellite Organisation, Inmarsat LOGO is a trademark of Inmarsat (IP) Company Limited. Both trademarks are licensed to Inmarsat Global Limited. © Inmarsat Global Limited 2006. All rights reserved.
Transcript of Video Surveillance over BGAN - Global Satellite Internet & Phone
1/21 Video Surveillance over BGAN
BGAN solutions guide
Video Surveillance over BGAN Version 01 10.10.06
www.inmarsat.com/bgan Whilst the information has been prepared by Inmarsat in good faith, and all reasonable efforts have been made to ensure its accuracy, Inmarsat makes no warranty or representation as to the accuracy, completeness or fitness for purpose or use of the information. Inmarsat shall not be liable for any loss or damage of any kind, including indirect or consequential loss, arising from use of the information and all warranties and conditions, whether express or implied by statute, common law or otherwise, are hereby excluded to the extent permitted by English law. INMARSAT is a trademark of the International Mobile Satellite Organisation, Inmarsat LOGO is a trademark of Inmarsat (IP) Company Limited. Both trademarks are licensed to Inmarsat Global Limited. © Inmarsat Global Limited 2006. All rights reserved.

2/21 Video Surveillance over BGAN
Contents 1.0. Introduction ....................................................................................................3
1.1. About this guide.....................................................................................................................3 1.2. Other sources of information ............................................................................................3
2.0. Introducing video surveillance over BGAN .................................................4
2.1. Introducing video surveillance............................................................................................4 3.0. Understanding protocols ...............................................................................5
3.1. Selecting the right terminal and Quality of Service .......................................................5 3.2. Understanding compression ...............................................................................................5 3.3. Protocols used .......................................................................................................................6
4.0. Using video surveillance solutions over BGAN ...........................................7 5.0. Using the D-Link IP Surveillance suite .........................................................7
5.1. Setting up the camera...........................................................................................................8 5.2. Sending snapshots via mail or FTP server .....................................................................11 5.3. Performance over BGAN..................................................................................................13
6.0. Using the Sony RZ30P network camera ....................................................14
6.1. Setting up the camera.........................................................................................................15 6.2. Configuring the camera for BGAN.................................................................................16 6.3. Configuring the HNS 9201................................................................................................17 6.4. Sending Images via mail or FTP server ...........................................................................17 6.5. Setting the Activity Detection function..........................................................................17 6.6. Performance over BGAN..................................................................................................18
7.0. Using the AXIS 2100 camera on a network ..............................................18
7.1. Assigning an IP Address to the AXIS 2100 ...................................................................19 7.2. Using Administration Tools ..............................................................................................20 7.3. Performance over BGAN..................................................................................................21
8.0. Support and feedback ..................................................................................21
3/21 Video Surveillance over BGAN
1.0. Introduction 1.1. About this guide
This document describes the use of Live video surveillance applications over the BGAN network, explains the protocols used and how to optimize them, and introduces some common off-the-shelf solutions. This document is intended for end users, Distribution Partners and Service Providers who either want to integrate an existing solution or looking for new audio/video surveillance solution over BGAN. A previous knowledge of satellite communications is useful, but not essential. The sections include:
• Introducing video surveillance over BGAN – a brief introduction to the surveillance types and connection options available.
• Understanding protocols – discusses the terminal and connection options available over BGAN, the compression types for still and moving image and the connection protocols used.
• Using video surveillance solutions over BGAN – introduces the tested solutions, and gives some guidance on optimizations.
• Using the D-Link IP Surveillance suite - gives performance measurements, explains how to set up the camera, and how to send images.
• Using the Sony RZ30P network camera - gives performance measurements, explains how to set up the camera, and how to send images.
• Using the AXIS 2100 camera on a network - gives performance measurements, explains how to set up the camera, and how to send images.
• 1.2. Other sources of information
• This is one of a series of PDF documents that make up the BGAN Solutions Guide. The Solutions Guide is designed to help you make the most of your BGAN terminal. Other documents in the series are available for download from www.inmarsat.com/bgan. Click on BGAN support, then click on How to guides. This Web site also gives further information on the BGAN service, including Industry solutions.
• Refer to “BGAN LaunchPad Help” for details on using BGAN LaunchPad.
• Refer to the documentation supplied with your video conferencing software for details on changing configuration and settings.
4/21 Video Surveillance over BGAN
2.0. Introducing video surveillance over BGAN The BGAN service enables remote offices or users to establish audio/video communications with company headquarters or business partners anywhere in the world. Audio/Video solutions are divided into 3 main categories. This guide covers Live video surveillance only. Each of the other categories is covered by its own Solutions Guide; refer to the appropriate guide for details on the other categories.
• Remote surveillance solutions (Remote IP camera) – typically, a one-way JPEG or motion video clip from field to fixed office when motion is detected; alternatively, the fixed office can access a live video stream remotely.
• Broadcasting solutions (Encoder & Decoder based) o Typically the one-way broadcast of live audio/video from the field. o Includes a high quality Store-and-Forward option for near real-time breaking news
coverage. • Video conferencing solutions (Hardware or Software based) – typically, two-way video
conferencing between remote and fixed office.
2.1. Introducing video surveillance A typical video surveillance solution over BGAN is made up of an IP camera connected to a BGAN terminal via Ethernet or WiFi, normally in an unmanned or semi-manned location. The camera sends a JPEG images or motion video clip to a specified location when it detects a motion. This type of solutions is designed for Security agencies, Government sites, Remote offices, warehouses and pipeline monitoring. Typically, this solution only uses uplink from the terminal to send images. Downlink can only be used to access the camera from fixed office to view live video stream. Remote surveillance solutions usually require a standard IP data connection to transmit still images. There are many IP camera solutions available on the market, and they offer a choice of image transfer method, including email or FTP back to HQ. These IP cameras also support live streaming option, where a user at HQ can login via web browser and access a live video stream. The live video stream can be accessed over TCP or UDP, and can be pre-defined in the camera before deployment. Refer to “Understanding protocols” on page 5 for details on the available settings.
5/21 Video Surveillance over BGAN
3.0. Understanding protocols This section explains IP data connections over BGAN, data compression algorithms, and the data transfer protocols and audio/video protocols used to ensure effective remote surveillance over BGAN.
3.1. Selecting the right terminal and Quality of Service The BGAN terminal provides two classes of connection: standard IP and streaming IP. On a standard IP connection, traffic throughput varies depending on terminal and network usage. Streaming IP differs from standard IP in that it offers a guaranteed, consistent connection rate, provided network resources are available end to end. TIP: Inmarsat strongly recommends that you use a standard IP data connection for
JPEG transmission, and a streaming IP data connection for live video stream. The streaming rates provided by the BGAN terminals differ, as shown in the following table:
Terminal Standard IP (maximum)
Streaming IP
HNS 9201
Thrane & Thrane EXPLORER 700
492kbps send
492kbps receive
32kbps, 64kbps, 128kbps, 256kbps
Thrane & Thrane EXPLORER 500 464 kbps send
448 kbps receive
32kbps, 64kbps, 128kbps
Nera WorldPro 1000/1010
Thrane & Thrane EXPLORER 300
384kbps send
240kbps receive
32kbps, 64kbps
3.2. Understanding compression
The type of compression used varies depending on whether you use JPEG or MPEG files. JPEG Compression JPEG compression is typically used in IP cameras when transferring still images back to HQ. JPEG compression is a lossy compression, which means you lose some quality from original picture quality However, lossy compression reduces the size of the data stream by discarding some data during the encoding process before it is sent over the BGAN network. Lossy compression offers data savings of around 10:1. JPEG compression uses one of the most effective algorithms available to image compression. The method is particularly effective as it groups together individual pixels into 8x8 blocks to average out colour content. For example, a typical 6MP camera might produce a RAW uncompressed file between 5-10MB depending on the complexity of the content. The same image taken as a JPEG file could typically be around 1MB or sometimes less. Once received on the client side, the codec attempts to reconstruct the information that was lost or discarded. The tested applications described in the document allow you to change various settings, which can make a difference in the way the application works over BGAN.
6/21 Video Surveillance over BGAN
MPEG Compression MPEG compression is typically used in IP cameras for live streaming. The MPEG range has different options: MPEG 1, MPEG 2 and MPEG 4. MPEG 1 and 2 are video-only formats. MPEG 4 is mainly targeted at low bandwidth, with scalable resolution. MPEG compression uses encoding motion vectors, so that only the portions of the picture that move are encoded. Pixels are grouped into blocks, and only the blocks that change between frames are re-encoded and sent across. This uses fewer bits, resulting in significant compression.
3.3. Protocols used Inmarsat recommends that you use a streaming IP connection to send and receive video data. A number of protocols can be used alongside the streaming connection to control the data flow and provide additional video surveillance capabilities. The following two transport protocols are for the general transmission of data over IP: • TCP • UDP These protocols are described below. TCP and UDP TCP and UDP are transport protocols that are used to transmit data over IP connections. The TCP protocol is configured to deliver data from end to end in a reliable manner. It is connection- oriented, and provides flow control and retransmission of lost packets. The UDP protocol is connectionless, and does not guarantee reliability, flow control or detection of lost packets. TCP/IP application will be more effective over Standard IP due to the nature of BGAN Standard IP service. Typical corporate application such as email, Web browsing, FTP and so on use TCP. UDP is more suited to Streaming IP because if packets are lost, they are ignored and packet transmission continues. This may cause a slight loss of quality in the transmission, but the transmission is not interrupted. If the same packets were lost over a TCP connection, TCP would stop delivery of further packets until the lost packets are successfully been retransmitted. This would cause an unacceptable break in the flow of the application. Therefore, UDP thus gives streaming applications greater control over the data flow than TCP. These characteristics mean that majority of the audio video applications use a combination of TCP and UDP where needed. Typically, call set-up and data flow control is carried out using TCP. The audio and video data is sent using UDP. TIP: BGAN LaunchPad allows the configuration of error correction. Inmarsat
recommends that you disable error correction for UDP applications. Refer to “BGAN LaunchPad Help” for details.
7/21 Video Surveillance over BGAN
4.0. Using video surveillance solutions over BGAN This section introduces the solutions tested over BGAN network, and gives recommendations for optimizing their use. A number of remote surveillance solutions have been tested over the BGAN network. These include: • D-Link DCS-6600 Series – DCS-6620G, DCS-6620 • D-Link DCS-5300 Series – DCS-5300G, DCS-5300 • D-Link DCS-3200 Series – DCS-3220G , DCS-3220 • D-Link DCS-2100 Series – DCS-2100G, DCS-2100 • Sony RZ30P • Axis Network Camera 2100 Each of the above applications is described in greater detail in the following sections. TIP: Inmarsat recommends the following for effective use of video surveillance
cameras over BGAN: • Your camera supports motion detection. • You upload high quality images using FTP over Email • You use the Standard IP data connection for JPEG images, to save cost and
resources. • You use a Streaming IP data connection to access live streaming images
from HQ. • If you use the automatic registration and automatic IP data connection
options, you must switch off the BGAN terminal when it is not in use.
5.0. Using the D-Link IP Surveillance suite The D-Link IP Surveillance suite is a low-cost solution that you can use with BGAN to monitor a number of remote locations simultaneously from one central location. You could connect cameras to a number of terminals around the world, and monitor them all from a single location. D-Link network cameras allow you to either receive automatic images over the Standard IP data connection, or view live streaming from fixed central location over a Streaming IP data connection. This section document covers following D-Link Series:
• DCS-6600 Series - DCS-6620G, DCS-6620. • DCS-5300 Series - DCS-5300G, DCS-5300. • DCS-3200 Series - DCS-3220G, DCS-3220. • DCS-2100 Series - DCS-2100G, DCS-2100.
8/21 Video Surveillance over BGAN
Pre-requisites To use one of these a video surveillance solutions over BGAN, you must have the following equipment:
• BGAN terminal, with the following configuration: o Static IP address. o Automatic registration. o Automatic IP data connection. o SMTP address from Distribution Partner/Service Provider (where applicable). o FTP server address (where applicable).
• Network camera.
5.1. Setting up the camera To set up the D-Link camera for use over BGAN, do the following:
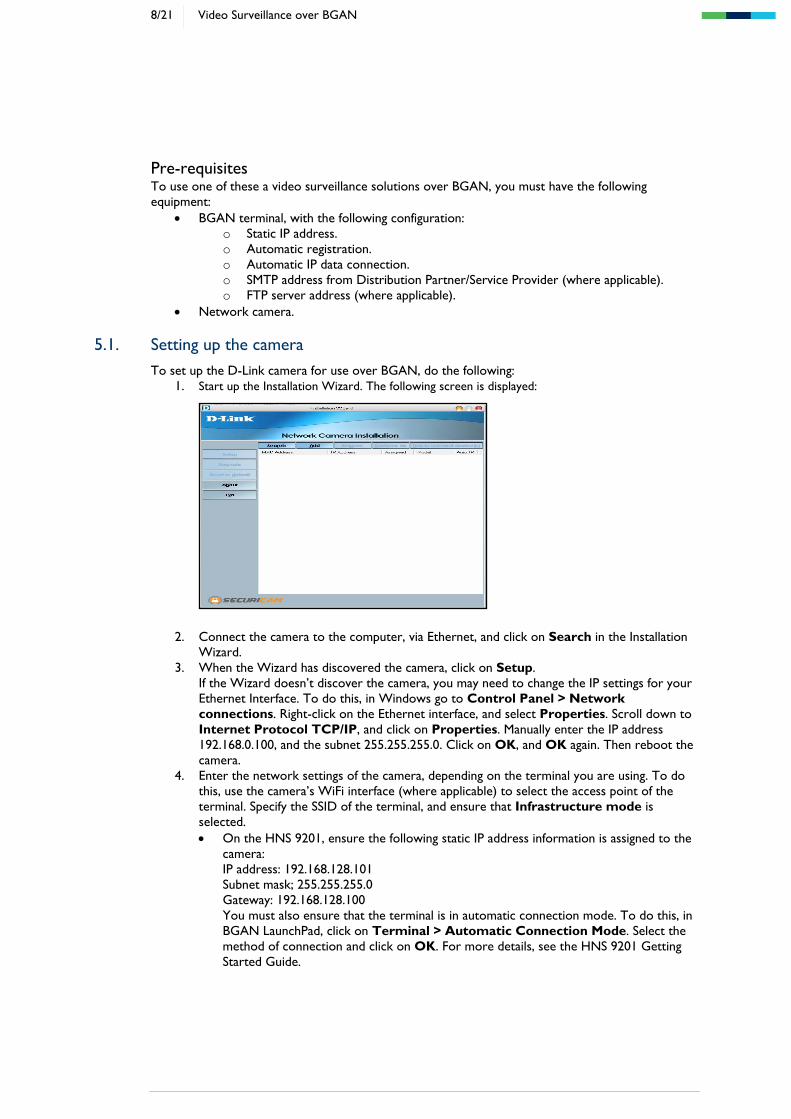
1. Start up the Installation Wizard. The following screen is displayed:
2. Connect the camera to the computer, via Ethernet, and click on Search in the Installation Wizard.
3. When the Wizard has discovered the camera, click on Setup. If the Wizard doesn’t discover the camera, you may need to change the IP settings for your Ethernet Interface. To do this, in Windows go to Control Panel > Network connections. Right-click on the Ethernet interface, and select Properties. Scroll down to Internet Protocol TCP/IP, and click on Properties. Manually enter the IP address 192.168.0.100, and the subnet 255.255.255.0. Click on OK, and OK again. Then reboot the camera.
4. Enter the network settings of the camera, depending on the terminal you are using. To do this, use the camera’s WiFi interface (where applicable) to select the access point of the terminal. Specify the SSID of the terminal, and ensure that Infrastructure mode is selected. • On the HNS 9201, ensure the following static IP address information is assigned to the
camera: IP address: 192.168.128.101 Subnet mask; 255.255.255.0 Gateway: 192.168.128.100 You must also ensure that the terminal is in automatic connection mode. To do this, in BGAN LaunchPad, click on Terminal > Automatic Connection Mode. Select the method of connection and click on OK. For more details, see the HNS 9201 Getting Started Guide.
9/21 Video Surveillance over BGAN
• For the Thrane & Thrane EXPLORER 700, make sure that the terminal is in Modem Mode, and the camera is set to DHCP. The user in the central location must know the static IP address of the terminal. If the terminal is in Modem mode, then you must set up DDNS server in the Installation Wizard. To do this, go to Configuration > Advanced, and go to the DDNS section.
5. Disconnect and reconnect the camera. The LED turns solid blue to indicate that the camera is connected to the terminal via WiFi. If it does not, reboot the camera by disconnecting its power supply.
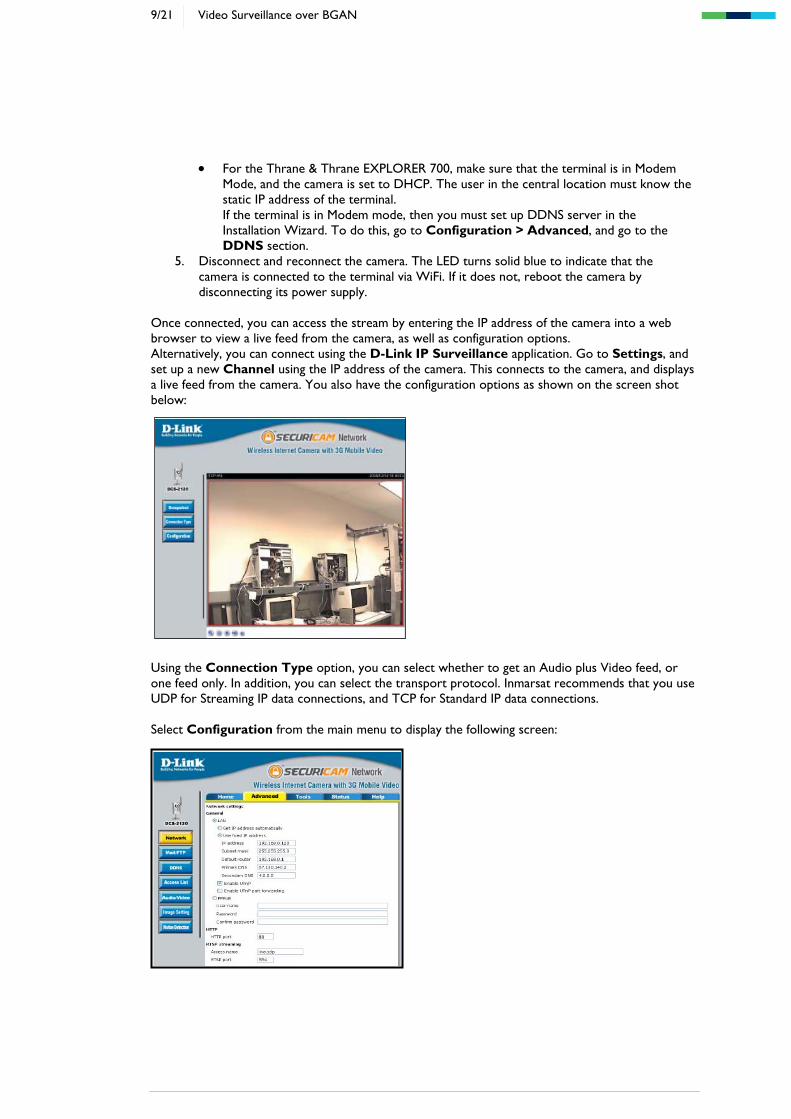
Once connected, you can access the stream by entering the IP address of the camera into a web browser to view a live feed from the camera, as well as configuration options. Alternatively, you can connect using the D-Link IP Surveillance application. Go to Settings, and set up a new Channel using the IP address of the camera. This connects to the camera, and displays a live feed from the camera. You also have the configuration options as shown on the screen shot below: Using the Connection Type option, you can select whether to get an Audio plus Video feed, or one feed only. In addition, you can select the transport protocol. Inmarsat recommends that you use UDP for Streaming IP data connections, and TCP for Standard IP data connections.
Select Configuration from the main menu to display the following screen:
10/21 Video Surveillance over BGAN
In the Advanced tab, you can: • Change network settings using the Network option. • Change mail and FTP servers for sending snapshots using the Mail/FTP option. See
“Sending snapshots via mail or FTP server” on page 11 for details. • Set up a DDNS server using the DDNS option.
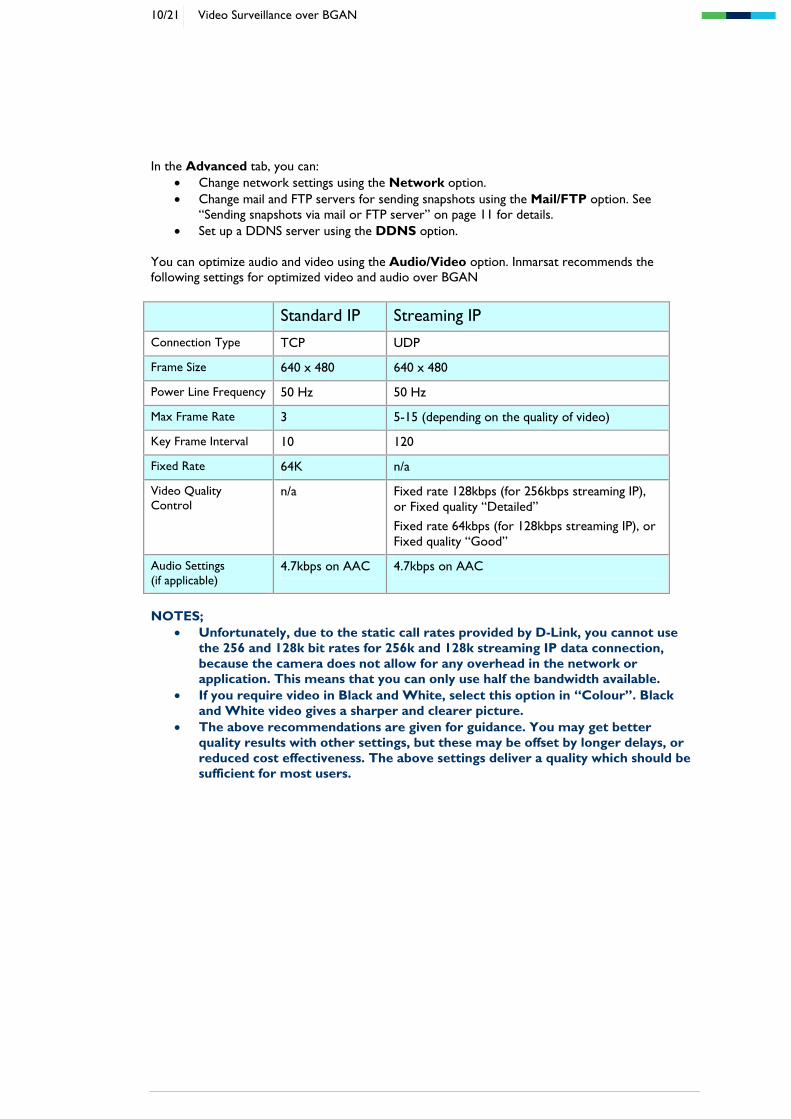
You can optimize audio and video using the Audio/Video option. Inmarsat recommends the following settings for optimized video and audio over BGAN
Standard IP Streaming IP
Connection Type TCP UDP
Frame Size 640 x 480 640 x 480
Power Line Frequency 50 Hz 50 Hz
Max Frame Rate 3 5-15 (depending on the quality of video)
Key Frame Interval 10 120
Fixed Rate 64K n/a
Video Quality Control
n/a Fixed rate 128kbps (for 256kbps streaming IP), or Fixed quality “Detailed”
Fixed rate 64kbps (for 128kbps streaming IP), or Fixed quality “Good”
Audio Settings (if applicable)
4.7kbps on AAC 4.7kbps on AAC
NOTES;
• Unfortunately, due to the static call rates provided by D-Link, you cannot use the 256 and 128k bit rates for 256k and 128k streaming IP data connection, because the camera does not allow for any overhead in the network or application. This means that you can only use half the bandwidth available.
• If you require video in Black and White, select this option in “Colour”. Black and White video gives a sharper and clearer picture.
• The above recommendations are given for guidance. You may get better quality results with other settings, but these may be offset by longer delays, or reduced cost effectiveness. The above settings deliver a quality which should be sufficient for most users.
11/21 Video Surveillance over BGAN
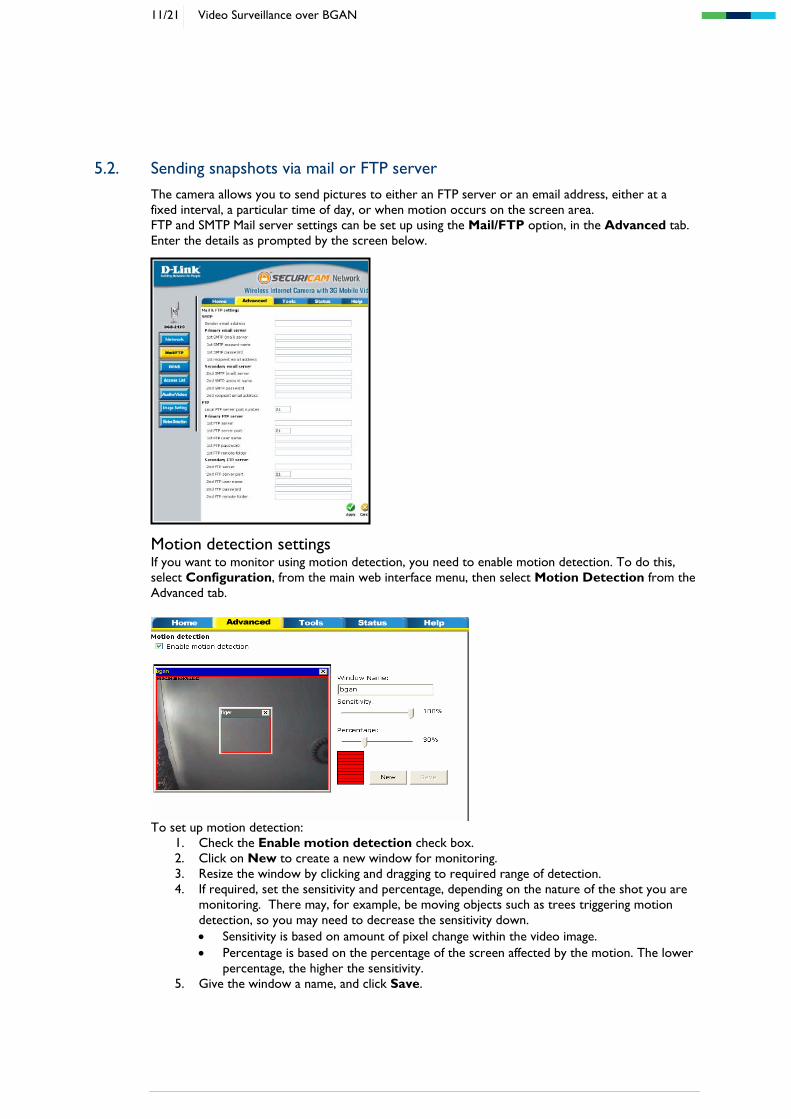
5.2. Sending snapshots via mail or FTP server The camera allows you to send pictures to either an FTP server or an email address, either at a fixed interval, a particular time of day, or when motion occurs on the screen area. FTP and SMTP Mail server settings can be set up using the Mail/FTP option, in the Advanced tab. Enter the details as prompted by the screen below.
Motion detection settings If you want to monitor using motion detection, you need to enable motion detection. To do this, select Configuration, from the main web interface menu, then select Motion Detection from the Advanced tab.
To set up motion detection:
1. Check the Enable motion detection check box. 2. Click on New to create a new window for monitoring. 3. Resize the window by clicking and dragging to required range of detection. 4. If required, set the sensitivity and percentage, depending on the nature of the shot you are
monitoring. There may, for example, be moving objects such as trees triggering motion detection, so you may need to decrease the sensitivity down. • Sensitivity is based on amount of pixel change within the video image. • Percentage is based on the percentage of the screen affected by the motion. The lower
percentage, the higher the sensitivity. 5. Give the window a name, and click Save.
12/21 Video Surveillance over BGAN
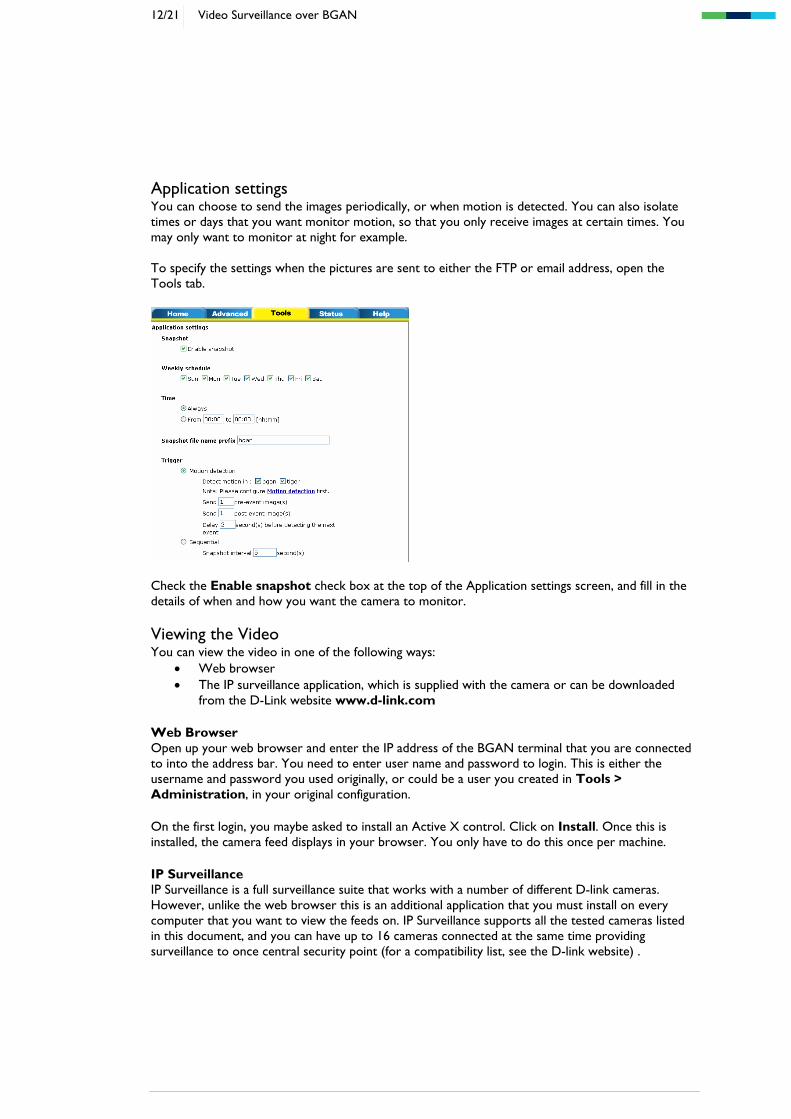
Application settings You can choose to send the images periodically, or when motion is detected. You can also isolate times or days that you want monitor motion, so that you only receive images at certain times. You may only want to monitor at night for example. To specify the settings when the pictures are sent to either the FTP or email address, open the Tools tab.
Check the Enable snapshot check box at the top of the Application settings screen, and fill in the details of when and how you want the camera to monitor. Viewing the Video You can view the video in one of the following ways:
• Web browser • The IP surveillance application, which is supplied with the camera or can be downloaded
from the D-Link website www.d-link.com Web Browser Open up your web browser and enter the IP address of the BGAN terminal that you are connected to into the address bar. You need to enter user name and password to login. This is either the username and password you used originally, or could be a user you created in Tools > Administration, in your original configuration. On the first login, you maybe asked to install an Active X control. Click on Install. Once this is installed, the camera feed displays in your browser. You only have to do this once per machine. IP Surveillance IP Surveillance is a full surveillance suite that works with a number of different D-link cameras. However, unlike the web browser this is an additional application that you must install on every computer that you want to view the feeds on. IP Surveillance supports all the tested cameras listed in this document, and you can have up to 16 cameras connected at the same time providing surveillance to once central security point (for a compatibility list, see the D-link website) .
13/21 Video Surveillance over BGAN
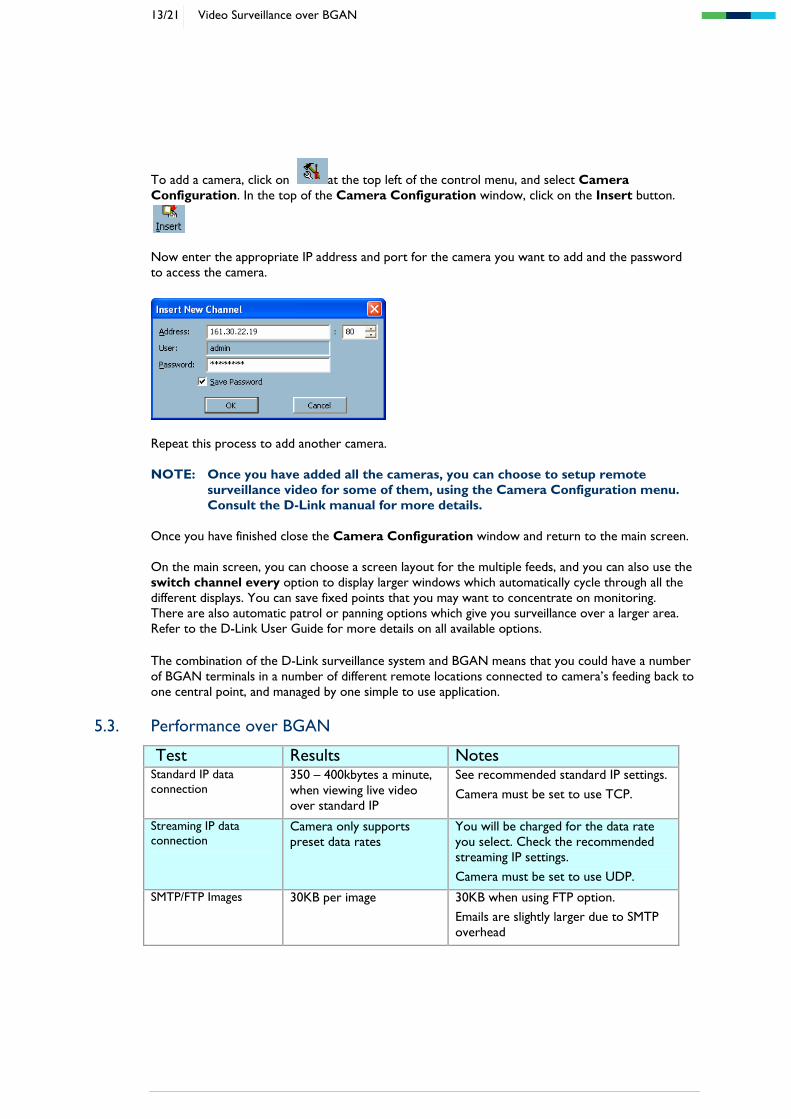
To add a camera, click on at the top left of the control menu, and select Camera Configuration. In the top of the Camera Configuration window, click on the Insert button. Now enter the appropriate IP address and port for the camera you want to add and the password to access the camera.
Repeat this process to add another camera. NOTE: Once you have added all the cameras, you can choose to setup remote
surveillance video for some of them, using the Camera Configuration menu. Consult the D-Link manual for more details.
Once you have finished close the Camera Configuration window and return to the main screen. On the main screen, you can choose a screen layout for the multiple feeds, and you can also use the switch channel every option to display larger windows which automatically cycle through all the different displays. You can save fixed points that you may want to concentrate on monitoring. There are also automatic patrol or panning options which give you surveillance over a larger area. Refer to the D-Link User Guide for more details on all available options. The combination of the D-Link surveillance system and BGAN means that you could have a number of BGAN terminals in a number of different remote locations connected to camera’s feeding back to one central point, and managed by one simple to use application.
5.3. Performance over BGAN
Test Results Notes Standard IP data connection
350 – 400kbytes a minute, when viewing live video over standard IP
See recommended standard IP settings.
Camera must be set to use TCP.
Streaming IP data connection
Camera only supports preset data rates
You will be charged for the data rate you select. Check the recommended streaming IP settings.
Camera must be set to use UDP.
SMTP/FTP Images 30KB per image 30KB when using FTP option.
Emails are slightly larger due to SMTP overhead
14/21 Video Surveillance over BGAN
Recommendations • Due to the nature of IP surveillance, and the amount of time you may be connected,
Inmarsat recommends that you use a Standard IP data connection. Recommended settings for a streaming IP data connection have been supplied for reference.
• If you use the automatic registration and automatic IP data connection options, you must switch off the BGAN terminal when it is not in use.
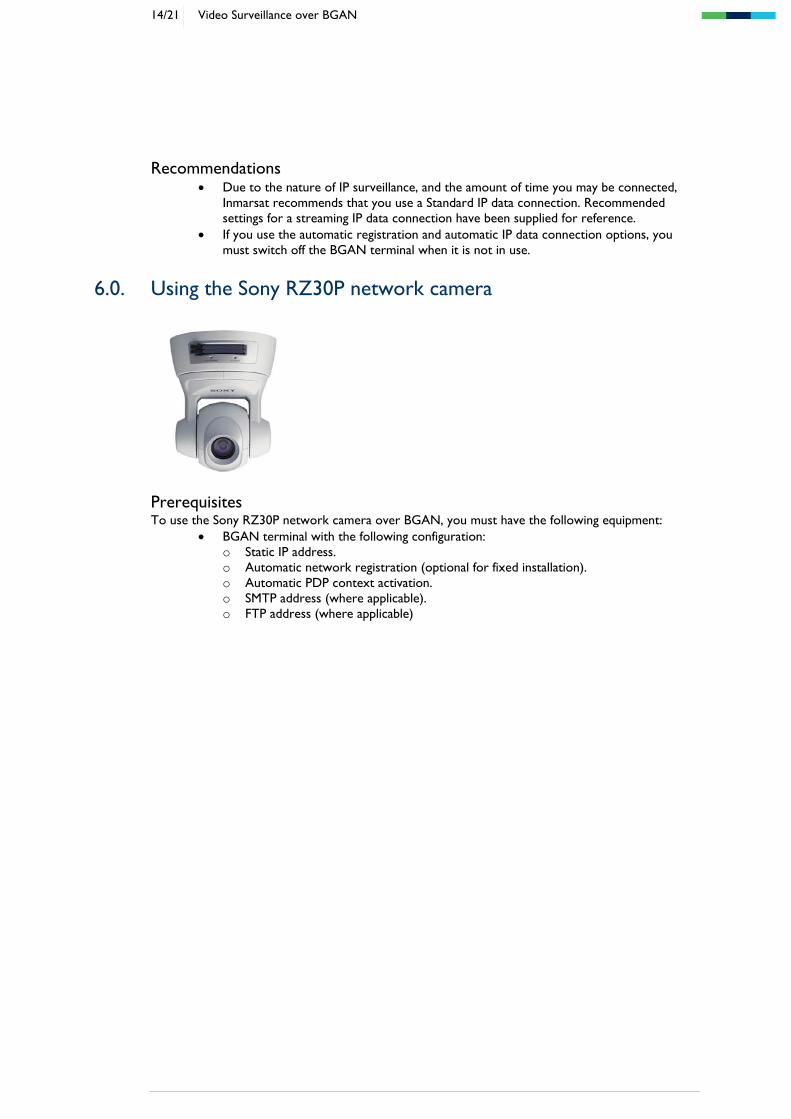
6.0. Using the Sony RZ30P network camera
Prerequisites To use the Sony RZ30P network camera over BGAN, you must have the following equipment:
• BGAN terminal with the following configuration: o Static IP address. o Automatic network registration (optional for fixed installation). o Automatic PDP context activation. o SMTP address (where applicable). o FTP address (where applicable)
15/21 Video Surveillance over BGAN
6.1. Setting up the camera To set up the camera:
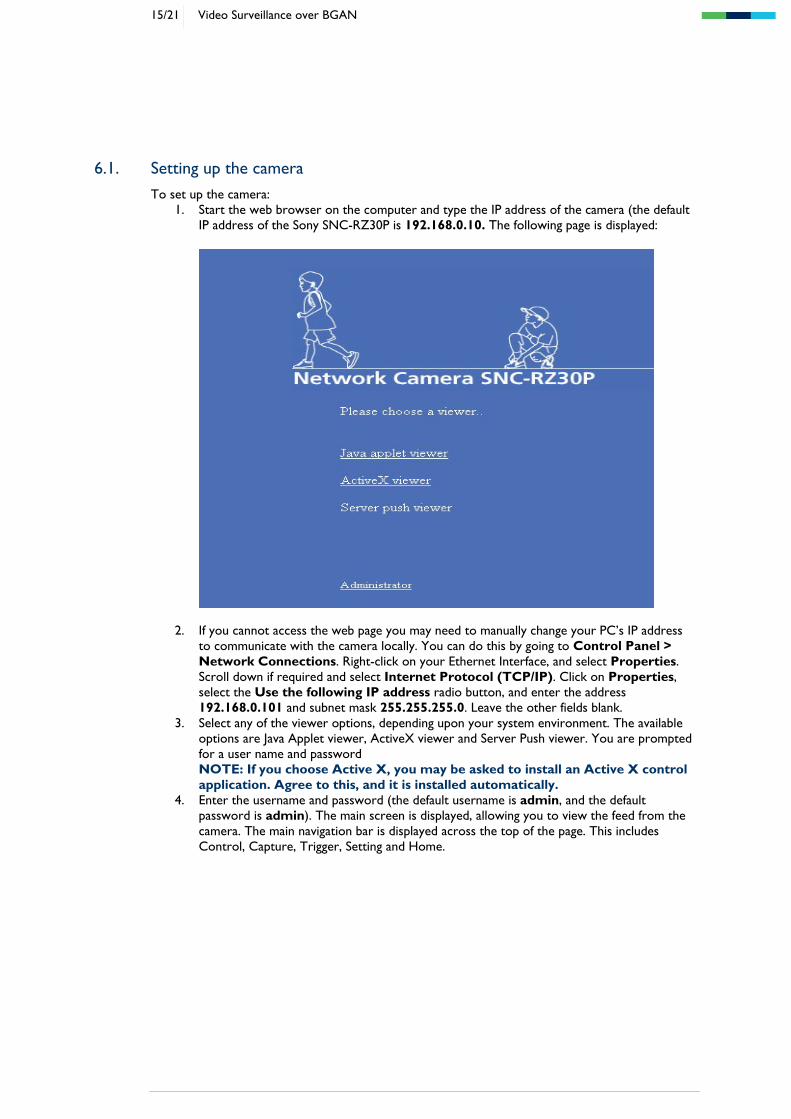
1. Start the web browser on the computer and type the IP address of the camera (the default IP address of the Sony SNC-RZ30P is 192.168.0.10. The following page is displayed:
2. If you cannot access the web page you may need to manually change your PC’s IP address to communicate with the camera locally. You can do this by going to Control Panel > Network Connections. Right-click on your Ethernet Interface, and select Properties. Scroll down if required and select Internet Protocol (TCP/IP). Click on Properties, select the Use the following IP address radio button, and enter the address 192.168.0.101 and subnet mask 255.255.255.0. Leave the other fields blank.
3. Select any of the viewer options, depending upon your system environment. The available options are Java Applet viewer, ActiveX viewer and Server Push viewer. You are prompted for a user name and password NOTE: If you choose Active X, you may be asked to install an Active X control application. Agree to this, and it is installed automatically.
4. Enter the username and password (the default username is admin, and the default password is admin). The main screen is displayed, allowing you to view the feed from the camera. The main navigation bar is displayed across the top of the page. This includes Control, Capture, Trigger, Setting and Home.

16/21 Video Surveillance over BGAN
5. Click on Control to display the camera control parts. The following figure shows the Image Control Section:
You can select the Frame rate where FPS indicates “the no of frames transmitted per second", and change the view size of the image.
Inmarsat recommends that you change the default in the Settings menu to the Inmarsat recommended settings (see Performance over BGAN), so that you do not need to wait for the page to load incorrectly and do not need to change the settings every time.
6.2. Configuring the camera for BGAN To configure the camera for use over BGAN:
1. From the camera’s main interface, select Setting. 2. Select Camera from the menu on the left to change the properties of the image, for
example: Image size, Image quality, Area setting, Zoom options, focus options, etc. 3. Select Network from the menu on the left to assign the IP address and all the related
network settings. 4. For the HNS 9201 then you need to statically assign an IP address to the camera, as
follows: • IP address: 192.168.128.101 • Subnet mask: 255.255.255.0 • Gateway: 192.168.128.100
5. Once you have selected the appropriate IP settings, click OK. The IP address of the camera has now changed. Unplug the Ethernet cable from your PC and plug it into your BGAN terminal.
NOTE: You can also use this camera with the wireless LAN. For that, you need a
wireless LAN card inserted into the PC card slot of the camera. Make sure that you define the IP address, subnet mask, and default gateway of the wireless LAN.

17/21 Video Surveillance over BGAN
6.3. Configuring the HNS 9201 The terminal must be in automatic connection mode. To set this up in BGAN LaunchPad, click on Terminal > Automatic Connection Mode. Select the method of connection, and click on OK. For more details, see the HNS 9201 Getting Started Guide. NOTE: If you have a fixed BGAN installation, you can choose to register the terminal
automatically when it receives power. To do this in BGAN LaunchPad, click Terminal > Auto-Start Mode. Choose to automatically register by checking the appropriate box. Click on OK. For more details, see the HNS 9201 Getting Started Guide.
NOTE: If you use the automatic registration and automatic IP data connection options,
you must switch off the BGAN terminal when it is not in use. Once you have pointed the terminal, press and hold the audio button for 5 seconds to make the terminal register. It will automatically open a data connection. Once connected, you can access the streaming IP data connection by entering the IP address of the camera into a web browser to view a live feed from the camera.
6.4. Sending images via mail or FTP server The camera allows you to send pictures either to an FTP server or an email address via the BGAN terminal. It can send images either at a fixed interval, a particular time of day, or when motion occurs on the screen area. This is especially useful for surveillance in remote areas. You can set up the FTP and SMTP Mail server settings using the FTP server and SMTP server function. To use SMTP function, you need to know:
• SMTP server name. • Recipient’s E-mail address. • Administrative E-mail address. • Image file name.
To use FTP function, you need to know:
• FTP server name. • User name. • Password. • Remote path. • Image file name.
You can also select the Mode, Manual, Alarm, or Periodical sending.
6.5. Setting the Activity Detection function The Activity Detection feature is especially powerful for use over BGAN. You can set up the terminal anywhere in the world and if motion is detected images are automatically sent back to you. The standard IP data connection only charges for when data is sent, and as the images are fairly small in file size this is an excellent low cost solution.
18/21 Video Surveillance over BGAN
If you want to use the built-in motion connection feature: 1. Select the Alarm feature, then select Activity Detection. The Activity Detection page is
displayed. You can use this page to set up the activity detection. 2. Select the Sensitivity of the activity detection from the drop-down list. You can set the
sensitivity to between level 1 and level 9 (maximum).
6.6. Performance over BGAN
Test Results Notes Standard IP data connection
800kbytes a minute - with Frame rate of 8 F/S, and View image of 320 x 240.
Video streaming over a standard IP data connection was tested.
See recommended standard IP settings.
Camera must be set to use TCP.
256kbps Streaming IP data connection
216kbps data rate – with fastest possible frame rate and View images of 640 x 480.
Check the recommended streaming IP settings
Camera must be set to use UDP.
SMTP/FTP Images 13KB per image 13KB when using FTP option.
Emails are slightly larger due to SMTP overhead
Once the data connection has been established on the BGAN terminal, the camera feed can be accessed by putting the BGAN Static IP address into a web browser.
Recommendations • Due to the nature of IP surveillance, and the amount of time you may be connected,
Inmarsat recommends that you use a Standard IP data connection. • Recommended settings for a streaming IP data connection have been supplied for
reference.
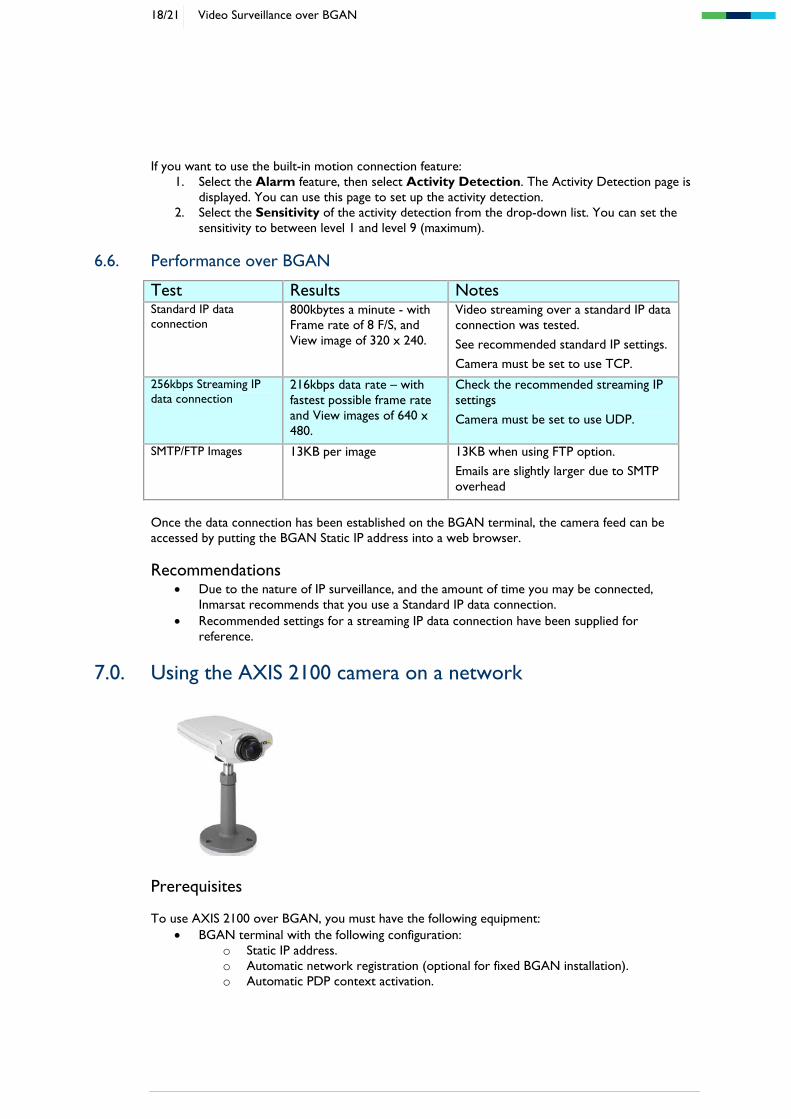
7.0. Using the AXIS 2100 camera on a network
Prerequisites To use AXIS 2100 over BGAN, you must have the following equipment:
• BGAN terminal with the following configuration: o Static IP address. o Automatic network registration (optional for fixed BGAN installation). o Automatic PDP context activation.
19/21 Video Surveillance over BGAN
7.1. Assigning an IP Address to the AXIS 2100
You need a PC with an Ethernet interface to configure the AXIS 2100 camera’s IP address before proceeding to BGAN setup. If you are using the HNS 9201 terminal, define the IP address as follows:
1. Assign a static IP address in the following range to your PC: • IP Address: 192.168.128.102-192.168.128.253 • Subnet mask: 255.255.255.0 • Gateway: 192.168.128.100
To do this, in Windows select Control Panel > Network Connections. Right-click on your Ethernet Interface, and select Properties. Scroll down if required and select Internet Protocol (TCP/IP). Click on Properties, select the Use the following IP address radio button, and enter the address 192.168.0.101 and subnet mask 255.255.255.0. Leave the other fields blank.
2. Connect your PC to your BGAN terminal via USB, WiFi or an Ethernet Hub. NOTE: Do not connect the camera to the PC yet.
3. In Windows, open a command prompt. To do this, select Start > Run, type in cmd, then click on OK. The command prompt window displays.
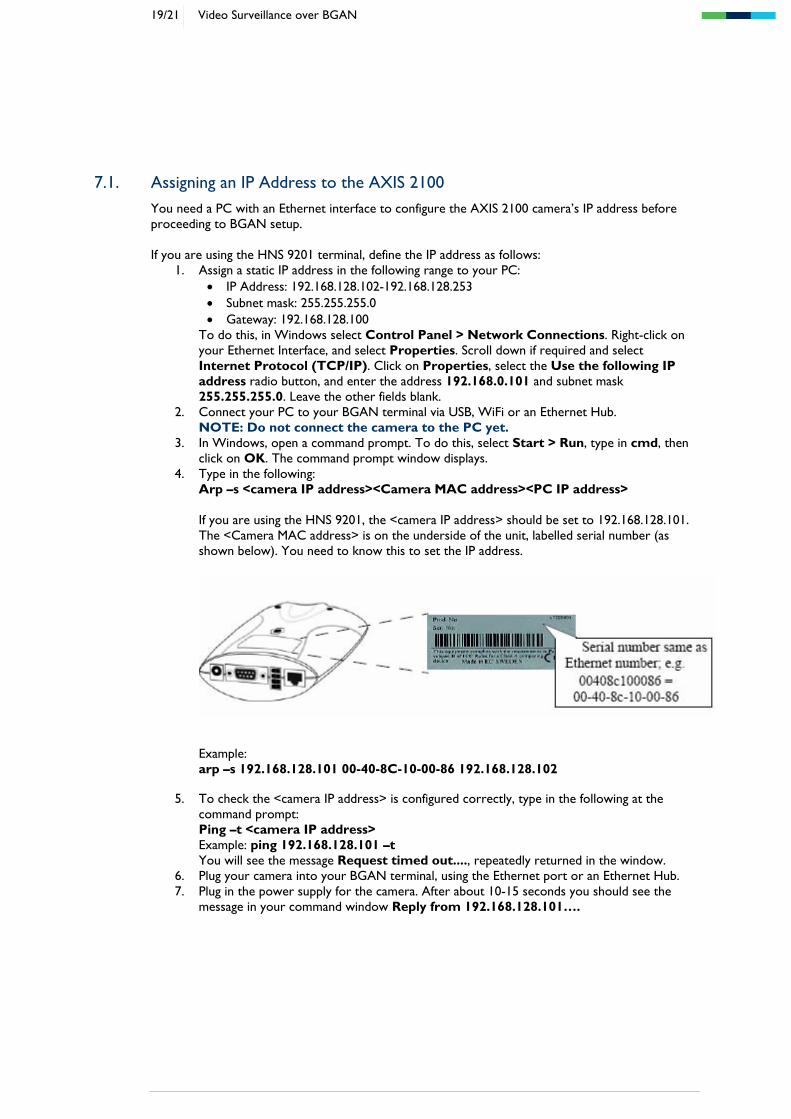
4. Type in the following: Arp –s <camera IP address><Camera MAC address><PC IP address> If you are using the HNS 9201, the <camera IP address> should be set to 192.168.128.101. The <Camera MAC address> is on the underside of the unit, labelled serial number (as shown below). You need to know this to set the IP address.
Example: arp –s 192.168.128.101 00-40-8C-10-00-86 192.168.128.102
5. To check the <camera IP address> is configured correctly, type in the following at the
command prompt: Ping –t <camera IP address> Example: ping 192.168.128.101 –t You will see the message Request timed out...., repeatedly returned in the window.
6. Plug your camera into your BGAN terminal, using the Ethernet port or an Ethernet Hub. 7. Plug in the power supply for the camera. After about 10-15 seconds you should see the
message in your command window Reply from 192.168.128.101….
20/21 Video Surveillance over BGAN
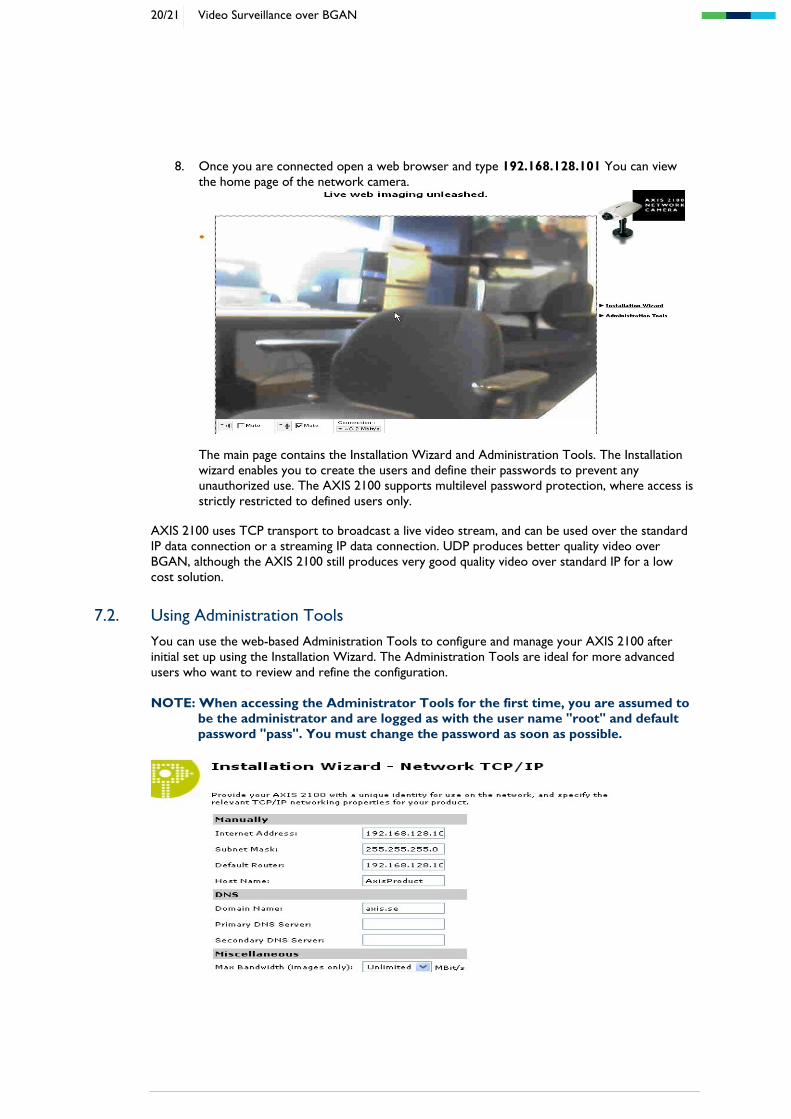
8. Once you are connected open a web browser and type 192.168.128.101 You can view the home page of the network camera.
The main page contains the Installation Wizard and Administration Tools. The Installation wizard enables you to create the users and define their passwords to prevent any unauthorized use. The AXIS 2100 supports multilevel password protection, where access is strictly restricted to defined users only.
AXIS 2100 uses TCP transport to broadcast a live video stream, and can be used over the standard IP data connection or a streaming IP data connection. UDP produces better quality video over BGAN, although the AXIS 2100 still produces very good quality video over standard IP for a low cost solution.
7.2. Using Administration Tools
You can use the web-based Administration Tools to configure and manage your AXIS 2100 after initial set up using the Installation Wizard. The Administration Tools are ideal for more advanced users who want to review and refine the configuration. NOTE: When accessing the Administrator Tools for the first time, you are assumed to
be the administrator and are logged as with the user name "root" and default password "pass". You must change the password as soon as possible.
21/21 Video Surveillance over BGAN
You can use above page to manually assign an IP address and other network related information. You can access the page by clicking on Administrator Tools, and selecting Network from the menu on the left. Make sure that the following information is entered for the HNS 9201.
• Internet Address: 192.168.128.101 • Subnet Mask: 255.255.255.0 • Default Router: 192.168.128.100
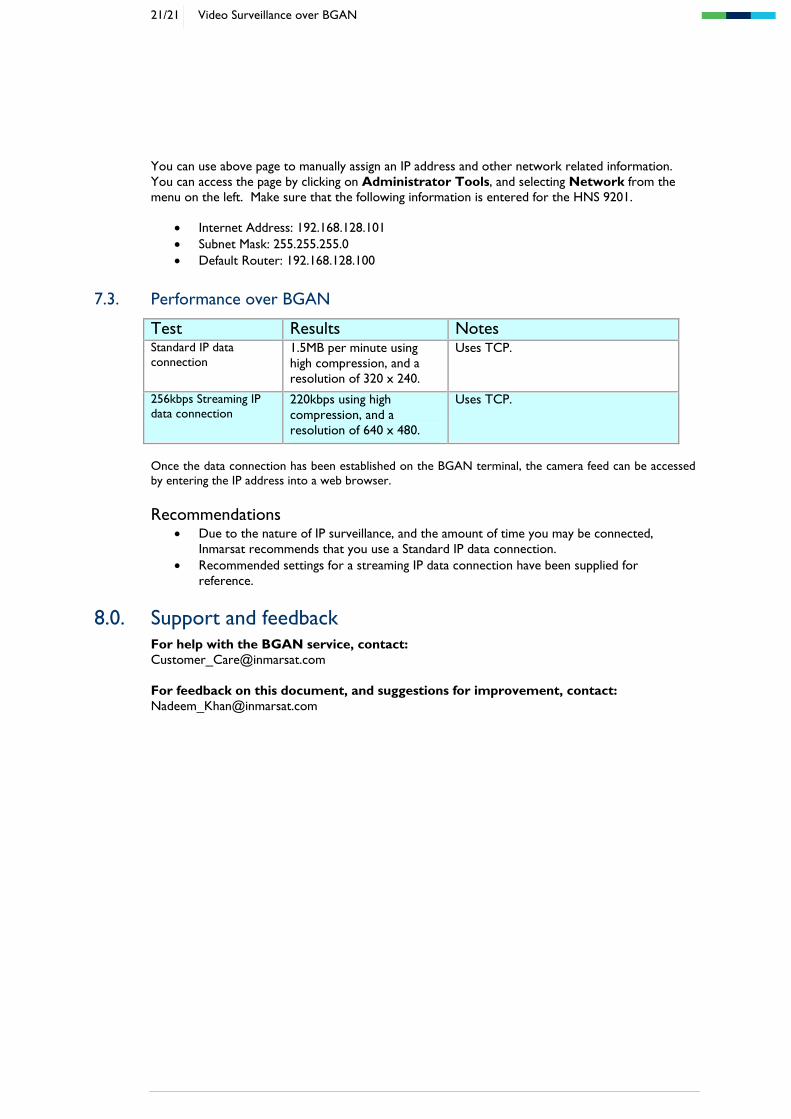
7.3. Performance over BGAN
Test Results Notes Standard IP data connection
1.5MB per minute using high compression, and a resolution of 320 x 240.
Uses TCP.
256kbps Streaming IP data connection
220kbps using high compression, and a resolution of 640 x 480.
Uses TCP.
Once the data connection has been established on the BGAN terminal, the camera feed can be accessed by entering the IP address into a web browser. Recommendations
• Due to the nature of IP surveillance, and the amount of time you may be connected, Inmarsat recommends that you use a Standard IP data connection.
• Recommended settings for a streaming IP data connection have been supplied for reference.
8.0. Support and feedback For help with the BGAN service, contact: [email protected] For feedback on this document, and suggestions for improvement, contact: [email protected]