
Video Conversion PHP
12
Video Conversion www.prodigyview.com
-
Upload
prodigyview -
Category
Technology
-
view
2.905 -
download
0
description
Learn how to use the video conversion in ProdigyView. In this video learn about delayed start times, setting duration, and images from videos.
Transcript of Video Conversion PHP

OverviewObjective
Learn how to convert videos using PVVideo class Requirements
Installed version of ffmpeg
Understanding of ffmpeg from ffmpeg tutorial
Understanding of the defines
Estimated Time
12 minutes
www.prodigyview.com

Follow Along With A Code Example
1. Download a copy of the example code at www.prodigyview.com/source.
2.Install the system in an environment you feel comfortable testing in.
3.Proceed to examples/avi/Video_Conversion.php
http://www.prodigyview.com
PVVideo
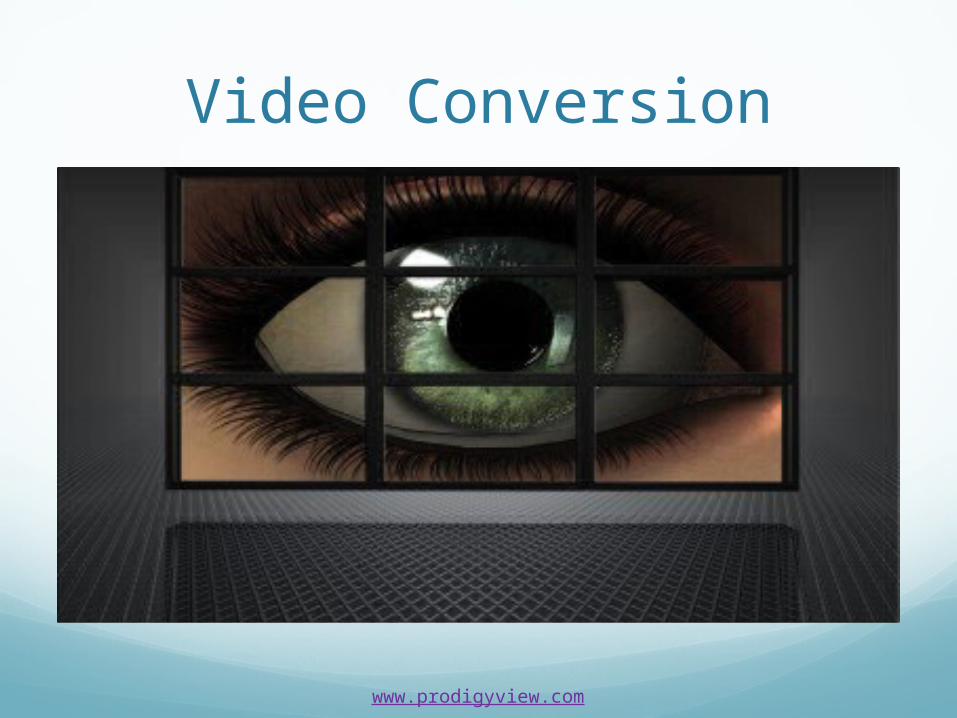
To begin this tutorial, we are going to initialize the PVVideo class. Initialization primary purpose to set the location of the ffmpeg on your server.
www.prodigyview.com

Video ConversionThe most basic way of using the PVVideo class is converting a video. All that is required is the input video file and the location to output a new video file.
1. Input File to Convert
2. Location and name to save the converted file
OptionsWe will want to add options to our video conversion such as creating images, delayed start, duration, etc. To utilize the options, we need to first know the options that can be passed to FFMPEG. Review and reference them here.
http://ffmpeg.org/ffmpeg.html#Video-Options
If you are new to ffmpeg, please view the tutorial on using ffmpeg.
www.prodigyview.com
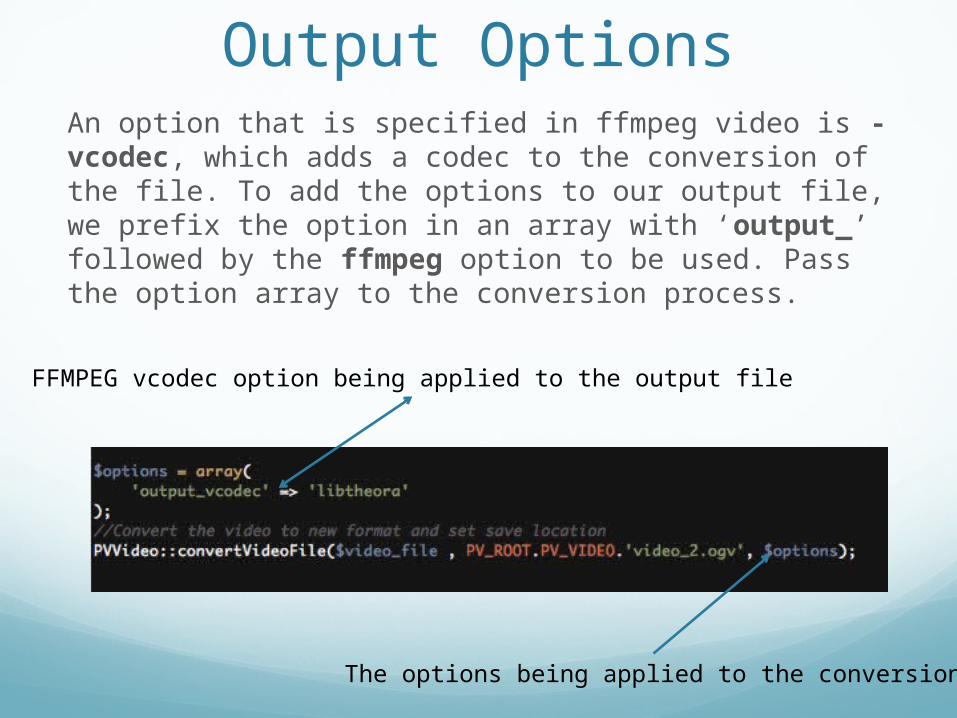
Output OptionsAn option that is specified in ffmpeg video is -vcodec, which adds a codec to the conversion of the file. To add the options to our output file, we prefix the option in an array with ‘output_’ followed by the ffmpeg option to be used. Pass the option array to the conversion process.
FFMPEG vcodec option being applied to the output file
The options being applied to the conversion

Delay Start TimeThere maybe be instances where you want to delay the start time of your video. In FFMPEG this would be accomplished with the –ss option.
1. Delay start time by 20 seconds
2. Pass options

Making PreviewsIf we can delay our start time, we can also see for how long our video runs. In other words, we can make short snippet and previews of a video. We use the –t option in ffmpeg.
1. Delayed start time 2. Only convert 30 seconds
3. Pass options to conversion

Images Output
Up until now, we have dealt with video conversions to other video formats. We can further manipulate PVVideo options to convert video files to images. We are going to use the ffmpeg options, -r, -f, and –vframes.
1. Limit the number of images created to 20
2. Force to image format 3. Image name with 3 numeric format

Delayed Image OutputFor our final demonstration on how to use the options, we are going to make images with a delay and set amount. For this last slide, figure out what the options are based off the previous slides.
www.prodigyview.com

www.prodigyview.com
More Tutorials
For more tutorials, please visit:
http://www.prodigyview.com/tutorials