Growing Farms: Successful Whole Farm Management Planning Book
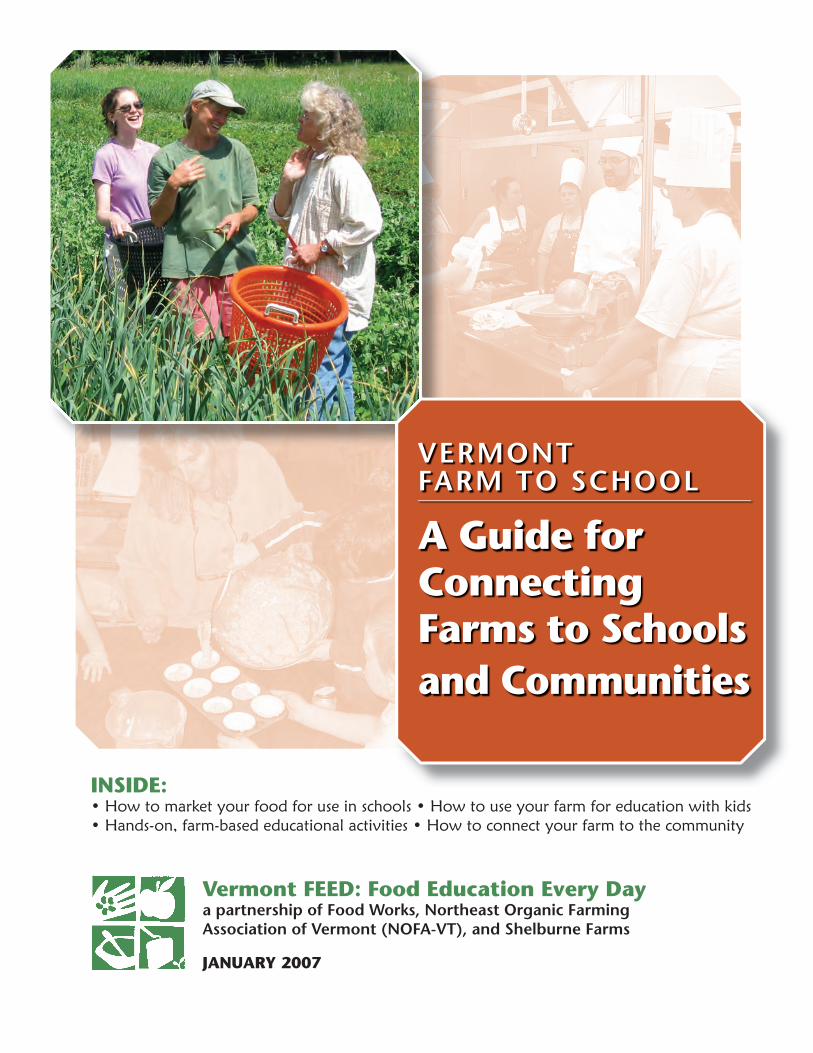
Vermont FEED: Food Education Every Daya partnership of Food Works, Northeast Organic Farming Association of Vermont (NOFA-VT), and Shelburne Farms
JANUARY 2007
INSIDE:• How to market your food for use in schools • How to use your farm for education with kids • Hands-on, farm-based educational activities • How to connect your farm to the community
VERMONT FARM TO SCHOOL
A Guide for Connecting Farms to Schools and Communities

The work of Vermont FEED, including this guidebook, has been made possible by
the generous support of the Argosy Foundation, Blue Cross and Blue Shield of
Vermont, Vermont Housing and Conservation Board - Farm Viability Program,
CSREES - USDA Community Food Projects Award #00-33800-9807,
Northeast SARE (Sustainable Agriculture Research and Education)
Vermont Food Education Every Day Grant LNE03-187, the Vermont
Agency of Agriculture and the Vermont Department of Education.
Any ideas or text in this manual that are similar to those in any copyrighted source were used unin-
tentionally and without awareness.
VT FEED • www.vtfeed.org • p. i
IntroductionPurpose of the Guide . . . . . . . . . . . . . . . . . . . . . . . . . . . . . . . . . . . . 1
Contact Information . . . . . . . . . . . . . . . . . . . . . . . . . . . . . . . . . . . . 2
Thank You . . . . . . . . . . . . . . . . . . . . . . . . . . . . . . . . . . . . . . . . . . . . 3
FEED Goals, Mission, Beliefs . . . . . . . . . . . . . . . . . . . . . . . . . . . . . . . 4
The Three C’s Approach to Food in Vermont Schools. . . . . . . . . . . . 5
Why Vermont FEED? . . . . . . . . . . . . . . . . . . . . . . . . . . . . . . . . . . . . 6
Getting Started . . . . . . . . . . . . . . . . . . . . . . . . . . . . 7How do I insure a safe environment for visitors on my farm? . . . . . . 9
How do I protect my farm and my visitors? . . . . . . . . . . . . . . . . . . 10
What are my insurance liability considerations for farm visitors?. . . 11
Do I charge groups to visit my farm? . . . . . . . . . . . . . . . . . . . . . . . 12
How will visitors know where to go on my farm?. . . . . . . . . . . . . . 13
Will all visitors have adequate accessibility to my farm? . . . . . . . . . 13
What about visitor transportation and parking? . . . . . . . . . . . . . . . 14
What bathroom and washing facilities do I have? . . . . . . . . . . . . . 14
What should I do if the weather turns bad? . . . . . . . . . . . . . . . . . . 15
What about trash? . . . . . . . . . . . . . . . . . . . . . . . . . . . . . . . . . . . . . 15
Connecting to the Classroom. . . . . . . . . . . . . . . . . 17Advertising and fi nding schools . . . . . . . . . . . . . . . . . . . . . . . . . . . 19
Preparing your farm for the visit. . . . . . . . . . . . . . . . . . . . . . . . . . . 20
Working with students of all ages . . . . . . . . . . . . . . . . . . . . . . . . . 22
Teaching Tips . . . . . . . . . . . . . . . . . . . . . . . . . . . . . . . . . . . . . . . . 25
Templates . . . . . . . . . . . . . . . . . . . . . . . . . . . . . . . . . . . . . . . . . . . 27
Field Trip Information . . . . . . . . . . . . . . . . . . . . . . . . . . . . . . . 29
Farm Visit Chaperone Letter. . . . . . . . . . . . . . . . . . . . . . . . . . . 30
Confi rmation Letter to School - Sample . . . . . . . . . . . . . . . . . . 31
Confi rmation Letter to School - Blank . . . . . . . . . . . . . . . . . . . 32
Table of Contents
continued
p. ii • VT FEED • www.vtfeed.org
Connecting to the Cafeteria . . . . . . . . . . . . . . . . . 33Understanding the School Food Environment . . . . . . . . . . . . . . . . 35
Where does school food come from?. . . . . . . . . . . . . . . . . . . . 35
Who prepares the school food? . . . . . . . . . . . . . . . . . . . . . . . . 35
How are decisions made about what is served? . . . . . . . . . . . . 36
Are any Vermont schools buying local products? . . . . . . . . . . . 36
How many farms does it take to feed a school district? . . . . . . 36
Local Purchasing Options. . . . . . . . . . . . . . . . . . . . . . . . . . . . . . . . 37
Wholesale Distributors . . . . . . . . . . . . . . . . . . . . . . . . . . . . . . . 37
Direct Purchasing. . . . . . . . . . . . . . . . . . . . . . . . . . . . . . . . . . . 37
CSA (Community Supported Agriculture) Arrangement . . . . . . 38
Contract Growing . . . . . . . . . . . . . . . . . . . . . . . . . . . . . . . . . . 38
Grow A Row . . . . . . . . . . . . . . . . . . . . . . . . . . . . . . . . . . . . . . 38
Marketing Cooperative . . . . . . . . . . . . . . . . . . . . . . . . . . . . . . 39
District Purchasing Cooperative . . . . . . . . . . . . . . . . . . . . . . . . 39
Why schools purchase local products. . . . . . . . . . . . . . . . . . . . . . . 39
Action steps to build purchasing relationships with a School Food Service . . . . . . . . . . . . . . . . . . . . . . . . . . . 40
Connecting to the Community . . . . . . . . . . . . . . . 43Ways to reach out to your community . . . . . . . . . . . . . . . . . . . . . . 45
Sample press release - Reporting on an Event . . . . . . . . . . . . . . . . 47
Sample press release - Announcing an Event . . . . . . . . . . . . . . . . . 47
Activities . . . . . . . . . . . . . . . . . . . . . . . . . . . . . . . . 49
Bibliography. . . . . . . . . . . . . . . . . . . . . . . . . . . . . 109

VT FEED • www.vtfeed.org • p. 1
Purpose of the Guide
This guide is intended to help farmers utilize their farms as learning
environments for local schools and communities, market their products
to schools, and increase their exposure within their community. There
are many details to consider before hosting the public. The contents of
this book will help you identify those considerations, overcome many
of the challenges, and provide farm-based activities and resources. By
hosting school groups, opening your farms for public events, and selling
farm products to the school cafeteria, you are not only reconnecting your
neighbors to Vermont’s agrarian history, but creating a more educated
and agriculturally-literate consumer. You are helping to rebuild and
redefi ne a local food system.
The Vermont FEED partners are thrilled to be offering this guide to you.
We have spent many years working to link Vermont schools with Vermont
farms. Joining a national trend of reconnecting people to where their
food comes from, the VT FEED project has worked with communities
throughout the state to bring school groups and the greater community
to farms, and to help farmers establish viable markets with the school
cafeterias.
Photocopying this guide is permitted for educational uses, with credit
given to VT FEED.
Thank you for being a steward of the land, growing food, and sharing
your experiences with others.
Enjoy!
INTRODUCTION
p. 2 • VT FEED • www.vtfeed.org
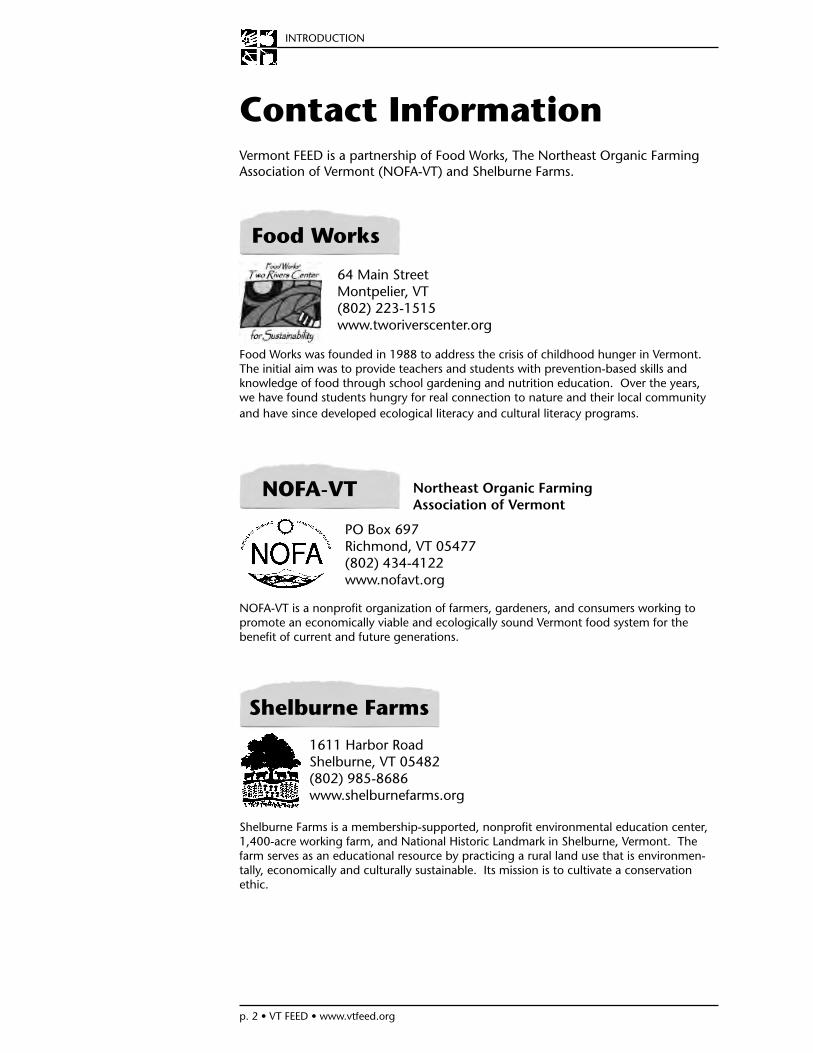
Contact InformationVermont FEED is a partnership of Food Works, The Northeast Organic Farming Association of Vermont (NOFA-VT) and Shelburne Farms.
64 Main StreetMontpelier, VT (802) 223-1515www.tworiverscenter.org
Food Works was founded in 1988 to address the crisis of childhood hunger in Vermont. The initial aim was to provide teachers and students with prevention-based skills and knowledge of food through school gardening and nutrition education. Over the years, we have found students hungry for real connection to nature and their local community and have since developed ecological literacy and cultural literacy programs.
Northeast Organic Farming Association of Vermont
PO Box 697Richmond, VT 05477(802) 434-4122www.nofavt.org
NOFA-VT is a nonprofi t organization of farmers, gardeners, and consumers working to promote an economically viable and ecologically sound Vermont food system for the benefi t of current and future generations.
1611 Harbor RoadShelburne, VT 05482(802) 985-8686www.shelburnefarms.org
Shelburne Farms is a membership-supported, nonprofi t environmental education center, 1,400-acre working farm, and National Historic Landmark in Shelburne, Vermont. The farm serves as an educational resource by practicing a rural land use that is environmen-tally, economically and culturally sustainable. Its mission is to cultivate a conservation ethic.
Food Works
Shelburne Farms
NOFA-VT
INTRODUCTION
VT FEED • www.vtfeed.org • p. 3
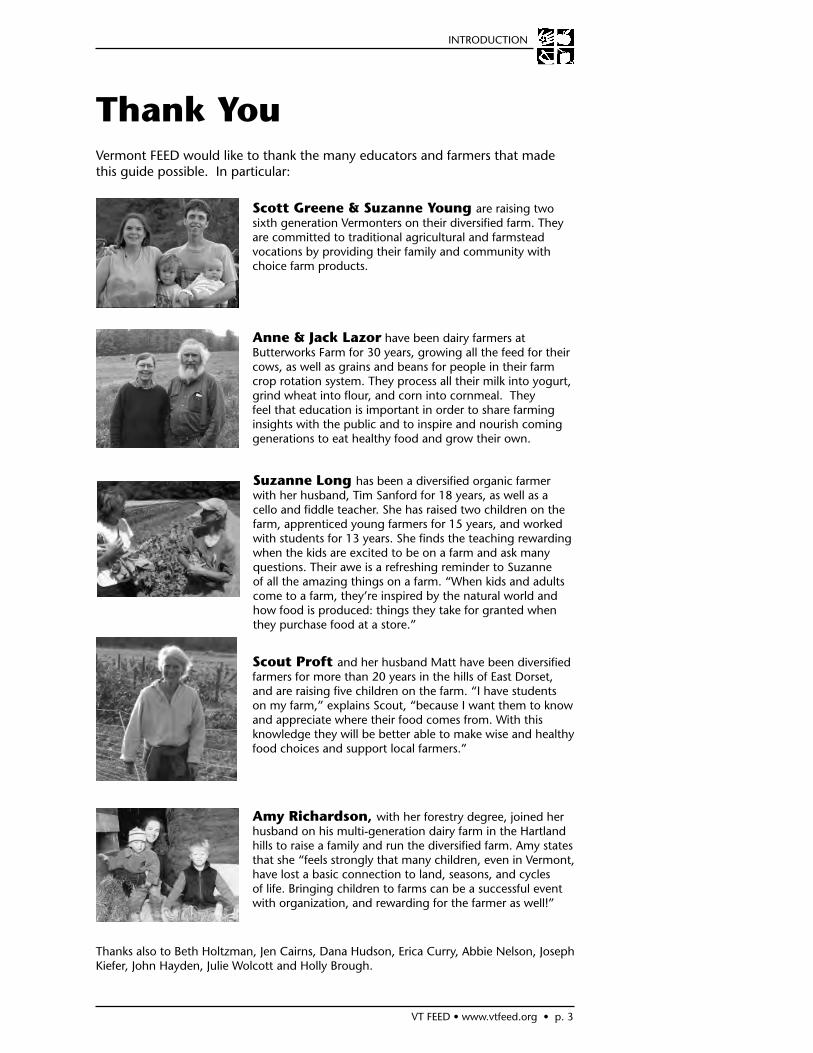
Thank YouVermont FEED would like to thank the many educators and farmers that made this guide possible. In particular:
Suzanne Long has been a diversifi ed organic farmer with her husband, Tim Sanford for 18 years, as well as a cello and fi ddle teacher. She has raised two children on the farm, apprenticed young farmers for 15 years, and worked with students for 13 years. She fi nds the teaching rewarding when the kids are excited to be on a farm and ask many questions. Their awe is a refreshing reminder to Suzanne of all the amazing things on a farm. “When kids and adults come to a farm, they’re inspired by the natural world and how food is produced: things they take for granted when they purchase food at a store.”
Anne & Jack Lazor have been dairy farmers at Butterworks Farm for 30 years, growing all the feed for their cows, as well as grains and beans for people in their farm crop rotation system. They process all their milk into yogurt, grind wheat into fl our, and corn into cornmeal. They feel that education is important in order to share farming insights with the public and to inspire and nourish coming generations to eat healthy food and grow their own.
Scott Greene & Suzanne Young are raising two sixth generation Vermonters on their diversifi ed farm. They are committed to traditional agricultural and farmstead vocations by providing their family and community with choice farm products.
INTRODUCTION
Amy Richardson, with her forestry degree, joined her husband on his multi-generation dairy farm in the Hartland hills to raise a family and run the diversifi ed farm. Amy states that she “feels strongly that many children, even in Vermont, have lost a basic connection to land, seasons, and cycles of life. Bringing children to farms can be a successful event with organization, and rewarding for the farmer as well!”
Scout Proft and her husband Matt have been diversifi ed farmers for more than 20 years in the hills of East Dorset, and are raising fi ve children on the farm. “I have students on my farm,” explains Scout, “because I want them to know and appreciate where their food comes from. With this knowledge they will be better able to make wise and healthy food choices and support local farmers.”
Thanks also to Beth Holtzman, Jen Cairns, Dana Hudson, Erica Curry, Abbie Nelson, Joseph Kiefer, John Hayden, Julie Wolcott and Holly Brough.
p. 4 • VT FEED • www.vtfeed.org
FEED Goals, Mission, Beliefs
To raise school and community awareness about healthy food, Vermont
farms and farmers, and good nutrition. We act as a catalyst to rebuild
healthy local food systems by cultivating links between classrooms, caf-
eterias, local farms, and communities.
• To increase student and teacher knowledge of food, farms, and nutri-
tion by developing and testing replicable curriculum that meets the
Vermont Framework for Standards and Learning.
• To increase direct marketing opportunities for locally produced foods
and improve the eating patterns of school-aged children by develop-
ing local purchasing contracts with schools and offering professional
development to school food personnel.
• To engage communities in active support of their local school and
community food system.
• All children and members of their community should have access to
safe, affordable, healthy, nutritious foods.
• Children will make healthier food choices, gain confi dence, and de-
velop critical thinking skills through growing, harvesting, and prepar-
ing foods as part of their school curriculum.
• Healthy diets positively and directly impact students’ academic per-
formance.
• Local agriculture is important historically, and for the future.
• School food policy must change to make local, healthy, and nutri-
tious foods available to students.
• Food-literate children will impact and change family purchasing,
cooking, and eating patterns.
Mission
Beliefs
Goals
INTRODUCTION
VT FEED • www.vtfeed.org • p. 5
INTRODUCTION
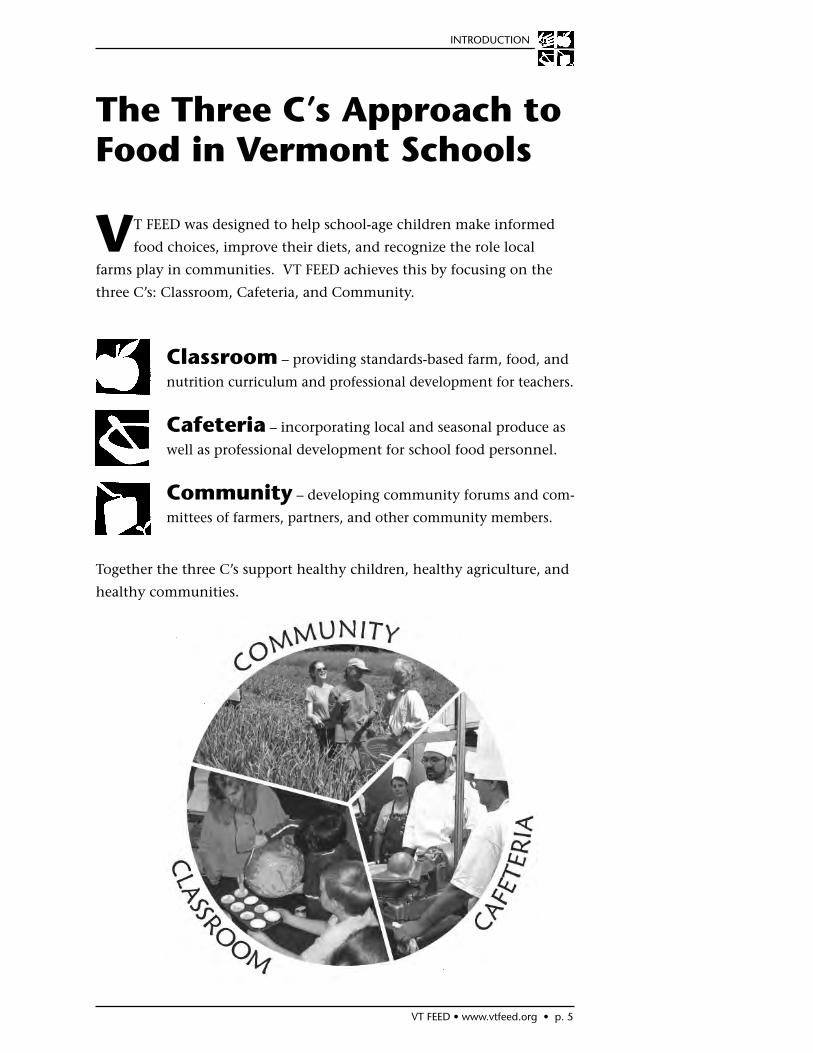
The Three C’s Approach to Food in Vermont Schools
VT FEED was designed to help school-age children make informed
food choices, improve their diets, and recognize the role local
farms play in communities. VT FEED achieves this by focusing on the
three C’s: Classroom, Cafeteria, and Community.
Classroom – providing standards-based farm, food, and
nutrition curriculum and professional development for teachers.
Cafeteria – incorporating local and seasonal produce as
well as professional development for school food personnel.
Community – developing community forums and com-
mittees of farmers, partners, and other community members.
Together the three C’s support healthy children, healthy agriculture, and
healthy communities.
p. 6 • VT FEED • www.vtfeed.org
INTRODUCTION
Why VT FEED?
• Twenty six percent of Vermont children are at risk of being or are now
overweight.
• Every day an average of 48,000 Vermont school children line up for
breakfast and lunch. For some this equates to 10 meals a week and half
of their daily nutritional intake.
• Only 2% of children and youth in our nation meet Food Guide Pyra-
mid recommendations for all fi ve major food groups in a day.
• Despite the abundance of food nationwide, children and youth are
still undernourished. Homemade meals have been replaced by highly
processed, convenient foods.
• School food service is challenged to feed a well-balanced meal to stu-
dents who have an appetite for high fat, salt and sugar foods.
• The farmer share of the food dollar has dropped drastically from 40%
in 1950 to 10% of every food dollar today.
• Although fresh, local foods are being grown next door to schools
and are readily available statewide, they are not being widely used in
schools.
• Youth are increasingly disconnected from how food is grown and how
it gets from the farm to their plates.
Getting Started
VT FEED • www.vtfeed.org • p. 7

p. 8 • VT FEED • www.vtfeed.org
VT FEED • www.vtfeed.org • p. 9
Initial Considerations Before you open your farm to schools and the public
Connecting a community or school to a farm can help defi ne and
deepen peoples’ sense of place. The public needs to understand the
local reality of our Vermont agricultural communities and what better
way than to have them on the farms to experience those connections?
Before you begin, however, you will need to consider some of the issues
surrounding visits to your farm.
Everyone anticipates having a safe and fun visit to the
farm, but you need to prepare for potential accidents.
It is important to ask the teacher of the visiting group about their fi rst aid
policy. Encourage teachers to bring their own fi rst aid kit and know their
students’ medical information. This information should clarify policies
regarding administering medicine (including pain relievers like aspirin)
to students. Be clear about these policies with each visiting group.
Make sure that you have an emergency plan that at least one other adult
is familiar with for emergency situations. There is no need to unneces-
sarily alarm students with a long emergency plan lecture, but a few words
about potential hazards will alert them to things on your farm that they
may not think about as hazards. If your visitors will be around farm
animals, you should alert them to the dangers of sharp teeth (pigs), etc.,
either verbally or with signage around pens, stables, or gates.
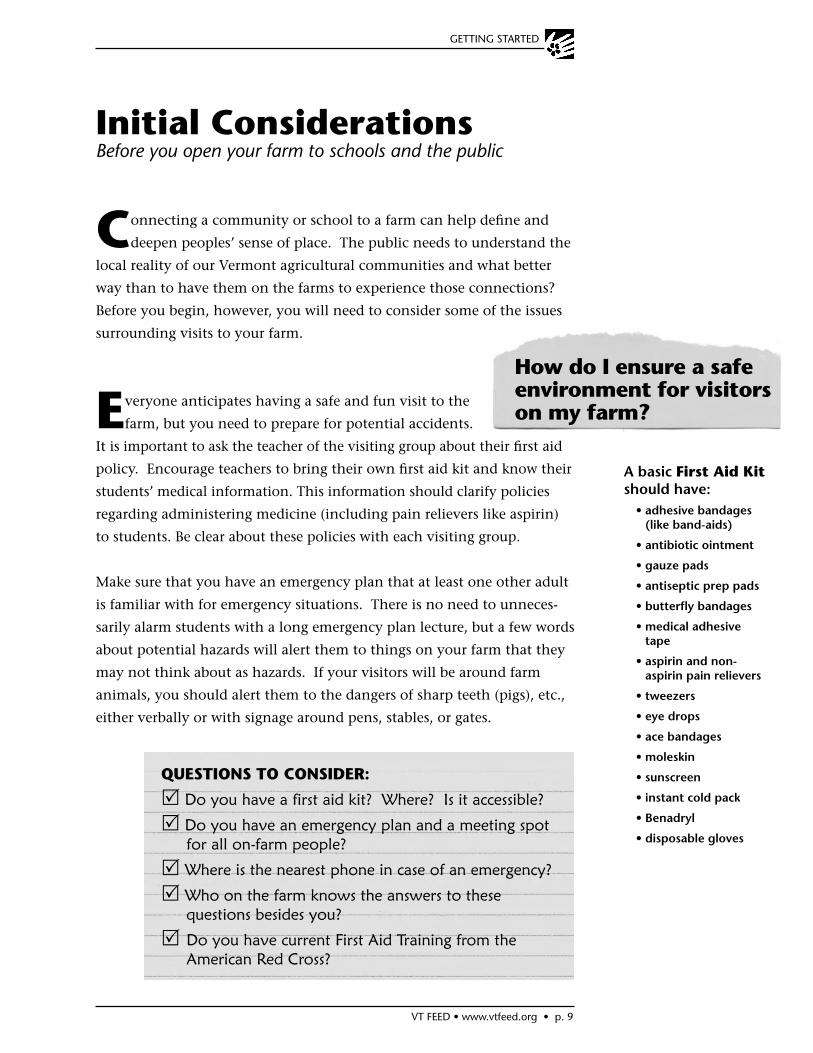
A basic First Aid Kit should have:
• adhesive bandages (like band-aids)
• antibiotic ointment
• gauze pads
• antiseptic prep pads
• butterfl y bandages
• medical adhesive tape
• aspirin and non- aspirin pain relievers
• tweezers
• eye drops
• ace bandages
• moleskin
• sunscreen
• instant cold pack
• Benadryl
• disposable gloves
QUESTIONS TO CONSIDER:
Do you have a first aid kit? Where? Is it accessible?
Do you have an emergency plan and a meeting spot for all on-farm people?
Where is the nearest phone in case of an emergency?
Who on the farm knows the answers to these questions besides you?
Do you have current First Aid Training from the American Red Cross?
How do I ensure a safe environment for visitors on my farm?
GETTING STARTED
p. 10 • VT FEED • www.vtfeed.org
The truth is that veterinarians, neighboring farmers,
and the milk tester who visits many different farms
(including yours) pose more of a threat to your farm than
students and community members who are not exposed to farm-based
contagions regularly. But precautions are necessary to ward off potential
biological threats arriving on the shoes and tires of your visitors. A com-
bination of several safety measures can help protect your farm and make
you feel comfortable welcoming visitors.
First, don’t hesitate to ask the group leader about where visitors have
been, especially if any have been out of the country in the past couple of
weeks. Also, a number of companies are now making disposable plastic
booties that visitors can slip over their street shoes, or you might place
a simple foot bath at the door of your barn and ask each visitor to walk
through it before they enter. These procedures protect the farm from
diseases transferred from other farms.
You may want to develop a policy to deal with potential hazards that
visitors may bring to your farm. The following is an example of a policy
on foot-and-mouth disease that is used at a farm that allows visitors.
We take every reasonable precaution to prevent the devastation resulting
from foot and mouth disease that is occurring in many rural communi-
ties around the world from spreading to this country and Vermont.
Foot-and-mouth is a highly contagious viral disease of cattle and swine.
It also affects sheep, goats, deer, and other cloven-hoofed ruminants. It
is not considered a human health risk but can be spread accidentally by
humans carrying the virus on their clothing, shoes, body (particularly
the throat and nasal passages), and personal items.
Before your fi eld trip here, please contact us if any student or anyone in
his or her household has been outside of the United States or Canada
within 7 days of coming to this farm and we can discuss possible
measures that can be taken to reduce the risk of spreading the disease.
Depending on particular family travel circumstances we may request
that a student not attend the fi eld trip.
Thank you so much for your consideration and cooperation.
GETTING STARTED
How do I protect my farm and my visitors?
For more information on foot-and-mouth disease, call the U.S. Department of Agriculture at (800) 601-9327, or the Vermont Agency of Agriculture at 802-828-3829
Facts about the disease are also available at: www.state.vt.us/agric under links or at www.aphis.usda.gov/
VT FEED • www.vtfeed.org • p. 11
It is important to research if your farm insurance covers
visitors to the farm. Consult with your insurance agent
to fi nd out if you are covered for accidents. Coverage often
requires, at minimum, an endorsement or rider added onto the current
general liability policy. Check if one-day coverage is an option, as some
carriers offer this as a separate choice. Also, fi nd out the specifi c range
and limits of the school’s insurance coverage. In some districts, students
are covered while on fi eld trips.
If older students are doing a service project or having a more extensive
on-farm experience, a more specifi c insurance rider may be appropriate.
You should also check out OSHA guidelines for the use of power tools by
students and Workers Compensation laws. There are no guidelines for
hand tools, except those dictated by common sense.
There is some debate over the usefulness of release forms or waivers. In
many instances, these documents, in which parents agree not to hold the
farm liable for injury, don’t hold up in court. Liability is based on fault
and can’t be sidestepped by a signature. Nevertheless, a release form that
students take home and have their parents sign performs an important
communication role about the issues and expectations on a farm visit.
What are my insurance liability considerations for farm visitors?
QUESTIONS TO CONSIDER:
How will you protect your farm from outside contaminants?
Do you have a written policy to share with the teacher or group leader?
Are there areas on the farm that need to be “off-limits” because of disease concerns?
GETTING STARTED
p. 12 • VT FEED • www.vtfeed.org
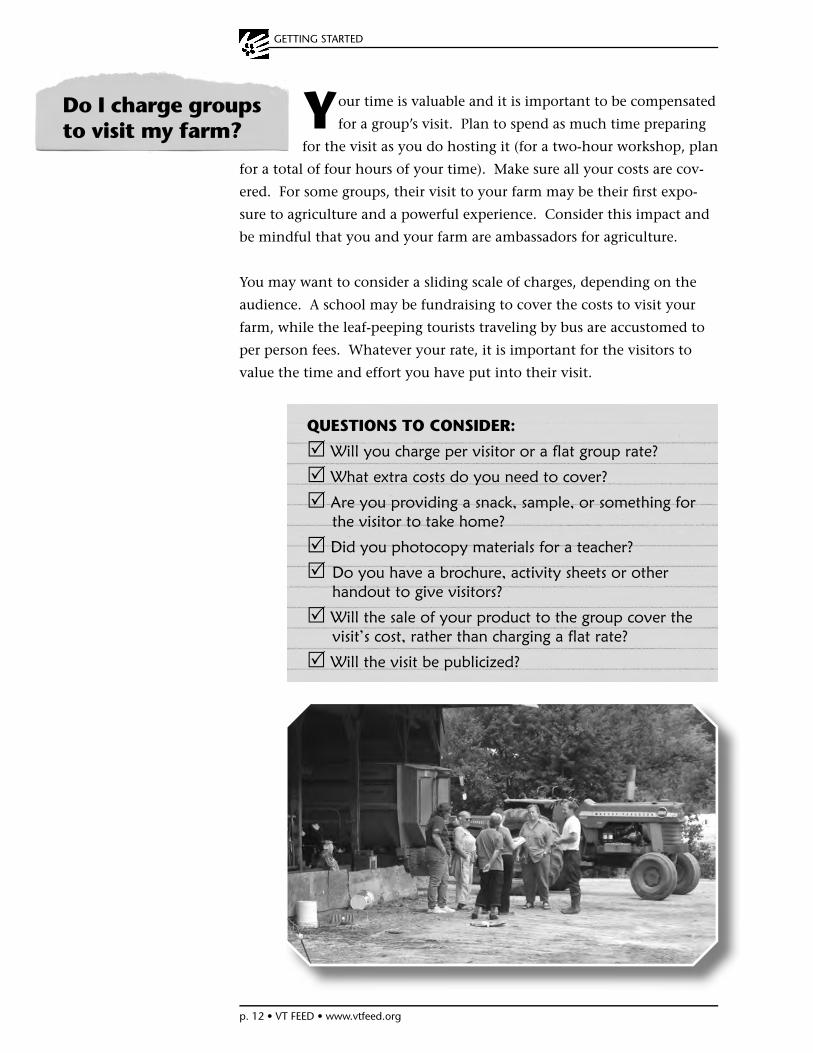
Your time is valuable and it is important to be compensated
for a group’s visit. Plan to spend as much time preparing
for the visit as you do hosting it (for a two-hour workshop, plan
for a total of four hours of your time). Make sure all your costs are cov-
ered. For some groups, their visit to your farm may be their fi rst expo-
sure to agriculture and a powerful experience. Consider this impact and
be mindful that you and your farm are ambassadors for agriculture.
You may want to consider a sliding scale of charges, depending on the
audience. A school may be fundraising to cover the costs to visit your
farm, while the leaf-peeping tourists traveling by bus are accustomed to
per person fees. Whatever your rate, it is important for the visitors to
value the time and effort you have put into their visit.
QUESTIONS TO CONSIDER:
Will you charge per visitor or a flat group rate?
What extra costs do you need to cover?
Are you providing a snack, sample, or something for the visitor to take home?
Did you photocopy materials for a teacher?
Do you have a brochure, activity sheets or other handout to give visitors?
Will the sale of your product to the group cover the visit’s cost, rather than charging a flat rate?
Will the visit be publicized?
GETTING STARTED
Do I charge groups to visit my farm?
VT FEED • www.vtfeed.org • p. 13
Be sure to ask your visiting group if any guests might
have challenges getting around the farm. If so, discuss
in detail your farm buildings and farmyard to fi nd opportu-
nities where you can be fully inclusive of the group. Your
farm is not required to meet public handicap accessibility laws, but you
will want to consider this issue when opening it to the public.
With minor adjustments, some areas can easily be made more accessible
for the elderly and physically disabled. Perhaps you can fi ll a pothole in
a path, move a piece of machinery to provide closer parking, or remove
obstacles in doorways and aisles to make for easier mobility.
QUESTIONS TO CONSIDER:
Will everyone be able to get around the farm?
Do you know of any visitors that may have mobility limitations and have you planned accordingly?
How will visitors know where to go on my farm?
QUESTIONS TO CONSIDER:
Is your farm visible from the road and clearly marked?
Will cars/buses know where to turn in and park?
Are electric fences labeled?
Have you roped off and labeled dangerous areas, like the manure pit or machine area?
GETTING STARTED
Take the extra time to put signs up that help visitors
know where on the farm they should not go and
where they should go. Many visitors may not be able
to identify farm hazards, so properly marking areas can
prevent confusion and save you time in the long run. Signs are impor-
tant to prevent situations such as visitors getting their cars stuck in the
mud, or driving/parking in undesirable areas. You may want to invest in
durable signs that will withstand weather conditions and can easily be
moved. Consider a map that shows areas on your farm open for visitors.
Will all visitors have adequate accessibility to my farm?
p. 14 • VT FEED • www.vtfeed.org
Students and public visitors will most likely arrive
at your farm in a bus or in cars. You can estimate
that one car will hold 3-5 students. There needs to
be a place to turn around and park the bus, or a large
space to park the cars. For safe boarding and de-boarding, please make
sure the parking area is not too close to heavy traffi c. Also, consider the
parking area’s soil condition. Vehicles will compact the soil, and parking
cars in a muddy fi eld may necessitate pulling visitors out with a tractor.
Whatever the facilities are, share your expec-
tations with the teacher or group leader
before they arrive so that there are no surprises. If
you plan on hosting groups on a regular basis, you will want to consider
renting port-o-lets. There are daily, weekly, and seasonal rental options.
Make sure you have enough for the number of guests.
Hand washing is another important consideration, not only after using
the restroom, but after activities, before lunch/snack, and before/after
touching animals. If sinks are not available, have a hose with running
water and antiseptic wipes available, or warm soapy water in a bucket
and hand-sanitizing lotion. It is also helpful to post signs that remind
visitors to wash their hands after touching animals.
QUESTIONS TO CONSIDER:
Will the group have access to a bathroom?
Do you want people in your house unattended?
Can your restroom facilities handle all your visitors?
Will you rent a port-o-let?
Will visitors be expected to use the woods?
Is there anywhere to wash hands besides the bathroom?
GETTING STARTED
What bathroom and wash-ing facilities do I have?
QUESTIONS TO CONSIDER:
Will the visiting group arrive by bus or cars?
Do you have a place for the bus to turn around?
Where will the cars park?
What about visitortransportation & parking?
VT FEED • www.vtfeed.org • p. 15
What should I do if the weather turns bad?
QUESTIONS TO CONSIDER:
Will you cancel or postpone and reschedule?
Do you have enough sheltered space to go ahead with the visit?
Do you schedule a rain date ahead of time?
QUESTIONS TO CONSIDER:
Where will visitors put their trash during the visit?
Will you supply garbage cans?
Did you factor the cost of disposing of garbage in your group fee calculations?
Do you want a “pack it in, pack it out” policy?
Create a plan for what you will do if the weather is not
cooperating and discuss it with the group leader before
the visit. Visitors should expect to be outside even if the
weather is not perfect, and wear appropriate clothing for both warm and
cold conditions (snowgear, raingear, warm layers, sunscreen, mud boots,
etc.). A hot drink may boost group morale when it is cold, and providing
cold water refi lls or a run though the sprinkler will help in the heat. If
the weather is too extreme, discuss alternatives with the teacher or group
leader before the visit. If you have indoor space to continue with the visit,
discuss with the group ahead of time. If not, you may want to reschedule.
GETTING STARTED
If you are supplying a snack, you will need a way for the visi-
tors to dispose of the waste. If you are not supplying food
and are worried about the cost of trash disposal, don’t hesitate to
ask the group to take their own trash with them. Be sure to discuss this
ahead of time so they know to “pack out” any trash that they “pack in.”
You may want to have some extra trash bags on hand in case the group
forgets theirs.
What about trash?
p. 16 • VT FEED • www.vtfeed.org
Connecting to theCLASSROOM
VT FEED • www.vtfeed.org • p. 17
p. 18 • VT FEED • www.vtfeed.org
VT FEED • www.vtfeed.org • p. 19
Connecting to the Classroom
There are many ways to open your farm to visitors. Hosting class-
room students is a powerful way to reach young people and build a
strong connection with the next generation. But don’t feel like you have
to do everything at once. Consider starting with just 10 school visits a
year or work with two classes for multiple visits. The one-time visit is a
perfectly good starting point, as well, but people learn best when they are
given multiple experiences.
Now that you’ve assessed your readiness to host a school
group, how do you fi nd one? Start with the phone book or
the internet. Start with just one or two schools. (Farmers often
start with their children’s schools.) After you have identifi ed schools
in your community (including preschools), send out a letter, fl yer, or
postcard. Try to identify a lead contact at each school who can be a
spokesperson for you as you start to make connections. You might even
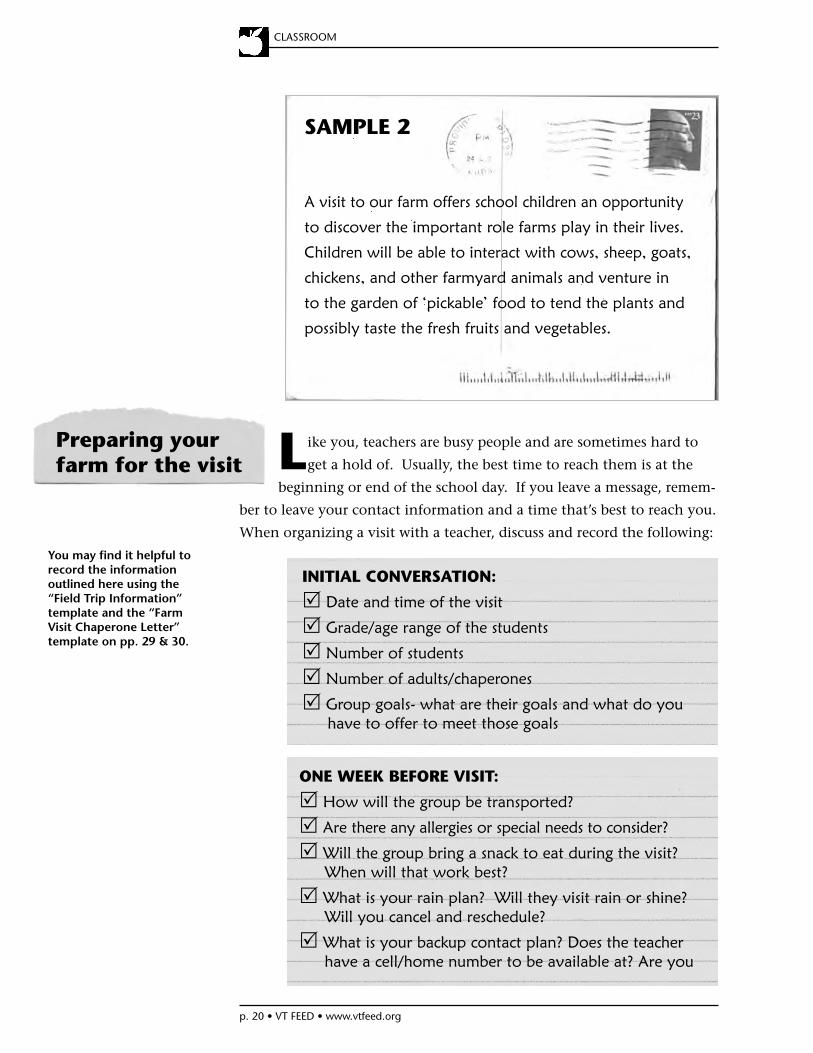
ask for fi ve minutes to speak at a faculty meeting. The following are two
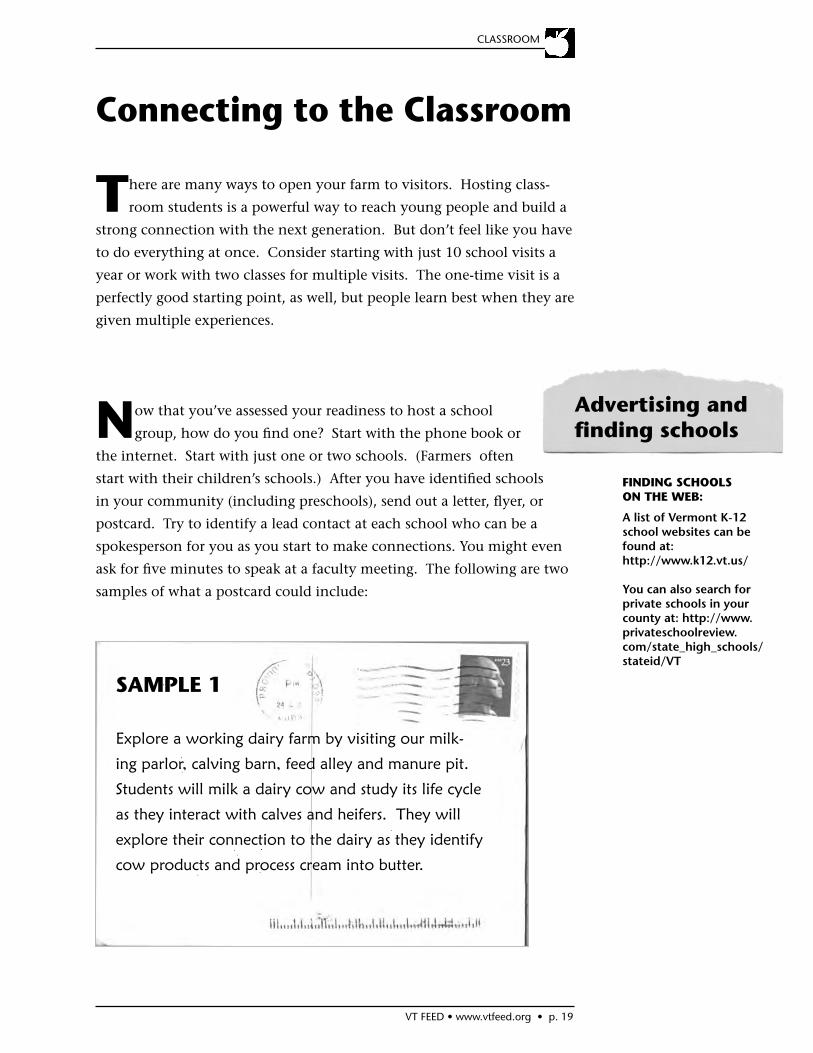
samples of what a postcard could include:
Advertising and fi nding schools
SAMPLE 1
Explore a working dairy farm by visiting our milk-
ing parlor, calving barn, feed alley and manure pit.
Students will milk a dairy cow and study its life cycle
as they interact with calves and heifers. They will
explore their connection to the dairy as they identify
cow products and process cream into butter.
CLASSROOM
FINDING SCHOOLS ON THE WEB:
A list of Vermont K-12 school websites can be found at: http://www.k12.vt.us/
You can also search for private schools in your county at: http://www.privateschoolreview.com/state_high_schools/stateid/VT
p. 20 • VT FEED • www.vtfeed.org
You may fi nd it helpful to record the information outlined here using the “Field Trip Information” template and the “Farm Visit Chaperone Letter” template on pp. 29 & 30.
Like you, teachers are busy people and are sometimes hard to
get a hold of. Usually, the best time to reach them is at the
beginning or end of the school day. If you leave a message, remem-
ber to leave your contact information and a time that’s best to reach you.
When organizing a visit with a teacher, discuss and record the following:
Preparing your farm for the visit
INITIAL CONVERSATION:
Date and time of the visit
Grade/age range of the students
Number of students
Number of adults/chaperones
Group goals- what are their goals and what do you have to offer to meet those goals
ONE WEEK BEFORE VISIT:
How will the group be transported?
Are there any allergies or special needs to consider?
Will the group bring a snack to eat during the visit? When will that work best?
What is your rain plan? Will they visit rain or shine? Will you cancel and reschedule?
What is your backup contact plan? Does the teacher have a cell/home number to be available at? Are you
SAMPLE 2
A visit to our farm offers school children an opportunity
to discover the important role farms play in their lives.
Children will be able to interact with cows, sheep, goats,
chickens, and other farmyard animals and venture in
to the garden of ‘pickable’ food to tend the plants and
possibly taste the fresh fruits and vegetables.
CLASSROOM
VT FEED • www.vtfeed.org • p. 21
willing to give out your home phone number or cell phone number to the teacher?
What are the teacher’s goals and objectives of the visit? What are yours?
How does the visit fit into their curriculum? Are they working on a farming unit? Is there anything they’d like to focus on during their visit?
What related activities will students complete before or after their visit? What are your ideas?
After all the details have been ironed out over the phone or in emails,
you may want to send a confi rmation letter or email to the teacher (sample
on p.31). If you discussed any activity ideas or would like to share a few
for the students to complete at school or at home, send those too!
DAY OF VISIT CHECKLIST:
Is the boot wash station ready?
Are signs and map ready?
Animals: Put dogs in the house; put bull in back pasture; lock up grumpy rooster
Is the first aid kit out and ready?
Do the bathrooms have toilet paper?
Is parking area clear of equipment & well marked?
Are emergency numbers posted by the phone?
What is the weather for the day? Do you have cover ready if it rains?
Put out extra trash bags
Are all materials for your activity stations ready?
Put hand sanitizer at hand washing stations
Are the snack and/or take-home activities ready?
Rope off areas where you do not want foot or car traffic (pond, equipment, infirmary, etc.)
Take keys out of tractor
Turn off the electric fence
Are all fertilizers, pest-control products and medicines out of reach?
Name tags or masking tape and pens
CLASSROOM
p. 22 • VT FEED • www.vtfeed.org
How do you know if the activities you’ve planned are appro-
priate for the students who are visiting on a particular day?
Will the activity that was a hit with the preschoolers yesterday be
a hit with 5th graders tomorrow? It depends on the activity. Milking a
cow or harvesting vegetables from the garden are activities for all ages. An
activity about trait selection in animal breeding, on the other hand, would
be most appropriate for high school-age students or older.
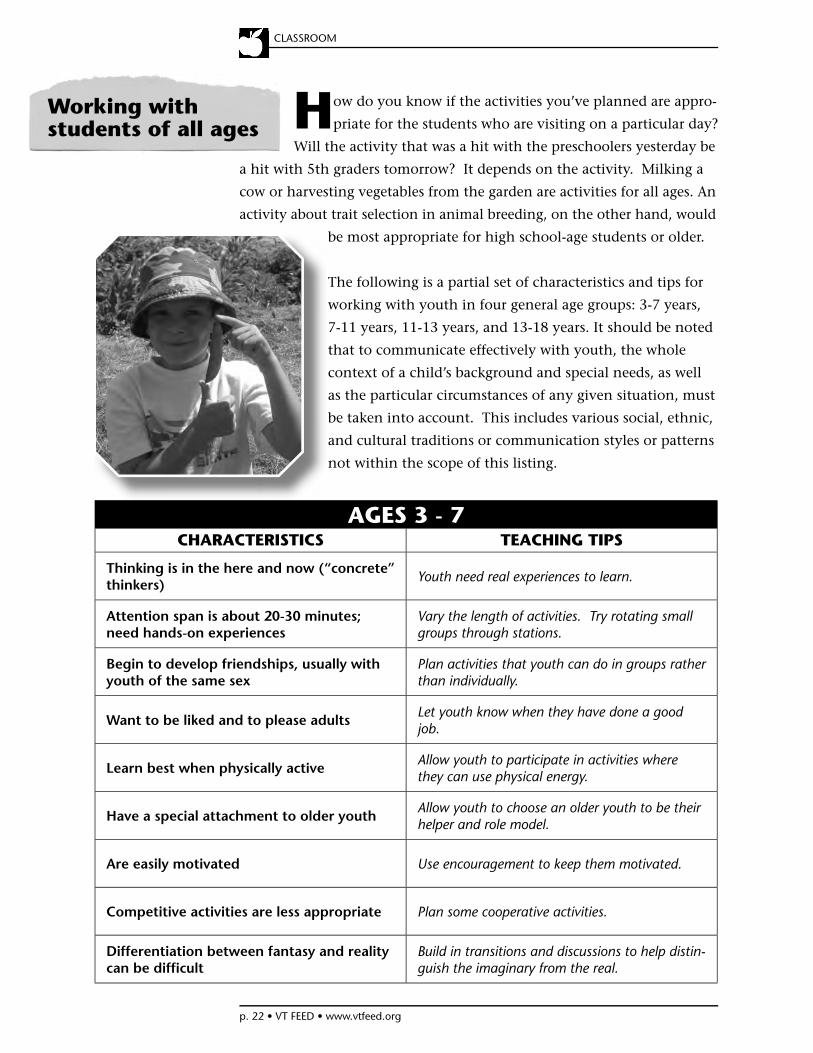
The following is a partial set of characteristics and tips for
working with youth in four general age groups: 3-7 years,
7-11 years, 11-13 years, and 13-18 years. It should be noted
that to communicate effectively with youth, the whole
context of a child’s background and special needs, as well
as the particular circumstances of any given situation, must
be taken into account. This includes various social, ethnic,
and cultural traditions or communication styles or patterns
not within the scope of this listing.
AGES 3 - 7CHARACTERISTICS TEACHING TIPS
Thinking is in the here and now (“concrete” thinkers) Youth need real experiences to learn.
Attention span is about 20-30 minutes; need hands-on experiences
Vary the length of activities. Try rotating small groups through stations.
Begin to develop friendships, usually with youth of the same sex
Plan activities that youth can do in groups rather than individually.
Want to be liked and to please adultsLet youth know when they have done a good job.
Learn best when physically active Allow youth to participate in activities where they can use physical energy.
Have a special attachment to older youth Allow youth to choose an older youth to be their helper and role model.
Are easily motivated Use encouragement to keep them motivated.
Competitive activities are less appropriate Plan some cooperative activities.
Differentiation between fantasy and reality can be diffi cult
Build in transitions and discussions to help distin-guish the imaginary from the real.
Working with students of all ages
CLASSROOM
VT FEED • www.vtfeed.org • p. 23
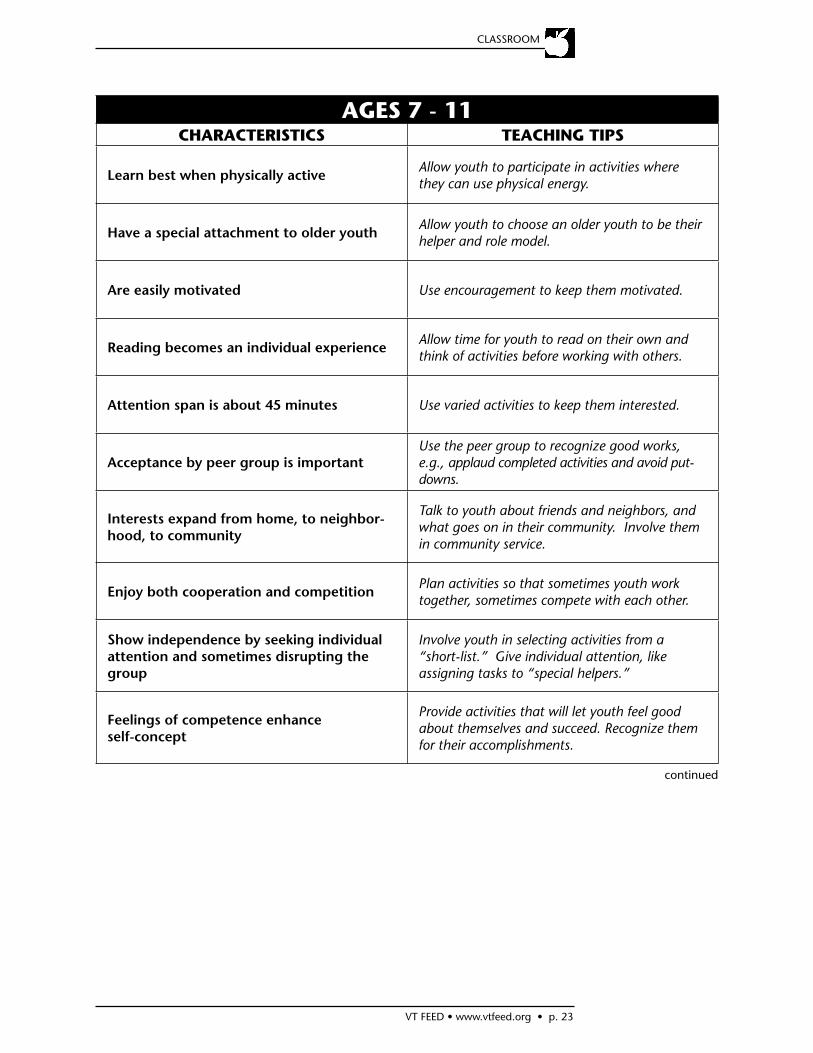
AGES 7 - 11CHARACTERISTICS TEACHING TIPS
Learn best when physically active Allow youth to participate in activities where they can use physical energy.
Have a special attachment to older youth Allow youth to choose an older youth to be their helper and role model.
Are easily motivated Use encouragement to keep them motivated.
Reading becomes an individual experience Allow time for youth to read on their own and think of activities before working with others.
Attention span is about 45 minutes Use varied activities to keep them interested.
Acceptance by peer group is importantUse the peer group to recognize good works, e.g., applaud completed activities and avoid put-downs.
Interests expand from home, to neighbor-hood, to community
Talk to youth about friends and neighbors, and what goes on in their community. Involve them in community service.
Enjoy both cooperation and competition Plan activities so that sometimes youth work together, sometimes compete with each other.
Show independence by seeking individual attention and sometimes disrupting the group
Involve youth in selecting activities from a “short-list.” Give individual attention, like assigning tasks to “special helpers.”
Feelings of competence enhance self-concept
Provide activities that will let youth feel good about themselves and succeed. Recognize them for their accomplishments.
CLASSROOM
continued
p. 24 • VT FEED • www.vtfeed.org
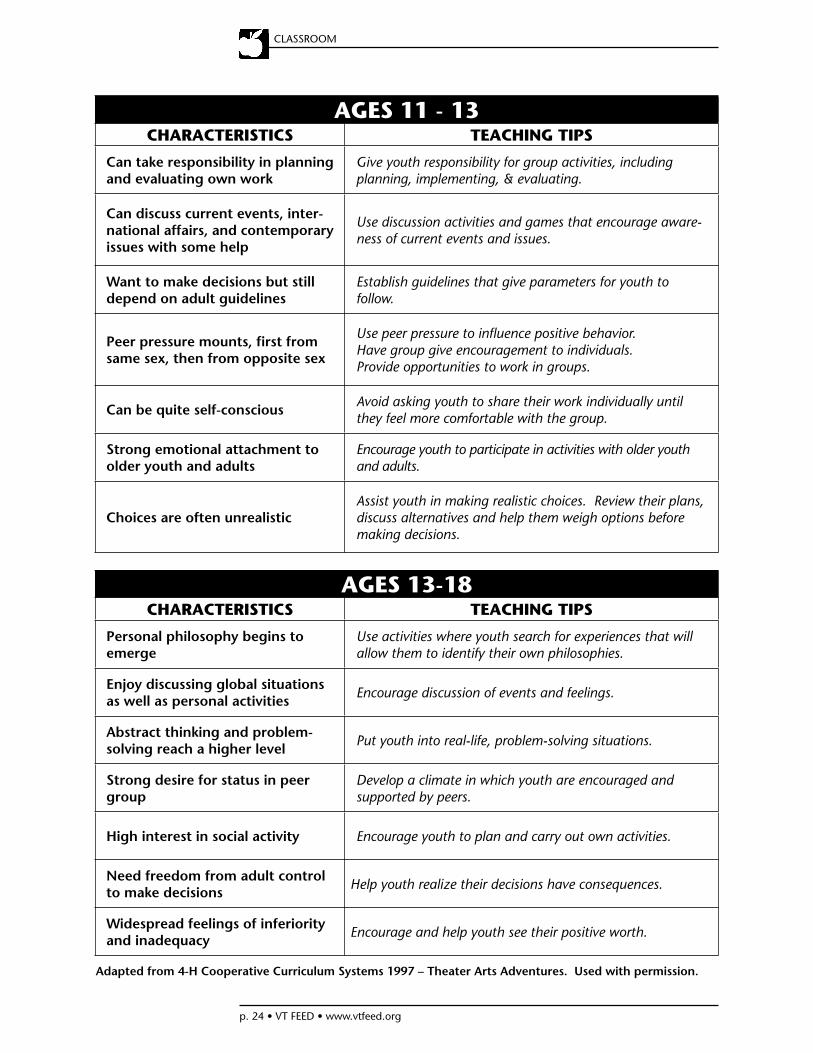
AGES 13-18CHARACTERISTICS TEACHING TIPS
Personal philosophy begins to emerge
Use activities where youth search for experiences that will allow them to identify their own philosophies.
Enjoy discussing global situations as well as personal activities Encourage discussion of events and feelings.
Abstract thinking and problem-solving reach a higher level Put youth into real-life, problem-solving situations.
Strong desire for status in peer group
Develop a climate in which youth are encouraged and supported by peers.
High interest in social activity Encourage youth to plan and carry out own activities.
Need freedom from adult control to make decisions Help youth realize their decisions have consequences.
Widespread feelings of inferiority and inadequacy Encourage and help youth see their positive worth.
Adapted from 4-H Cooperative Curriculum Systems 1997 – Theater Arts Adventures. Used with permission.
AGES 11 - 13CHARACTERISTICS TEACHING TIPS
Can take responsibility in planning and evaluating own work
Give youth responsibility for group activities, including planning, implementing, & evaluating.
Can discuss current events, inter-national affairs, and contemporary issues with some help
Use discussion activities and games that encourage aware-ness of current events and issues.
Want to make decisions but still depend on adult guidelines
Establish guidelines that give parameters for youth to follow.
Peer pressure mounts, fi rst from same sex, then from opposite sex
Use peer pressure to infl uence positive behavior. Have group give encouragement to individuals. Provide opportunities to work in groups.
Can be quite self-conscious Avoid asking youth to share their work individually until they feel more comfortable with the group.
Strong emotional attachment to older youth and adults
Encourage youth to participate in activities with older youth and adults.
Choices are often unrealisticAssist youth in making realistic choices. Review their plans, discuss alternatives and help them weigh options before making decisions.
CLASSROOM
VT FEED • www.vtfeed.org • p. 25
1. Set the tone at the beginning of the trip. Establish guidelines
and rules with the students—what can they do to help themselves have
a safe and fun day? See what they come up with and then add other
things that they may have left out.
2. Use a positive tone. Use phrases like “Please walk” and “Keep your
hands to yourself” instead of “Don’t run” or “Don’t touch.”
3. Give the group a brief overview of the day. “We’ll be spend-
ing the whole day outside. We’ll have time to see the animals, do some
chores, and we may even be tasting something today!”
4. Refer to the students by name as often as you can. Name tags
are very helpful, so ask the teacher to use them. Small pieces of masking
tape and a pen will do if nametags are forgotten.
5. Eye contact is important. Make sure to situate yourself so that the
group can look at you and not have to look into the sun.
6. Instead of giving all of the information, ask students to come up
with it themselves. Asking questions will encourage your students to
think and discover on their own and will help you understand their level
of knowledge. Let them think for a few seconds, then give a hint or two
if there is no response. Leading them to discover the answer themselves
builds their confi dence.
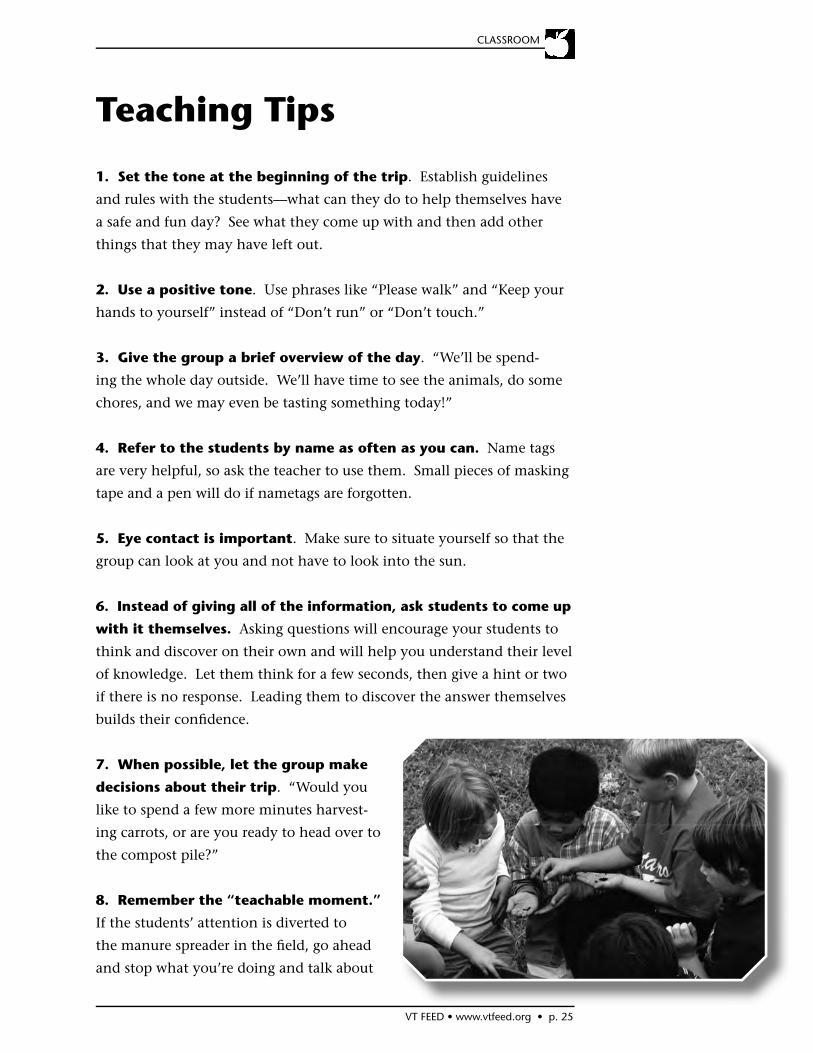
7. When possible, let the group make
decisions about their trip. “Would you
like to spend a few more minutes harvest-
ing carrots, or are you ready to head over to
the compost pile?”
8. Remember the “teachable moment.”
If the students’ attention is diverted to
the manure spreader in the fi eld, go ahead
and stop what you’re doing and talk about
CLASSROOM
Teaching Tips
p. 26 • VT FEED • www.vtfeed.org
natural fertilizers and the benefi ts of manure! Take advantage of their
interests.
9. Be aware that students have multiple learning styles. It will be
helpful to use a range of methods to convey the ideas you would like the
students to learn about. Try to be creative, allow the students to smell,
hear, see, and touch while learning.
10. Stay one step ahead of your group. Try to foresee safety issues
before they happen and identify students who may need special atten-
tion. For example, if one student has an especially high energy level,
delegate a special task for them or give them an extra responsibility, such
as carrying an item or opening gates.
11. Keep the group actively participating instead of mostly watching
and listening. You can vary the pace by letting them run in some areas
and tip toe in other areas.
12. Gear the duration of your activity to the energy and interests
of the group. Sometimes an activity will last for 10 minutes, some
groups can do it for 20.
13. You are not responsible for behavior management and discipline.
If you are having a problem with a child or group of children, ask a
teacher or chaperone to deal with the situation separate from your activity.
14. Be fl exible and HAVE FUN! If the group senses that you’re enjoy-
ing yourself, they will too!
CLASSROOM
Templates
CLASSROOM
VT FEED • www.vtfeed.org • p. 27

p. 28 • VT FEED • www.vtfeed.org
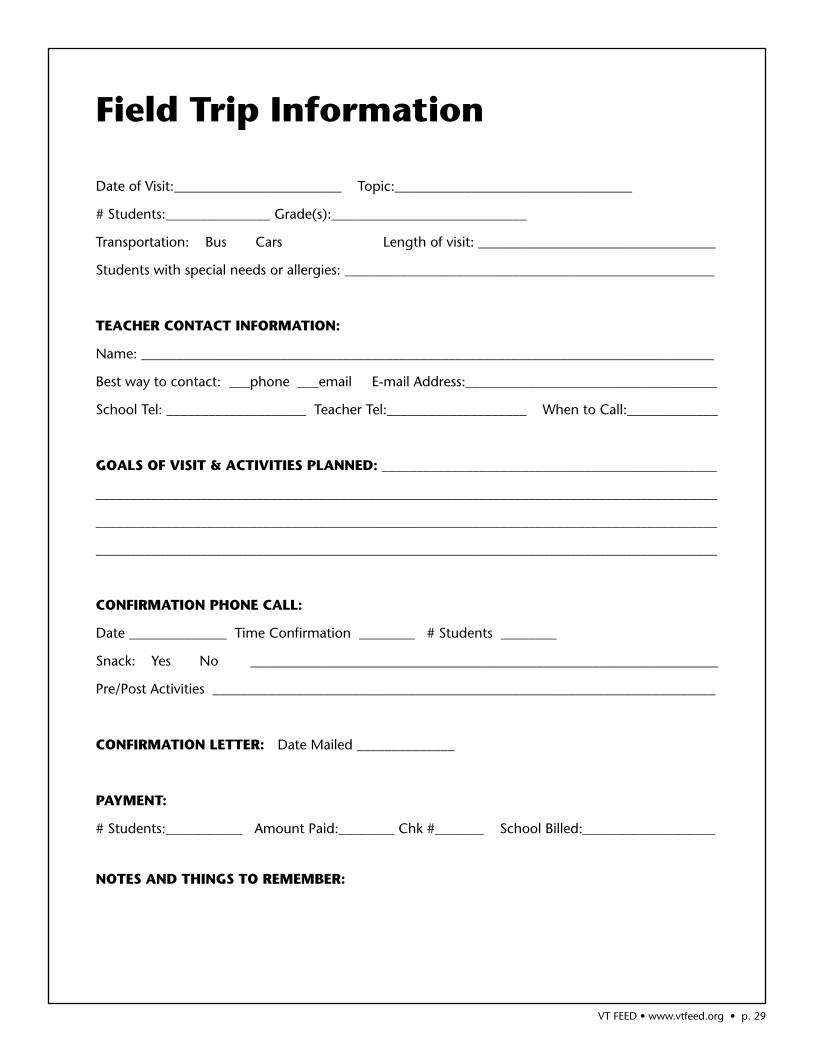
Field Trip Information
Date of Visit:________________________ Topic:__________________________________
# Students:_______________ Grade(s):____________________________
Transportation: Bus Cars Length of visit: __________________________________
Students with special needs or allergies: _____________________________________________________
TEACHER CONTACT INFORMATION:
Name: __________________________________________________________________________________
Best way to contact: ___phone ___email E-mail Address:____________________________________
School Tel: ____________________ Teacher Tel:____________________ When to Call:_____________
GOALS OF VISIT & ACTIVITIES PLANNED: ________________________________________________
_________________________________________________________________________________________
_________________________________________________________________________________________
_________________________________________________________________________________________
CONFIRMATION PHONE CALL:
Date ______________ Time Confi rmation ________ # Students ________
Snack: Yes No ___________________________________________________________________
Pre/Post Activities ________________________________________________________________________
CONFIRMATION LETTER: Date Mailed ______________
PAYMENT:
# Students:___________ Amount Paid:________ Chk #_______ School Billed:___________________
NOTES AND THINGS TO REMEMBER:
VT FEED • www.vtfeed.org • p. 29
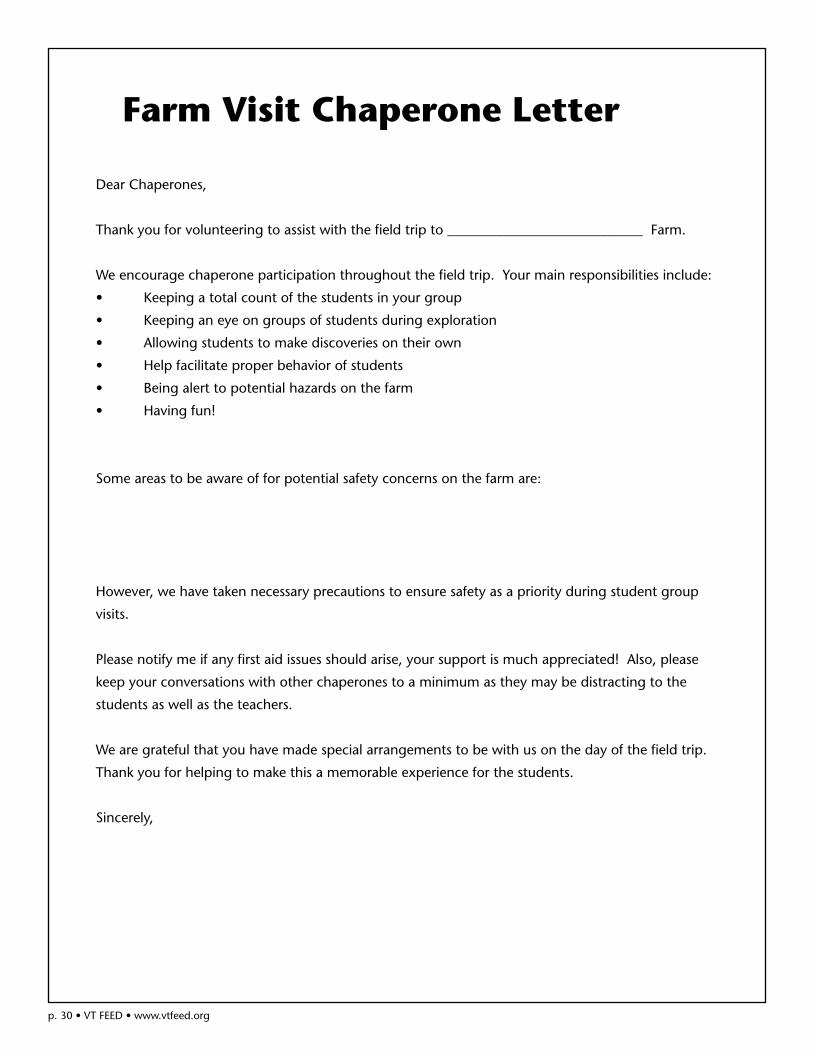
Farm Visit Chaperone Letter
Dear Chaperones,
Thank you for volunteering to assist with the fi eld trip to ____________________________ Farm.
We encourage chaperone participation throughout the fi eld trip. Your main responsibilities include:
• Keeping a total count of the students in your group
• Keeping an eye on groups of students during exploration
• Allowing students to make discoveries on their own
• Help facilitate proper behavior of students
• Being alert to potential hazards on the farm
• Having fun!
Some areas to be aware of for potential safety concerns on the farm are:
However, we have taken necessary precautions to ensure safety as a priority during student group
visits.
Please notify me if any fi rst aid issues should arise, your support is much appreciated! Also, please
keep your conversations with other chaperones to a minimum as they may be distracting to the
students as well as the teachers.
We are grateful that you have made special arrangements to be with us on the day of the fi eld trip.
Thank you for helping to make this a memorable experience for the students.
Sincerely,
p. 30 • VT FEED • www.vtfeed.org
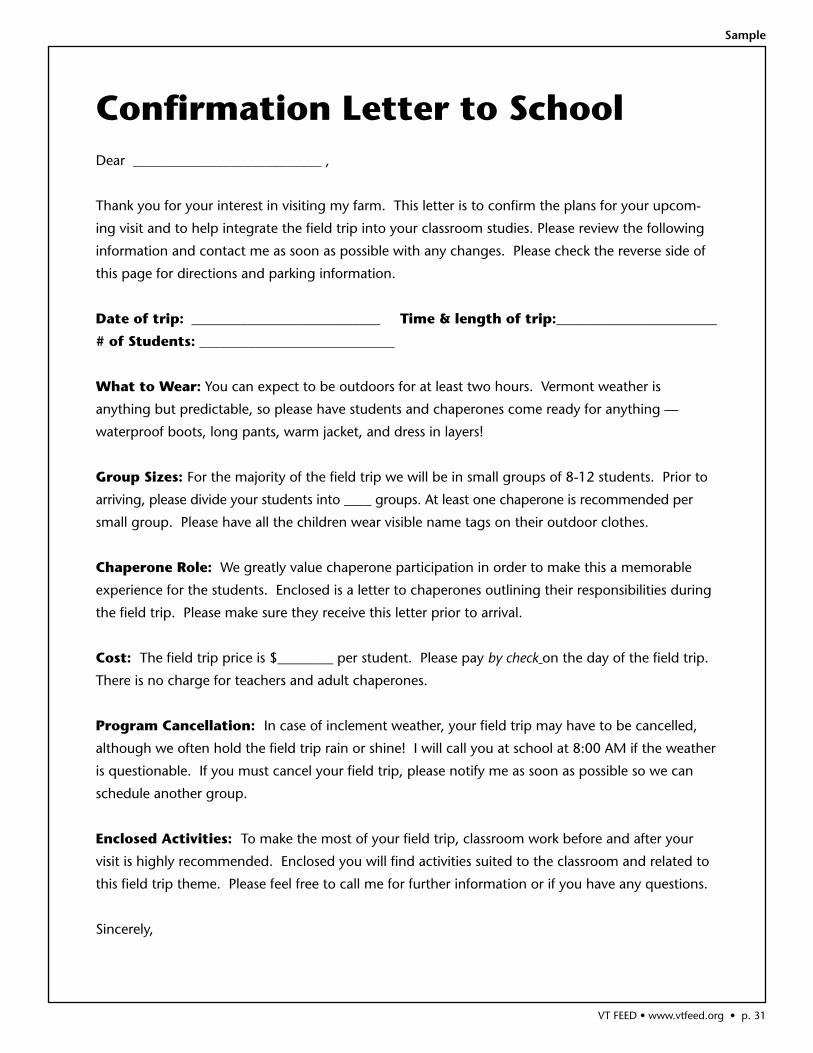
Confi rmation Letter to SchoolDear ___________________________ ,
Thank you for your interest in visiting my farm. This letter is to confi rm the plans for your upcom-
ing visit and to help integrate the fi eld trip into your classroom studies. Please review the following
information and contact me as soon as possible with any changes. Please check the reverse side of
this page for directions and parking information.
Date of trip: ___________________________ Time & length of trip:_______________________
# of Students: ____________________________
What to Wear: You can expect to be outdoors for at least two hours. Vermont weather is
anything but predictable, so please have students and chaperones come ready for anything —
waterproof boots, long pants, warm jacket, and dress in layers!
Group Sizes: For the majority of the fi eld trip we will be in small groups of 8-12 students. Prior to
arriving, please divide your students into ____ groups. At least one chaperone is recommended per
small group. Please have all the children wear visible name tags on their outdoor clothes.
Chaperone Role: We greatly value chaperone participation in order to make this a memorable
experience for the students. Enclosed is a letter to chaperones outlining their responsibilities during
the fi eld trip. Please make sure they receive this letter prior to arrival.
Cost: The fi eld trip price is $________ per student. Please pay by check on the day of the fi eld trip.
There is no charge for teachers and adult chaperones.
Program Cancellation: In case of inclement weather, your fi eld trip may have to be cancelled,
although we often hold the fi eld trip rain or shine! I will call you at school at 8:00 AM if the weather
is questionable. If you must cancel your fi eld trip, please notify me as soon as possible so we can
schedule another group.
Enclosed Activities: To make the most of your fi eld trip, classroom work before and after your
visit is highly recommended. Enclosed you will fi nd activities suited to the classroom and related to
this fi eld trip theme. Please feel free to call me for further information or if you have any questions.
Sincerely,
VT FEED • www.vtfeed.org • p. 31
Sample

Confi rmation Letter to SchoolDear _________________________ ,
Thank you for your interest in visiting my farm. This letter is to confi rm the plans for your upcoming
visit and to help integrate the fi eld trip into your classroom studies. Please review the following
information and contact me as soon as possible with any changes. Please check the reverse side of
this page for directions and parking information.
Date of trip: ____________________________
Time & length of trip: _______________________
# of Students: ____________________________
What to Wear:
Group Sizes:
Chaperone Role:
Cost:
Program Cancellation:
Enclosed Activities:
Sincerely,
p. 32 • VT FEED • www.vtfeed.org

Connecting to theCAFETERIA
VT FEED • www.vtfeed.org • p. 33
p. 34 • VT FEED • www.vtfeed.org
VT FEED • www.vtfeed.org • p. 35
Understanding the School Food Environment
Every day schools in Vermont serve breakfast and/or lunch to more
than 50,000 Vermont students, an annual business of $30 million.
The average amount that can be spent on the food for a lunch (includes
milk, vegetable, fruit, protein, and carbohydrate) is about $1.00. It is
also common today for a school district to serve after-school snacks, and
meals for summer programs, making them a year-round program.
School food service directors are responsible for providing healthy, nutri-
tious meals, budgeting and controlling costs, establishing menus, man-
aging USDA commodity food, and meeting federal nutrition guidelines.
With all of these responsibilities and constraints, they need high-quality
products, in the quantity specifi ed, at a price that works, with a consistent
delivery system. Meeting these needs and establishing a successful work-
ing relationship takes time and good communication. When each party
is familiar with the challenges and opportunities that the other party
faces, a working relationship is more likely to fl ourish.
Currently schools in Vermont order about 86% of all their
food through distributors. This often entails on-line order-
ing or just a few phone calls to salespeople. To save on time and
labor, the food service industry sells schools inexpensive fresh produce
that is already washed, cut, and ready to serve. Schools also receive low
cost USDA commodity foods; this makes up about 14% of their total
food inventory. These include: meats, cheeses, a few types of fresh storage
vegetables and fruits, canned and frozen vegetables and fruits, and some
dry goods (such as fl our and pasta).
Fifty percent of Vermont schools run their own independent
food programs. The rest either receive prepared food from
another school in the district or have a catering company run the
program. The food service manager OF any given school may not have
authority to make purchasing decisions.
CAFETERIA
Where does school food come from?
Who prepares the school food?
p. 36 • VT FEED • www.vtfeed.org
Depending on ages, nutrition requirements, and
food preferences, different foods might be of-
fered at different schools even within the same district.
Of course, the supply that the school receives from its
catering company or distributor affects its meal offerings.
Some schools are requesting Vermont products
from their distributors, and a few are buying
directly from local farmers. Local products can be
challenging for school food service because of the time and labor it takes
to wash and process them—even carrot sticks. Vermont is just beginning
to supply some Vermont products (starting with apples in Fall 2005) into
the USDA stream. Some directors are mixing less expensive commodity
products with local product (such as chili made with USDA commodity
beef and local vegetables). Others are having local lunches once a month.
The number of farms needed to feed a school district
depends on the school district’s needs and the farms
in any local region. A single farm might meet many of a
small school’s needs. Where there are several in the area, the
school or district might obtain berries from one grower, spring vegetables
from some other farm, and fall produce from still another farm.
How are decisions made about what is served?
Are any Vermont schools buying local products?
How many farms does it take to feed a school district?
CAFETERIA
VT FEED • www.vtfeed.org • p. 37
Local Purchasing Options
School Food Service programs in Vermont are expanding their local
purchasing through a variety of arrangements outlined below.
Whichever option is selected, know that every school food service must
comply with a strict food safety program based on the Hazard Analysis
and Critical Control Point (HACCP) principles. Temperature control
of fresh and cooked products is very important. Therefore, arrange for
proper refrigeration of merchandise during storage and distribution.
Distributors are the link to virtually every institutional food service
operation in Vermont and a true resource for farms that do not have
transportation or storage infrastructure. Vermont is fortunate to have a
number of distributors who look for, and showcase, Vermont products.
If you are a larger producer, your product will get to many more schools
without you worrying about distribution. If you want to bring your
products to one place, be aware distributors often require a minimum
amount of product. The upside to this arrangement is that there is often
no contract or long-term commitment. The downside is that your farm
may be anonymous — schools will likely only know that the product
they receive is from Vermont, but not know which farm it comes from.
In direct purchasing, food service staff call you directly, or you may
contact food services about your products. Food service directors and
managers expect to work with dependable farmers with whom they can
establish a long-term purchasing relationship. Things will go wrong
occasionally. Food service directors need to be able to contact someone
quickly if there is a problem. They will also want to be notifi ed ahead
of time if a delivery will be late or missed completely so they can make
substitutions and adjustments. Here are some direct purchasing options
that a farmer could offer:
CAFETERIA
Wholesale Distributors
Direct Purchasing
p. 38 • VT FEED • www.vtfeed.org
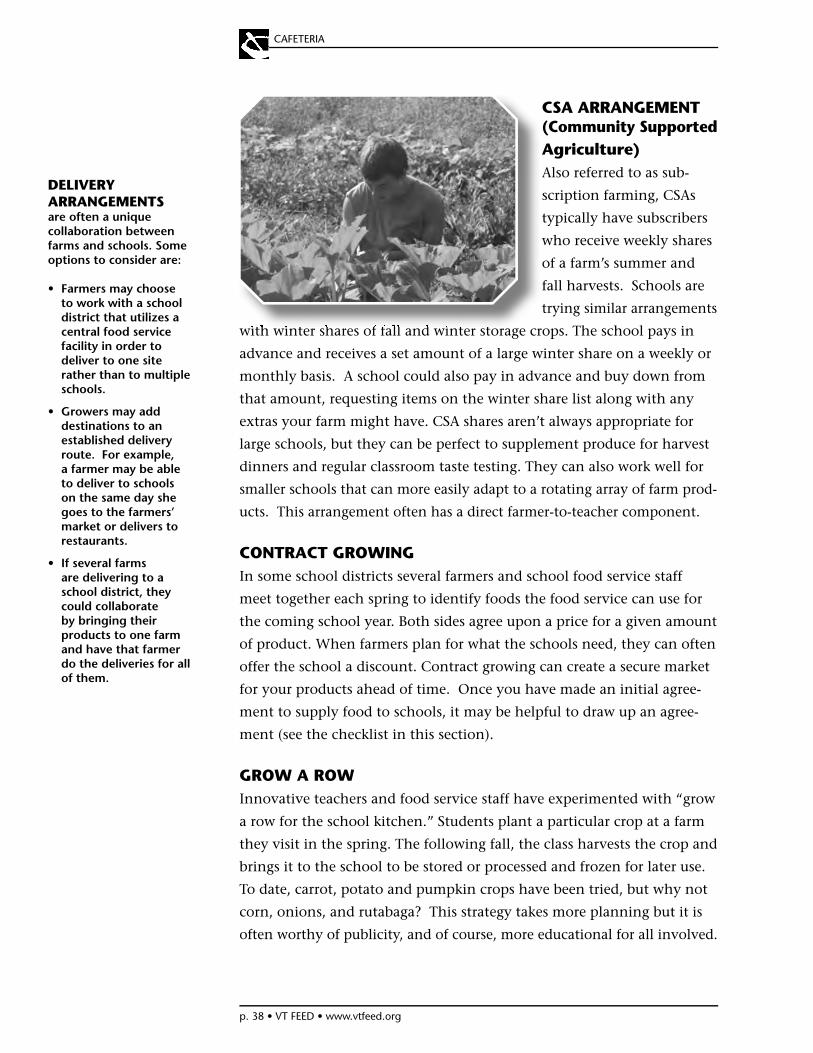
CSA ARRANGEMENT (Community Supported Agriculture)Also referred to as sub-
scription farming, CSAs
typically have subscribers
who receive weekly shares
of a farm’s summer and
fall harvests. Schools are
trying similar arrangements
with winter shares of fall and winter storage crops. The school pays in
advance and receives a set amount of a large winter share on a weekly or
monthly basis. A school could also pay in advance and buy down from
that amount, requesting items on the winter share list along with any
extras your farm might have. CSA shares aren’t always appropriate for
large schools, but they can be perfect to supplement produce for harvest
dinners and regular classroom taste testing. They can also work well for
smaller schools that can more easily adapt to a rotating array of farm prod-
ucts. This arrangement often has a direct farmer-to-teacher component.
CONTRACT GROWINGIn some school districts several farmers and school food service staff
meet together each spring to identify foods the food service can use for
the coming school year. Both sides agree upon a price for a given amount
of product. When farmers plan for what the schools need, they can often
offer the school a discount. Contract growing can create a secure market
for your products ahead of time. Once you have made an initial agree-
ment to supply food to schools, it may be helpful to draw up an agree-
ment (see the checklist in this section).
GROW A ROWInnovative teachers and food service staff have experimented with “grow
a row for the school kitchen.” Students plant a particular crop at a farm
they visit in the spring. The following fall, the class harvests the crop and
brings it to the school to be stored or processed and frozen for later use.
To date, carrot, potato and pumpkin crops have been tried, but why not
corn, onions, and rutabaga? This strategy takes more planning but it is
often worthy of publicity, and of course, more educational for all involved.
CAFETERIA
DELIVERY ARRANGEMENTS are often a unique collaboration between farms and schools. Some options to consider are:
• Farmers may choose to work with a school district that utilizes a central food service facility in order to deliver to one site rather than to multiple schools.
• Growers may add destinations to an established delivery route. For example, a farmer may be able to deliver to schools on the same day she goes to the farmers’ market or delivers to restaurants.
• If several farms are delivering to a school district, they could collaborate by bringing their products to one farm and have that farmer do the deliveries for all of them.
VT FEED • www.vtfeed.org • p. 39
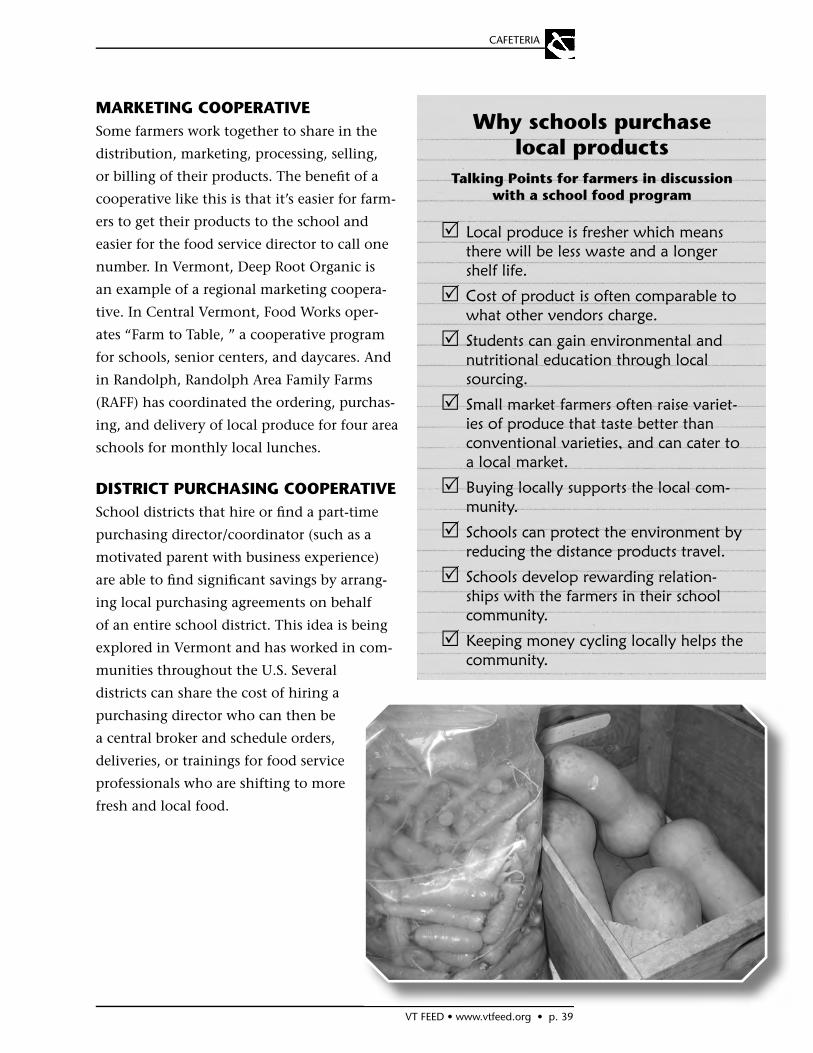
MARKETING COOPERATIVESome farmers work together to share in the
distribution, marketing, processing, selling,
or billing of their products. The benefi t of a
cooperative like this is that it’s easier for farm-
ers to get their products to the school and
easier for the food service director to call one
number. In Vermont, Deep Root Organic is
an example of a regional marketing coopera-
tive. In Central Vermont, Food Works oper-
ates “Farm to Table, ” a cooperative program
for schools, senior centers, and daycares. And
in Randolph, Randolph Area Family Farms
(RAFF) has coordinated the ordering, purchas-
ing, and delivery of local produce for four area
schools for monthly local lunches.
DISTRICT PURCHASING COOPERATIVESchool districts that hire or fi nd a part-time
purchasing director/coordinator (such as a
motivated parent with business experience)
are able to fi nd signifi cant savings by arrang-
ing local purchasing agreements on behalf
of an entire school district. This idea is being
explored in Vermont and has worked in com-
munities throughout the U.S. Several
districts can share the cost of hiring a
purchasing director who can then be
a central broker and schedule orders,
deliveries, or trainings for food service
professionals who are shifting to more
fresh and local food.
Why schools purchase local products
Talking Points for farmers in discussion with a school food program
Local produce is fresher which means there will be less waste and a longer shelf life.
Cost of product is often comparable to what other vendors charge.
Students can gain environmental and nutritional education through local sourcing.
Small market farmers often raise variet-ies of produce that taste better than conventional varieties, and can cater to a local market.
Buying locally supports the local com-munity.
Schools can protect the environment by reducing the distance products travel.
Schools develop rewarding relation-ships with the farmers in their school community.
Keeping money cycling locally helps the community.
CAFETERIA
p. 40 • VT FEED • www.vtfeed.org
Action Steps to build purchasing relationships with a School Food Service1. Start small. To develop a reputation as a reliable vendor, commit to
a realistic sales volume and develop a realistic delivery schedule that suits
you and the school food service.
2. Identify and set up business appointments with the directors of
school food service (rather than school cafeteria managers), since they
are typically responsible for making fi nal procurement decisions.
3. Invite the food service director and employees to visit your
farm. Your best selling point is your farm and your products. When
food service staff visit, they will see how you care for your farm and the
work it takes to produce the food they want. Food service directors need
to develop menus that accommodate what grows seasonally in your re-
gion, and visiting your farm will help make this point.
4. Offer free samples. Think about offering potential school food ser-
vice customers samples that they can test in their school
food programs.
5. Make sure you are considering the labor costs
and product costs to ensure your program is sustain-
able in the long run.
6. Develop a sales strategy that offers a variety of
ways the food service can incorporate local prod-
ucts. You might suggest recipes for some of your more
uncommon foods such as hubbard squash.
7. Be aware of how your farm liability insurance
interfaces with the school food service’s food safe-
ty program. Every school food service has a strict food
safety program that is based on the Hazard Analysis and
CAFETERIA
VT FEED • www.vtfeed.org • p. 41
Critical Control Point (HACCP) principals.
Temperature control of fresh and cooked
products is very important. Therefore, ar-
range for proper refrigeration of merchan-
dise during storage and distribution. Also,
incorporate strict quality standards when
assembling and packaging products.
8. Supply products that are diffi cult to
obtain from long-distance shippers, such
as highly perishable fruits or small-quantity
products.
9. Consider growing a different variety
of crops to serve more of the daily needs of
the school food service. Cherry tomatoes,
for example, only require washing; they
store well, and are easy to serve. Talk to
schools as early as possible to plant vegeta-
bles accordingly.
10. Consider washing and even cutting and bagging your product.
A “value-added” product could make you more money and save the food
service time.
11. Work with the school food service on meeting their nutrition
guidelines, which dictate what can be on menus. Because menus are
developed a month ahead of time, substituting products can be diffi cult.
Devise a system with the food service director for supply replacements,
such as putting “local fresh seasonal vegetable” on the menu to accom-
modate the ebb and fl ow of your vegetables.
12. Develop fact sheets for food service and the school community
throughout the season. A weekly fact sheet could include information
about: product availability, size of food items, quality descriptions, esti-
mated quantity and price per unit, other timely news that would provide
food service directors with factors necessary to make good purchasing de-
cisions. It could also contain a farm profi le to further connect the farm
to the school community.
CAFETERIA
A Purchasing Agreement with the School Food Service should include:
The total estimated volume of each item to be delivered.
Amount and price of standing order items.
Delivery schedule: time of day, frequency, and location.
Packing requirements: standard box, grade, loose pack, bulk, etc.
Post-harvest handling practices; is the product pre-cooled? How clean should the product be?
Cost per unit, payment terms, payment process.
Names and phone numbers of the contact people for ordering and billing.
p. 42 • VT FEED • www.vtfeed.org
CAFETERIA
13. Clearly establish a payment schedule plan. School districts often
have a payment cycle of 30-90 days or longer. As a farmer, however,
you may be used to presenting an invoice and receiving payment upon
delivery. This difference in operation needs to be worked out between a
school district and the farmer before purchasing begins.
14. Stay in touch to inform the school what crops will be harvested.
If you can let them know what products to expect one to two weeks
ahead, they can plan. Try to get a standing order by offering a discount.
When each party is familiar with the challenges and opportunities that
the other party faces, a working relationship is more likely to fl ourish.

Connecting to theCOMMUNITY
VT FEED • www.vtfeed.org • p. 43
p. 44 • VT FEED • www.vtfeed.org
VT FEED • www.vtfeed.org • p. 45
Connecting to the Community
The idea of improving children’s nutrition and supporting local farms
is easy to “sell” as a local media story. The more positive media
coverage a project receives, the more support it will generate from the
school administration, school board, parents, teachers, food service staff,
and the local community. By collaborating with teachers, administrators,
and community members, you can fi nd the appropriate individual and
organization to support and develop different aspects of your farm-to-
school initiatives and farm education program. As a farmer, you can do many things within your community to get the
word out about your interest in selling food to local schools and having
community education on your farm.
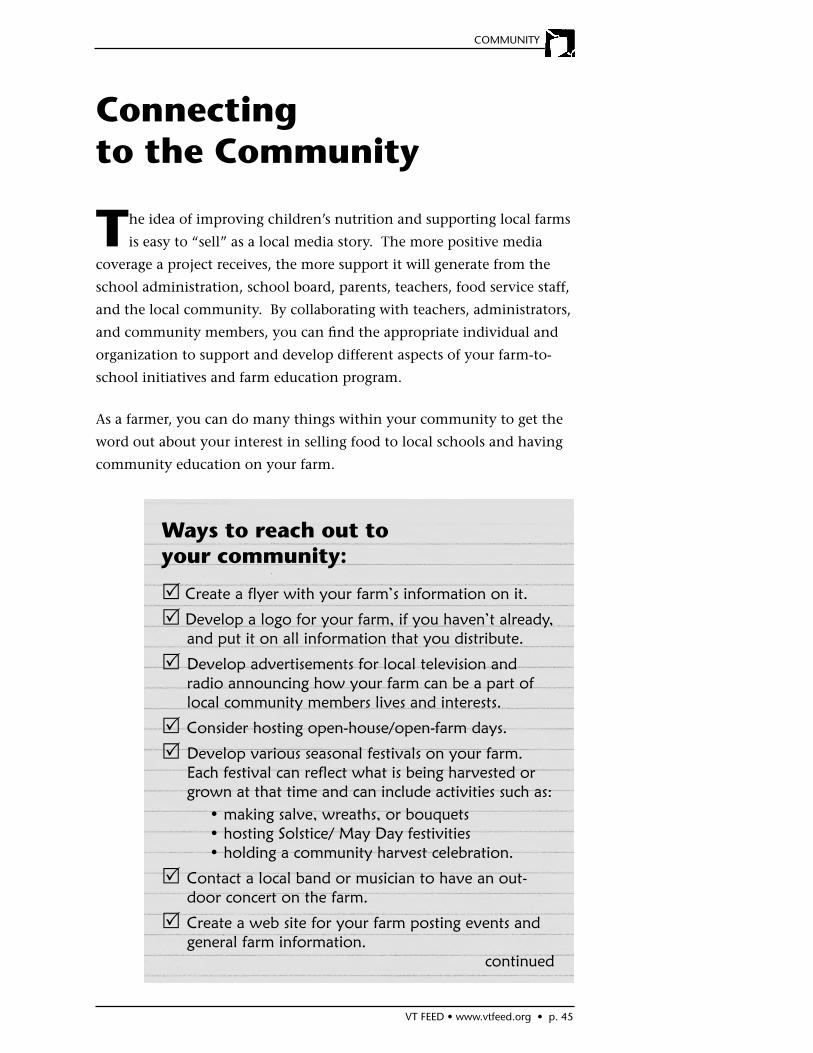
Ways to reach out to your community:
Create a flyer with your farm’s information on it.
Develop a logo for your farm, if you haven’t already, and put it on all information that you distribute.
Develop advertisements for local television and radio announcing how your farm can be a part of local community members lives and interests.
Consider hosting open-house/open-farm days.
Develop various seasonal festivals on your farm. Each festival can reflect what is being harvested or grown at that time and can include activities such as:
• making salve, wreaths, or bouquets • hosting Solstice/ May Day festivities • holding a community harvest celebration.
Contact a local band or musician to have an out-door concert on the farm.
Create a web site for your farm posting events and general farm information.
continued
COMMUNITY
p. 46 • VT FEED • www.vtfeed.org
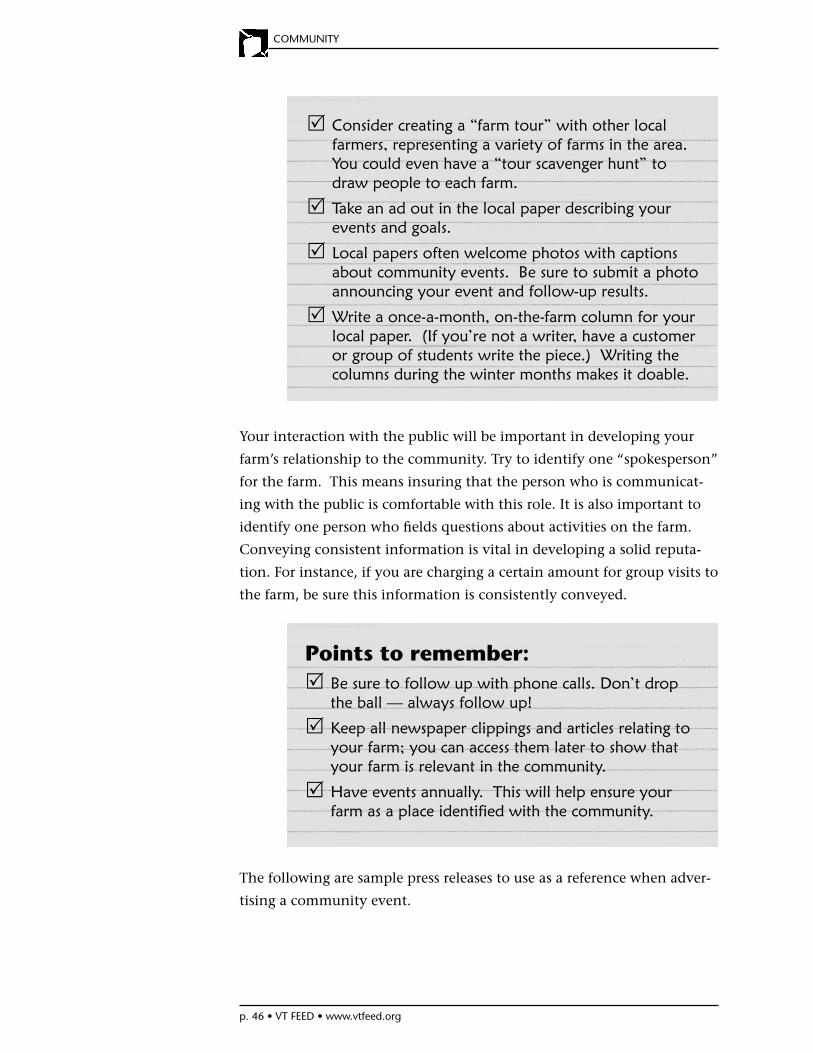
Consider creating a “farm tour” with other local farmers, representing a variety of farms in the area. You could even have a “tour scavenger hunt” to draw people to each farm.
Take an ad out in the local paper describing your events and goals.
Local papers often welcome photos with captions about community events. Be sure to submit a photo announcing your event and follow-up results.
Write a once-a-month, on-the-farm column for your local paper. (If you’re not a writer, have a customer or group of students write the piece.) Writing the columns during the winter months makes it doable.
Your interaction with the public will be important in developing your
farm’s relationship to the community. Try to identify one “spokesperson”
for the farm. This means insuring that the person who is communicat-
ing with the public is comfortable with this role. It is also important to
identify one person who fi elds questions about activities on the farm.
Conveying consistent information is vital in developing a solid reputa-
tion. For instance, if you are charging a certain amount for group visits to
the farm, be sure this information is consistently conveyed.
Points to remember: Be sure to follow up with phone calls. Don’t drop the ball — always follow up!
Keep all newspaper clippings and articles relating to your farm; you can access them later to show that your farm is relevant in the community.
Have events annually. This will help ensure your farm as a place identified with the community.
The following are sample press releases to use as a reference when adver-
tising a community event.
COMMUNITY
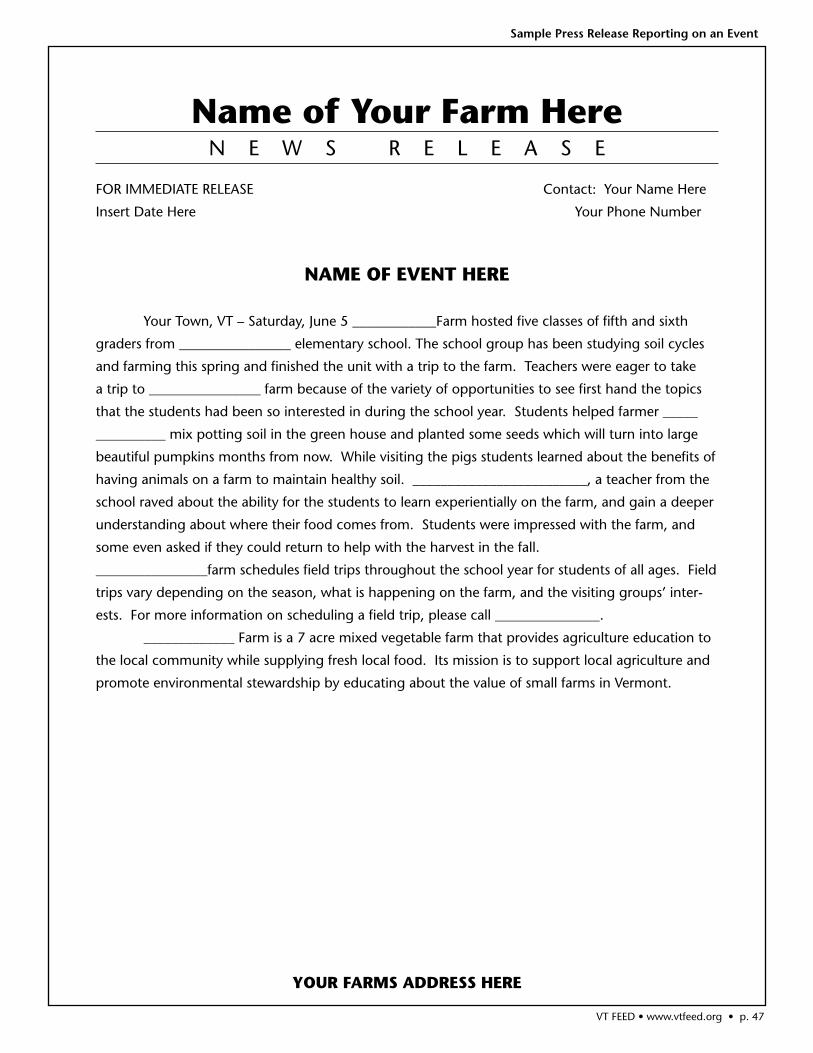
Name of Your Farm HereN E W S R E L E A S E
FOR IMMEDIATE RELEASE Contact: Your Name Here
Insert Date Here Your Phone Number
NAME OF EVENT HERE
Your Town, VT – Saturday, June 5 ____________Farm hosted fi ve classes of fi fth and sixth
graders from ________________ elementary school. The school group has been studying soil cycles
and farming this spring and fi nished the unit with a trip to the farm. Teachers were eager to take
a trip to ________________ farm because of the variety of opportunities to see fi rst hand the topics
that the students had been so interested in during the school year. Students helped farmer _____
__________ mix potting soil in the green house and planted some seeds which will turn into large
beautiful pumpkins months from now. While visiting the pigs students learned about the benefi ts of
having animals on a farm to maintain healthy soil. _________________________, a teacher from the
school raved about the ability for the students to learn experientially on the farm, and gain a deeper
understanding about where their food comes from. Students were impressed with the farm, and
some even asked if they could return to help with the harvest in the fall.
________________farm schedules fi eld trips throughout the school year for students of all ages. Field
trips vary depending on the season, what is happening on the farm, and the visiting groups’ inter-
ests. For more information on scheduling a fi eld trip, please call _______________.
_____________ Farm is a 7 acre mixed vegetable farm that provides agriculture education to
the local community while supplying fresh local food. Its mission is to support local agriculture and
promote environmental stewardship by educating about the value of small farms in Vermont.
YOUR FARMS ADDRESS HERE
Sample Press Release Reporting on an Event
VT FEED • www.vtfeed.org • p. 47

Name of Your Farm HereN E W S R E L E A S E
FOR IMMEDIATE RELEASE Contact: Your Name Here
Insert Date Here Your Phone Number
NAME OF EVENT HERE
Your Town, VT – Saturday, November 26 ____________Farm will be hosting its annual Har-
vest Festival. The farm will be bustling with exciting annual events and friendly community faces.
The day-long event features music, storytelling, traditional crafts, and foods from the bounty of the
harvest. Visitors can participate from 11:00 am to 5:00 in a variety of harvest activities including
wreath making, salve making, and learning how to make dried fl ower wreaths. Hay rides are free,
weather permitting, and are offered on a fi rst-come, fi rst-served basis.
The ______________band will be providing entertainment for the whole family to enjoy.
Other family friendly activities include pumpkin picking and carving, pressing apple cider and visits
with farm animals. Enjoy your neighbors cooking skills and fresh baked pies from the annual apple
pie contest at the festival.
Admission to the Harvest Festival is $6/adults; $4/children. Children under three years of
age are free. THE EVENT IS HELD RAIN OR SHINE. For information, please call _________.
_____________ Farm is a 7 acre mixed vegetable farm that provides agriculture education to
the local community while supplying fresh local food. Its mission is to support local agriculture and
promote environmental stewardship by educating about the value of small farms in Vermont.
YOUR FARM’S ADDRESS HERE
Sample Press Release Announcing an Event
p. 48 • VT FEED • www.vtfeed.org
VT FEED • www.vtfeed.org • p. 49
ACTIVITIESGENERAL FARM Activities Food Chain Game . . . . . . . . . . . . . . . . . . . . . . . . . . . . . . . . . . . . . . . . 51
Sound Map/Fistful of Sounds . . . . . . . . . . . . . . . . . . . . . . . . . . . . . . . . 52
Five Basic Needs on the Farm Scavenger Hunt . . . . . . . . . . . . . . . . . . . 53
Animal Feed Scavenger Hunt . . . . . . . . . . . . . . . . . . . . . . . . . . . . . . . . 55
Dress up a __________ . . . . . . . . . . . . . . . . . . . . . . . . . . . . . . . . . . . . 57
Product Relay. . . . . . . . . . . . . . . . . . . . . . . . . . . . . . . . . . . . . . . . . . . . 59
Farm Detective Bingo . . . . . . . . . . . . . . . . . . . . . . . . . . . . . . . . . . . . . 61
Help with the Chores. . . . . . . . . . . . . . . . . . . . . . . . . . . . . . . . . . . . . . 63
SOILS, COMPOST & LAND Activities Compost Critter Charades . . . . . . . . . . . . . . . . . . . . . . . . . . . . . . . . . . 64
Compost Concoctions . . . . . . . . . . . . . . . . . . . . . . . . . . . . . . . . . . . . . 65
Soil and Worm Search . . . . . . . . . . . . . . . . . . . . . . . . . . . . . . . . . . . . . 66
Learning about Soil . . . . . . . . . . . . . . . . . . . . . . . . . . . . . . . . . . . . . . . 67
GARDEN & GREENHOUSE Activities A Fruit by Any Other Name . . . . . . . . . . . . . . . . . . . . . . . . . . . . . . . . . 69
Brown Bag Botany . . . . . . . . . . . . . . . . . . . . . . . . . . . . . . . . . . . . . . . . 70
Simply Salads. . . . . . . . . . . . . . . . . . . . . . . . . . . . . . . . . . . . . . . . . . . . 72
Recipe Scavenger Hunt . . . . . . . . . . . . . . . . . . . . . . . . . . . . . . . . . . . . 73
Smelly Plant Scents Match . . . . . . . . . . . . . . . . . . . . . . . . . . . . . . . . . . 75
Blindfold Walk in the Garden . . . . . . . . . . . . . . . . . . . . . . . . . . . . . . . . 76
Count the Seeds . . . . . . . . . . . . . . . . . . . . . . . . . . . . . . . . . . . . . . . . . 77
Three Sisters Improvisation . . . . . . . . . . . . . . . . . . . . . . . . . . . . . . . . . 78
Three Sisters Tag Game . . . . . . . . . . . . . . . . . . . . . . . . . . . . . . . . . . . . 79
Plant Needs Inventory . . . . . . . . . . . . . . . . . . . . . . . . . . . . . . . . . . . . . 80
Stages of Growth Scavenger Hunt . . . . . . . . . . . . . . . . . . . . . . . . . . . . 81
Working in the Greenhouse: Greenhouse Stations . . . . . . . . . . . . . . . . 82
Greenhouse Pests. . . . . . . . . . . . . . . . . . . . . . . . . . . . . . . . . . . . . . . . . 83
Learning about Seeds . . . . . . . . . . . . . . . . . . . . . . . . . . . . . . . . . . . . . 84
continued
p. 50 • VT FEED • www.vtfeed.org
A NOTE ON SOURCES:The activities that follow were submitted by farmers; many of them were hand written. Any ideas, images, and text in this book that are similar to those in any copyrighted materials were used unintentionally and without awareness. To the best of our abilities, we have credited all the sources for activities. These sources include: PROJECT SEASONS, UK Soil Association, DIGGING DEEPER, the NOFA FARM-TO-SCHOOL DIRECTORY, and the FARM FIELD TRIP MANUAL from Massachusetts Ag in the Classroom. See the bibliography for a complete listing of sources.
DAIRY Activities What Does it Take to Make Milk? . . . . . . . . . . . . . . . . . . . . . . . . . . . . . 85
If I Were a Cow, What Would I Eat? . . . . . . . . . . . . . . . . . . . . . . . . . . . 86
Dairy Food Tasting. . . . . . . . . . . . . . . . . . . . . . . . . . . . . . . . . . . . . . . . 87
Ice Cream in a Bag. . . . . . . . . . . . . . . . . . . . . . . . . . . . . . . . . . . . . . . . 88
There’s No Such Thing as a Free Lunch . . . . . . . . . . . . . . . . . . . . . . . . 89
POULTRY Activities Flocks of a Feather . . . . . . . . . . . . . . . . . . . . . . . . . . . . . . . . . . . . . . . . 90
How Does Your Food Behave? . . . . . . . . . . . . . . . . . . . . . . . . . . . . . . . 91
Farm Animal Travels. . . . . . . . . . . . . . . . . . . . . . . . . . . . . . . . . . . . . . . 93
Feathers, Feathers, Feathers . . . . . . . . . . . . . . . . . . . . . . . . . . . . . . . . . 94
Chicken Choices . . . . . . . . . . . . . . . . . . . . . . . . . . . . . . . . . . . . . . . . . 96
Grinding Grain . . . . . . . . . . . . . . . . . . . . . . . . . . . . . . . . . . . . . . . . . . 97
MAPLE SUGARING & TREE Activities Signs of Sugaring. . . . . . . . . . . . . . . . . . . . . . . . . . . . . . . . . . . . . . . . . 98
Maple Stations. . . . . . . . . . . . . . . . . . . . . . . . . . . . . . . . . . . . . . . . . . . 99
Every Tree is Different . . . . . . . . . . . . . . . . . . . . . . . . . . . . . . . . . . . . 101
Food from Trees. . . . . . . . . . . . . . . . . . . . . . . . . . . . . . . . . . . . . . . . . 102
Tree Life Cycle Sort . . . . . . . . . . . . . . . . . . . . . . . . . . . . . . . . . . . . . . 103
Those Tappable Trees. . . . . . . . . . . . . . . . . . . . . . . . . . . . . . . . . . . . . 104
Tapping Sugar Maples . . . . . . . . . . . . . . . . . . . . . . . . . . . . . . . . . . . . 105
The Boiling Process . . . . . . . . . . . . . . . . . . . . . . . . . . . . . . . . . . . . . . 106
BEE & INSECT Activities Insect Safari . . . . . . . . . . . . . . . . . . . . . . . . . . . . . . . . . . . . . . . . . . . . 107
Bees A-Buzzin’ . . . . . . . . . . . . . . . . . . . . . . . . . . . . . . . . . . . . . . . . . . 108
VT FEED • www.vtfeed.org • p. 51
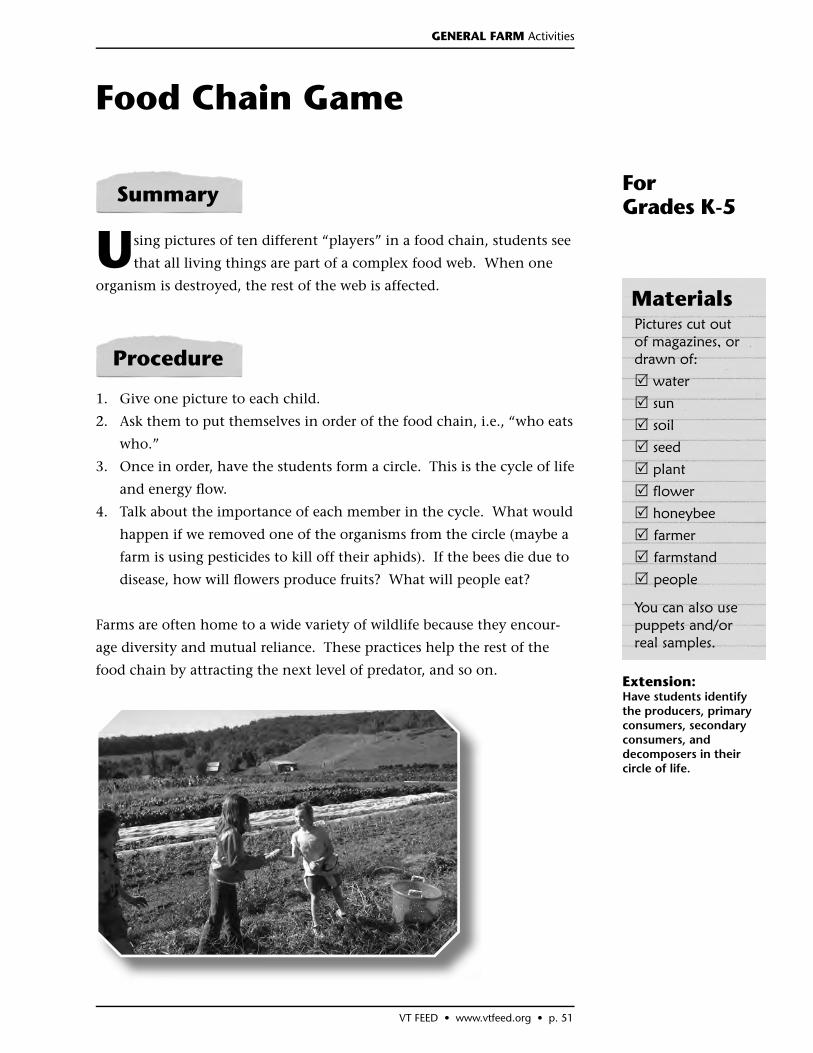
Summary
Food Chain Game
Using pictures of ten different “players” in a food chain, students see
that all living things are part of a complex food web. When one
organism is destroyed, the rest of the web is affected.
1. Give one picture to each child.
2. Ask them to put themselves in order of the food chain, i.e., “who eats
who.”
3. Once in order, have the students form a circle. This is the cycle of life
and energy fl ow.
4. Talk about the importance of each member in the cycle. What would
happen if we removed one of the organisms from the circle (maybe a
farm is using pesticides to kill off their aphids). If the bees die due to
disease, how will fl owers produce fruits? What will people eat?
Farms are often home to a wide variety of wildlife because they encour-
age diversity and mutual reliance. These practices help the rest of the
food chain by attracting the next level of predator, and so on.
Procedure
Pictures cut out of magazines, or drawn of:
water
sun
soil
seed
plant
flower
honeybee
farmer
farmstand
people
You can also use puppets and/or real samples.
Materials
Extension:Have students identify the producers, primary consumers, secondary consumers, and decomposers in their circle of life.
For Grades K-5
GENERAL FARM Activities
p. 52 • VT FEED • www.vtfeed.org
Sound Map/Fistful of Sounds
Use this activity to introduce the group to your farm using senses
other than sight—you’ll be amazed at what they’ll notice!
Before everyone starts walking around and exploring the farm with
their senses of sight and touch, explain that they will begin by lis-
tening to the sounds of the farm. Have each child fi nd a private spot so
that he or she is not touching anyone else. Ask them to close their eyes
and hold up one fi st. For each sound they hear, have them hold out one
fi nger. After a few minutes, gather the group back together and share the
sounds. To heighten the sounds, you can ask the students to cup their
hands behind their ears (like satellite dishes or deer ears).
For an older group, you may want to expand this activity. Give each
child a piece of paper and pencil before they fi nd their private spot. Ask
them to draw a dot in the middle of the paper to represent themselves.
Have them sit and draw or write down all the sounds they hear in rela-
tionship to themselves (e.g., bird chirping behind me, airplane overhead,
chicken clucking to my right, etc.). Come together after 5-10 minutes
and share maps!
Now you can explore the farm looking for the sources of all of those
sounds!
Encourage students to try this same activity back at school or at home.
Materials
Procedure
Summary For Grades K-8
(all optional)
paper
pencil
clipboard or hard surface
Extensions:• Have students tape record sounds of the farm.
• Farmers can use taped sounds as background for narrative about the farm.
GENERAL FARM Activities
VT FEED • www.vtfeed.org • p. 53
Materials
Five Basic Needs on the Farm Scavenger Hunt
Using a scavenger hunt as a discovery tool, introduce students to the
basic needs that all living things share and the concept of the farm
as a whole system.
1. Following introductions, discuss the fi ve basic elements all organisms
need for survival — food, water, shelter, air, and space to grow. Explain
that in many ways, a farm is a kind of living organism. It needs all
the same things other living things need. Humans, animals, plants,
and machines help the farm organism to thrive.
2. Ask the students, individually, in pairs or small groups, to fi nd the
various things listed on the scavenger hunt sheet and draw a sketch
of each thing they fi nd in the square.
3. As part of the hunt, have students lay the hunt sheet on the ground.
How many plants are growing under it? How many insects travel
over or under it in three minutes? See if you can get three or more
people to stand on the paper at the same time.
4. How might students help to keep the farm viable? How about profes-
sionals (veterinarian, scientist, seed distributor)?
Procedure
Summary
scavenger hunt sheets (enough for each person or small group)
pencils or pens
clipboards (optional)
gathering bas-kets (optional)
For Grades 2-8
GENERAL FARM Activities
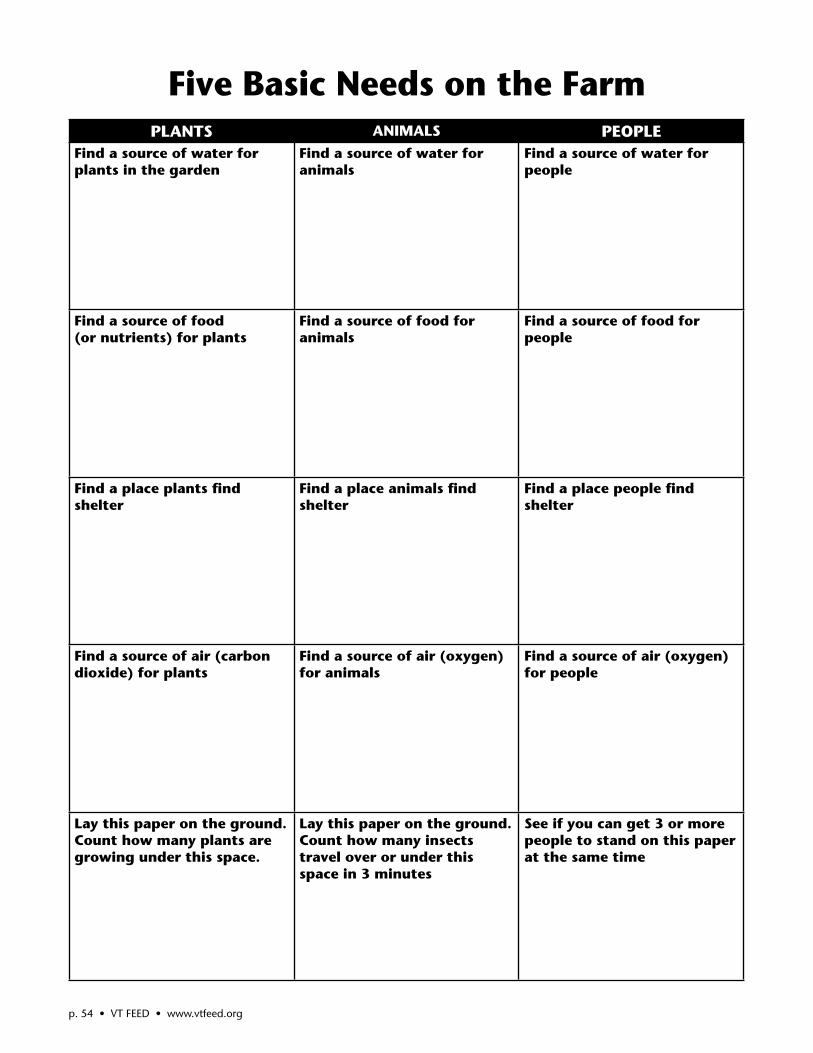
PLANTS ANIMALS PEOPLEFind a source of water for plants in the garden
Find a source of water for animals
Find a source of water for people
Find a source of food (or nutrients) for plants
Find a source of food for animals
Find a source of food for people
Find a place plants fi nd shelter
Find a place animals fi nd shelter
Find a place people fi nd shelter
Find a source of air (carbon dioxide) for plants
Find a source of air (oxygen) for animals
Find a source of air (oxygen) for people
Lay this paper on the ground. Count how many plants are growing under this space.
Lay this paper on the ground. Count how many insects travel over or under this space in 3 minutes
See if you can get 3 or more people to stand on this paper at the same time
Five Basic Needs on the Farm
p. 54 • VT FEED • www.vtfeed.org
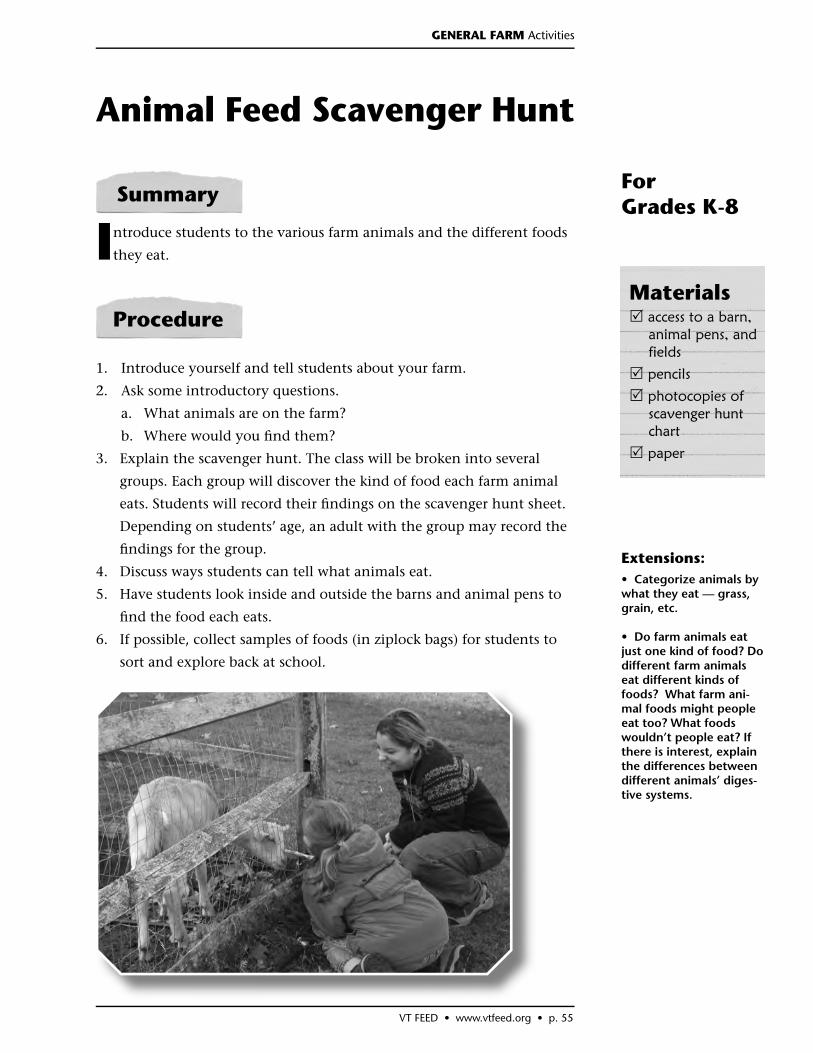
VT FEED • www.vtfeed.org • p. 55
Animal Feed Scavenger Hunt
Introduce students to the various farm animals and the different foods
they eat.
1. Introduce yourself and tell students about your farm.
2. Ask some introductory questions.
a. What animals are on the farm?
b. Where would you fi nd them?
3. Explain the scavenger hunt. The class will be broken into several
groups. Each group will discover the kind of food each farm animal
eats. Students will record their fi ndings on the scavenger hunt sheet.
Depending on students’ age, an adult with the group may record the
fi ndings for the group.
4. Discuss ways students can tell what animals eat.
5. Have students look inside and outside the barns and animal pens to
fi nd the food each eats.
6. If possible, collect samples of foods (in ziplock bags) for students to
sort and explore back at school.
Summary
Materials access to a barn, animal pens, and fields
pencils
photocopies of scavenger hunt chart
paper
Procedure
Extensions:• Categorize animals by what they eat — grass, grain, etc.
• Do farm animals eat just one kind of food? Do different farm animals eat different kinds of foods? What farm ani-mal foods might people eat too? What foods wouldn’t people eat? If there is interest, explain the differences between different animals’ diges-tive systems.
For Grades K-8
GENERAL FARM Activities
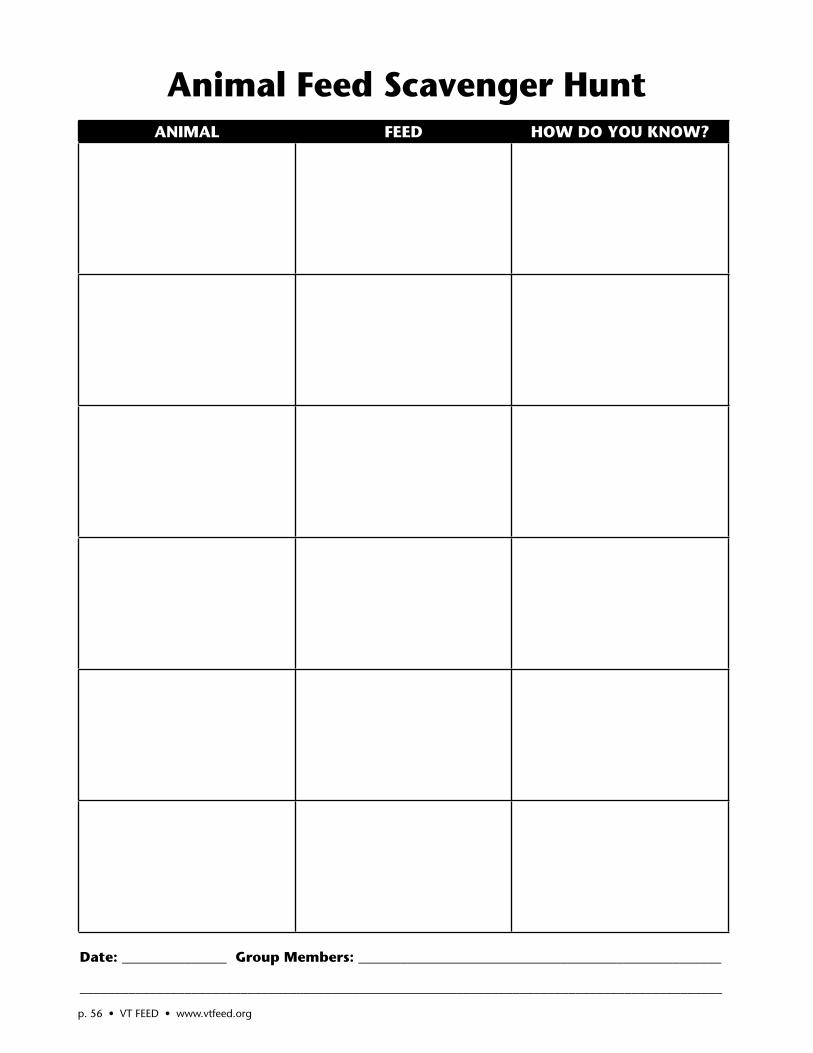
ANIMAL FEED HOW DO YOU KNOW?
Animal Feed Scavenger Hunt
Date: _______________ Group Members: ____________________________________________________
____________________________________________________________________________________________
p. 56 • VT FEED • www.vtfeed.org
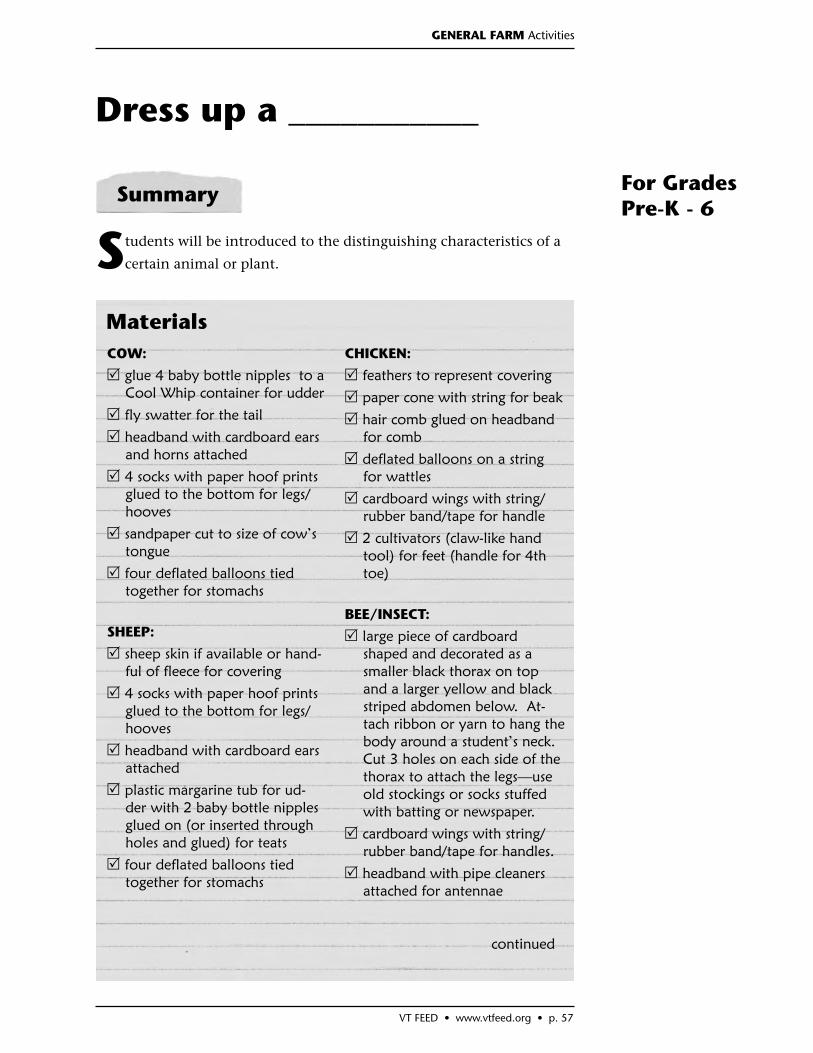
VT FEED • www.vtfeed.org • p. 57
Dress up a ___________
Students will be introduced to the distinguishing characteristics of a
certain animal or plant.
Summary For Grades Pre-K - 6
COW:
glue 4 baby bottle nipples to a Cool Whip container for udder
fly swatter for the tail
headband with cardboard ears and horns attached
4 socks with paper hoof prints glued to the bottom for legs/hooves
sandpaper cut to size of cow’s tongue
four deflated balloons tied together for stomachs
SHEEP:
sheep skin if available or hand-ful of fleece for covering
4 socks with paper hoof prints glued to the bottom for legs/hooves
headband with cardboard ears attached
plastic margarine tub for ud-der with 2 baby bottle nipples glued on (or inserted through holes and glued) for teats
four deflated balloons tied together for stomachs
CHICKEN:
feathers to represent covering
paper cone with string for beak
hair comb glued on headband for comb
deflated balloons on a string for wattles
cardboard wings with string/rubber band/tape for handle
2 cultivators (claw-like hand tool) for feet (handle for 4th toe)
BEE/INSECT:
large piece of cardboard shaped and decorated as a smaller black thorax on top and a larger yellow and black striped abdomen below. At-tach ribbon or yarn to hang the body around a student’s neck. Cut 3 holes on each side of the thorax to attach the legs—use old stockings or socks stuffed with batting or newspaper.
cardboard wings with string/rubber band/tape for handles.
headband with pipe cleaners attached for antennae
Materials
continued
GENERAL FARM Activities
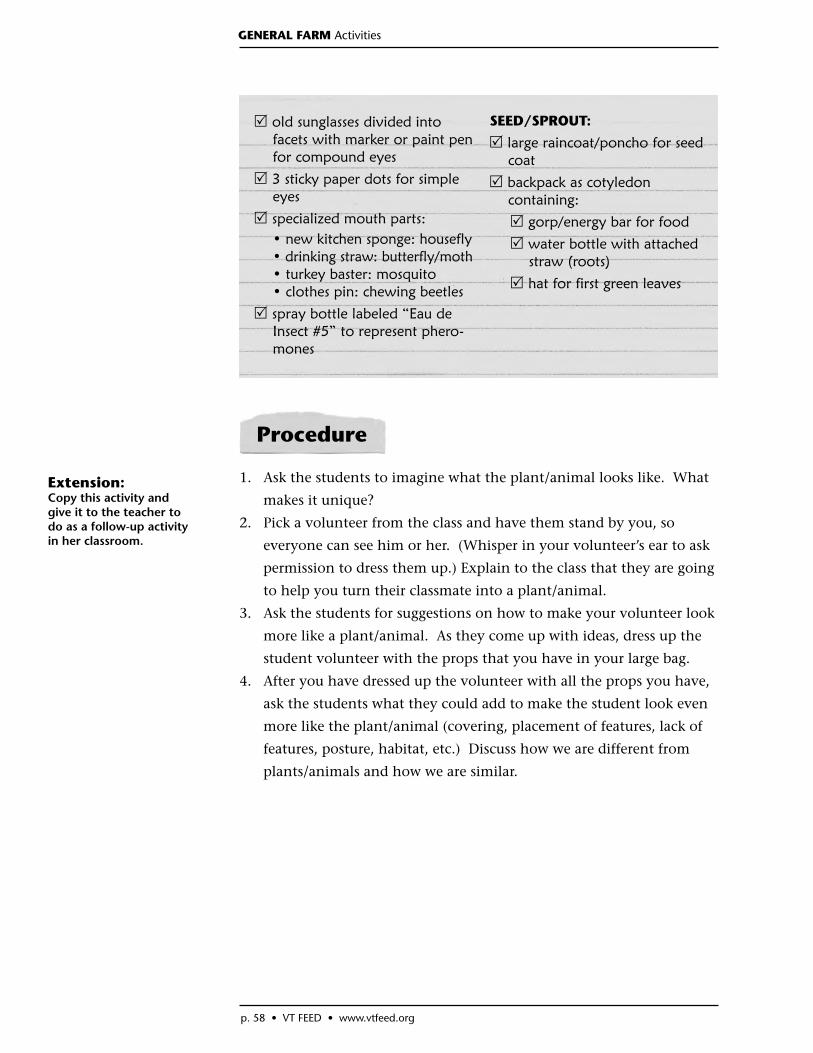
p. 58 • VT FEED • www.vtfeed.org
old sunglasses divided into facets with marker or paint pen for compound eyes
3 sticky paper dots for simple eyes
specialized mouth parts: • new kitchen sponge: housefly • drinking straw: butterfly/moth
• turkey baster: mosquito • clothes pin: chewing beetles
spray bottle labeled “Eau de Insect #5” to represent phero-mones
SEED/SPROUT:
large raincoat/poncho for seed coat
backpack as cotyledon containing:
gorp/energy bar for food
water bottle with attached straw (roots)
hat for first green leaves
Procedure
1. Ask the students to imagine what the plant/animal looks like. What
makes it unique?
2. Pick a volunteer from the class and have them stand by you, so
everyone can see him or her. (Whisper in your volunteer’s ear to ask
permission to dress them up.) Explain to the class that they are going
to help you turn their classmate into a plant/animal.
3. Ask the students for suggestions on how to make your volunteer look
more like a plant/animal. As they come up with ideas, dress up the
student volunteer with the props that you have in your large bag.
4. After you have dressed up the volunteer with all the props you have,
ask the students what they could add to make the student look even
more like the plant/animal (covering, placement of features, lack of
features, posture, habitat, etc.) Discuss how we are different from
plants/animals and how we are similar.
Extension:Copy this activity and give it to the teacher to do as a follow-up activity in her classroom.
GENERAL FARM Activities
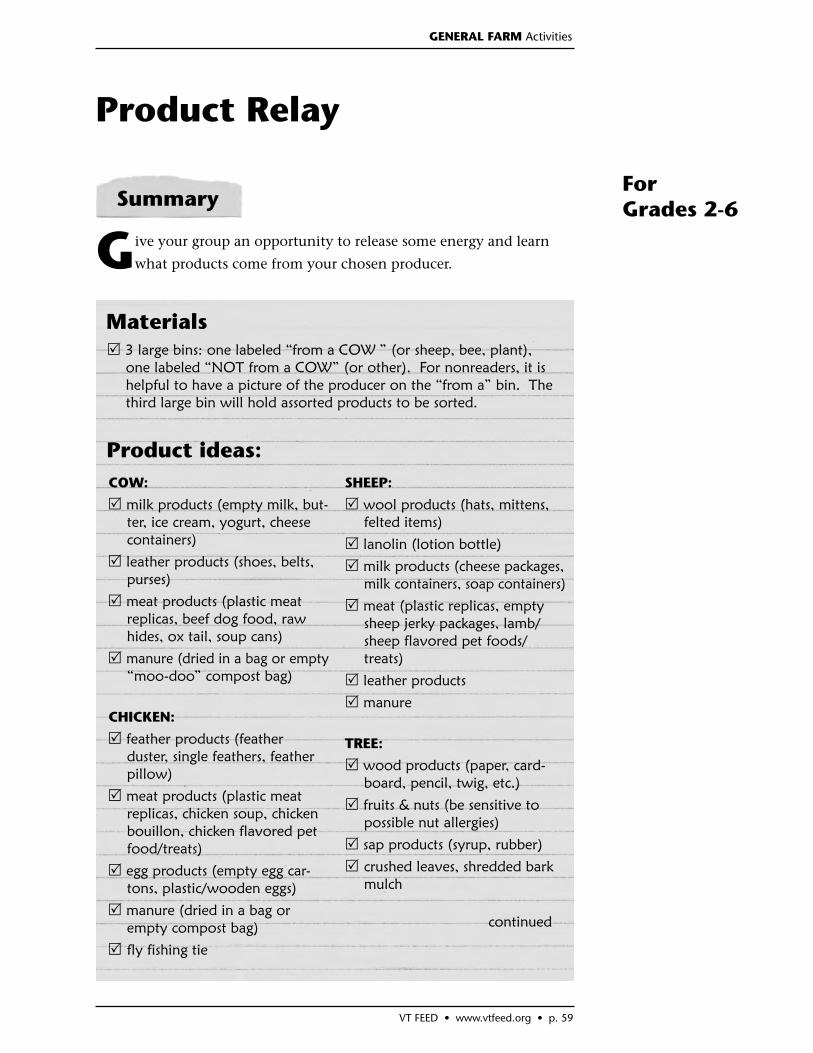
VT FEED • www.vtfeed.org • p. 59
Product Relay
Give your group an opportunity to release some energy and learn
what products come from your chosen producer.
For Grades 2-6Summary
Materials 3 large bins: one labeled “from a COW ” (or sheep, bee, plant), one labeled “NOT from a COW” (or other). For nonreaders, it is helpful to have a picture of the producer on the “from a” bin. The third large bin will hold assorted products to be sorted.
Product ideas: COW:
milk products (empty milk, but-ter, ice cream, yogurt, cheese containers)
leather products (shoes, belts, purses)
meat products (plastic meat replicas, beef dog food, raw hides, ox tail, soup cans)
manure (dried in a bag or empty “moo-doo” compost bag)
CHICKEN:
feather products (feather duster, single feathers, feather pillow)
meat products (plastic meat replicas, chicken soup, chicken bouillon, chicken flavored pet food/treats)
egg products (empty egg car-tons, plastic/wooden eggs)
manure (dried in a bag or empty compost bag)
fly fishing tie
SHEEP:
wool products (hats, mittens, felted items)
lanolin (lotion bottle)
milk products (cheese packages, milk containers, soap containers)
meat (plastic replicas, empty sheep jerky packages, lamb/sheep flavored pet foods/treats)
leather products
manure TREE:
wood products (paper, card-board, pencil, twig, etc.)
fruits & nuts (be sensitive to possible nut allergies)
sap products (syrup, rubber)
crushed leaves, shredded bark mulch
continued
GENERAL FARM Activities
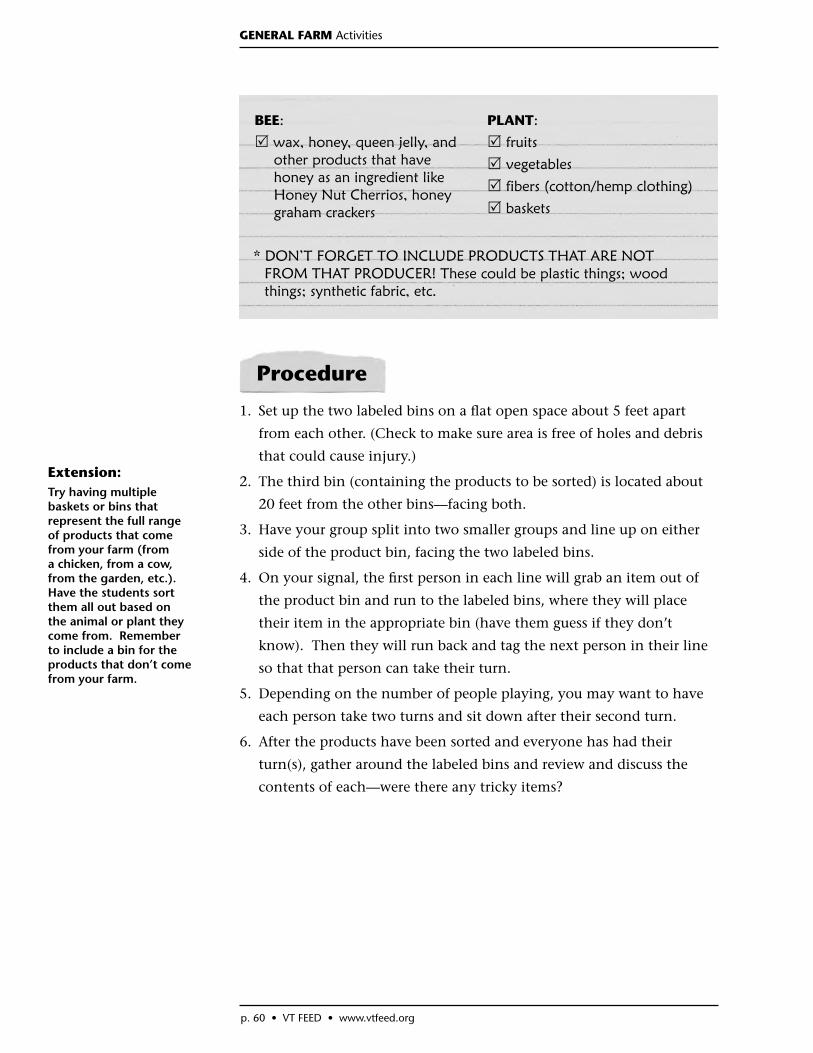
p. 60 • VT FEED • www.vtfeed.org
BEE:
wax, honey, queen jelly, and other products that have honey as an ingredient like Honey Nut Cherrios, honey graham crackers
PLANT:
fruits
vegetables
fibers (cotton/hemp clothing)
baskets
* DON’T FORGET TO INCLUDE PRODUCTS THAT ARE NOT FROM THAT PRODUCER! These could be plastic things; wood things; synthetic fabric, etc.
1. Set up the two labeled bins on a fl at open space about 5 feet apart
from each other. (Check to make sure area is free of holes and debris
that could cause injury.)
2. The third bin (containing the products to be sorted) is located about
20 feet from the other bins—facing both.
3. Have your group split into two smaller groups and line up on either
side of the product bin, facing the two labeled bins.
4. On your signal, the fi rst person in each line will grab an item out of
the product bin and run to the labeled bins, where they will place
their item in the appropriate bin (have them guess if they don’t
know). Then they will run back and tag the next person in their line
so that that person can take their turn.
5. Depending on the number of people playing, you may want to have
each person take two turns and sit down after their second turn.
6. After the products have been sorted and everyone has had their
turn(s), gather around the labeled bins and review and discuss the
contents of each—were there any tricky items?
Procedure
Extension: Try having multiple baskets or bins that represent the full range of products that come from your farm (from a chicken, from a cow, from the garden, etc.). Have the students sort them all out based on the animal or plant they come from. Remember to include a bin for the products that don’t come from your farm.
GENERAL FARM Activities

VT FEED • www.vtfeed.org • p. 61
Farm Detective Bingo
Students explore the farm using a “bingo” card as a discovery guide.
1. Photocopy and laminate the “Farm Detective Bingo” card on the fol-
lowing page, or create your own to guide students around your farm.
2. Divide the students into several smaller groups. Depending on the
age, it may be appropriate to have an adult chaperone with each
group. Give each group a card and grease pencil to carry with them
around the farm as they hunt for the pieces to make a straight line for
“Bingo.”
3. Establish boundaries for the hunt, and the time frame for returning.
4. Send the students out to collect as many items as they need to com-
plete a straight line.
For Grades K-4
Summary
Procedure Materials
bingo cards
grease pencils
bags to gather items
Extension:Have groups try to fi ll in the entire board.
GENERAL FARM Activities
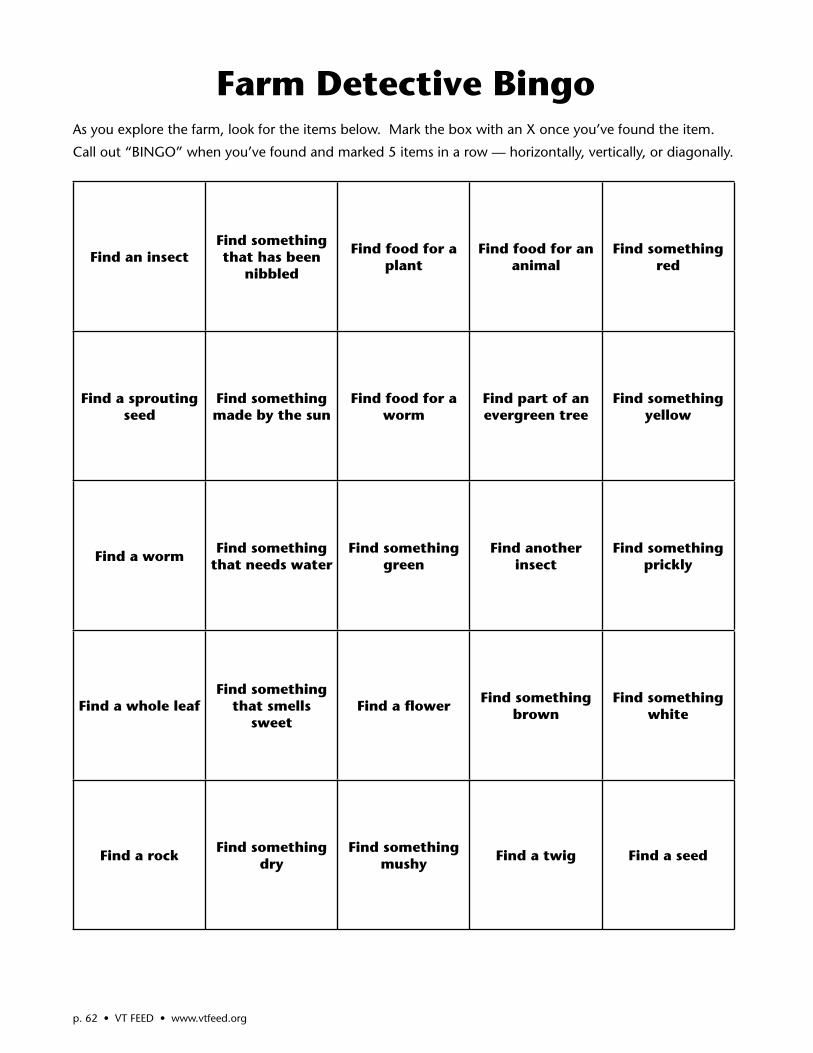
Find an insectFind something that has been
nibbled
Find food for a plant
Find food for an animal
Find something red
Find a sprouting seed
Find something made by the sun
Find food for a worm
Find part of an evergreen tree
Find something yellow
Find a wormFind something
that needs waterFind something
greenFind another
insectFind something
prickly
Find a whole leafFind something
that smells sweet
Find a fl owerFind something
brownFind something
white
Find a rockFind something
dryFind something
mushyFind a twig Find a seed
Farm Detective BingoAs you explore the farm, look for the items below. Mark the box with an X once you’ve found the item.
Call out “BINGO” when you’ve found and marked 5 items in a row — horizontally, vertically, or diagonally.
p. 62 • VT FEED • www.vtfeed.org
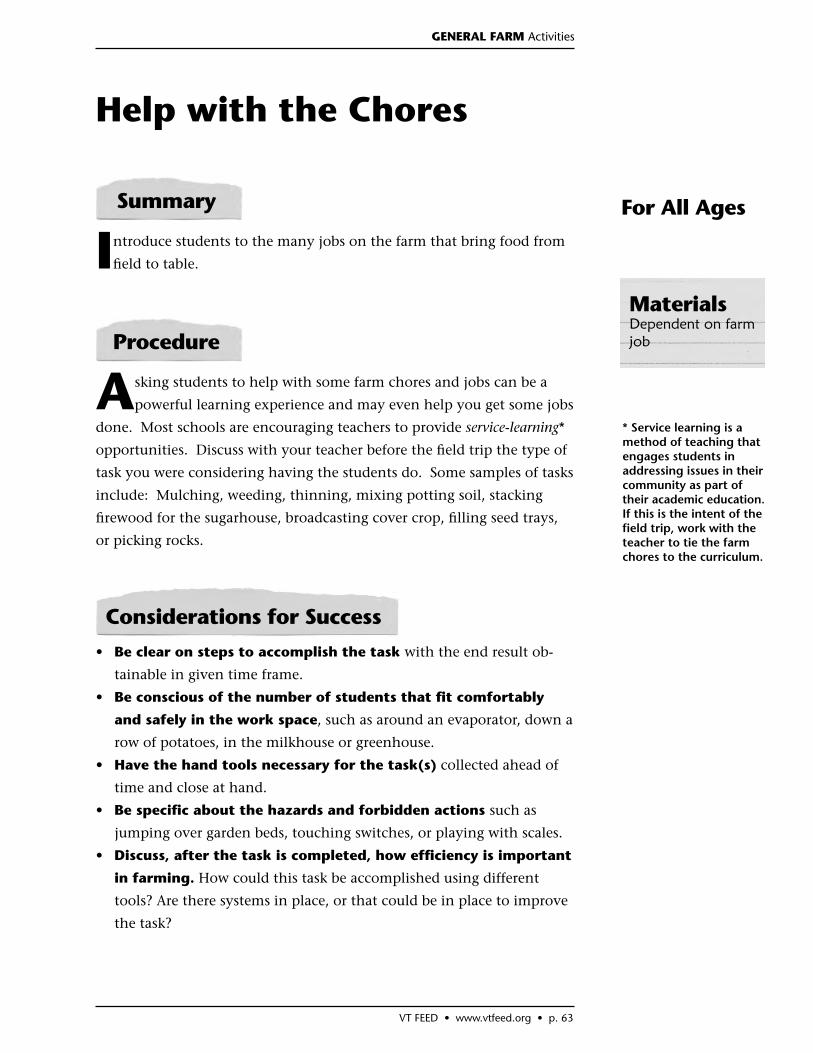
VT FEED • www.vtfeed.org • p. 63
Help with the Chores
Introduce students to the many jobs on the farm that bring food from
fi eld to table.
Asking students to help with some farm chores and jobs can be a
powerful learning experience and may even help you get some jobs
done. Most schools are encouraging teachers to provide service-learning*
opportunities. Discuss with your teacher before the fi eld trip the type of
task you were considering having the students do. Some samples of tasks
include: Mulching, weeding, thinning, mixing potting soil, stacking
fi rewood for the sugarhouse, broadcasting cover crop, fi lling seed trays,
or picking rocks.
Summary
Procedure
Materials Dependent on farm job
For All Ages
• Be clear on steps to accomplish the task with the end result ob-
tainable in given time frame.
• Be conscious of the number of students that fi t comfortably
and safely in the work space, such as around an evaporator, down a
row of potatoes, in the milkhouse or greenhouse.
• Have the hand tools necessary for the task(s) collected ahead of
time and close at hand.
• Be specifi c about the hazards and forbidden actions such as
jumping over garden beds, touching switches, or playing with scales.
• Discuss, after the task is completed, how effi ciency is important
in farming. How could this task be accomplished using different
tools? Are there systems in place, or that could be in place to improve
the task?
Considerations for Success
GENERAL FARM Activities
* Service learning is a method of teaching that engages students in addressing issues in their community as part of their academic education. If this is the intent of the fi eld trip, work with the teacher to tie the farm chores to the curriculum.
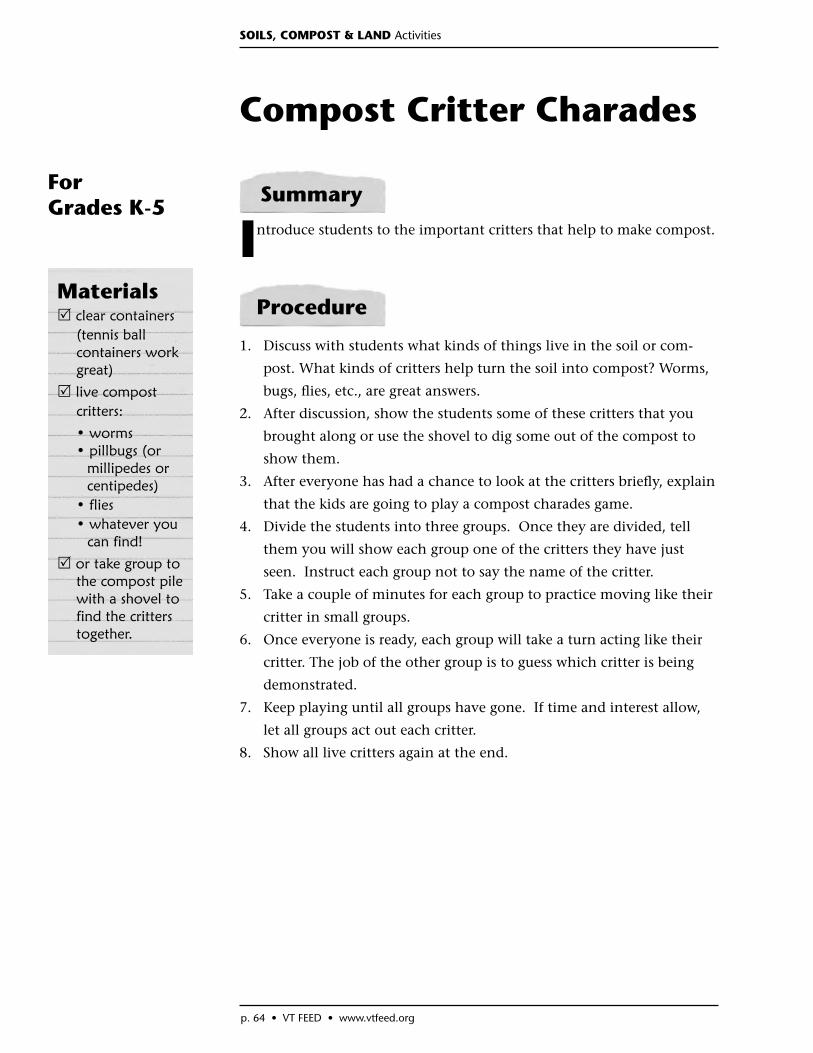
p. 64 • VT FEED • www.vtfeed.org
Compost Critter Charades
Introduce students to the important critters that help to make compost.
1. Discuss with students what kinds of things live in the soil or com-
post. What kinds of critters help turn the soil into compost? Worms,
bugs, fl ies, etc., are great answers.
2. After discussion, show the students some of these critters that you
brought along or use the shovel to dig some out of the compost to
show them.
3. After everyone has had a chance to look at the critters briefl y, explain
that the kids are going to play a compost charades game.
4. Divide the students into three groups. Once they are divided, tell
them you will show each group one of the critters they have just
seen. Instruct each group not to say the name of the critter.
5. Take a couple of minutes for each group to practice moving like their
critter in small groups.
6. Once everyone is ready, each group will take a turn acting like their
critter. The job of the other group is to guess which critter is being
demonstrated.
7. Keep playing until all groups have gone. If time and interest allow,
let all groups act out each critter.
8. Show all live critters again at the end.
Summary
Procedure
For Grades K-5
SOILS, COMPOST & LAND Activities
Materials clear containers (tennis ball
containers work great)
live compost critters:
• worms • pillbugs (or
millipedes or centipedes)
• flies • whatever you can find!
or take group to the compost pile with a shovel to find the critters together.
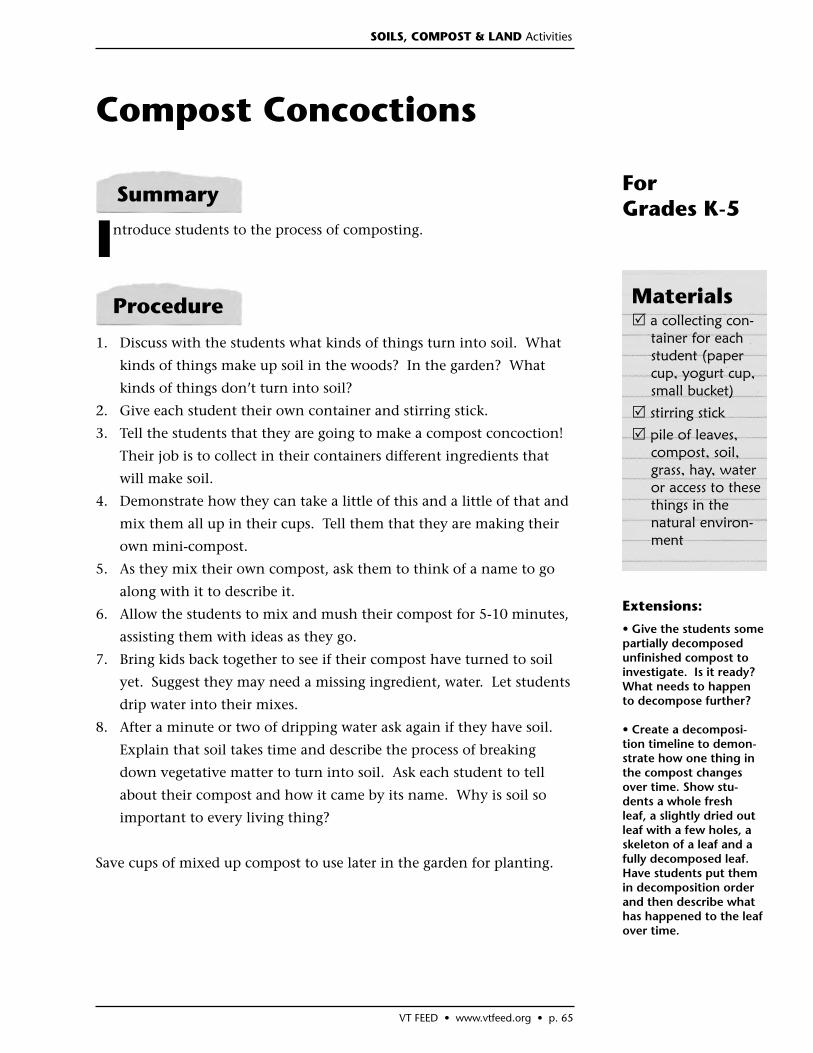
VT FEED • www.vtfeed.org • p. 65
Compost Concoctions
Introduce students to the process of composting.
1. Discuss with the students what kinds of things turn into soil. What
kinds of things make up soil in the woods? In the garden? What
kinds of things don’t turn into soil?
2. Give each student their own container and stirring stick.
3. Tell the students that they are going to make a compost concoction!
Their job is to collect in their containers different ingredients that
will make soil.
4. Demonstrate how they can take a little of this and a little of that and
mix them all up in their cups. Tell them that they are making their
own mini-compost.
5. As they mix their own compost, ask them to think of a name to go
along with it to describe it.
6. Allow the students to mix and mush their compost for 5-10 minutes,
assisting them with ideas as they go.
7. Bring kids back together to see if their compost have turned to soil
yet. Suggest they may need a missing ingredient, water. Let students
drip water into their mixes.
8. After a minute or two of dripping water ask again if they have soil.
Explain that soil takes time and describe the process of breaking
down vegetative matter to turn into soil. Ask each student to tell
about their compost and how it came by its name. Why is soil so
important to every living thing?
Save cups of mixed up compost to use later in the garden for planting.
Summary
Procedure Materials a collecting con-tainer for each student (paper cup, yogurt cup, small bucket)
stirring stick
pile of leaves, compost, soil, grass, hay, water or access to these things in the natural environ-ment
For Grades K-5
Extensions:
• Give the students some partially decomposed unfi nished compost to investigate. Is it ready? What needs to happen to decompose further?
• Create a decomposi-tion timeline to demon-strate how one thing in the compost changes over time. Show stu-dents a whole fresh leaf, a slightly dried out leaf with a few holes, a skeleton of a leaf and a fully decomposed leaf. Have students put them in decomposition order and then describe what has happened to the leaf over time.
SOILS, COMPOST & LAND Activities
p. 66 • VT FEED • www.vtfeed.org
Soil and Worm Search
Introduce students to the biology and natural history of earthworms by
digging into soil, examining worms, soil, and other creatures they fi nd.
1. Following introductions, talk with the students about soil as an
ecosystem with living and dead components, and how it is home to
earthworms and many other critters. Tell students that they will be
investigating earthworms. An earthworm has fi ve hearts, which are
actually pairs of enlarged blood vessels that pump blood throughout
the worm. Worms eat their weight in soil each day. Soil enters the
mouth, travels into a bag-like crop, and then to the gizzard, where
strong muscles and bits of soil act like teeth to grind up food hidden
in the soil. The remaining soil is expelled from the worm as waste,
called worm castings.
2. Discuss earthworms’ role in soil quality (and, therefore, animal and
plant health). Worm castings are fi ve times richer in nitrogen, seven
times richer in potassium and eleven times richer in phosphorus than
the soil ingested. These nutrients are important for plant growth.
3. With her or his string, have each student mark a patch of ground that
she or he will dig in.
4. Have students dig small holes with their spoons. Encourage them
to look carefully for worms, insects and evidence of plant roots or
decomposing leaves.
5. Lay the white clothes on the ground. Place specimens on the cloths
to get a better look at the soil and worms. Have the students observe
the worms carefully and describe what they notice. What parts of the
worms can they see? What parts can they see through the magnifi er?
Put a worm on a clear plastic plate and shine a fl ashlight under it to
show some of its internal and external parts.
6. After everyone has fi nished looking at their worms and sharing their
observations, place the worms gently in the holes and cover them
lightly with soil and leaves.
For Grades K-8
Summary
Procedure Materials metal spoons
3-ft. lengths of string
2-3 trowels
pieces of 2x3-ft. white cloth or lage pieces of white paper
hand lenses or magnifiers
SOILS, COMPOST & LAND Activities
VT FEED • www.vtfeed.org • p. 67
Summary
Procedure Materials Each pair/group of students will need:
copy of the “Soil Properties Record Sheet”
on p. 68.
clear jar with lid
trowel
paper cup
one mason jar (quart size)
paper & pencil
pie plate
For Grades 6-12
Learning about Soil
This series of experiments involves students in soil investigation and
comparison.
Experiment #1:
1. Have groups or pairs of students collect soil samples. Each group
should be assigned a different place on the farm so that each sample
will be unique.
2. Each pair of students will study their soil sample and record their
fi ndings on the “Soil Properties Record Sheet.”
3. Discuss with the entire group how the soil samples are different.
4. Have each group fi ll their lidded jar 2/3 full of water. Add 1/3 soil,
add a lid, and shake the contents vigorously.
5. Leave the samples alone for at least 15 minutes while performing an-
other experiment or exploring the farm. Let the contents settle out
and observe the differences. Which soil is heaviest? Which soil has
the most sand? Sand will settle at the very bottom because it is the
heaviest; clay will be on top since it is the lightest and has the small-
est particle size.
6. Discuss how different plants need different kinds of soil, how Vermont
has more than 25 different soil types, and how soil types are derived.
Experiment #2:
1. Have students poke three holes in the bottom of their paper cups and
fi ll the cups ½ full with soil.
2. Hold the soil cup over the mason jar and then pour a measured
amount of water through the soil. Time how long it takes for ½ of
the water to pass through the soil.
3. Compare results. How does soil “hold” the water? Which part of
this experiment illustrates a part of the water cycle? How does this
experiment relate to water pollution? How do farmers and gardeners
use this information to farm better?
Extension:Set up 3 containers: One with sand, one with clay, one with silt. Do Experi-ments 1 and 2 with these pure samples. Explain to students that their soil samples from the farm have a mixture of these soil particle sizes. Let students compare their own soil samples to the sand, clay, and silt. Ask students which soil par-ticle sample their soil is most like.
SOILS, COMPOST & LAND Activities
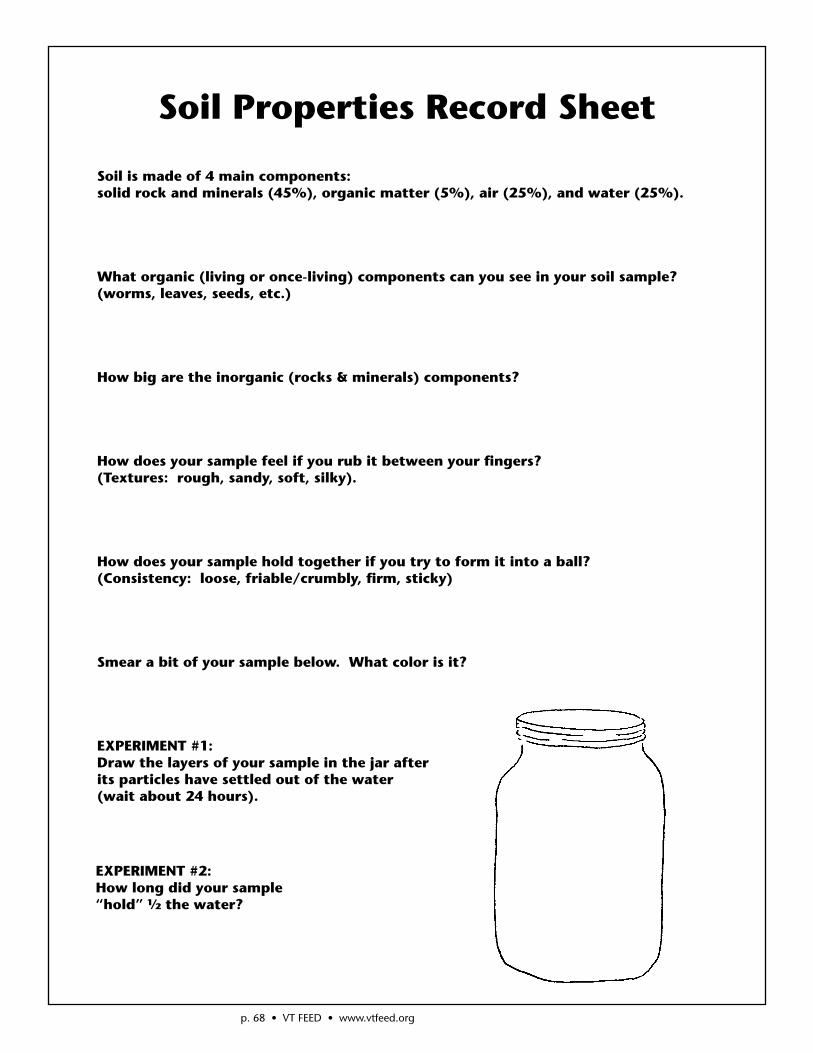
p. 68 • VT FEED • www.vtfeed.org
Soil Properties Record Sheet
Soil is made of 4 main components: solid rock and minerals (45%), organic matter (5%), air (25%), and water (25%).
What organic (living or once-living) components can you see in your soil sample? (worms, leaves, seeds, etc.)
How big are the inorganic (rocks & minerals) components?
How does your sample feel if you rub it between your fi ngers?(Textures: rough, sandy, soft, silky).
How does your sample hold together if you try to form it into a ball?(Consistency: loose, friable/crumbly, fi rm, sticky)
Smear a bit of your sample below. What color is it?
EXPERIMENT #1: Draw the layers of your sample in the jar afterits particles have settled out of the water (wait about 24 hours).
EXPERIMENT #2: How long did your sample “hold” ½ the water?
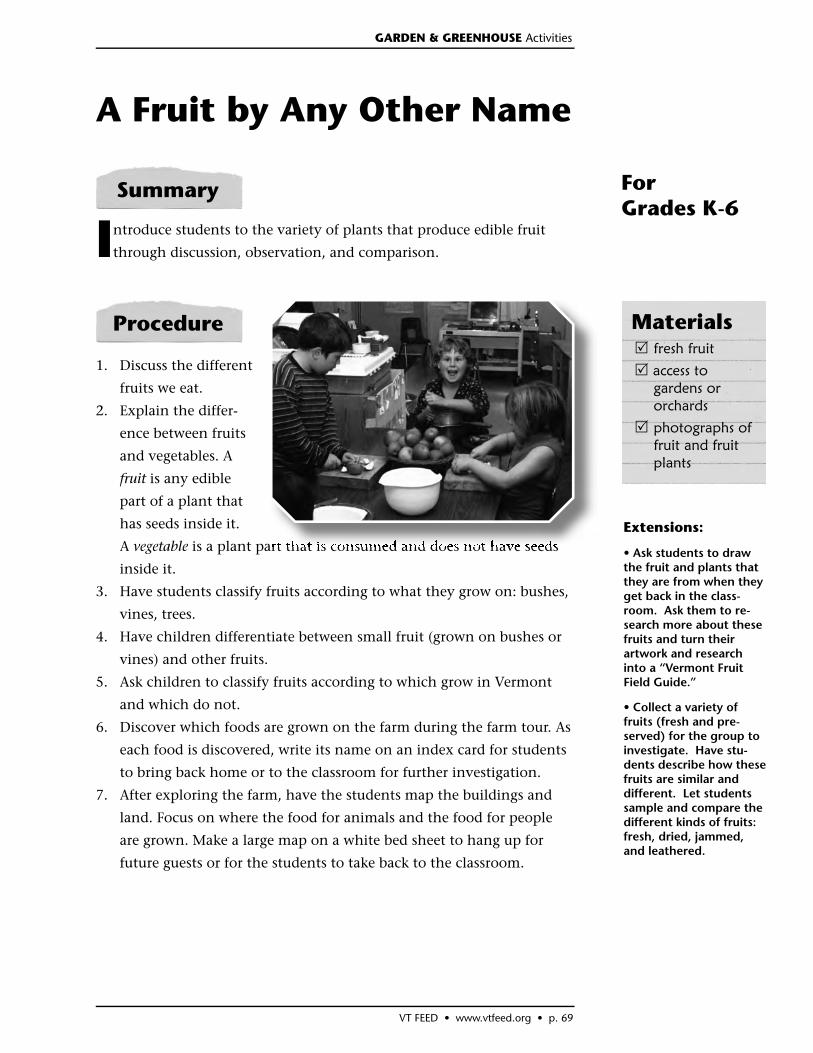
VT FEED • www.vtfeed.org • p. 69
A Fruit by Any Other Name
Introduce students to the variety of plants that produce edible fruit
through discussion, observation, and comparison.
1. Discuss the different
fruits we eat.
2. Explain the differ-
ence between fruits
and vegetables. A
fruit is any edible
part of a plant that
has seeds inside it.
A vegetable is a plant part that is consumed and does not have seeds
inside it.
3. Have students classify fruits according to what they grow on: bushes,
vines, trees.
4. Have children differentiate between small fruit (grown on bushes or
vines) and other fruits.
5. Ask children to classify fruits according to which grow in Vermont
and which do not.
6. Discover which foods are grown on the farm during the farm tour. As
each food is discovered, write its name on an index card for students
to bring back home or to the classroom for further investigation.
7. After exploring the farm, have the students map the buildings and
land. Focus on where the food for animals and the food for people
are grown. Make a large map on a white bed sheet to hang up for
future guests or for the students to take back to the classroom.
Summary
Procedure fresh fruit
access to gardens or orchards
photographs of fruit and fruit plants
Materials
For Grades K-6
Extensions:
• Ask students to draw the fruit and plants that they are from when they get back in the class-room. Ask them to re-search more about these fruits and turn their artwork and research into a “Vermont Fruit Field Guide.”
• Collect a variety of fruits (fresh and pre-served) for the group to investigate. Have stu-dents describe how these fruits are similar and different. Let students sample and compare the different kinds of fruits: fresh, dried, jammed, and leathered.
GARDEN & GREENHOUSE Activities
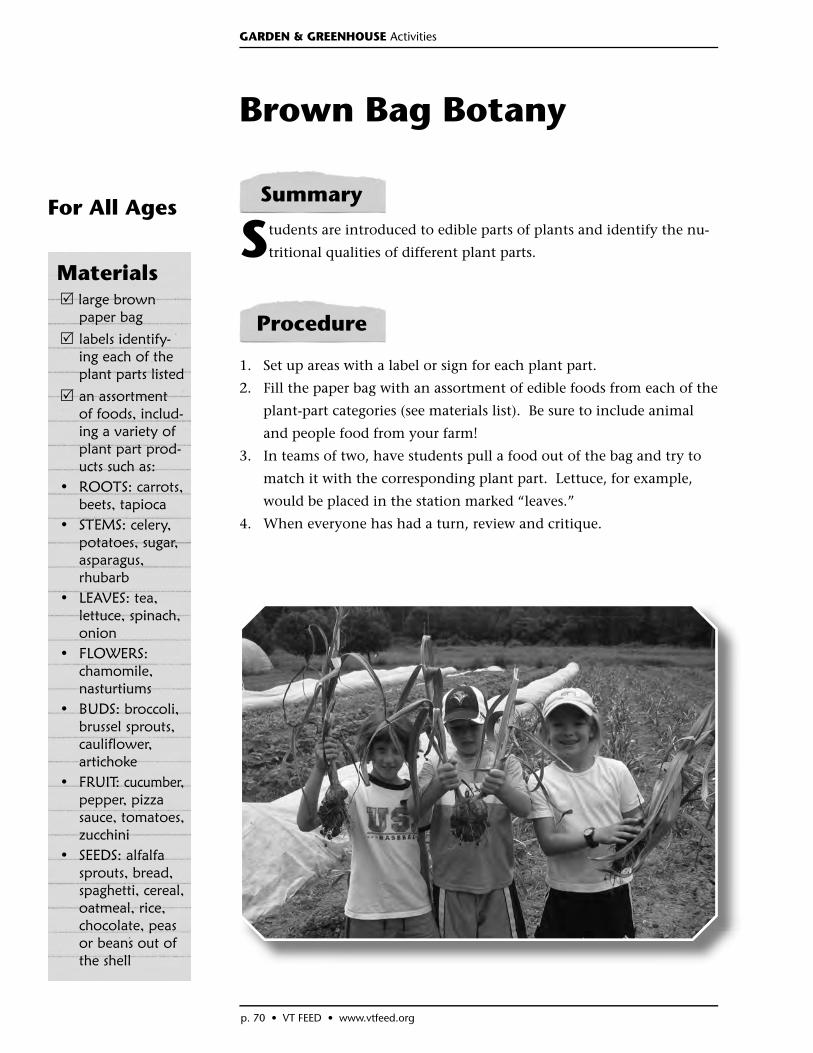
p. 70 • VT FEED • www.vtfeed.org
Brown Bag Botany
Students are introduced to edible parts of plants and identify the nu-
tritional qualities of different plant parts.
1. Set up areas with a label or sign for each plant part.
2. Fill the paper bag with an assortment of edible foods from each of the
plant-part categories (see materials list). Be sure to include animal
and people food from your farm!
3. In teams of two, have students pull a food out of the bag and try to
match it with the corresponding plant part. Lettuce, for example,
would be placed in the station marked “leaves.”
4. When everyone has had a turn, review and critique.
Summary
Procedure large brown paper bag
labels identify-ing each of the plant parts listed
an assortment of foods, includ-ing a variety of plant part prod-ucts such as:
• ROOTS: carrots, beets, tapioca
• STEMS: celery, potatoes, sugar, asparagus,
rhubarb• LEAVES: tea,
lettuce, spinach, onion
• FLOWERS: chamomile, nasturtiums
• BUDS: broccoli, brussel sprouts, cauliflower, artichoke
• FRUIT: cucumber, pepper, pizza sauce, tomatoes, zucchini
• SEEDS: alfalfa sprouts, bread, spaghetti, cereal, oatmeal, rice, chocolate, peas or beans out of the shell
Materials
For All Ages
GARDEN & GREENHOUSE Activities
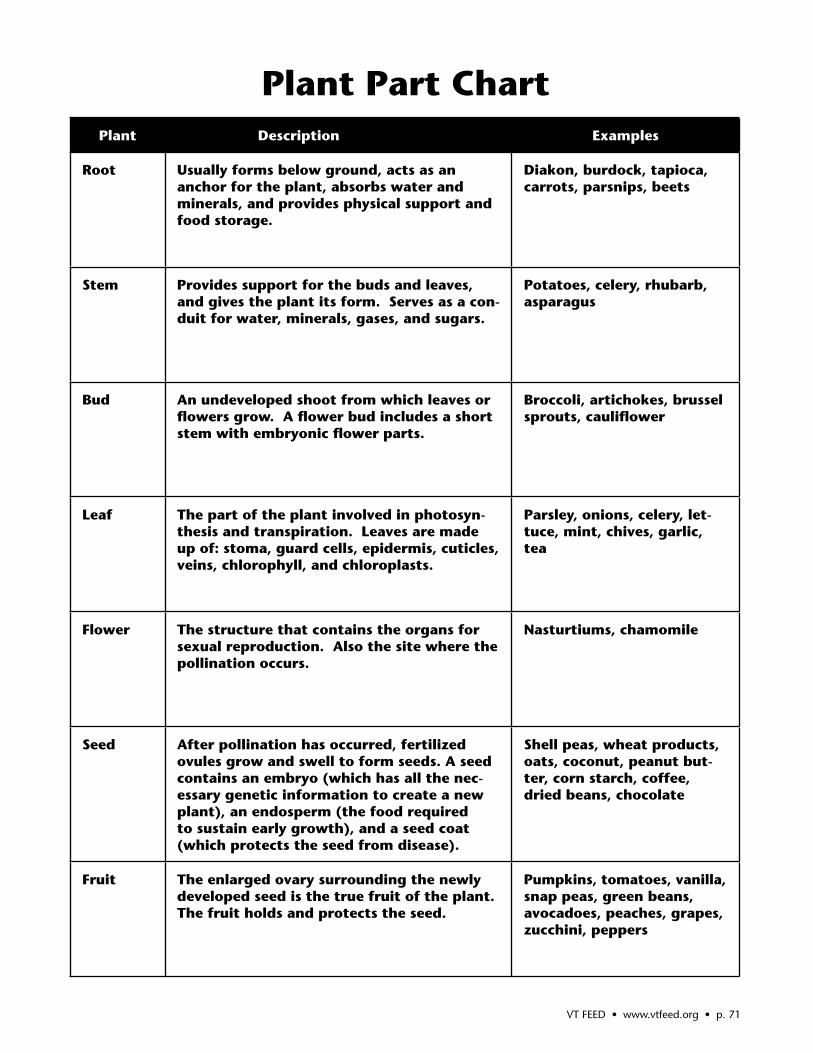
Plant Description/Defi nition Examples
Root Usually forms below ground, acts as an anchor for the plant, absorbs water and minerals, and provides physical support and food storage.
Diakon, burdock, tapioca, carrots, parsnips, beets
Stem Provides support for the buds and leaves, and gives the plant its form. Serves as a con-duit for water, minerals, gases, and sugars.
Potatoes, celery, rhubarb, asparagus
Bud An undeveloped shoot from which leaves or fl owers grow. A fl ower bud includes a short stem with embryonic fl ower parts.
Broccoli, artichokes, brussel sprouts, caulifl ower
Leaf The part of the plant involved in photosyn-thesis and transpiration. Leaves are made up of: stoma, guard cells, epidermis, cuticles, veins, chlorophyll, and chloroplasts.
Parsley, onions, celery, let-tuce, mint, chives, garlic, tea
Flower The structure that contains the organs for sexual reproduction. Also the site where the pollination occurs.
Nasturtiums, chamomile
Seed After pollination has occurred, fertilized ovules grow and swell to form seeds. A seed contains an embryo (which has all the nec-essary genetic information to create a new plant), an endosperm (the food required to sustain early growth), and a seed coat (which protects the seed from disease).
Shell peas, wheat products, oats, coconut, peanut but-ter, corn starch, coffee, dried beans, chocolate
Fruit The enlarged ovary surrounding the newly developed seed is the true fruit of the plant. The fruit holds and protects the seed.
Pumpkins, tomatoes, vanilla, snap peas, green beans, avocadoes, peaches, grapes, zucchini, peppers
Plant Part Chart
VT FEED • www.vtfeed.org • p. 71
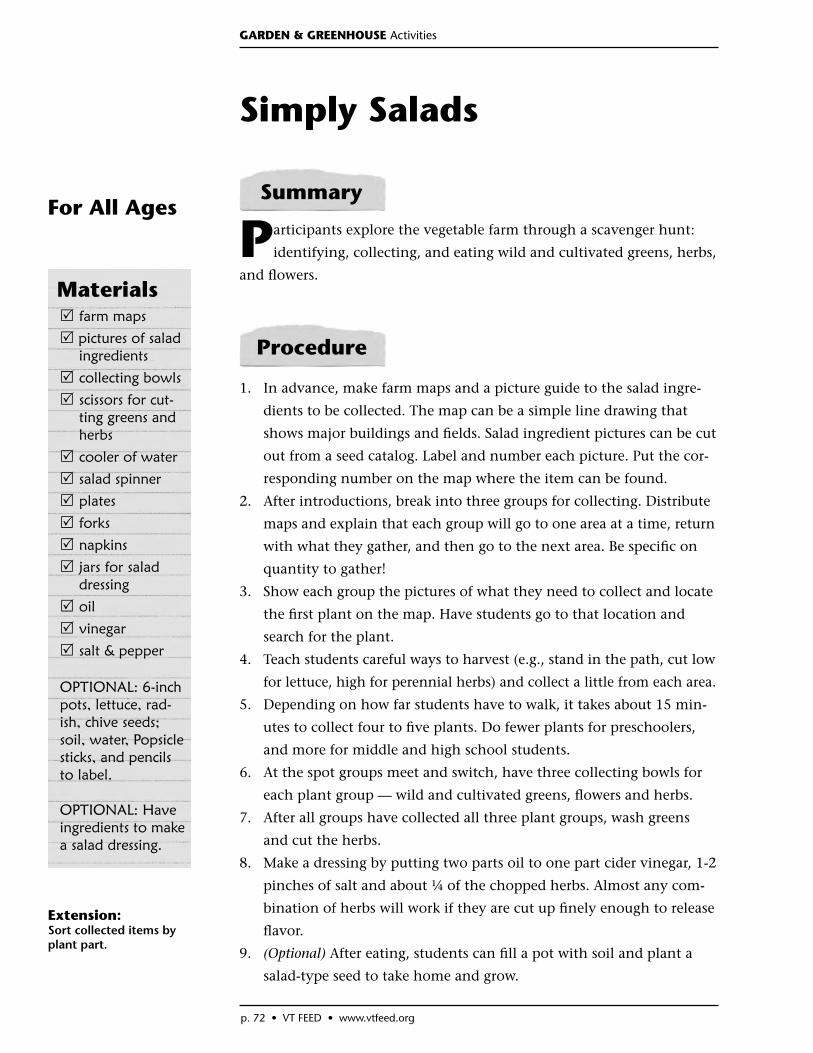
p. 72 • VT FEED • www.vtfeed.org
Simply Salads
Participants explore the vegetable farm through a scavenger hunt:
identifying, collecting, and eating wild and cultivated greens, herbs,
and fl owers.
1. In advance, make farm maps and a picture guide to the salad ingre-
dients to be collected. The map can be a simple line drawing that
shows major buildings and fi elds. Salad ingredient pictures can be cut
out from a seed catalog. Label and number each picture. Put the cor-
responding number on the map where the item can be found.
2. After introductions, break into three groups for collecting. Distribute
maps and explain that each group will go to one area at a time, return
with what they gather, and then go to the next area. Be specifi c on
quantity to gather!
3. Show each group the pictures of what they need to collect and locate
the fi rst plant on the map. Have students go to that location and
search for the plant.
4. Teach students careful ways to harvest (e.g., stand in the path, cut low
for lettuce, high for perennial herbs) and collect a little from each area.
5. Depending on how far students have to walk, it takes about 15 min-
utes to collect four to fi ve plants. Do fewer plants for preschoolers,
and more for middle and high school students.
6. At the spot groups meet and switch, have three collecting bowls for
each plant group — wild and cultivated greens, fl owers and herbs.
7. After all groups have collected all three plant groups, wash greens
and cut the herbs.
8. Make a dressing by putting two parts oil to one part cider vinegar, 1-2
pinches of salt and about ¼ of the chopped herbs. Almost any com-
bination of herbs will work if they are cut up fi nely enough to release
fl avor.
9. (Optional) After eating, students can fi ll a pot with soil and plant a
salad-type seed to take home and grow.
Summary
Procedure
farm maps
pictures of salad ingredients
collecting bowls
scissors for cut-ting greens and herbs
cooler of water
salad spinner
plates
forks
napkins
jars for salad dressing
oil
vinegar
salt & pepper
OPTIONAL: 6-inch pots, lettuce, rad-ish, chive seeds; soil, water, Popsicle sticks, and pencils to label.
OPTIONAL: Have ingredients to make a salad dressing.
Materials
For All Ages
Extension:Sort collected items by plant part.
GARDEN & GREENHOUSE Activities

VT FEED • www.vtfeed.org • p. 73
Recipe Scavenger Hunt
Students discover the connections between the foods they eat and the
foods produced on Vermont farms.
1. Make copies of a simple recipe containing farm products. Common
recipes include vegetable stew, squash soup, vegetable rice pilaf, car-
rot parsnip beet salad, etc. (Include your farm’s name on the recipe.)
2. After a tour of the farm, divide into groups and give each group a
copy of the recipe (or give each child a copy of the recipe).
3. Talk about the ingredients that are not produced on the farm, and
where they will come from.
4. Take the group(s) out around the farm to collect the ingredients.
5. If there is enough time and the necessary facilities, the students can
use the ingredients to make the recipe. If not, make the recipe in ad-
vance so the children can taste it, or give the ingredients and recipe
card to the teacher for the students to make it at school.
Summary
Procedure
bags or gather-ing baskets are helpful
copies of a simple recipe made from farm products
Materials
For All Ages
Extensions:
• Make sweet dips or dairy dips for harvested fruits and vegetables.
• Dry harvested items for tasting later or mix-ing into cereals, yogurt (for fruit), or soup with pasta (for vegetables).
GARDEN & GREENHOUSE Activities
Carrot, Parsnip & Beet Salad
INGREDIENTS 2 ½ lbs. parsnips 1 ½ lbs. carrots 1 lb. beets or ½ lb. green cabbage and ½ lb. red cabbage 2 Tbsp. grated fresh ginger or 1 Tbsp. dried ginger ¼ cup honey or ½ cup of brown sugar (sweeten to taste depending on vegetables) ¼ cup lemon juice ¼ cup orange juice ½ cup olive or vegetable oil
Yield: 25 servings
DIRECTIONS 1. Clean and grate all vegetables. 2. Make a dressing by mixing ginger,
honey, lemon juice, and orange juice. 3. Add vegetables to dressing. Mix well. 4. Let stand for one hour to marinate
before serving.
Variations: Add dried fruits such as cranberries.
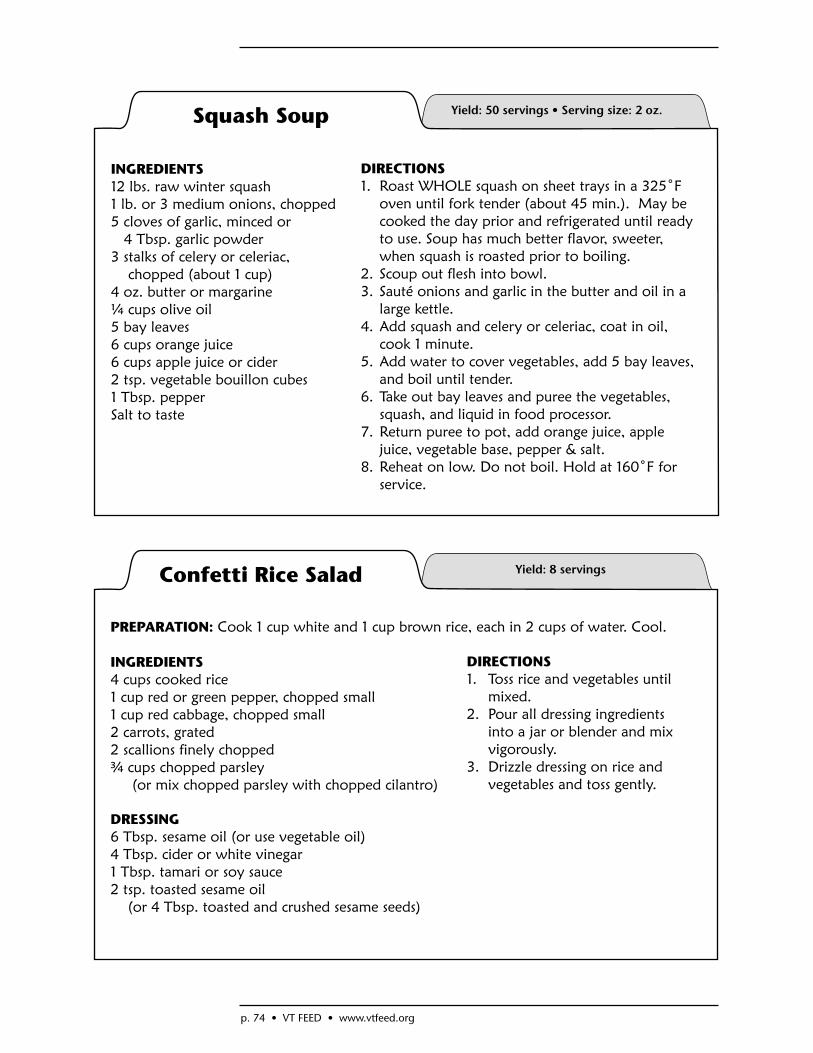
p. 74 • VT FEED • www.vtfeed.org
Squash Soup
INGREDIENTS 12 lbs. raw winter squash1 lb. or 3 medium onions, chopped 5 cloves of garlic, minced or 4 Tbsp. garlic powder 3 stalks of celery or celeriac, chopped (about 1 cup) 4 oz. butter or margarine ¼ cups olive oil 5 bay leaves 6 cups orange juice 6 cups apple juice or cider 2 tsp. vegetable bouillon cubes 1 Tbsp. pepperSalt to taste
Yield: 50 servings • Serving size: 2 oz.
DIRECTIONS1. Roast WHOLE squash on sheet trays in a 325˚F
oven until fork tender (about 45 min.). May be cooked the day prior and refrigerated until ready to use. Soup has much better flavor, sweeter, when squash is roasted prior to boiling.
2. Scoup out flesh into bowl.3. Sauté onions and garlic in the butter and oil in a
large kettle. 4. Add squash and celery or celeriac, coat in oil,
cook 1 minute. 5. Add water to cover vegetables, add 5 bay leaves,
and boil until tender. 6. Take out bay leaves and puree the vegetables,
squash, and liquid in food processor. 7. Return puree to pot, add orange juice, apple
juice, vegetable base, pepper & salt. 8. Reheat on low. Do not boil. Hold at 160˚F for
service.
Confetti Rice Salad
PREPARATION: Cook 1 cup white and 1 cup brown rice, each in 2 cups of water. Cool.
INGREDIENTS 4 cups cooked rice 1 cup red or green pepper, chopped small 1 cup red cabbage, chopped small 2 carrots, grated 2 scallions finely chopped ¾ cups chopped parsley (or mix chopped parsley with chopped cilantro)
DRESSING6 Tbsp. sesame oil (or use vegetable oil) 4 Tbsp. cider or white vinegar 1 Tbsp. tamari or soy sauce 2 tsp. toasted sesame oil (or 4 Tbsp. toasted and crushed sesame seeds)
Yield: 8 servings
DIRECTIONS 1. Toss rice and vegetables until
mixed. 2. Pour all dressing ingredients
into a jar or blender and mix vigorously.
3. Drizzle dressing on rice and vegetables and toss gently.
VT FEED • www.vtfeed.org • p. 75
Summary
Procedure film canisters (available free in film stores) or small yogurt containers with lids
cotton balls or tissues
access to garden, vegetable fields, and other areas with fragrant plants
Materials
For All Ages
Smelly Plant Scents Match
Encourage students to explore the scent of plants, herbs, and fl owers
on the farm and begin to identify them by scent; demonstrate how
animals use their sense of smell to identify other animals and food.
1. After introductions, encourage students in partners to explore a par-
ticular area of the farm with fragrant plants.
2. After they have explored for a short while, give each student pair
two fi lm canisters and two cotton balls. In each canister, they place a
piece of plant with a unique of obvious smell. The same plant should
go in both canisters. Take a moment to demonstrate to students proper
harvesting techniques — “pick only 1 leaf, not the whole plant.”
3. Students then place cotton balls or tissues on top of the plant to
conceal its identity. Encourage students to fi nd plants different from
their friends.
4. Gather the students and their canisters in an area where they can
move around easily.
5. Set aside half of the canister pairs for a second round. Give one canis-
ter to each student pair.
6. Make a large circle. Direct students to mingle, sharing their scent and
trying to match up with like scents. Discourage students from talking
or peeking; encourage them to concentrate on their noses. Everyone
should fi nd a partner; there may be groups with the same scent.
7. Play again with the remaining canisters.
8. At the end of the second round, have the pairs try to match the smell
of their canister with the actual plant where they found the scents
originally. If students are having a hard time with this, they can peek
at the plant to compare appearance.
9. Ask students to answer some or all of the following questions: How
hard was it to fi nd your matching smells? Are there places on your
plant that have more smell than others? Where? Why do you think
plants have smells? How do humans use their sense of smell? How
about other animals? How about farm animals?
GARDEN & GREENHOUSE Activities
p. 76 • VT FEED • www.vtfeed.org
Blindfold Walk in the Garden
Encourage students to discover the scents and textures of various
garden plants.
1. Split the group into pairs.
2. In each pair, one person is blindfolded, the other is the guide. Chap-
erones can be used for each pair of children to guard against injury.
Hats may also be pulled down over eyes in lieu of using blindfolds.
3. The guide carefully leads the blindfolded partner to an area in the
garden by holding one hand of the blind person and placing the
other hand on his or her shoulder. Make sure the blindfolded person
feels safe.
4. Try not to step on plants or obstacles.
5. When the pair reaches a the chosen spot, the guide shows the blind-
folded partner where the plants are with his or her hands. The blind-
folded partner squeezes the plant and smells its aroma. Encourage the
students to feel for other things in the area – soil texture, row size,
etc., without moving their feet too far from the chosen spot.
6. When the blindfolded person is ready, the guide leads the blindfold-
ed partner back to the starting point. When the blindfolded person
is back at the starting point, the student may remove the blindfold.
Now, can that person fi nd the same plant?
7. Switch roles, and do it all again.
8. Share observations. Which plants smell similar? Do they look similar?
What makes it easy to fi nd your plant? Describe the texture.
Summary
blindfolds—one for every two people
access to a garden
Materials
For Grades 3-12
Procedure
GARDEN & GREENHOUSE Activities
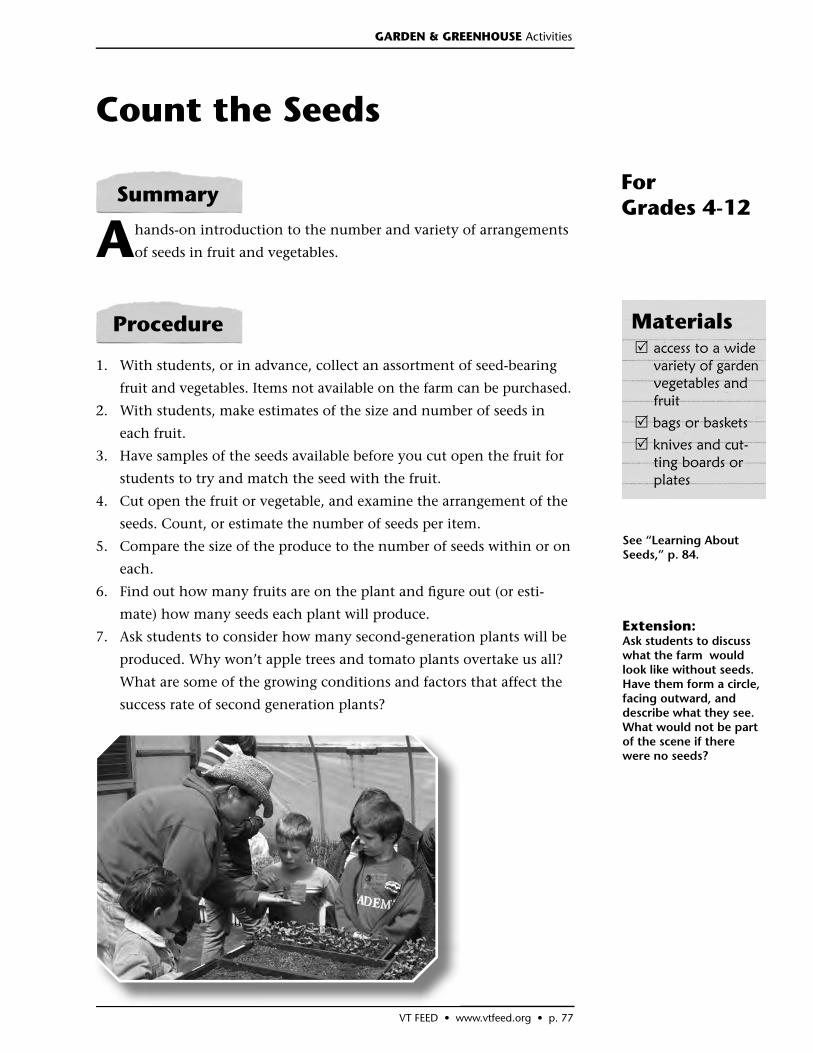
VT FEED • www.vtfeed.org • p. 77
Count the Seeds
A hands-on introduction to the number and variety of arrangements
of seeds in fruit and vegetables.
1. With students, or in advance, collect an assortment of seed-bearing
fruit and vegetables. Items not available on the farm can be purchased.
2. With students, make estimates of the size and number of seeds in
each fruit.
3. Have samples of the seeds available before you cut open the fruit for
students to try and match the seed with the fruit.
4. Cut open the fruit or vegetable, and examine the arrangement of the
seeds. Count, or estimate the number of seeds per item.
5. Compare the size of the produce to the number of seeds within or on
each.
6. Find out how many fruits are on the plant and fi gure out (or esti-
mate) how many seeds each plant will produce.
7. Ask students to consider how many second-generation plants will be
produced. Why won’t apple trees and tomato plants overtake us all?
What are some of the growing conditions and factors that affect the
success rate of second generation plants?
Summary
access to a wide variety of garden vegetables and fruit
bags or baskets
knives and cut-ting boards or plates
Materials
For Grades 4-12
Procedure
See “Learning About Seeds,” p. 84.
Extension:Ask students to discuss what the farm would look like without seeds. Have them form a circle, facing outward, and describe what they see. What would not be part of the scene if there were no seeds?
GARDEN & GREENHOUSE Activities

p. 78 • VT FEED • www.vtfeed.org
Summary
optional: bean, corn, and squash seeds
Materials
For Grades K-4
Procedure
Three Sisters Improvisation
Introduce students to companion planting by acting out the planting
and growing of the “Three Sisters” — corn, beans and squash.
1. Explain to the students about the plants they will be “growing”
— corn, beans and squash. Discuss how plants begin to grow from
seeds.
2. Each student pretends to be a seed by crouching down in a ball.
Explain the growing cycle and ask the students to act it out.
3. Pretend to cover them with soil and warm them with sunshine. De-
scribe the seed sprouting and growing into a plant. Ask the students
to act this out as you describe it.
4. Ask a volunteer to come to the front of the group to be a tall corn
plant. Then plant a “bean seed” (student) next to the corn plant.
Describe how the corn provides a trellis for the bean plant to grow
tall on. Next, plant a “pumpkin seed” (another student) next to the
corn and bean. Describe how the pumpkin seed grows into a plant
that is long and sprawling along the ground.
5. Choose a fourth student to role play a raccoon. What does the rac-
coon want? Ask the students, why can’t the raccoon get it? Have the
child who is role playing the squash act “bristly” toward the raccoon,
not letting the raccoon get through the plants to the corn. The
squash’s bristles protect the fruits of the three sisters.
6. Summarize how the “Three Sisters” plants help each other out. The
corn provides a trellis for the beans. The pumpkin protects the corn
and beans, trapping moisture and shading out weeds. The bristles
repel the raccoon. The bean roots provide soil nutrients for the corn
and pumpkins.
7. How are plants on the farm grown in relation to one another?
8. What animals might damage the plants grown on the farm?
Extension: If time allows, play Three Sisters Tag afterward.
GARDEN & GREENHOUSE Activities
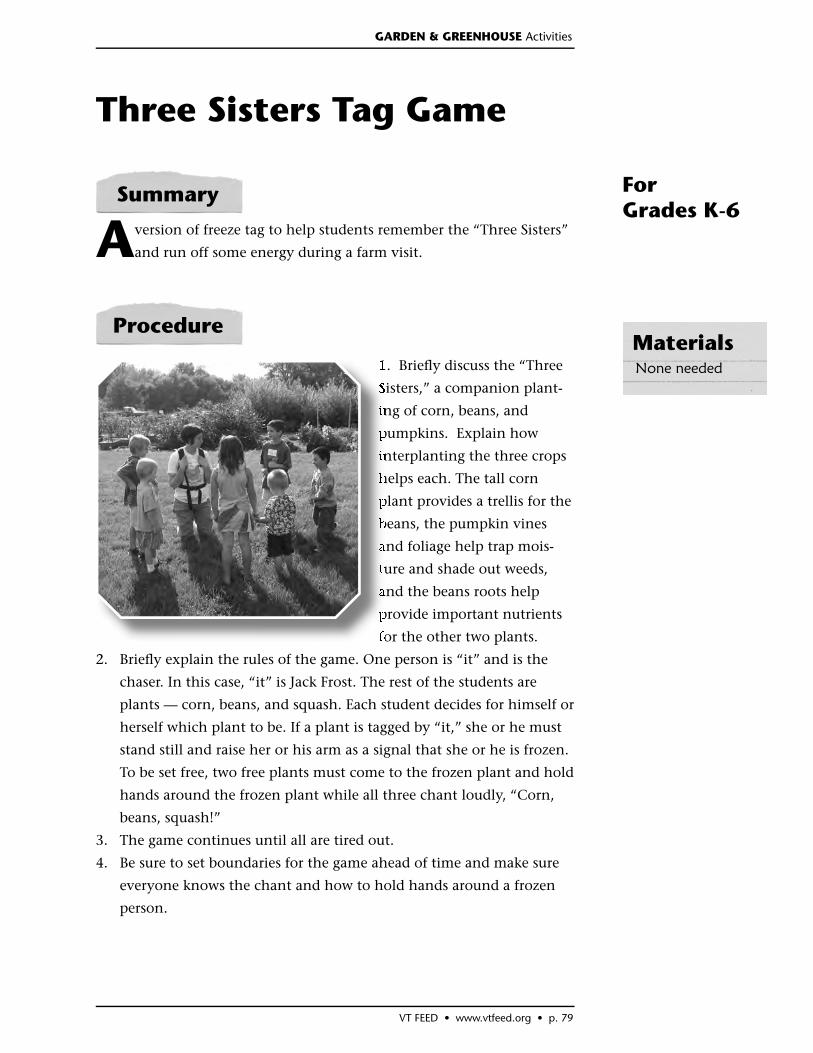
VT FEED • www.vtfeed.org • p. 79
Three Sisters Tag Game
A version of freeze tag to help students remember the “Three Sisters”
and run off some energy during a farm visit.
1. Briefl y discuss the “Three
Sisters,” a companion plant-
ing of corn, beans, and
pumpkins. Explain how
interplanting the three crops
helps each. The tall corn
plant provides a trellis for the
beans, the pumpkin vines
and foliage help trap mois-
ture and shade out weeds,
and the beans roots help
provide important nutrients
for the other two plants.
2. Briefl y explain the rules of the game. One person is “it” and is the
chaser. In this case, “it” is Jack Frost. The rest of the students are
plants — corn, beans, and squash. Each student decides for himself or
herself which plant to be. If a plant is tagged by “it,” she or he must
stand still and raise her or his arm as a signal that she or he is frozen.
To be set free, two free plants must come to the frozen plant and hold
hands around the frozen plant while all three chant loudly, “Corn,
beans, squash!”
3. The game continues until all are tired out.
4. Be sure to set boundaries for the game ahead of time and make sure
everyone knows the chant and how to hold hands around a frozen
person.
None needed
Materials
For Grades K-6
Summary
Procedure
GARDEN & GREENHOUSE Activities
p. 80 • VT FEED • www.vtfeed.org
Plant Needs Inventory
Students learn about what different plants need to grow and why
some plants grow well together in certain conditions.
1. Discuss with students what plants need to grow. Include in the
discussion how different plants need varying amounts of light, heat,
nutrients, and water in order to grow.
2. Split the group into two. Give half the group a number of different
plants that are started in a greenhouse. Have them research their
plants to fi nd out their growing requirements. Have other students
guess the identity of each plant and their growing requirements.
3. Ask, which plant groups might be grouped together? Why?
Some plant sets might include:
• tomatoes, peppers, eggplants (need a lot of light)
• lettuce, spinach, cabbage (grow early in the season)
• melons, hot peppers, okra (like hot temperatures, grow late in season)
• ferns, moss, impatients, hostas (like light shade)
4. Have students then plant in the greenhouse while discussing what
the specifi c plants need for optimum growth such as: sifted soil for
the smaller seeds, low light for shade plants, extra fertilizer for peren-
nial starts.
5. Set out various fertilizers, soil amendments, and insecticides with
their labels, in clear plastic bags. In small groups led by a chaperone,
have students read the labels and decide which plants benefi t from
which product and why.
Summary
plants started in a greenhouse representing various plant groups that grow well to-gether
books/maga-zines/catalogs/manuals that students can use to identify and research the plants
seeds for plant-ing
various fertilizer and insecticide packages in clear bags (so students can’t touch them directly)
Materials
For Grades 6-12
Procedure
GARDEN & GREENHOUSE Activities
VT FEED • www.vtfeed.org • p. 81
Stages of Growth Scavenger Hunt
Students will discover the various stages of plant growth and learn
the distinguishing characteristics of these stages.
1. Break the class into small groups.
2. Give each group a sheet that lists the fi ve stages of plant growth
(seed, seedling, immature plant with true leaves, mature/reproducing
plant, and dead plant).
3. In the greenhouse or in the fi eld, display plants in various stages of
growth.
4. For each plant species, have the small groups try to answer the fol-
lowing questions on their questionnaire:
• Which stage lasts the longest?
• Which stage is like a toddler, a teenager, an adult, a grandparent?
• Can you still see the seed attached to the plant?
• When does the plant fl ower?
• How can you tell when the plant is ready to have its edible parts
harvested?
• How do these chosen plants reproduce? (Have a sample of repro-
duction styles available to discuss — seed, tuber, runner, bulb, etc.)
5. With the whole group back together, ask students to share their fi nd-
ings. Review the questions and the answers with the whole group.
Use plant markers to distinguish the stages.
Summary
plants in vary-ing stages of growth
small group questionnaires
Materials
For Grades 5-12
Procedure
GARDEN & GREENHOUSE Activities
p. 82 • VT FEED • www.vtfeed.org
Working in the Greenhouse Greenhouse stations
Students learn the ins and outs of working in a greenhouse by plant-
ing, working with plant foods, and making soil.
Set up three stations at various places in the greenhouse:
STATION 1: Making Soil
Have students sift potting soil components and mix the components
into a growing medium. Experiment with different size screens and de-
termine how each component is important to the mixture. What are the
origins of the components? Fill seed trays with the soil.
STATION 2: Learning About Plant Food
Have students smell different plant foods such as fi sh emulsion, compost
tea, egg shells, seaweed extract, or “Miracle Grow.” Using the informa-
tion on the labels mix some of the fertilizers. What is the proper use of
each plant food? What are these foods made from? Which fertilizer is
the strongest? Which is best for leaf growth? Root growth? Would you
use one over the other? When and why?
STATION 3: Planting
Start a variety of seeds in appropriately sized pots or plugs. Remember
to label each planting and write varieties in the calendar. Count days to
harvest, where appropriate. Discuss with students why each seed needs
the size container it is being planted in. Tie in the previous stations with
discussions about why the seeds are being planted in that particular soil
or in that particular plug or pot size.
Summary
seeds and pots for planting
a variety of plant foods
components for potting soil
soil-making screens (could use window screens, tennis racket, food sieves)
Materials
For Grades 4-12
Procedure
Extension: Examine greenhouse tools with students. Search for tools that aid in growing the greenhouse plants. For example: fans, screens, watering wands, heater, fl ats, trowels, etc.
GARDEN & GREENHOUSE Activities
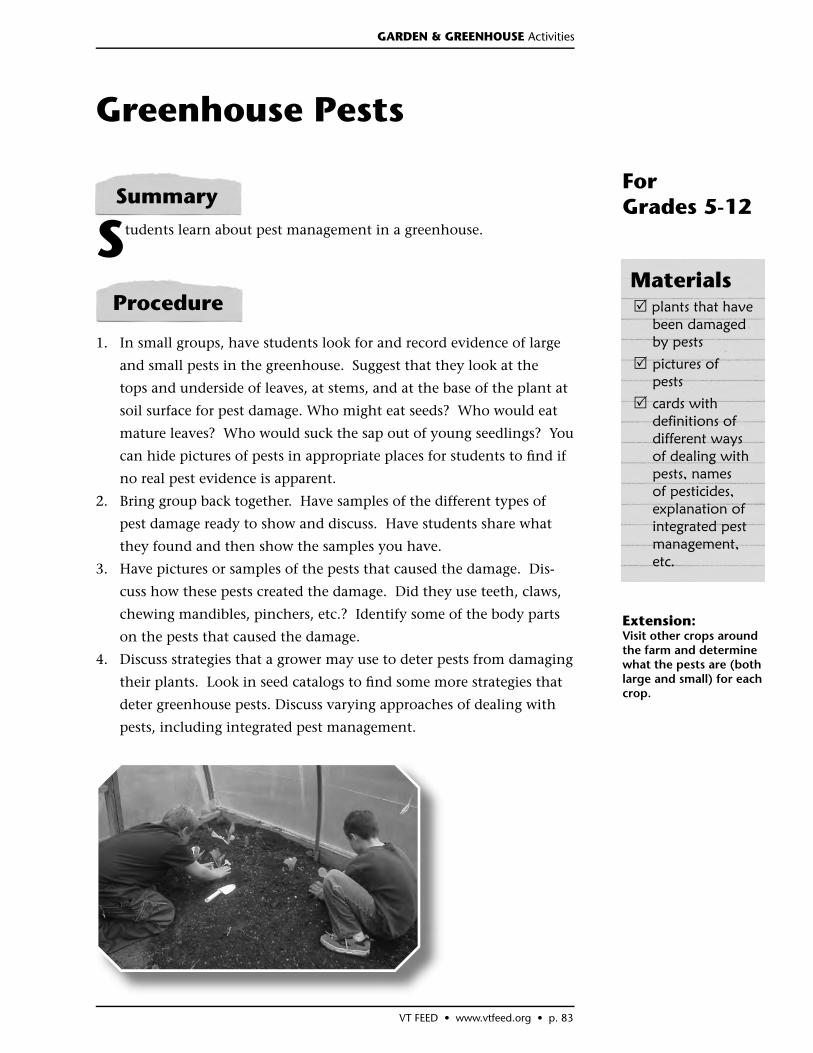
VT FEED • www.vtfeed.org • p. 83
Greenhouse Pests
Students learn about pest management in a greenhouse.
1. In small groups, have students look for and record evidence of large
and small pests in the greenhouse. Suggest that they look at the
tops and underside of leaves, at stems, and at the base of the plant at
soil surface for pest damage. Who might eat seeds? Who would eat
mature leaves? Who would suck the sap out of young seedlings? You
can hide pictures of pests in appropriate places for students to fi nd if
no real pest evidence is apparent.
2. Bring group back together. Have samples of the different types of
pest damage ready to show and discuss. Have students share what
they found and then show the samples you have.
3. Have pictures or samples of the pests that caused the damage. Dis-
cuss how these pests created the damage. Did they use teeth, claws,
chewing mandibles, pinchers, etc.? Identify some of the body parts
on the pests that caused the damage.
4. Discuss strategies that a grower may use to deter pests from damaging
their plants. Look in seed catalogs to fi nd some more strategies that
deter greenhouse pests. Discuss varying approaches of dealing with
pests, including integrated pest management.
Summary
plants that have been damaged by pests
pictures of pests
cards with definitions of different ways of dealing with pests, names of pesticides, explanation of integrated pest management, etc.
Materials
For Grades 5-12
Procedure
Extension: Visit other crops around the farm and determine what the pests are (both large and small) for each crop.
GARDEN & GREENHOUSE Activities
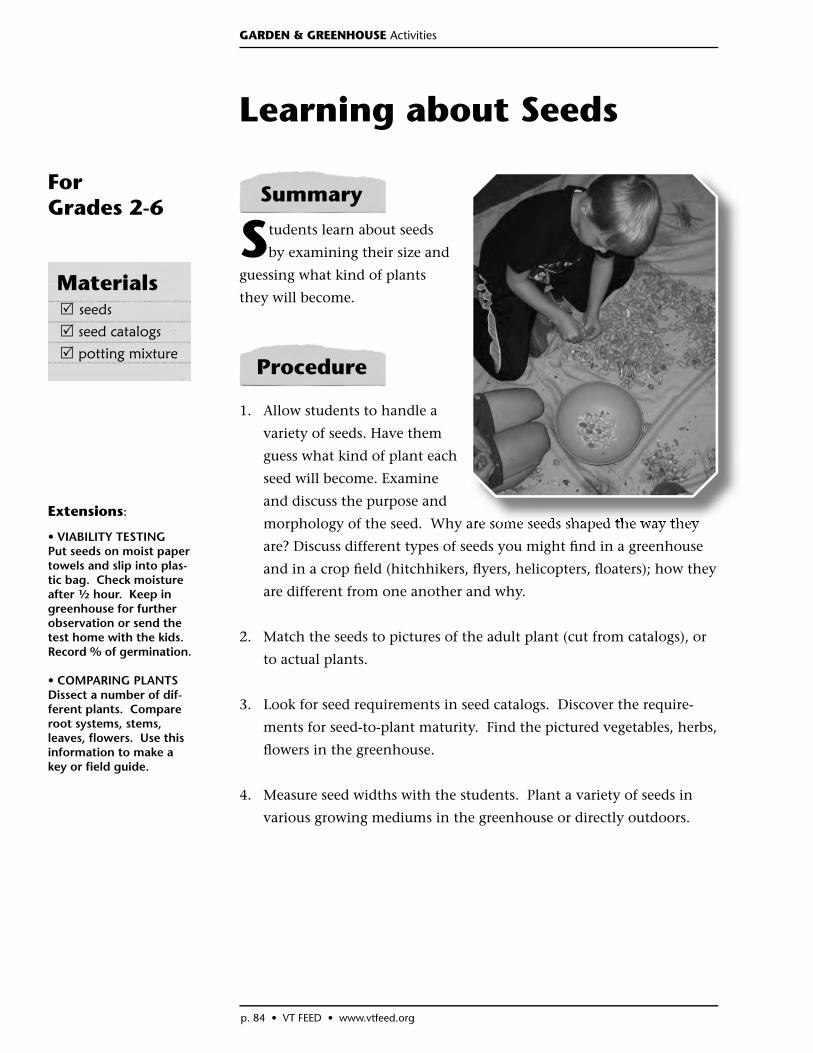
p. 84 • VT FEED • www.vtfeed.org
Learning about Seeds
Students learn about seeds
by examining their size and
guessing what kind of plants
they will become.
1. Allow students to handle a
variety of seeds. Have them
guess what kind of plant each
seed will become. Examine
and discuss the purpose and
morphology of the seed. Why are some seeds shaped the way they
are? Discuss different types of seeds you might fi nd in a greenhouse
and in a crop fi eld (hitchhikers, fl yers, helicopters, fl oaters); how they
are different from one another and why.
2. Match the seeds to pictures of the adult plant (cut from catalogs), or
to actual plants.
3. Look for seed requirements in seed catalogs. Discover the require-
ments for seed-to-plant maturity. Find the pictured vegetables, herbs,
fl owers in the greenhouse.
4. Measure seed widths with the students. Plant a variety of seeds in
various growing mediums in the greenhouse or directly outdoors.
Summary
seeds
seed catalogs
potting mixture
Materials
For Grades 2-6
Procedure
Extensions:
• VIABILITY TESTING Put seeds on moist paper towels and slip into plas-tic bag. Check moisture after ½ hour. Keep in greenhouse for further observation or send the test home with the kids. Record % of germination.
• COMPARING PLANTS Dissect a number of dif-ferent plants. Compare root systems, stems, leaves, fl owers. Use this information to make a key or fi eld guide.
GARDEN & GREENHOUSE Activities
VT FEED • www.vtfeed.org • p. 85
What Does It Take to Make Milk?
Introduce the students to the cow. Learn about the milking process,
different breeds, feed, and manure.
1. Introduce the students to the different parts of a cow by using post-it
notes to label the different parts of a cow on a large diagram.
2. Go through the milk house and explain where the milk goes and how
it is fi ltered. Introduce students to the milking equipment.
a. Explain the cooling system and the washing system.
b. Ask students if they know what pasteurization and homogeniza-
tion mean. Explain these two processes to the students.
c. Explain the tests that are performed on milk before it is used for
consumption. The tests help make dairy food safe.
3. Visit the grain/TMR/feed area. Explain the feed and give a simple
explanation about how the food is turned into milk.
4. Have the students milk a cow (or demonstrate for them). Show the
sanitary steps used to prepare the teats for milking.
5. Go through the manure system used on the farm. Ask students if
they know about the free fertilizer that farmers have. Have them
guess how much manure (free fertilizer) a cow makes in one year.
6. Introduce students to the different breeds of cows and their charac-
teristics: Holstein, Jersey, Milking Shorthorn, etc.
7. Have each student fi nd a favorite cow. Name it if it doesn’t have one.
8. Give students the outline of a cow handout and have them color in
the cow to look like their favorite cow.
9. Have students present to the group which cow was their favorite, the
name they gave it, and what made it special or unique.
Summary
large diagram of a cow
an outline of a cow (mul-tiple copies for handouts)
access to a dairy barn
Materials
For All Ages
Procedure
DAIRY Activities
p. 86 • VT FEED • www.vtfeed.org
If I Were A Cow, What Would I Eat?
Students discover the variety of plants that grow in pasture and begin
to identify which plants farm animals eat.
1. Ask students the following questions to see what they already know.
Do they know what cows eat? Is there a difference between lawn
grass and the grass cows eat? They’re about to explore your pastures
to fi nd out.
3. Split the group into pairs. Each pair will need a bag to collect veg-
etation. For older groups, add a notebook (or paper) and pencil to
record their observations.
4. Ask each pair to explore the pasture, observing and collecting the dif-
ferent grasses growing in different areas. Encourage students to look
under trees, along the fenceline where cows can’t eat, in the pasture,
and near manure. Older students should record where they found
the plant, and may draw pictures. While they are collecting, students
should consider whether they think the plant is something cows like
to eat or not. How might they tell?
5. Spread white sheet out and have students lay their samples on the
sheet, then sort them into groups of similar plant varieties. Have older
students use fi eld guides to identify the different plants. Discuss with
the group which plants cows like to eat and which they do not.
6. Students may glue their samples to a piece of poster board. Label each
plant (if they know what it is) and where they found it. Leave a space
under each plant so students can write if this is a plant that cows
think is “Yummy” or “Yucky.” This board can be taken back to school
and displayed as a pasture fi eld guide.
Summary
access to rota-tionally grazed pastures
plastic bags
pencils, markers
notebooks
poster board
glue
white sheet
field guides for older youth
Materials
For Grades K-12
Procedure
DAIRY Activities
VT FEED • www.vtfeed.org • p. 87
Dairy Food Tasting
Introduce students to a variety of dairy products (cow, sheep, and goat).
1. Cheese tasting
a. Cut up different cheeses in advance. Number each sample group.
b. Let students taste each type of cheese.
c. List on a whiteboard/chalkboard or piece of paper the name of the
cheeses they are tasting. Can they match each taste with the cor-
rect name? What type of animal did each cheese come from (cow,
sheep, goat)? Discuss some common uses of the cheeses they are
trying (mozzarella is often used on pizza, cheddar is often used in
macaroni and cheese, etc.).
2. Yogurt tasting
a. Have several different fl avors and name brands of yogurt available
for sampling. Hand out each sample one at a time in a Dixie cup.
b. Write a letter — A, B, C, for example — on the bottom.
c. Have a key to which milk goes to which letter.
d. Have students guess the fl avor of yogurt and if it is nonfat, low fat,
or whole milk. Many children have not tried the different yogurt
fl avors available so this is a good way to turn them on to something.
e. Read labels to discover ingredients of each product.
3. Milk tasting
a. Have skim milk, 1%, 2%, whole milk, and half-&-half in Dixie cups.
b. Write a letter — A, B, C, for example — on the bottom.
c. Create a key to match milk with corresponding letter.
d. Have the students put in order their favorite milk.
e. Have students tell the group which milk they usually drink at home
and then give them the key to see if they picked that kind of milk.
f. For older students, discuss and explain the descriptions on each
container (homogenized, organic, Seal of Quality, USDA certifi ed).
Summary
cheese samples cut up
a white board and marker
yogurt samples
Dixie cups for sampling
milk samples
Materials
For All Ages
Procedure
DAIRY Activities
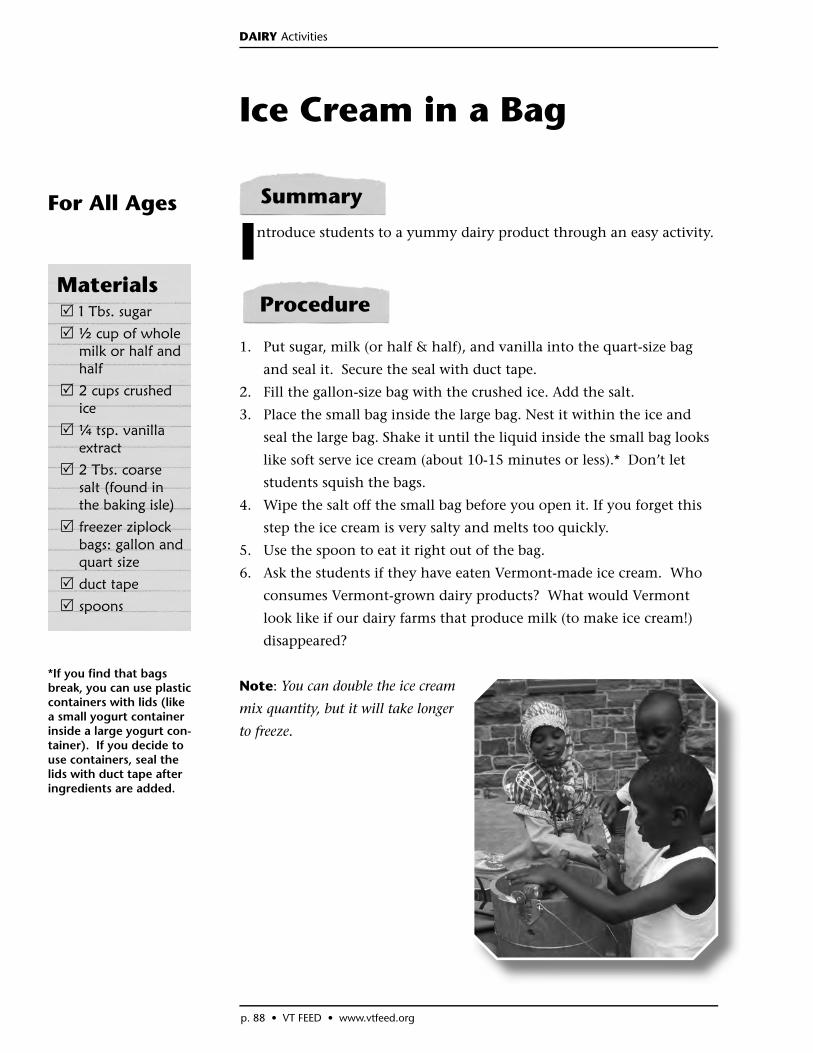
p. 88 • VT FEED • www.vtfeed.org
Summary
1 Tbs. sugar
½ cup of whole milk or half and half
2 cups crushed ice
¼ tsp. vanilla extract
2 Tbs. coarse salt (found in the baking isle)
freezer ziplock bags: gallon and quart size
duct tape
spoons
Materials
For All Ages
Procedure
Ice Cream in a Bag
Introduce students to a yummy dairy product through an easy activity.
1. Put sugar, milk (or half & half), and vanilla into the quart-size bag
and seal it. Secure the seal with duct tape.
2. Fill the gallon-size bag with the crushed ice. Add the salt.
3. Place the small bag inside the large bag. Nest it within the ice and
seal the large bag. Shake it until the liquid inside the small bag looks
like soft serve ice cream (about 10-15 minutes or less).* Don’t let
students squish the bags.
4. Wipe the salt off the small bag before you open it. If you forget this
step the ice cream is very salty and melts too quickly.
5. Use the spoon to eat it right out of the bag.
6. Ask the students if they have eaten Vermont-made ice cream. Who
consumes Vermont-grown dairy products? What would Vermont
look like if our dairy farms that produce milk (to make ice cream!)
disappeared?
Note: You can double the ice cream
mix quantity, but it will take longer
to freeze.
*If you fi nd that bags break, you can use plastic containers with lids (like a small yogurt container inside a large yogurt con-tainer). If you decide to use containers, seal the lids with duct tape after ingredients are added.
DAIRY Activities
VT FEED • www.vtfeed.org • p. 89
There’s No Such Thing as a Free Lunch
Through a tour of the farm, students will examine energy fl ows on
a farm and energy needed to produce food. Buttermaking may be
used as a hands-on demonstration.
Note: This activity assumes that students have a working understanding of
energy concepts. You may want to check with the teacher beforehand to make
sure students have studied what energy is and how we make energy.
1. While touring the farm, look for energy consumption. Have students
identify where the energy is coming from — directly from the sun,
from “purchased” sources such as fossil fuels and electricity, or some
combination.
2. Before beginning buttermaking, have students discuss and draw pic-
tures or charts of where butter comes from. Start with butter and go
back to identify the ingredients and energy needed to make butter:
• Butter comes from cream that is mixed using electricity.
• Cream comes from milk which comes from a cow.
• The cow is milked using electricity.
• The cow needs water, grain, and grass to make milk.
• The water is pumped using electricity.
• Grain is grown using sunlight, soil, and water (rain and irrigation).
Planting, cultivating, harvesting, and processing all use fossil fuels.
• The grass is grown using sunlight, soil, and rain.
3. Make butter with the students. Either put heavy pasteurized cream in
a bowl and mix it with an electric mixer, or put the cream in a glass jar with
lid and shake it until it turns to butter. If you can, try both options and
discuss which type of energy each option took. Serve butter on crackers.
Summary
cream
bowls
electric mixer(s)
Materials
For Grades 5-10
Procedure
Extension: Ask students to identify ways to reduce purchased energy on the farm. What are the trade-offs? What other energy needs are there to get food from farm to table (de-livery, storage, refrigera-tion).
DAIRY Activities
p. 90 • VT FEED • www.vtfeed.org
Flocks of a Feather
Introduction to the feathered friends on a farm through comparing,
drawing, writing, investigating, observing, hypothesizing, and experi-
menting.
1. Ask some introductory questions:
• What is a chicken and why do we have them on farms?
• What kinds of chickens are on the farm? (meat vs. laying)
2. Discuss the various characteristics of chickens compared to those of
humans. How do they eat? How do they keep warm? How do they
hear? How do they get around? How is what they use to see, eat,
hear, walk, different from what we use?
3. Gather feathers from the chicken coop.
4. Gather eggs and count them and compare to the number of chickens.
Discuss how egg production varies according to the age and health of
the bird, the season, and other factors such as weather and stress.
5. Draw a picture of the chickens, their home, incubated eggs, etc.
6. Candle eggs to see the growth of the chickens. Grade the eggs accord-
ing to size and quality.
If you have ducks:
1. Visit them and have the students discuss the differences between
chickens and ducks.
2. Check out a duck before and after it has gone swimming and have
students make some observations.
paper
pencils
candle
access to eggs and chickens
Materials
For Grades K-4 Summary
Procedure
Extensions:• For students in 2nd grade and older, ask them to write a story about your chickens/ducks. What is life like? What does it think about? How does it fi ll its day?
• Discuss the difference between wild birds and your domesticated birds living on the farm. Intro-duce and visit any other birds that use your farm for their home. Look for nests and habitats of these birds.
• Visit various hatchery web sites to discover additional breeds of farm birds.
POULTRY Activities
VT FEED • www.vtfeed.org • p. 91
How Does Your Food Behave?
Encourage students to value the food they eat and the sources of that
food by exploring the behaviors, lifestyles, and actions of poultry
they eat. (Other animals may also be observed using procedures below.
Poultry works well because they move more often.)
1. Provide a little background about the farm and the animals students
will observe. Describe the behaviors that students may see: territorial,
dominance, hierarchy, and courting.
2. Ask each student to choose a bird to watch. Have each student record
his or her bird’s height and approximate weight, color, and distin-
guishing markings.
3. Have each student observe and record his or her bird’s behaviors for
fi ve minutes. Every 10 seconds time will be called, and students will
use tick marks to record what their birds are doing: walking, eating,
sleeping, pecking, standing, scratching, grooming, or laying down.
4. Have students total the marks for each behavior, and identify which
behavior their birds displayed most frequently. (Optional: have
students calculate the percentage of time the animal spent in each
behavior.)
5. Ask students to respond (in discussion or writing) to the following
questions:
a. Identify three stimuli that produced behaviors you observed.
Label the stimuli “internal” or “environmental.”
b. Pick three behaviors and describe the message the bird communi-
cated through each.
c. Describe a behavior you think is innate. Describe another that is
learned.
d. Where is your bird’s approximate place in the pecking order?
What did you observe that supports that conclusion?
Summary
access to chickens (and/or other poultry species)
copies of a behavior chart
pencils and notebooks for recording observations
Materials
For Grades 4-12
Procedure
Extensions:• Offer students time to draw or photograph the chickens and the chicken area, particularly if they will be asked to com-plete a report or poster at a later date.
• Repeat at a second station with a differ-ent species or chicks. Have students compare behaviors.
POULTRY Activities
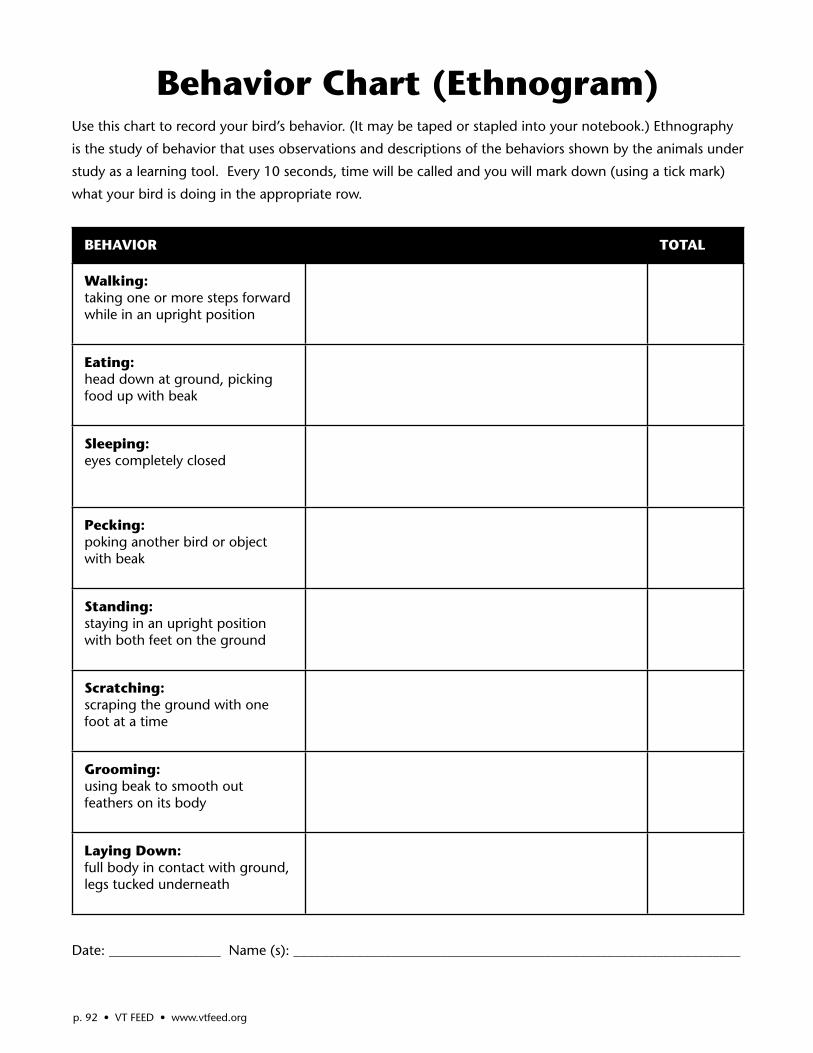
Behavior Chart (Ethnogram)Use this chart to record your bird’s behavior. (It may be taped or stapled into your notebook.) Ethnography
is the study of behavior that uses observations and descriptions of the behaviors shown by the animals under
study as a learning tool. Every 10 seconds, time will be called and you will mark down (using a tick mark)
what your bird is doing in the appropriate row.
BEHAVIOR TOTAL
Walking: taking one or more steps forward while in an upright position
Eating:head down at ground, picking food up with beak
Sleeping: eyes completely closed
Pecking: poking another bird or object with beak
Standing: staying in an upright position with both feet on the ground
Scratching: scraping the ground with one foot at a time
Grooming: using beak to smooth out feathers on its body
Laying Down: full body in contact with ground, legs tucked underneath
Date: ________________ Name (s): ________________________________________________________________
p. 92 • VT FEED • www.vtfeed.org
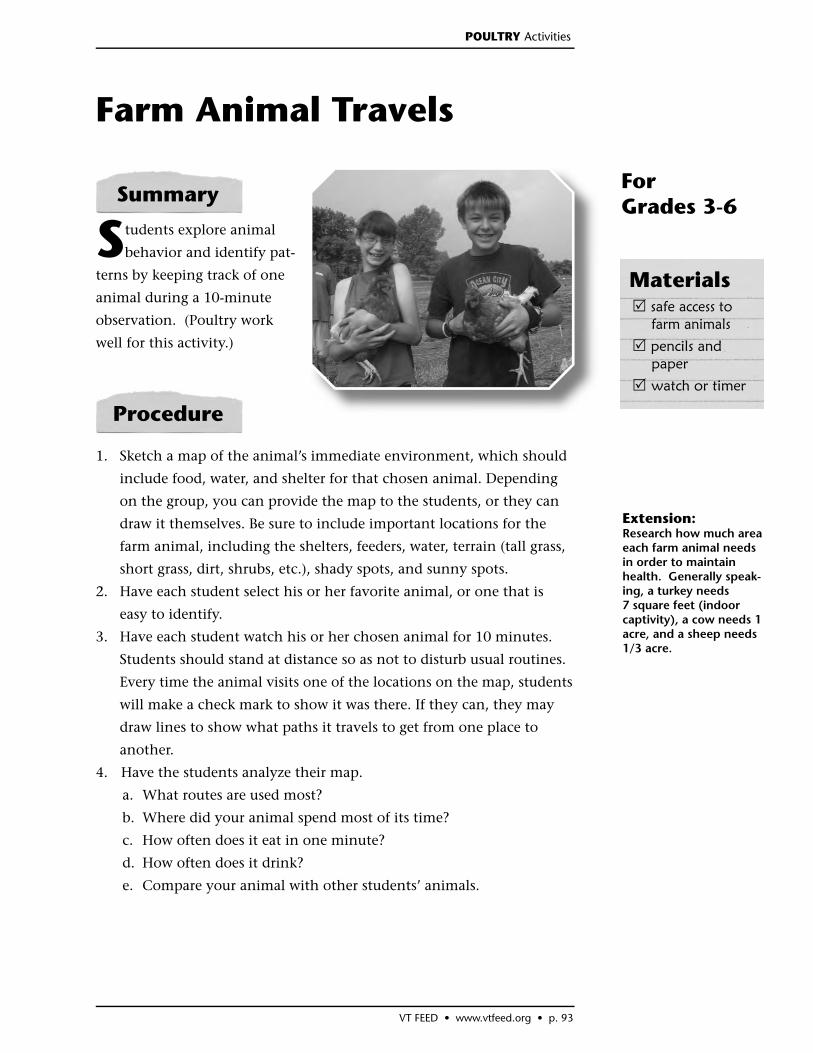
VT FEED • www.vtfeed.org • p. 93
Farm Animal Travels
Students explore animal
behavior and identify pat-
terns by keeping track of one
animal during a 10-minute
observation. (Poultry work
well for this activity.)
1. Sketch a map of the animal’s immediate environment, which should
include food, water, and shelter for that chosen animal. Depending
on the group, you can provide the map to the students, or they can
draw it themselves. Be sure to include important locations for the
farm animal, including the shelters, feeders, water, terrain (tall grass,
short grass, dirt, shrubs, etc.), shady spots, and sunny spots.
2. Have each student select his or her favorite animal, or one that is
easy to identify.
3. Have each student watch his or her chosen animal for 10 minutes.
Students should stand at distance so as not to disturb usual routines.
Every time the animal visits one of the locations on the map, students
will make a check mark to show it was there. If they can, they may
draw lines to show what paths it travels to get from one place to
another.
4. Have the students analyze their map.
a. What routes are used most?
b. Where did your animal spend most of its time?
c. How often does it eat in one minute?
d. How often does it drink?
e. Compare your animal with other students’ animals.
Summary
safe access to farm animals
pencils and paper
watch or timer
Materials
For Grades 3-6
Procedure
POULTRY Activities
Extension:Research how much area each farm animal needs in order to maintain health. Generally speak-ing, a turkey needs7 square feet (indoor captivity), a cow needs 1 acre, and a sheep needs 1/3 acre.
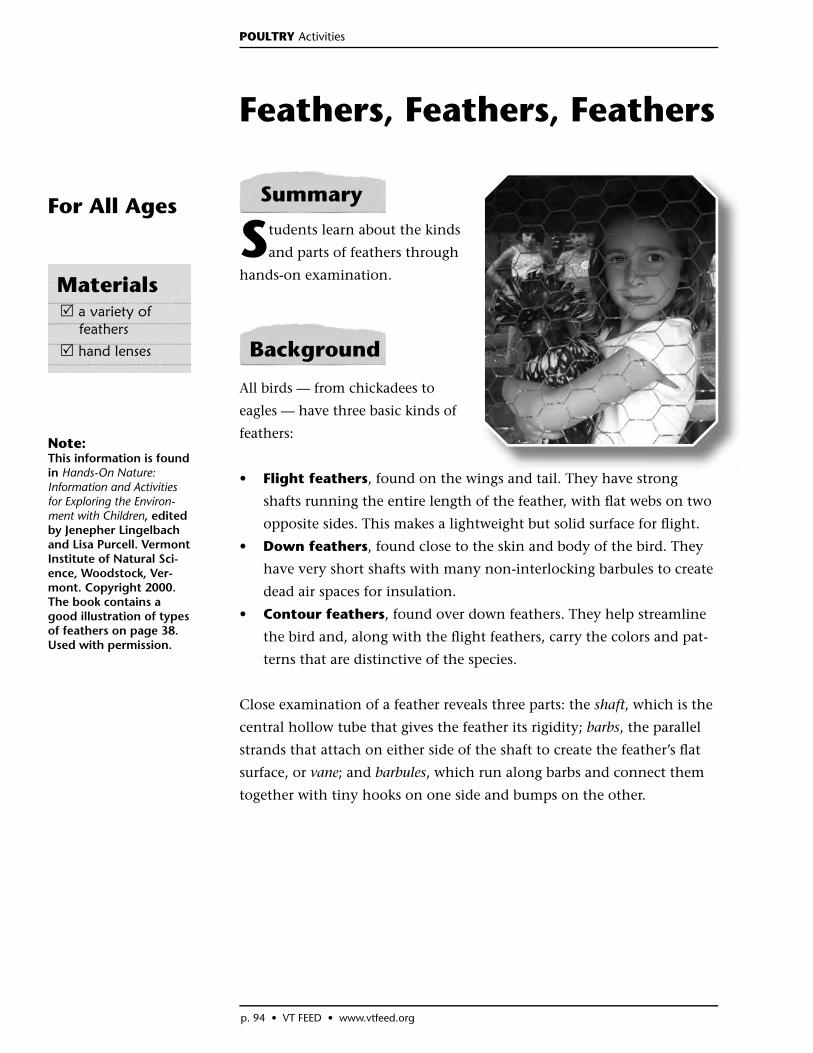
p. 94 • VT FEED • www.vtfeed.org
Feathers, Feathers, Feathers
Students learn about the kinds
and parts of feathers through
hands-on examination.
All birds — from chickadees to
eagles — have three basic kinds of
feathers:
• Flight feathers, found on the wings and tail. They have strong
shafts running the entire length of the feather, with fl at webs on two
opposite sides. This makes a lightweight but solid surface for fl ight.
• Down feathers, found close to the skin and body of the bird. They
have very short shafts with many non-interlocking barbules to create
dead air spaces for insulation.
• Contour feathers, found over down feathers. They help streamline
the bird and, along with the fl ight feathers, carry the colors and pat-
terns that are distinctive of the species.
Close examination of a feather reveals three parts: the shaft, which is the
central hollow tube that gives the feather its rigidity; barbs, the parallel
strands that attach on either side of the shaft to create the feather’s fl at
surface, or vane; and barbules, which run along barbs and connect them
together with tiny hooks on one side and bumps on the other.
a variety of feathers
hand lenses
Materials
For All Ages Summary
Note: This information is found in Hands-On Nature: Information and Activities for Exploring the Environ-ment with Children, edited by Jenepher Lingelbach and Lisa Purcell. Vermont Institute of Natural Sci-ence, Woodstock, Ver-mont. Copyright 2000. The book contains a good illustration of types of feathers on page 38.Used with permission.
Background
POULTRY Activities
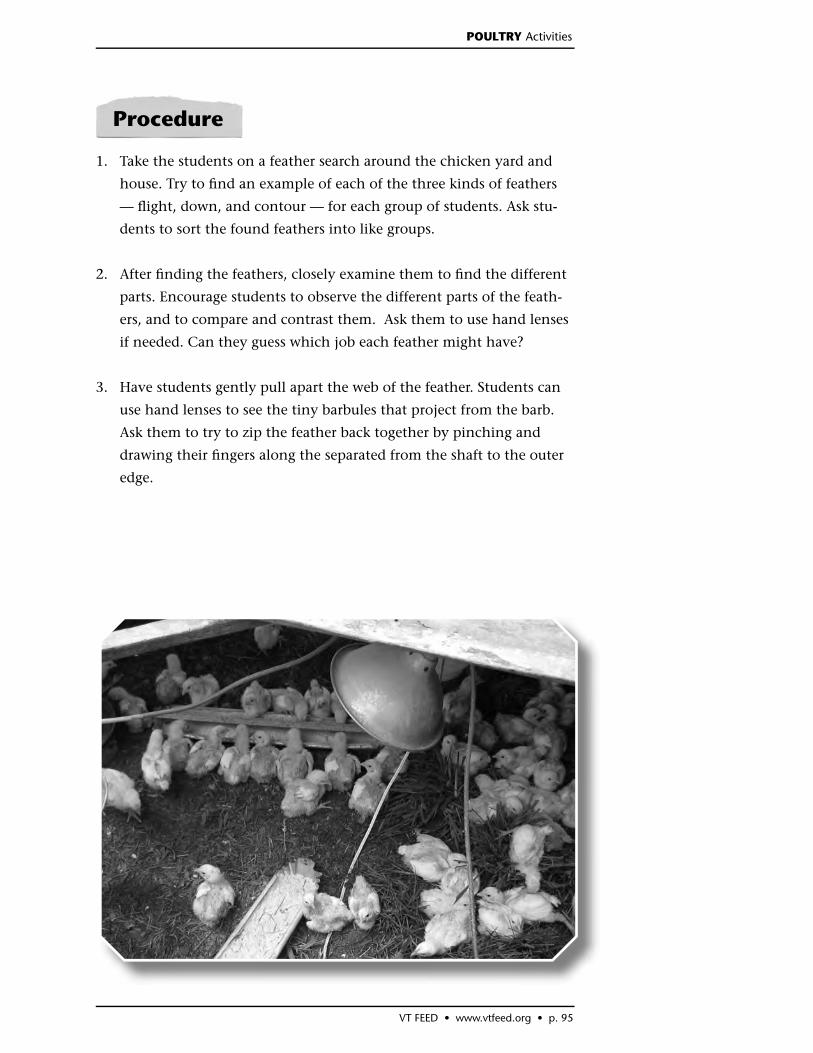
VT FEED • www.vtfeed.org • p. 95
Procedure
1. Take the students on a feather search around the chicken yard and
house. Try to fi nd an example of each of the three kinds of feathers
— fl ight, down, and contour — for each group of students. Ask stu-
dents to sort the found feathers into like groups.
2. After fi nding the feathers, closely examine them to fi nd the different
parts. Encourage students to observe the different parts of the feath-
ers, and to compare and contrast them. Ask them to use hand lenses
if needed. Can they guess which job each feather might have?
3. Have students gently pull apart the web of the feather. Students can
use hand lenses to see the tiny barbules that project from the barb.
Ask them to try to zip the feather back together by pinching and
drawing their fi ngers along the separated from the shaft to the outer
edge.
POULTRY Activities
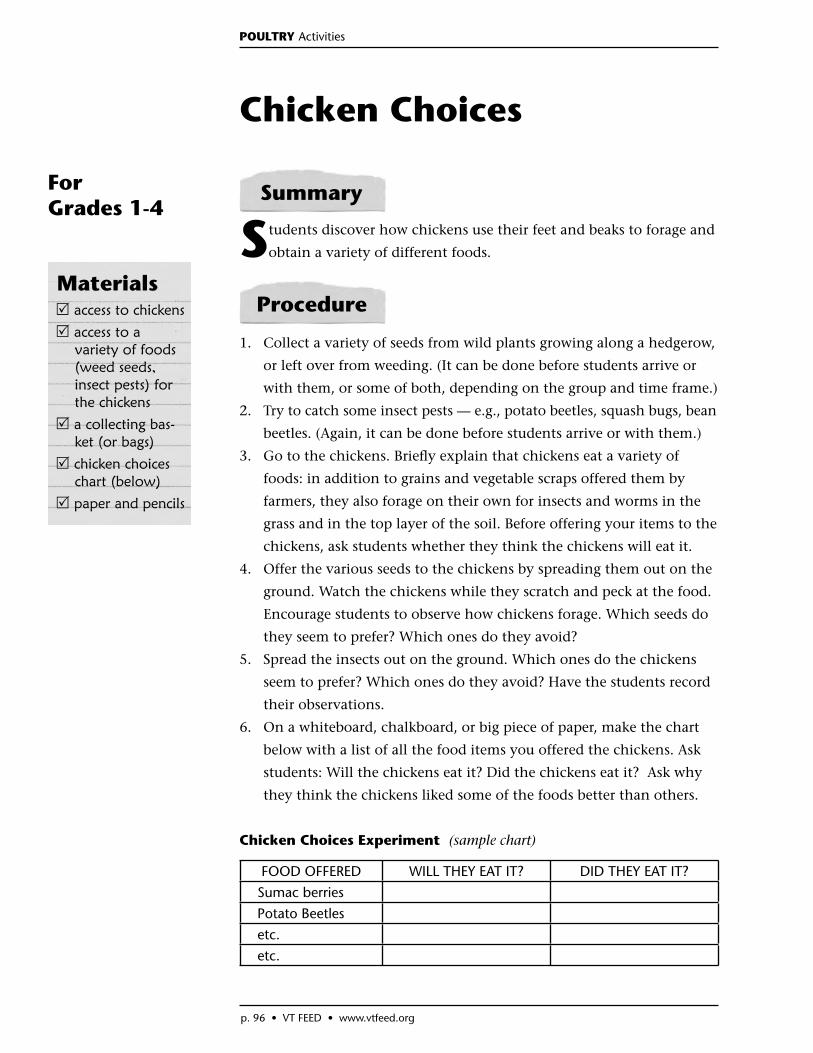
p. 96 • VT FEED • www.vtfeed.org
Chicken Choices
Students discover how chickens use their feet and beaks to forage and
obtain a variety of different foods.
1. Collect a variety of seeds from wild plants growing along a hedgerow,
or left over from weeding. (It can be done before students arrive or
with them, or some of both, depending on the group and time frame.)
2. Try to catch some insect pests — e.g., potato beetles, squash bugs, bean
beetles. (Again, it can be done before students arrive or with them.)
3. Go to the chickens. Briefl y explain that chickens eat a variety of
foods: in addition to grains and vegetable scraps offered them by
farmers, they also forage on their own for insects and worms in the
grass and in the top layer of the soil. Before offering your items to the
chickens, ask students whether they think the chickens will eat it.
4. Offer the various seeds to the chickens by spreading them out on the
ground. Watch the chickens while they scratch and peck at the food.
Encourage students to observe how chickens forage. Which seeds do
they seem to prefer? Which ones do they avoid?
5. Spread the insects out on the ground. Which ones do the chickens
seem to prefer? Which ones do they avoid? Have the students record
their observations.
6. On a whiteboard, chalkboard, or big piece of paper, make the chart
below with a list of all the food items you offered the chickens. Ask
students: Will the chickens eat it? Did the chickens eat it? Ask why
they think the chickens liked some of the foods better than others.
Chicken Choices Experiment (sample chart)
FOOD OFFERED WILL THEY EAT IT? DID THEY EAT IT?
Sumac berries
Potato Beetles
etc.
etc.
access to chickens
access to a variety of foods (weed seeds, insect pests) for the chickens
a collecting bas-ket (or bags)
chicken choices chart (below)
paper and pencils
Materials
For Grades 1-4
Summary
Procedure
POULTRY Activities
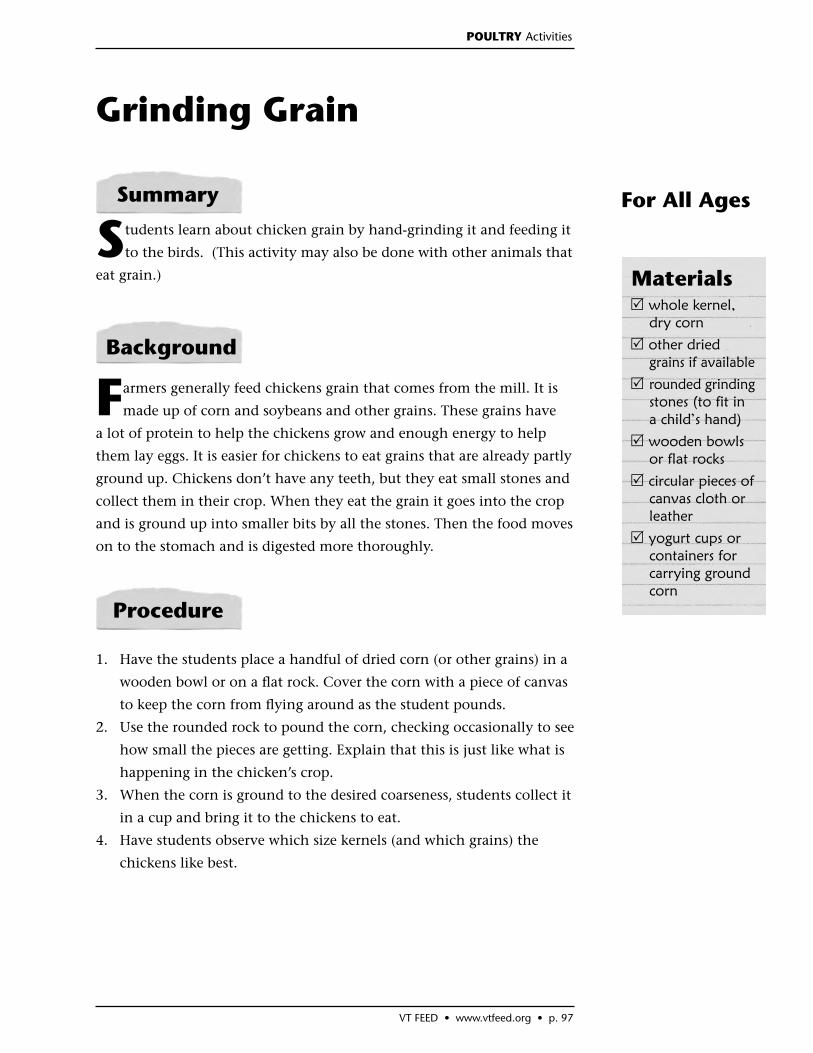
VT FEED • www.vtfeed.org • p. 97
Grinding Grain
Students learn about chicken grain by hand-grinding it and feeding it
to the birds. (This activity may also be done with other animals that
eat grain.)
Farmers generally feed chickens grain that comes from the mill. It is
made up of corn and soybeans and other grains. These grains have
a lot of protein to help the chickens grow and enough energy to help
them lay eggs. It is easier for chickens to eat grains that are already partly
ground up. Chickens don’t have any teeth, but they eat small stones and
collect them in their crop. When they eat the grain it goes into the crop
and is ground up into smaller bits by all the stones. Then the food moves
on to the stomach and is digested more thoroughly.
1. Have the students place a handful of dried corn (or other grains) in a
wooden bowl or on a fl at rock. Cover the corn with a piece of canvas
to keep the corn from fl ying around as the student pounds.
2. Use the rounded rock to pound the corn, checking occasionally to see
how small the pieces are getting. Explain that this is just like what is
happening in the chicken’s crop.
3. When the corn is ground to the desired coarseness, students collect it
in a cup and bring it to the chickens to eat.
4. Have students observe which size kernels (and which grains) the
chickens like best.
Summary
whole kernel, dry corn
other dried grains if available
rounded grinding stones (to fit in a child’s hand)
wooden bowls or flat rocks
circular pieces of canvas cloth or leather
yogurt cups or containers for carrying ground corn
Materials
For All Ages
Procedure
Background
POULTRY Activities
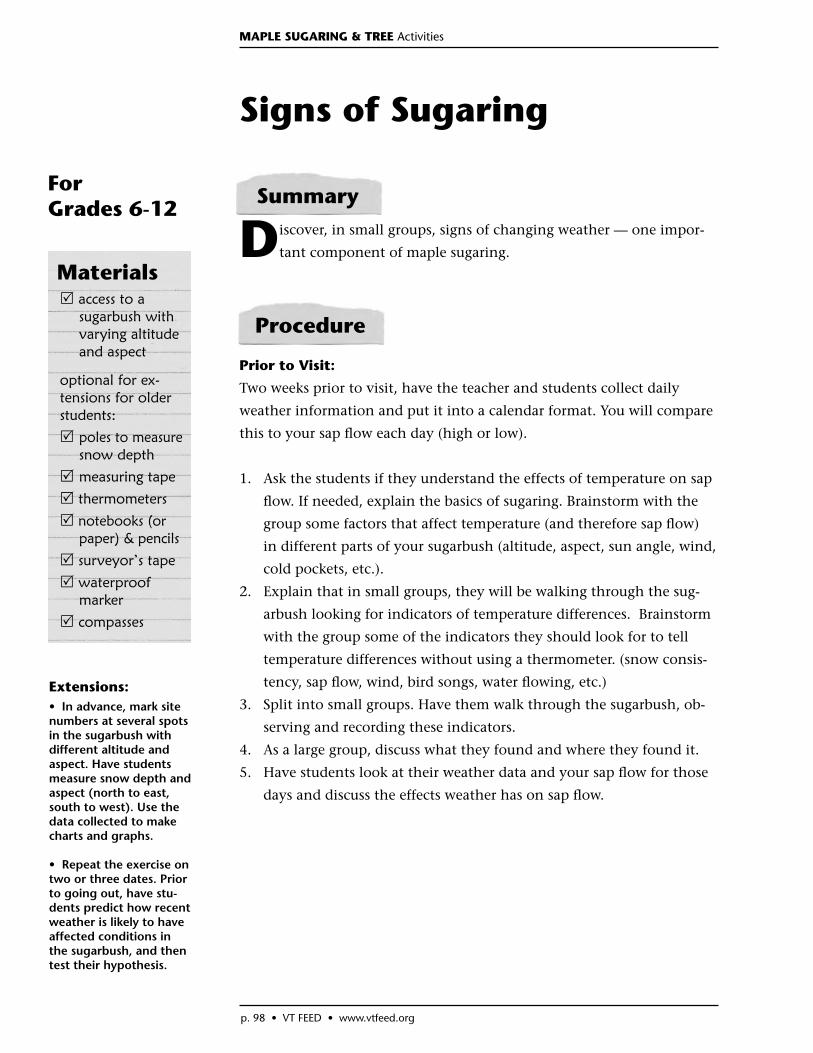
p. 98 • VT FEED • www.vtfeed.org
Signs of Sugaring
Discover, in small groups, signs of changing weather — one impor-
tant component of maple sugaring.
Prior to Visit:
Two weeks prior to visit, have the teacher and students collect daily
weather information and put it into a calendar format. You will compare
this to your sap fl ow each day (high or low).
1. Ask the students if they understand the effects of temperature on sap
fl ow. If needed, explain the basics of sugaring. Brainstorm with the
group some factors that affect temperature (and therefore sap fl ow)
in different parts of your sugarbush (altitude, aspect, sun angle, wind,
cold pockets, etc.).
2. Explain that in small groups, they will be walking through the sug-
arbush looking for indicators of temperature differences. Brainstorm
with the group some of the indicators they should look for to tell
temperature differences without using a thermometer. (snow consis-
tency, sap fl ow, wind, bird songs, water fl owing, etc.)
3. Split into small groups. Have them walk through the sugarbush, ob-
serving and recording these indicators.
4. As a large group, discuss what they found and where they found it.
5. Have students look at their weather data and your sap fl ow for those
days and discuss the effects weather has on sap fl ow.
Summary
access to a sugarbush with varying altitude and aspect
optional for ex-tensions for older students:
poles to measure snow depth
measuring tape
thermometers
notebooks (or paper) & pencils
surveyor’s tape
waterproof marker
compasses
Materials
For Grades 6-12
Procedure
Extensions: • In advance, mark site numbers at several spots in the sugarbush with different altitude and aspect. Have students measure snow depth and aspect (north to east, south to west). Use the data collected to make charts and graphs.
• Repeat the exercise on two or three dates. Prior to going out, have stu-dents predict how recent weather is likely to have affected conditions in the sugarbush, and then test their hypothesis.
MAPLE SUGARING & TREE Activities

VT FEED • www.vtfeed.org • p. 99
For each station:
maple scavenger hunt cards
tasting samples
trash bag
paper cups
napkins
tape
stapler
string
crayons or markers
a sugaring legend
vocabulary/pic-ture matching page
Materials
For Grades K-8
Summary
Procedure
Maple Stations
Introduce students to maple sugaring process, vocabulary, products,
and history through small group discovery at educational stations.
Each station should take approximately 15 minutes. Many other activi-
ties can be used as stations as well.
1. Divide students into small groups with one adult chaperone per group.
2. Describe each station and the rotation process thoroughly.
3. Choose an indicator sound (bell or whistle) to let everyone know
when it is time to rotate. Space out the home bases for each station
so that students have room to work with their group.
4. Provide printed instructions and materials needed at each station.
STATION 1: Scavenger Hunt
At the home base is a scavenger hunt card listing different things for stu-
dents to fi nd: sugarhouse, sap lines, sap bucket, storage tank, sugarbush,
a spile, wood pile, etc. Let students roam around to familiarize them-
selves with sugaring vocabulary and equipment. Ten to twelve items can
be covered in 15 minutes.
STATION 2: Taste Testing
Encourage students to taste a variety of
sweeteners provided at this station. Items
to taste can include honey, corn syrup,
molasses, and imitation maple syrup,
among others. Be sure to have a supply of
paper cups, napkins, and trash bags at this
station. Discuss where different products
come from, and common uses. Taste pure
maple syrup, and follow the same discus-
sion. Have students taste fresh sap and
MAPLE SUGARING & TREE Activities
p. 100 • VT FEED • www.vtfeed.org
compare it to maple syrup. You could also try sap at different stages of
the boiling process as well as different grades. With student help, make a
list of maple syrup uses (especially for different grades of syrup).
STATION 3: Visit the Sugarhouse
Give students a tour of the large equipment within the sugarhouse and
explain the process of boiling. Introduce the students to all the large
equipment in the sugarhouse: fi lter press, evaporator, sap pump, syrup
drum, syrup grade tickers, syrup canner, etc. If boiling, demonstrate as
best you can the different tasks: testing with the thermometer, testing
with the hydrometer, sheeting/aproning, etc.
STATION 4: Tools of the Trade
Collect a variety of smaller maple-related tools and label them with
numbers. On index cards, write the name of the tool and describe its
purpose. Have students match the cards to the tools. Examples: grad-
ing kit, splies, tubing, bucket, drill, fi lter, maple syrup container, scoop,
gloves, etc. To make it a little harder, exclude the name of the tool and
only provide the description. Students can take photos or draw the differ-
ent tools for later use back in school.
MAPLE SUGARING & TREE Activities
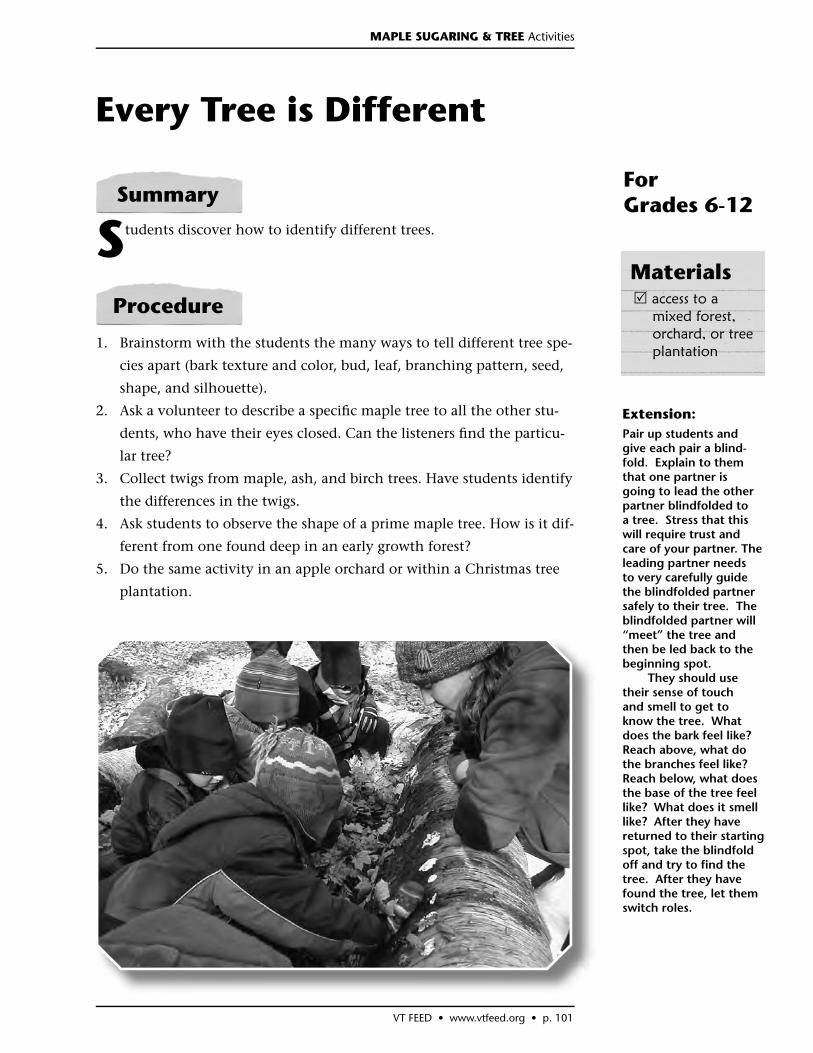
VT FEED • www.vtfeed.org • p. 101
Every Tree is Different
Students discover how to identify different trees.
1. Brainstorm with the students the many ways to tell different tree spe-
cies apart (bark texture and color, bud, leaf, branching pattern, seed,
shape, and silhouette).
2. Ask a volunteer to describe a specifi c maple tree to all the other stu-
dents, who have their eyes closed. Can the listeners fi nd the particu-
lar tree?
3. Collect twigs from maple, ash, and birch trees. Have students identify
the differences in the twigs.
4. Ask students to observe the shape of a prime maple tree. How is it dif-
ferent from one found deep in an early growth forest?
5. Do the same activity in an apple orchard or within a Christmas tree
plantation.
Summary
access to a mixed forest, orchard, or tree plantation
Materials
For Grades 6-12
Procedure
Extension:Pair up students and give each pair a blind-fold. Explain to them that one partner is going to lead the other partner blindfolded to a tree. Stress that this will require trust and care of your partner. The leading partner needs to very carefully guide the blindfolded partner safely to their tree. The blindfolded partner will “meet” the tree and then be led back to the beginning spot. They should use their sense of touch and smell to get to know the tree. What does the bark feel like? Reach above, what do the branches feel like? Reach below, what does the base of the tree feel like? What does it smell like? After they have returned to their starting spot, take the blindfold off and try to fi nd the tree. After they have found the tree, let them switch roles.
MAPLE SUGARING & TREE Activities
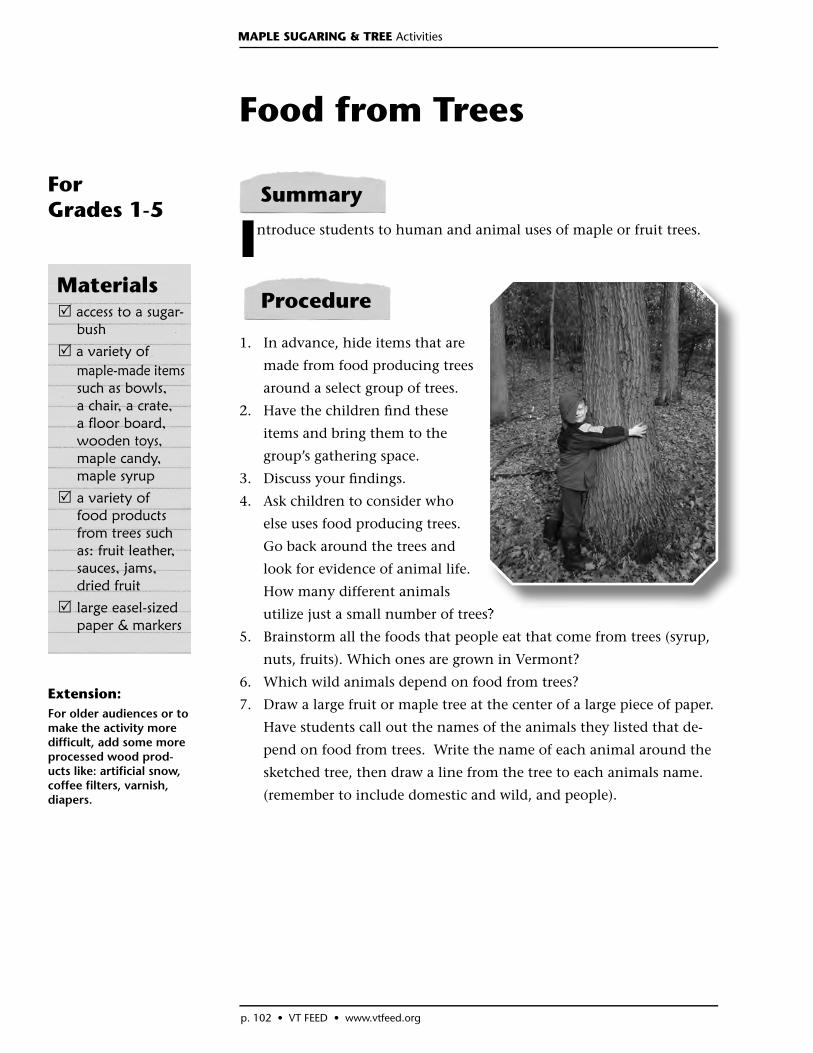
p. 102 • VT FEED • www.vtfeed.org
Food from Trees
Introduce students to human and animal uses of maple or fruit trees.
1. In advance, hide items that are
made from food producing trees
around a select group of trees.
2. Have the children fi nd these
items and bring them to the
group’s gathering space.
3. Discuss your fi ndings.
4. Ask children to consider who
else uses food producing trees.
Go back around the trees and
look for evidence of animal life.
How many different animals
utilize just a small number of trees?
5. Brainstorm all the foods that people eat that come from trees (syrup,
nuts, fruits). Which ones are grown in Vermont?
6. Which wild animals depend on food from trees?
7. Draw a large fruit or maple tree at the center of a large piece of paper.
Have students call out the names of the animals they listed that de-
pend on food from trees. Write the name of each animal around the
sketched tree, then draw a line from the tree to each animals name.
(remember to include domestic and wild, and people).
access to a sugar-bush
a variety of maple-made items
such as bowls, a chair, a crate, a floor board, wooden toys, maple candy, maple syrup
a variety of food products from trees such as: fruit leather, sauces, jams, dried fruit
large easel-sized paper & markers
Materials
For Grades 1-5
Summary
Procedure
Extension: For older audiences or to make the activity more diffi cult, add some more processed wood prod-ucts like: artifi cial snow, coffee fi lters, varnish, diapers.
MAPLE SUGARING & TREE Activities
VT FEED • www.vtfeed.org • p. 103
Tree Life Cycle Sort
Students will learn about the developmental stages in the life of an
organism by focusing on a tree life cycle.
1. Tell students that you have a collection of photographs of a person
over the years and you’d like the students’ help putting the photos in
chronological order. Ask them to brainstorm important events in a
person’s life that might be recorded in the photographs.
2. Allow students to study the photographs. Have them guess the proper
sequence and record their guesses. When everyone has fi nished, ask
the class what they think the right order is. Have them match the
photos to the stages and events they brainstormed.
3. Explain that all living things go through different stages of develop-
ment in their lives just as we do. The sequence of these stages from
beginning to end is called a life cycle. Can they think of any obvi-
ous examples in nature? (Egg, tadpole, frog; egg, chick, chicken; calf,
heifer, cow.)
4. Divide the class into two or three groups, depending on size. Have
the students in each group stand in a circle. Hang one life-cycle card
around each student’s neck with the picture on his or her back. Ex-
plain that they may look at everyone’s card but their own.
5. As a group, the students must determine the order of the life cycle
of a tree. Explain to the students that they may not tell each other
what cards they have on their backs. As they decide the order they
can sit in that order on the ground. As they sit they can guess what
card they have on their backs by looking at who comes in front and
behind them in order.
6. Allow students to see cards on their backs and discuss the tree life
cycle. Finish by comparing the stages in a tree’s life with stages in hu-
man life. Discuss the life cycle of other plants on the farm.
a selection of photographs of one person from infancy through adult-hood
Tree Life Cycle cards hung on long strings. Cards show: seed, seedling, sapling, pole, mature tree, dying tree, rotting log
Materials
For Grades 3-6
Summary
Procedure
MAPLE SUGARING & TREE Activities
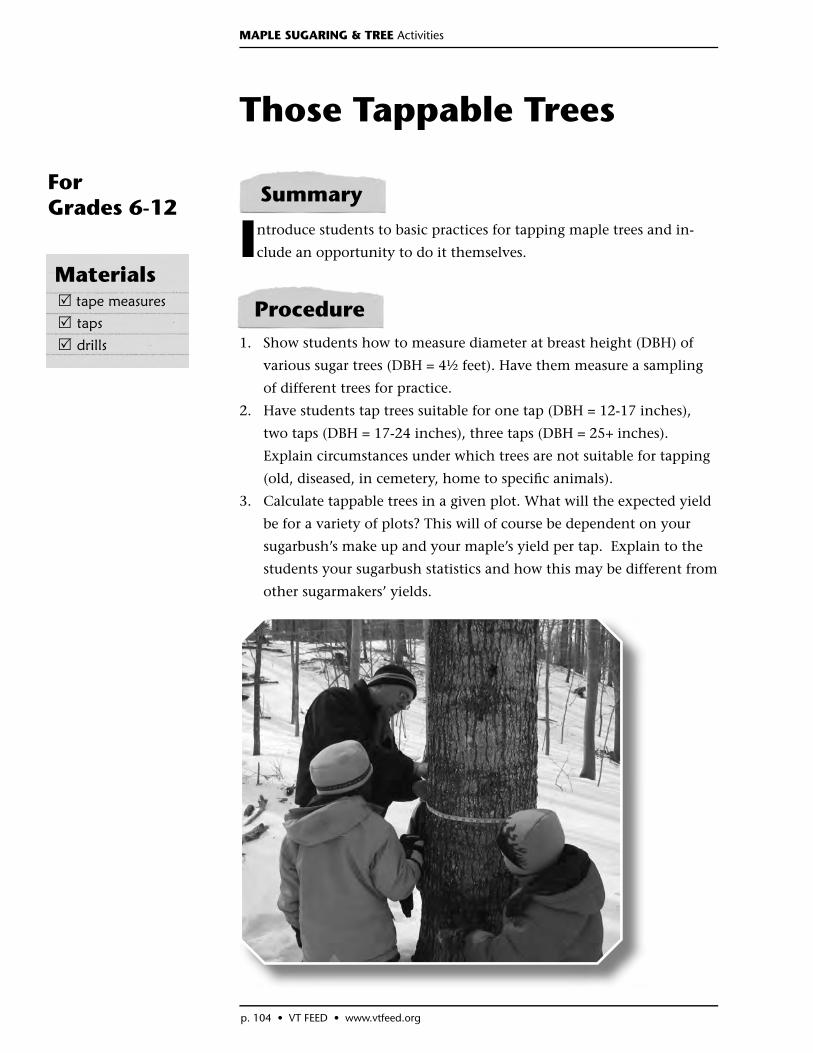
p. 104 • VT FEED • www.vtfeed.org
Those Tappable Trees
Introduce students to basic practices for tapping maple trees and in-
clude an opportunity to do it themselves.
1. Show students how to measure diameter at breast height (DBH) of
various sugar trees (DBH = 4½ feet). Have them measure a sampling
of different trees for practice.
2. Have students tap trees suitable for one tap (DBH = 12-17 inches),
two taps (DBH = 17-24 inches), three taps (DBH = 25+ inches).
Explain circumstances under which trees are not suitable for tapping
(old, diseased, in cemetery, home to specifi c animals).
3. Calculate tappable trees in a given plot. What will the expected yield
be for a variety of plots? This will of course be dependent on your
sugarbush’s make up and your maple’s yield per tap. Explain to the
students your sugarbush statistics and how this may be different from
other sugarmakers’ yields.
Summary
tape measures
taps
drills
Materials
For Grades 6-12
Procedure
MAPLE SUGARING & TREE Activities
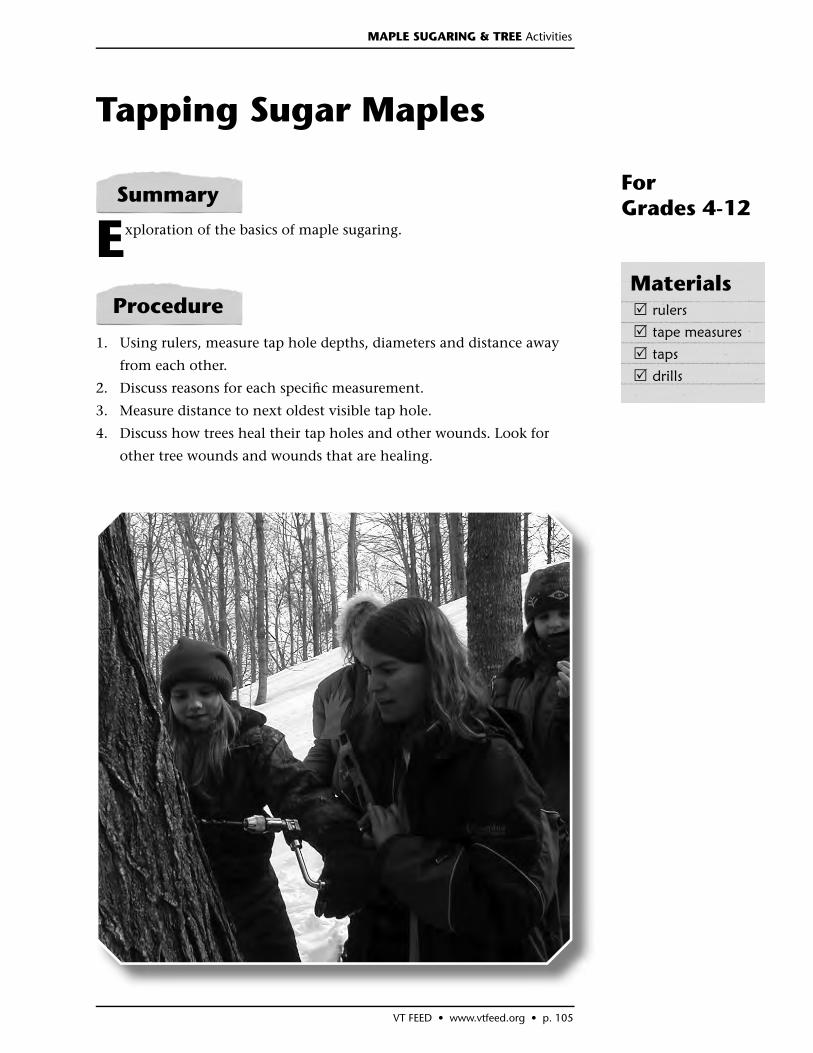
VT FEED • www.vtfeed.org • p. 105
Tapping Sugar Maples
Exploration of the basics of maple sugaring.
1. Using rulers, measure tap hole depths, diameters and distance away
from each other.
2. Discuss reasons for each specifi c measurement.
3. Measure distance to next oldest visible tap hole.
4. Discuss how trees heal their tap holes and other wounds. Look for
other tree wounds and wounds that are healing.
rulers
tape measures
taps
drills
Materials
For Grades 4-12
Summary
Procedure
MAPLE SUGARING & TREE Activities
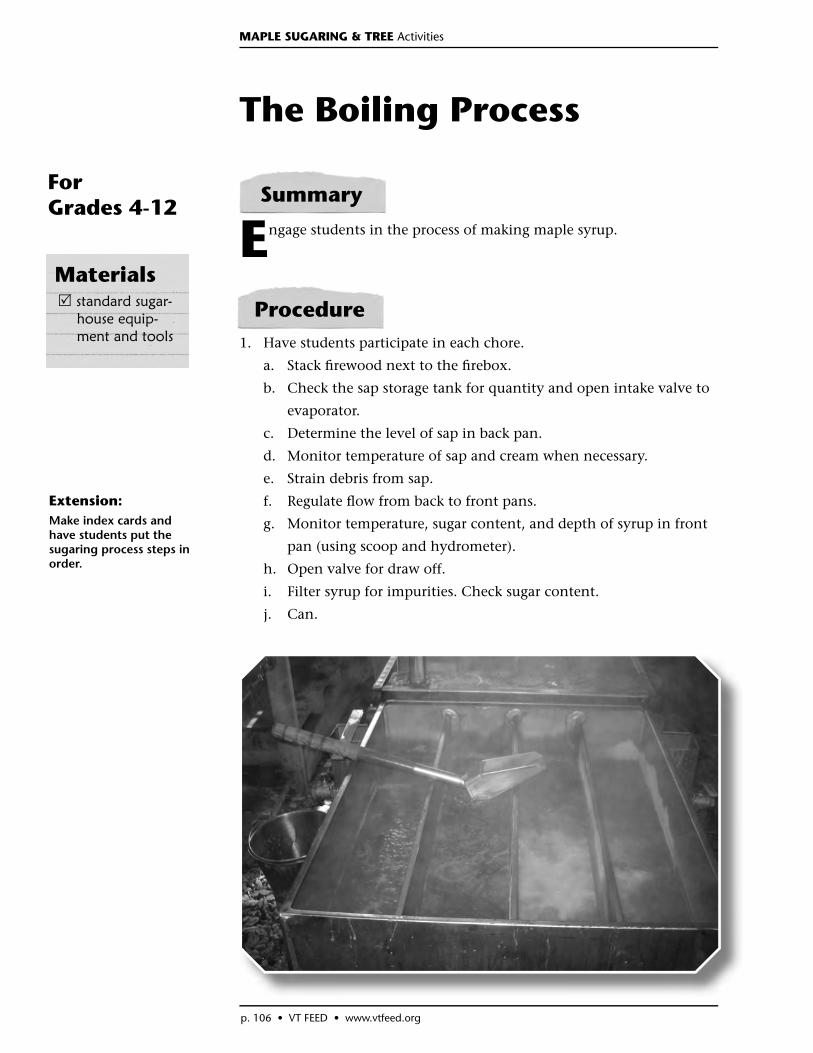
p. 106 • VT FEED • www.vtfeed.org
The Boiling Process
Engage students in the process of making maple syrup.
1. Have students participate in each chore.
a. Stack fi rewood next to the fi rebox.
b. Check the sap storage tank for quantity and open intake valve to
evaporator.
c. Determine the level of sap in back pan.
d. Monitor temperature of sap and cream when necessary.
e. Strain debris from sap.
f. Regulate fl ow from back to front pans.
g. Monitor temperature, sugar content, and depth of syrup in front
pan (using scoop and hydrometer).
h. Open valve for draw off.
i. Filter syrup for impurities. Check sugar content.
j. Can.
Summary
standard sugar-house equip-ment and tools
Materials
For Grades 4-12
Procedure
Extension: Make index cards and have students put the sugaring process steps in order.
MAPLE SUGARING & TREE Activities
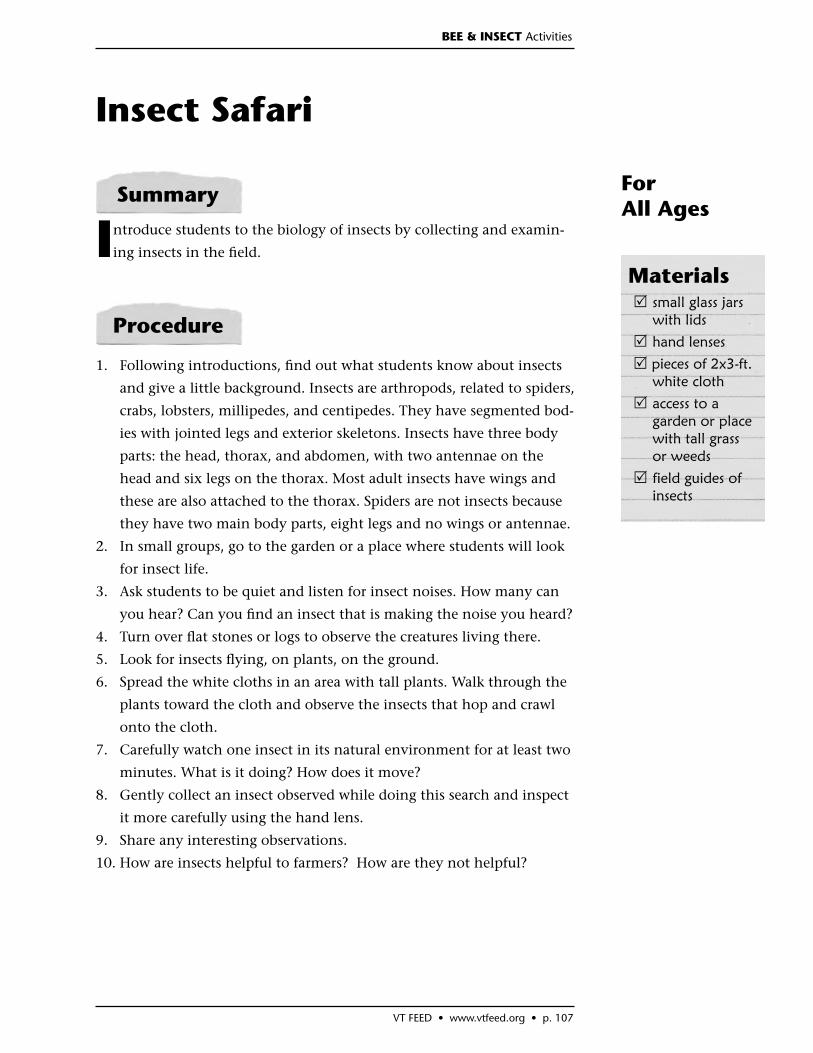
VT FEED • www.vtfeed.org • p. 107
Insect Safari
Introduce students to the biology of insects by collecting and examin-
ing insects in the fi eld.
1. Following introductions, fi nd out what students know about insects
and give a little background. Insects are arthropods, related to spiders,
crabs, lobsters, millipedes, and centipedes. They have segmented bod-
ies with jointed legs and exterior skeletons. Insects have three body
parts: the head, thorax, and abdomen, with two antennae on the
head and six legs on the thorax. Most adult insects have wings and
these are also attached to the thorax. Spiders are not insects because
they have two main body parts, eight legs and no wings or antennae.
2. In small groups, go to the garden or a place where students will look
for insect life.
3. Ask students to be quiet and listen for insect noises. How many can
you hear? Can you fi nd an insect that is making the noise you heard?
4. Turn over fl at stones or logs to observe the creatures living there.
5. Look for insects fl ying, on plants, on the ground.
6. Spread the white cloths in an area with tall plants. Walk through the
plants toward the cloth and observe the insects that hop and crawl
onto the cloth.
7. Carefully watch one insect in its natural environment for at least two
minutes. What is it doing? How does it move?
8. Gently collect an insect observed while doing this search and inspect
it more carefully using the hand lens.
9. Share any interesting observations.
10. How are insects helpful to farmers? How are they not helpful?
Summary
small glass jars with lids
hand lenses
pieces of 2x3-ft. white cloth
access to a garden or place with tall grass or weeds
field guides of insects
Materials
For All Ages
Procedure
BEE & INSECT Activities
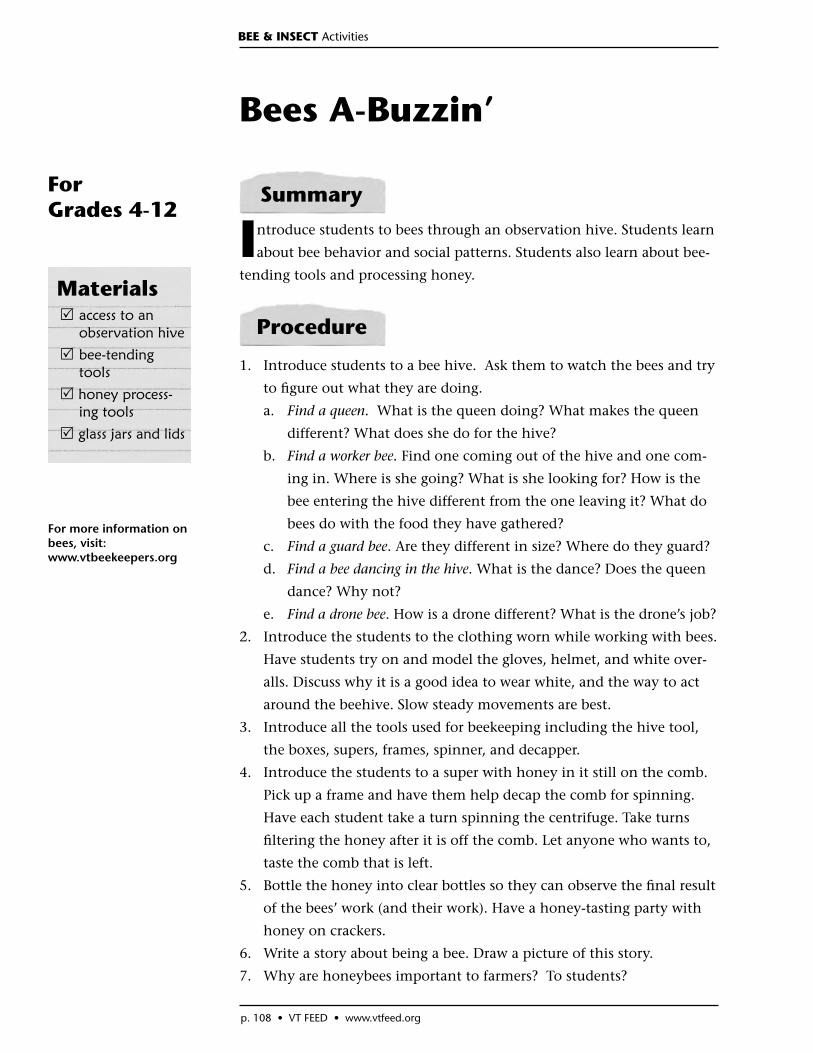
p. 108 • VT FEED • www.vtfeed.org
Bees A-Buzzin’
Introduce students to bees through an observation hive. Students learn
about bee behavior and social patterns. Students also learn about bee-
tending tools and processing honey.
1. Introduce students to a bee hive. Ask them to watch the bees and try
to fi gure out what they are doing.
a. Find a queen. What is the queen doing? What makes the queen
different? What does she do for the hive?
b. Find a worker bee. Find one coming out of the hive and one com-
ing in. Where is she going? What is she looking for? How is the
bee entering the hive different from the one leaving it? What do
bees do with the food they have gathered?
c. Find a guard bee. Are they different in size? Where do they guard?
d. Find a bee dancing in the hive. What is the dance? Does the queen
dance? Why not?
e. Find a drone bee. How is a drone different? What is the drone’s job?
2. Introduce the students to the clothing worn while working with bees.
Have students try on and model the gloves, helmet, and white over-
alls. Discuss why it is a good idea to wear white, and the way to act
around the beehive. Slow steady movements are best.
3. Introduce all the tools used for beekeeping including the hive tool,
the boxes, supers, frames, spinner, and decapper.
4. Introduce the students to a super with honey in it still on the comb.
Pick up a frame and have them help decap the comb for spinning.
Have each student take a turn spinning the centrifuge. Take turns
fi ltering the honey after it is off the comb. Let anyone who wants to,
taste the comb that is left.
5. Bottle the honey into clear bottles so they can observe the fi nal result
of the bees’ work (and their work). Have a honey-tasting party with
honey on crackers.
6. Write a story about being a bee. Draw a picture of this story.
7. Why are honeybees important to farmers? To students?
access to an observation hive
bee-tending tools
honey process-ing tools
glass jars and lids
Materials
For Grades 4-12
Summary
Procedure
BEE & INSECT Activities
For more information on bees, visit:www.vtbeekeepers.org
VT FEED • www.vtfeed.org • p. 109
BibliographyBellows, Barbara C., Rex Dufour, and Janet Bachmann. Bringing Local Food to Local
Institutions: A Resource Guide for Farm-to-School and Farm-to-Institution Programs. Fayetteville, AR: ATTRA, National Sustainable Agriculture Information Service, 2003. Available at http://attra.ncat.org/attra-pub/PDF/farmtoschool.pdf
The Center for Agroecology and Sustainable Food Systems, Teaching Organic Farming & Gardening: Resources for Instructors. University of California, Santa Cruz, 2003. Available at http://zzyx.ucsc.edu/casfs/instruction/tofg/contents.html
The Center for Ecoliteracy. Rethinking School Lunch Guide. Berkeley, CA, 2004. Available at http://www.ecoliteracy.org/programs/rsl-guide.html
Community Involved in Sustaining Agriculture (CISA), Supplying Local Food to Educa-tional Institutions: A How-To Manual. South Deerfi eld, MA. Available at 413-559-5338; e-mail: [email protected]. See also www.buylocalfood.com
Jaffe, Roberta and Gary Appel. The Growing Classroom: Garden Based Science Curriculum. Developed by Life Lab Science Program, Inc. Published by the Addi-son-Wesley Innovative Division, 1990. Available at http://www.lifelab.org/products/pro-ductorder.html, or by calling 831-459-3833
Kalb, Marion, Kristen Markley, and Sara Tedeschi. Linking Farms with Schools, A Guide to Understanding Farm-to-School Programs for Schools, Farmers and Organizers. Venice, CA: Community Food Security Coalition, 2004.
Available to order at: http://www.foodsecurity.org/pubs.html#linking
Kiefer, Joseph and Martin Kemple. Digging Deeper, Integrating Youth Gardens Into Schools and Communities. Montpelier, VT: Food Works, 1998. 802-223-1515
Lay-Dopyera, Margaret & John Dopyera. Becoming a Teacher of Young Children. New York, NY: McGraw-Hill, Inc., 1993.
Lingelbach, Jenepher and Lisa Purcell, eds. Hands-On Nature: Information and Activities for Exploring the Environment with Children. Woodstock, Vermont: Vermont Institute of Natural Science, 2000.
Massachusetts Ag in the Classroom. Farm Field Trip Manual. Available at: PO Box 345 Seekonk, MA 02771, Massachusetts Ag in the Classroom 508-336-4426,
www.agintheclassroom.org
National Farm to School Program. http://www.farmtoschool.org, www.foodsecurity.org/farmtoschool
Northeast Organic Farming Association of Vermont. Vermont Farm to School Directory. Richmond, Vermont, 2004.
Ohmart, Jeri L. Direct Marketing to Schools: A New Opportunity for Family Farmers. University of California Sustainable Agriculture Research and Education Program, July 2002. Available at http://www.sarep.ucdavis.edu/CDPP/directmarketingtoschool.htm
Parrella, Deborah, Project Seasons: Hands on Activities for Discovering the Won-ders of the World. Shelburne, VT: Shelburne Farms, 1995. Available to order at: http://www.shelburnefarms.org/prodinfo.asp?number=PS or at 802-985-8686
p. 110 • VT FEED • www.vtfeed.org
Sanger, Kelli and Leslie Zenz. Farm-to-Cafeteria Connections: Marketing Opportu-nities for Small Farmers in Washington State. Small Farm and Direct Marketing Program, Washington State Department of Agriculture, November 2003. Available at http://agr.wa.gov/Marketing/SmallFarm/102-FarmToCafeteriaConnections-Web.pdf or 360-902-2976
Seefeldt, Carol and Nita Barbour. Early Childhood Education: Introduction. New York: MacMillan College Publishing Company. 1994.
Strohbehn, Catherine H. and Mary Gregoire. Institutional and Commercial Food Service Buyers’ Perceptions of Benefi ts and Obstacles to Purchase of Lo-cally Grown and Processed Foods. Ames, Iowa: Leopold Center for Sustainable Agriculture. Available at http://www.extension.iastate.edu/hrim/localfoods/downloads/ISU_localfoods_summary_2002.pdf
US Department of Agriculture. Innovative Marketing Opportunities for Small Farmers: Local Schools as Customers. Washington, DC, February, 2000. Available at: http://agmarketing.extension.psu.edu/begfrmrs/SmllFarm.pdf
VT Food Education Every Day, (VT FEED). Vermont Farm to School: A Guide for Using Local Foods in Schools. January 2006. Available at www.vtfeed.org or 802-985-8686
VT Food Education Every Day, (VT FEED). “How Do We Feed Vermont’s School Chil-dren? An Insider’s Guide to Vermont School Meals and How to Improve Them.” May 2005. Available at www.vtfeed.org, or 802-985-8686
VT Food Education Every Day, (VT FEED). Taste Test Guide. To be published in 2007. Available at www.vtfeed.org, or 802-985-8686
Visher, David. Selling Directly to Local Schools. Davis, CA: Small Farms Center, University of California, 1996. Available at: http://www.sfc.ucdavis.edu/pubs/SFNews/ar-chive/96032.htm