Using the Smart Carver in Corel PaintShop Pro X4 IS
4
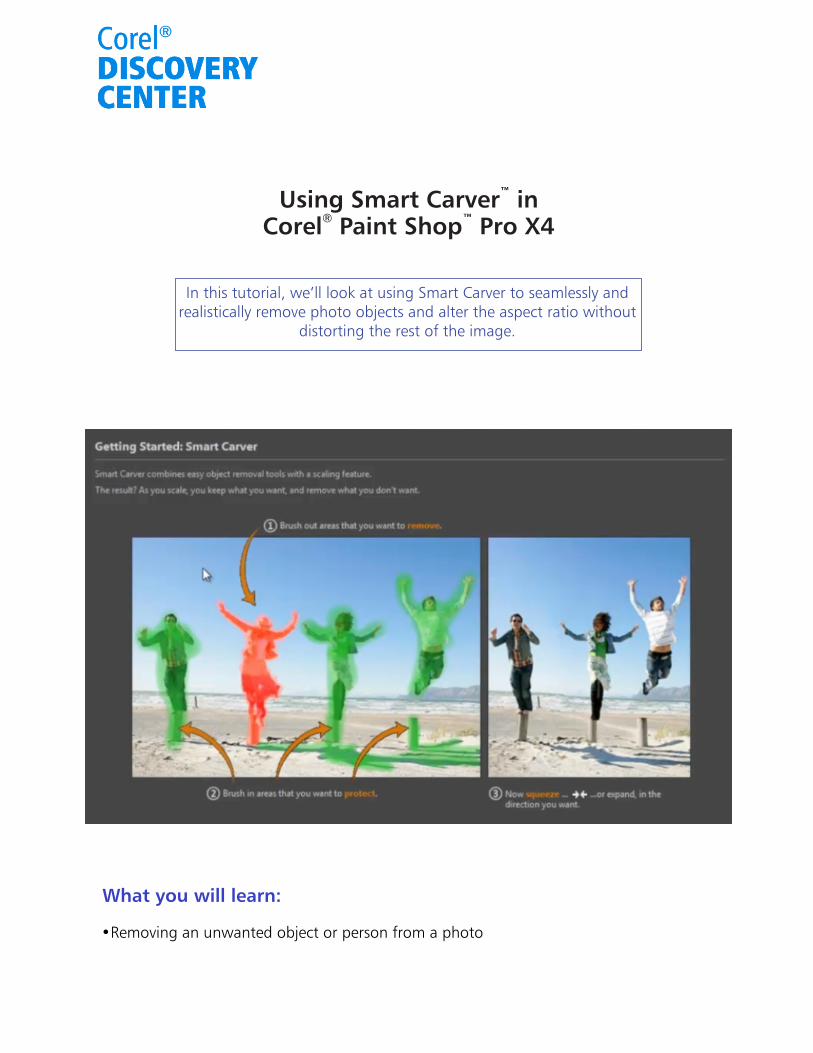
What you will learn: •Removing an unwanted object or person from a photo ™ Using Smart Carver in ® ™ Corel Paint Shop Pro X4 In this tutorial, we’ll look at using Smart Carver to seamlessly and realistically remove photo objects and alter the aspect ratio without distorting the rest of the image.
Transcript of Using the Smart Carver in Corel PaintShop Pro X4 IS
What you will learn:
•Removing an unwanted object or person from a photo
™Using Smart Carver in ® ™Corel Paint Shop Pro X4
In this tutorial, we’ll look at using Smart Carver to seamlessly and realistically remove photo objects and alter the aspect ratio without
distorting the rest of the image.
Smart Carver lets you remove unwanted objects from a photo without visibly affecting the background and change the aspect ration of the photo at the same time. This tutorial guides you through the process of removing an object from an image so that the background and other elements in the photo are not altered.
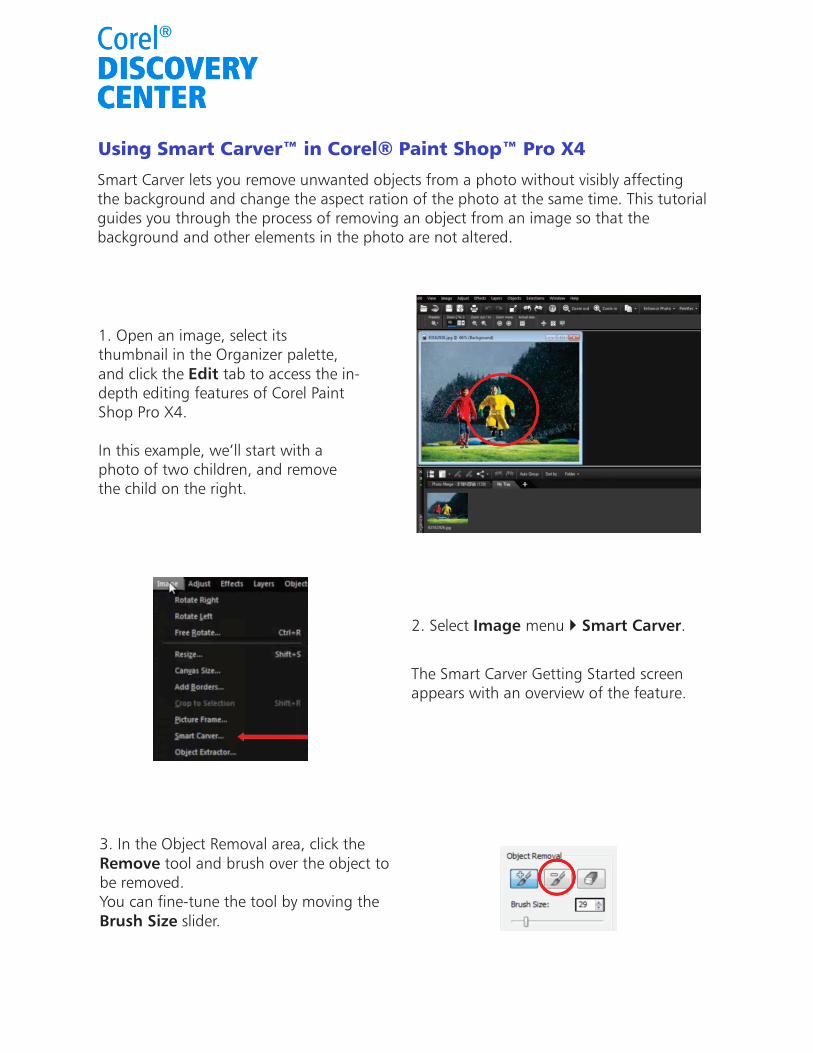
1. Open an image, select its thumbnail in the Organizer palette, and click the Edit tab to access the in-depth editing features of Corel Paint Shop Pro X4.
In this example, we’ll start with a photo of two children, and remove the child on the right.
2. Select Image menu } Smart Carver.
The Smart Carver Getting Started screen appears with an overview of the feature.
3. In the Object Removal area, click the Remove tool and brush over the object to be removed. You can fine-tune the tool by moving the Brush Size slider.
Using Smart Carver in Corel® Paint Shop Pro X4™ ™
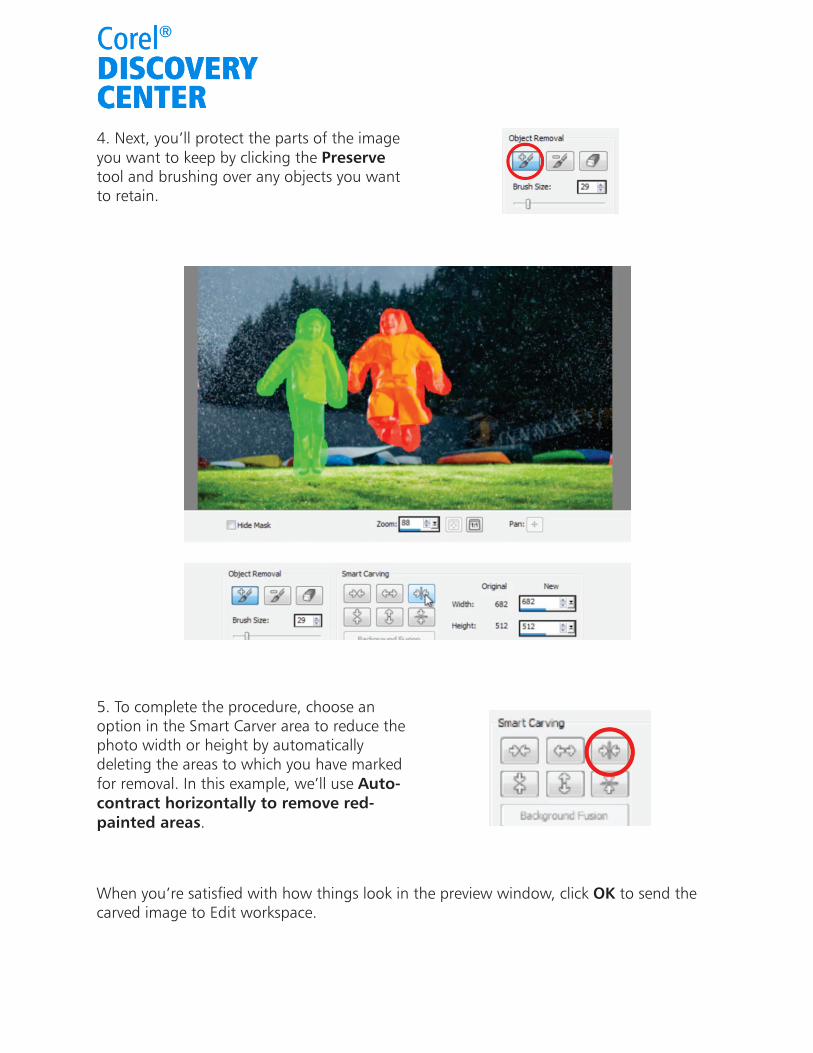
4. Next, you’ll protect the parts of the image you want to keep by clicking the Preserve tool and brushing over any objects you want to retain.
5. To complete the procedure, choose an option in the Smart Carver area to reduce the photo width or height by automatically deleting the areas to which you have marked for removal. In this example, we’ll use Auto-contract horizontally to remove red-painted areas.
When you’re satisfied with how things look in the preview window, click OK to send the carved image to Edit workspace.
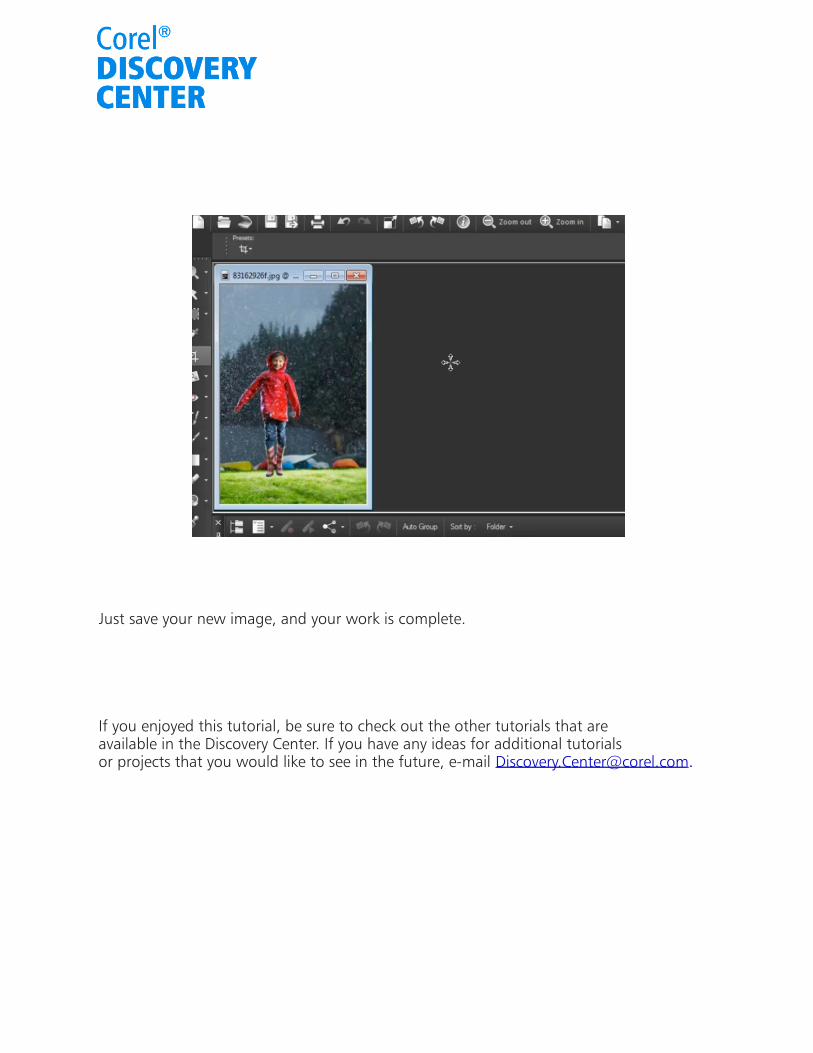
Just save your new image, and your work is complete.
If you enjoyed this tutorial, be sure to check out the other tutorials that are available in the Discovery Center. If you have any ideas for additional tutorials or projects that you would like to see in the future, e-mail [email protected].


![Corel PaintShop Pro X9 Reviewer's Guide - … · Corel PaintShop Pro X9 Reviewer’s Guide [ 1 ] Introducing Corel® PaintShop® Pro X91 Photos matter. Truer today than ever before.](https://static.fdocuments.us/doc/165x107/5bb4d2ea09d3f24d6c8be0d0/corel-paintshop-pro-x9-reviewers-guide-corel-paintshop-pro-x9-reviewers.jpg)