Using the Helmert (two-point) transformation in Quantum...
6
Using the Helmert (two-point) transformation in Quantum GIS Anna Kathrin Hodgkinson
Transcript of Using the Helmert (two-point) transformation in Quantum...

Using the Helmert (two-point) transformation in Quantum GIS
Anna Kathrin Hodgkinson
Using the Helmert (two-point) transformation in Quantum GIS
This quick guide is intended to guide the reader through the Helmert georeferencing method, which is available in the plugin repository of open source desktop GIS package Quantum GIS (QGIS)1.The guide has been written mainly for an archaeological audience, as it is still common practice to offset plans of archaeological features using no more than two points, usually the section drawing points, which are surveyed. The plans would then be scanned and referenced to the site data for digitisation using a two-point transformation in CAD software.Until recently open source GIS packages, the use of which is becoming increasingly popular within archaeology, have not been able to reference raster images using only two points, but required a minimum of three points for (usually polynomial) georeferencing. This is undisputedly the most accurate method of georeferencing, however the offsetting and survey of additional points is time-consuming, which is not ideal on archaeological sites. Hence, proprietary CAD software still had to be regularly used for two-point transformations of archaeological site plans. Now the excellent open source GIS package QGIS contains this tool within its georeferencing plugin and thus provides another reason not to use proprietary CAD software for archaeological spatial data.
Open Quantum GIS, define the appropriate co-ordinate system and upload the surveyed reference drawing points (DPs) or ensure that the co-ordinates of these points is available.
Load the Georeferencing Plugin:
1 Available at www.qgis.org
1

Select the scanned plan (raster image) to be georeferenced:
The raster image has been loaded into the georeferencing tool:
Now the reference points will be defined: Select “Add point”
2

The georeferencing tool allows us to zoom into the raster image in order to select the point with the cursor as precisely as possible:
Click onto the source DP on the raster image, the following dialogue will pop up:
Now select either to choose the target DP “from map canvas” or enter the co-ordinates of the first surveyed DP manually. Here, the target point is selected from the map canvas:
3
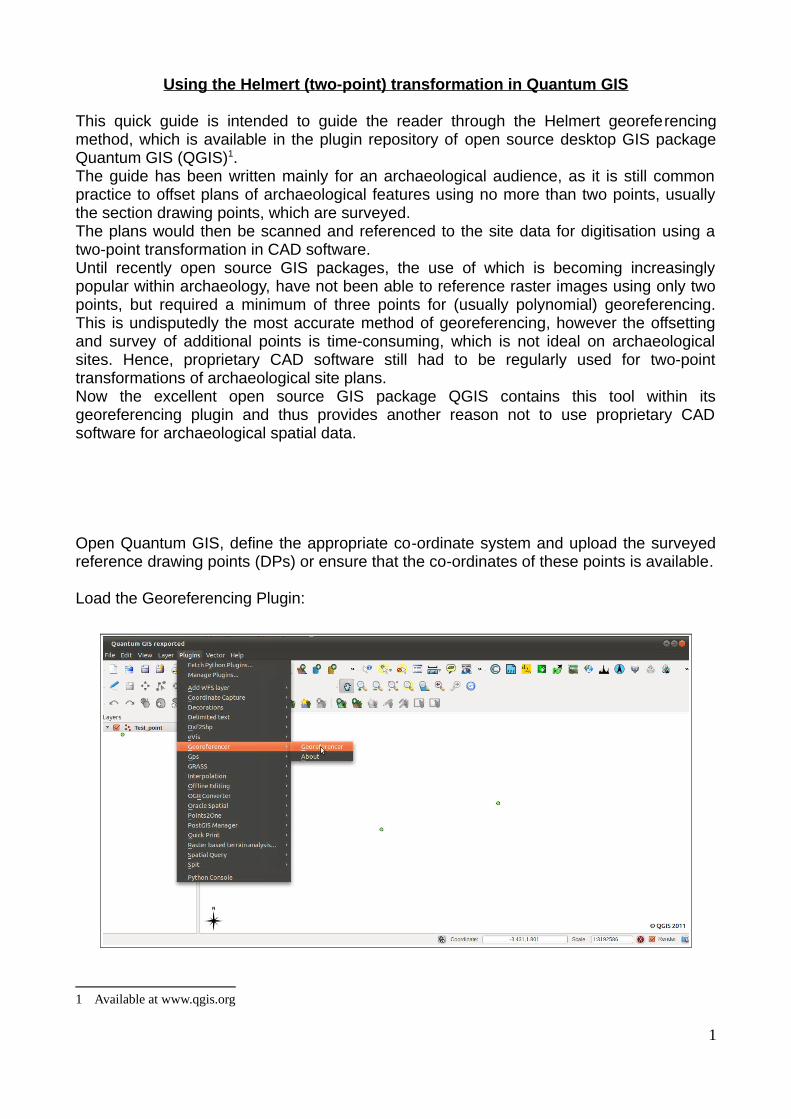
Once the target point has been selected the co-ordinates of both source (on the raster image) and target points will be added to a list in the georeferencing tool:
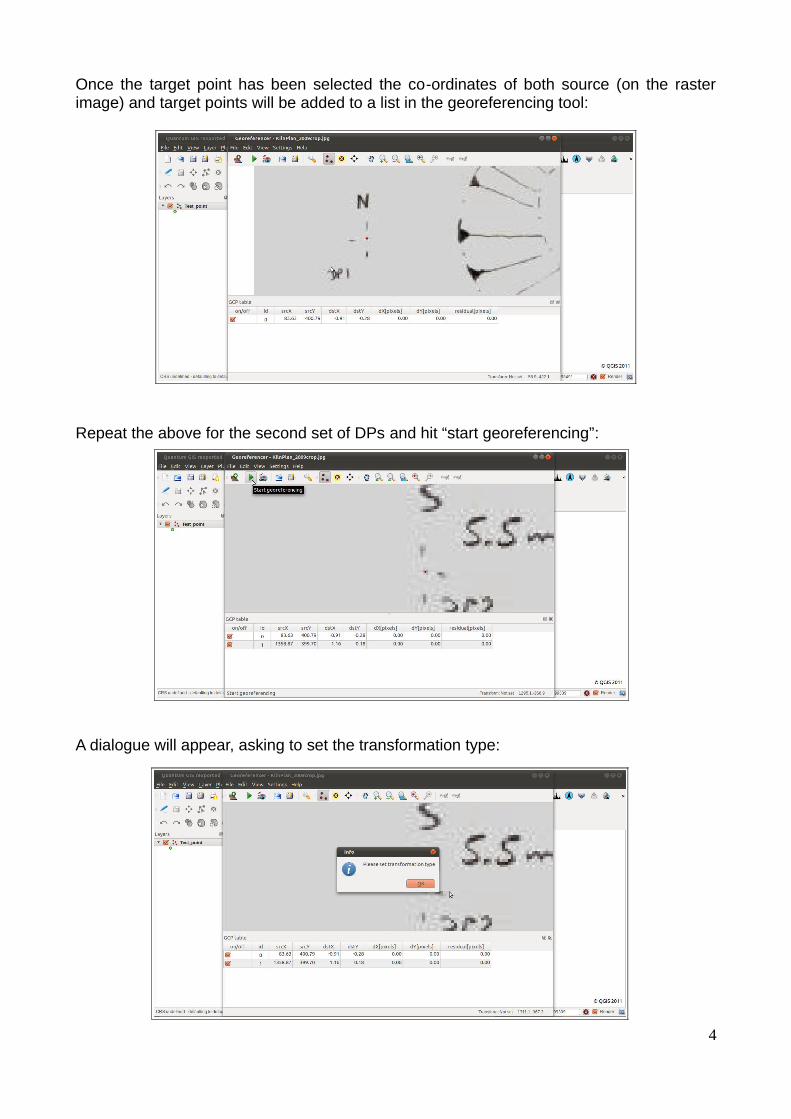
Repeat the above for the second set of DPs and hit “start georeferencing”:
A dialogue will appear, asking to set the transformation type:
4

Select the “Helmert” transformation:
Select the following options, ensuring to define an output raster and the target SRS (co-ordinate system):
If the option to “Load in QGIS when done” is selected, the georeferenced raster image will be loaded into the active view and can now be digitised in QGIS.
5