Using smartphones to teach digital media in writing courses: Handouts
19
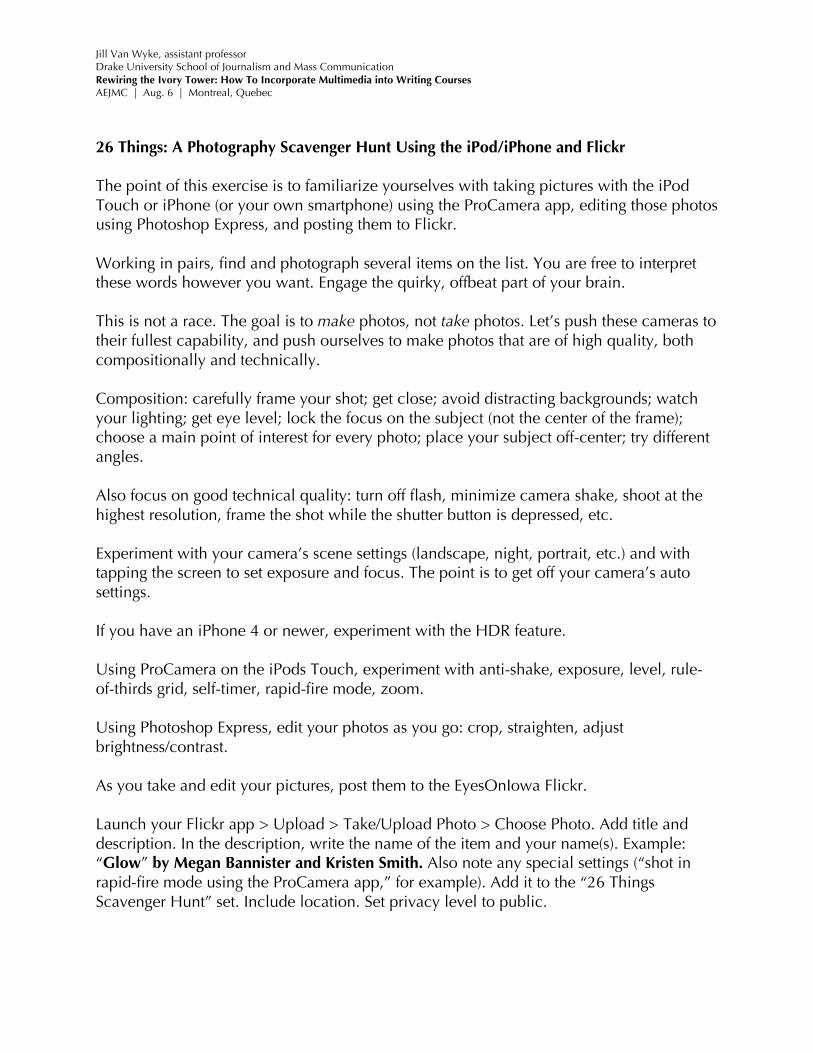
Jill Van Wyke, assistant professor Drake University School of Journalism and Mass Communication Rewiring the Ivory Tower: How To Incorporate Multimedia into Writing Courses AEJMC | Aug. 6 | Montreal, Quebec 26 Things: A Photography Scavenger Hunt Using the iPod/iPhone and Flickr The point of this exercise is to familiarize yourselves with taking pictures with the iPod Touch or iPhone (or your own smartphone) using the ProCamera app, editing those photos using Photoshop Express, and posting them to Flickr. Working in pairs, find and photograph several items on the list. You are free to interpret these words however you want. Engage the quirky, offbeat part of your brain. This is not a race. The goal is to make photos, not take photos. Let’s push these cameras to their fullest capability, and push ourselves to make photos that are of high quality, both compositionally and technically. Composition: carefully frame your shot; get close; avoid distracting backgrounds; watch your lighting; get eye level; lock the focus on the subject (not the center of the frame); choose a main point of interest for every photo; place your subject off-center; try different angles. Also focus on good technical quality: turn off flash, minimize camera shake, shoot at the highest resolution, frame the shot while the shutter button is depressed, etc. Experiment with your camera’s scene settings (landscape, night, portrait, etc.) and with tapping the screen to set exposure and focus. The point is to get off your camera’s auto settings. If you have an iPhone 4 or newer, experiment with the HDR feature. Using ProCamera on the iPods Touch, experiment with anti-shake, exposure, level, rule- of-thirds grid, self-timer, rapid-fire mode, zoom. Using Photoshop Express, edit your photos as you go: crop, straighten, adjust brightness/contrast. As you take and edit your pictures, post them to the EyesOnIowa Flickr. Launch your Flickr app > Upload > Take/Upload Photo > Choose Photo. Add title and description. In the description, write the name of the item and your name(s). Example: “Glow” by Megan Bannister and Kristen Smith. Also note any special settings (“shot in rapid-fire mode using the ProCamera app,” for example). Add it to the “26 Things Scavenger Hunt” set. Include location. Set privacy level to public.
-
Upload
jill-van-wyke -
Category
Education
-
view
657 -
download
20
description
Handouts to accompany my presentation on mobile reporting, editing, publishing instructional ideas and tools at AEJMC14 in Montreal Aug. 6, 2014.
Transcript of Using smartphones to teach digital media in writing courses: Handouts
Jill Van Wyke, assistant professor Drake University School of Journalism and Mass Communication Rewiring the Ivory Tower: How To Incorporate Multimedia into Writing Courses AEJMC | Aug. 6 | Montreal, Quebec
26 Things: A Photography Scavenger Hunt Using the iPod/iPhone and Flickr The point of this exercise is to familiarize yourselves with taking pictures with the iPod Touch or iPhone (or your own smartphone) using the ProCamera app, editing those photos using Photoshop Express, and posting them to Flickr. Working in pairs, find and photograph several items on the list. You are free to interpret these words however you want. Engage the quirky, offbeat part of your brain. This is not a race. The goal is to make photos, not take photos. Let’s push these cameras to their fullest capability, and push ourselves to make photos that are of high quality, both compositionally and technically. Composition: carefully frame your shot; get close; avoid distracting backgrounds; watch your lighting; get eye level; lock the focus on the subject (not the center of the frame); choose a main point of interest for every photo; place your subject off-center; try different angles. Also focus on good technical quality: turn off flash, minimize camera shake, shoot at the highest resolution, frame the shot while the shutter button is depressed, etc. Experiment with your camera’s scene settings (landscape, night, portrait, etc.) and with tapping the screen to set exposure and focus. The point is to get off your camera’s auto settings. If you have an iPhone 4 or newer, experiment with the HDR feature. Using ProCamera on the iPods Touch, experiment with anti-shake, exposure, level, rule-of-thirds grid, self-timer, rapid-fire mode, zoom. Using Photoshop Express, edit your photos as you go: crop, straighten, adjust brightness/contrast. As you take and edit your pictures, post them to the EyesOnIowa Flickr. Launch your Flickr app > Upload > Take/Upload Photo > Choose Photo. Add title and description. In the description, write the name of the item and your name(s). Example: “Glow” by Megan Bannister and Kristen Smith. Also note any special settings (“shot in rapid-fire mode using the ProCamera app,” for example). Add it to the “26 Things Scavenger Hunt” set. Include location. Set privacy level to public.
Jill Van Wyke, assistant professor Drake University School of Journalism and Mass Communication Rewiring the Ivory Tower: How To Incorporate Multimedia into Writing Courses AEJMC | Aug. 6 | Montreal, Quebec
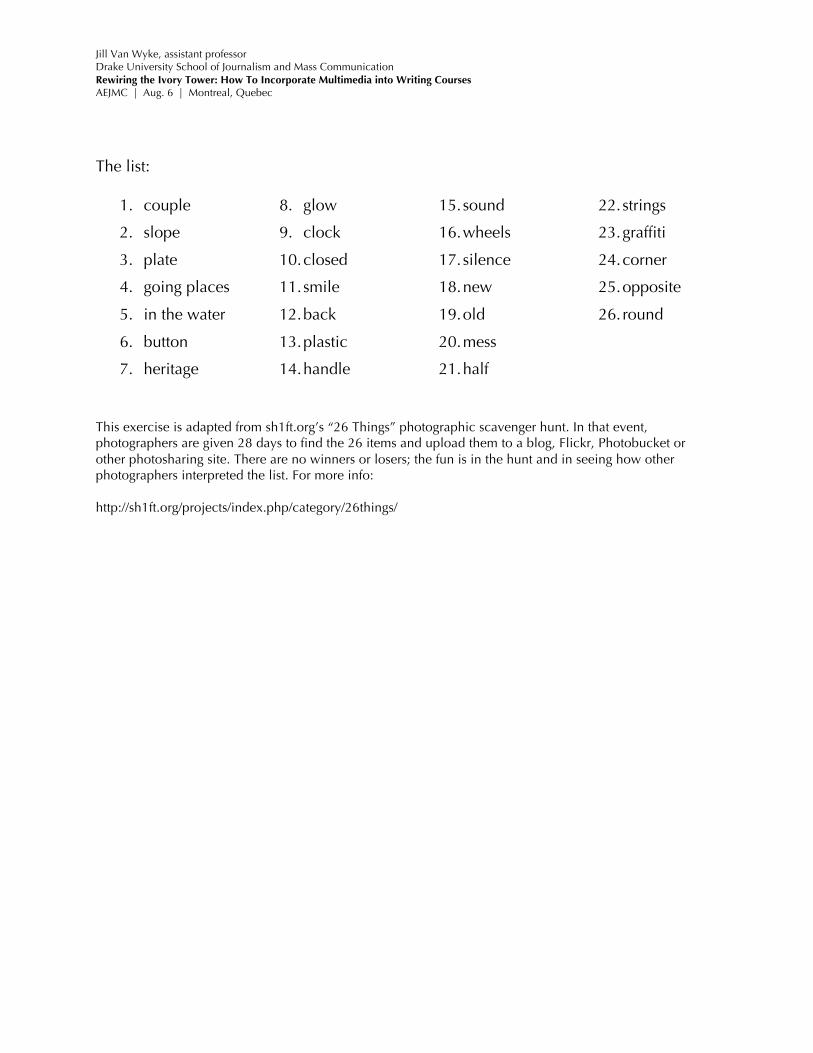
The list:
1. couple
2. slope
3. plate
4. going places
5. in the water
6. button
7. heritage
8. glow
9. clock
10. closed
11. smile
12. back
13. plastic
14. handle
15. sound
16. wheels
17. silence
18. new
19. old
20. mess
21. half
22. strings
23. graffiti
24. corner
25. opposite
26. round
This exercise is adapted from sh1ft.org’s “26 Things” photographic scavenger hunt. In that event, photographers are given 28 days to find the 26 items and upload them to a blog, Flickr, Photobucket or other photosharing site. There are no winners or losers; the fun is in the hunt and in seeing how other photographers interpreted the list. For more info: http://sh1ft.org/projects/index.php/category/26things/
Jill Van Wyke, assistant professor Drake University School of Journalism and Mass Communication Rewiring the Ivory Tower: How To Incorporate Multimedia into Writing Courses AEJMC | Aug. 6 | Montreal, Quebec
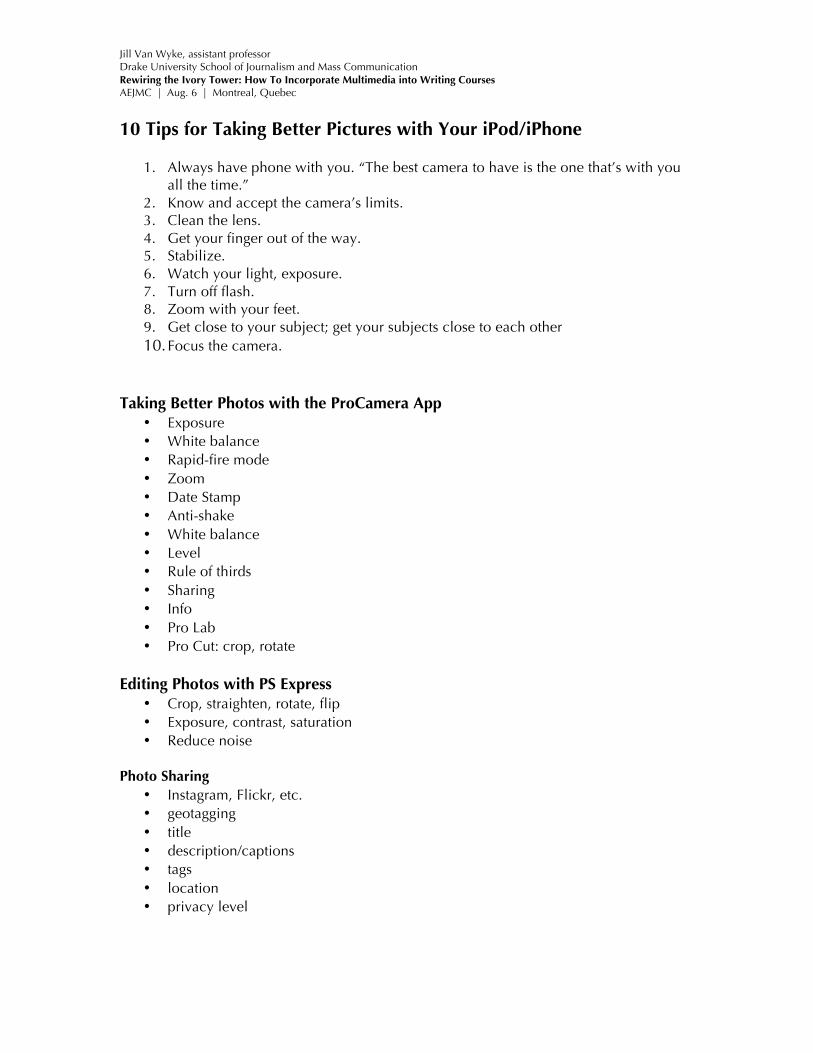
10 Tips for Taking Better Pictures with Your iPod/iPhone
1. Always have phone with you. “The best camera to have is the one that’s with you all the time.”
2. Know and accept the camera’s limits. 3. Clean the lens. 4. Get your finger out of the way. 5. Stabilize. 6. Watch your light, exposure. 7. Turn off flash. 8. Zoom with your feet. 9. Get close to your subject; get your subjects close to each other 10. Focus the camera.
Taking Better Photos with the ProCamera App
• Exposure • White balance • Rapid-fire mode • Zoom • Date Stamp • Anti-shake • White balance • Level • Rule of thirds • Sharing • Info • Pro Lab • Pro Cut: crop, rotate
Editing Photos with PS Express
• Crop, straighten, rotate, flip • Exposure, contrast, saturation • Reduce noise
Photo Sharing
• Instagram, Flickr, etc. • geotagging • title • description/captions • tags • location • privacy level
Jill Van Wyke, assistant professor Drake University School of Journalism and Mass Communication Rewiring the Ivory Tower: How To Incorporate Multimedia into Writing Courses AEJMC | Aug. 6 | Montreal, Quebec
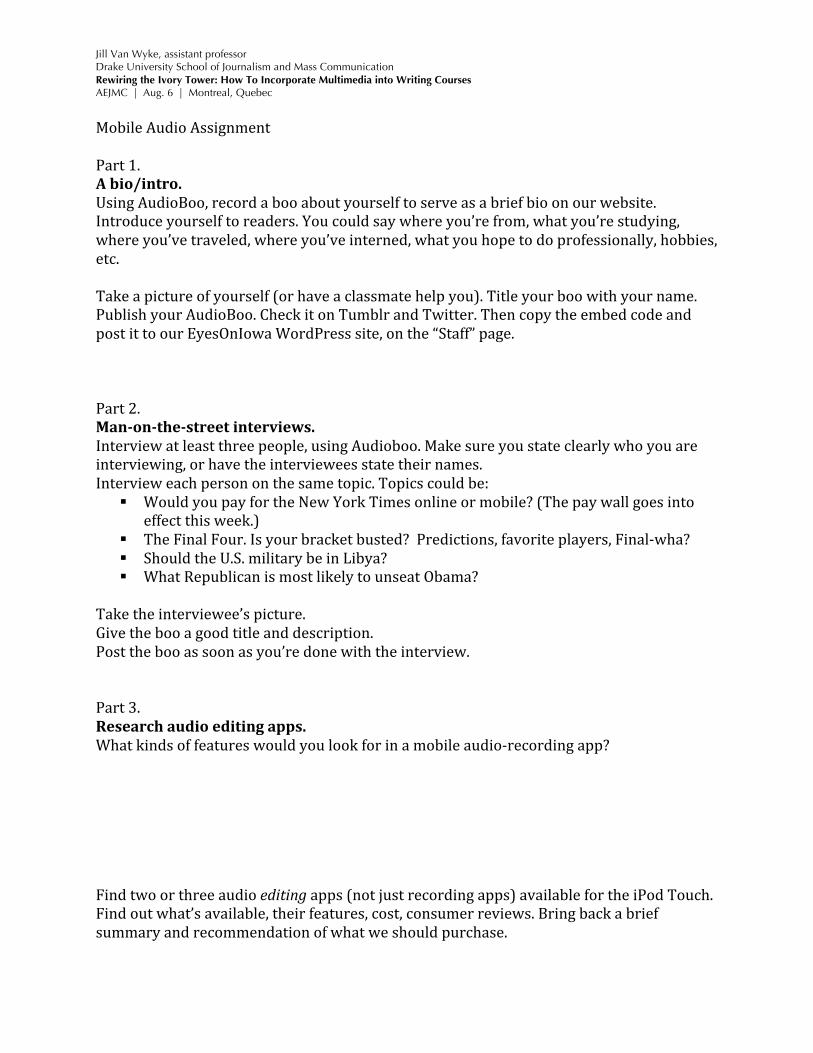
Mobile Audio Assignment Part 1. A bio/intro. Using AudioBoo, record a boo about yourself to serve as a brief bio on our website. Introduce yourself to readers. You could say where you’re from, what you’re studying, where you’ve traveled, where you’ve interned, what you hope to do professionally, hobbies, etc. Take a picture of yourself (or have a classmate help you). Title your boo with your name. Publish your AudioBoo. Check it on Tumblr and Twitter. Then copy the embed code and post it to our EyesOnIowa WordPress site, on the “Staff” page. Part 2. Man-‐on-‐the-‐street interviews. Interview at least three people, using Audioboo. Make sure you state clearly who you are interviewing, or have the interviewees state their names. Interview each person on the same topic. Topics could be:
§ Would you pay for the New York Times online or mobile? (The pay wall goes into effect this week.)
§ The Final Four. Is your bracket busted? Predictions, favorite players, Final-‐wha? § Should the U.S. military be in Libya? § What Republican is most likely to unseat Obama?
Take the interviewee’s picture. Give the boo a good title and description. Post the boo as soon as you’re done with the interview. Part 3. Research audio editing apps. What kinds of features would you look for in a mobile audio-‐recording app? Find two or three audio editing apps (not just recording apps) available for the iPod Touch. Find out what’s available, their features, cost, consumer reviews. Bring back a brief summary and recommendation of what we should purchase.

Jill Van Wyke, assistant professor Drake University School of Journalism and Mass Communication Rewiring the Ivory Tower: How To Incorporate Multimedia into Writing Courses AEJMC | Aug. 6 | Montreal, Quebec
Note: This was an exercise in experimenting with three different audio recorders, comparing their ease of use and quality of audio recording. Audio Interviewing Exercise Work in pairs (and one trio). Interview each other in two settings, using both recorders at both sites. Make sure everybody in your group gets a chance to operate both recorders. Set the date and time for all three recorders. Olympus WS-331 experiment with
rec mode: ST XQ (highest quality) to HQ (lowest) distance b/t mic and subject’s voice internal vs. external mic
Tascam First, adjust these settings:
menu > input setting > input > mic mic > type: mono
power > on (must be “on” for external mic to work) rec settings > format > WAV 16 or 24 rec settings > sample > 44.1 rec settings > pre rec > off rec settings > delay > off Then, experiment with:
internal mic. vs. external mic internal mic with and without windscreen distance b/t mic and subject recording level 1-10 (dial on right side)
Jill Van Wyke, assistant professor Drake University School of Journalism and Mass Communication Rewiring the Ivory Tower: How To Incorporate Multimedia into Writing Courses AEJMC | Aug. 6 | Montreal, Quebec
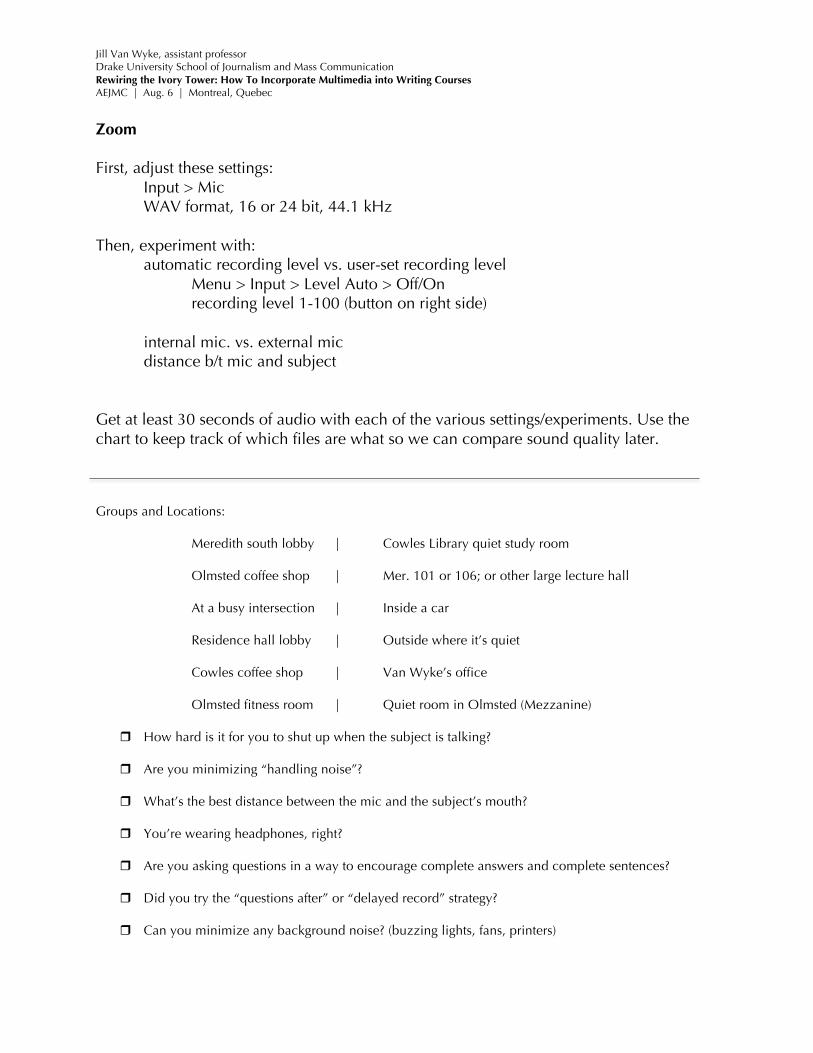
Zoom First, adjust these settings: Input > Mic WAV format, 16 or 24 bit, 44.1 kHz Then, experiment with:
automatic recording level vs. user-set recording level Menu > Input > Level Auto > Off/On
recording level 1-100 (button on right side)
internal mic. vs. external mic distance b/t mic and subject
Get at least 30 seconds of audio with each of the various settings/experiments. Use the chart to keep track of which files are what so we can compare sound quality later. Groups and Locations:
Meredith south lobby | Cowles Library quiet study room
Olmsted coffee shop | Mer. 101 or 106; or other large lecture hall
At a busy intersection | Inside a car
Residence hall lobby | Outside where it’s quiet
Cowles coffee shop | Van Wyke’s office
Olmsted fitness room | Quiet room in Olmsted (Mezzanine)
r How hard is it for you to shut up when the subject is talking?
r Are you minimizing “handling noise”?
r What’s the best distance between the mic and the subject’s mouth?
r You’re wearing headphones, right?
r Are you asking questions in a way to encourage complete answers and complete sentences?
r Did you try the “questions after” or “delayed record” strategy?
r Can you minimize any background noise? (buzzing lights, fans, printers)
Jill Van Wyke, assistant professor Drake University School of Journalism and Mass Communication Rewiring the Ivory Tower: How To Incorporate Multimedia into Writing Courses AEJMC | Aug. 6 | Montreal, Quebec
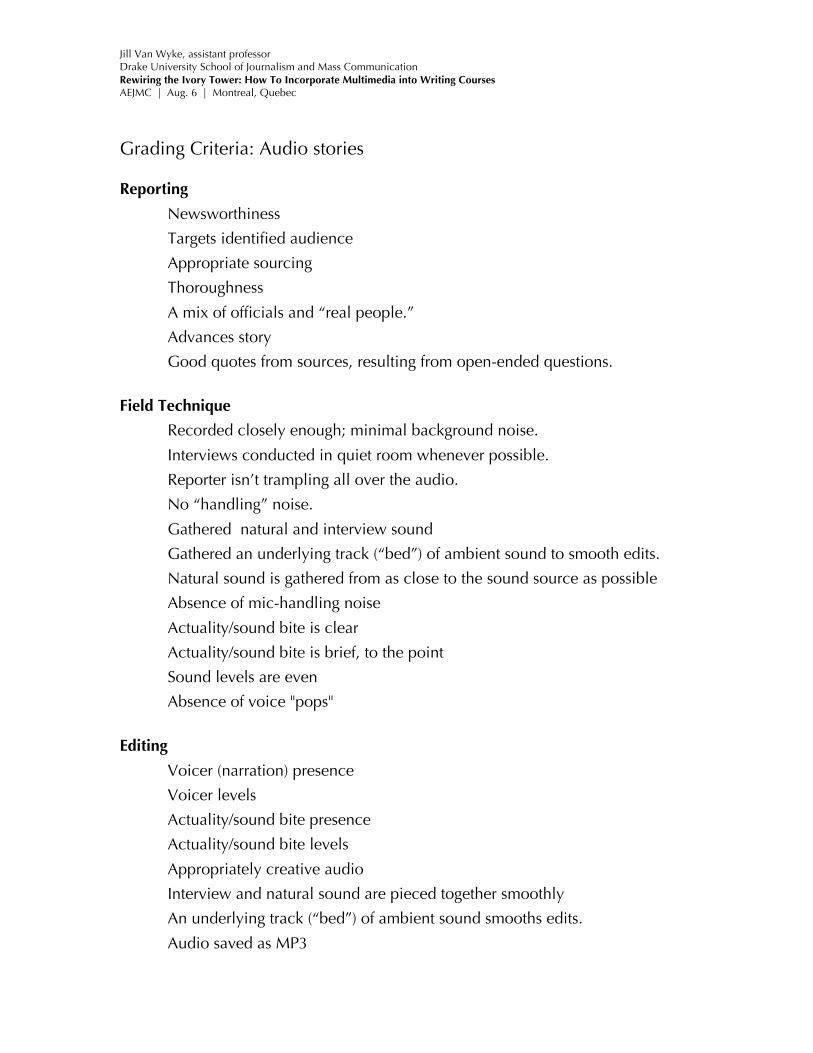
Grading Criteria: Audio stories Reporting
Newsworthiness
Targets identified audience
Appropriate sourcing
Thoroughness
A mix of officials and “real people.”
Advances story
Good quotes from sources, resulting from open-ended questions.
Field Technique
Recorded closely enough; minimal background noise.
Interviews conducted in quiet room whenever possible.
Reporter isn’t trampling all over the audio.
No “handling” noise.
Gathered natural and interview sound
Gathered an underlying track (“bed”) of ambient sound to smooth edits.
Natural sound is gathered from as close to the sound source as possible
Absence of mic-handling noise
Actuality/sound bite is clear
Actuality/sound bite is brief, to the point
Sound levels are even
Absence of voice "pops"
Editing
Voicer (narration) presence
Voicer levels
Actuality/sound bite presence
Actuality/sound bite levels
Appropriately creative audio
Interview and natural sound are pieced together smoothly
An underlying track (“bed”) of ambient sound smooths edits.
Audio saved as MP3
Jill Van Wyke, assistant professor Drake University School of Journalism and Mass Communication Rewiring the Ivory Tower: How To Incorporate Multimedia into Writing Courses AEJMC | Aug. 6 | Montreal, Quebec
Writing
Written for the ear
Script formatted properly
Overall
Places the listener at scene of story
Jill Van Wyke, assistant professor Drake University School of Journalism and Mass Communication Rewiring the Ivory Tower: How To Incorporate Multimedia into Writing Courses AEJMC | Aug. 6 | Montreal, Quebec
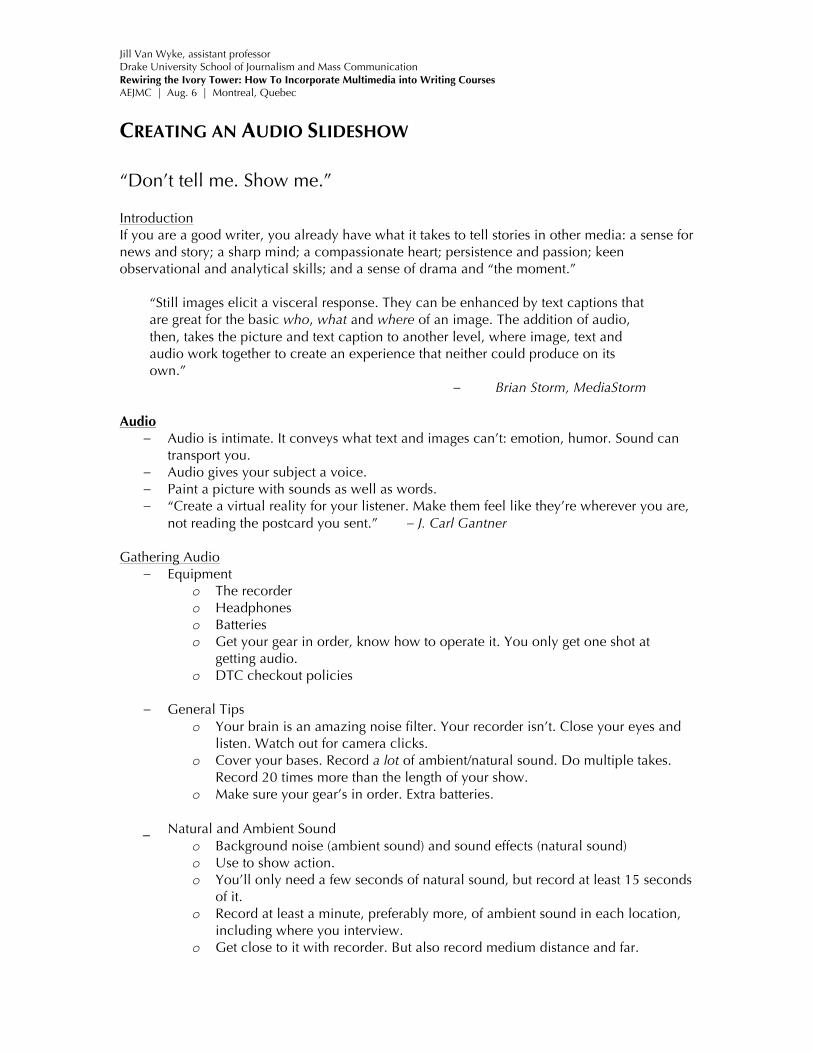
CREATING AN AUDIO SLIDESHOW “Don’t tell me. Show me.” Introduction If you are a good writer, you already have what it takes to tell stories in other media: a sense for news and story; a sharp mind; a compassionate heart; persistence and passion; keen observational and analytical skills; and a sense of drama and “the moment.”
“Still images elicit a visceral response. They can be enhanced by text captions that are great for the basic who, what and where of an image. The addition of audio, then, takes the picture and text caption to another level, where image, text and audio work together to create an experience that neither could produce on its own.”
– Brian Storm, MediaStorm Audio
– Audio is intimate. It conveys what text and images can’t: emotion, humor. Sound can transport you.
– Audio gives your subject a voice. – Paint a picture with sounds as well as words. – “Create a virtual reality for your listener. Make them feel like they’re wherever you are,
not reading the postcard you sent.” – J. Carl Gantner Gathering Audio
– Equipment o The recorder o Headphones o Batteries o Get your gear in order, know how to operate it. You only get one shot at
getting audio. o DTC checkout policies
– General Tips
o Your brain is an amazing noise filter. Your recorder isn’t. Close your eyes and listen. Watch out for camera clicks.
o Cover your bases. Record a lot of ambient/natural sound. Do multiple takes. Record 20 times more than the length of your show.
o Make sure your gear’s in order. Extra batteries.
_ Natural and Ambient Sound o Background noise (ambient sound) and sound effects (natural sound) o Use to show action. o You’ll only need a few seconds of natural sound, but record at least 15 seconds
of it. o Record at least a minute, preferably more, of ambient sound in each location,
including where you interview. o Get close to it with recorder. But also record medium distance and far.
Jill Van Wyke, assistant professor Drake University School of Journalism and Mass Communication Rewiring the Ivory Tower: How To Incorporate Multimedia into Writing Courses AEJMC | Aug. 6 | Montreal, Quebec
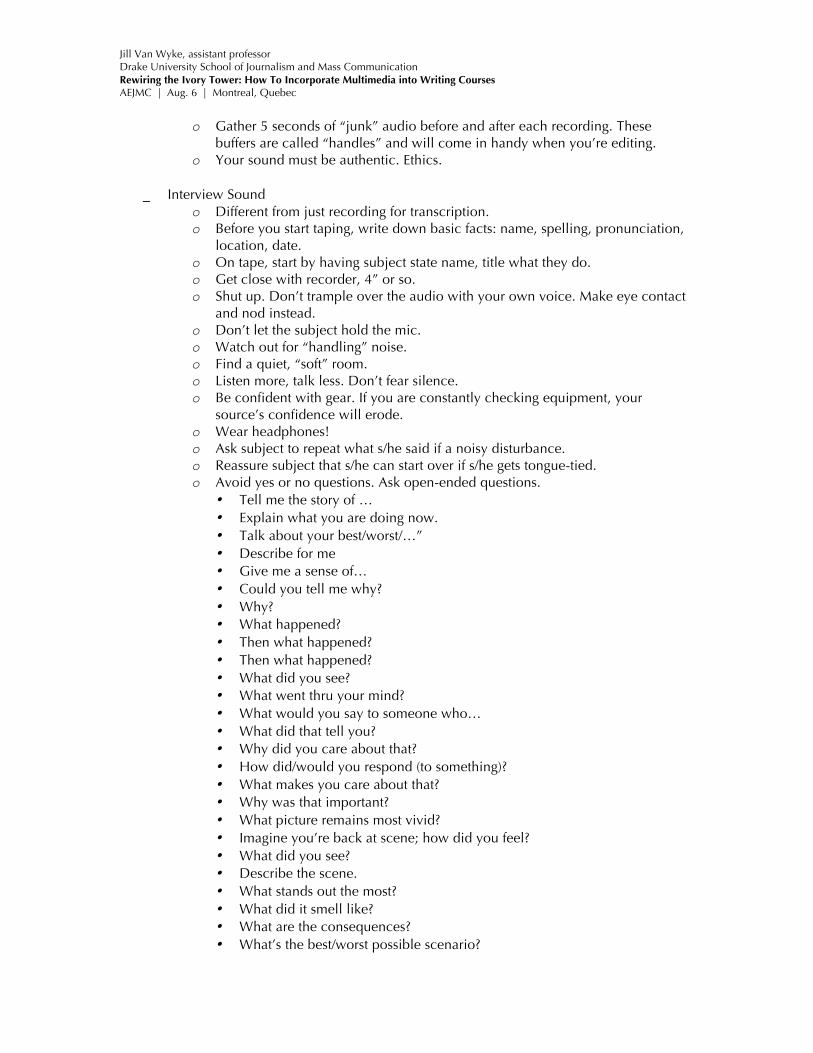
o Gather 5 seconds of “junk” audio before and after each recording. These
buffers are called “handles” and will come in handy when you’re editing. o Your sound must be authentic. Ethics.
_ Interview Sound
o Different from just recording for transcription. o Before you start taping, write down basic facts: name, spelling, pronunciation,
location, date. o On tape, start by having subject state name, title what they do. o Get close with recorder, 4” or so. o Shut up. Don’t trample over the audio with your own voice. Make eye contact
and nod instead. o Don’t let the subject hold the mic. o Watch out for “handling” noise. o Find a quiet, “soft” room. o Listen more, talk less. Don’t fear silence. o Be confident with gear. If you are constantly checking equipment, your
source’s confidence will erode. o Wear headphones! o Ask subject to repeat what s/he said if a noisy disturbance. o Reassure subject that s/he can start over if s/he gets tongue-tied. o Avoid yes or no questions. Ask open-ended questions.
• Tell me the story of … • Explain what you are doing now. • Talk about your best/worst/…” • Describe for me • Give me a sense of… • Could you tell me why? • Why? • What happened? • Then what happened? • Then what happened? • What did you see? • What went thru your mind? • What would you say to someone who… • What did that tell you? • Why did you care about that? • How did/would you respond (to something)? • What makes you care about that? • Why was that important? • What picture remains most vivid? • Imagine you’re back at scene; how did you feel? • What did you see? • Describe the scene. • What stands out the most? • What did it smell like? • What are the consequences? • What’s the best/worst possible scenario?

Jill Van Wyke, assistant professor Drake University School of Journalism and Mass Communication Rewiring the Ivory Tower: How To Incorporate Multimedia into Writing Courses AEJMC | Aug. 6 | Montreal, Quebec
• What do you fear? • How did/does that affect you? • How did you deal with that? • How do you know? • What went thru your mind? • What did he/she/they say? • What were the options? • How would you describe that?
Editing Audio
_ Make copies of your audio files. Never edit original files. _ Keep your audio files organized. Find a consistent naming/filing system. _ Place all sound files for one project in one folder, slugged with the interviewee’s name
and the date of interview. _ Audio formats. Ours will come in as .WMA (Windows Media). Newer Macs will
convert them automatically to an editable AIFF file. We’ll edit in Audacity (GarageBand works, too).
_ Bring all your audio clips into Audacity and listen to all of it. Write down specifically what’s being discussed and note the time stamps of important material. Jot down what photos might relate to that sequence.
_ When you’re done editing, export the finished file as an MP3. Photography Gathering Photos
_ Shooting for a slideshow is like shooting a photo essay, but with more pictures. _ Is the story linear (chronological)? Then think sequence: beginning, middle, end. If not,
how will you organize your photos in a logical way? _ Photos must be high quality: sharp, well-focused, well-composed. Get variety, in angle,
lighting, distance from subject, horizontal/vertical. _ For a 2-3 minute slideshow, you’ll need 20 to 35 great photos. _ Get a mix of wide-angle shots, medium shots, close-ups and tight detail shots. _ Shots for beginning of show: set the scene, introduce topic and main character _ Shots for middle of show: develop the topic and character with details. _ Shots for end of show: Wrap up the story, what does it all mean, what’s next, what
does this story point to. _ Think about the “cover” or “title” shot. This will be the teaser thumbnail.
Editing Photos
_ Make copies! Never overwrite your original image. _ In PhotoShop, crop, adjust red-eye, adjust brightness. _ Decide on sequence of photos. Rename photos in numerical order (01farm, 02sunrise,
03barn, 04fence, 05cow…). No spaces, no punctuation. _ Decide if you want to make a title page or section title pages, with text on photo. _ Prep image for Soundslides:
o Set resolution to 72 dpi. Image Size > Resolution > 72 dpi o Resample Image > Bicubic Sharper

Jill Van Wyke, assistant professor Drake University School of Journalism and Mass Communication Rewiring the Ivory Tower: How To Incorporate Multimedia into Writing Courses AEJMC | Aug. 6 | Montreal, Quebec
o Constrain Proportions o Width > 680 px o File > File Info. Soundslides pulls caption info from here (you can edit later in
Soundslides). Include author (photographer), copyrighted work/notice (“2009 by Jill Van Wyke”)
o Save As > .jpg, quality setting “High.” (Soundslides will compress.) o Do not “Save for Web”
_ Save all your images for one slideshow in one folder. Don’t put any other images in that folder. Soundslides imports folders, not individual images.
_ Remember where you put it. Make a parent folder with two folders in it, one for your edited images, one your edited audio.
Soundslides Producing in Soundslides
_ Optimum length of a slideshow is 2-3 minutes. _ Five to six seconds per photo. 20-35 photos total. _ The quality of your photos and your audio determine length. _ Look through your pictures first, then edit your audio. Your photos will give you an
idea of how the sound needs to flow. What audio do you need to leave in or take out, based on your photos?
_ Your audio must support your photos must support your audio. The audio commentary should match the picture being shown. It’s confusing for viewer if it doesn’t. Match sound to pictures.
_ Avoid visual redundancy. Vary images by close-ups, medium, detail, wide shots, different angles.
_ Use a quick series of stills to indicate motion/action. _ If you have someone speaking for 15 seconds, try to use three appropriate photos for
that 15 seconds. Captions
_ Viewers should concentrate on images, not captions. _ Keep them short. You don’t need time, date, place in every caption (very different from
print captions). _ You can omit captions entirely where the image, in the context of the story is self-
explanatory. _ But don’t omit all captions. Briefly identify anyone speaking in audio, and anyone
introduced in show for the first time. _ Test it: Do you have time to read the entire caption before the show advances to the
next frame? _ Why bother with captions at all? They are key in an all-digital, metadata-driven search
universe. You can’t search pixels. You search text. Final Thoughts
_ Try. Fail. Try again. Fail harder. _ The best way to learn to write is to read. The best way to learn audio is to listen. _ Practice is the path to perfection.
Jill Van Wyke, assistant professor Drake University School of Journalism and Mass Communication Rewiring the Ivory Tower: How To Incorporate Multimedia into Writing Courses AEJMC | Aug. 6 | Montreal, Quebec
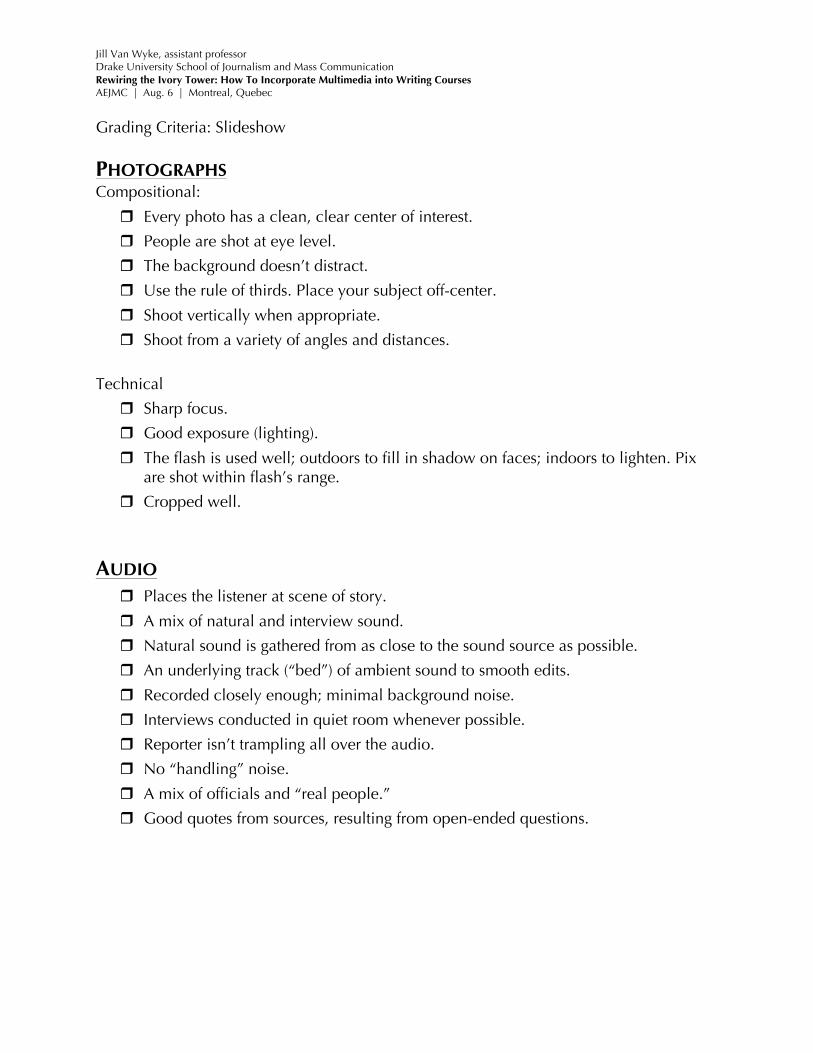
Grading Criteria: Slideshow
PHOTOGRAPHS Compositional:
r Every photo has a clean, clear center of interest.
r People are shot at eye level.
r The background doesn’t distract.
r Use the rule of thirds. Place your subject off-center.
r Shoot vertically when appropriate.
r Shoot from a variety of angles and distances.
Technical
r Sharp focus.
r Good exposure (lighting).
r The flash is used well; outdoors to fill in shadow on faces; indoors to lighten. Pix are shot within flash’s range.
r Cropped well.
AUDIO r Places the listener at scene of story.
r A mix of natural and interview sound.
r Natural sound is gathered from as close to the sound source as possible.
r An underlying track (“bed”) of ambient sound to smooth edits.
r Recorded closely enough; minimal background noise.
r Interviews conducted in quiet room whenever possible.
r Reporter isn’t trampling all over the audio.
r No “handling” noise.
r A mix of officials and “real people.”
r Good quotes from sources, resulting from open-ended questions.
Jill Van Wyke, assistant professor Drake University School of Journalism and Mass Communication Rewiring the Ivory Tower: How To Incorporate Multimedia into Writing Courses AEJMC | Aug. 6 | Montreal, Quebec
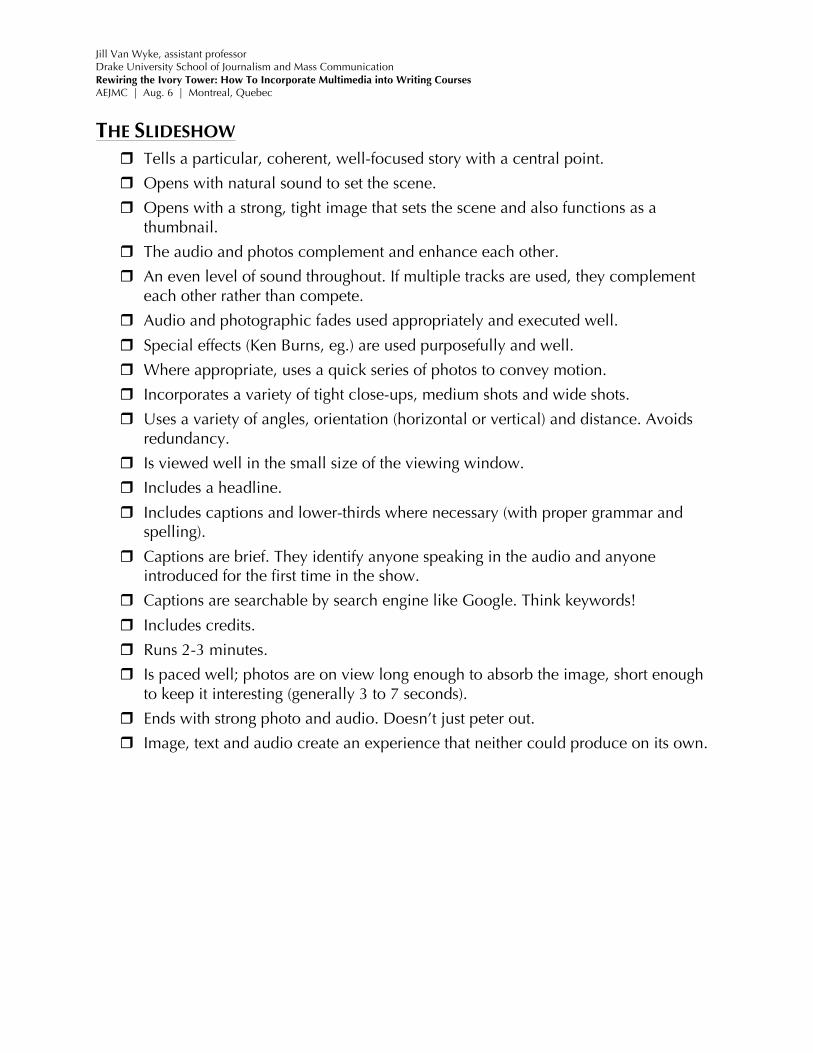
THE SLIDESHOW
r Tells a particular, coherent, well-focused story with a central point.
r Opens with natural sound to set the scene.
r Opens with a strong, tight image that sets the scene and also functions as a thumbnail.
r The audio and photos complement and enhance each other.
r An even level of sound throughout. If multiple tracks are used, they complement each other rather than compete.
r Audio and photographic fades used appropriately and executed well.
r Special effects (Ken Burns, eg.) are used purposefully and well.
r Where appropriate, uses a quick series of photos to convey motion.
r Incorporates a variety of tight close-ups, medium shots and wide shots.
r Uses a variety of angles, orientation (horizontal or vertical) and distance. Avoids redundancy.
r Is viewed well in the small size of the viewing window.
r Includes a headline.
r Includes captions and lower-thirds where necessary (with proper grammar and spelling).
r Captions are brief. They identify anyone speaking in the audio and anyone introduced for the first time in the show.
r Captions are searchable by search engine like Google. Think keywords!
r Includes credits.
r Runs 2-3 minutes.
r Is paced well; photos are on view long enough to absorb the image, short enough to keep it interesting (generally 3 to 7 seconds).
r Ends with strong photo and audio. Doesn’t just peter out.
r Image, text and audio create an experience that neither could produce on its own.
Jill Van Wyke, assistant professor Drake University School of Journalism and Mass Communication Rewiring the Ivory Tower: How To Incorporate Multimedia into Writing Courses AEJMC | Aug. 6 | Montreal, Quebec
Video Assignment Due date: Your in-depth story will be accompanied by a video of 2-3 minutes’ length. Your video should supplement your text story by presenting new information; it should not repeat or rehash what you’ve written in the story. Focus on the action and emotion of your story that can best be conveyed by video rather than text. In general, your video should consist of 25 to 35 shots of an average of 5 seconds each, but let your creativity and sense of story guide you. The video must include A-roll and B-roll. Do not turn in a video that is one l – o – n – g shot of a person being interviewed! The choice of whether to narrate your video or to rely only on natural sound and interview is up to you. If you use music in your video, you need to convince us that it’s necessary and appropriate to the story. Of course, any music must respect copyrights. You will work in pairs to shoot your videos. For your story, you’ll conduct the interviews and play “director,” making sure you get all the necessary shots. Your partner will operate the camera and monitor audio. Reverse roles on your partner’s story. Edit together, using iMovie.
iMovie ’09 tutorial available at: http://www.apple.com/ilife/tutorials/#imovie iMovie HD 6 tutorial available at: http://www.apple.com/support/ilife/tutorials/imovie/index.html
Before you shoot your video, you will submit a plan for it: how you conceive it, and how you’ll execute it. (See reverse.) Make sure your edited video has an opening title and properly credits all those who worked on it. It must include lower-thirds of everybody interviewed. When you’re done with your video, upload it to YouTube, following YouTube’s instructions regarding file formats, compression, etc. Grading criteria for this assignment is attached. That’s it for now, until we’re ready to post your complete multimedia package to our site.

Jill Van Wyke, assistant professor Drake University School of Journalism and Mass Communication Rewiring the Ivory Tower: How To Incorporate Multimedia into Writing Courses AEJMC | Aug. 6 | Montreal, Quebec
Using only a smartphone:
1. Take video of some scenes around campus, both indoors and outdoors. Practice with setting the exposure. Shoot clips of at least 30 seconds each.
2. Interview a classmate outdoors on any topic. Practice:
a. holding the camera steady b. holding the camera horizontal c. hold the camera level d. framing (rule of thirds; don’t cut off heads; interviewee looking into frame;
no distracting background) e. getting the best audio possible; quiet place; watch out for wind noise
3. Switch cameras and experiment with shooting video of yourself.
4. Practice using the built-‐in editor to trim your scene and interview clips. Remember
to Save a New Clip.
5. Upload one of your videos via the Tumblr app.
6. Upload one of your videos to YouTube, using the “share” function. Use your own YouTube account if you have one, or see me for my account info.
a. After the video is compressed and published, click View on YouTube. Tap the share, then tap email icon. Scroll down and copy the embed code. Then, launch the WordPress app, and paste the embed code in a new post. Put it in the video category.
7. Launch the uStream app. > Allow current location. > Tape the camera icon in the upper right, then “Go Live.”
a. Livestream some video. Share it?

Jill Van Wyke, assistant professor Drake University School of Journalism and Mass Communication Rewiring the Ivory Tower: How To Incorporate Multimedia into Writing Courses AEJMC | Aug. 6 | Montreal, Quebec
Download the iMovie app to your smartphone. Read the following chapters in “iMovie help” in the app, and play with these features: Gestures: read all Create a Project: § Create a new project § Open an existing project § Rename a project § Play a project Record Video and Photos § Record video into iMovie § Take photos in iMovie Edit Clips § Add video to a project § Add photos to a project § Trim a video clip or photo § Edit a photo § Split a video clip § Rotate a video clip § Rearrange video clips § Delete a video clip or photo from your project Adjust audio § Record audio into a project § Adjust the volume of a video or audio clip § Adjust the duration of an audio clip § Move a sound effect or audio clip § Delete an audio clip Add Titles and Transitions § Add a title to a video clip or photo § Edit title text § Delete a title § Change the style, duration of a transition § Delete a transition § Add a fade-in, fade-out Share § Share a movie to YouTube
Jill Van Wyke, assistant professor Drake University School of Journalism and Mass Communication Rewiring the Ivory Tower: How To Incorporate Multimedia into Writing Courses AEJMC | Aug. 6 | Montreal, Quebec
iMovie app assignment Create a short movie about something you will already be doing over the weekend. It should tell a story and meet the criteria for good composition and technical quality. Specifically, your movie should: § have a mix of videos and still photos § include A-roll and B-roll § have a brief voiceover to introduce it § have a title § have transitions (fade-ins and -outs) § be at least 2 minutes long but no more than 5 § be uploaded to the Eyes on Iowa YouTube account, named and tagged appropriately § posted to our Eyes on Iowa site I’ll give you time in class Monday to finish editing the movie, upload it to YouTube and post it to Eyes on Iowa. You may need more time, so it wouldn’t hurt to do a little editing over the weekend. At a minimum, bring your raw video and photos.
The goal of this assignment is to gain proficiency and confidence in shooting and editing video with the iPhone. We’ll want that skill and comfort level when we cover our Drake Relays events live. Be thinking as you work through this exercise how we might use video to cover the beautiful bulldog contest and the other Relays event you signed up for. What complications should we anticipate, and how might we address them?

Jill Van Wyke, assistant professor Drake University School of Journalism and Mass Communication Rewiring the Ivory Tower: How To Incorporate Multimedia into Writing Courses AEJMC | Aug. 6 | Montreal, Quebec
Video Assignment Grading Criteria
Quality of Video Shooting
• Steady shots (you used a tripod) • Minimal, if any, panning and zooming • Clear audio, both natural sound and interview • Well-lit • Sources are interviewed at eye level • Interviewees are shot from a slight angle to the left or right • Interviewees are not looking at camera • You are silent during interviews (no laughter, “uh-huhs,” etc.) • Composition
o rule of thirds o in focus o level o no distracting backgrounds or poles emerging from people’s heads o close to source or action o varying angles and perspectives o fill the frame
Quality of Video Editing
• No jumpcuts • Appropriate shot lengths; good pacing • Good mix of wide, medium and close-
ups • Good transitions • Title • Credits • Good audio levels
• Audio matches action • Every edit has a purpose • Opens with strong visual • Continuity of content, movement,
sound • Compressed properly and uploaded to
YouTube
Quality of Overall Storytelling
• Coherent story arc: beginning, middle end • Good character(s) • Captures emotion and/or action • Tightly focused • Strong visuals • Good sequencing