Using H5P with MoodleMoodle.pdf · Using H5P with Moodle At present there is no H5P plugin for...
10
Using H5P with Moodle At present there is no H5P plugin for Moodle. This short tutorial explains how you can embed H5P in your Moodle course without the plugin. In this tutorial, we assume that you know have already created content in your H5P account that you can embed in your Moodle course, and that you have experience creating Moodle activities and resources. Please also see https://youtu.be/EKkKb_Fttkw for a video tutorial.
Transcript of Using H5P with MoodleMoodle.pdf · Using H5P with Moodle At present there is no H5P plugin for...

Using H5P with MoodleUsing H5P with Moodle
At present there is no H5P plugin for Moodle. This short tutorial explains how you can embed H5P in your Moodle course without the plugin.
In this tutorial, we assume that you know have already created content in your H5P account that you can embed in your Moodle course, and that you have experience creating Moodle activities and resources.
Please also see https://youtu.be/EKkKb_Fttkw for a video tutorial.

1. Create an activity or resource
Switch into the editing mode by clicking the green button in the top right or by clicking “Turn editing on” in the Administration menu.
Once in editing mode, (you can tell because the button is red) create a new resource or activity by clicking “Add a resource or activity.”

2. Select which activity to use
Select a resource or activity into which you are going to insert the H5P content. Any of them that display HTML blocks will work.
The web page is probably the simplest, but you can string together a series of H5P content using the book, presentation or lesson modules.

3. Set up your HTML page
Give your resource a title and description suitable for your H5P content (mine is a hotspot activity about Junkanoo).
Scroll down to the content HTML block (this is where you will embed your H5P content). Click the toolbar toggle button to expand the toolbar.

4. Turn on HTML editing
To turn on HTML you will click the HTML tool at the very end of the toolbar. It looks like this: <>
Once you have clicked the HTML tool, you will notice that all the other tools are greyed out. This means that when you type in the editing box, you will be typing HTML code. Now you are ready to embed the H5P content.
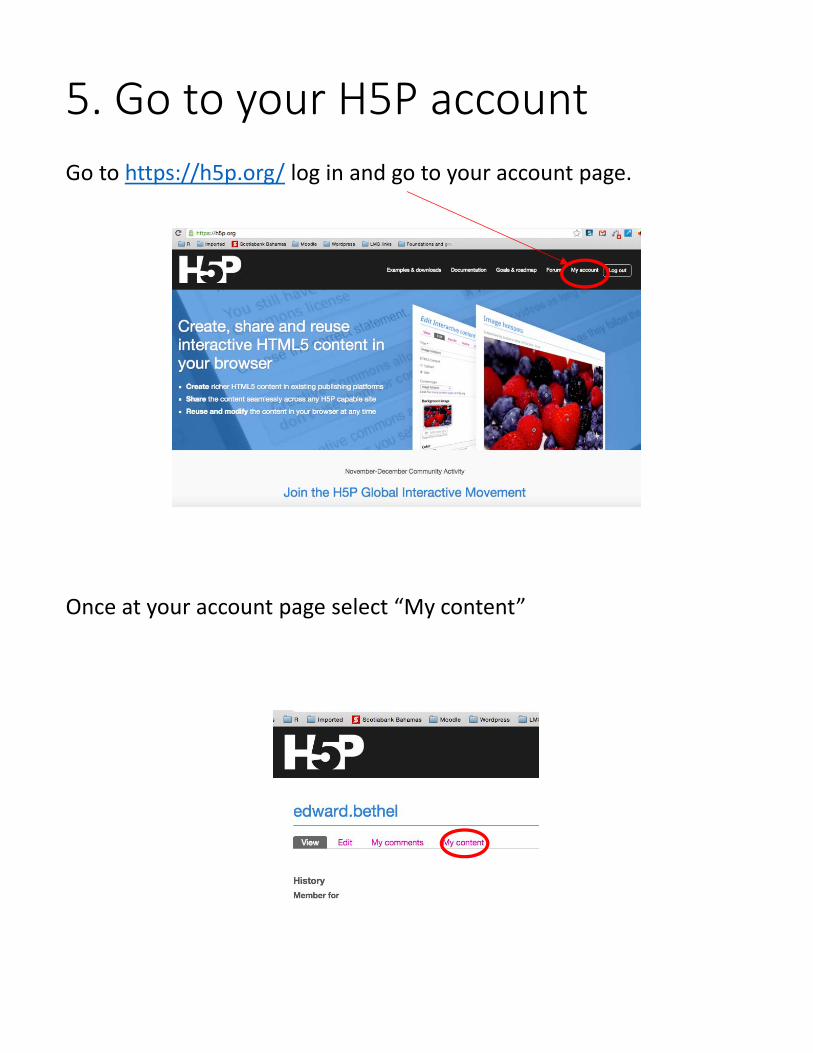
5. Go to your H5P account
Go to https://h5p.org/ log in and go to your account page.
Once at your account page select “My content”

5. Go to your H5P account
At your account page select which H5P content you wish to embed and click on it.
When your content opens up, click on the <>embed link to get the embed code that you will copy to your Moodle activity.

6. Copy/paste the embed code
When the embed window opens, copy the all the embed code (it is automatically selected). Note that if you want to change the size, you may do so, but remember that the aspect ratio is not fixed, so you will have to be careful to ensure that the object is not distorted. The code will adjust automatically.
Switch back to your Moodle course, paste the embed code into the HTML editor. To check that it worked properly, you can click the HTML code tool again. Your H5P content should appear in the editor.

7. Check your content and save
Once you click the HTML editor tool, the H5P content should appear in the editor. You should be able to launch it right in the editor.
Save the Resource. If you want to see whether it embedded properly, click “Save and display”. If you want to go back to the course, click “Save and return to course”. “Save and display” should take you to the content:

8. All done!
You can check that the content is functioning properly (in this case I clicked on one of the hotspots and the explanation popped up).
When you close your object, you should see your newly created content appearing in your learning unit. (Note that you could also use Labels to have H5P content actually appear on your course preview page as well using the same method explained above).